
Back in 2014 the first recipe post I did on this site was Halloween spritz cookies. Today I took that simple post down and added this one to replace it! It has more detail and also has more shapes than the old post, as this one includes the disks in our Halloween Two set that came out in 2019. Our company has grown, and I have grown as a baker, decorator, and blogger. So it’s time I updated how to make and decorate Halloween spritz cookies!
This post is a nice overview of several decorating techniques used in combination. I colored much of the dough, used luster dust to both dry brush and wet paint some shapes, and I used touches of colored icing to add accents and spooky eyes.
I’ve been so busy coming up with extravagant recipes the last few years that I haven’t gone back to the basics for a while, so for this post I’m using my favorite spritz recipe, our Impress Vanilla-Honey Spritz. You could use any tint-able dough for this decorating presentation, so browse the recipes on this blog site if you want something different. If you go with something like pumpkin cookies, your colored dough will come out darker but it will still work. I absolutely love how fun and festive this turned out!
I used all 16 disks in both of our Halloween Disk sets:


Our website has all of our 200+ disk shapes, cookie press, embossed rolling pins, baking accessories plus more about our Women/Family Owned company! impressbakeware.com
All products are on our Etsy shop.
Our Amazon shop has our cookie press and disks and embossed rolling pins.
🎉EXTENDED❗ Big Fall 15% off SALE
🍁Make edible art this Fall, because baking should be fun!
Discount on our cookie press disks, cookie press, embossed rolling pins, luster dusts, cookie cutters & baking accessories. Sale October 7-28, 2025, on our website and Etsy shops ONLY! (Links above) Sale excludes holiday gift sets and our recipe book.
Let’s bake!
Impress! Vanilla-Honey Spritz
1 1/2 cups (3 sticks) butter, softened (not melted) (I recommend Land O Lakes brand as I know it creams well. I have had trouble with some generic butters not creaming properly and making the dough hard to press)
1/2 cup granulated sugar
1/3 cup honey
1 and 1/2 Tablespoons vanilla extract
1 egg
4 cups all-purpose flour
3/4 teaspoon baking powder
1/4 teaspoon salt
Note: For a gluten-free option simply replace the flour with a 1:1 substitute like King Arthur’s Gluten Free Measure for Measure.
Preheat oven to 400°F.
In a large bowl, combine the flour, baking powder, and salt. Using a big wire whisk is a good way to mix them evenly. Set aside.
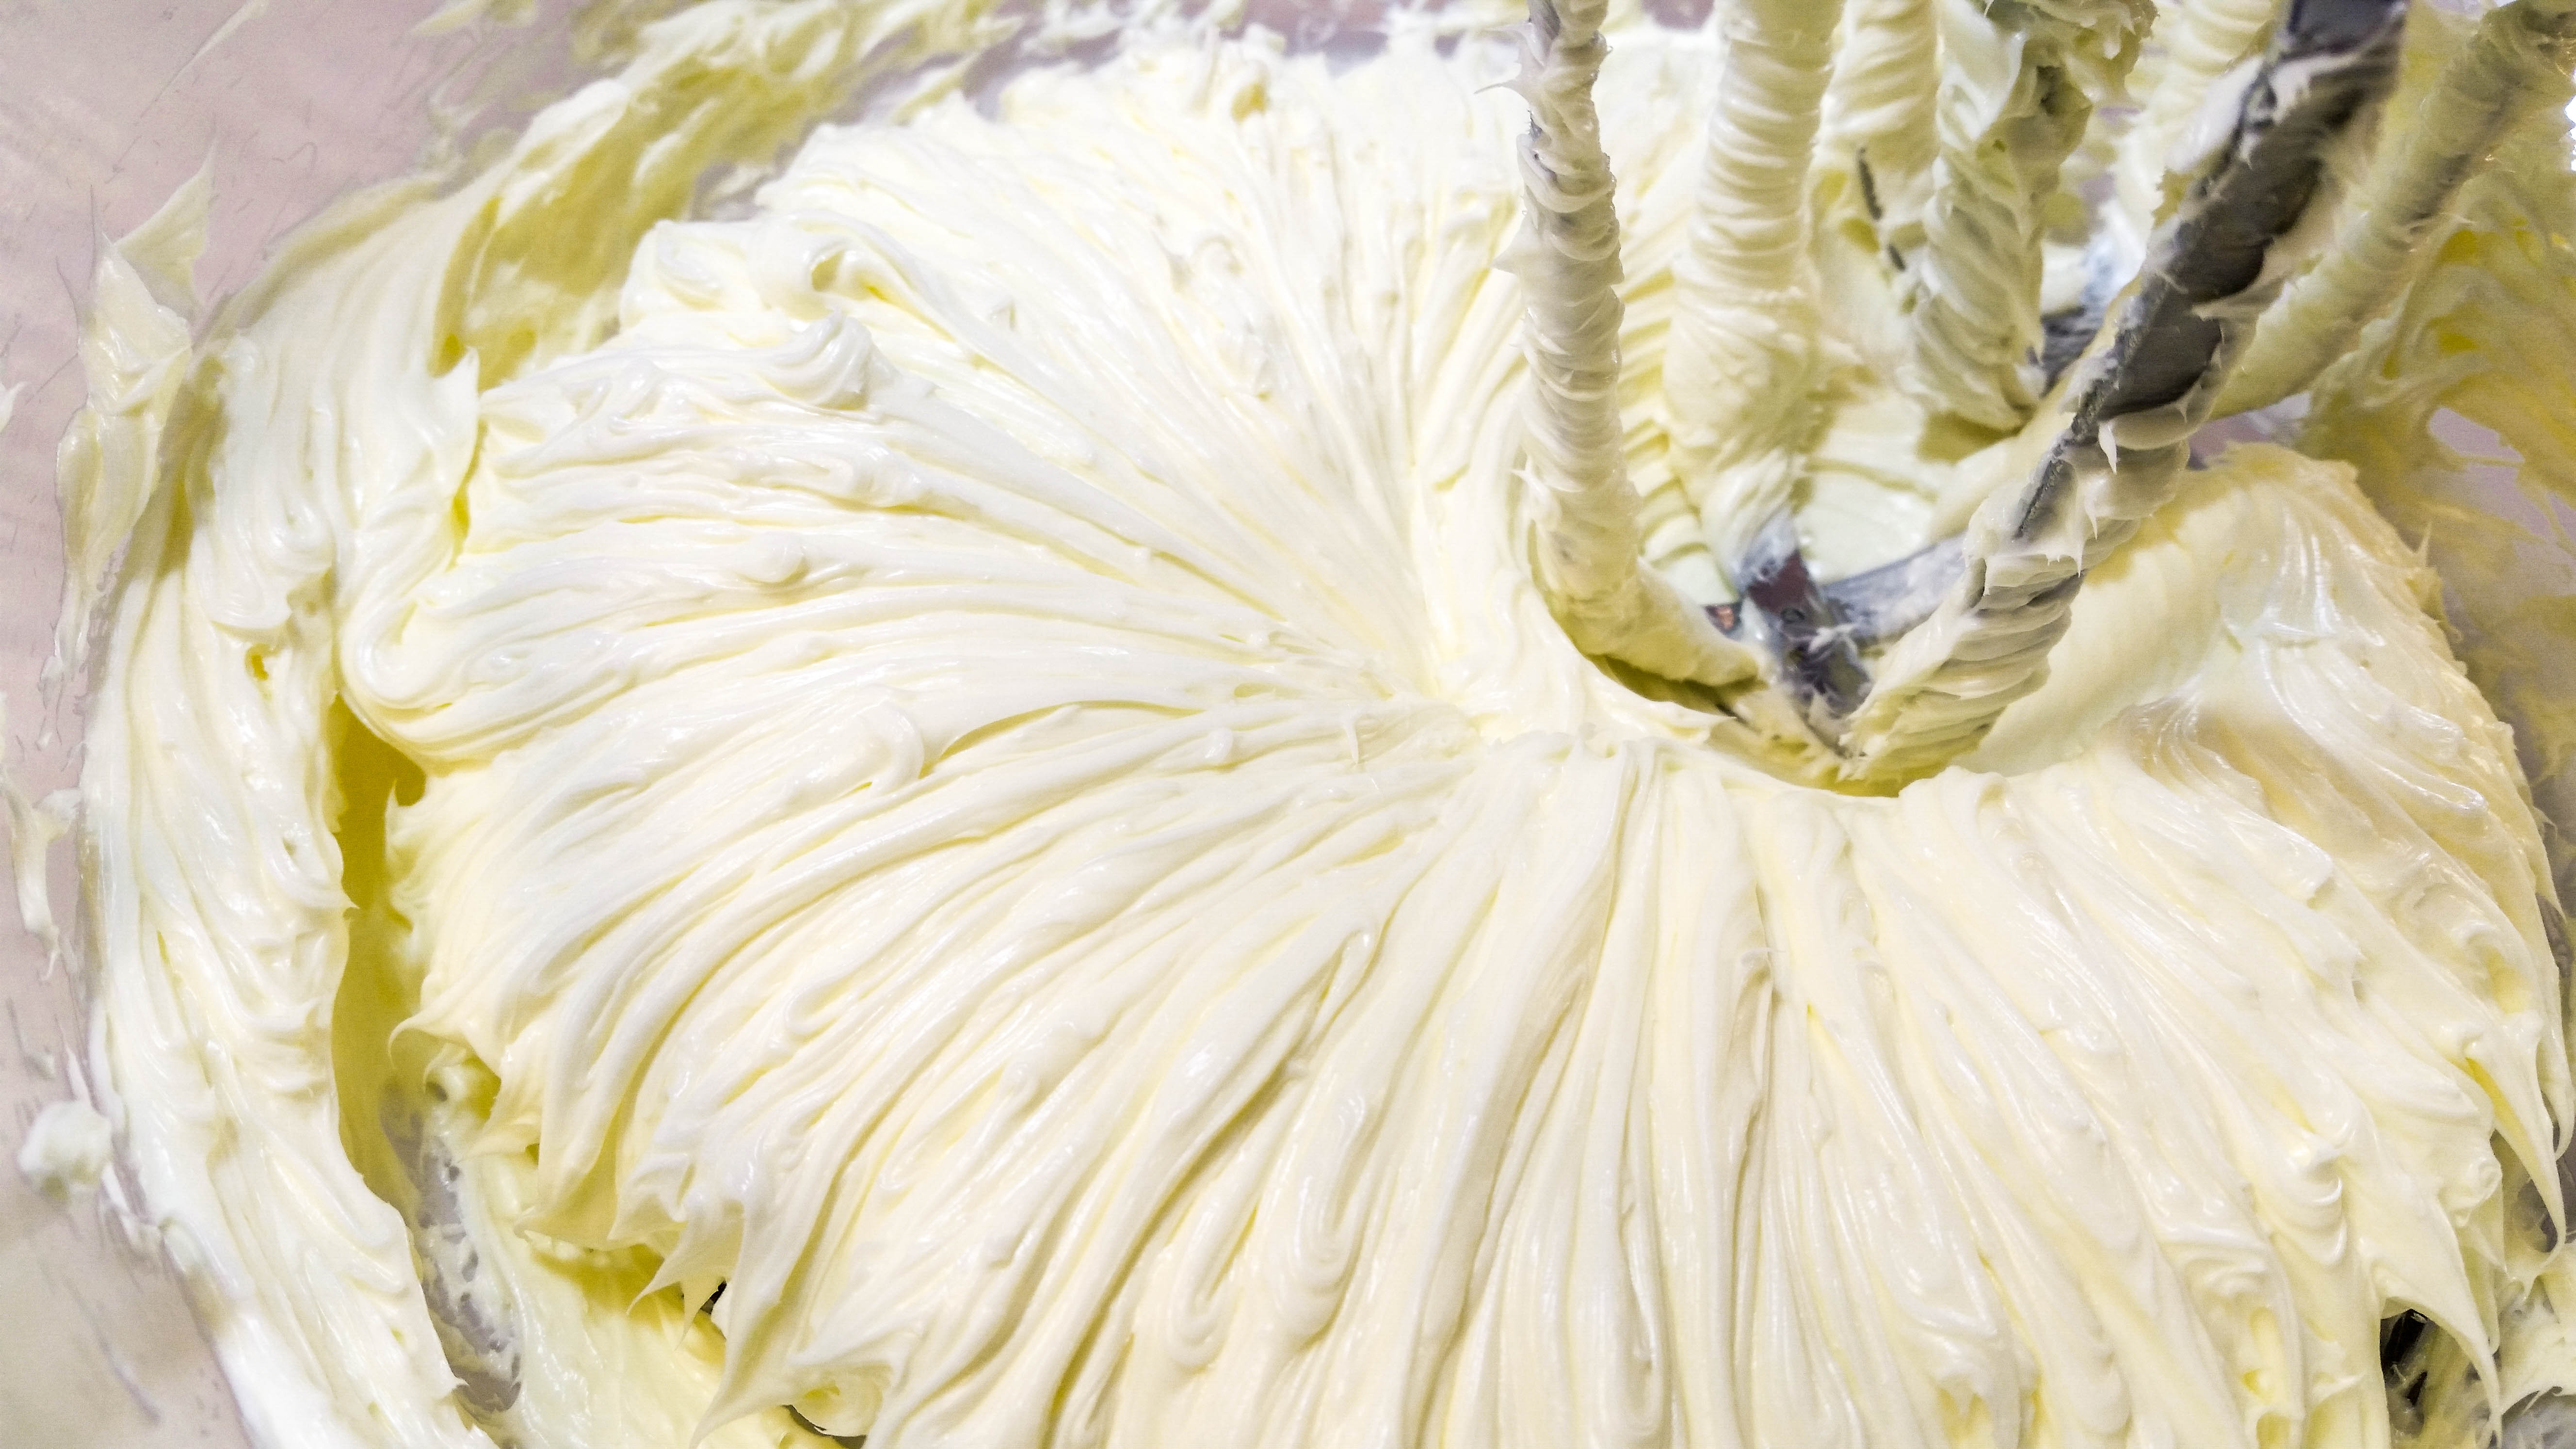
Using an electric mixer, cream the butter very well. I say this in every post so sorry for being repetitive! Creaming your butter until it is fluffy is the key to great spritz cookies. I like to pretend I’m making frosting and use the highest setting on my mixer. Butter turns a slightly lighter color when it’s creamed well.
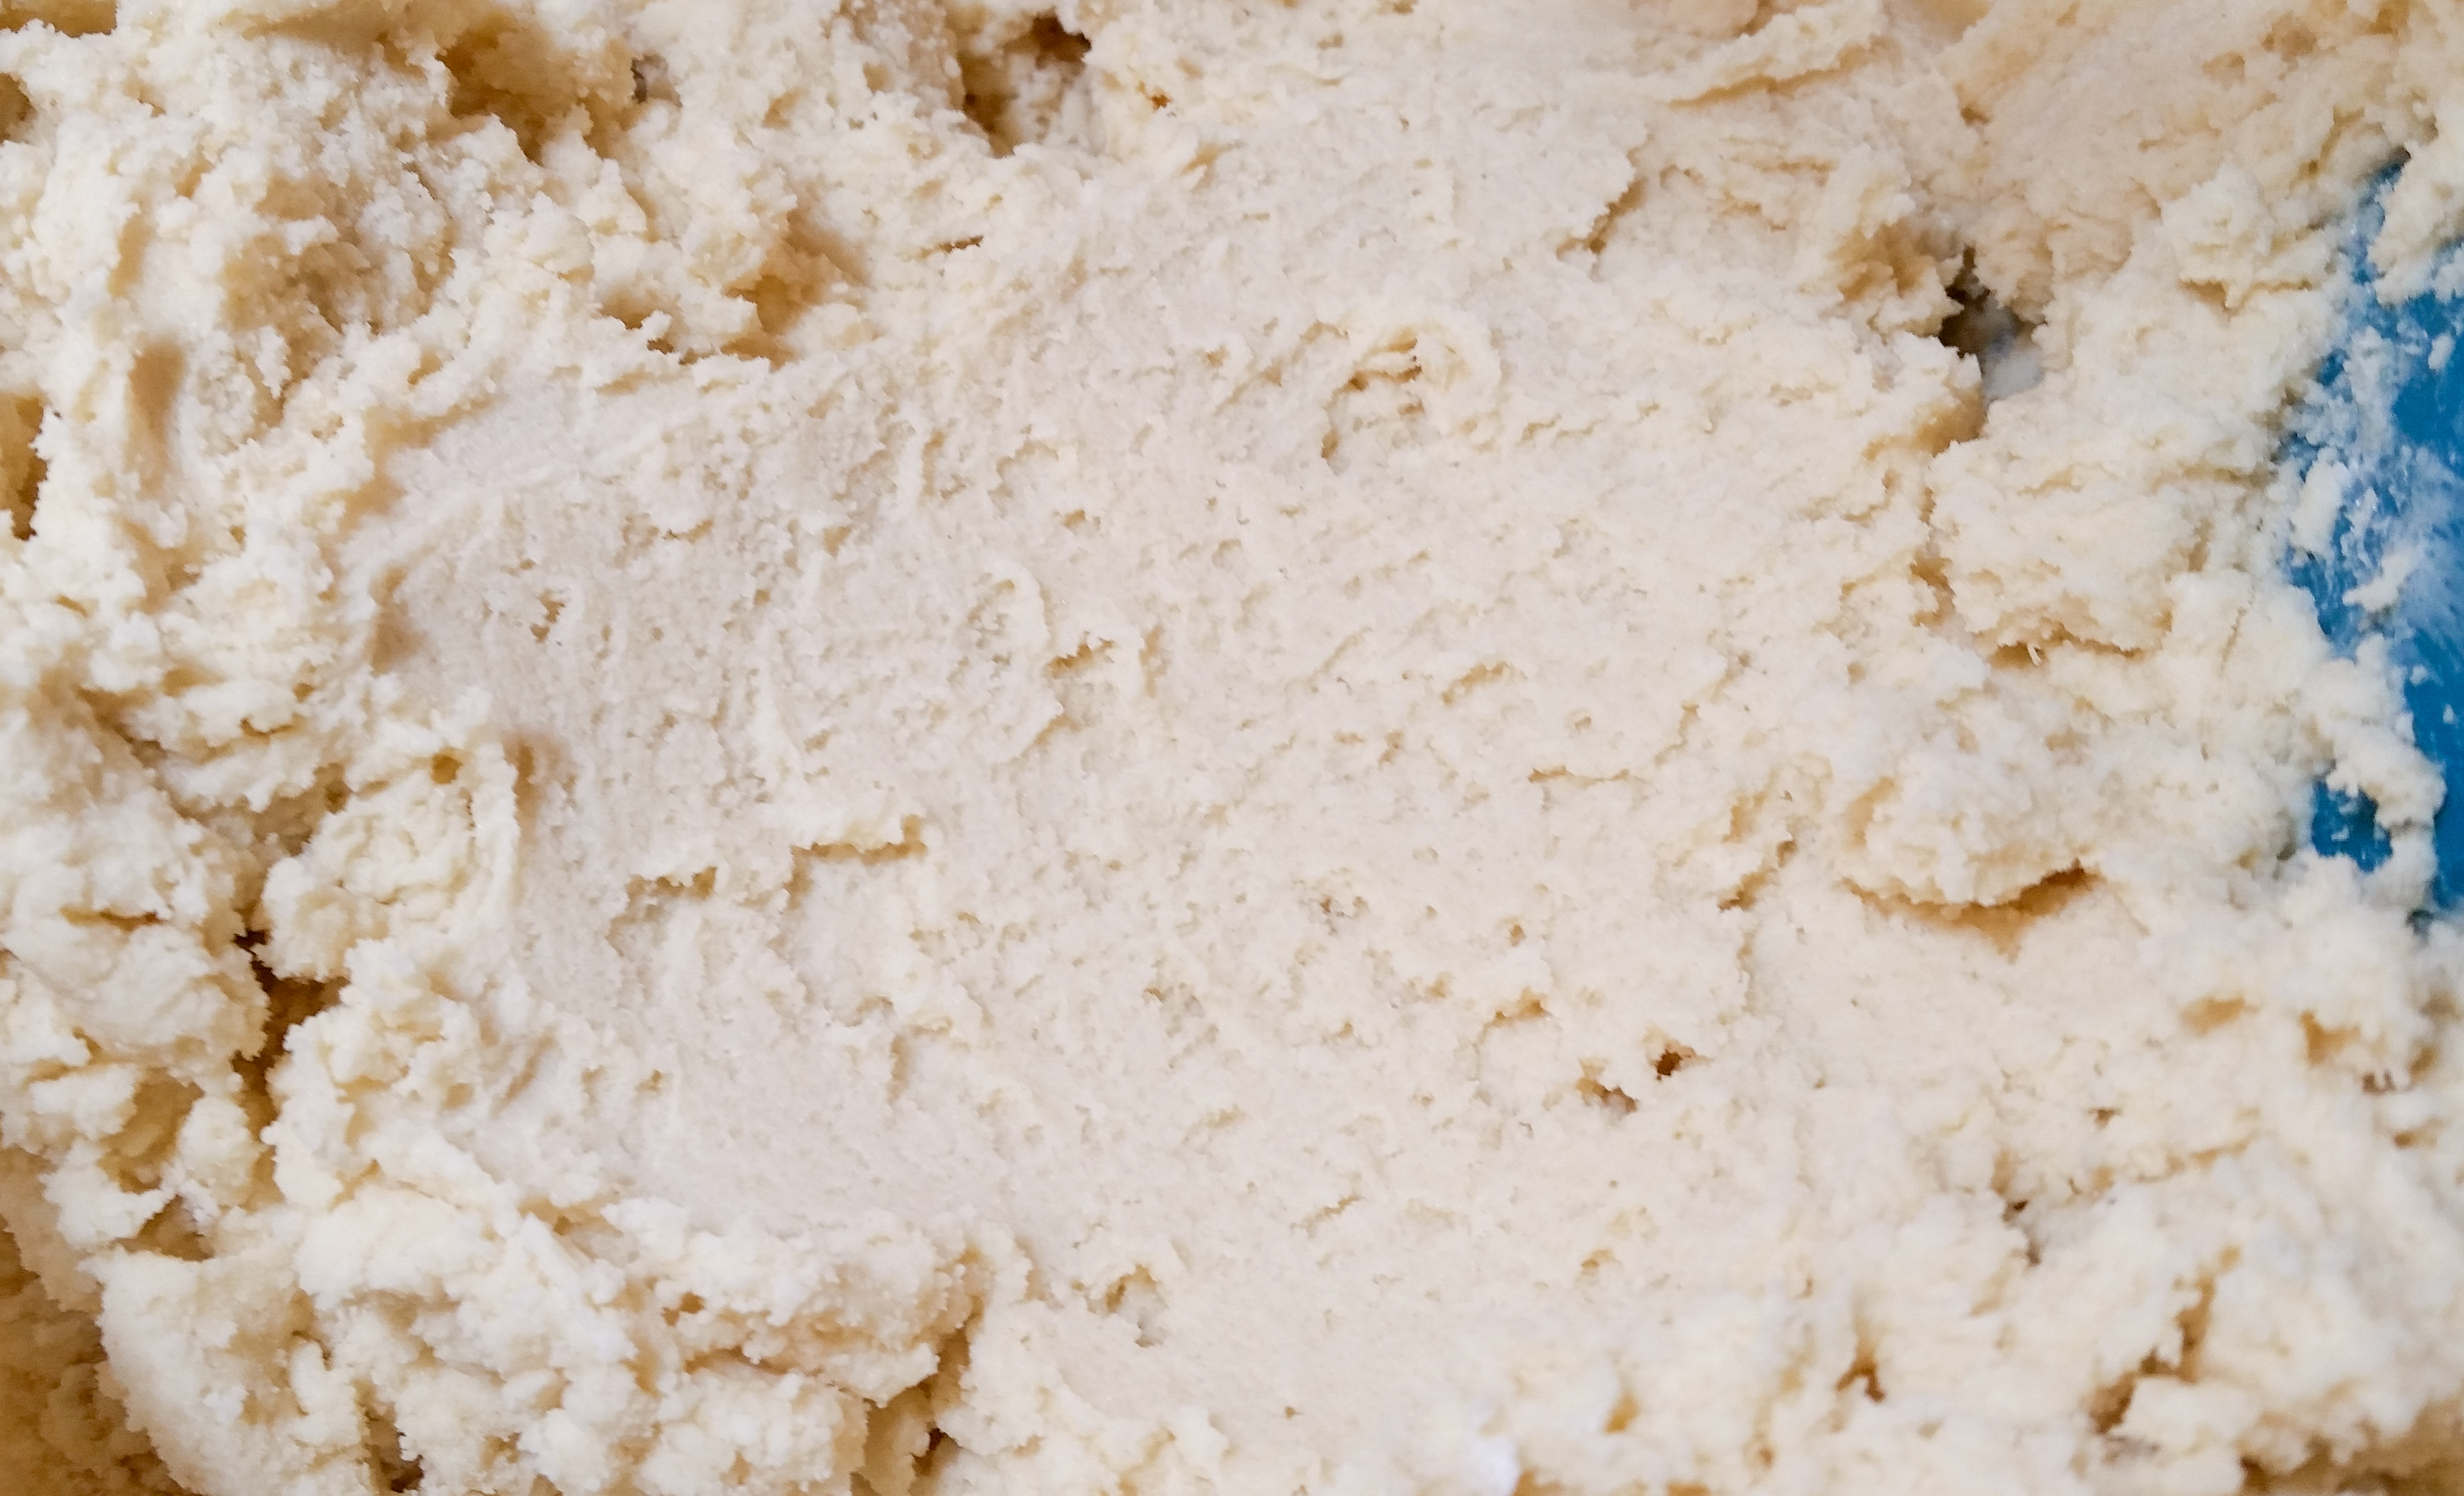
Add the sugar and cream it very well again. Then incorporate the honey, the vanilla extract, and egg, and re-cream the mixture after each new addition. Next add the flour mixture a little at a time, mixing on a slow speed until a soft dough forms. Perfect spritz dough has a soft malleable texture that is not too sticky or too stiff. It should not stick to your hands. You can always knead it by hand at the end if your mixer is leaving any flour unincorporated. Smooshing it into a play-dough like texture by hand is actually pretty fun. Always remember that you can tweak overly stiff dough by adding more vanilla a teaspoon at a time (or by the tablespoon if it’s particularly stiff), or tweak overly soft or sticky dough by adding flour a tablespoon at a time. Watch some of my videos to see what a correct spritz dough texture looks like.
To tint sprtiz dough use gel food coloring. Not gel writing icing, but food dye that’s a gel, not liquid. Gel maintains the consistency of the dough while liquid would change it too much. You can work the color in with a spoon or knead it by hand. Most gel colors wash off your hands surprisingly easily. Just make sure it’s evenly incorporated.

Get your disks and pack your dough into your cookie press barrel, using the back of a spoon to press the air bubbles out as you add dough. This helps create consistent pressure to avoid mis-shaped cookies.
Place the disk in the bottom ring, attach to your press, and start pressing onto an un-greased cookie sheet. Use a consistent rhythm to keep the shapes a uniform size. It’s not at all uncommon for your first few cookies to be mis-shaped, as pressure needs to build in the barrel to make consistent shapes. It’s totally ok! Just throw them back in the bowl to be re-pressed. If you’re still having trouble pressing (mis-shaped cookies, trouble sticking to the pan, etc) press one cookie into the air and wipe it off and toss back into the bowl to re-set your pressure in the press. You can also refrigerate your cookie sheets for 5 minutes if sticking is an issue. (There are more troubleshooting tips on the Troubleshooting and Decorating Tips page- see the top menu on the blog homepage. )
If using a one-click-per-cookie type press remember that you don’t always have to follow that guideline. Some shapes may take more or less than one click and that’s ok! Cookies don’t have to come out in even “clicks”. One click, half a click, it doesn’t matter. A press (any press) is a dough pump (it’s kind of like a caulking gun). It’s simply a mechanism for pumping dough out, however many (or few) “clicks” it takes. Again, you can read all about that in the Troubleshooting and Decorating Tips page if you’re new to this.
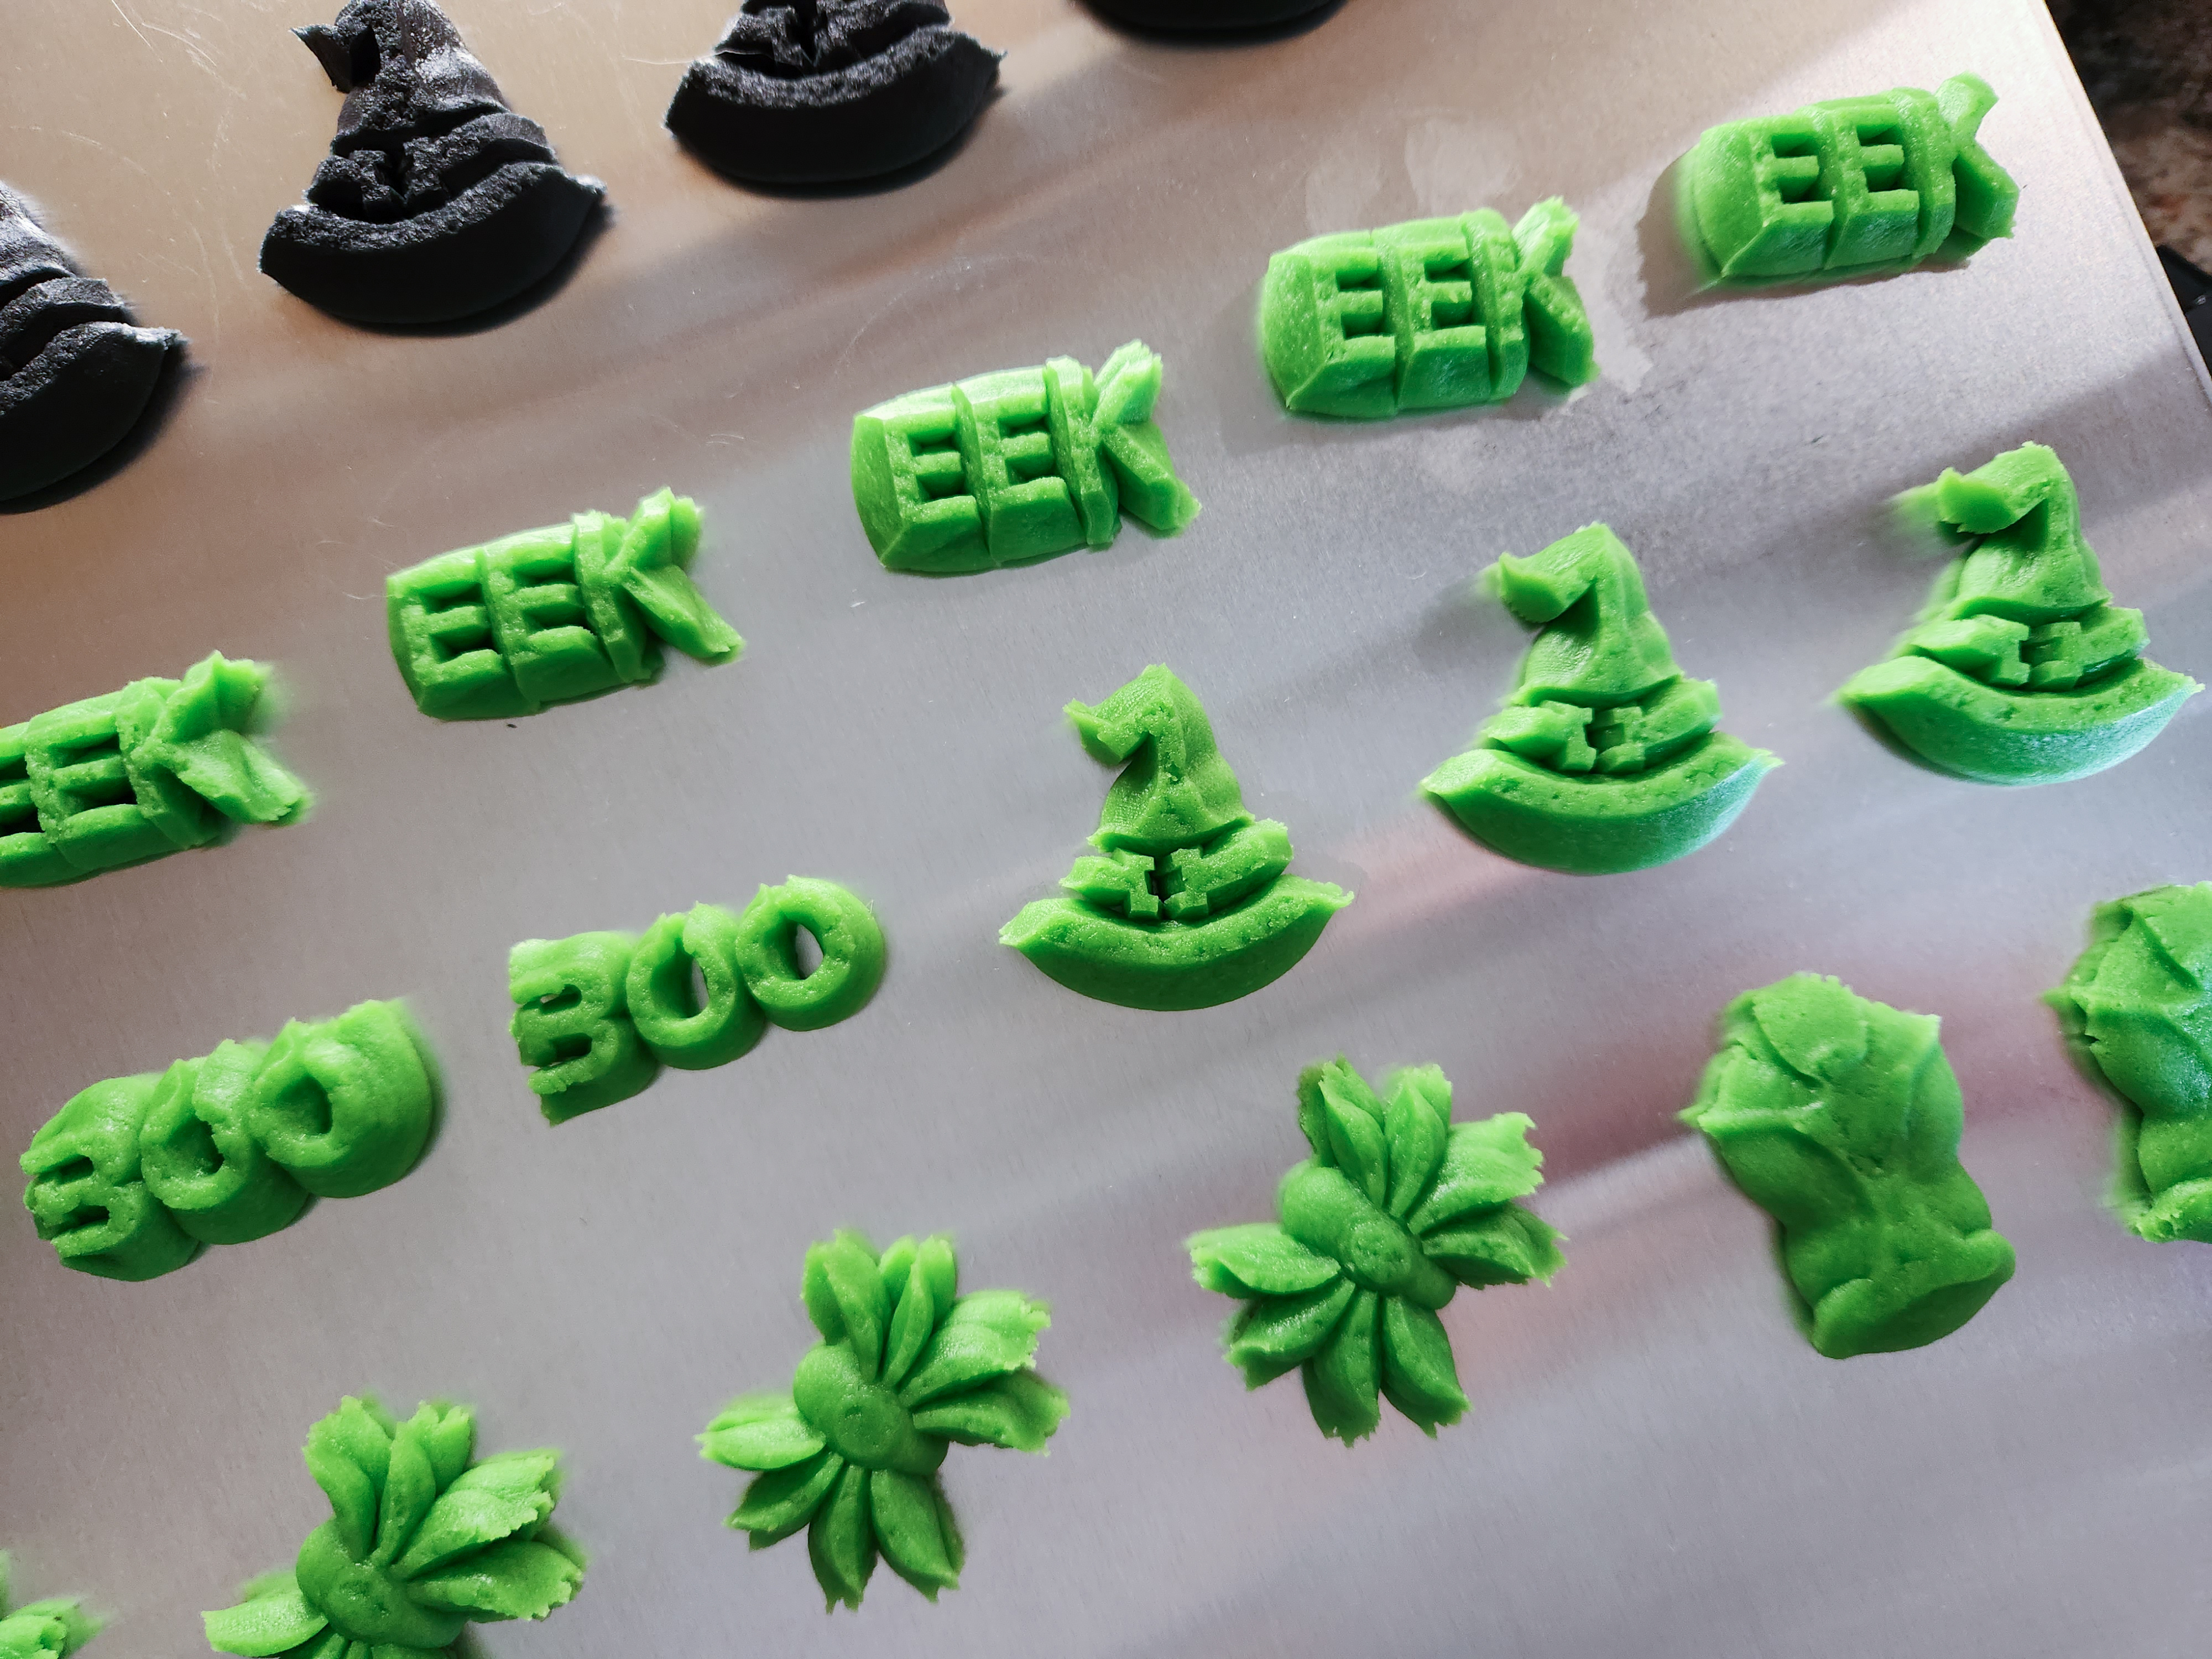

The shapes pressed easily in this dough. Try to keeps your shapes on the small side, neat and tidy. Don’t let them spread out into blobs. Keep the words small and tight with neat ridges. Use your fingers to adjust anything that looks off to you. The left side of the words sometimes spread, just push them in a bit. Pinch the tips of the candy corn so they’re pointy, and straighten the sides if they spread.

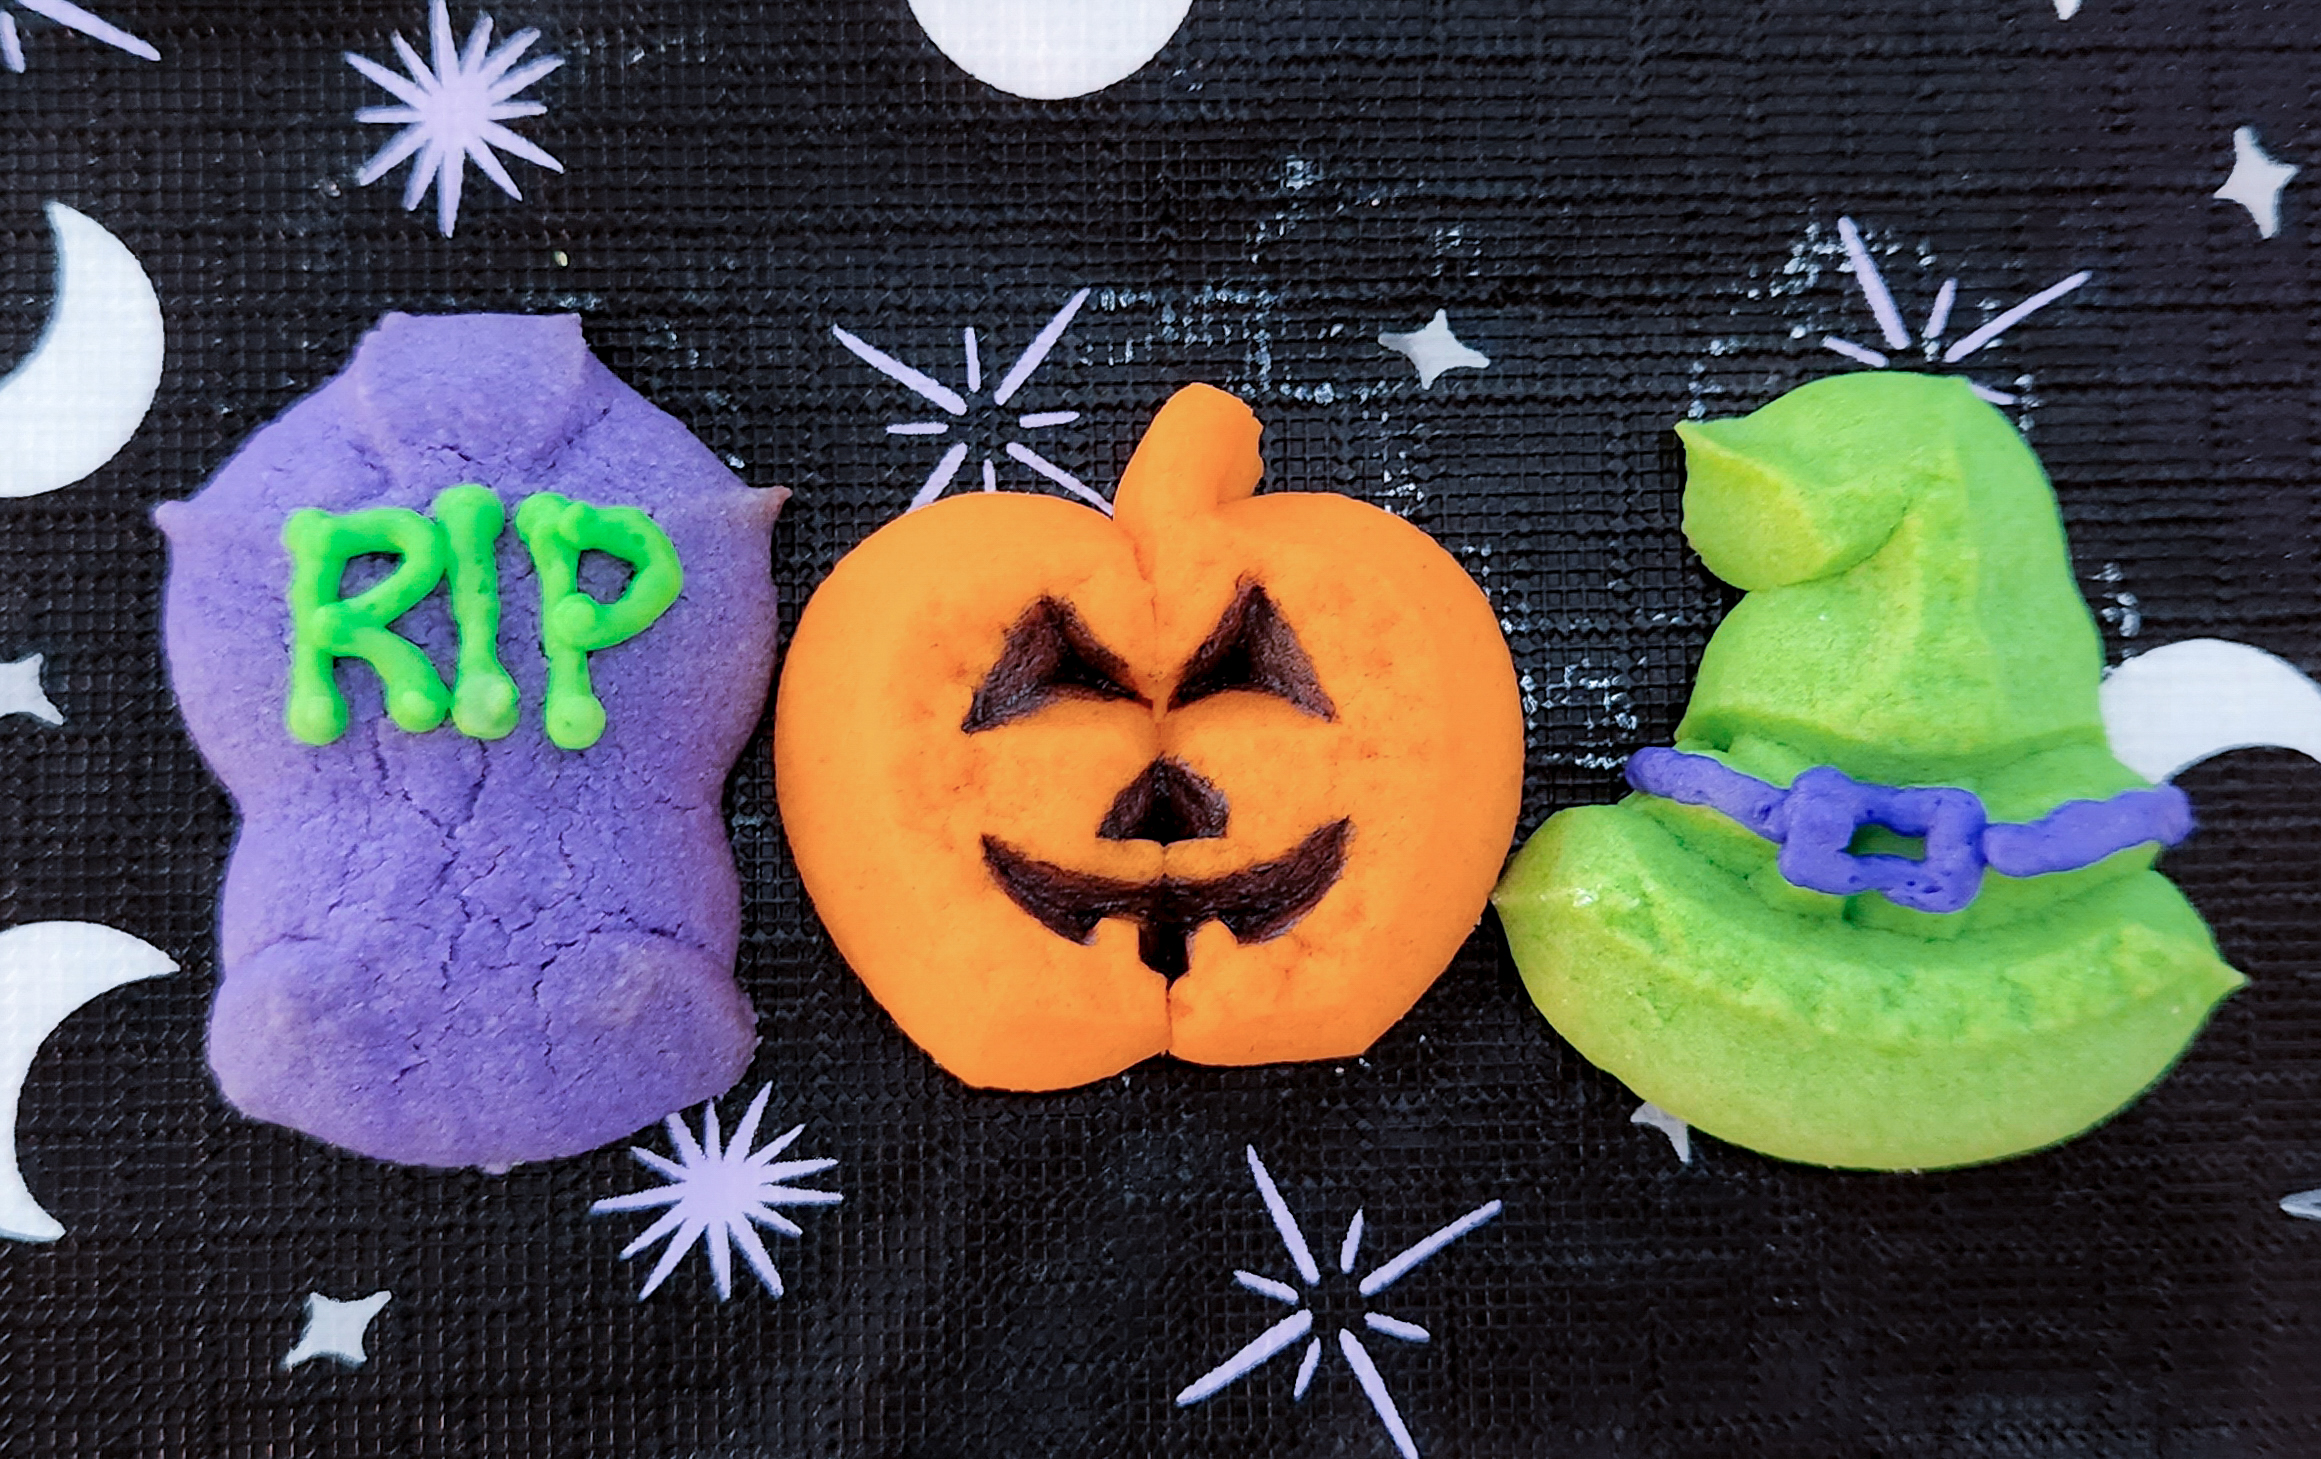
For the tombstones, flatten the rough surfaces to make a good space to write RIP in icing. Just tap and smooth the dough flat with slightly damp fingertips as shown above.
NOTE: the Bubbling Cauldron can be tricky to press if your dough is warm or too soft or sticky, which can happen when coloring dough. Add flour to a small amount of dough for those should it become a problem.
Bake in a 400 degree oven for 6-10 minutes or until the edges just begin to brown slightly. Check them early and often as all ovens are different, and spritz can brown quickly once they start to go. Let them cool for four or five minutes before removing to a cooling rack. If they’re too soft after baking they may break when you lift them, and if you wait too long they could stick to the pan. With time you’ll get a feel for it. Check them to see if they’re ready to be moved. If not, wait a few more minutes.
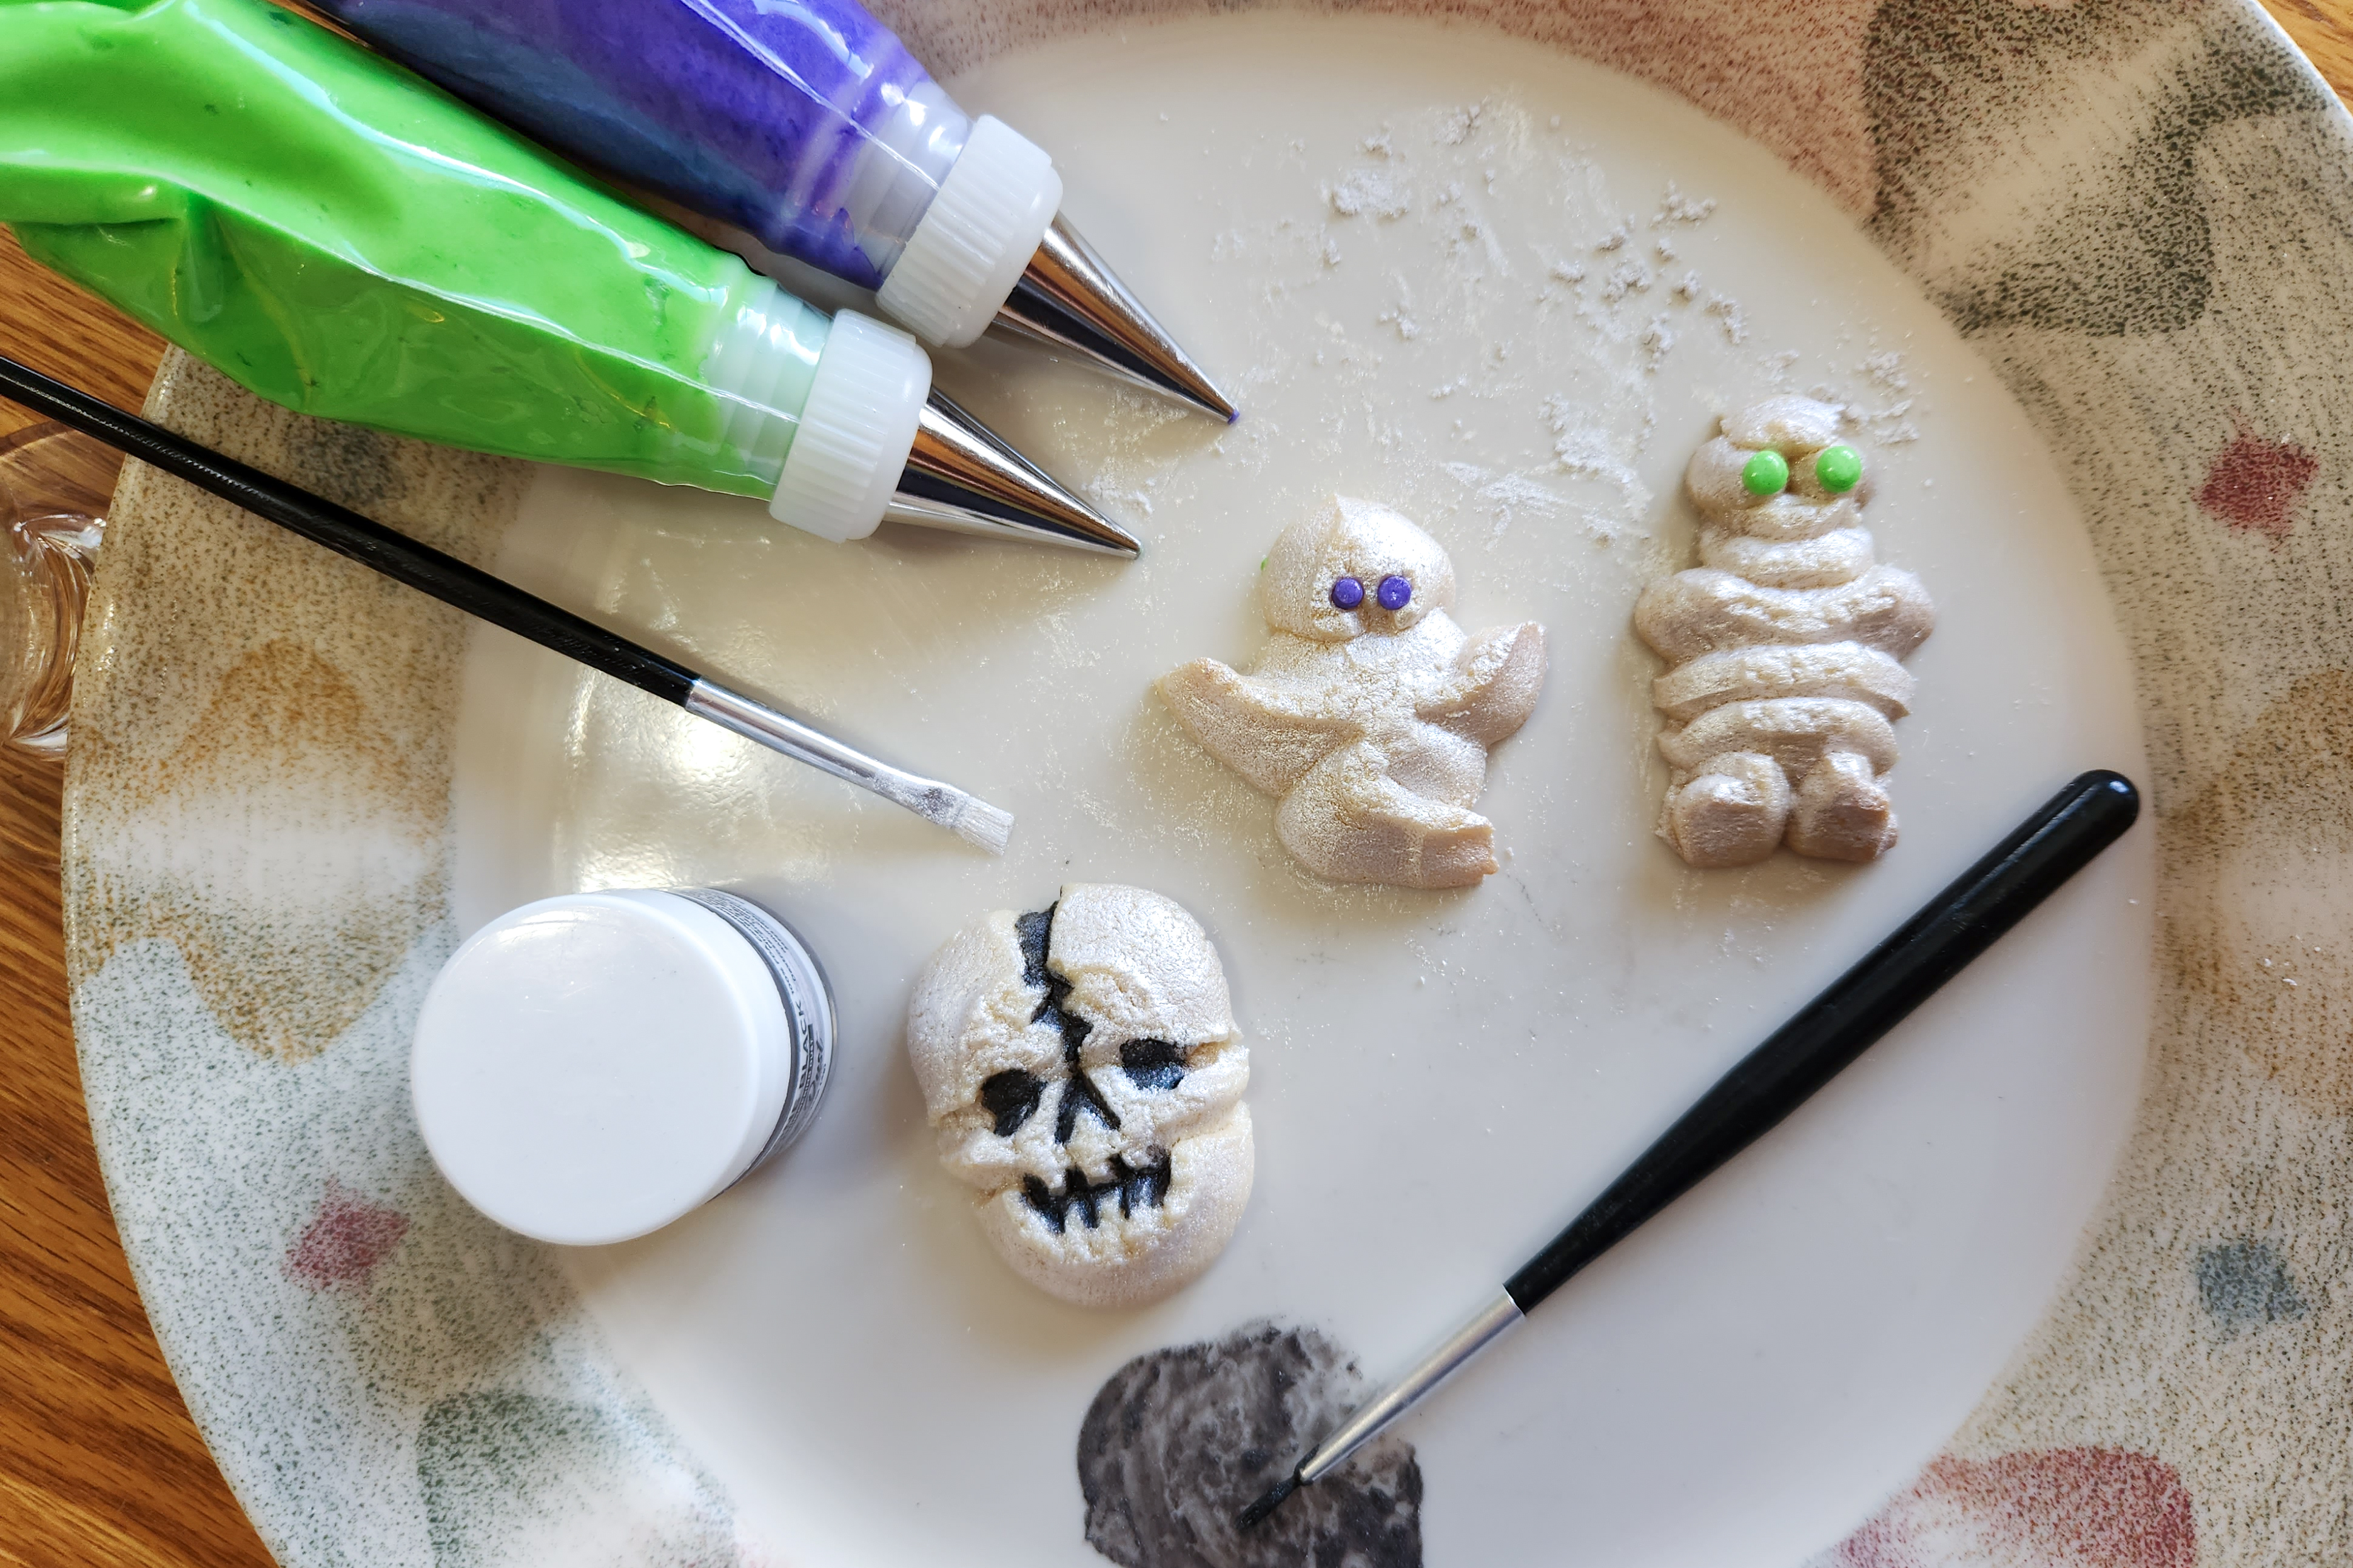
The decorating for this is straightforward. Use colored icing and edible luster dust to add accents!
You could buy icing in tubes with tips and follow these instructions, or here’s my favorite decorating buttercream.
1/2 cup (1 stick) butter, softened (not melted)
2 1/4 cups powdered sugar
1 teaspoon vanilla extract
2 Tablespoons heavy cream
1/8 teaspoon salt
Cream your butter then add the rest of the ingredients, and once incorporated whip this for 2 to 3 minutes to make it super fluffy. Tweak it with a little more heavy cream if it’s too thick for decorating or with more sugar if it’s too thin.
Use GEL food coloring (not gel icing, use gel food dye/coloring) to tint your icing. Liquid affects texture too much. I use a toothpick to add my color. Always start with a little bit- you can add more but you can’t take it away! Use decorating bags and tips. You’ll only need a small-ish round writing tip.


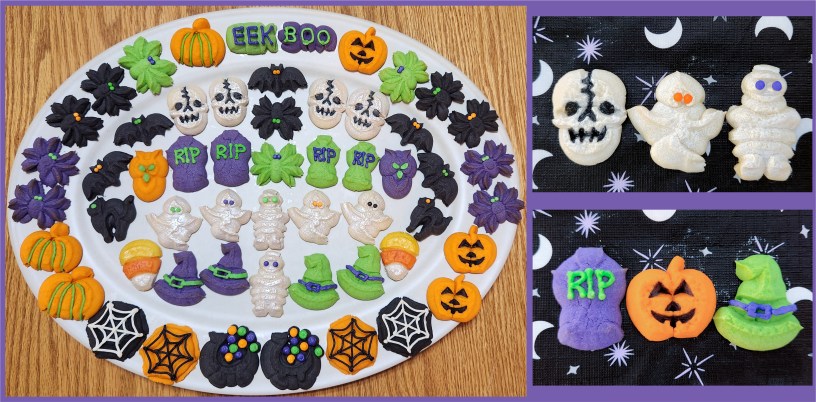
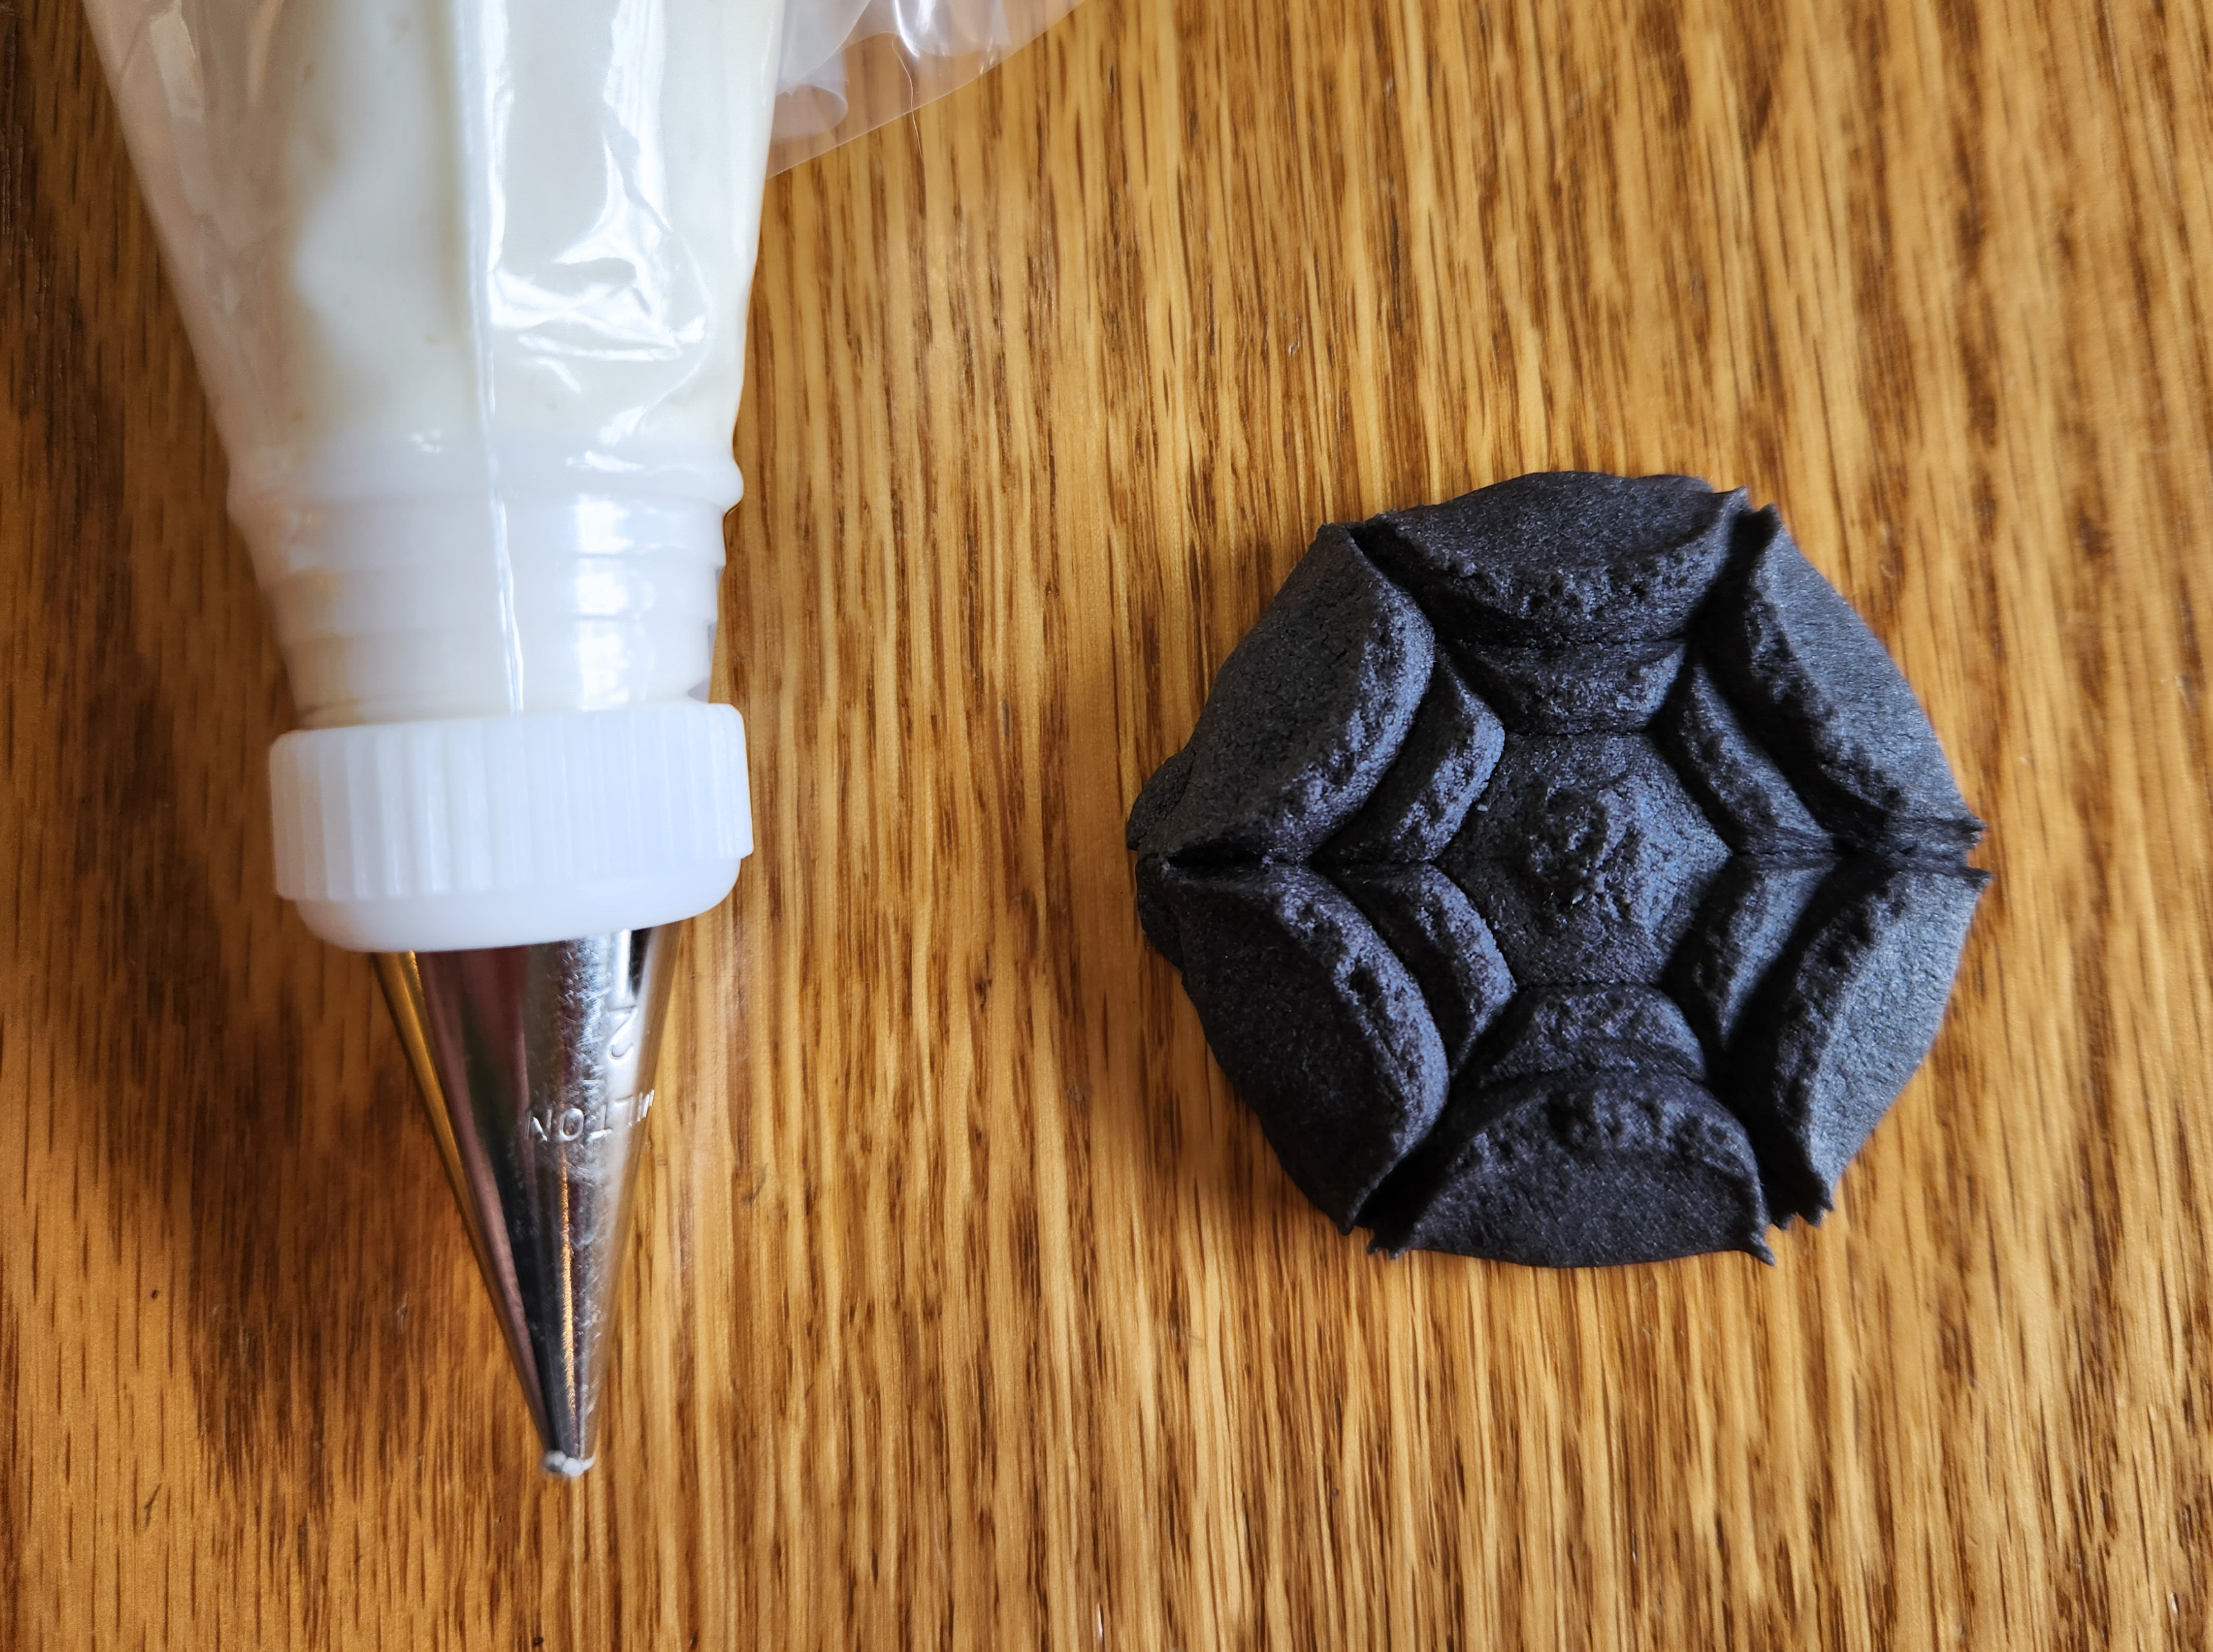
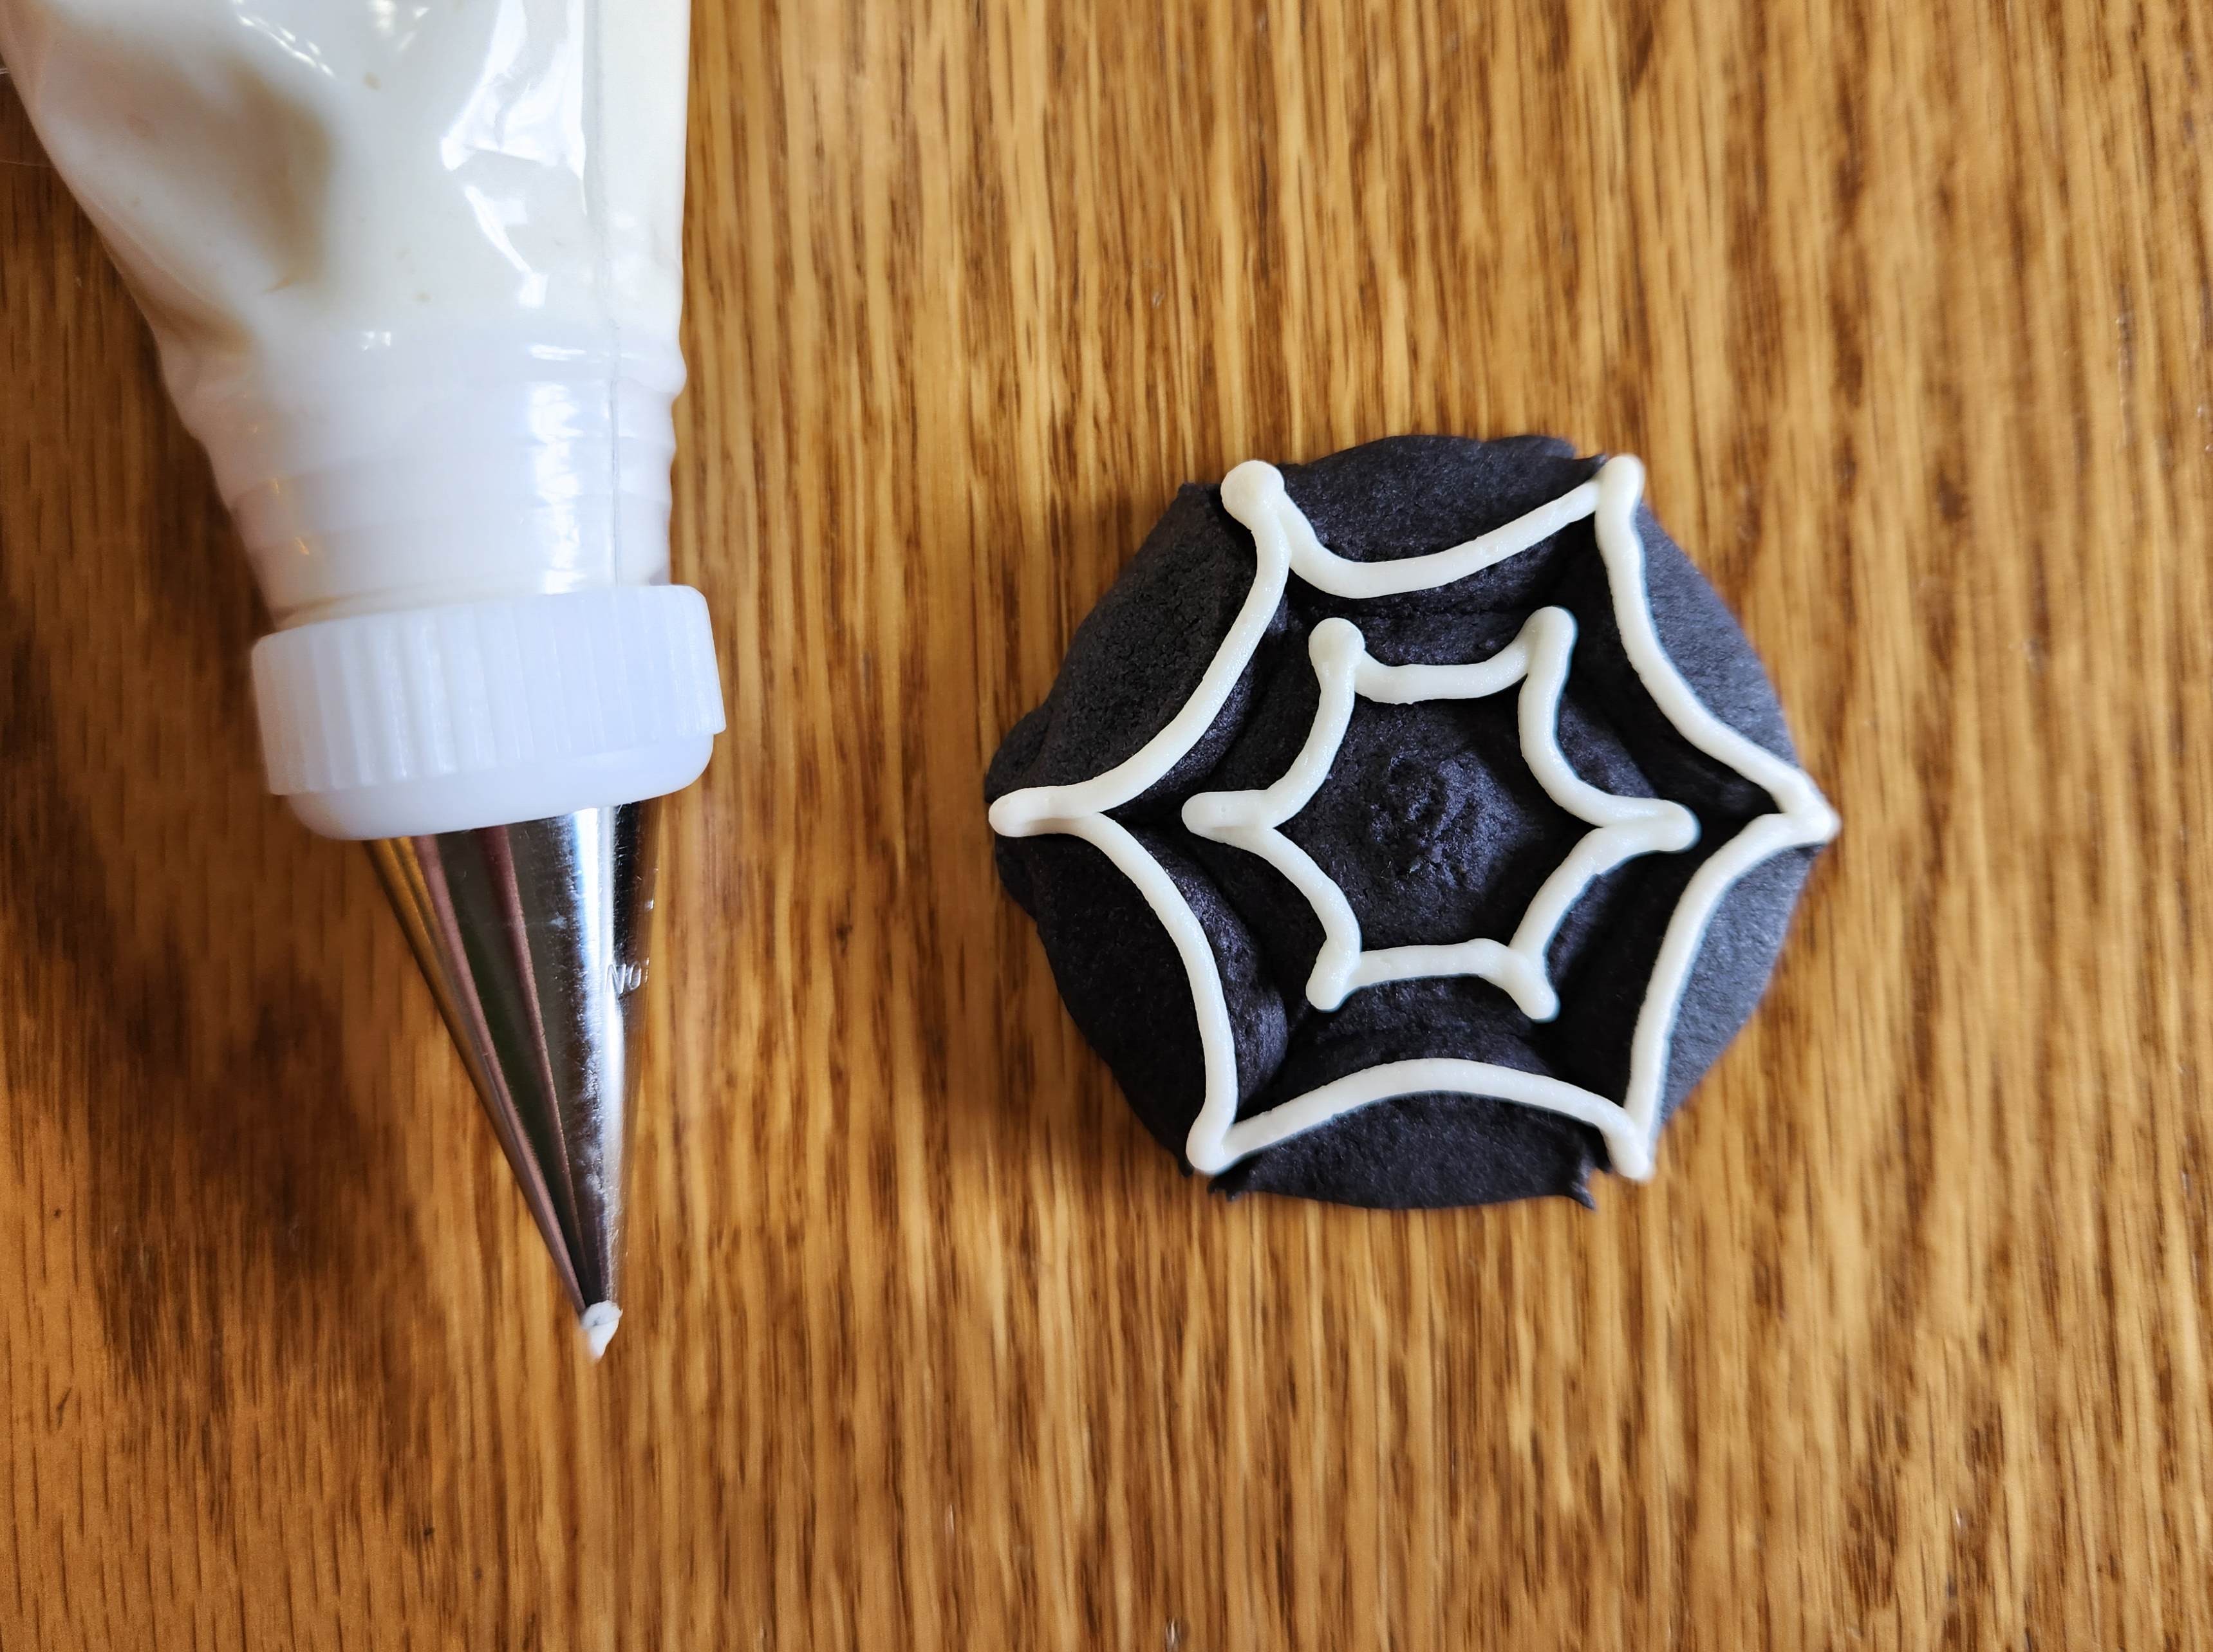
Use the icing to add the webs to the spiderweb cookies. It’s SO easy because the cookie lays out the pattern for you. Follow this photo guide. Trace the inner and outer ridges of the hexagons, then crisscross the cookie through the center with 3 straight lines. I did mine white on black cookies and black on orange cookies. Tip: it’s always best to start and stop your lines with a dot, it makes a cleaner look.

Make dots for eyes on the critters and mummies. Use a damp fingertip to gently tap down any points in the icing to make the eyes round.

Make bigger dots for the “bubbles” in the Bubbling Cauldron. And draw fat lines for the buckle on the Witch Hats. Write RIP on the tombstones. Draw 4 icing lines in the grooves on the pumpkins and trace the letters on the words. (You could also wet paint the grooves of the pumpkins with green luster dust.)
Take a look at the main photo to see everything I did.

On to luster dust!
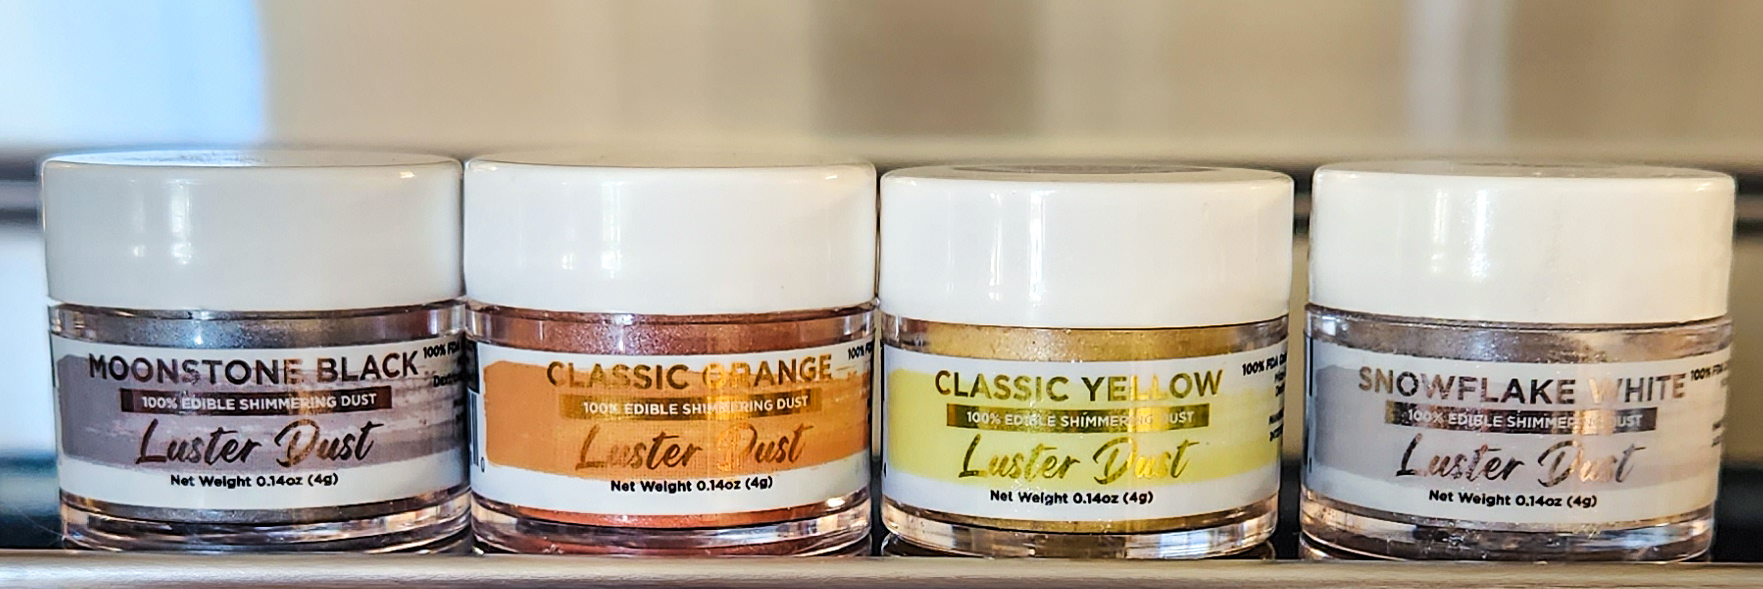
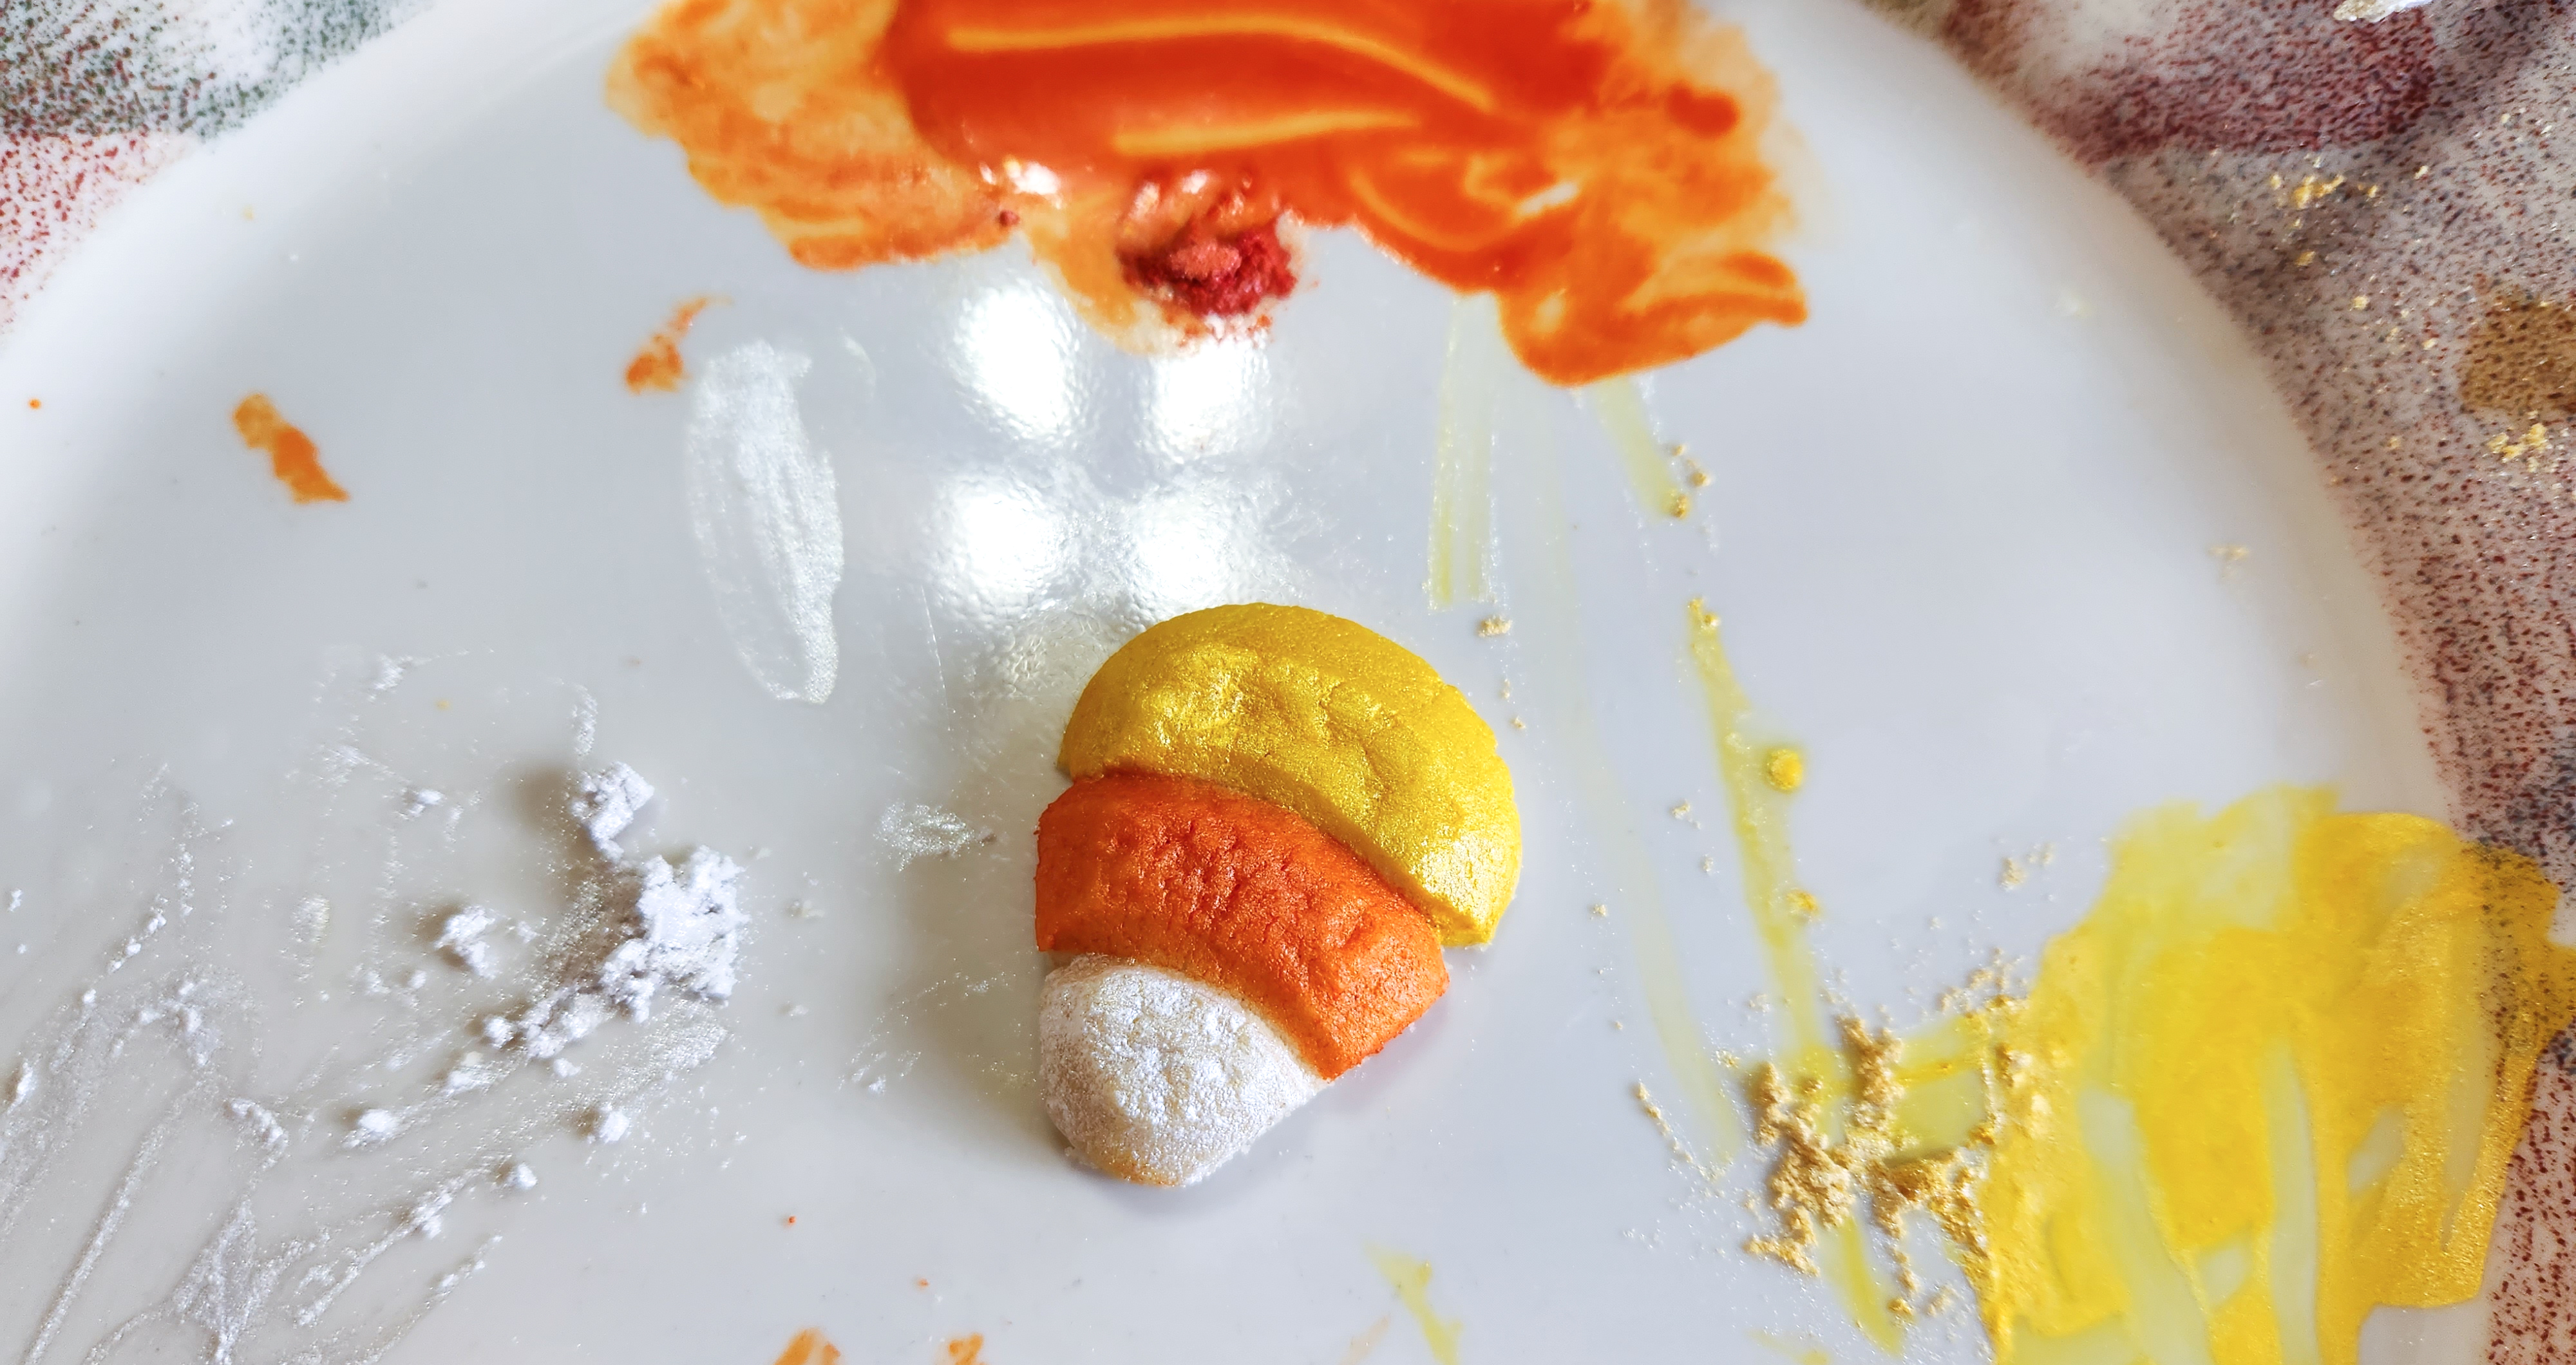
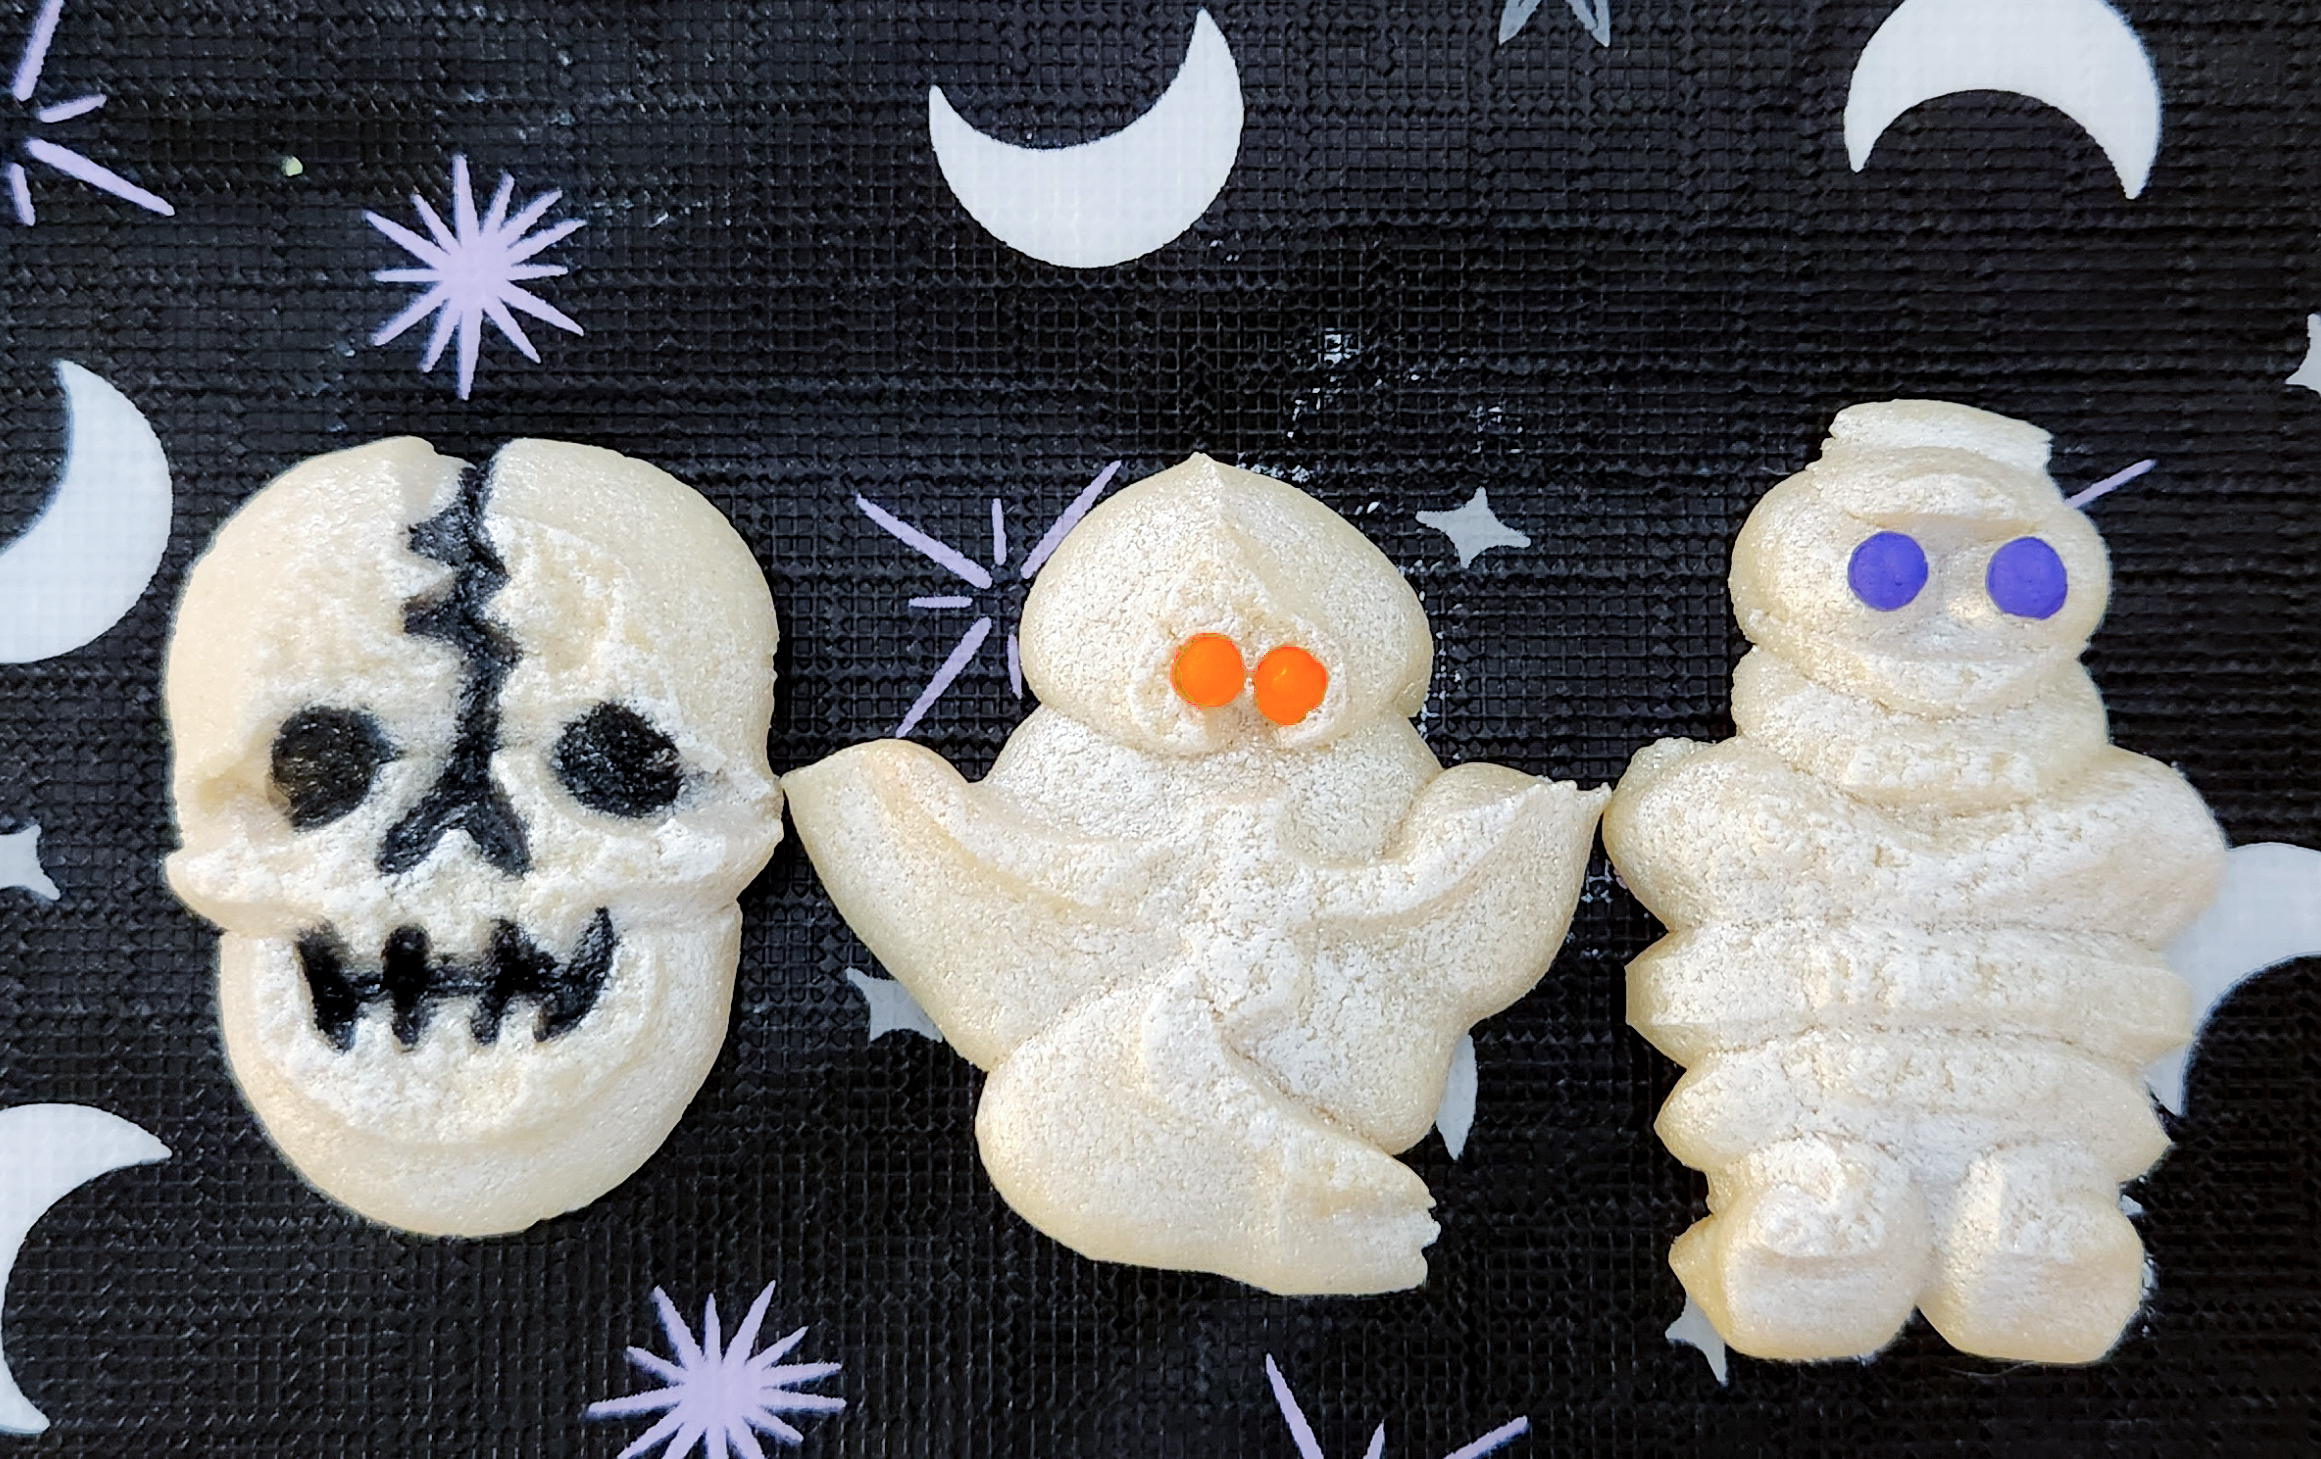
Luster dust is what makes the white cookies look sparkly white, fills in the recesses in the skull and jack-o-lantern, and gives the candy corn its 3 color look. I use it so often in my cookie press posts that in 2022 we started selling it on our website and Etsy shop! We chose to partner with an American company, Bakell, that makes dusts here in the USA. They make gorgeous dusts that are silky, vibrant, and a joy to work with. Their 4 gram jars last and last. A little goes a long way! For this recipe I used Moonstone Black, Classic Orange, Classic Yellow, and Snowflake White.
NOTE: Whatever brand you use, always make sure you are using EDIBLE dusts! Some luster/pearl/glitter dusts on the market are “non-toxic” but that does not mean they are edible. Plenty of brands have actual food ingredients and are marked “edible”. ONLY use those for safety’s sake!
I did both dry brushing and wet painting. Here’s how.
Dry brushing is just like it sounds. Use a dry brush to smear luster dust on top of a cookie. It makes a wonderful affect on white cookies like the ghost (and come winter, snowflakes!).

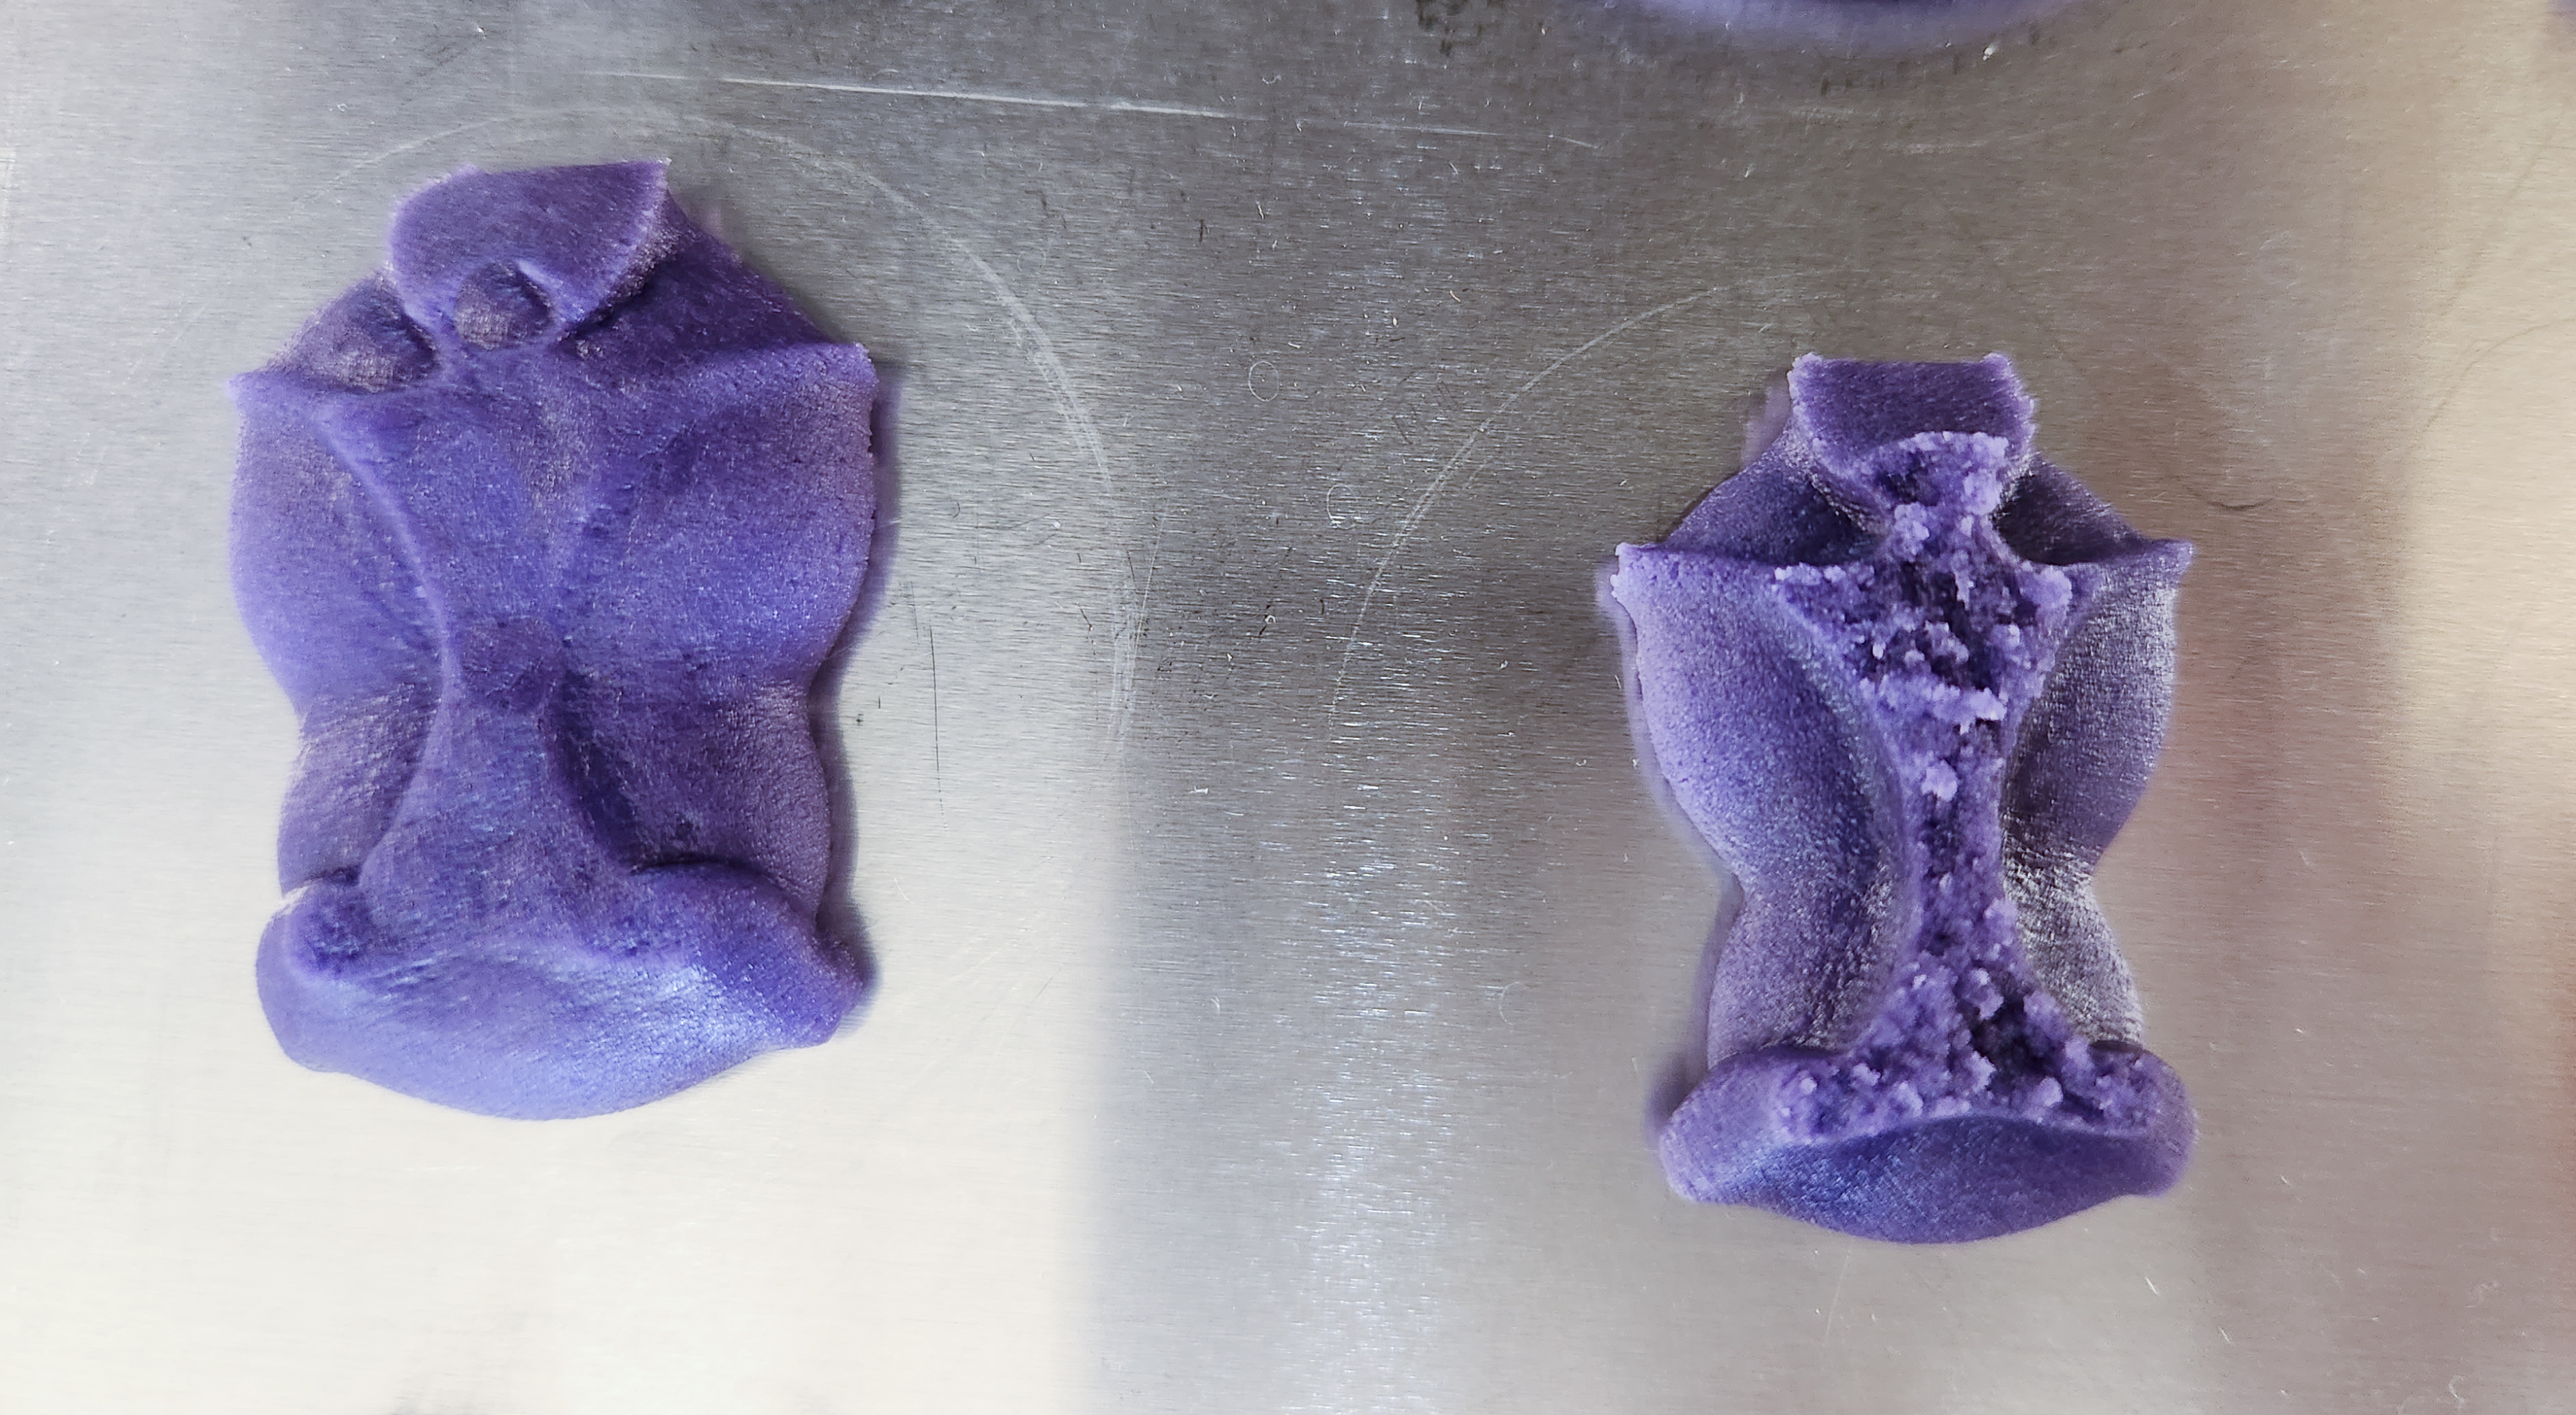
Now add accents to these shapes. For the skull, wet paint with black luster dust. Use the same technique for the jack-o-lanterns.
My wet paint technique is to put a small amount of vodka in a little dish or cup, then use a larger brush (always use food safe brushes) to drip the liquid a little at a time next to the piles of dust. I use a big plate and place small dust piles around it, then add extract a little at a time- it doesn’t take much! It also dries out quickly so you’ll find yourself adding more. I save that big brush and keep it clean so I’m always re-dipping it in a clean liquid. You can alternatively use any clear extract but vodka is by far the best choice for smooth painting.

Use the black paint to carefully fill in the spaces as shown.


For the ghost and mummy, just add icing dots for eyes.
Wet paint the candy corn.
That’s it! Get creative with colors and techniques and make yourself a spookylicious batch of Halloween fun!
As you’re arranging your cookies watch out for the spiders. Every time I bake those little buggers I have the hardest time keeping them on their own plate! 😉

Happy Halloween!
~Susie
Disk Designer/Co-Owner at Impress! Bakeware, LLC
Our website has all of our 200+ disk shapes, cookie press, embossed rolling pins, stamps, luster dusts, baking accessories plus more about our Women/Family Owned company! impressbakeware.com
All products are on our Etsy shop.
Our Amazon shop has our cookie press and disks and embossed rolling pins.
Follow us on facebook!
