
Rose flavored cookies with rose buttercream! These delicate melt-in-your-mouth delights are perfect for Valentine’s Day, weddings, baby showers & more! Make beautiful shapes & patterns with our cookie press disks or embossed rolling pins. Flavored with food grade rose water! I show 4 different ways to make these cookies & buttercream, pick your favorite(s) and have fun!

This rose water cookies & buttercream recipe was too wonderful to not share both ways – made with our cookie press disks and with our embossed rolling pins! I couldn’t just do it one way; I wanted fans of both kinds of cookies to enjoy these. So this post has instructions for both. The recipe is the same except there is extra flour in the rolled version. The instructions are then given first for spritz cookies with a cookie press, then for rolled embossed cookies. There are also instructions to press icing to put on plain rolled cutout cookies, and to roll and emboss patterns into super thick buttercream to top cutout cookies! This is the first time I’ve blogged about pressing icing.
You decide how you want to enjoy these!
I’ve never baked with rose water before and honestly I was stunned at how aromatic and unique it is. The buttercream is simply amazing.🥰 If you love floral scents you will really enjoy these.🌹 As the icing melts in your mouth and you take a breath, you’re both tasting the flavor and smelling the aroma of roses. It’s delicate and exquisite, elegant and wonderful.
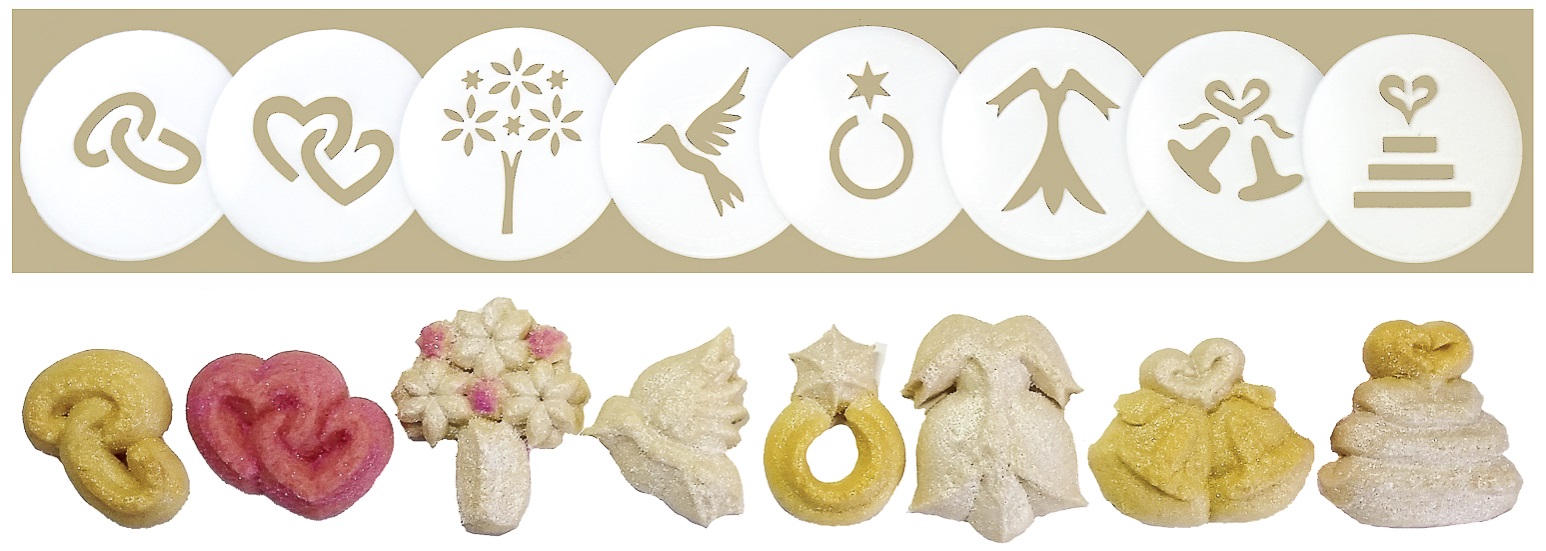
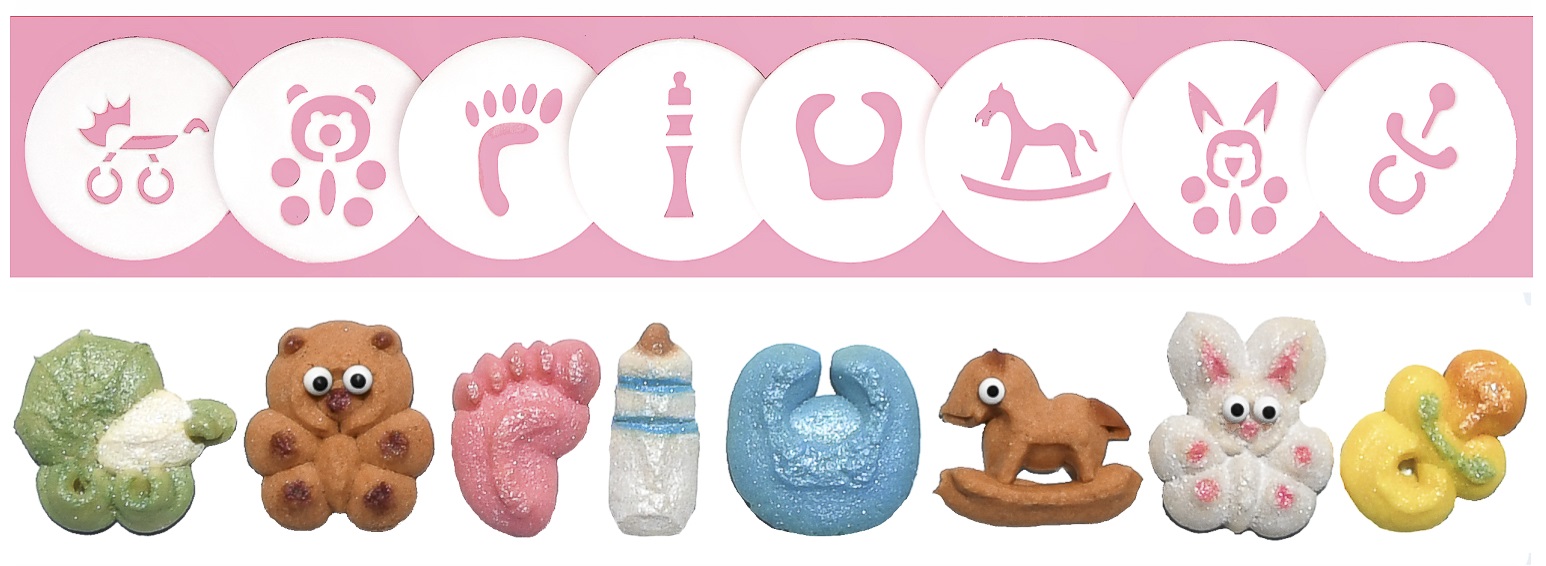
Thinking there are several occasions these would be fabulous for, I chose a handful of disks from the Valentine’s Day, Wedding, and Baby Disk Sets, The Rose 2 Disk from the Flowers Set, and the pretty Serrated Heart Disk from the Press Box Set ( the set of disks that comes with our cookie press – the set set is also sold separately).
Here are the first four:


I used the Roses Embossed Rolling Pin and the Valentine’s Day Embossed Rolling Pin.


Our website has all of our 200+ disk shapes, cookie press, embossed rolling pins, baking accessories plus more about our Women/Family Owned company in beautiful Colorado Springs! impressbakeware.com
All products are on our Etsy shop.
Our Amazon shop has our cookie press and disks and embossed rolling pins.
![]() SALE! February Fun SALE! 💖15% off cookie press, disks, embossed rolling pins & more. 🌹Support family-owned small businesses!
SALE! February Fun SALE! 💖15% off cookie press, disks, embossed rolling pins & more. 🌹Support family-owned small businesses! ![]() Offer only on our website & popular Etsy Shop January 31 – February 14, 2024. Sale NOT on Amazon store and not on Gift sets or the new recipe book.
Offer only on our website & popular Etsy Shop January 31 – February 14, 2024. Sale NOT on Amazon store and not on Gift sets or the new recipe book. ![]() Happy Baking from our families to yours!
Happy Baking from our families to yours!
Let’s bake!
I ordered my edible rose water on Etsy from another Colorado-based small business, Old Town Spice Shop, but you can find it online at specialty stores or on Amazon. Just PLEASE make sure it is EDIBLE and food grade!
Impress! Rose Water Spritz/Rolled Cookies
1 1/2 cups (3 sticks) butter, softened (not melted) (I recommend Land O Lakes brand as I know it creams well. I have had trouble with some generic butters not creaming properly and making the dough hard to press)
1/2 cup granulated sugar
1/4 cup honey
1/4 cup FOOD GRADE EDIBLE Rose Water
1 egg
4 cups all-purpose flour – you may need more – have an extra 4 or 5 Tablespoons ready. FOR THE ROLLED COOKIES ADD 1/2 CUP OR MORE OF FLOUR. More details in instructions.
3/4 teaspoon baking powder
1/4 teaspoon salt
Preheat oven to 400°F.
In a large bowl, combine the flour, baking powder, and salt. Using a big wire whisk is a good way to mix them evenly. Set aside.
Using an electric mixer, cream the butter very well. I say this in every post so sorry for being repetitive! Creaming your butter until it is fluffy is the key to great spritz cookies. I like to pretend I’m making frosting and use the “whip” setting on my mixer. Butter turns a slightly lighter color when it’s creamed well.
Add the sugar and cream it very well again. Add the honey and the rose water and cream it all together very well. This is a much sloppier concoction than my usual spritz dough, but don’t be alarmed! It will turn out well.

Once well-combined add the egg and mix until fully incorporated. Next add the flour mixture a little at a time, mixing on a slow speed until a soft dough forms. Perfect spritz dough has a soft malleable texture that is not too sticky or too stiff. You can always knead it by hand at the end if your mixer is leaving any flour unincorporated. Smooshing it into a play-dough like texture by hand is actually pretty fun. Always remember that you can tweak overly stiff dough (which honestly is NOT a problem with this dough!) by adding more liquid ingredients a teaspoon at a time (or by the tablespoon if it’s particularly stiff), or tweak overly soft or sticky dough by adding flour a tablespoon at a time. Watch some of my videos to see what a correct spritz dough texture looks like.
NOTE: Let this dough sit for 10 to 15 minutes for the rose water to absorb. Do not start adding flour to stiffen it up until you’ve let it sit. You will most likely find that it needs some extra flour to be pressable. The goal is to have a spritz dough that is on the softer side, but does not stick to your fingers and that presses cleanly and easily. Add flour a tablespoon at a time till it reaches that texture.
For rolling pin dough, add a half a cup of flour to the original recipe. This should give you a stiffer dough that holds up to the rolling pin. If it’s still too soft, add more flour, a Tablespoon at a time, until it is a slightly stiff workable dough that feels like clay.
Instructions to make these as spritz cookies – with a cookie press:
Get your disks and pack your dough into your cookie press barrel, using the back of a spoon to press the air bubbles out as you add dough. This helps create consistent pressure to avoid mis-shaped cookies.
Place the disk in the bottom ring, attach to your press, and start pressing onto an un-greased cookie sheet. Use a consistent rhythm to keep the shapes a uniform size. It’s not at all uncommon for your first few cookies to be mis-shaped, as pressure needs to build in the barrel to make consistent shapes. It’s totally ok! Just throw them back in the bowl to be re-pressed. If you’re still having trouble pressing (mis-shaped cookies, trouble sticking to the pan, etc) press one cookie into the air and wipe it off and toss back into the bowl to re-set your pressure in the press. You can also refrigerate your cookie sheets for 5 minutes if sticking is an issue. (There are more troubleshooting tips on the Troubleshooting and Decorating Tips page- see the top menu on the blog homepage. )


You want to press these shapes tidy and small so that they aren’t just blobs. If using a one-click-per-cookie type press remember that you don’t always have to follow that guideline. Some shapes may take more or less than one click and that’s ok! Cookies don’t have to come out in even “clicks”. One click, half a click, it doesn’t matter. A press (any press) is a dough pump (it’s kind of like a caulking gun). It’s simply a mechanism for pumping dough out, however many (or few) “clicks” it takes. Again, you can read all about that in the Troubleshooting and Decorating Tips page if you’re new to this.
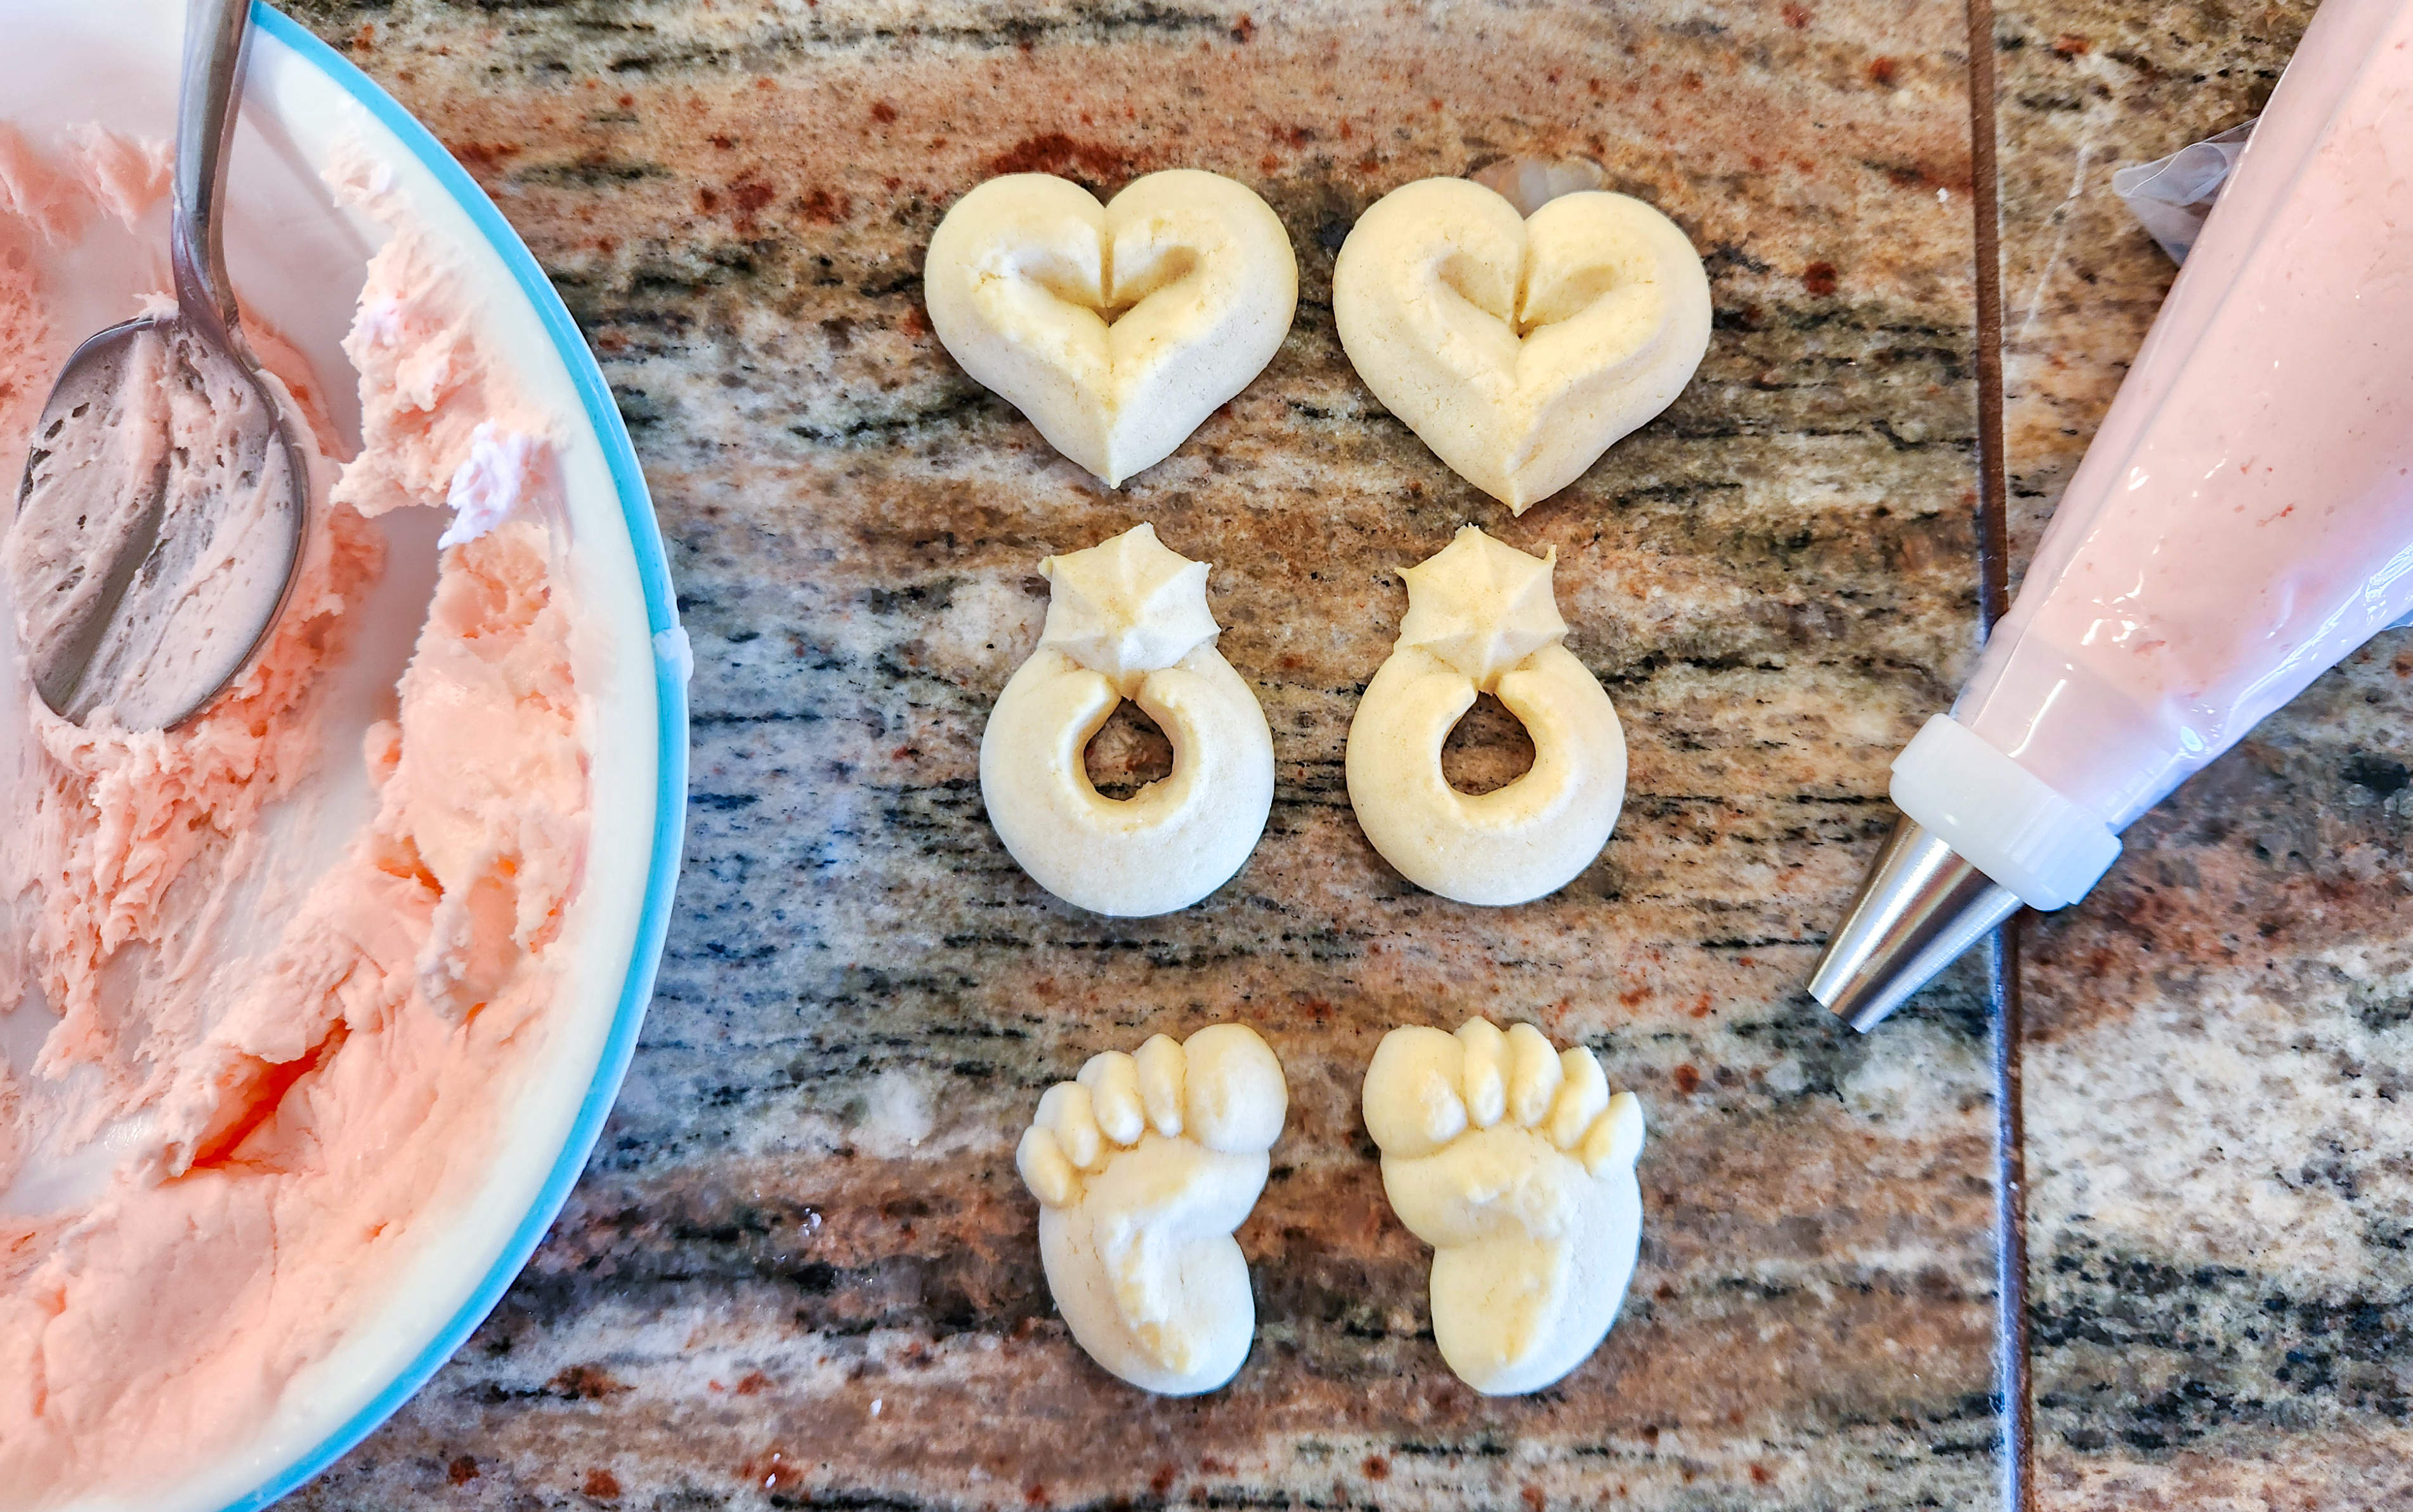
**TIP: If you’re making sandwich cookies and using non-symmetrical shapes like the baby foot, press your shapes an equal number facing both directions, so they match up bottom-to bottom when sandwiched!
Bake in a 400 degree oven for 6-10 minutes or until the edges just begin to brown slightly. Check them early and often as all ovens are different, and spritz can brown quickly once they start to go. Let them cool for four or five minutes before removing to a cooling rack. If they’re too soft after baking they may break when you lift them, and if you wait too long they could stick to the pan. With time you’ll get a feel for it. Check them to see if they’re ready to be moved. If not, wait a few more minutes.

Instructions to make these as cutout cookies – with an embossed rolling pin:
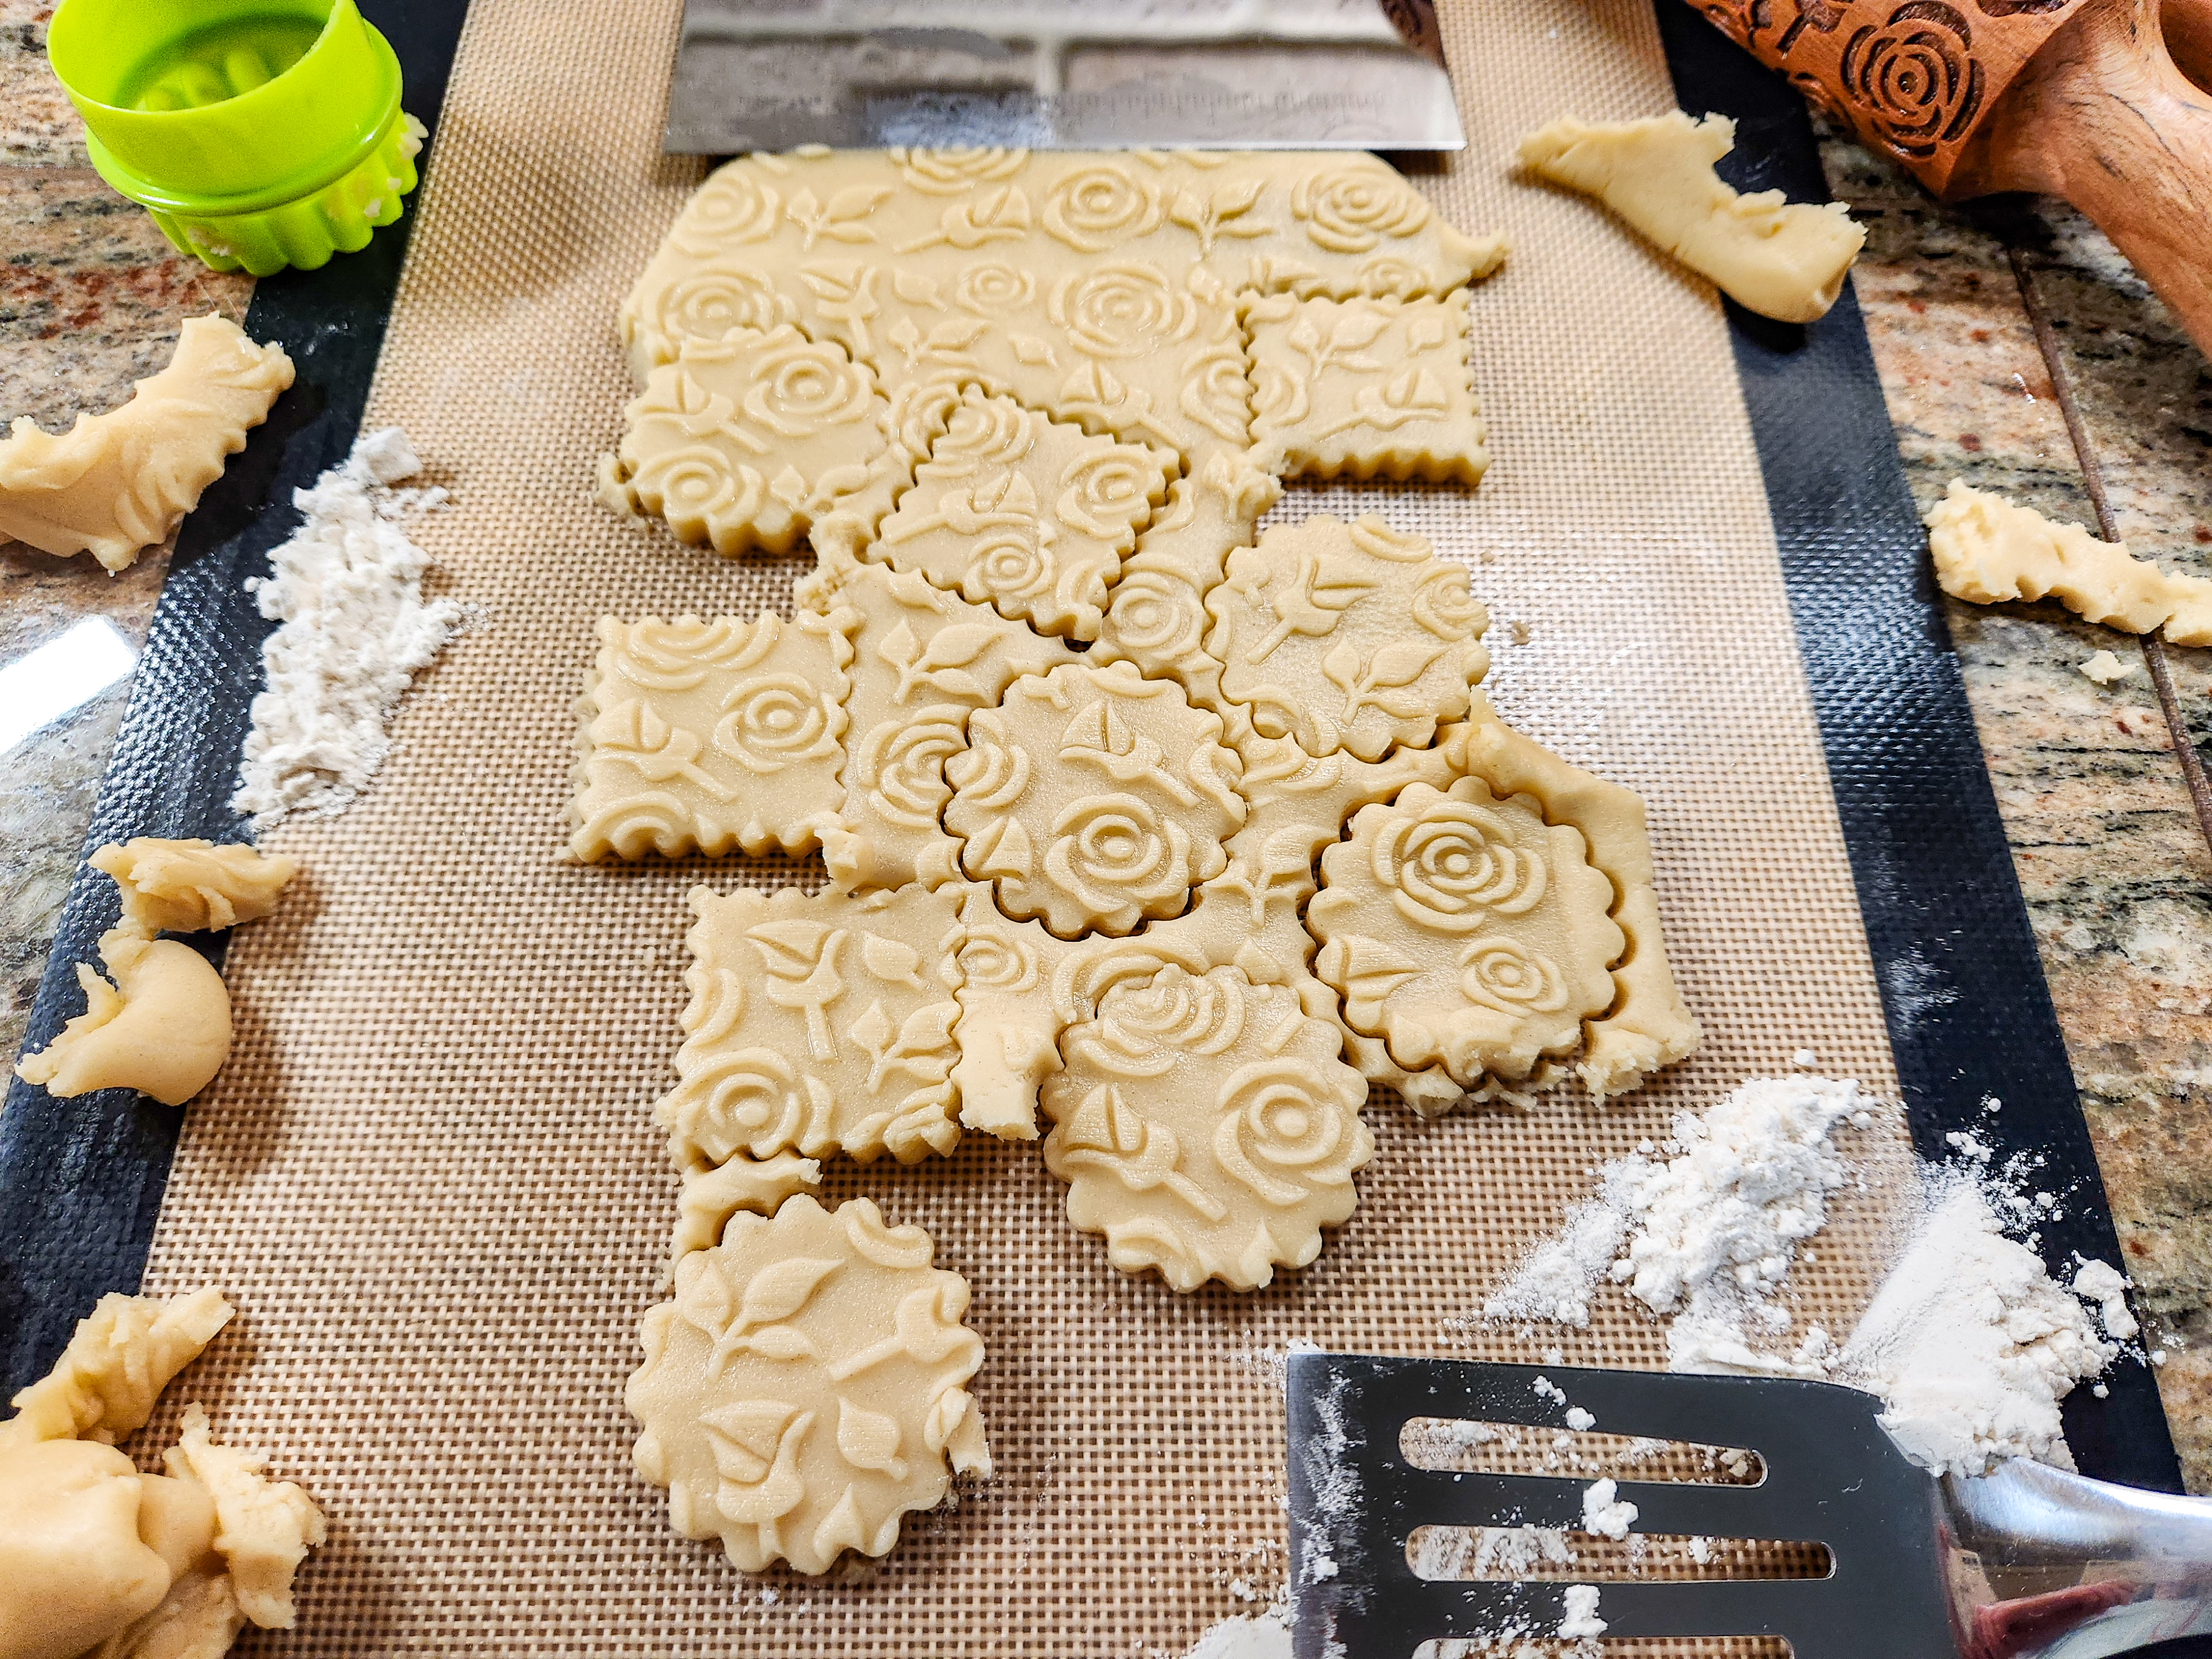
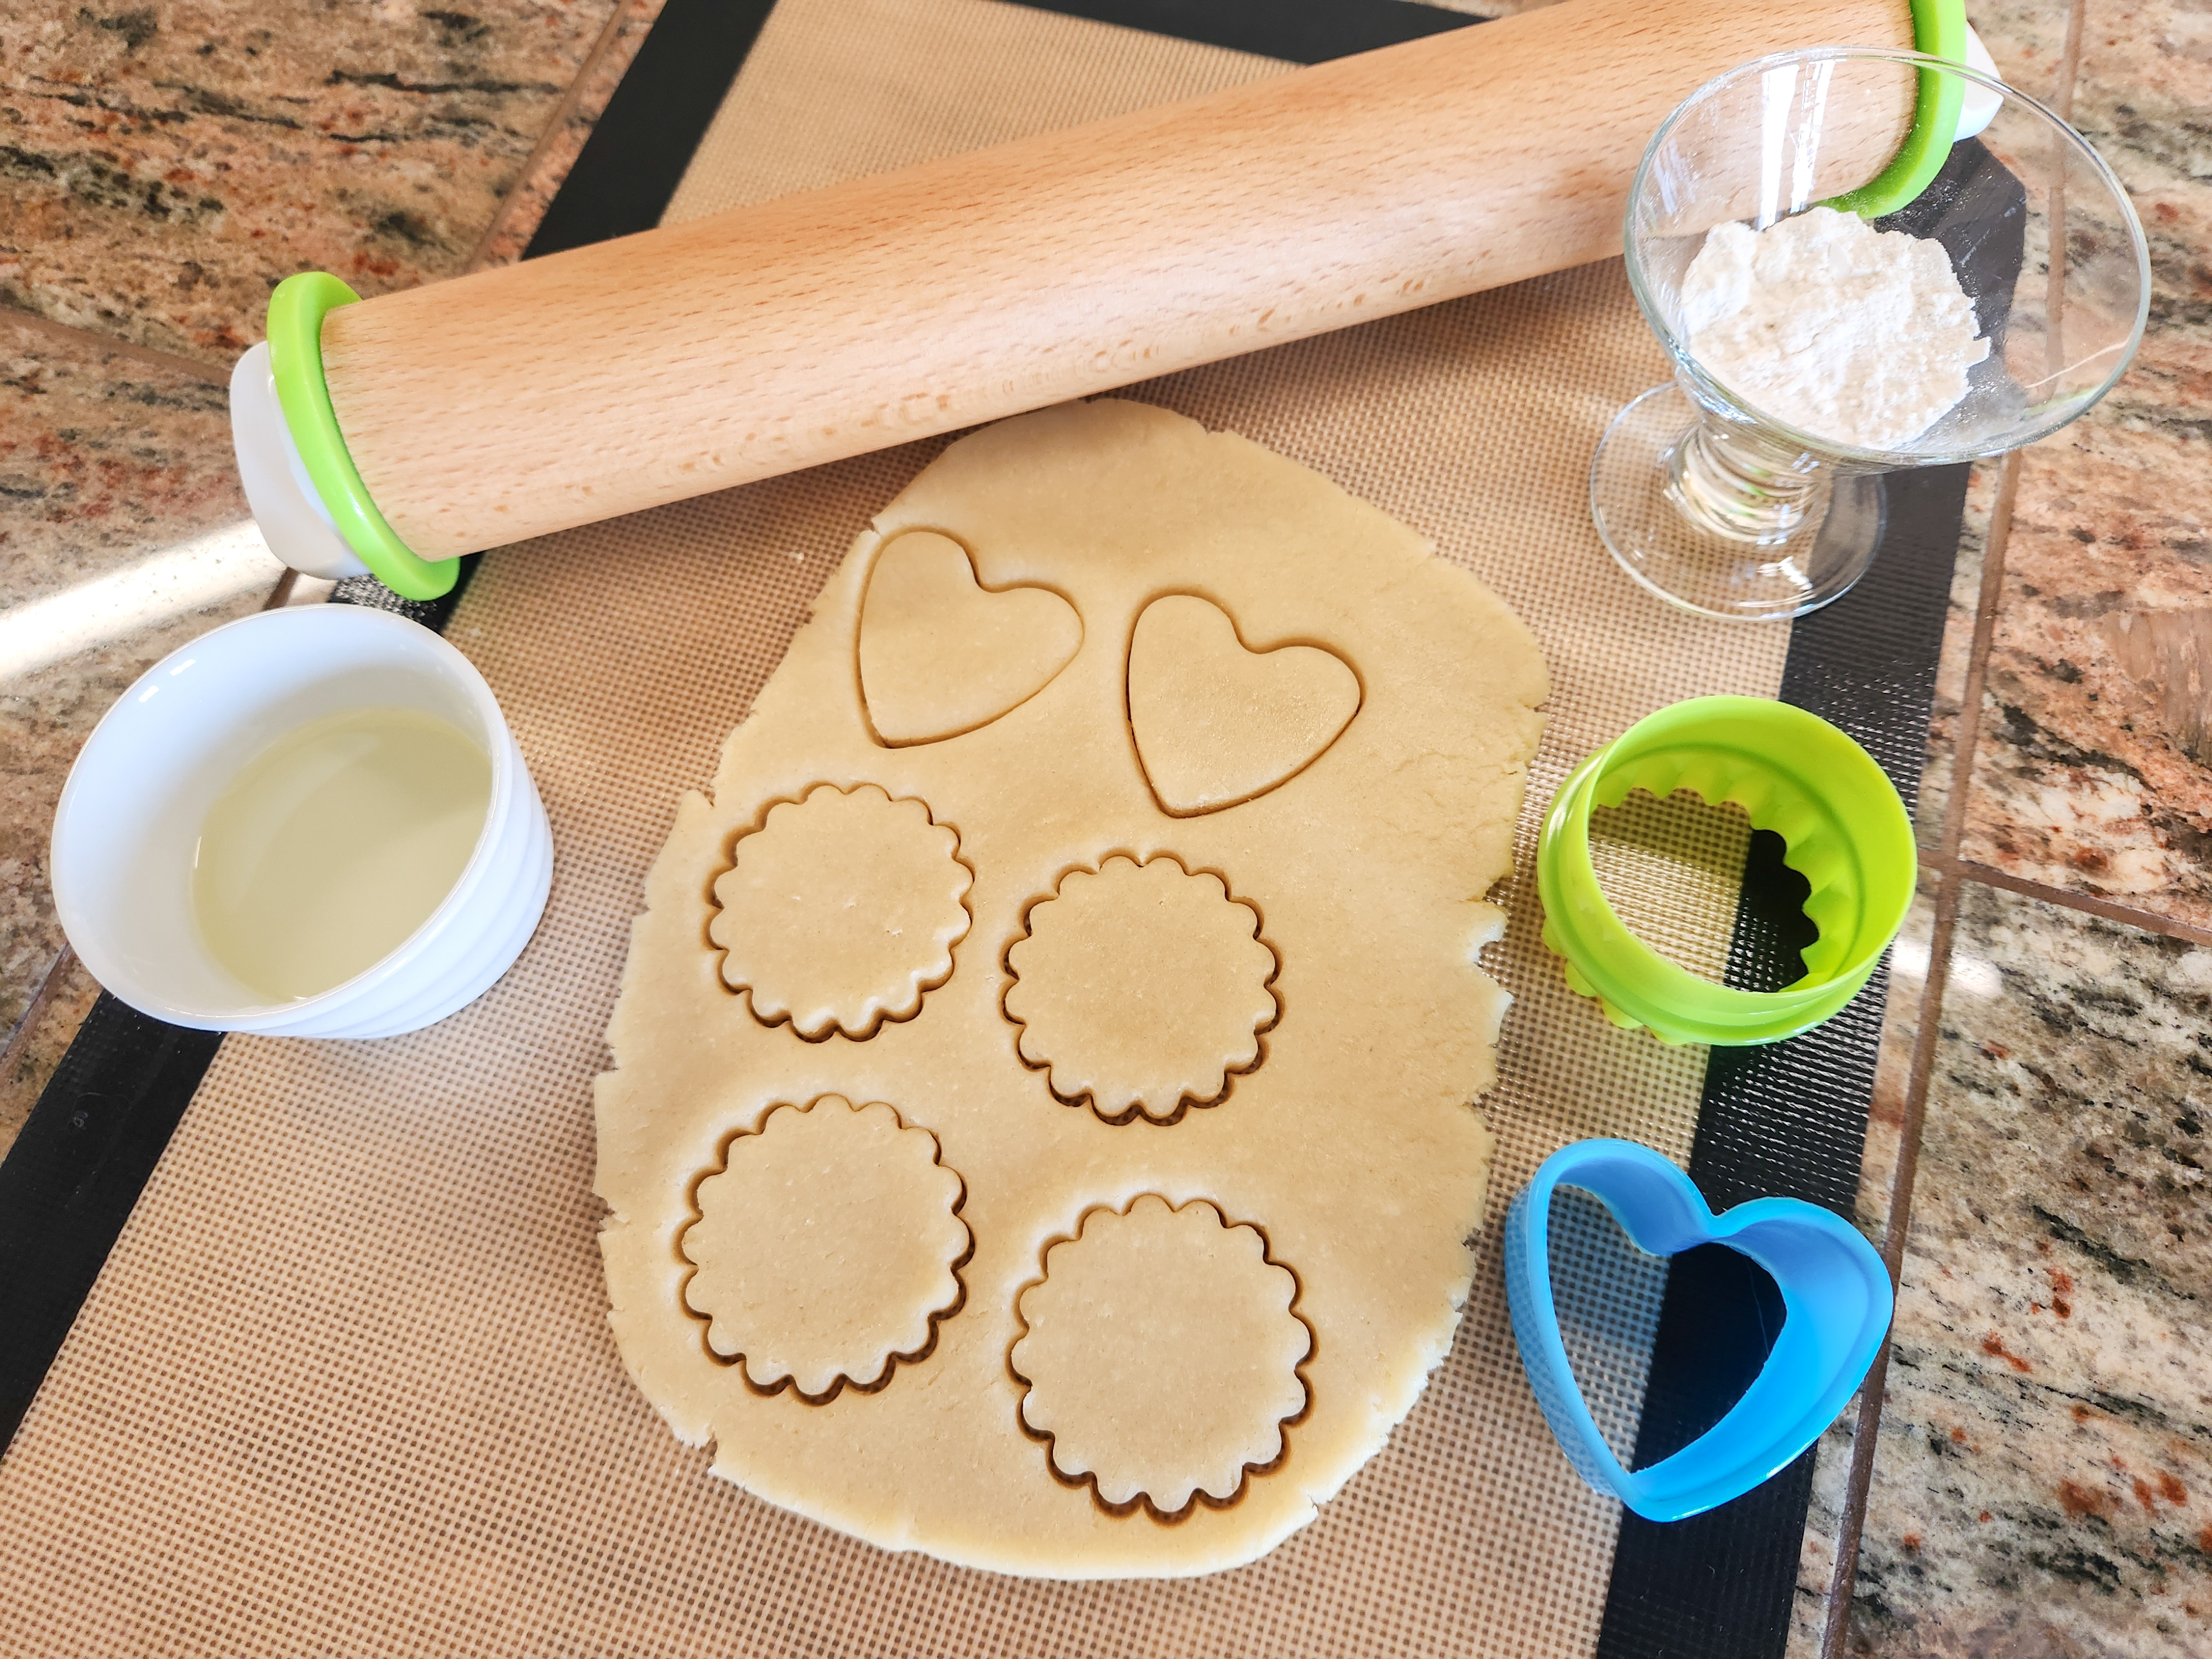
Use a lightly oiled regular rolling pin (preferably one with thickness spacer rings to make a perfect thickness) to roll your dough on to a silicone baking mat, glass cooktop, or lightly floured surface. Roll to a 1/4” thickness, and wide enough to accommodate the designed pin. Create a long rectangular slab of dough. The patterns on the embossed pins are designed to repeat, so you will be rolling a long rectangle of patterned dough.
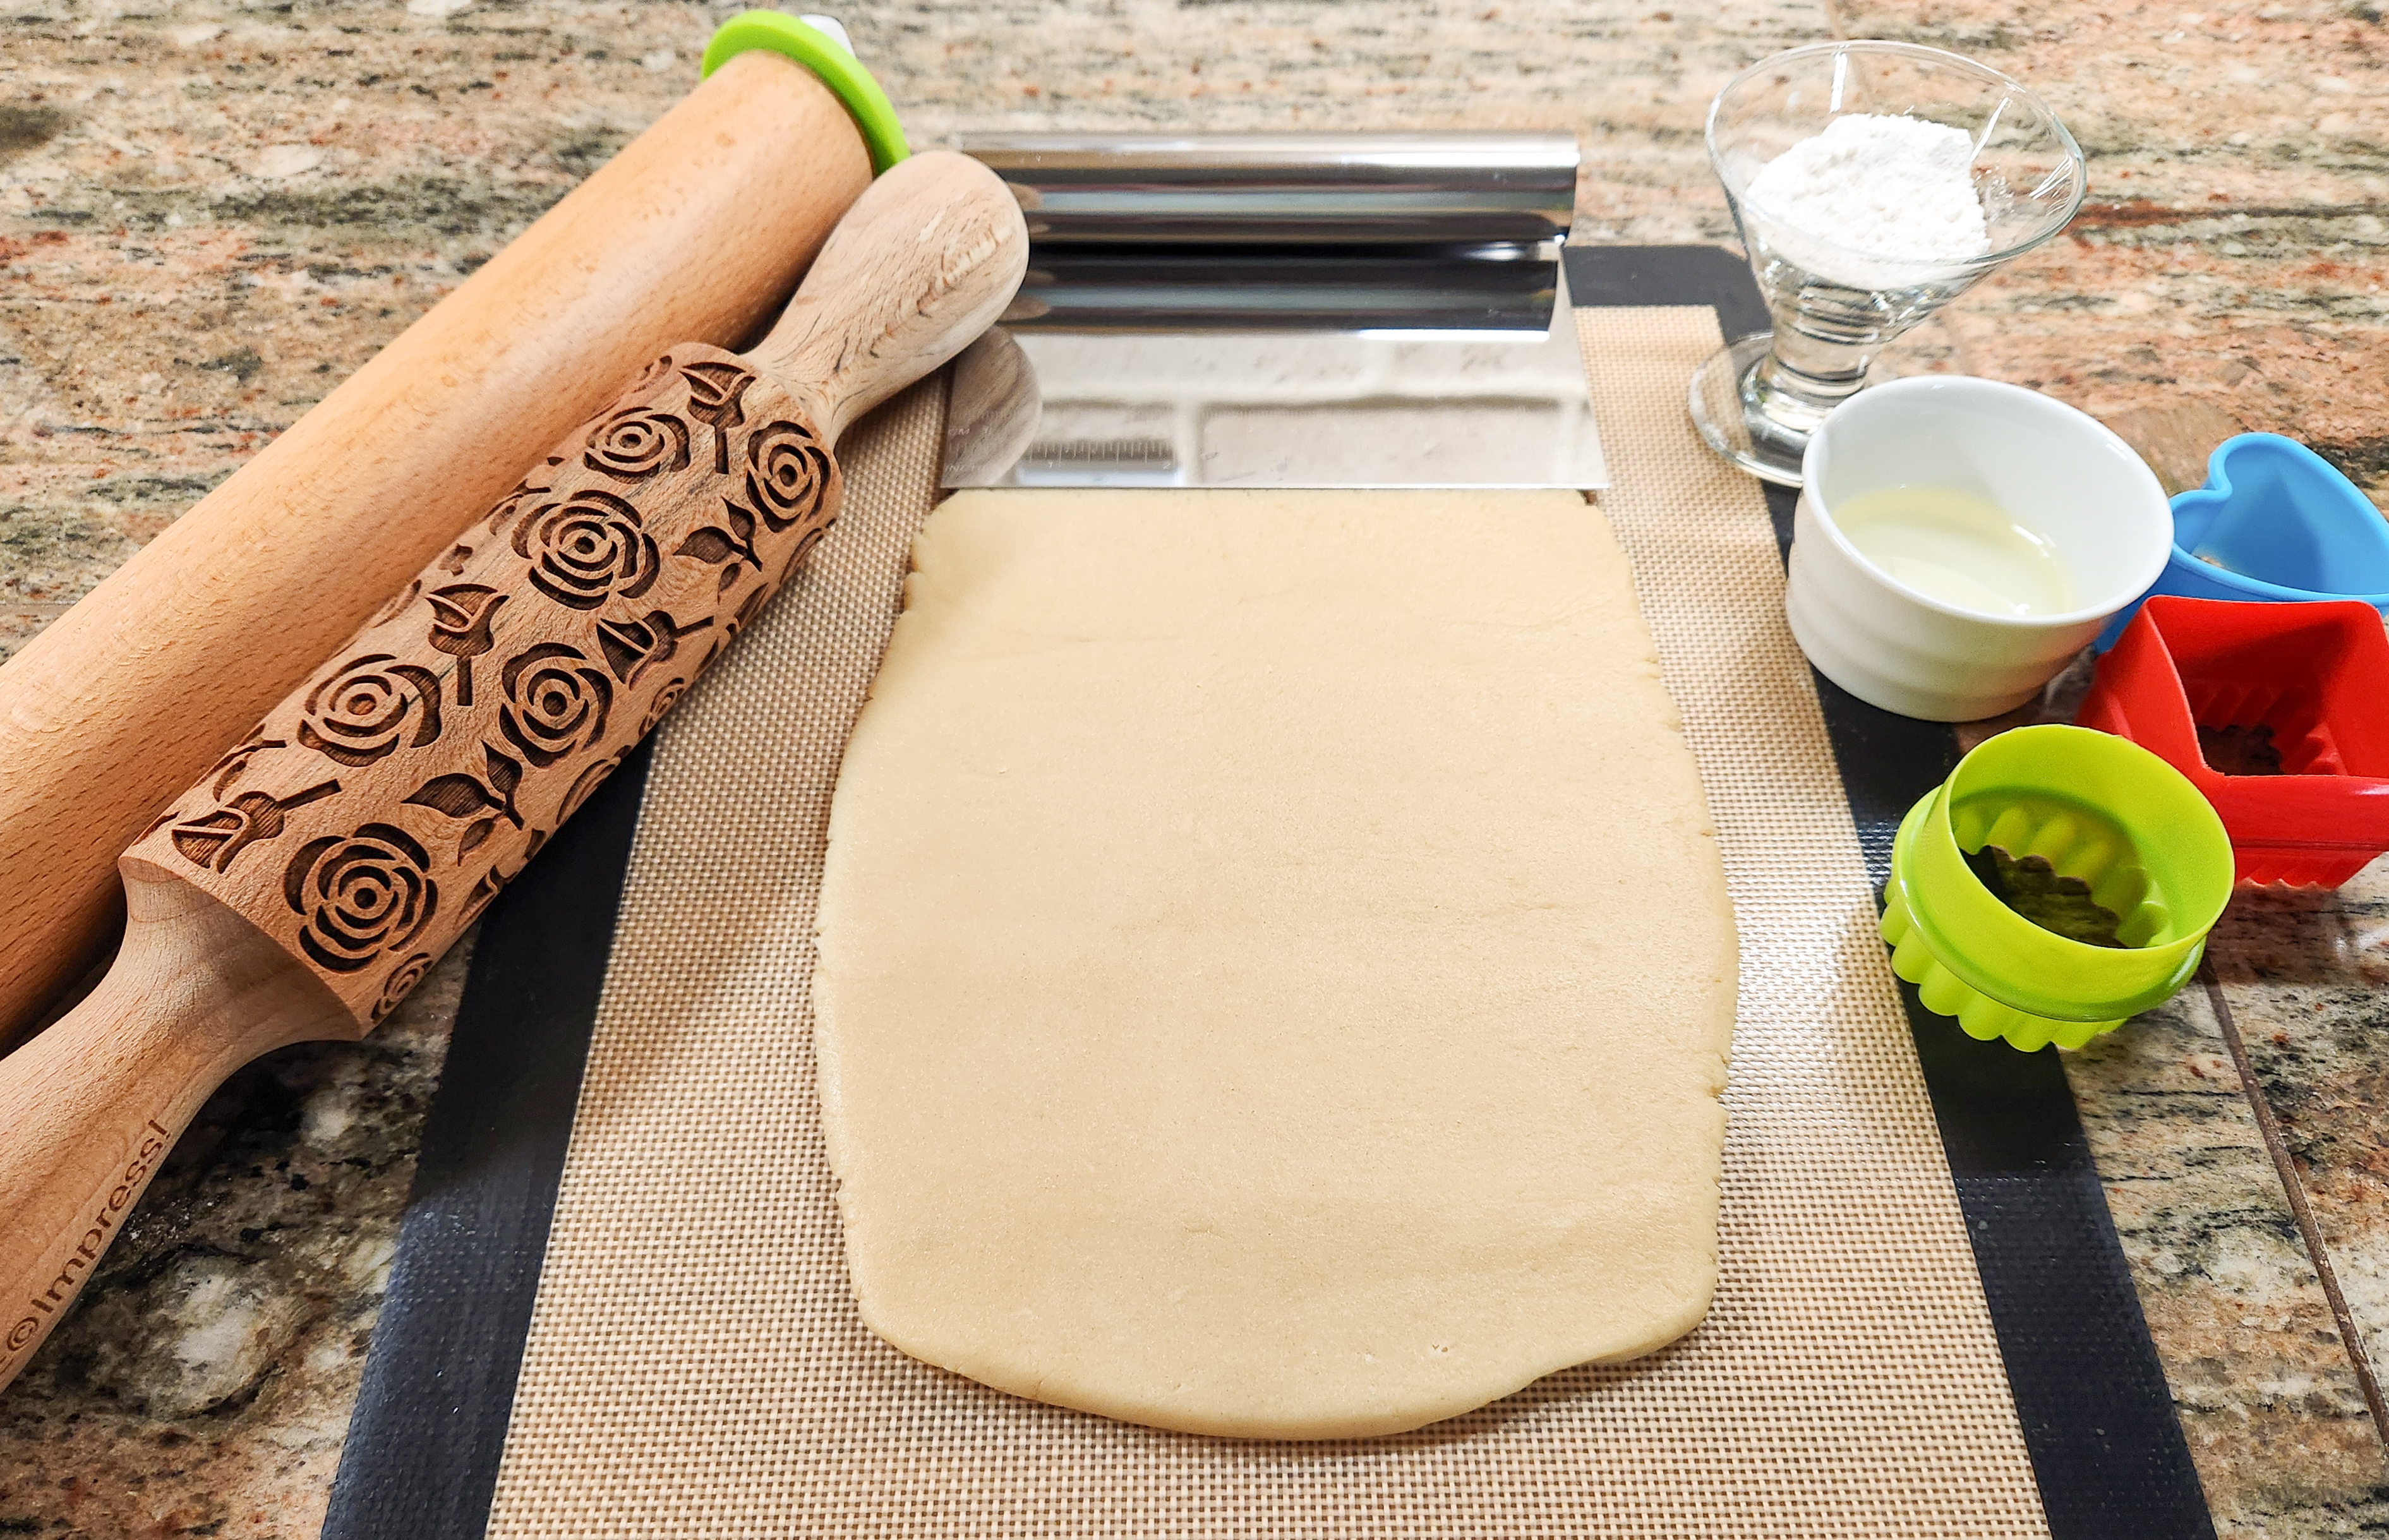
Oil your embossed pin with canola (or similar) oil before rolling. Make sure to get it down into the engraved areas. Wipe off any excess with a paper towel. Oil should be down in the patterns, but not pooling in them! You can use a pastry brush or apply by hand, gently squeezing the pin to get oil into the shapes, and rubbing the surface to coat.

Roll with your embossed pin, pressing down with a steady pressure that leaves a deep impression in the dough. The designs should be as raised up on the dough as deep as they are in the pin. If the pattern is not deep enough it will disappear as the cookies bake and puff. As this dough is not cold or stiff, you do not have to press terribly hard! Just an even pressure.
Here’s a quick video clip of me oiling the pin, rolling this dough, cutting shapes and lifting them.
Once rolled, use cookie cutters to cut out shapes. Remove any excess dough around the edges. Keep your spatula/lifter flat, dust the end with a little flour, and lift the shapes, beginning by lifting one edge slightly first, then sliding the spatula/scraper under the whole shape. Transfer them to a cookie sheet lined with parchment paper, spacing them at least an inch apart. The rolling pin with thickness rings, bench/dough scraper and cookie cutters I’m using here are available at our website and Etsy shops. Links at bottom!

Bake at 400°F for 6-10 minutes, checking at 6 minutes and every minute after as cookies brown quickly. They are done when the edges are barely, slightly brown. Cookies harden significantly the longer they bake, so bake just a few cookies first to test timing for desired doneness and hardness.
Move to a cooling rack after 5 minutes.
If you are making sandwich cookies or plain cutout cookies to be topped with patterned buttercream, roll out the dough and cut shapes as needed to make enough bottom cookies. Off to parchment paper on a cookie sheet and bake as described above.


Now Sandwiches! First for cutout cookies:
The sandwich cookie stuffing is rose water buttercream so thick you can roll it out and cut it. This allows you to put perfect middles with beautiful edges on your cookies. Using a thickness spacing pin lets you choose precisely how thick you want your middles.
I went a little crazy with the sandwiches. Instead of being reasonable and rolling a thin layer of filling I rolled that stuffing out at a full ¼” thick. LOL If you don’t want mega-thick filling just roll it thinner. The cookies are honestly flavorful and sweet enough that they in no way need the filling to be thick. So do it your way, however it makes you happy! If that’s ridiculously thick like I did? HI! You’re my people.
Super Thick Rose Water Buttercream
1/2 cup (1 stick) butter, softened
4 cups powdered sugar
1 Tablespoon heavy cream
1 teaspoon Food Grade Edible Rose Water (it is very potent! You can add more but start with this!)
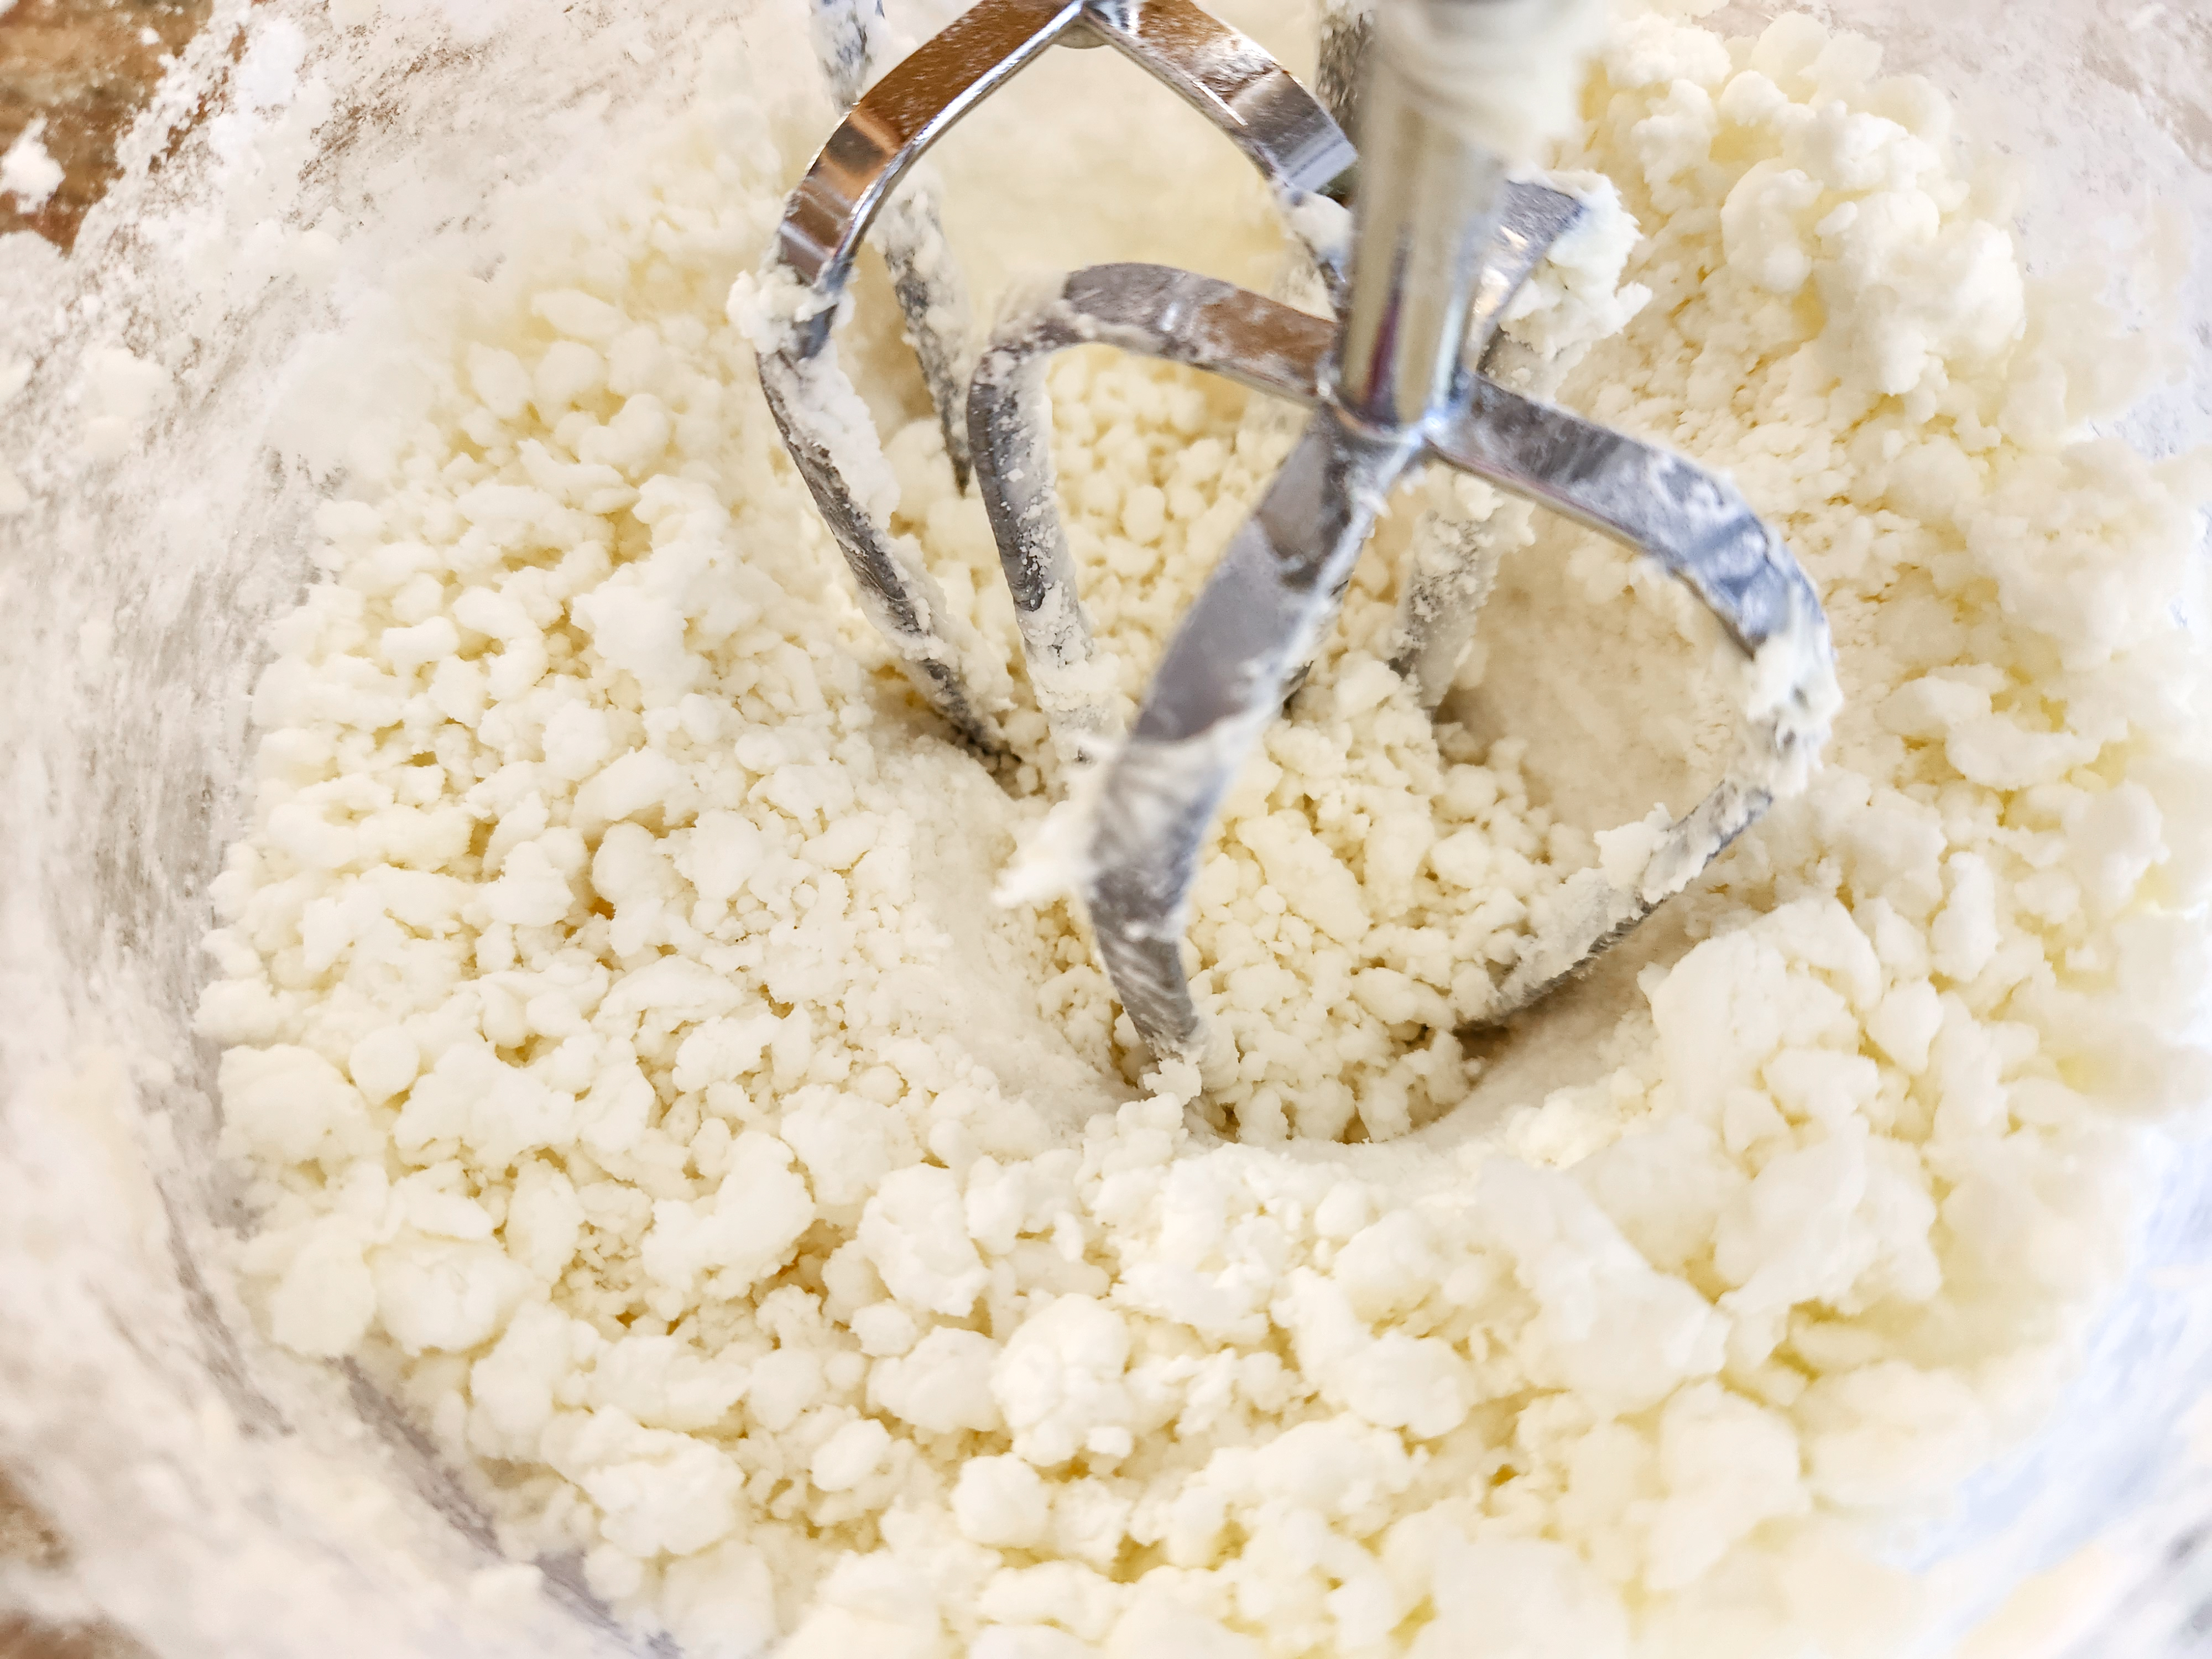
Cream the butter with an electric mixer, then add the heavy cream and rose water and mix thoroughly. Add powdered sugar a little at a time. Do not be alarmed or surprised! This mixture will be very dry and crumbly, so finish kneading by hand until a smooth clay-like dough forms. It will be much stiffer than the cookie dough. Keep kneading even if it seems very stiff, until it forms a workable ball. It will warm and soften as you work it. Add cream to an overly stiff mixture, or powdered sugar to a soft sticky mixture, as needed to get a workable clay-like consistency. It will be fun to knead, though still quite stiff, when it’s the right texture. Add pink or a small amount of red GEL food dye to tint it, kneading it in by hand.

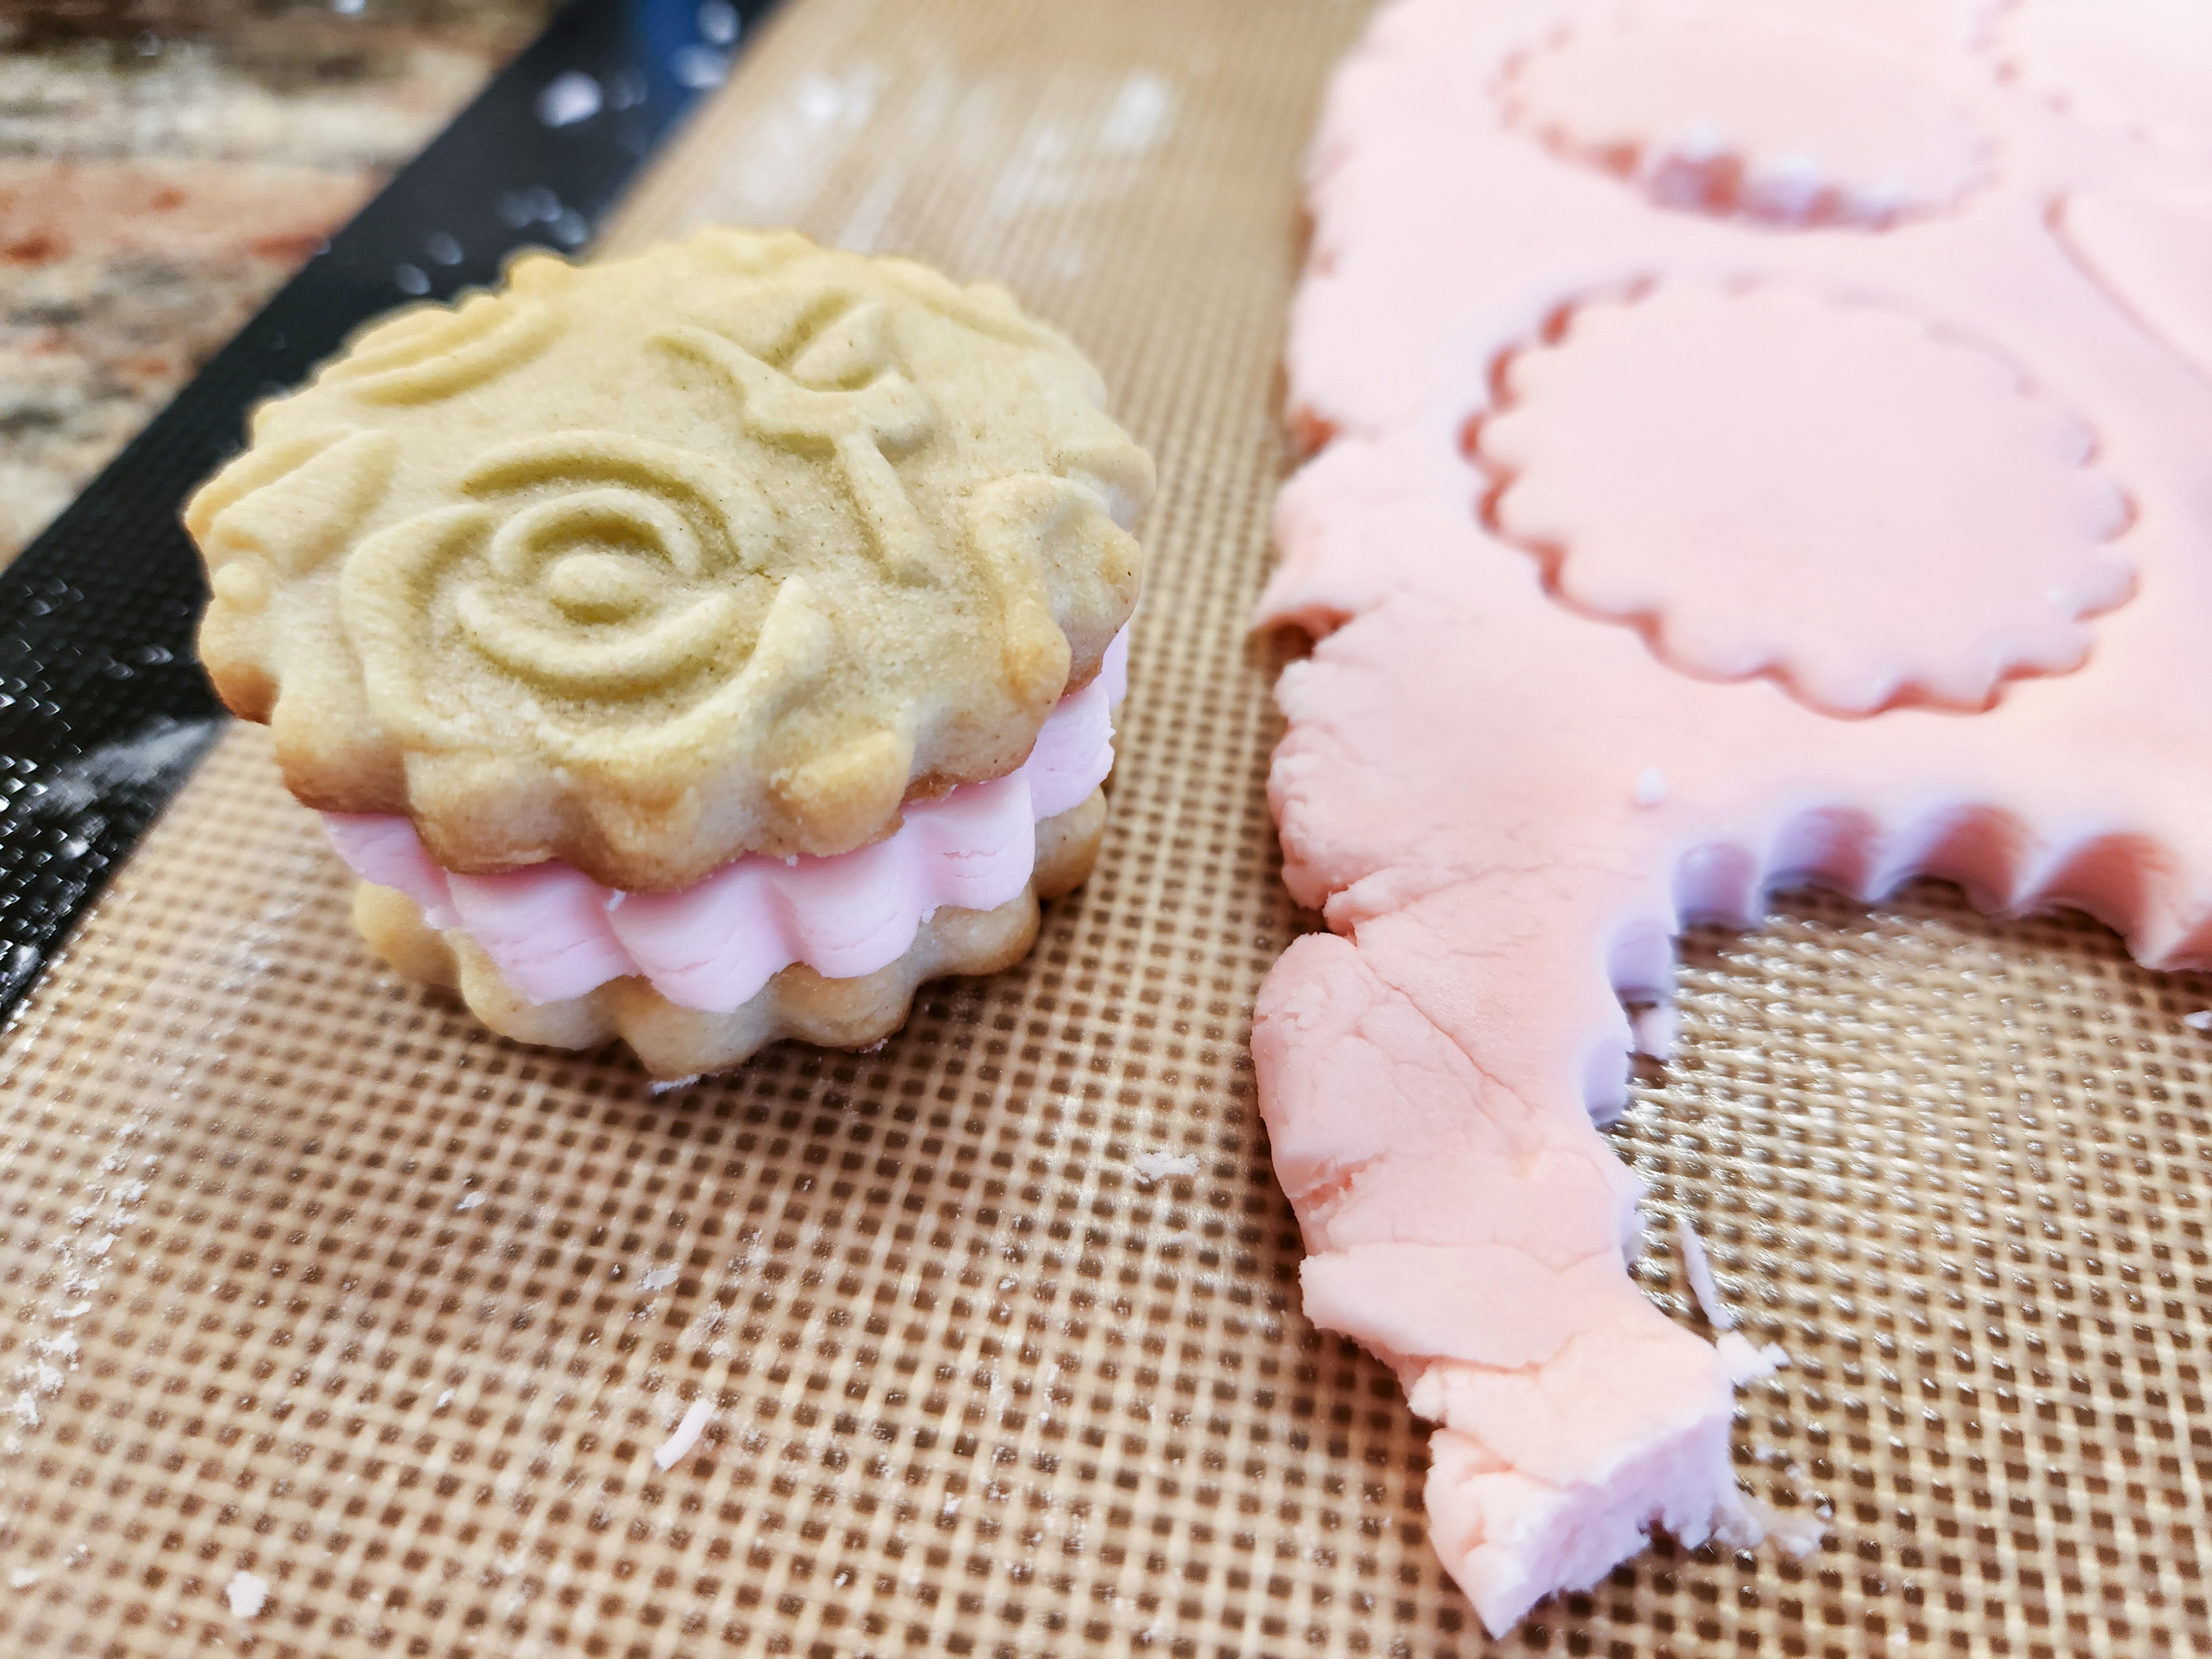
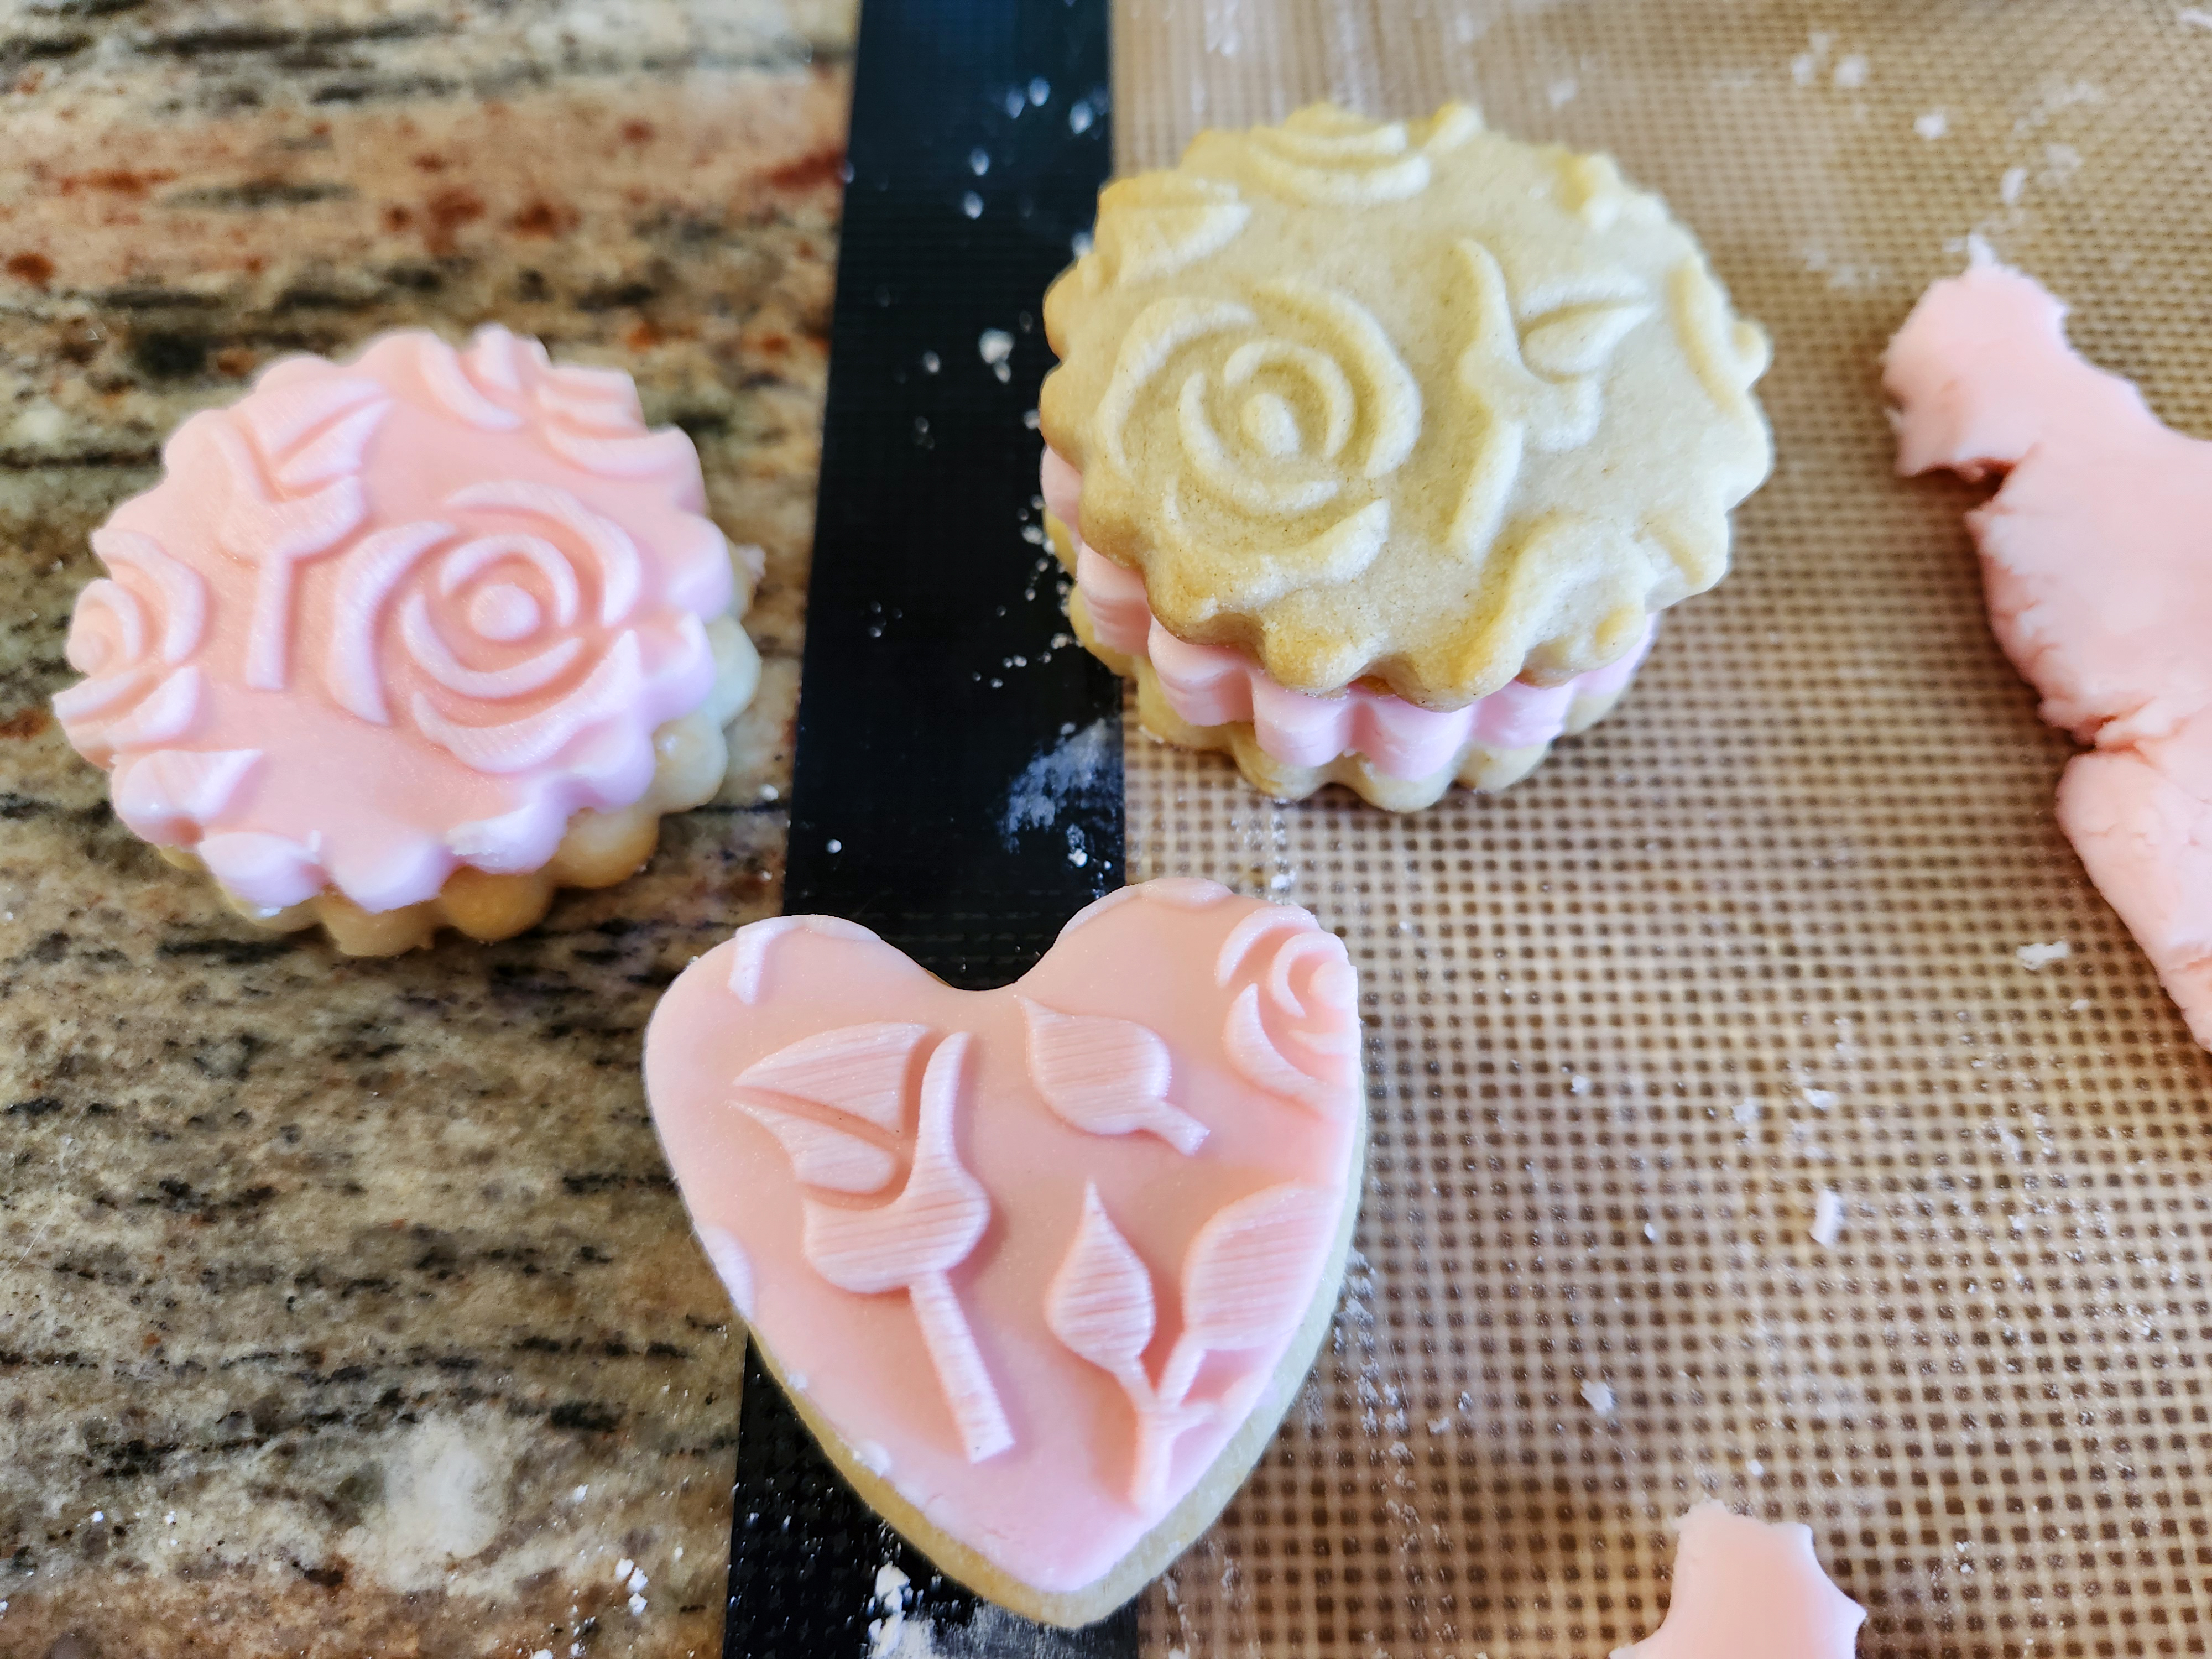
Roll it out with an oiled regular rolling pin on a clean silicone mat or surface, preferably with a spacing pin. Then cut out the shapes you need to sandwich your cookies. Do non-patterned shapes to use as sandwich middles, and do patterned buttercream to go on top of cookie bottoms. I love the look of the patterned buttercream!
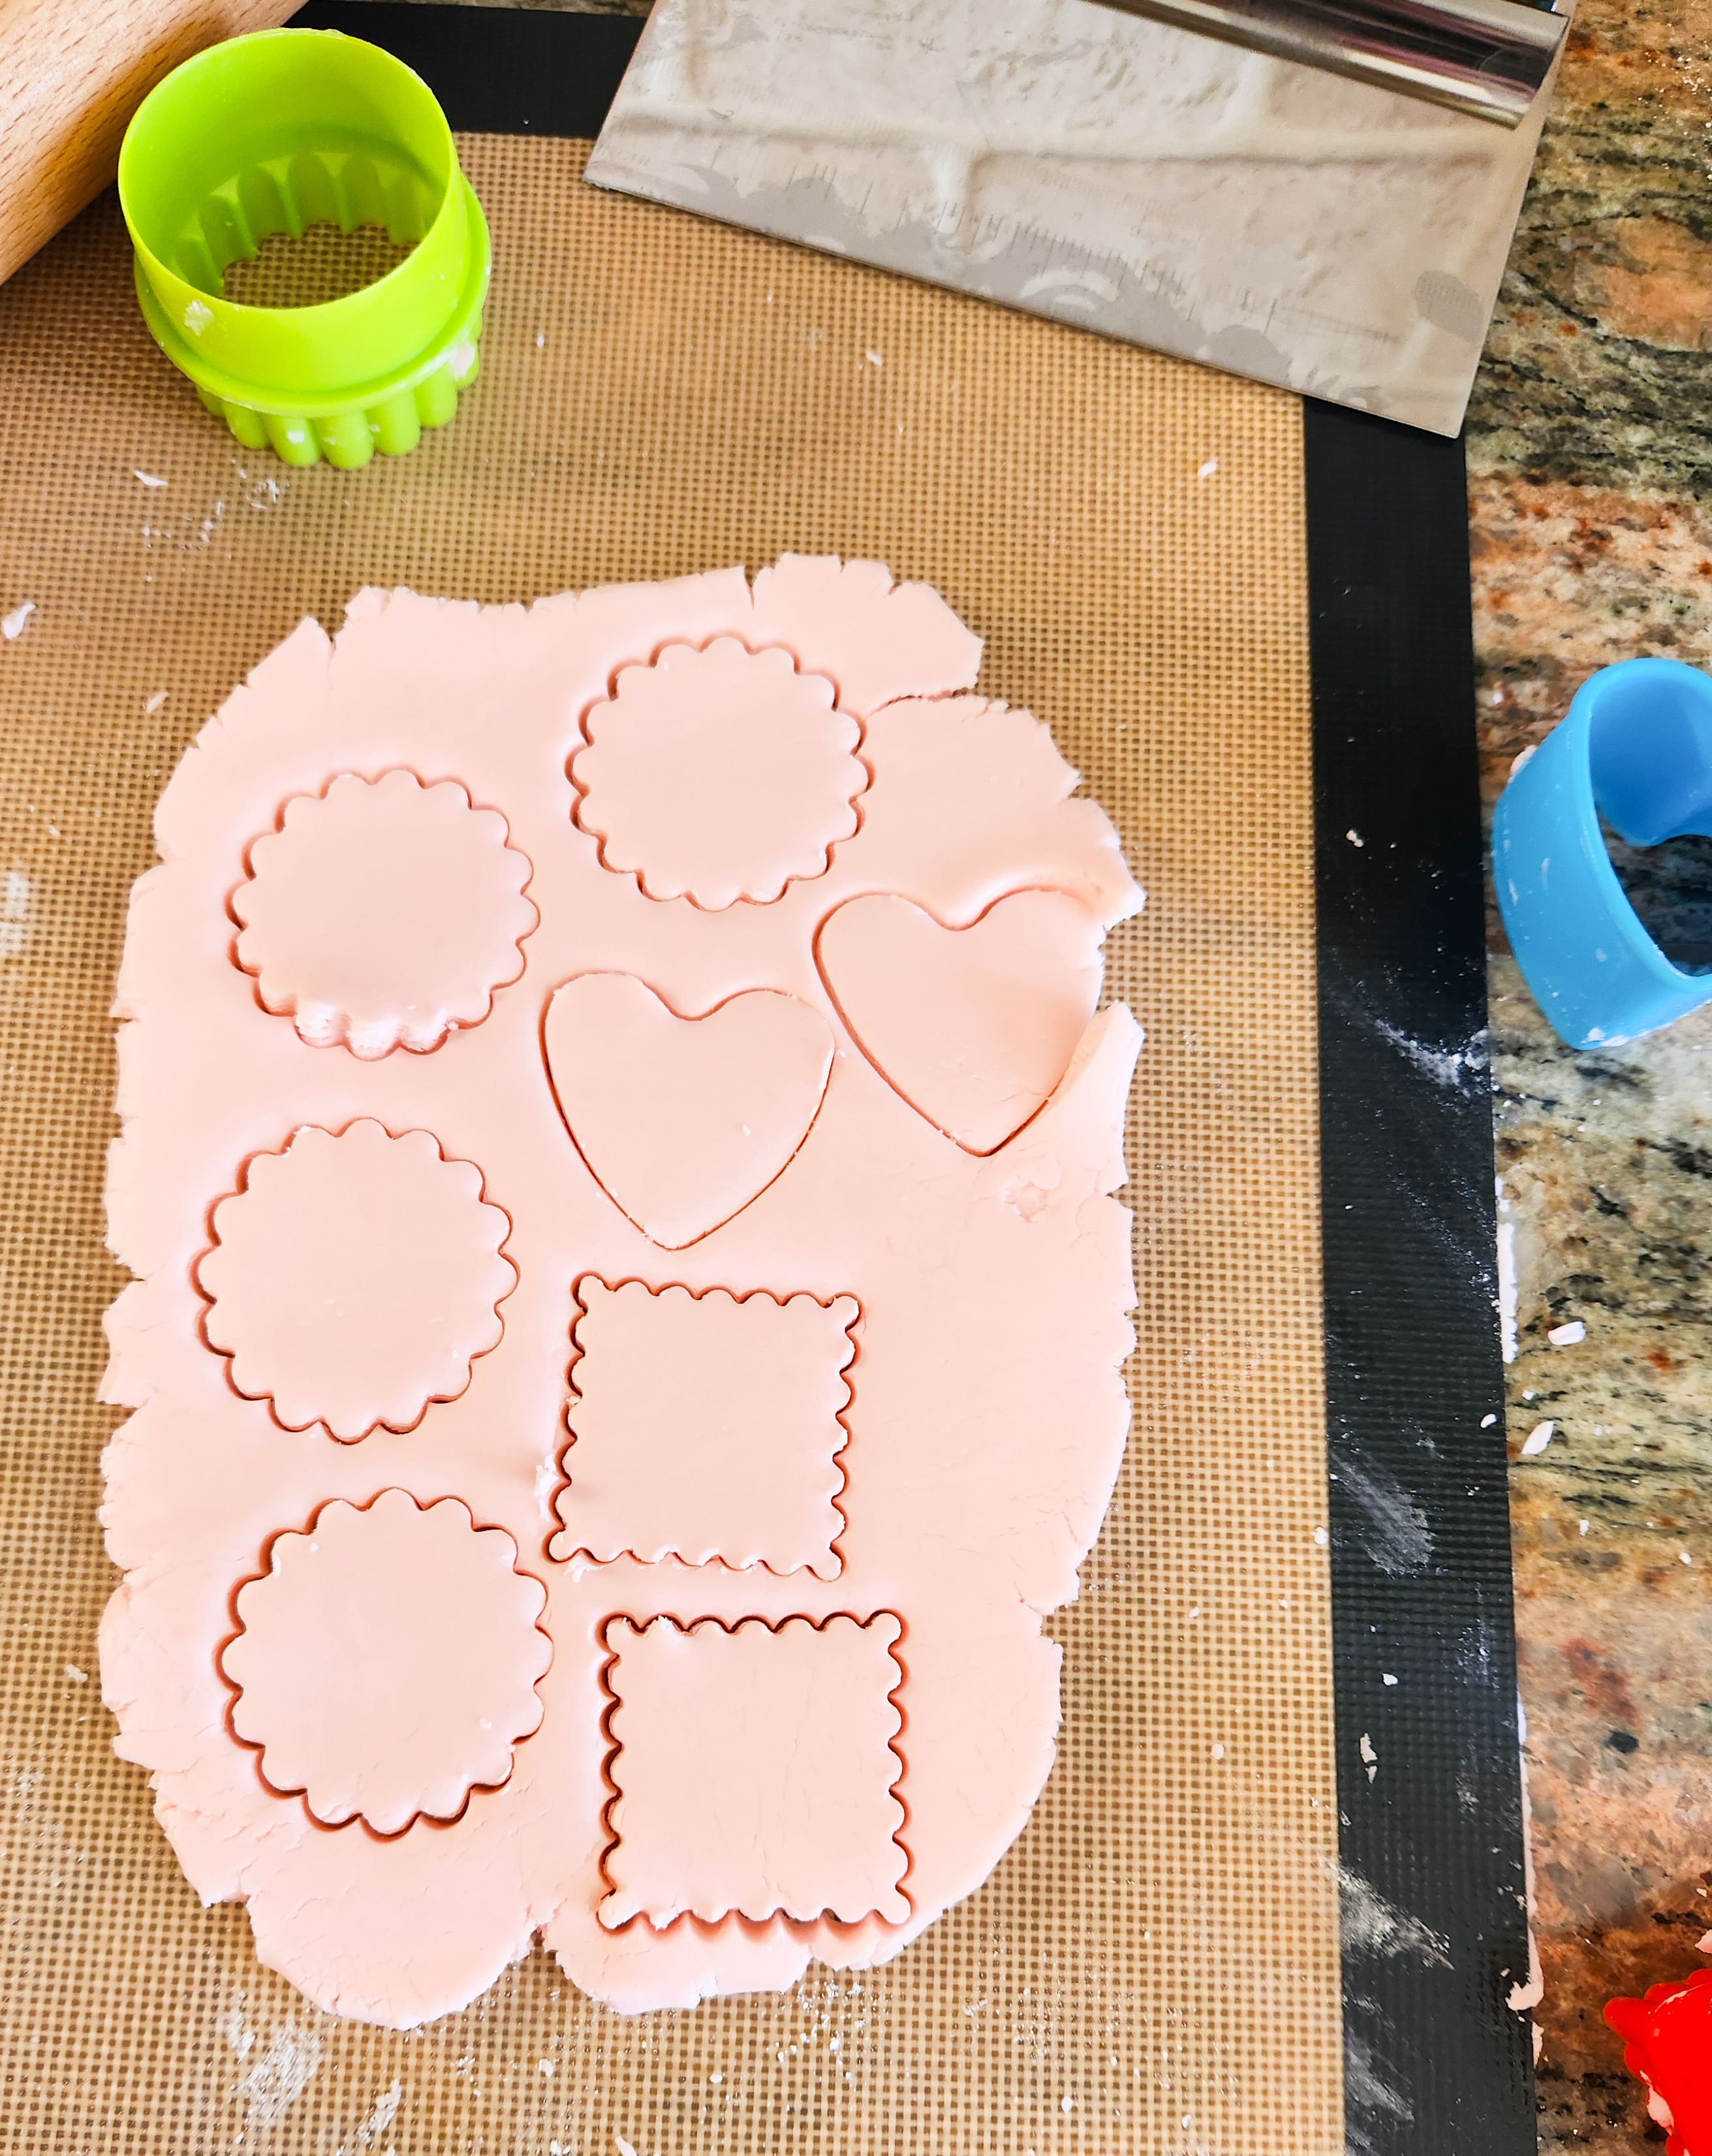


Cut them out and place them in the middles or on top!

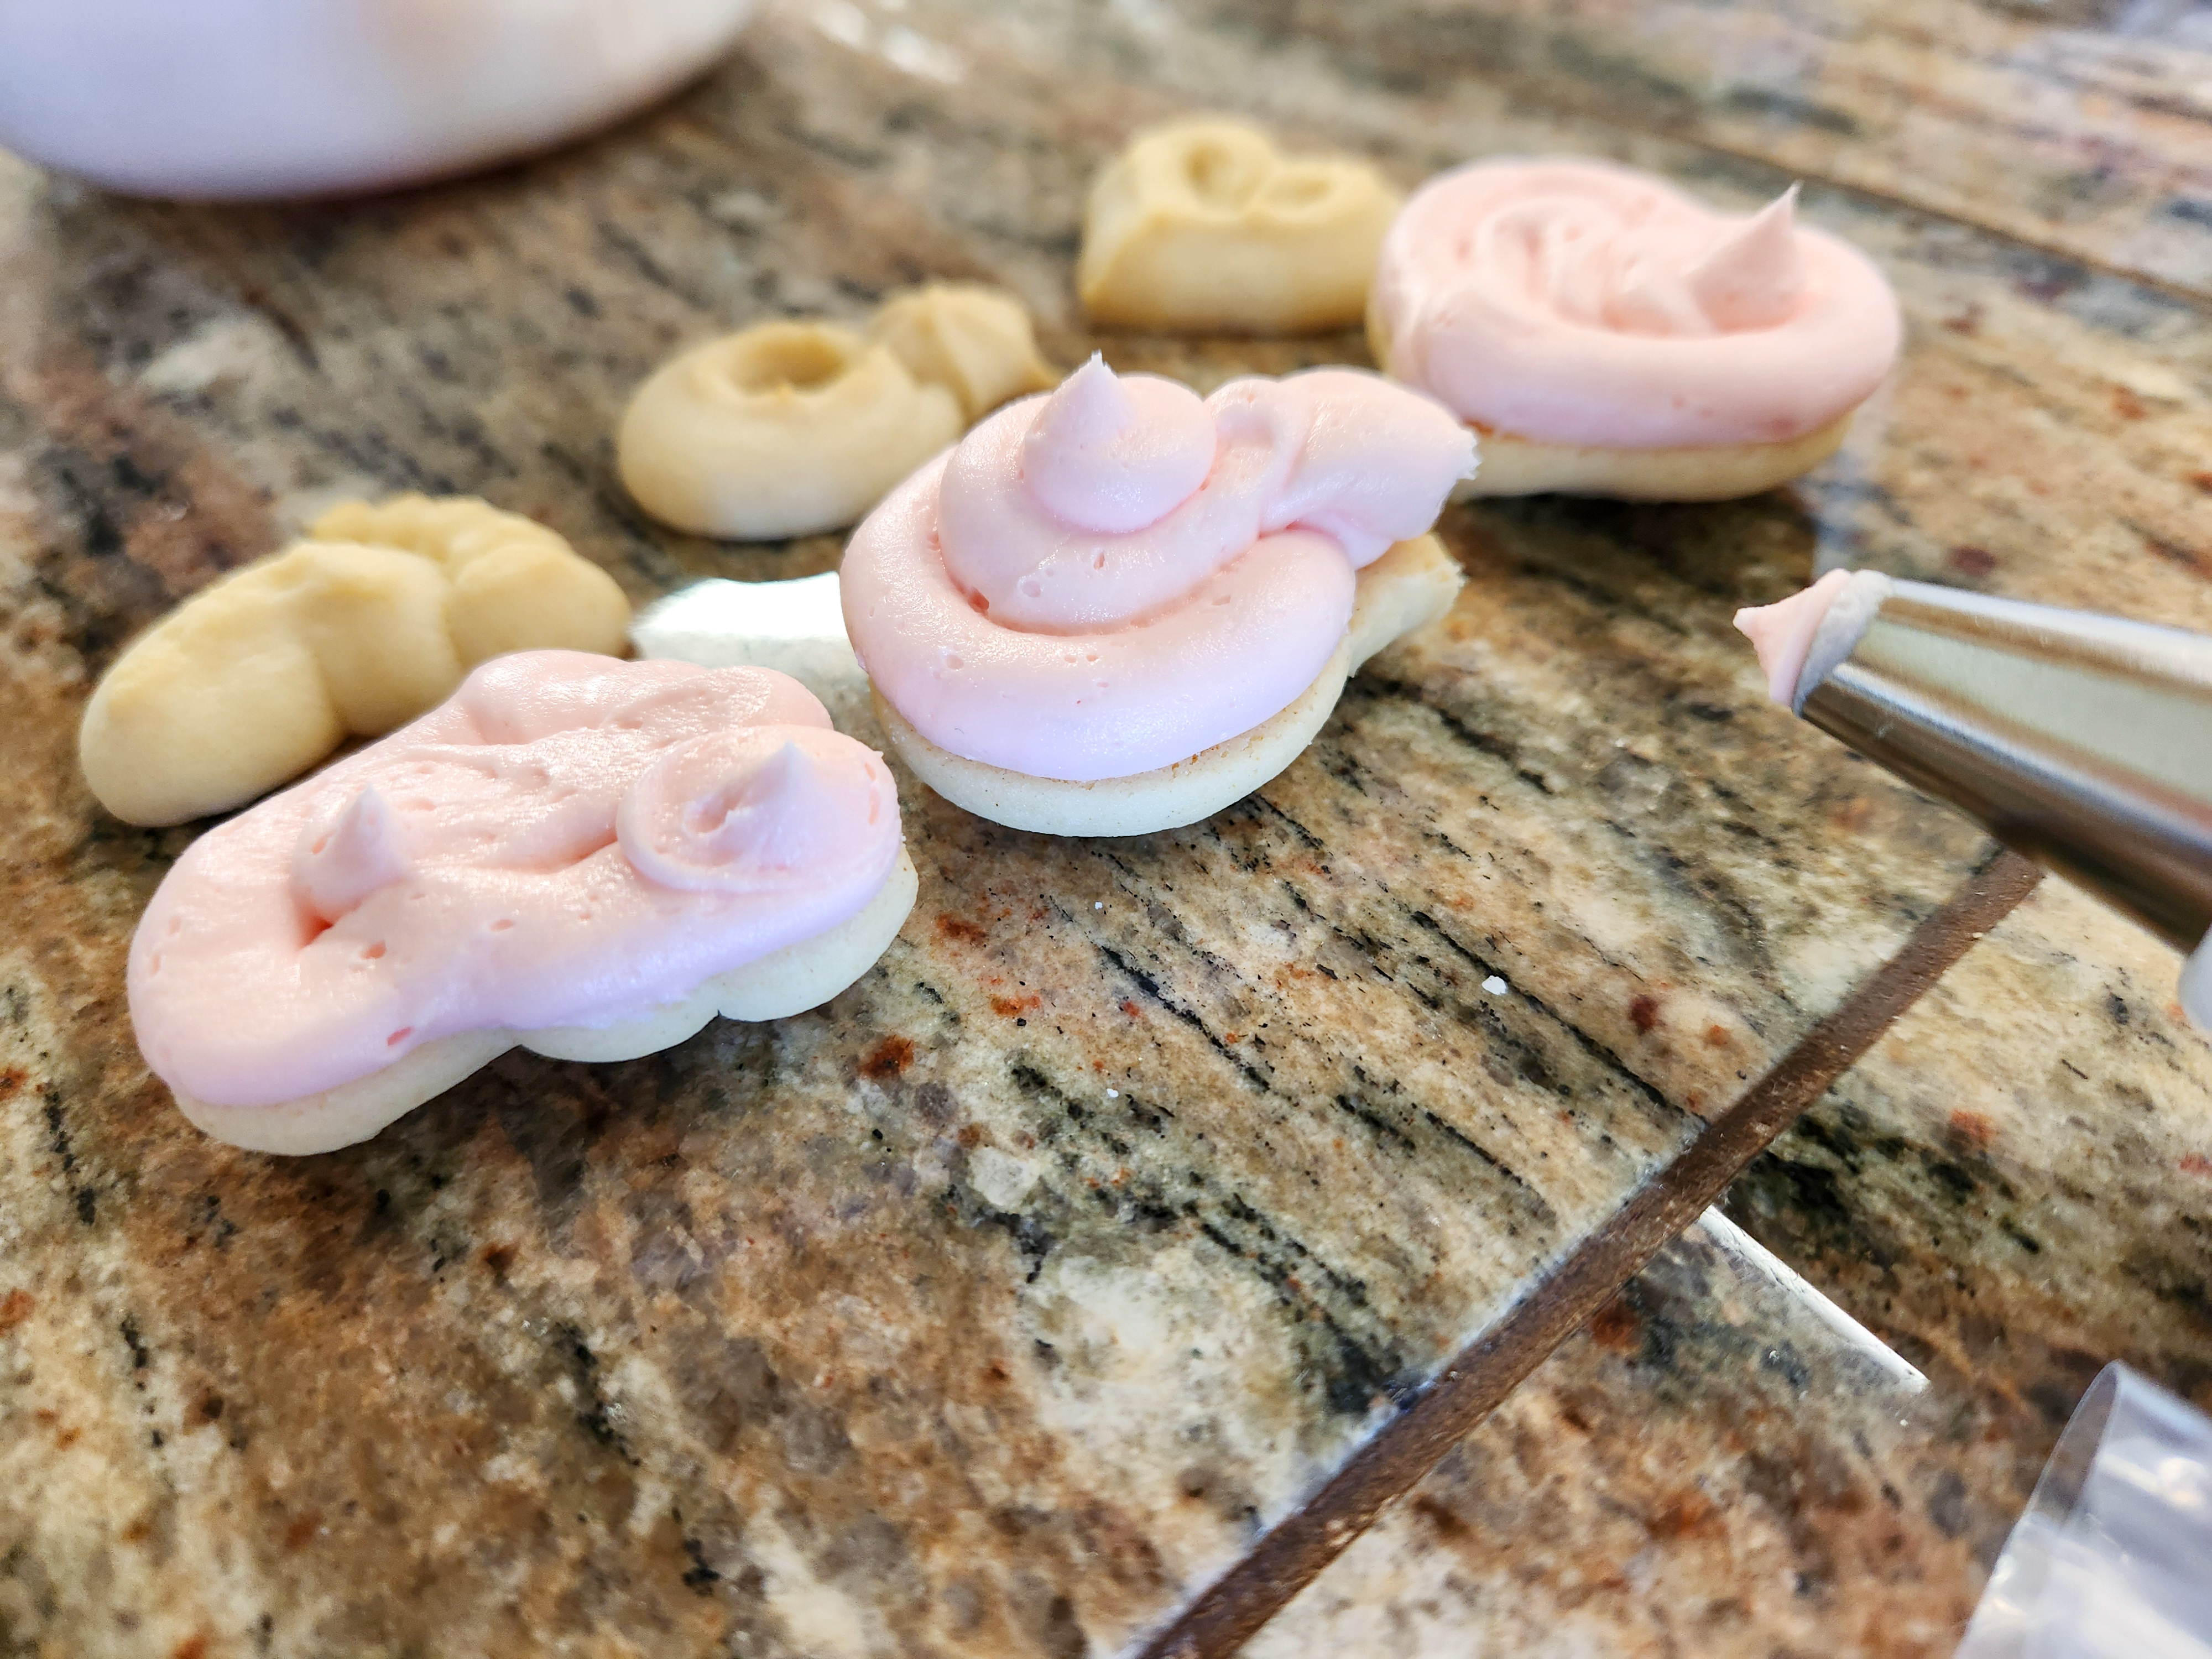
Rose Water buttercream pressed with a cookie press
Place these beautiful shapes on top of rolled out buttercream, and place both on top of a plain bottom cookie. I suggest going thinner for the rolled buttercream flats- maybe 1/8″ instead of 1/4″. Otherwise its just too much!
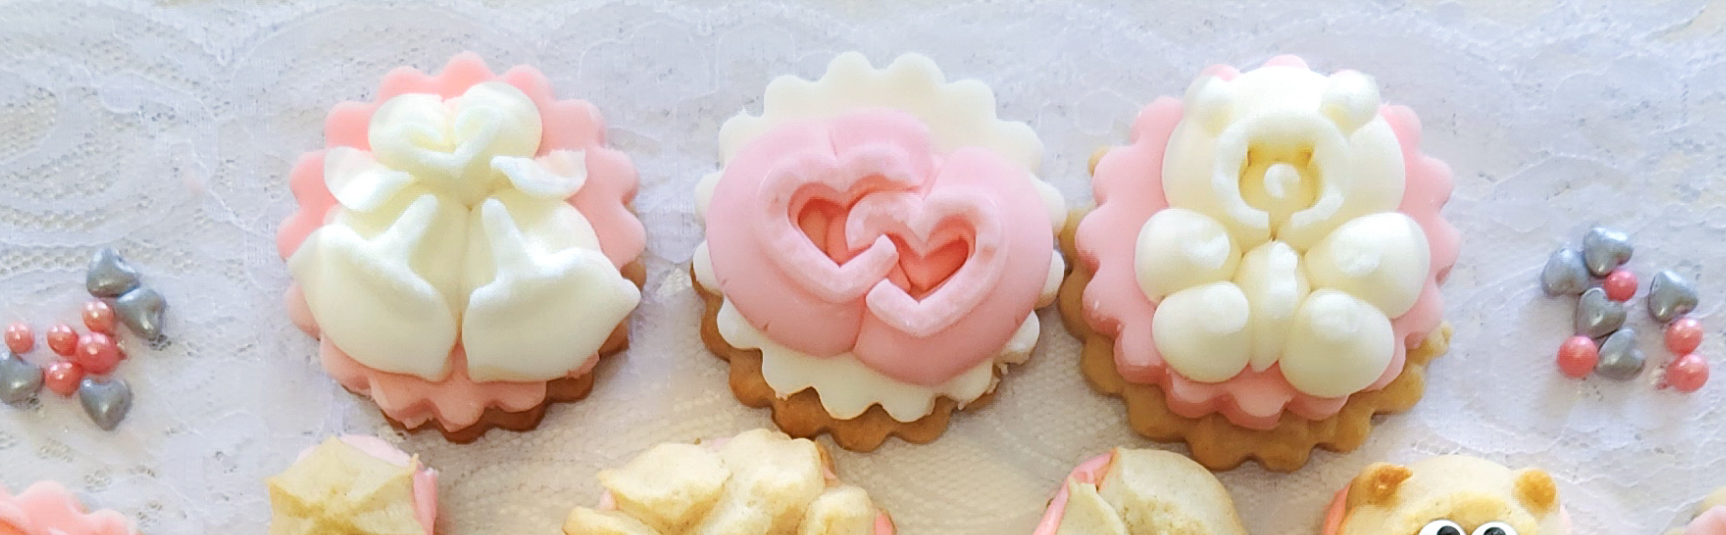
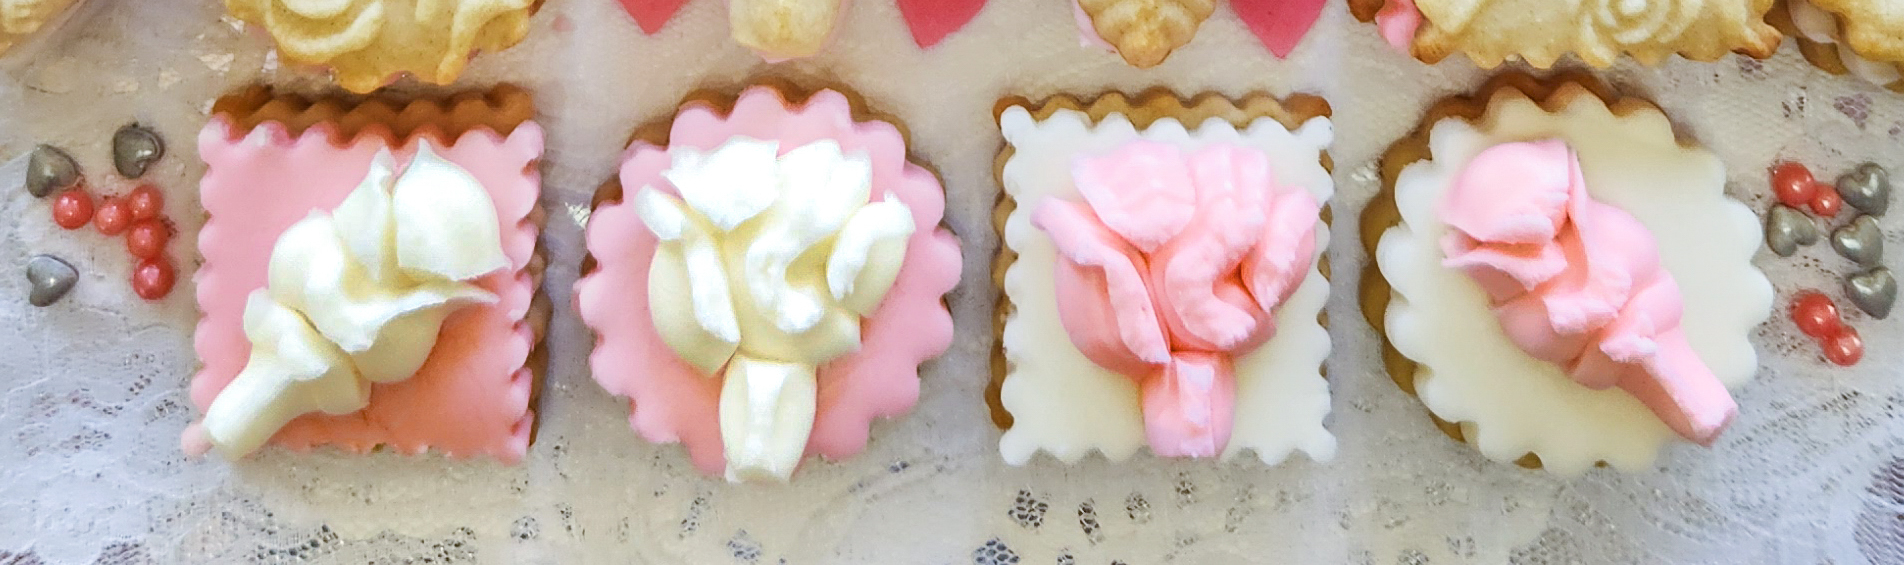
Use the same “super thick” recipe as above. Load it into your press barrel and press your shapes VERY SLOwLY. This will NOT feel like presisng cookie dough! You will need to be patient and accept that some shapes will come out wrong. LOL. Just as with cookies, toss them back in the bowl to be re-pressed! The effort is worth the learning curve as these buttercream shapes are absolutely gorgeous!
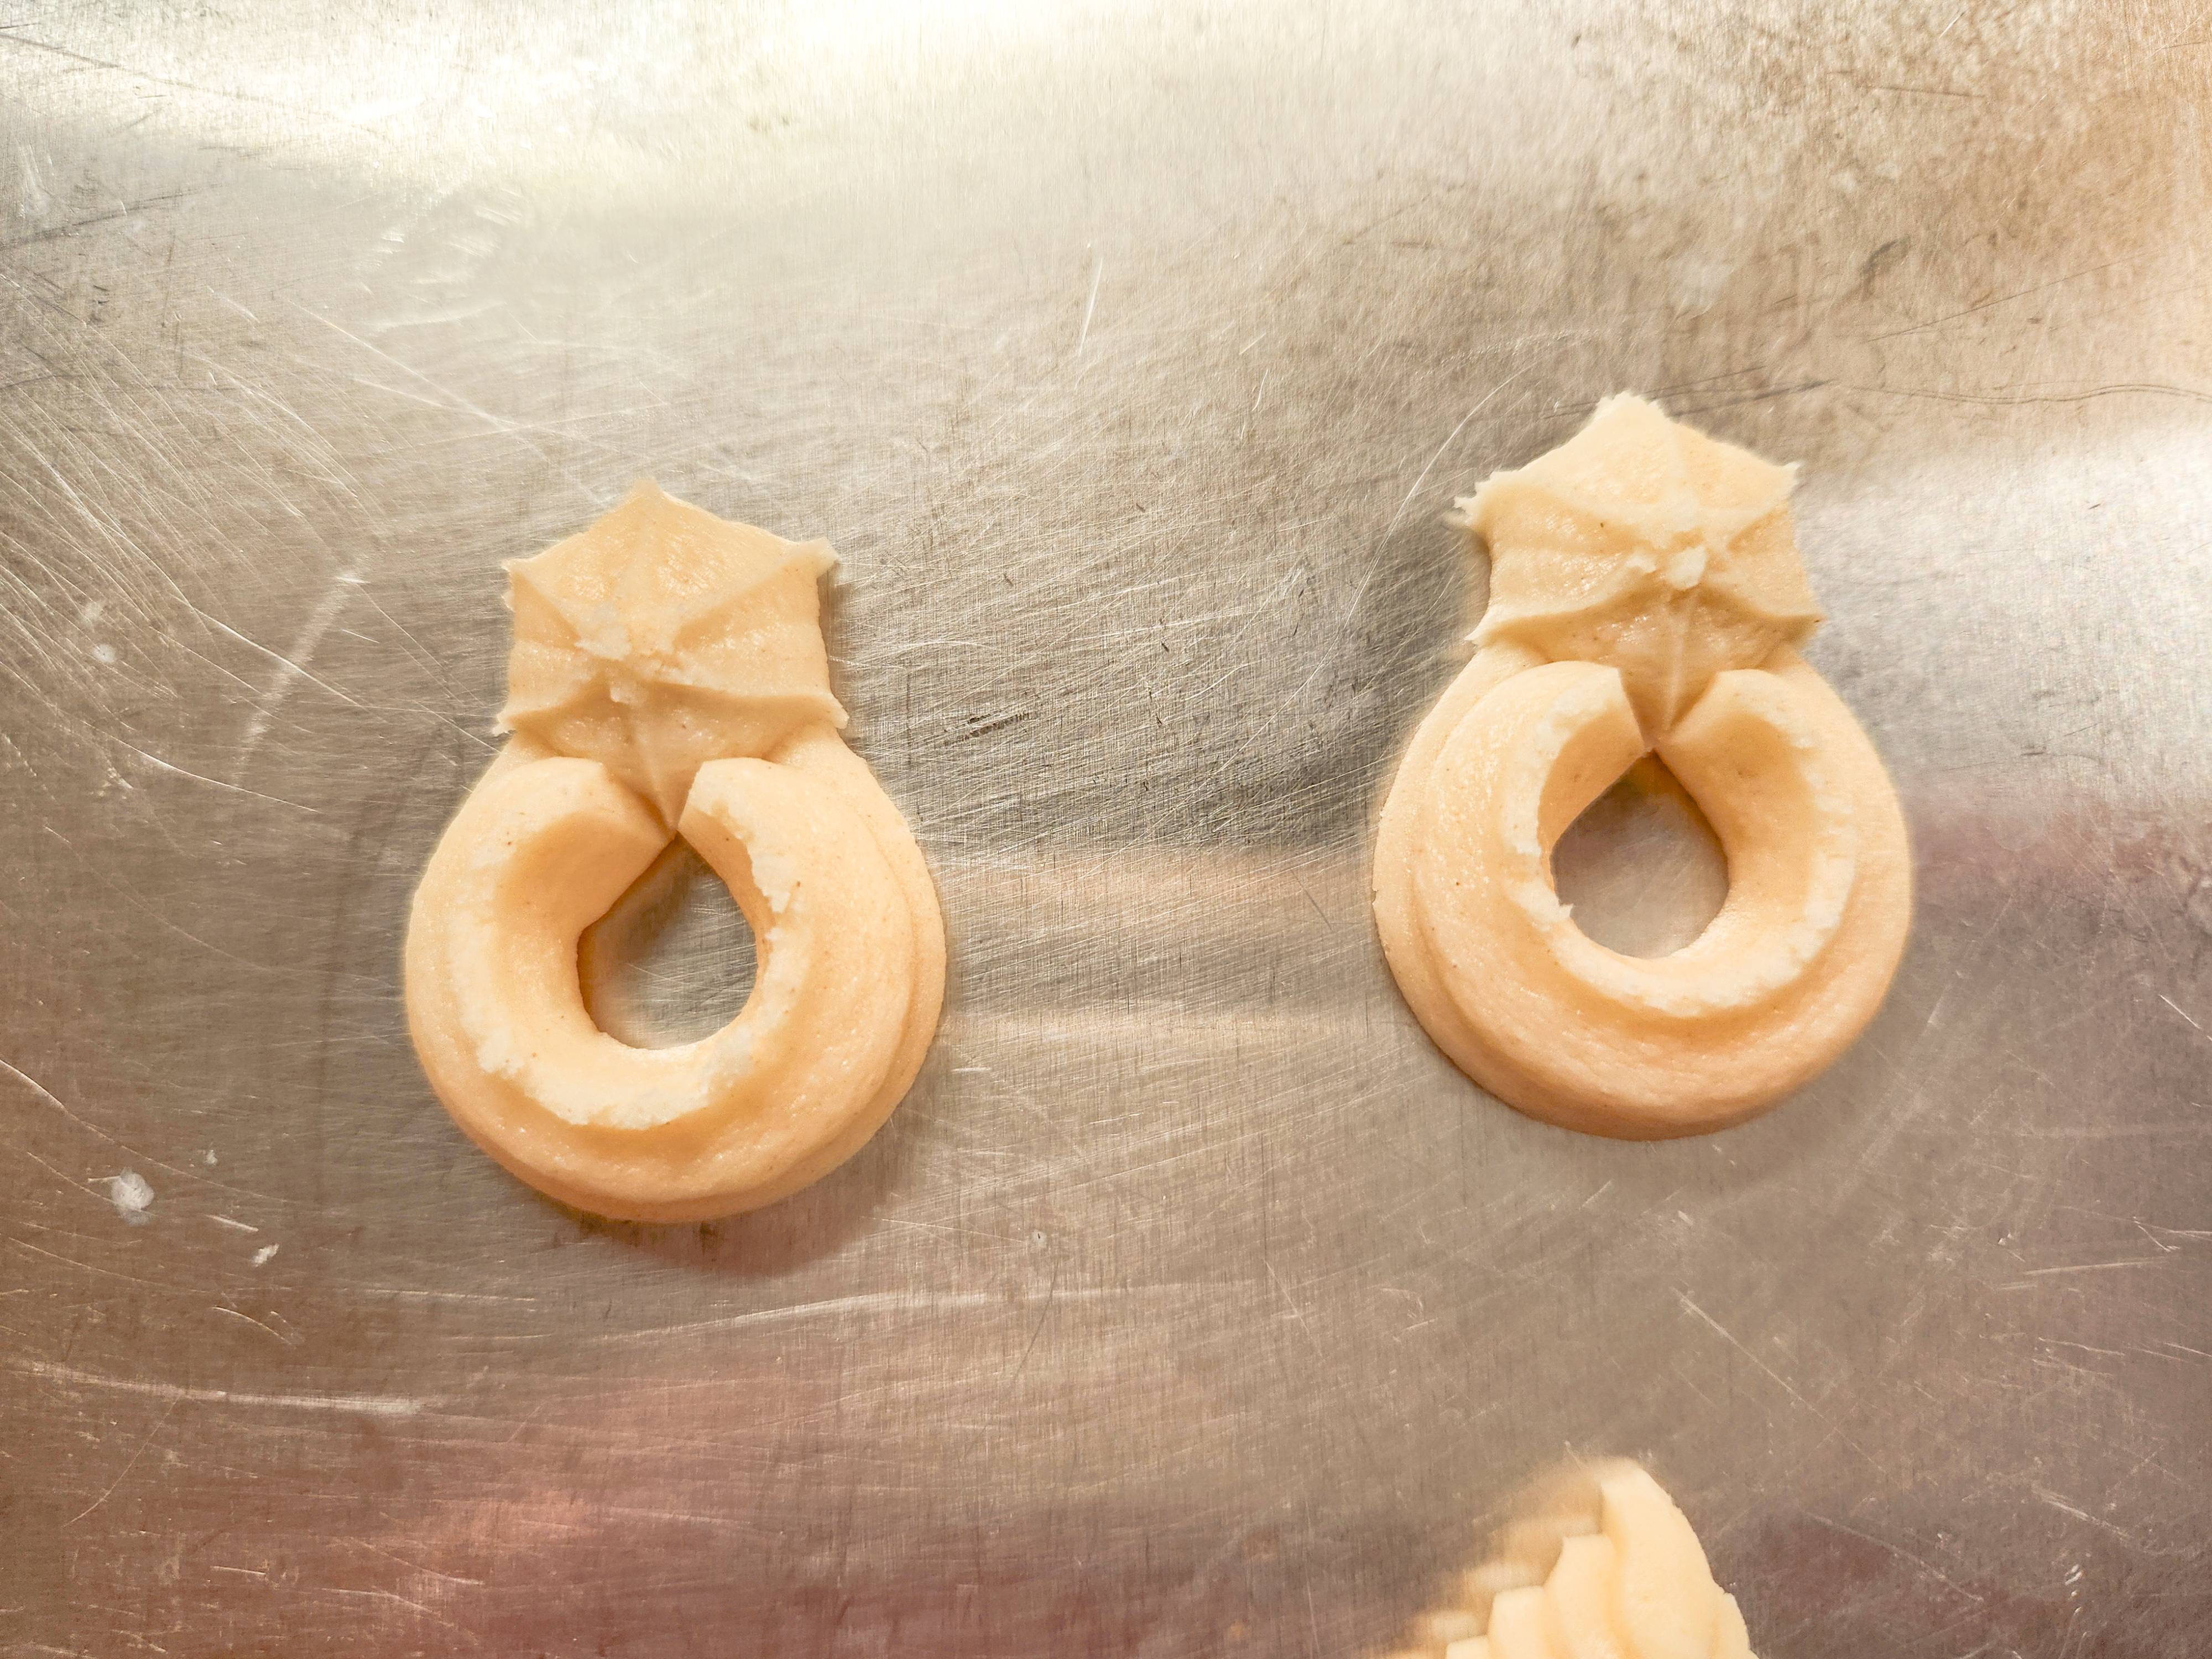
Take a good three to five seconds per shape as you press, SLOWLY and steadily, and keep “pressing” as you lift up, it helps them stick. DO NOT press so hard you break your press! Use steady slow pressure, harder than for cookies but again not so hard it breaks the press! Rely on time instead of force. Use a good, clean, grease-free cookie sheet. Here are mine with the disks I used.
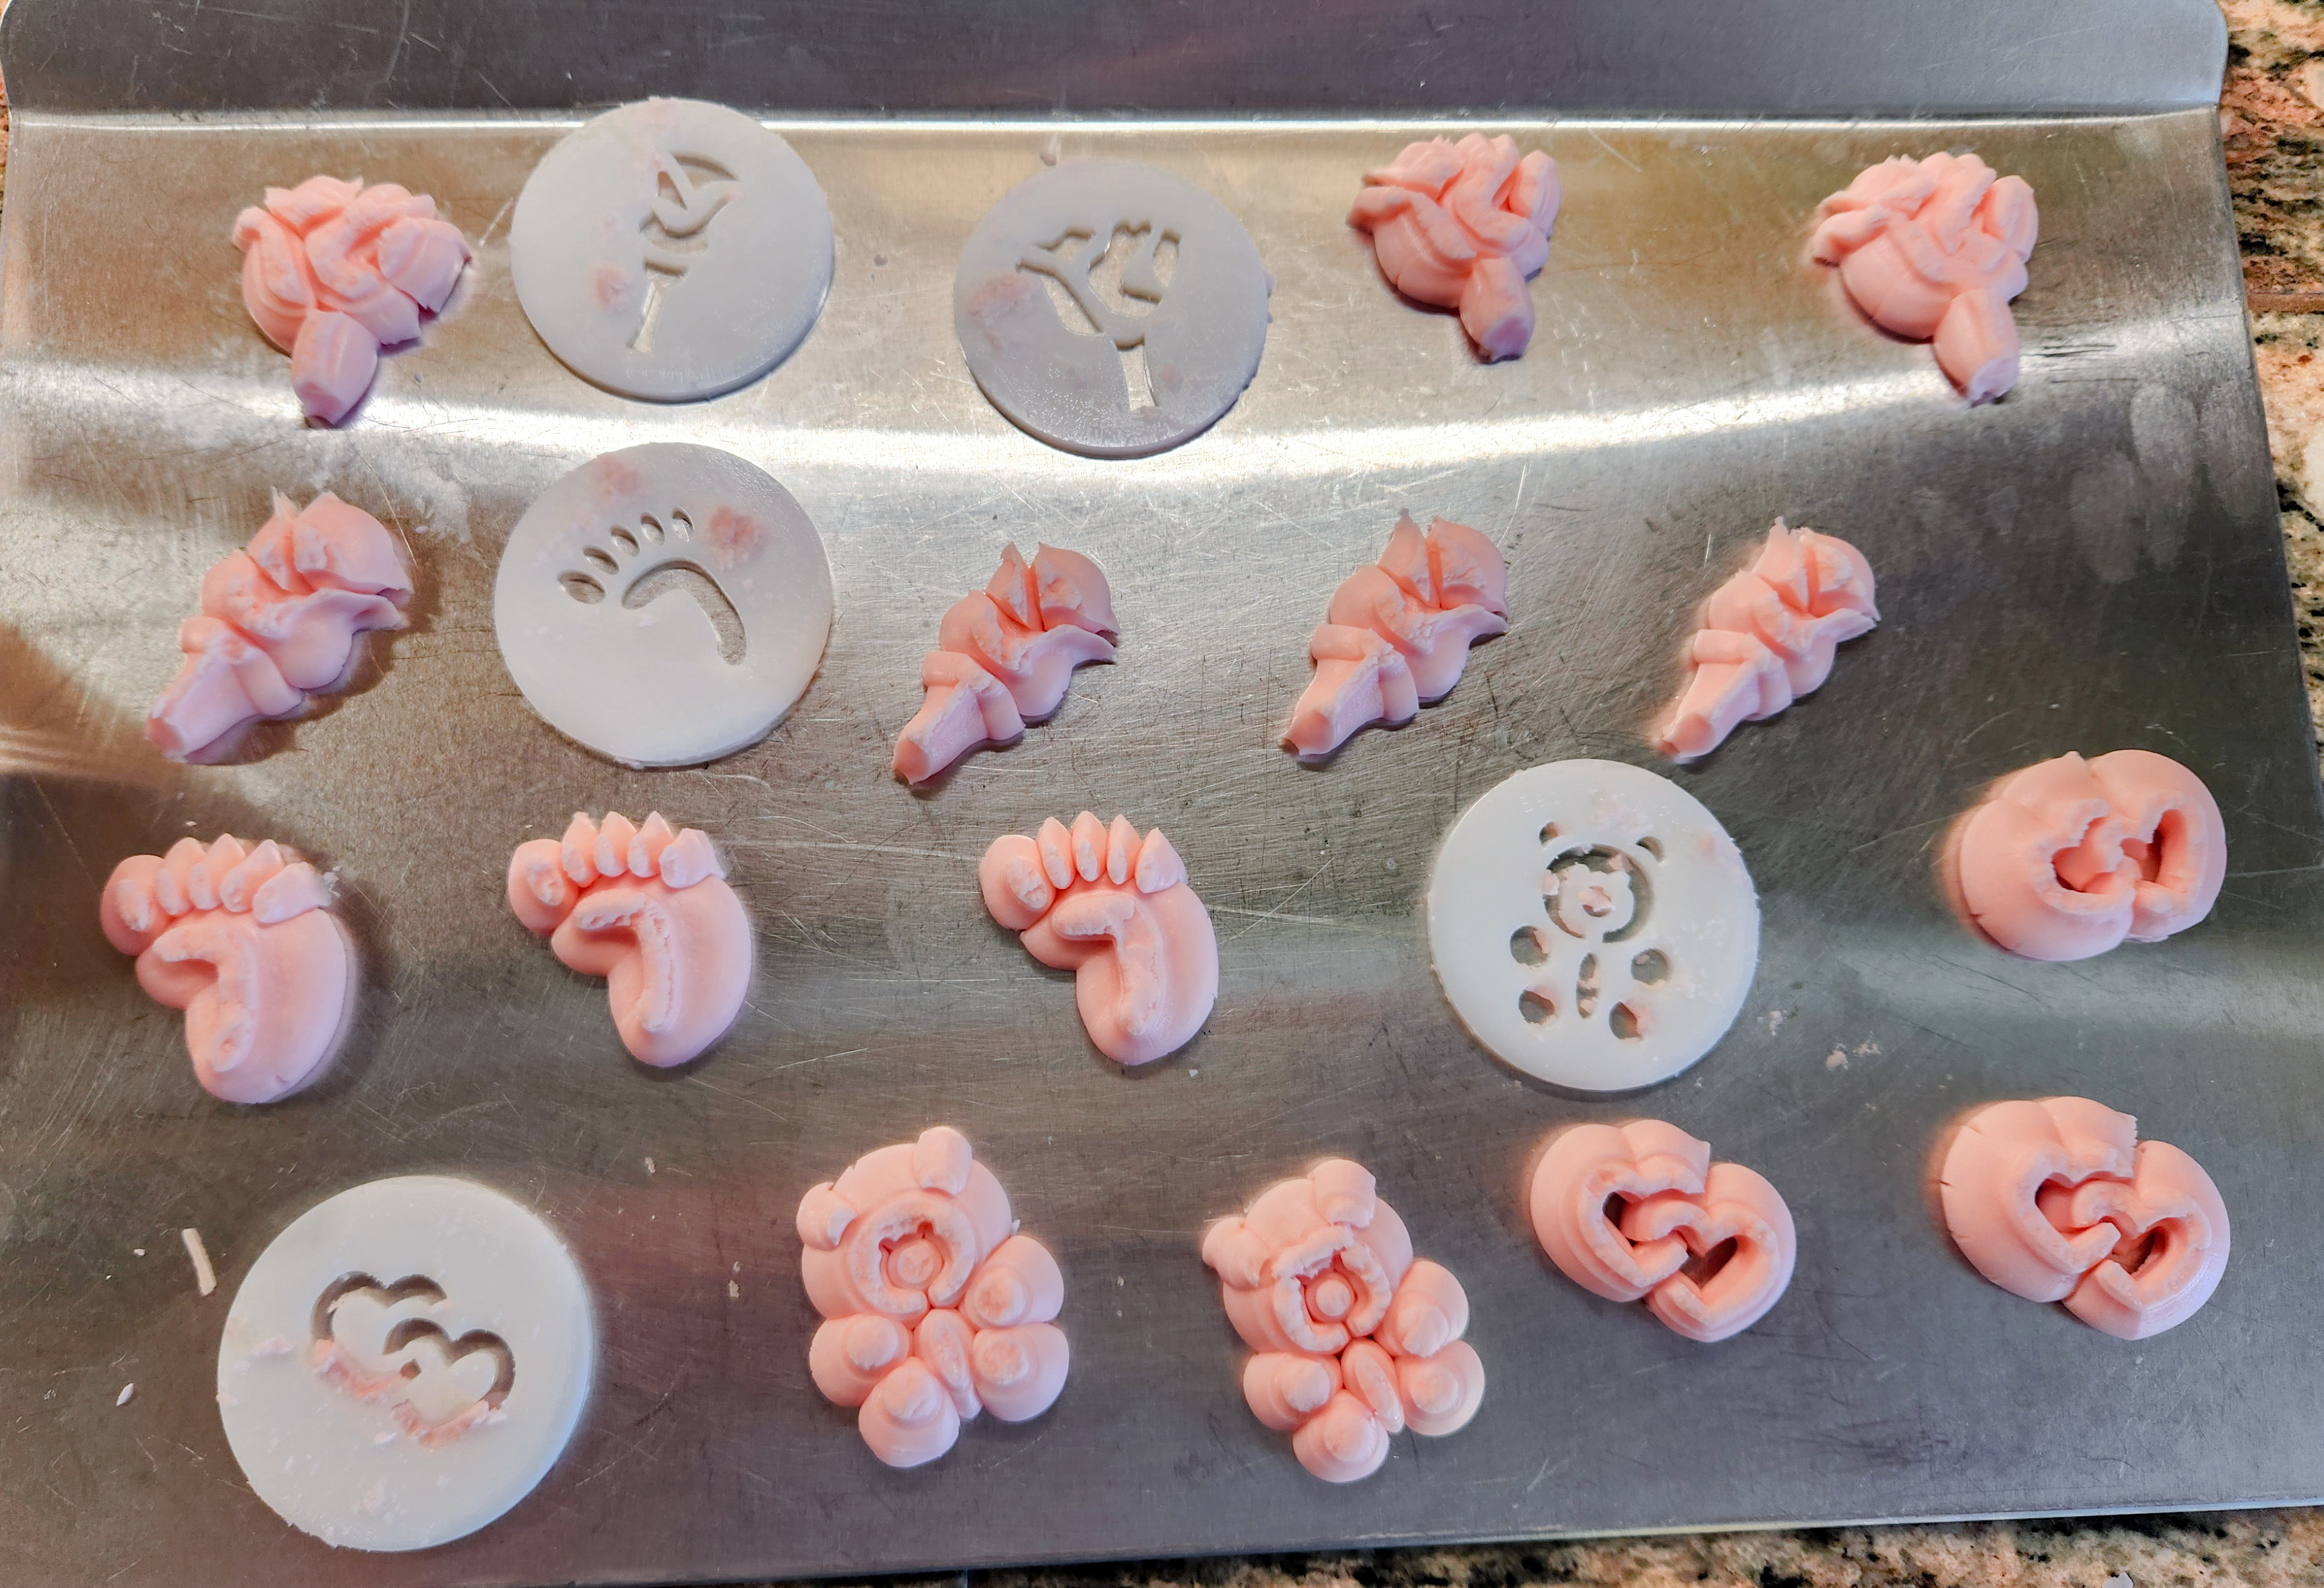
When your shapes are pressed, put them in the freezer for at least 15 minutes. Take them out and let them sit out for 10 to 15 minutes, just long enough for them to easily come off when you slide a spatula under them. Keep that spatula/lifter FLAT so as not to bend or break the shapes! Set them carefully on a cooling rack to stiffen up and dry out. Place on top of plain rolled buttercream as described above.
The last thing! Regular rose water buttercream to sandwich the spritz cookies!
This is simple! Whip up this icing and use a decorating bag with a big fat piping tip like a # 10 or higher to make thick sandwich filling with clean edges.
Rose Water Buttercream for spritz cookie sandwiches
½ cup (1 stick) butter, softened (not melted)
2 1/4 cups powdered sugar
1 teaspoon edible rose water (more if you want it stronger- just add more powdered sugar to compensate if needed). **Rose water is potent in buttercream so start with 1 teaspoon!
2 Tablespoons heavy cream
Whip all the ingredients together until it is light and fluffy! I love a good fluffy buttercream. Tint pink with GEL food coloring. Start with a little color- you can always add more but you can’t take it out! Use decorating bag and tips to make neat sandwiches. Apply the icing to the underside of a cookie then top with a matching shape.

This was a big post but I hope you enjoy one or all versions of this unique recipe!
Here’s a few photos of how my yummy lovelies turned out!
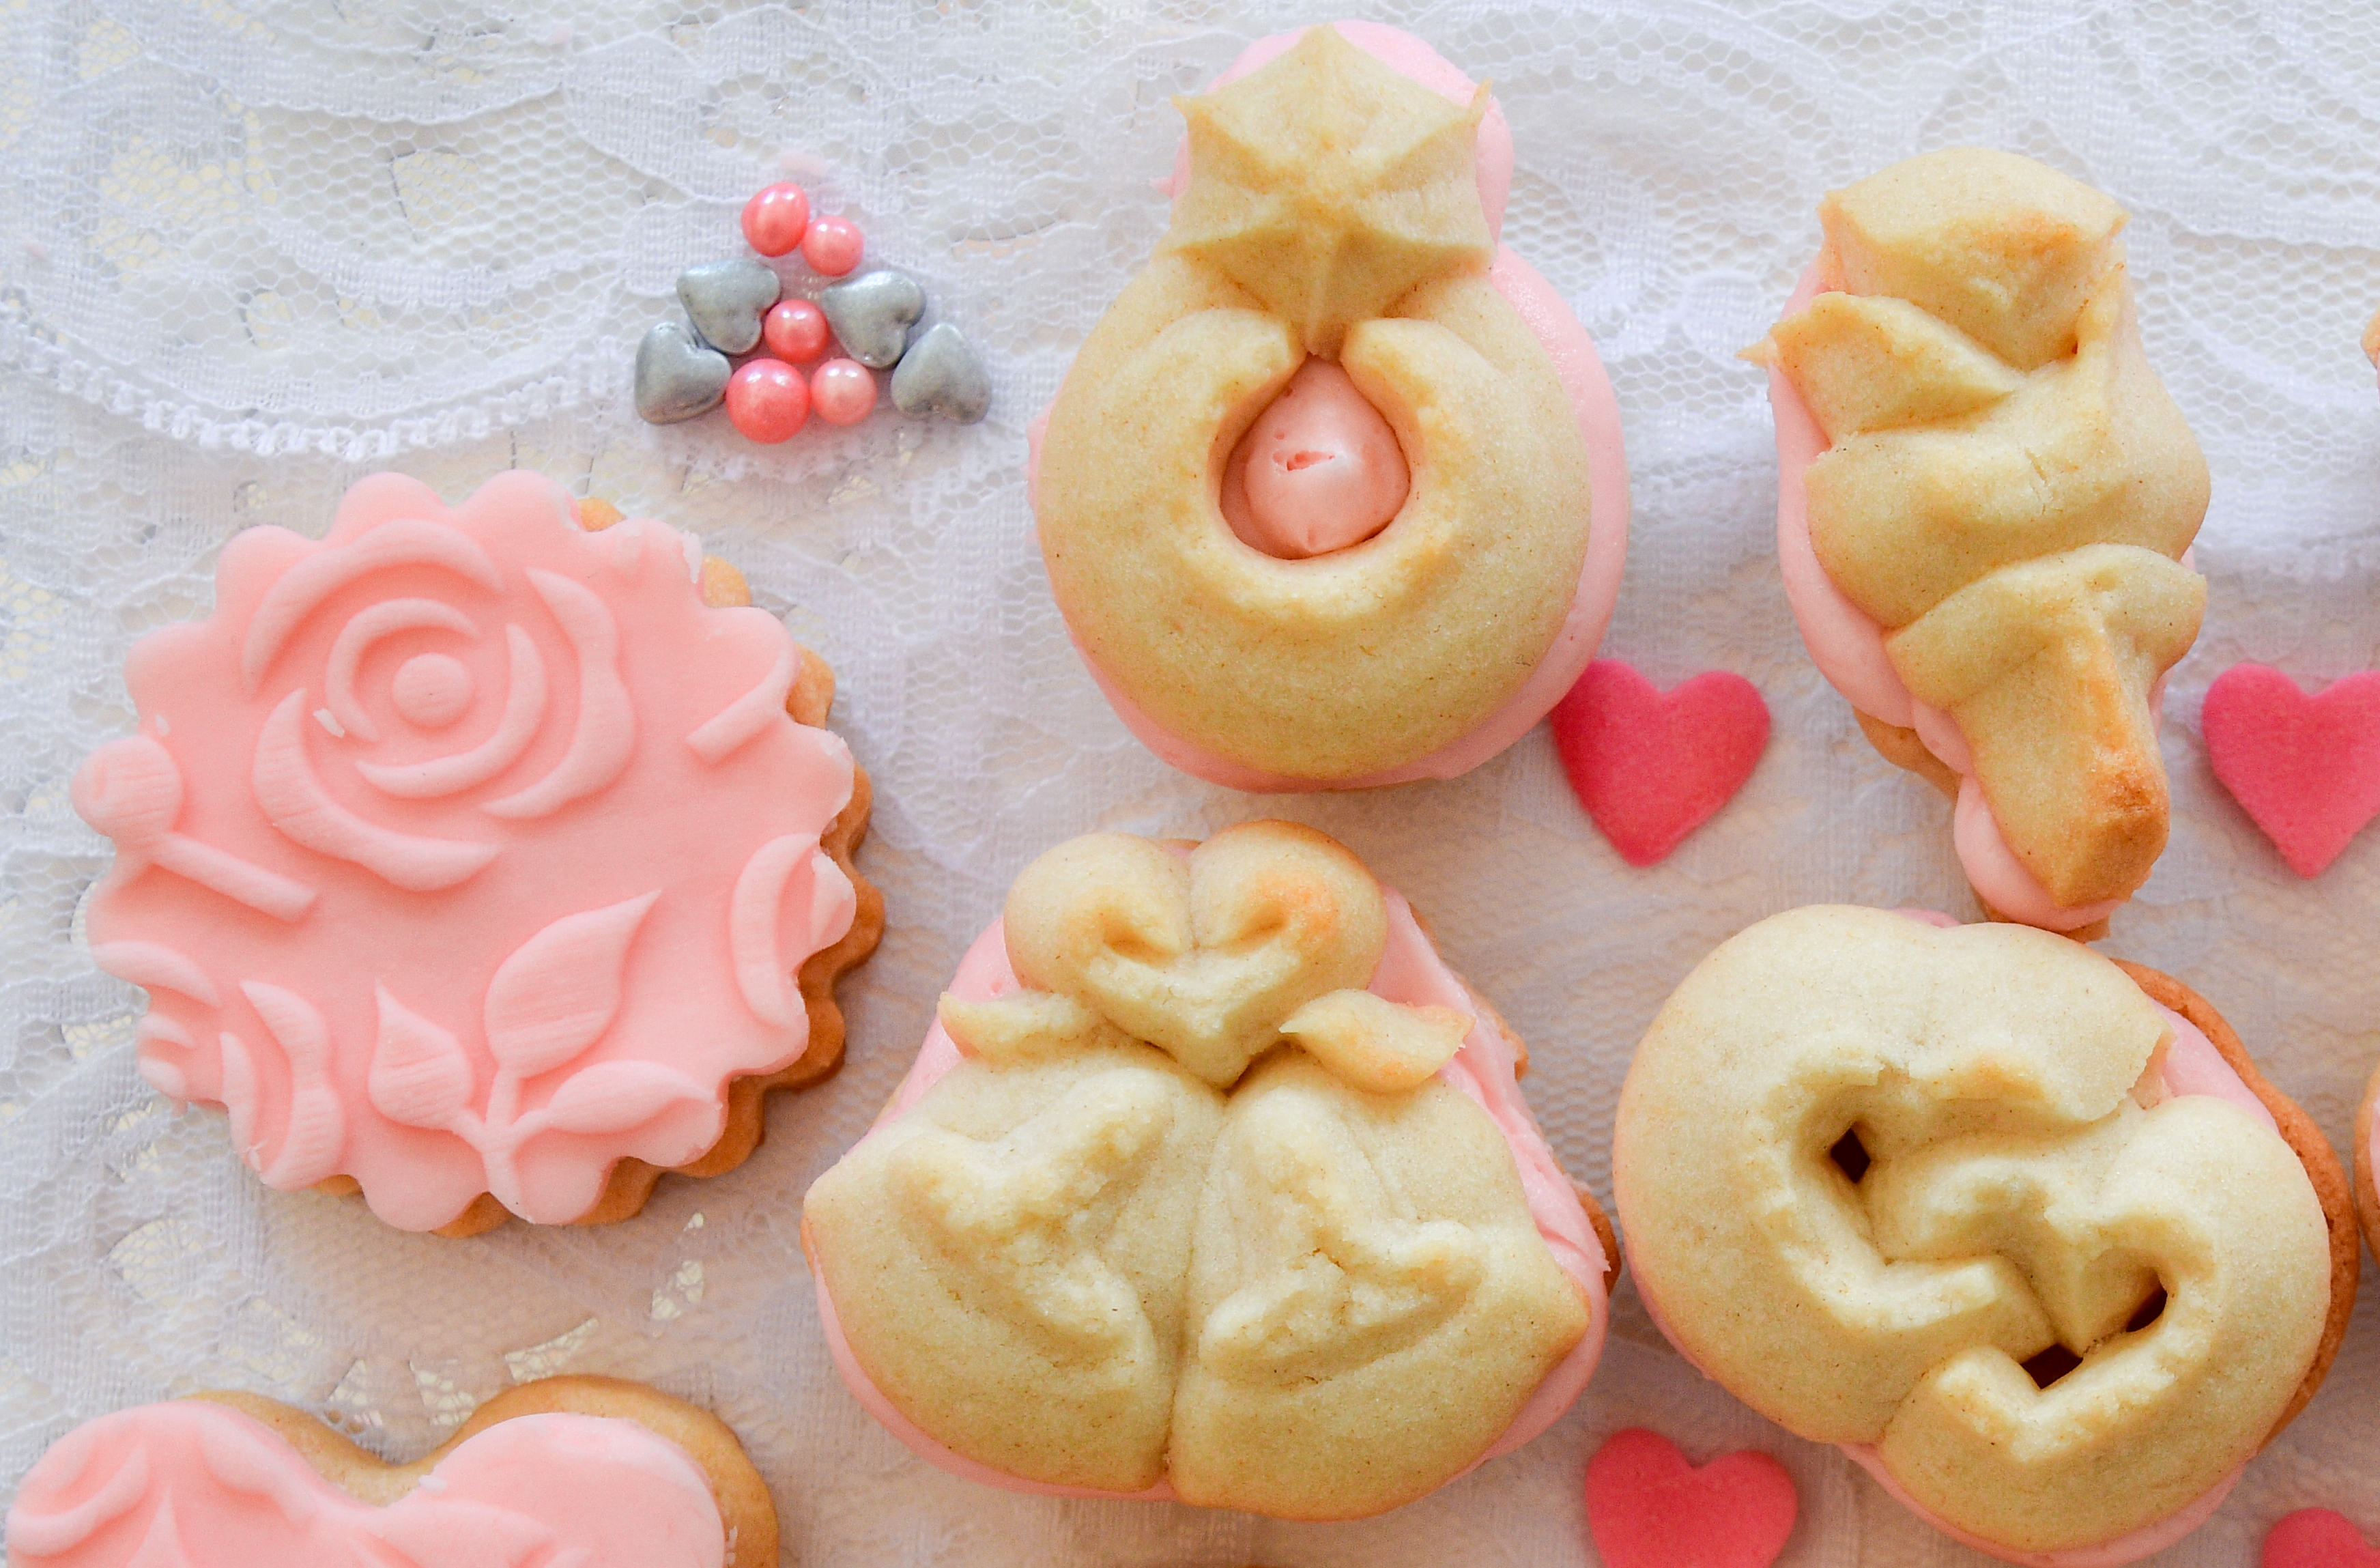


Happy Baking!
~Susie
Disk & Pin Designer/Co-Owner at Impress! Bakeware, LLC
Our website has all of our 200+ disk shapes, cookie press, embossed rolling pins, baking accessories plus more about our Women/Family Owned company! impressbakeware.com
All products are on our Etsy shop.
Our Amazon shop has our cookie press and disks and embossed rolling pins.
Follow us on facebook!
