

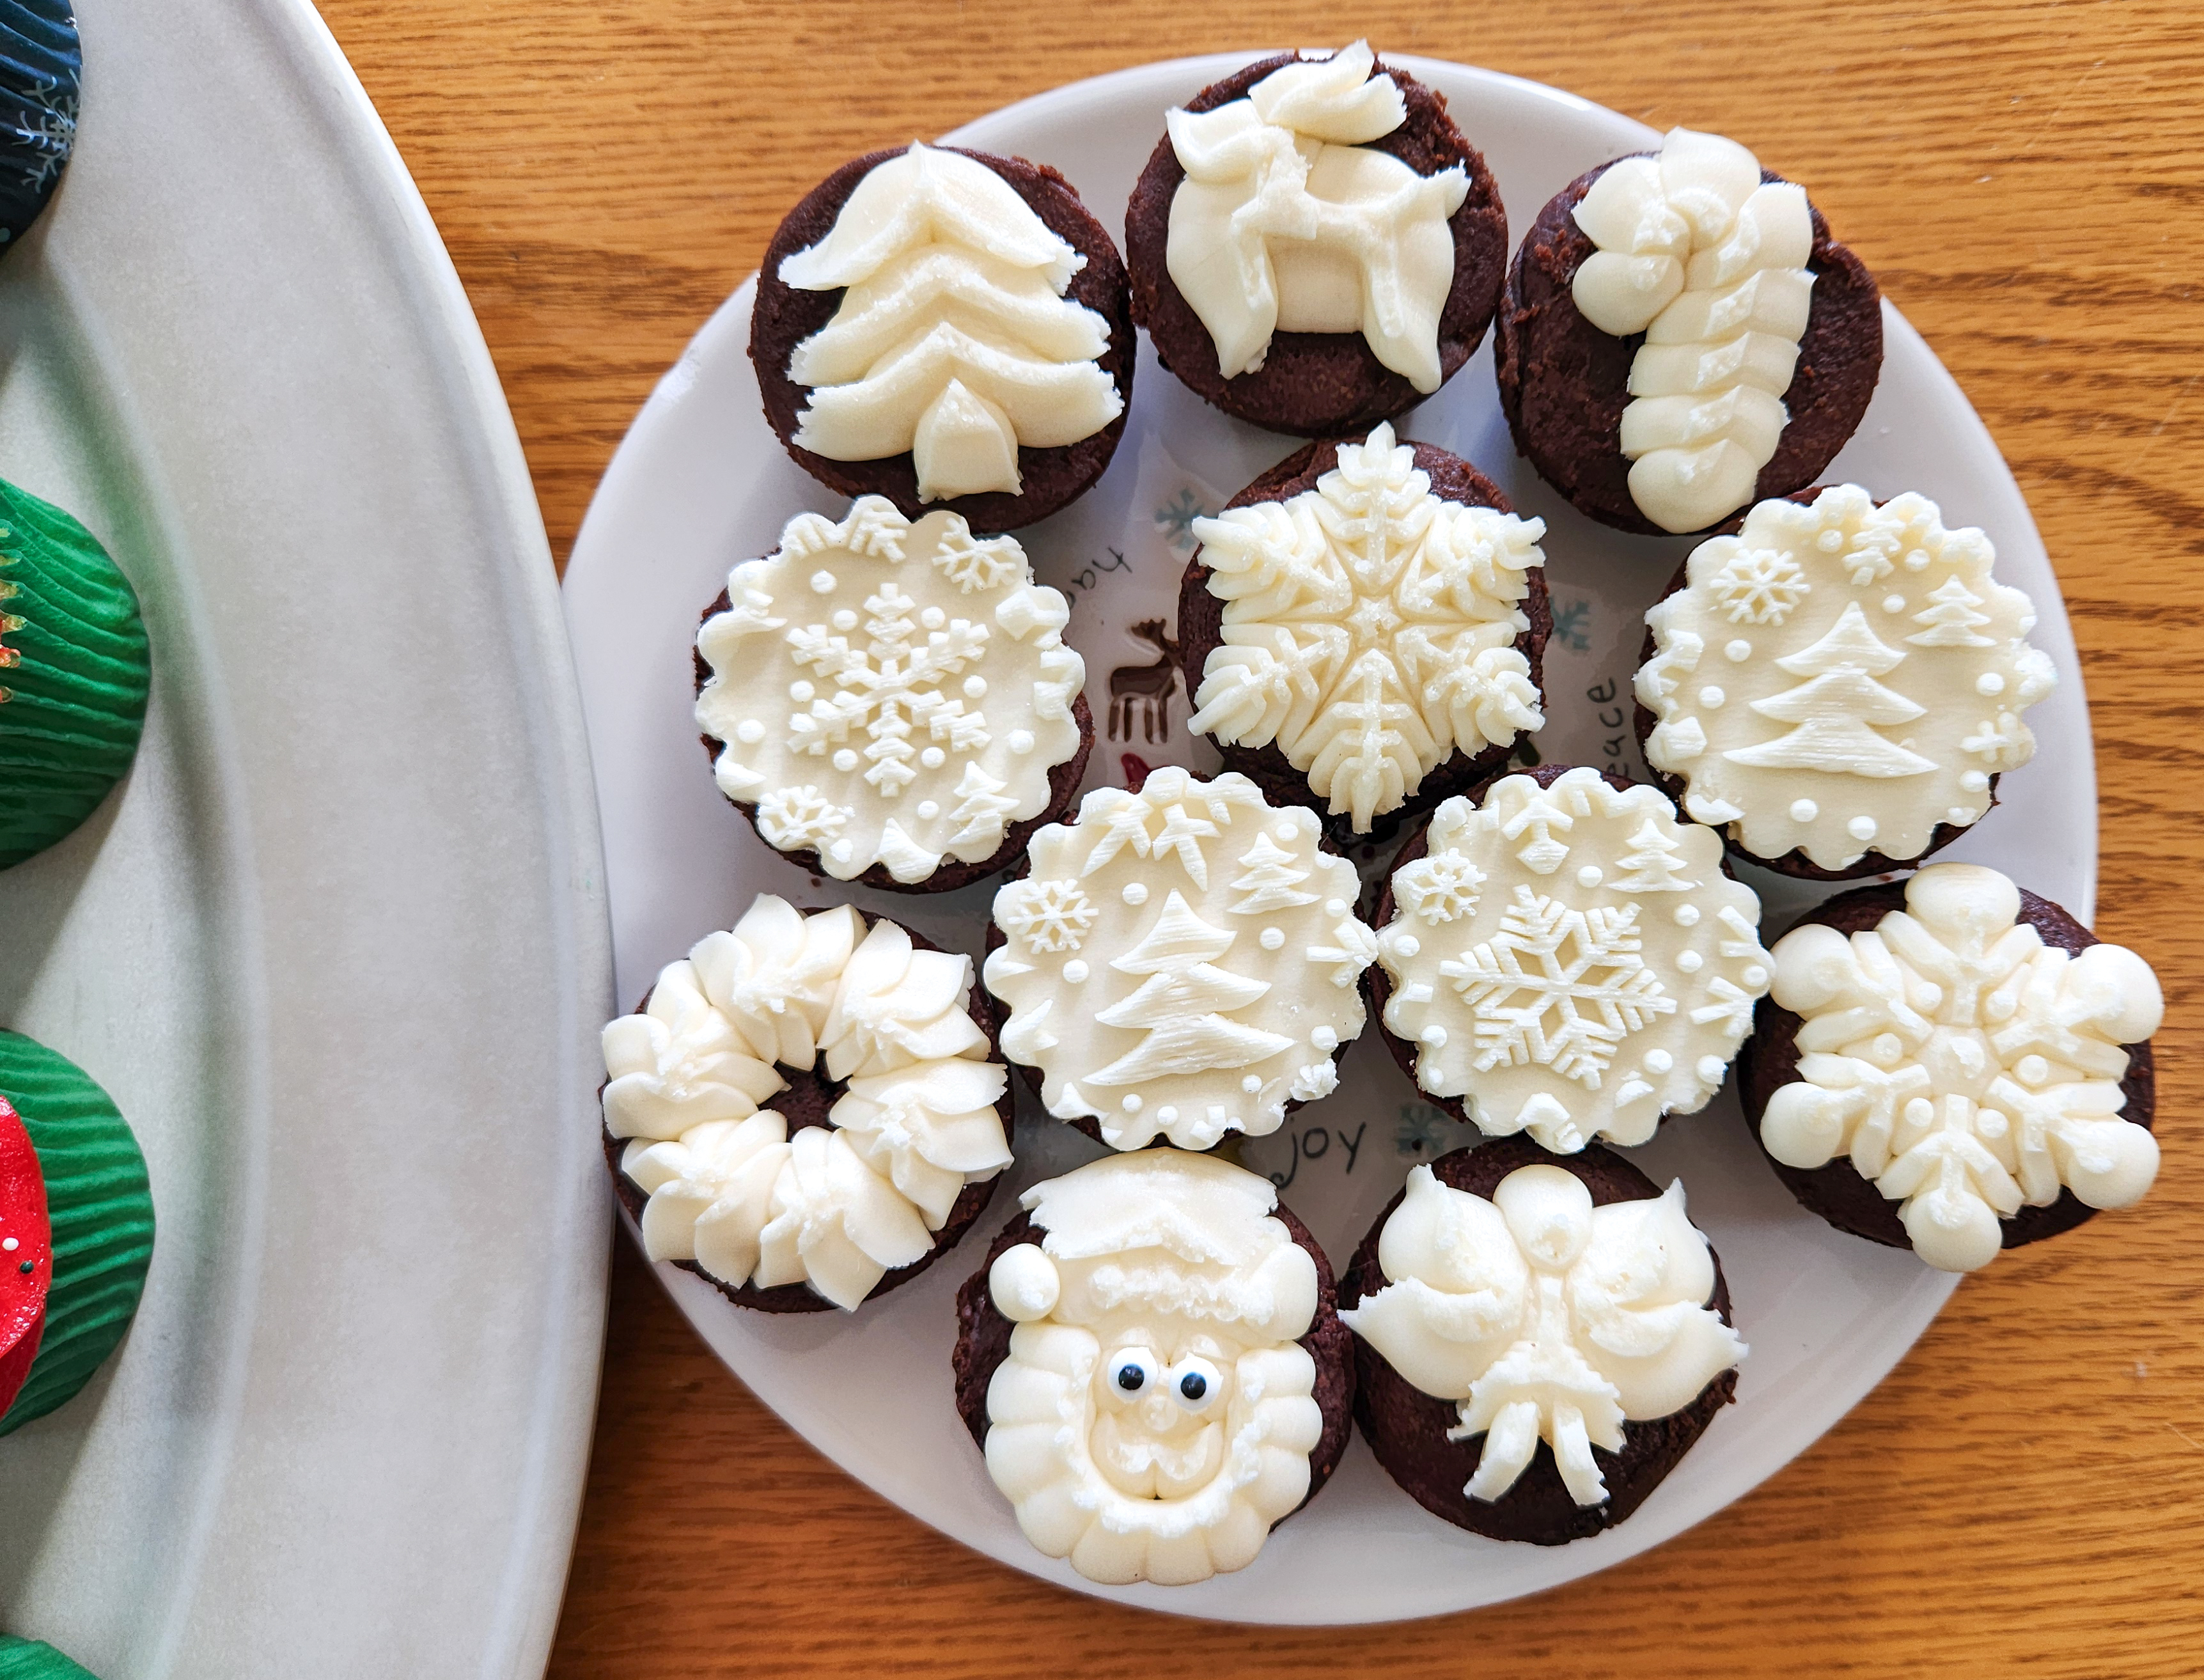
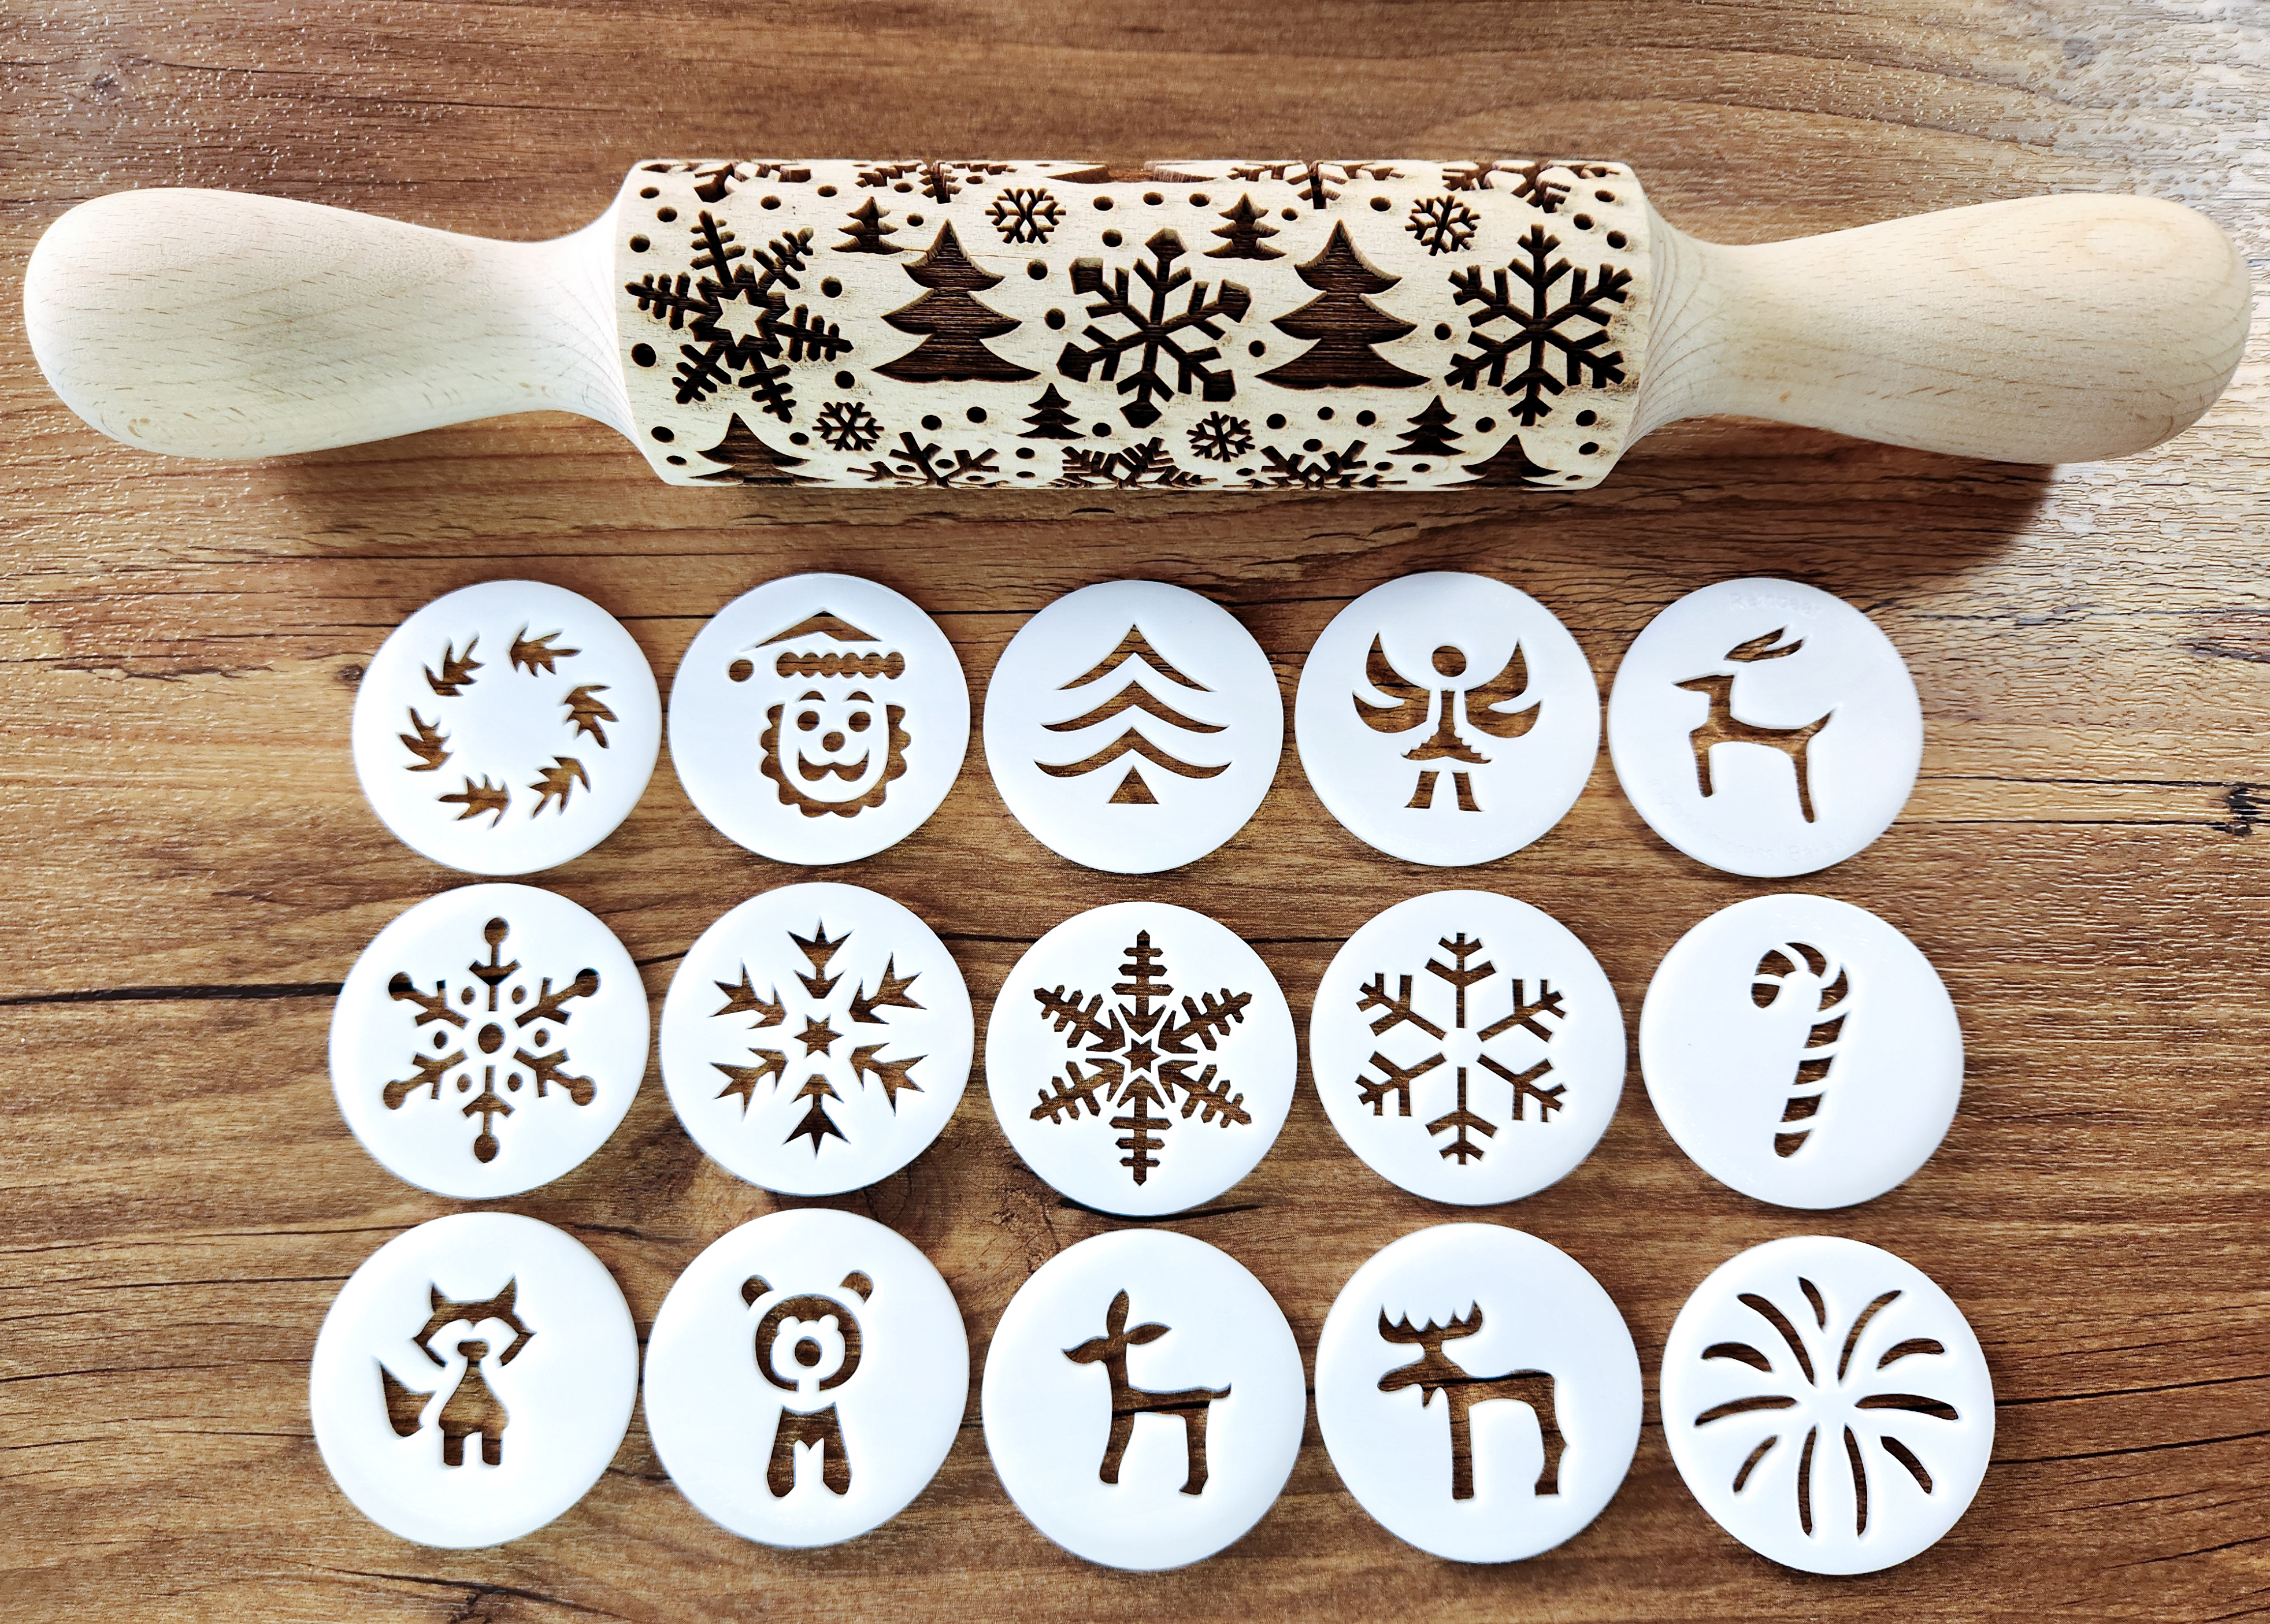
Make Beautiful Buttercream! Use our cookie press disks or embossed rolling pins to shape and pattern thick buttercream into something unique! Press out angels, Santas, snowflakes & more OR imprint gorgeous patterns onto buttercream circles to top cupcakes and brownie bites. Add a quick swirl of frosting to cupcakes then place the shapes on top. Who doesn’t love extra buttercream?
I have three recipes for you that my friends and family (several of whom are complete buttercream freaks😂) absolutely rave about. I make very vanilla buttercreams!
In this post I show you how to make two different versions of very thick buttercream. They seem similar but they are very specific and different enough that it matters. They cannot be interchanged: you can’t press the rollable one and you can’t roll the pressable one! (Yes, I’ve tried LOL.) Basically you’re going to be making a buttercream clay that’s very similar in consistency to modeling chocolate. You can set these shapes or patterned circles directly onto cupcakes or brownie bites or set them atop fluffy frosting. So choose which one you want to do: press cute shapes or roll out pretty patterns!

I used our best-selling embossed rolling pin: Snowflakes & Woodland Pine Trees, and a few disks from several different cookie press disk sets including: Christmas, Snowflakes, More Snowflakes! and Woodland sets. The Fireworks disk (for New Year’s Eve Party idea!) is from the Patriotic & 4th of July disk set, the Bear is from Woodland Two, and the Wreath is from Christmas Two. Choose whatever makes you happy! We have 29 pins and 367 cookie press disks to choose from.


Our website has all of our 300+ disk shapes, cookie press, embossed rolling pins, baking accessories plus more about our Women/Family Owned small business! impressbakeware.com
All products are on our Etsy shop.
Our Amazon shop has our cookie press and disks and embossed rolling pins.
(💕We make our money selling disks and pins! There are no annoying ads on this recipe blog!)
🎉 15% OFF Last SALE of 2025 ❗
🎄Make edible art for the Holidays, because baking should be fun!
Discount on our cookie press disks, cookie press, embossed rolling pins, luster dusts, cookie cutters & baking accessories. Sale December 26 – January 4, 2026, on our website and Etsy shops ONLY! (Links above) Sale excludes holiday gift sets and our recipe book.
For this post I’m focusing on how you can use cookie press disks and embossed rolling pins with special press-able and roll-able buttercream recipes. If I were to include cupcake and brownie recipes this post would be ridiculously long. SO, that said, use your favorite cupcake or brownie recipe. If you need recipe ideas, look at some of the popular baking bloggers out there. I love Preppy Kitchen’s Moist Vanilla Cupcakes recipe. Yum. My favorite brownies are Ghirardelli’s Fudgy Chocolate Brownie recipe.
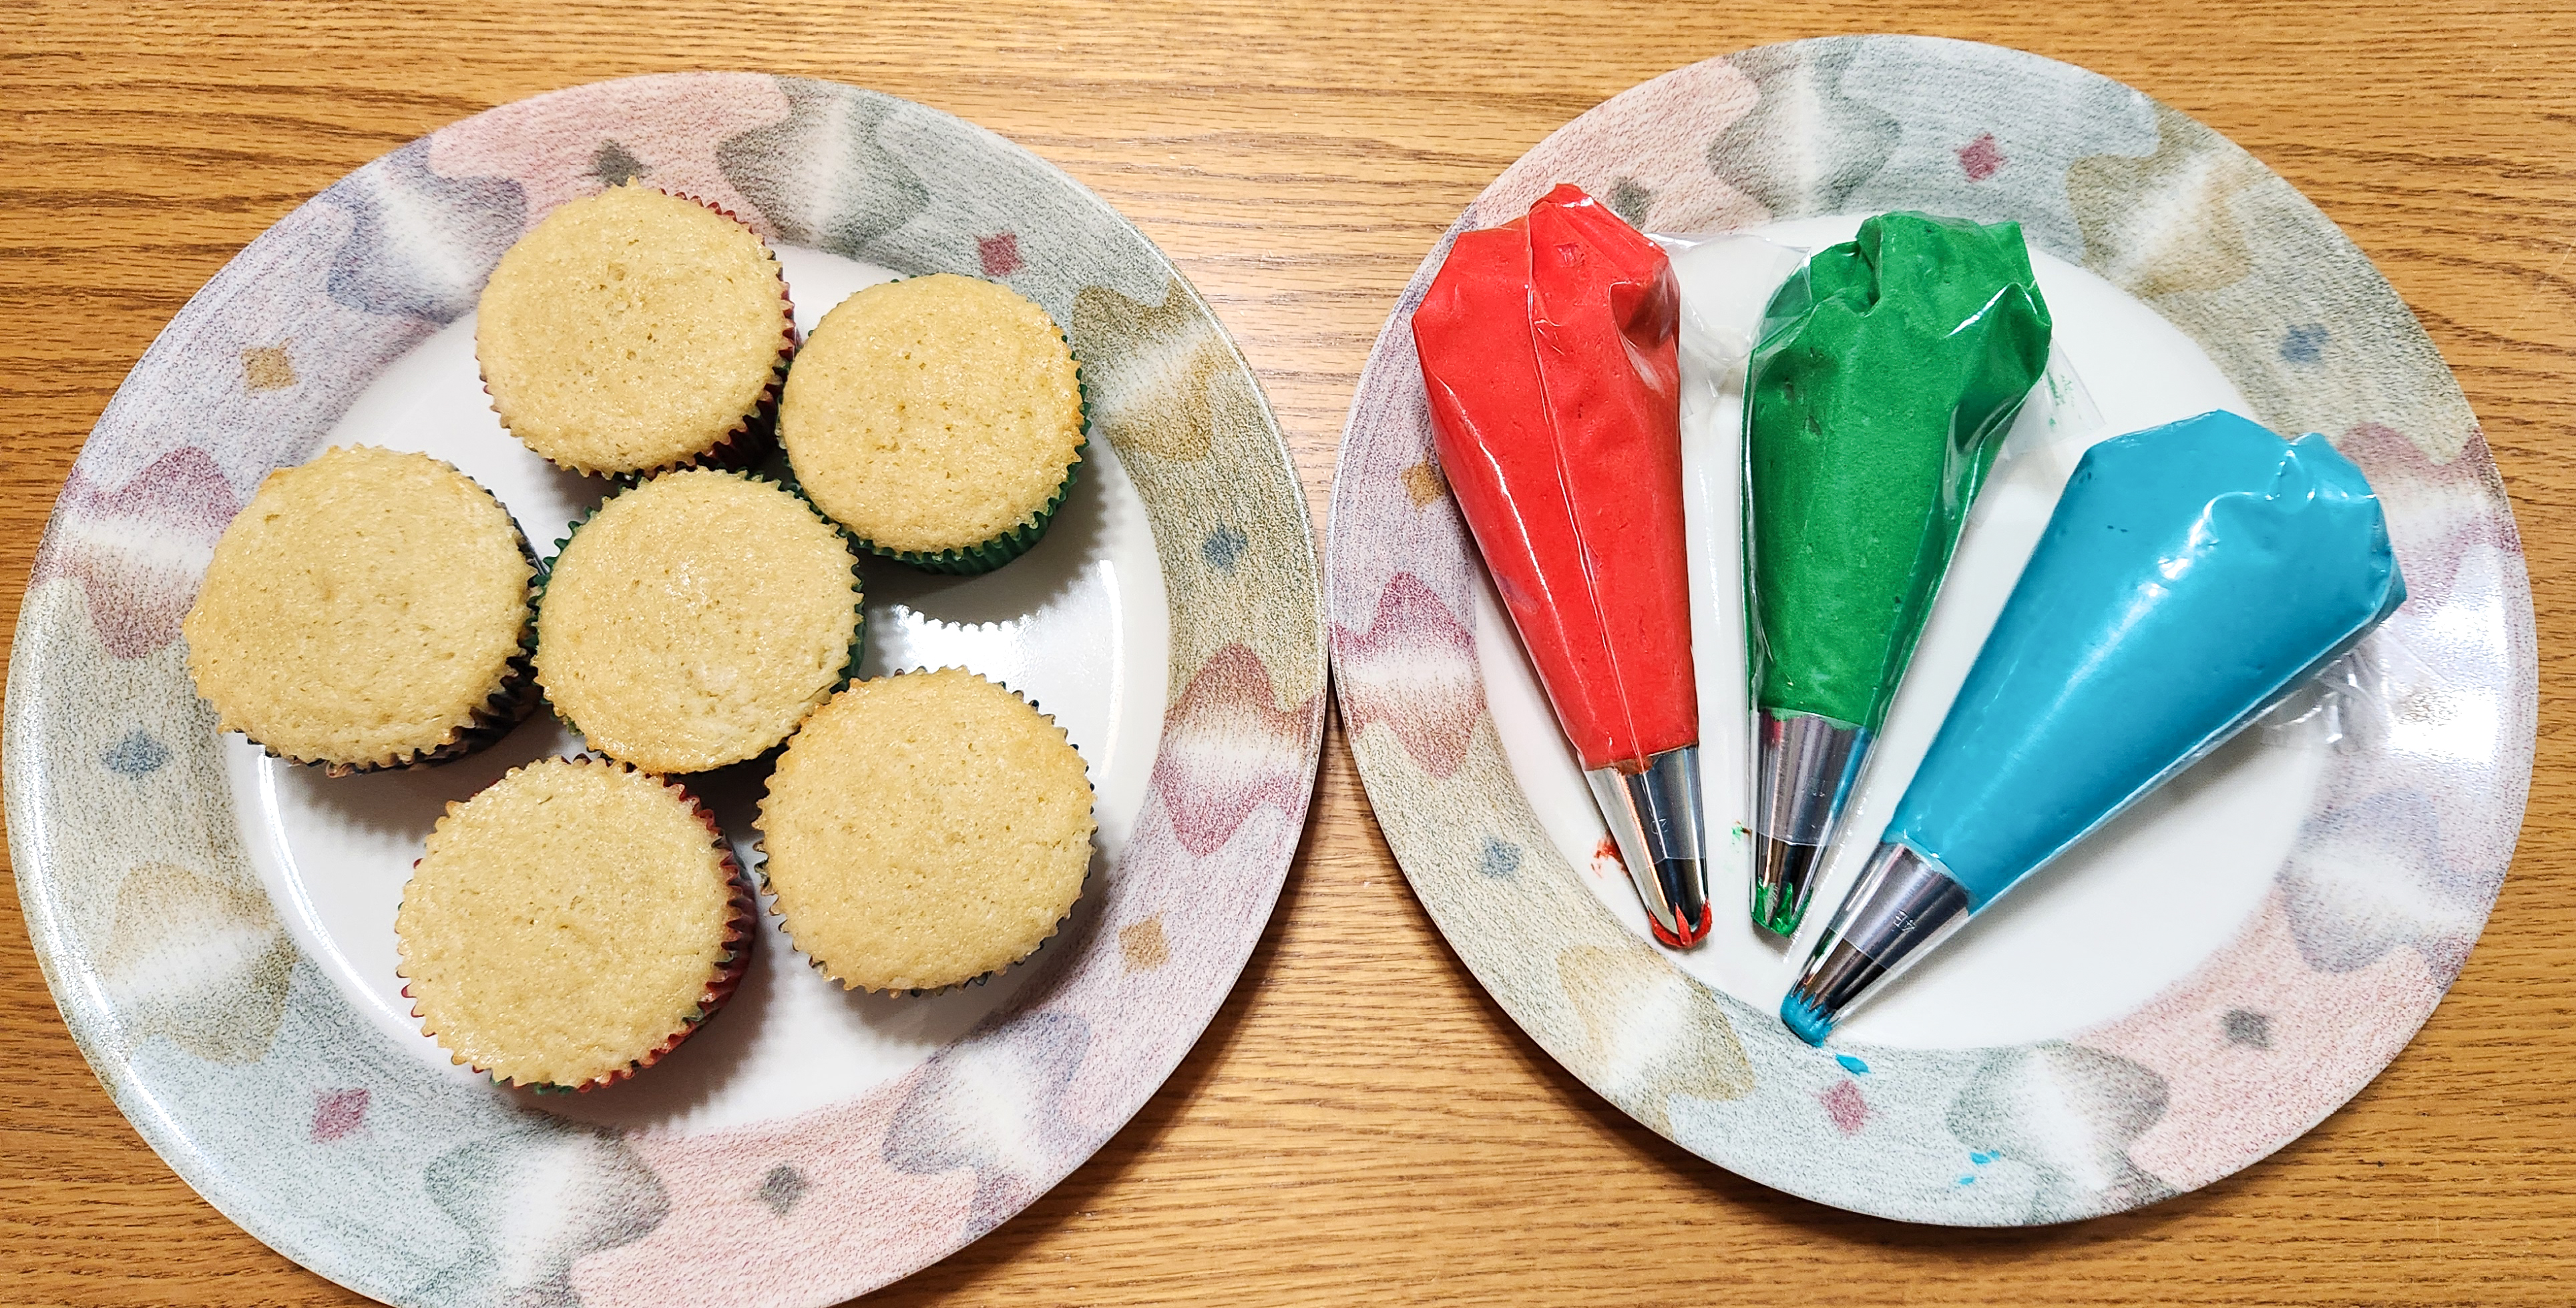
The recipes I used made 18 cupcakes and 12 brownie bites. Each of these buttercream recipes will give you enough frosting or shapes to cover them.
Make your cupcakes or brownies and allow them to cool.
On to how to top cupcakes or brownie bites with adorable and beautiful shapes & patterns!

Here are the 3 buttercream recipes, each with a different consistency and purpose. Frosting, making shapes, or making rolled out disks of icing cut out with cookie cutters. I highly recommend using high-quality ingredients. NOTE: I’ve made these with all generic ingredients to save money and honestly the flavor was just not the same. I’m a fan of Land O Lakes butter for its consistency, and for buttercreams I can’t recommend C&H powdered sugar highly enough. Its taste and consistency is superior and creates fabulous frostings. I don’t do affiliate links or have any sponsors. That’s just my personal opinion. 😊
TIP! Make the shapes or patterned circles BEFORE you make the fluffy frosting for cupcakes. You want that frosting to go on fresh and then set the buttercream shapes or circles on top while the frosting is still soft. If you wait until later you may crack the dry top of the frosting, messing up the pretty swirls!
Susie’s Buttercream for Cookie Press Shapes
½ cup butter, softened to room temperature but not melty or overly mushy
4 cups powdered sugar
2 teaspoons vanilla extract
2 tablespoons heavy cream
This buttercream is very thick but also super smooth. Start by creaming the butter with an electric mixer. Add the vanilla, heavy cream, and one cup of the powdered sugar. Slowly start mixing, and add the rest of the sugar a cup at a time. After each addition of sugar is combined enough to not fly out of the bowl, mix it at higher speed. As you add sugar, it is going to get very very stiff. Stop to scrape your bowl often, then let the mixer get everything combined well. Remove the icing from the mixer and knead it by hand on your counter or a silicone mat. As you work it it should become smoother and easier to handle. It turns into a medium-stiff buttercream “clay” that you can mold in your hands. It’s quite fun!
If it is so stiff you can’t even knead it, add vanilla or heavy cream a little at a time until it feels truly smooth and workable. If it is still sticky and not clay-like, add a little powdered sugar.
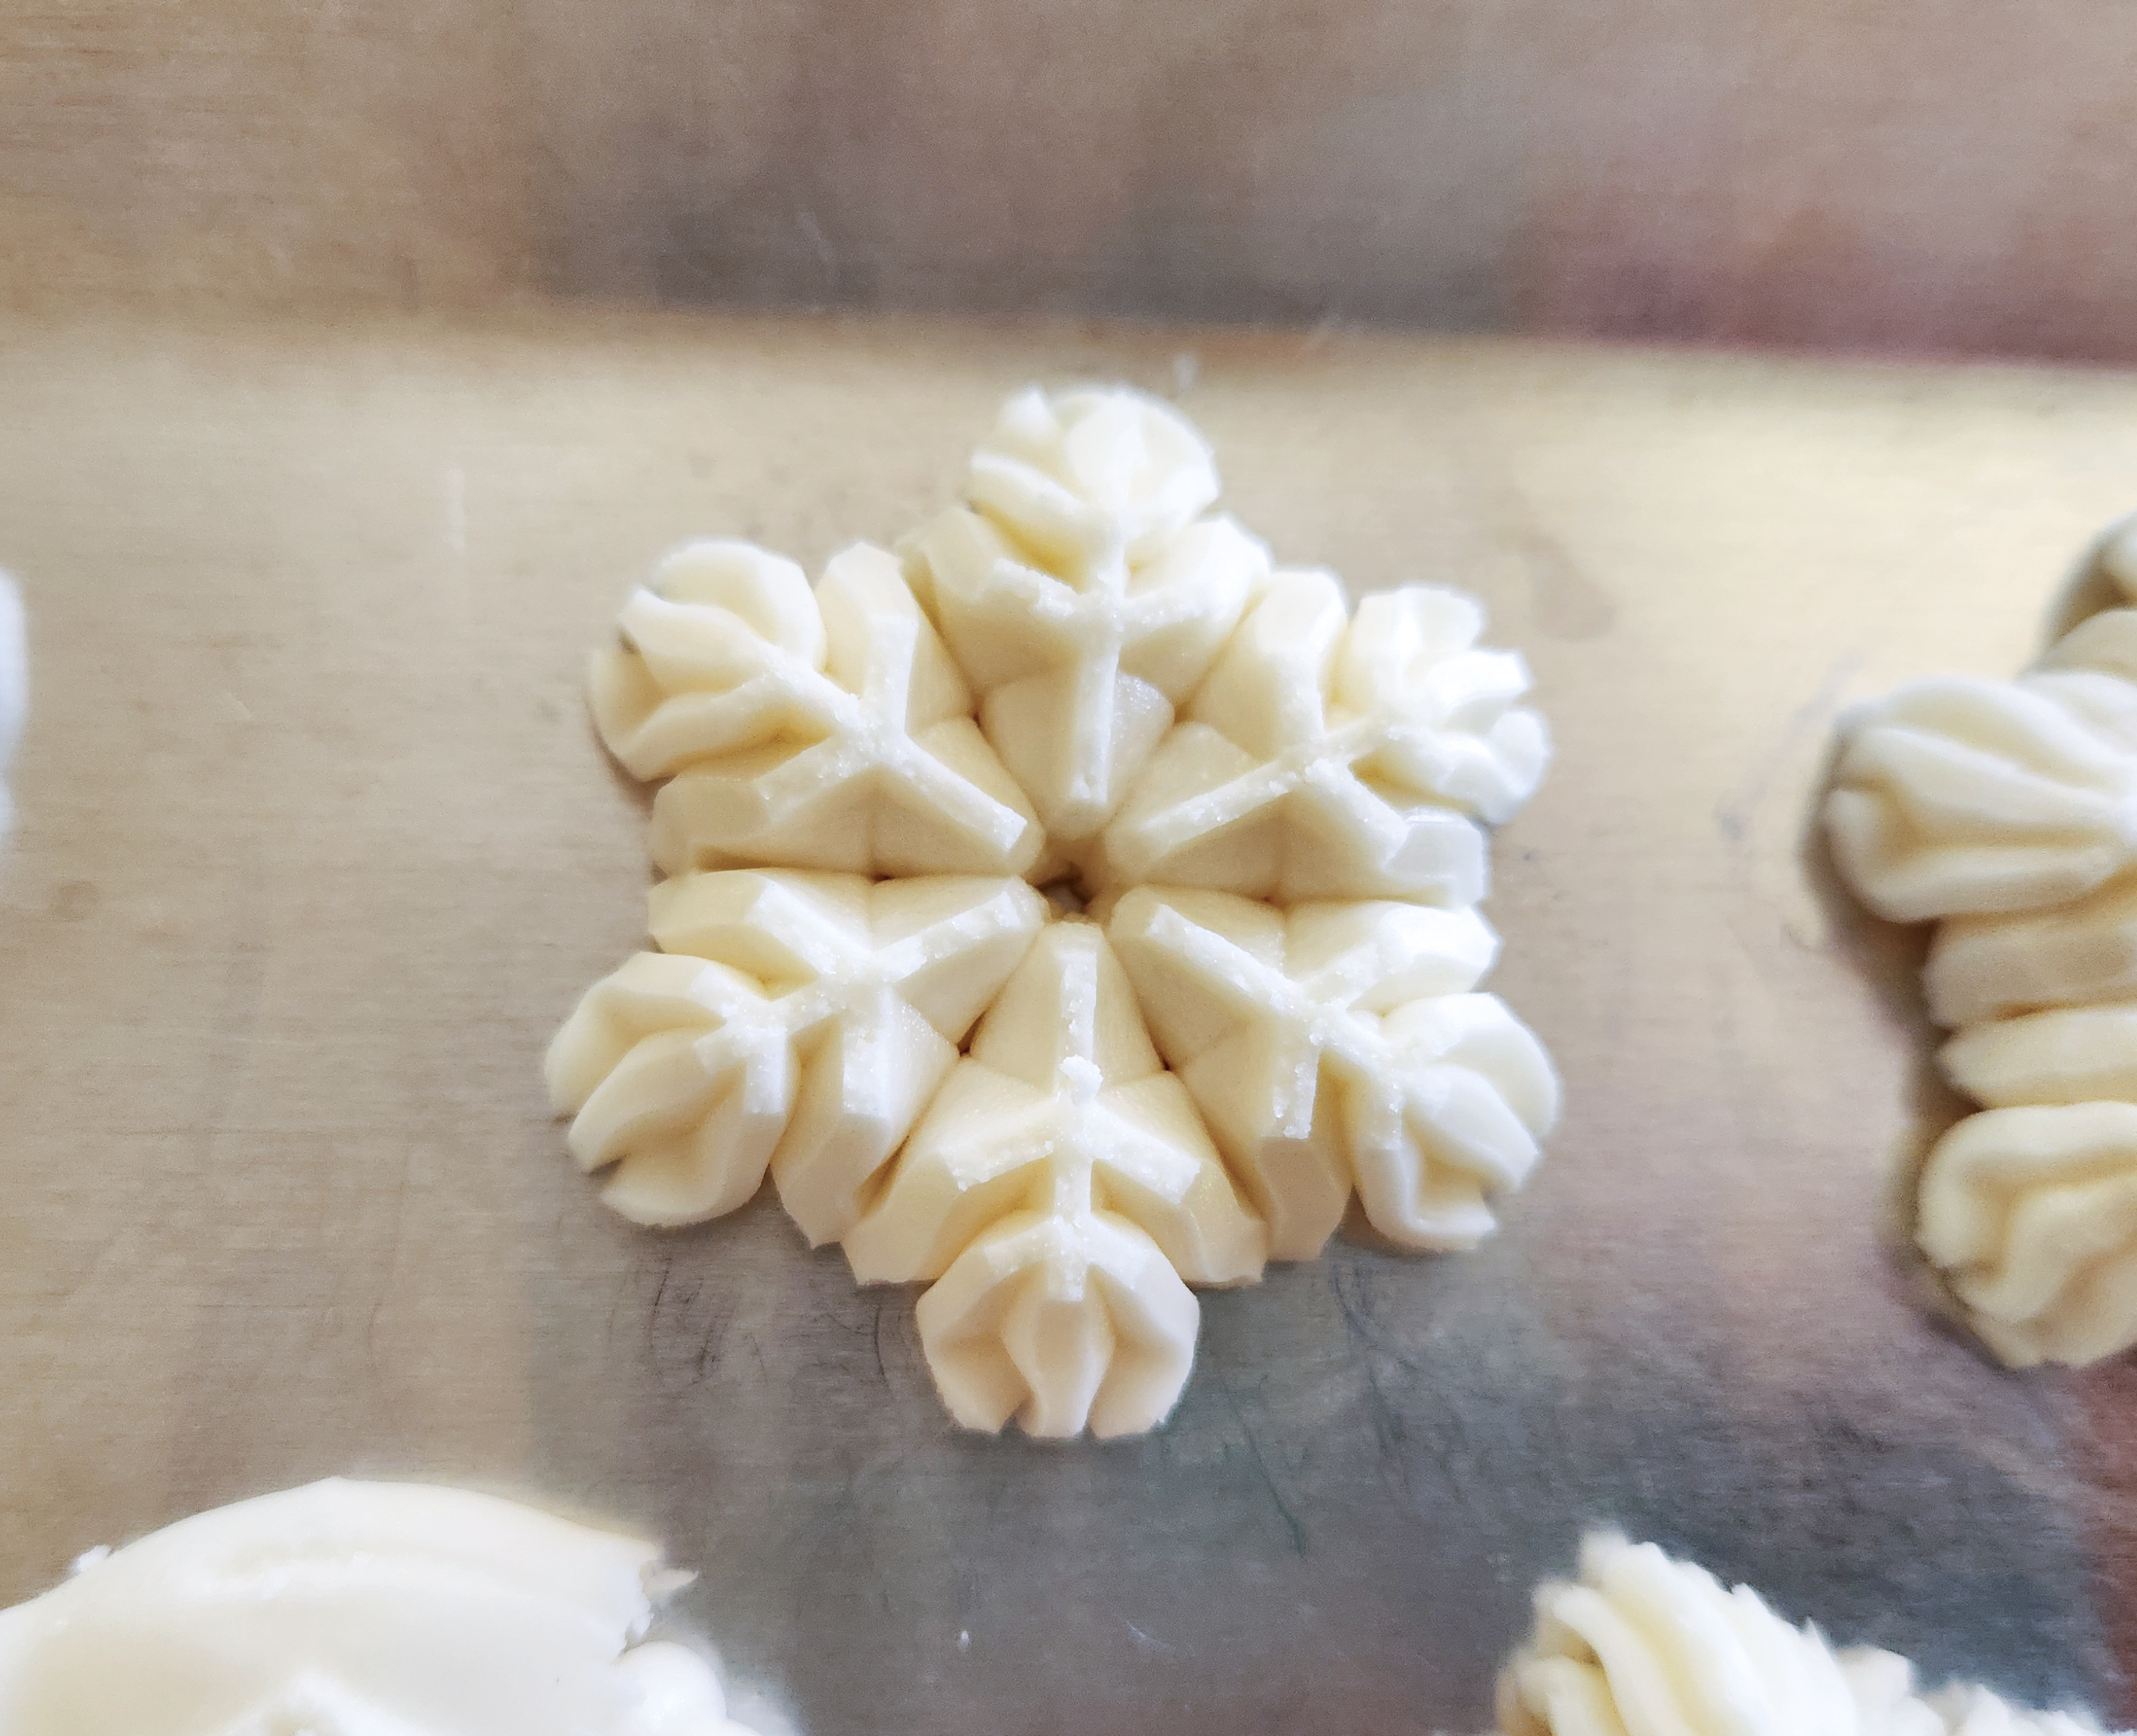
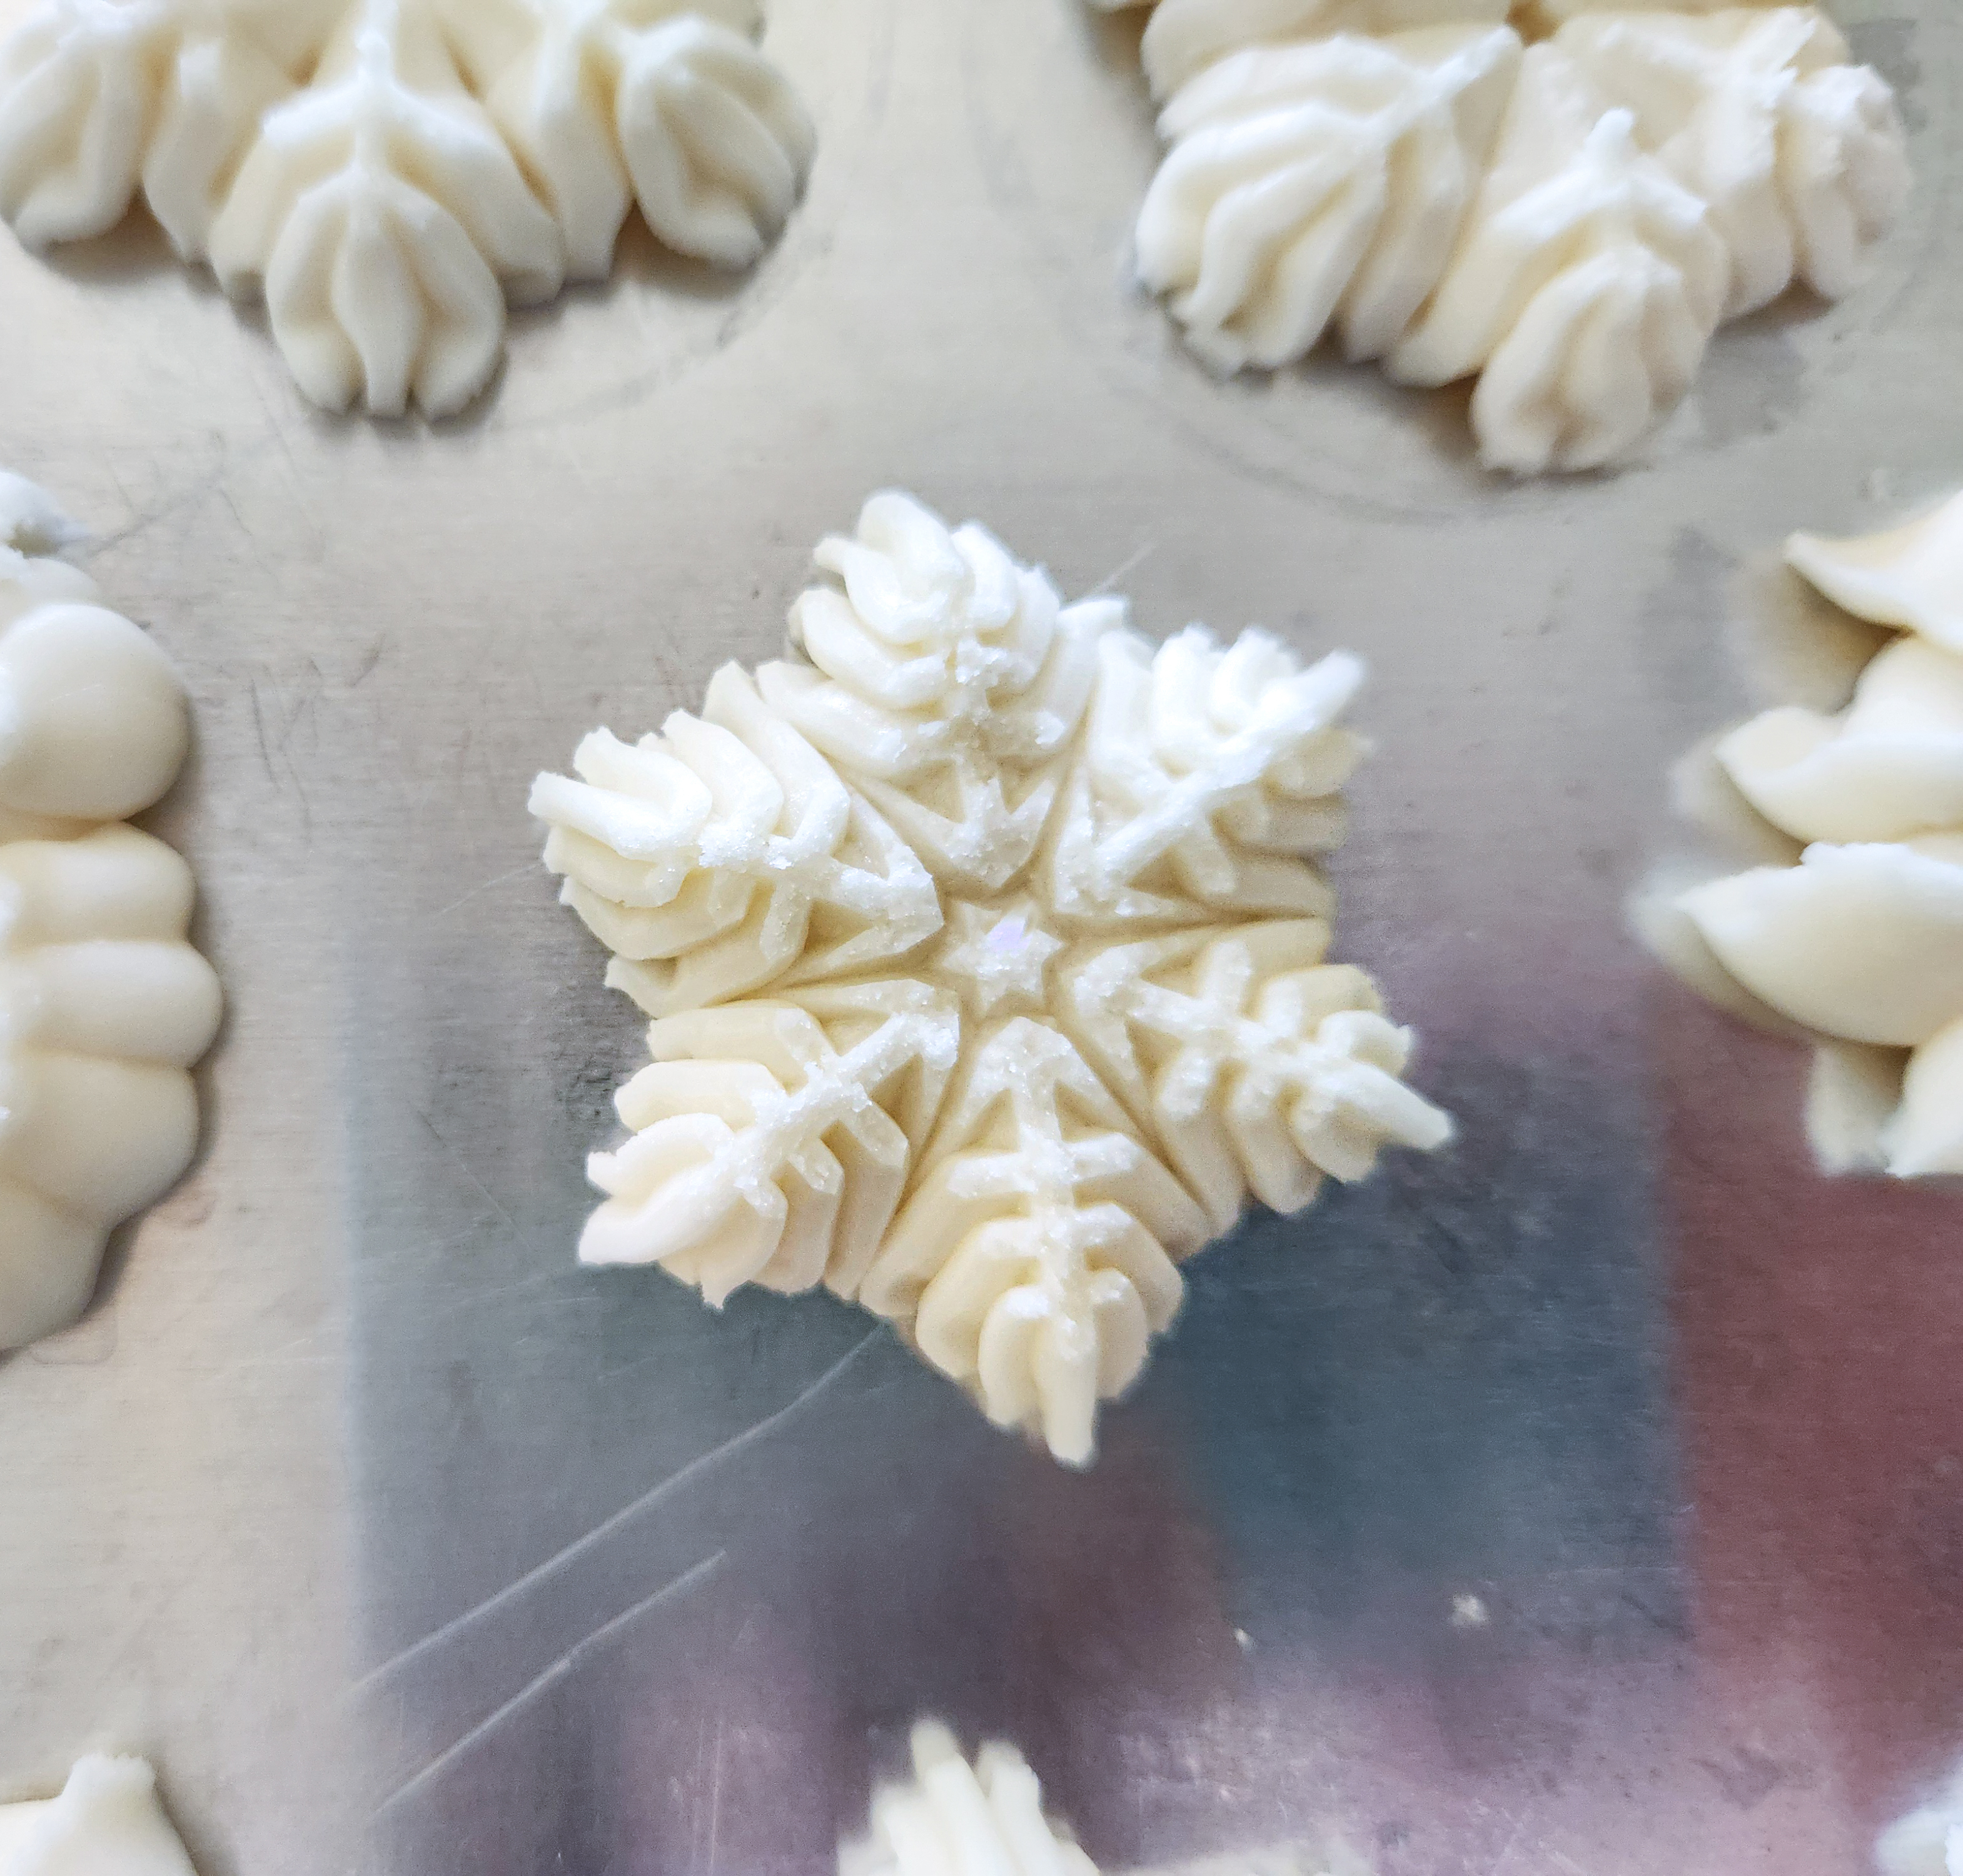
When the texture is soft enough to knead and smooth, roll some up and place it in your cookie press barrel. Put your disk in the bottom ring and start pressing onto a CHILLED cookie sheet. This will stick better to a chilled sheet. Press SLOWLY! This is NOT cookie dough! It will press shapes more slowly and you will throw more back in the bowl than usual. Once you get the hang of it, it goes quickly. Sometimes it takes a few shapes to come out poorly before pressure is set right in the press. Just toss the bad shapes to be re-pressed. Once they start forming right they’re so worth it! SO be patient, expect mistakes, and keep it fun.
TIP! Make more than you need because you’re going to freeze these and I assure you, a couple of them will break when you take them off the cookie sheet. So make extras. They’ll make fine little snacks LOL.


Place these in the freezer for at least 15 minutes. You can leave them longer or even overnight if you want to do this ahead of time before making the cupcakes.
When you take them out let the pan warm up for at least 15 minutes before you try to remove them. Use the thinnest spatula you have and keep it perfectly flat as you slide it under the shapes. If needed, you can make it slide a little easier by dusting the spatula with powdered sugar. And if you break a shape? Lucky you! It’s yours to eat. Yum. Count on breaking a few. It happens. That’s why you made extras! 😉
Place the shapes on top of brownie bites or pre-frosted cupcakes. You can wet the bottoms of the shapes to help them stick to brownies. Get a few drops of water on your fingertip and spread it around. It softens the buttercream and makes it stickier.
For the cupcakes I made thick big fancy swirls of frosting for the ones that would hold these shapes.
Here’s a few cute woodland friends I made. I added 3/16″ candy eyes (also called icing eyes) to Santa and some of the animals. You can find those tiny eyes on places like Etsy! Or you could add little black icing dots or round black sprinkles.

Susie’s Buttercream for Patterning with an Embossed Rolling Pin
½ cup butter, softened to room temperature but not melty or overly mushy
4 cups powdered sugar
2 ½ teaspoons heavy cream
1 ½ teaspoons vanilla extract
This is almost the same directions as above for the pressable buttercream. Except that it’s even stiffer!
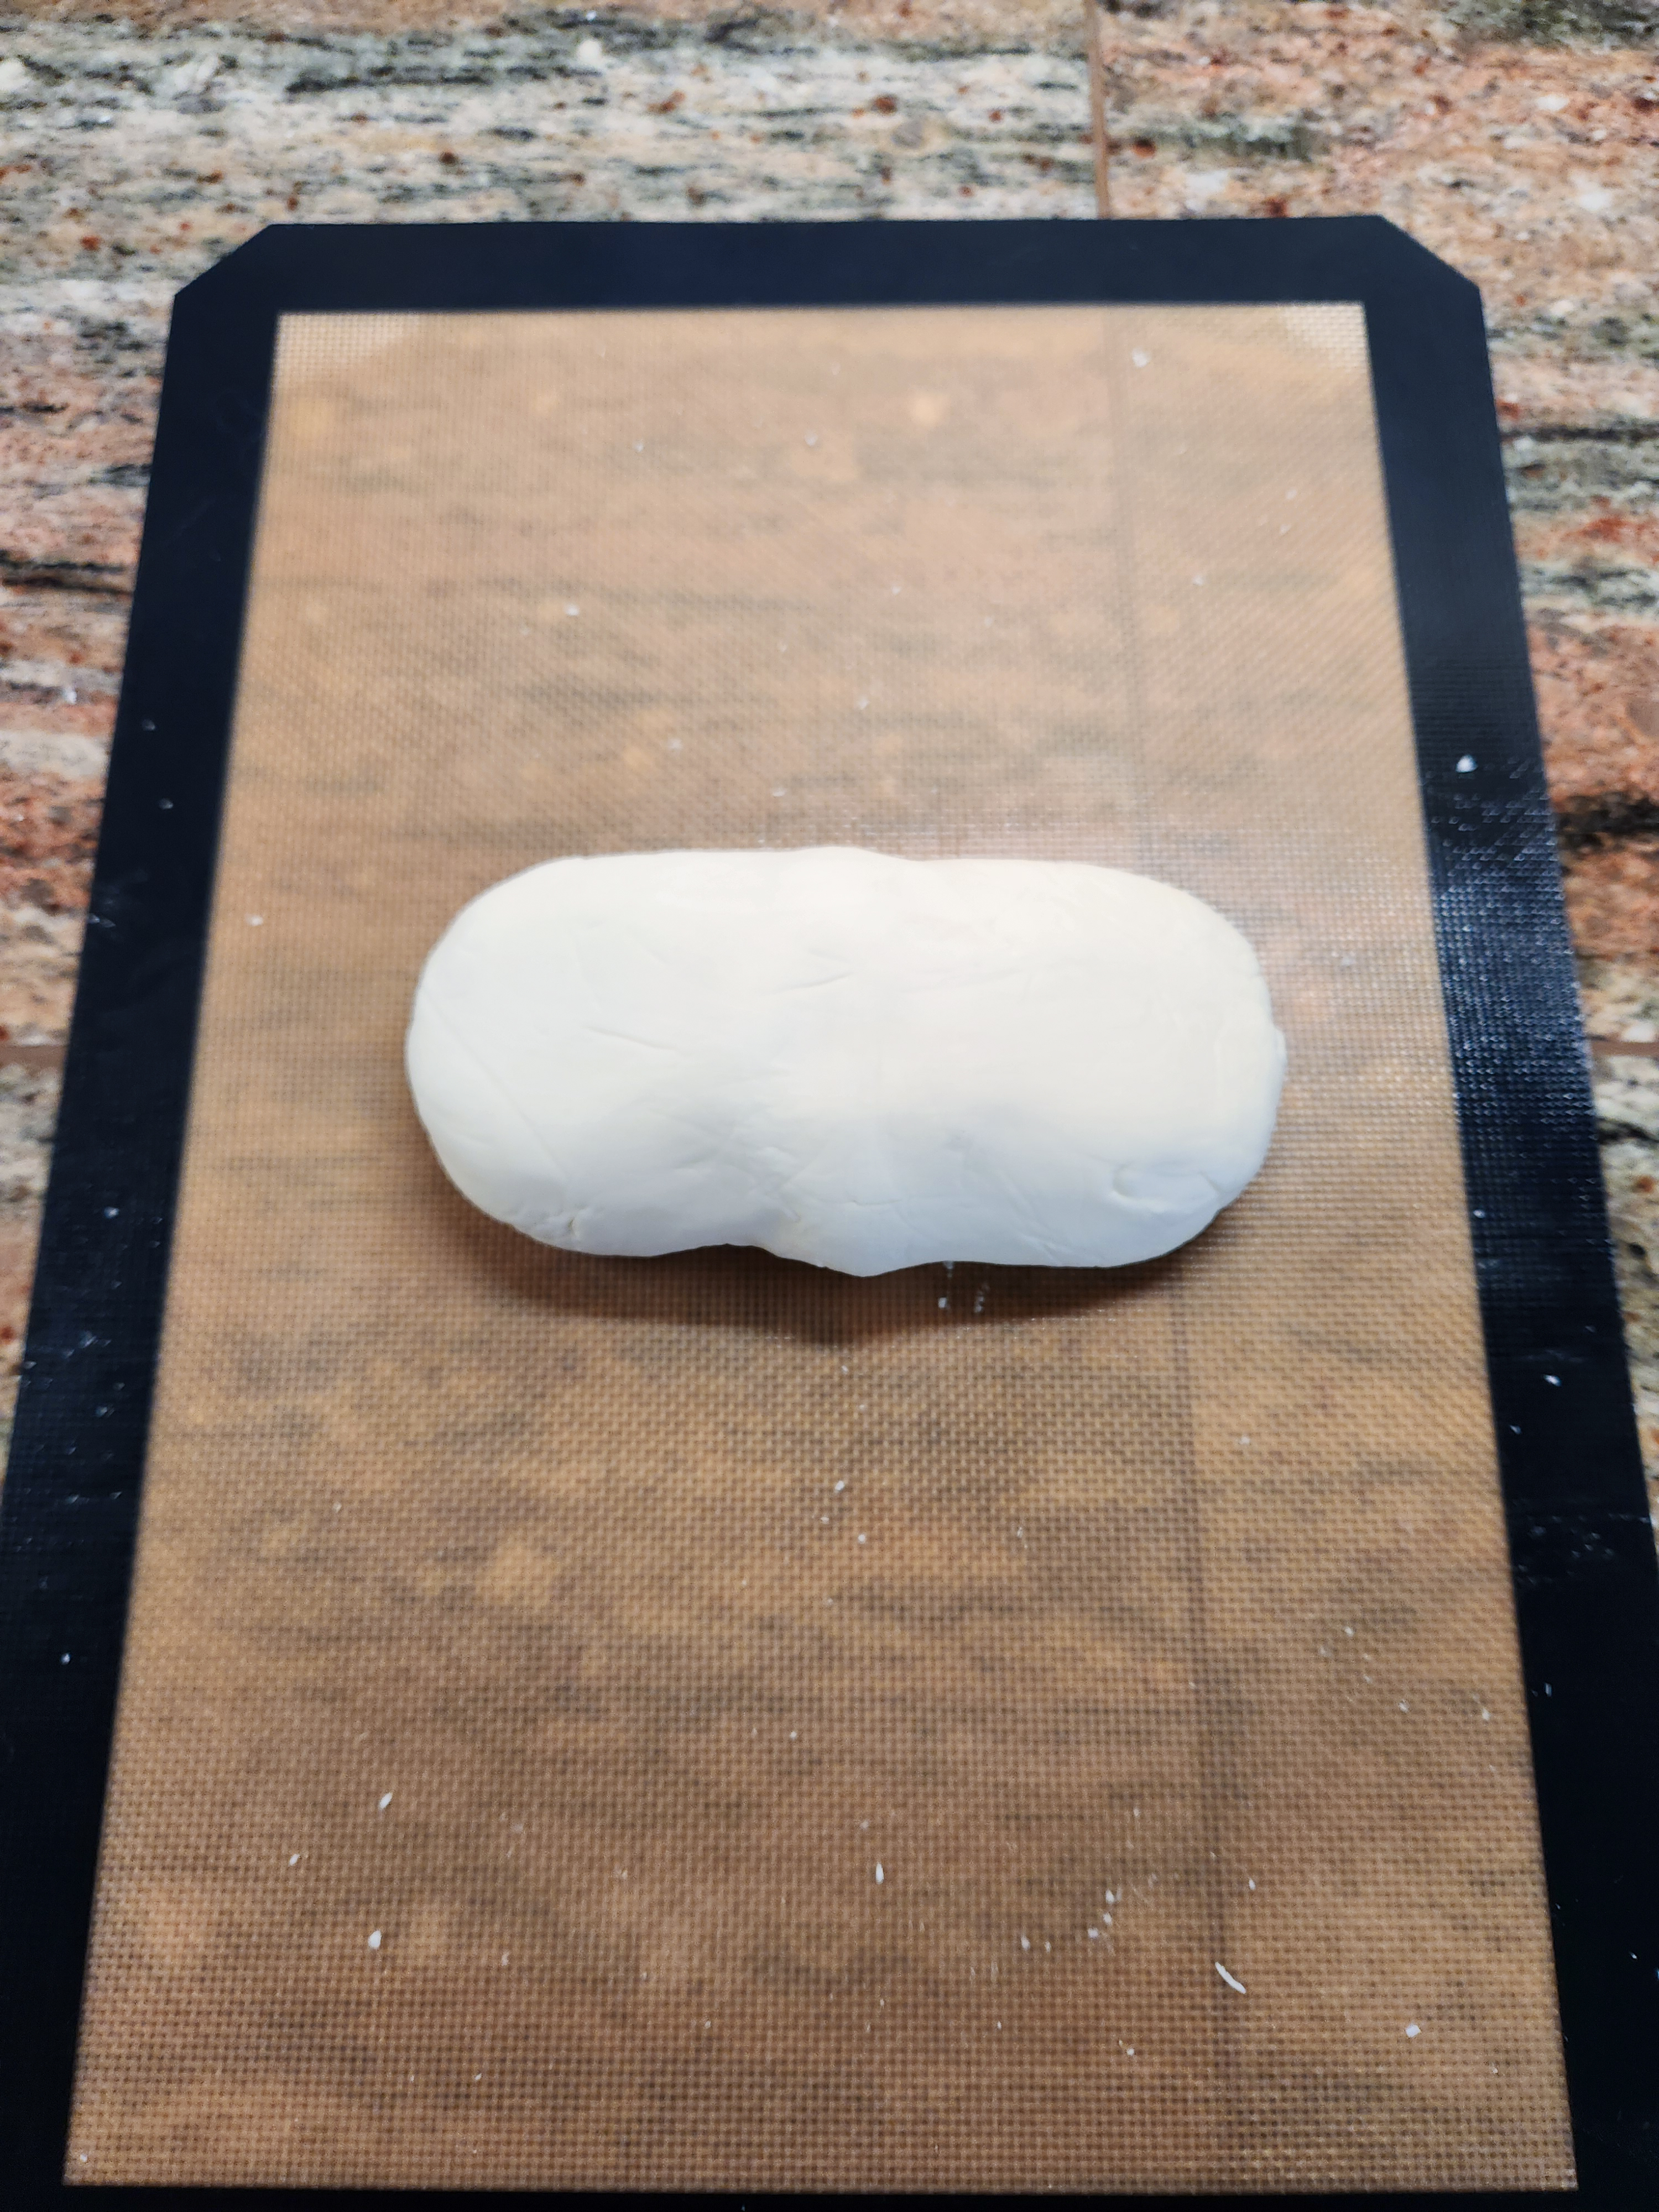
This buttercream is very thick but also super smooth. Start by creaming the butter with an electric mixer. Add the vanilla, heavy cream, and one cup of the powdered sugar. Slowly start mixing, and add the rest of the sugar a cup at a time. After each addition of sugar is combined enough to not fly out of the bowl, mix it at higher speed. As you add sugar, it is going to get very very stiff. Stop to scrape your bowl often, then let the mixer get everything combined well. Remove the icing from the mixer and knead it by hand on your counter or a silicone mat. As you work it it should become smoother and easier to handle. It turns into a stiff buttercream “clay” that you can mold in your hands. Again, it’s quite fun! This version is a much stiffer “clay” though. A little harder to knead, but so worth it!
If it is so stiff you can’t even knead it, add vanilla or heavy cream a little but at a time until it feels truly smooth and workable.
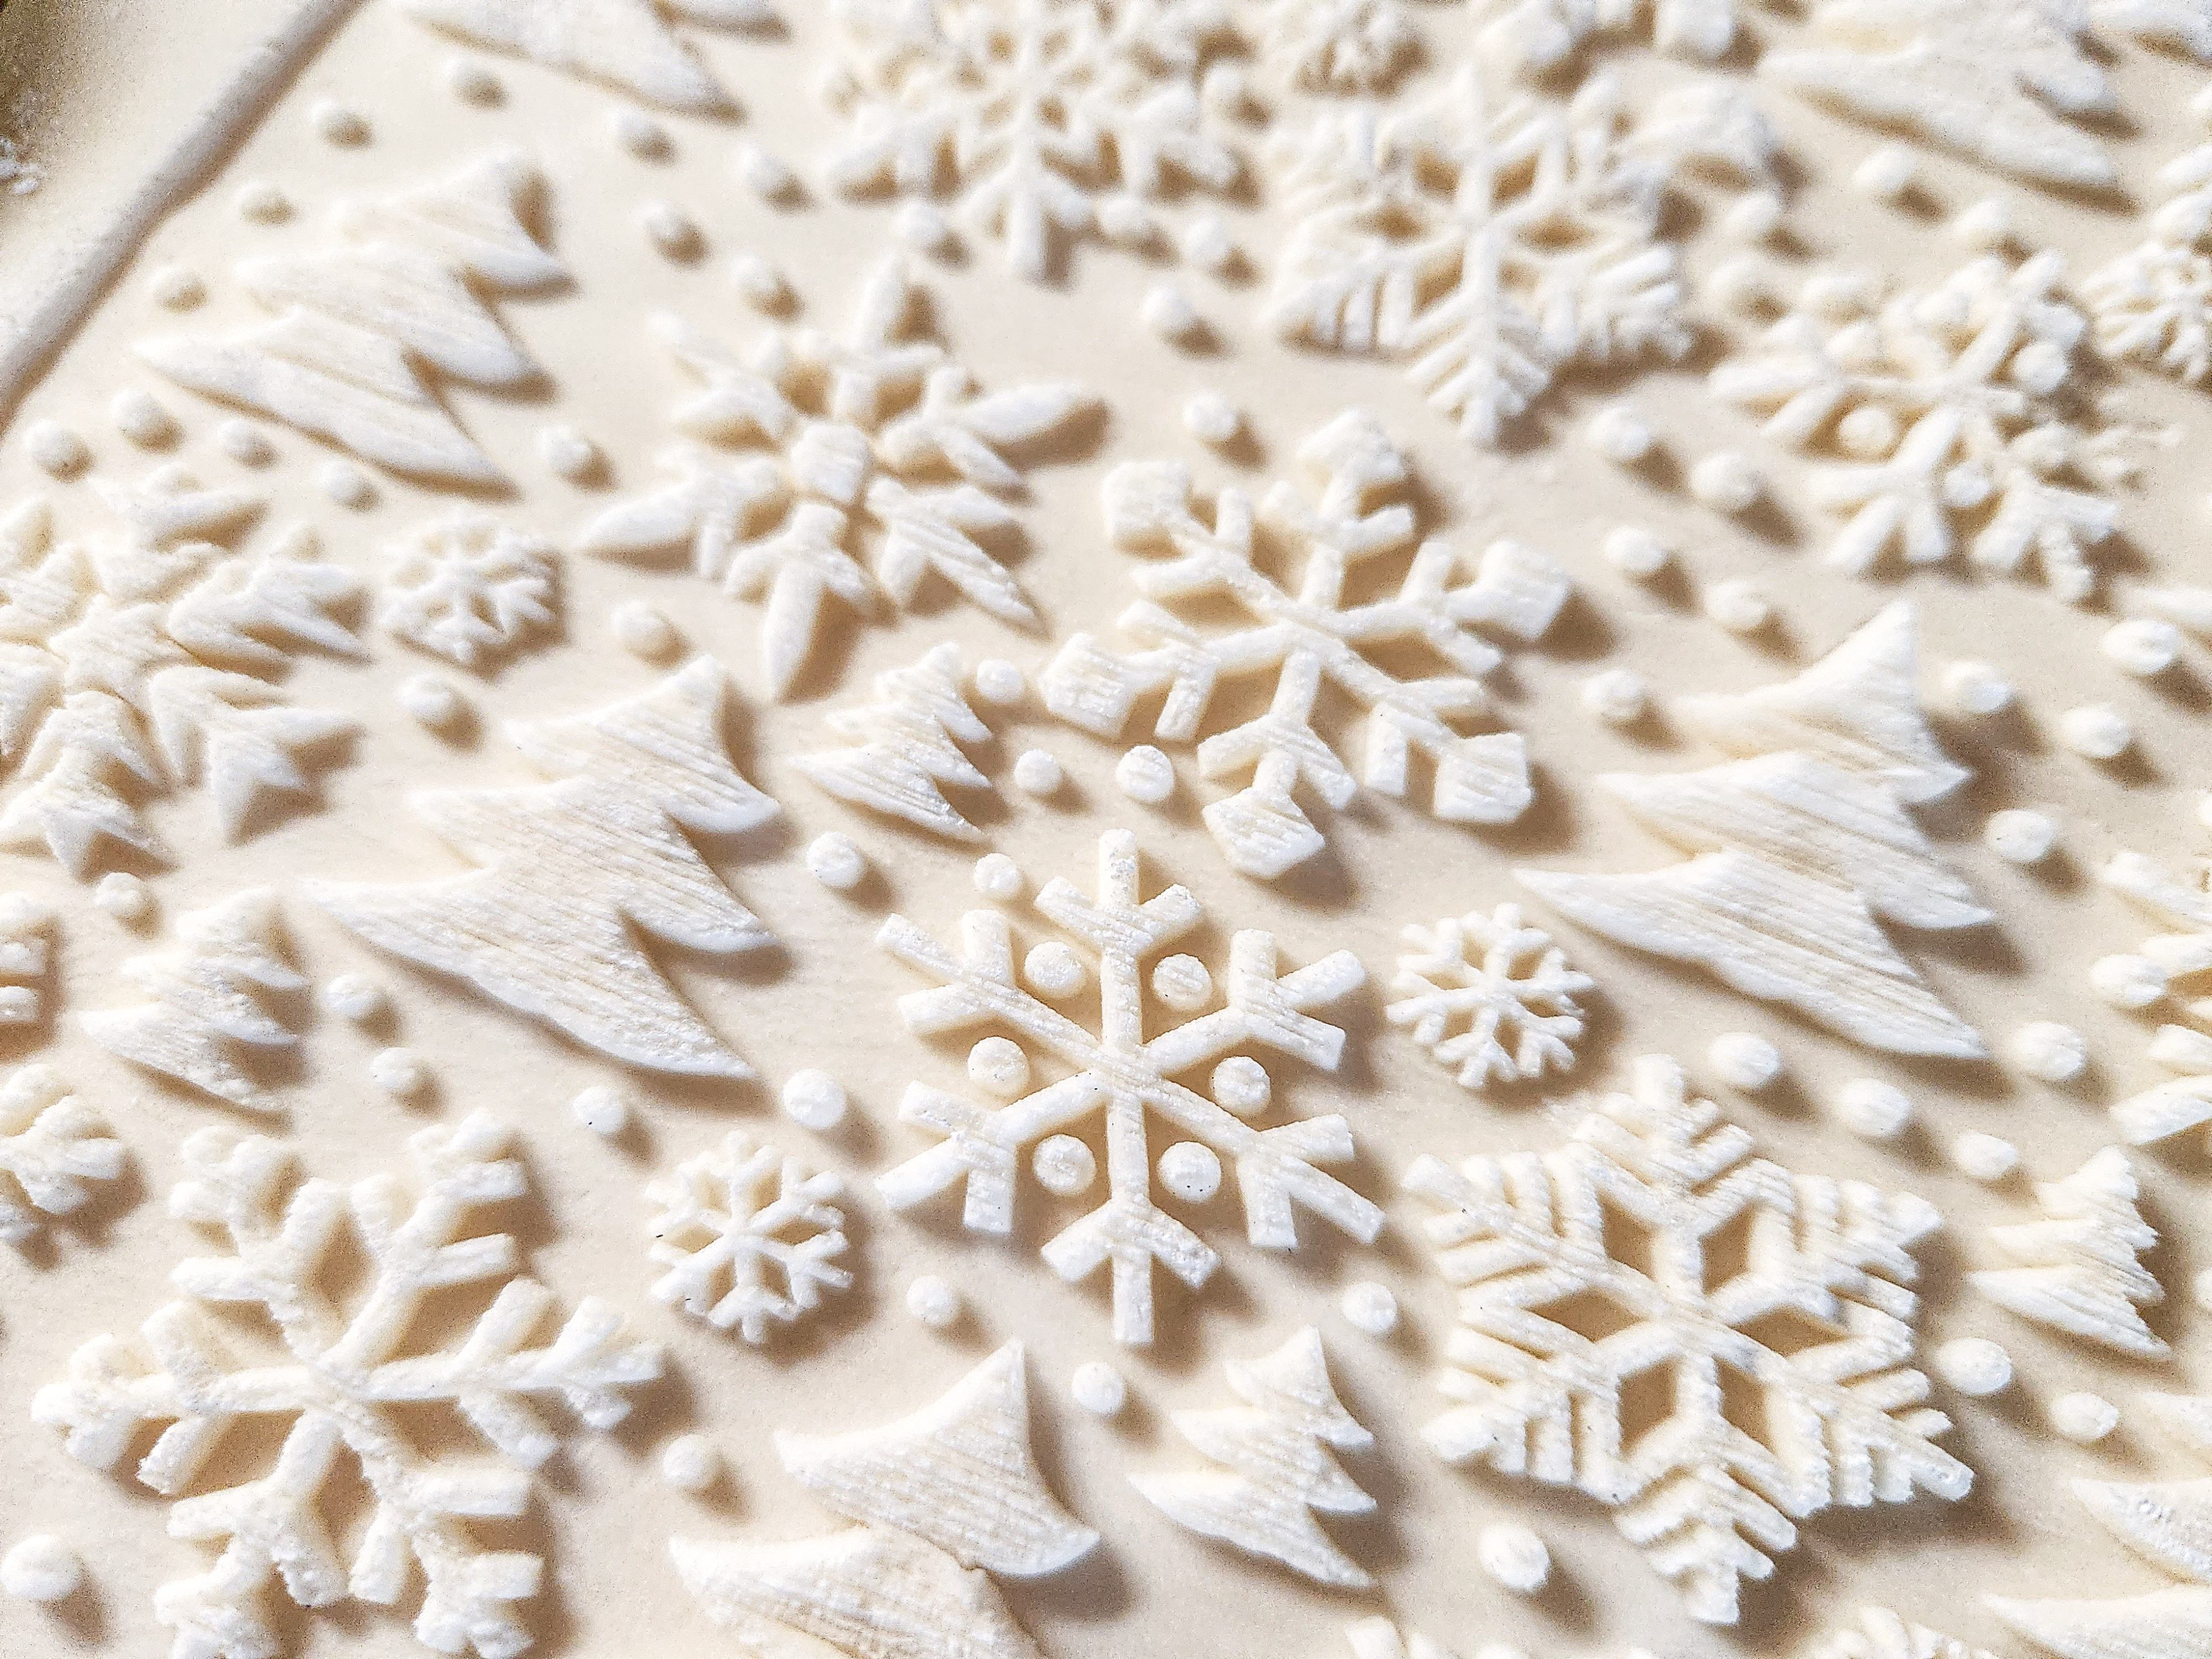
You can roll this out on a countertop, flat cooktop, or silicone mat. Roll a portion a little bigger than your fist into a log the same width as the pattern on the rolling pin. Cover it with waxed paper (plastic wrap will do in a pinch). Roll it out with a regular rolling pin, preferably one with thickness spacing rings. Roll it out 1/4″ thick.
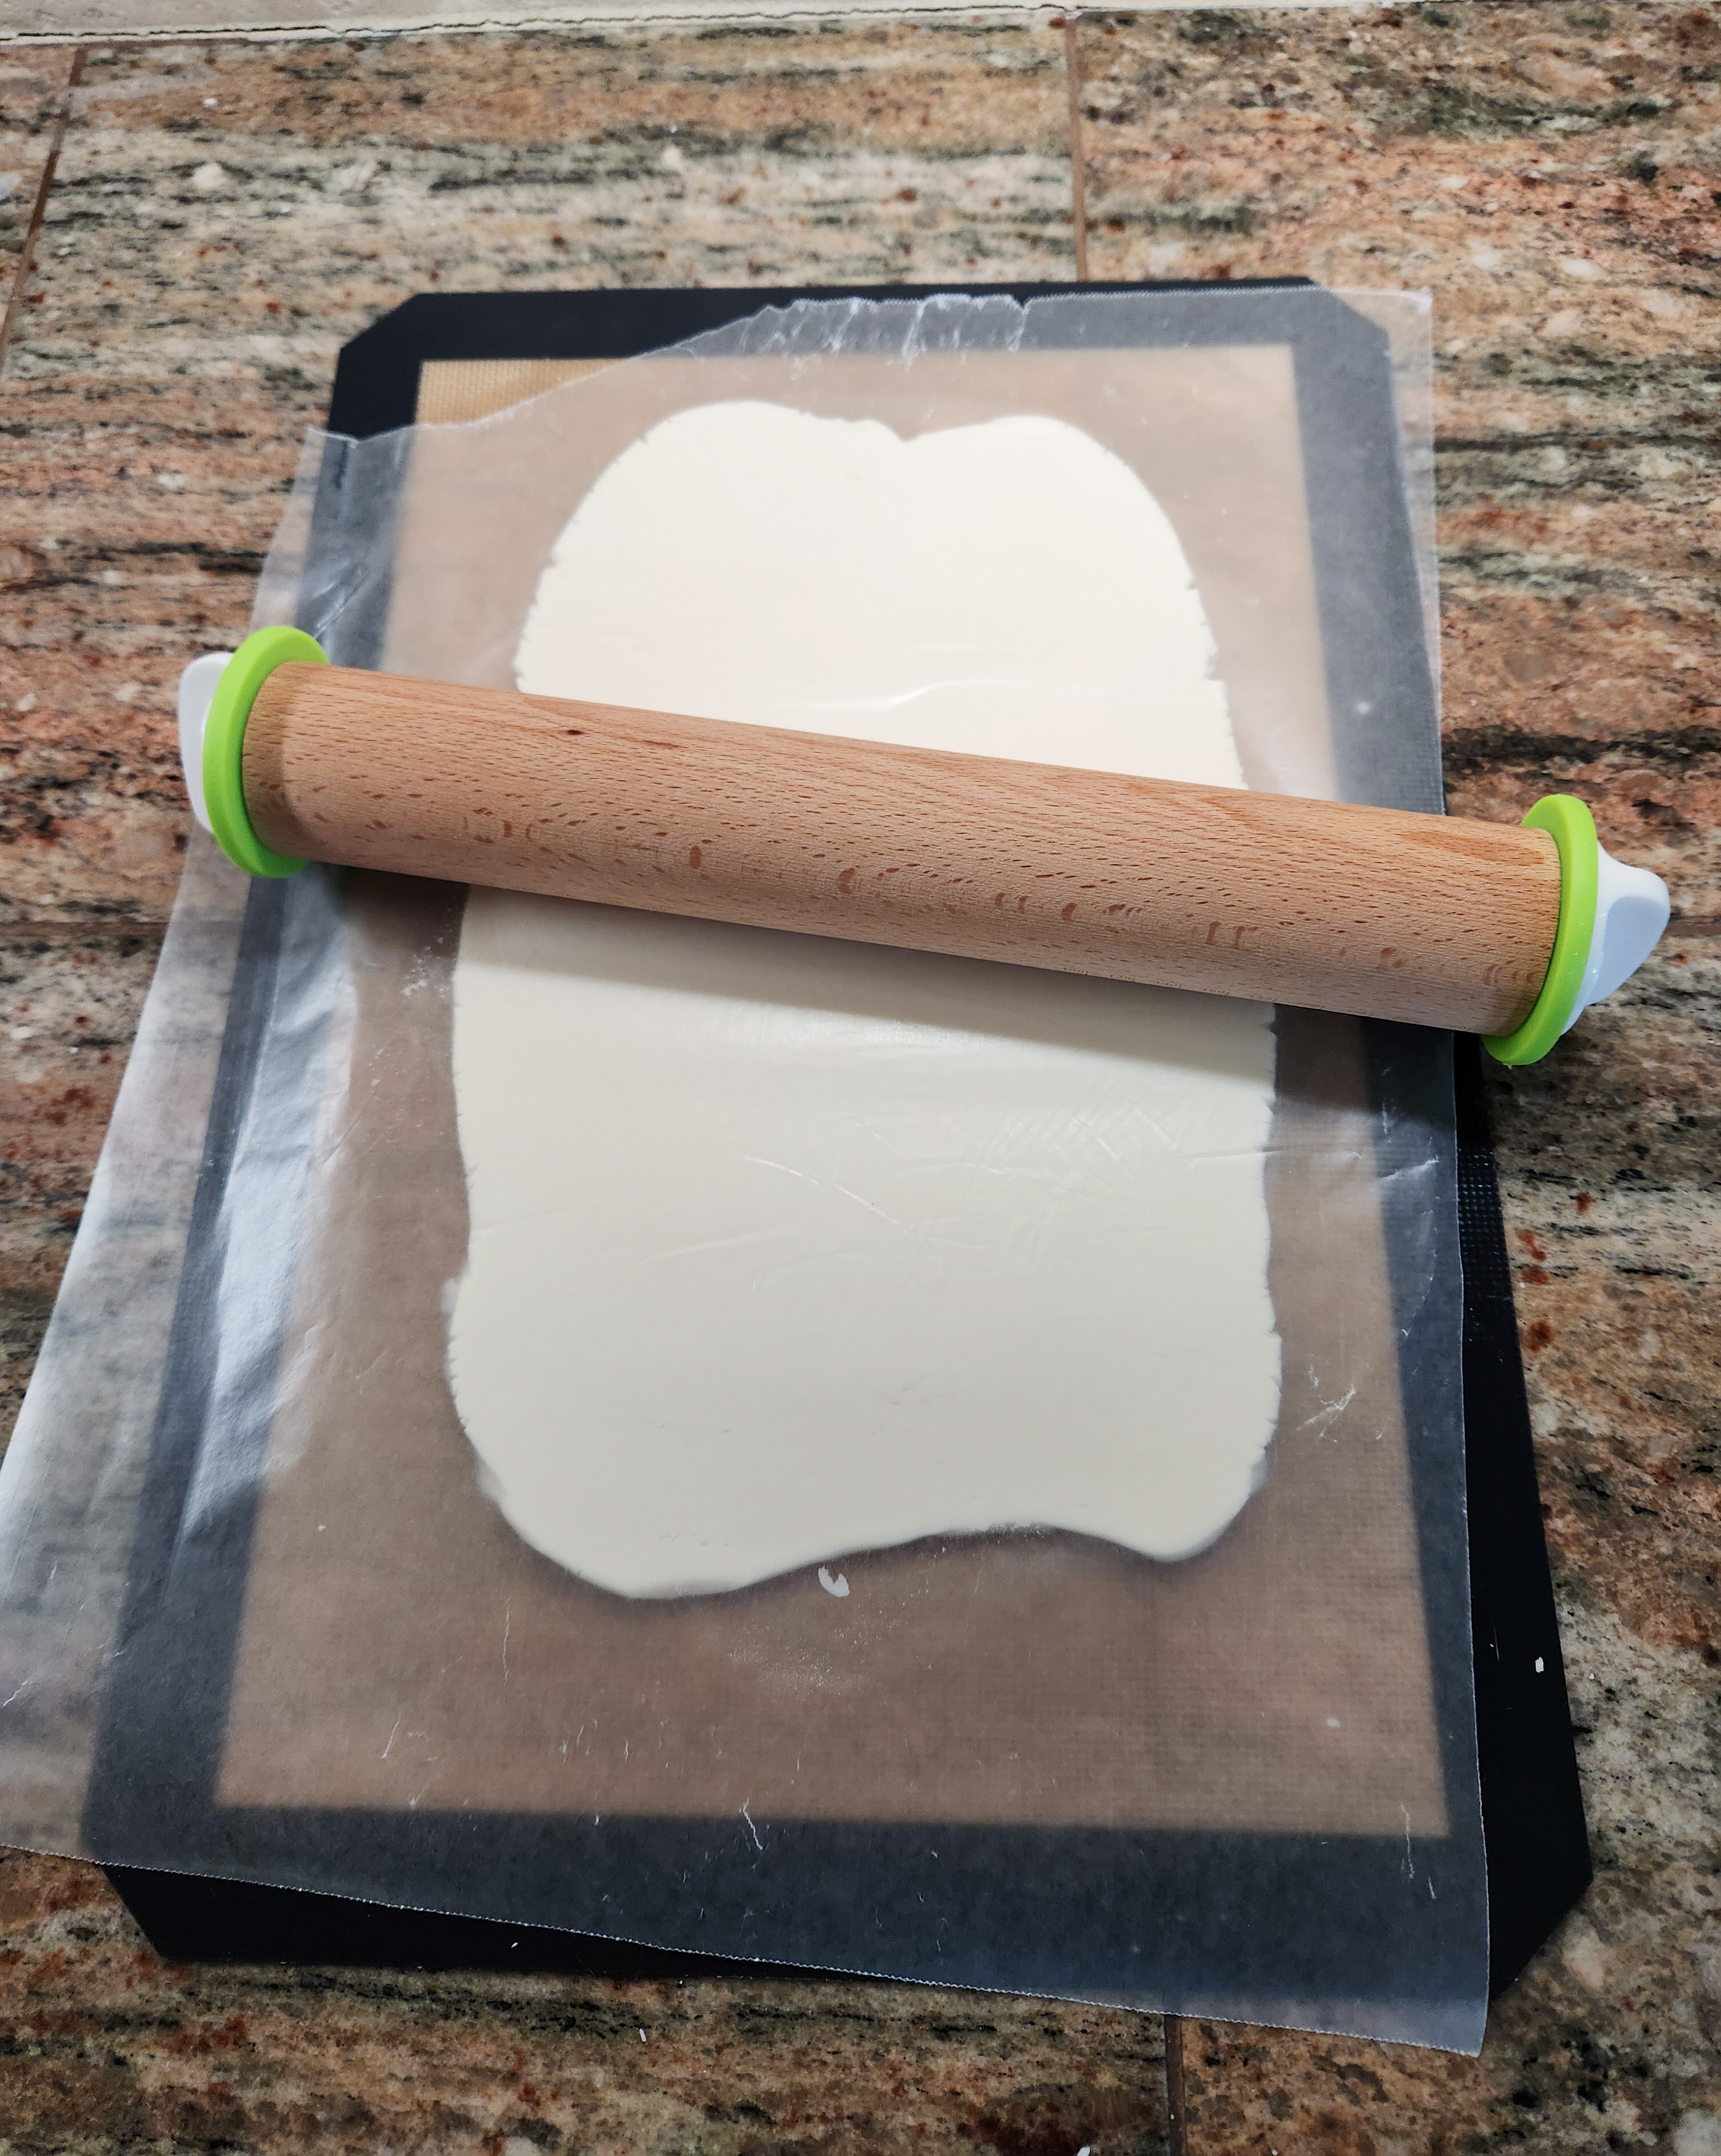
Dust both the surface of the buttercream and the embossed rolling pin with powdered sugar. Sprinkle it onto the buttercream then spread it around with your fingers to very lightly coat the surface. Same with the pin. Sprinkle it on, then rub it around, then tap the pin on your other hand to shake excess off.
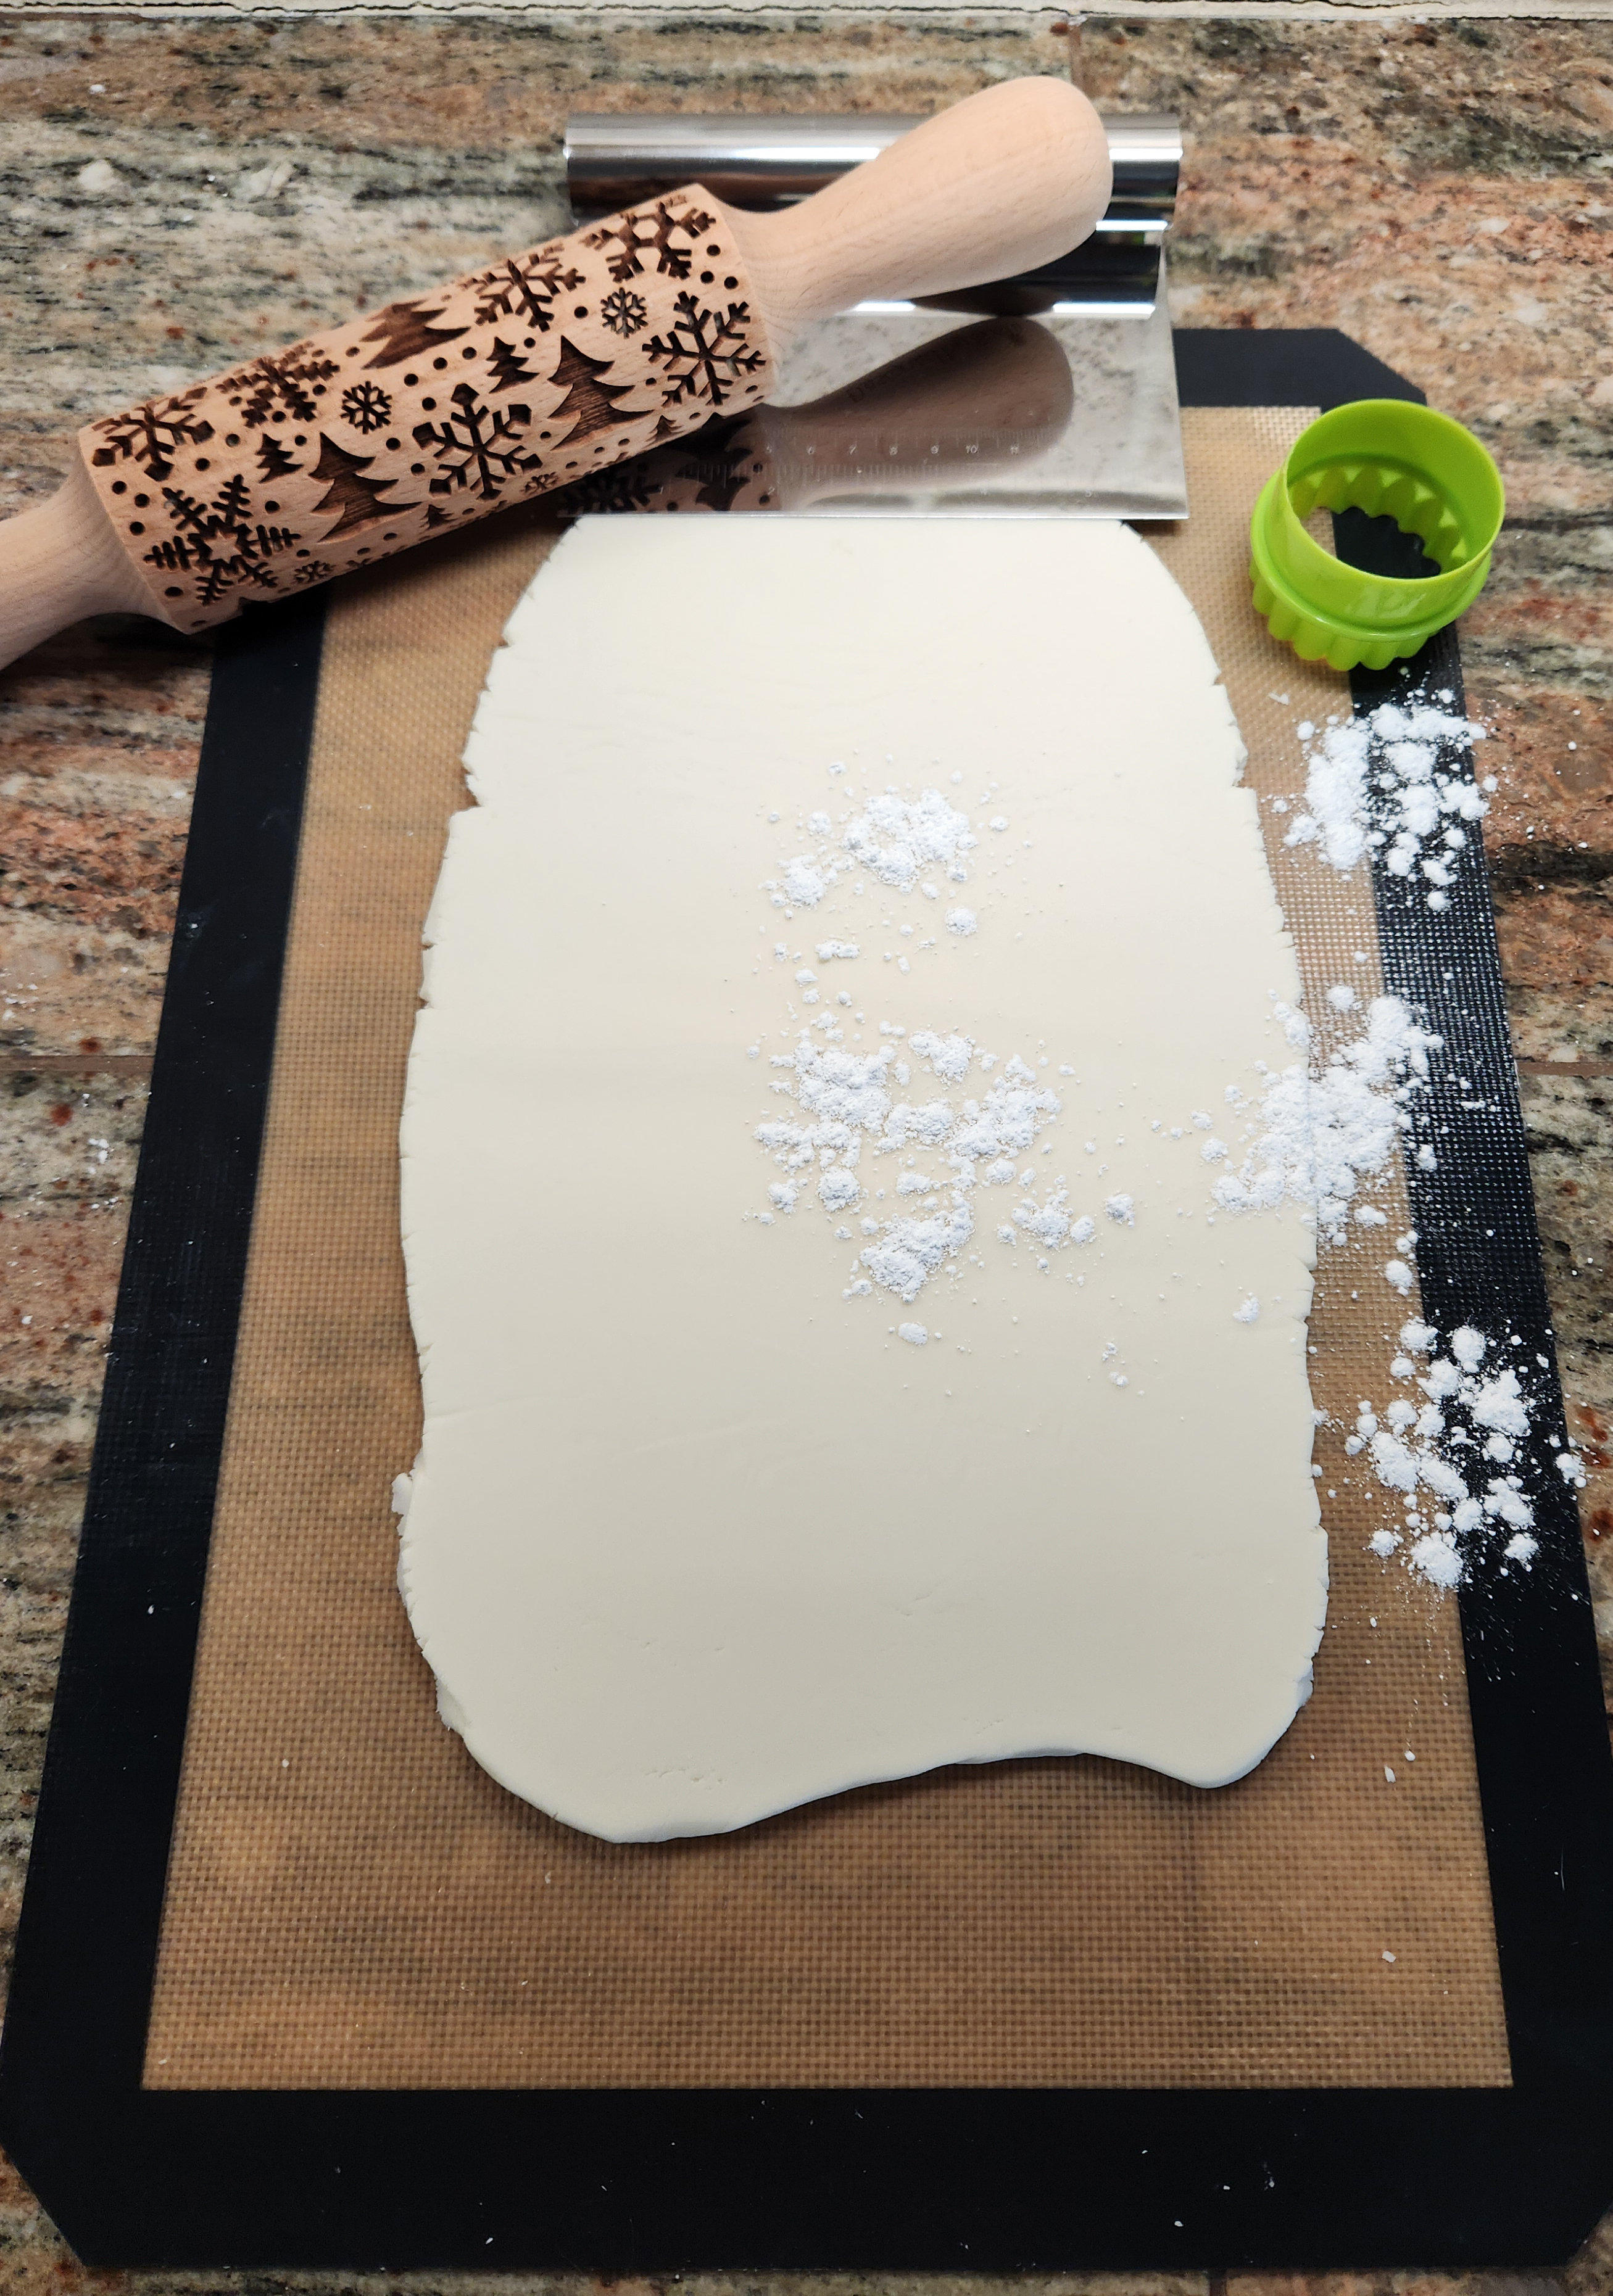

Place a bench scraper or similar object at the far end of your buttercream to hold it down as you roll with the embossed pin. Roll towards you with the embossed pin, pressing down fairly hard. This is much stiffer than my cookie doughs so for this you do need to apply some pressure. Roll slow, steady, and even. The imprints should be raised on the buttercream as thick as the impressions on the pin. If you don’t press hard enough they may come out shallow. No problem! Scoop it all up and roll it out again! It happens to me sometimes, too.
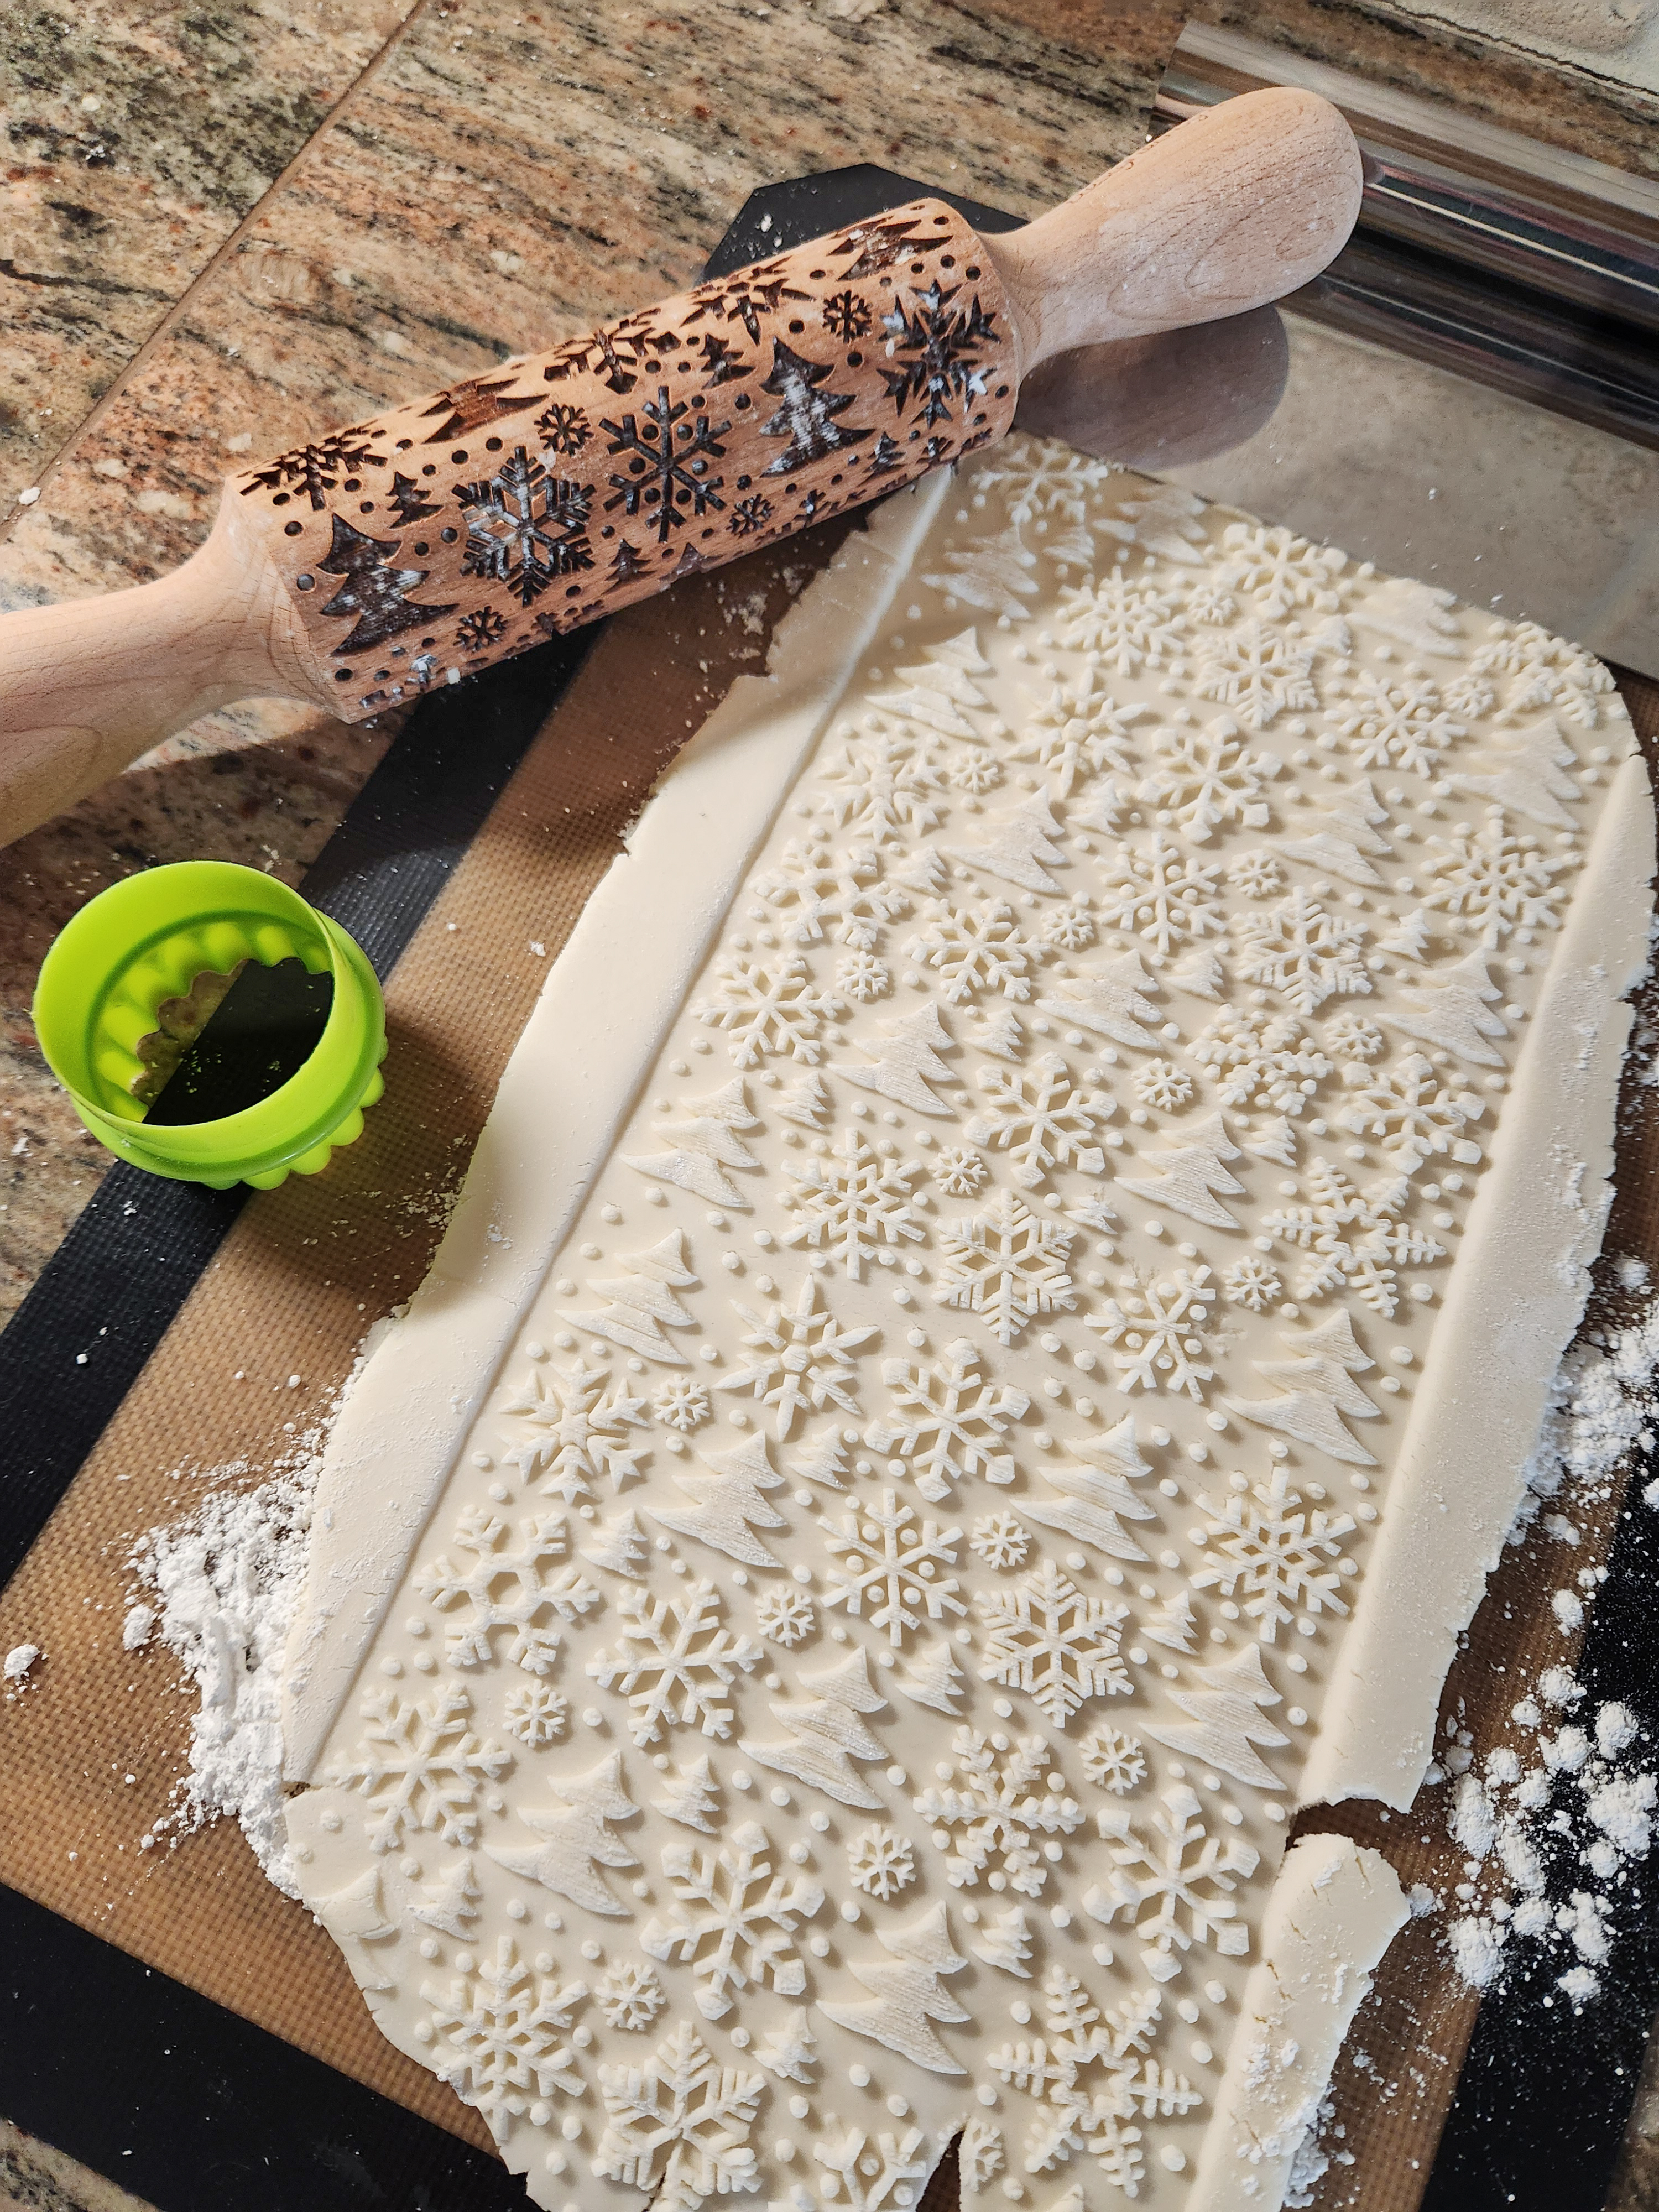
Use round cookie cutters the right size to make circles that will fit on your brownie bites or cupcakes. The two smallest of our round cookie cutters are just the right sizes and have cute fluted edges. Use powdered sugar on the spatula and silicone mat to make it slide under the circles more easily.
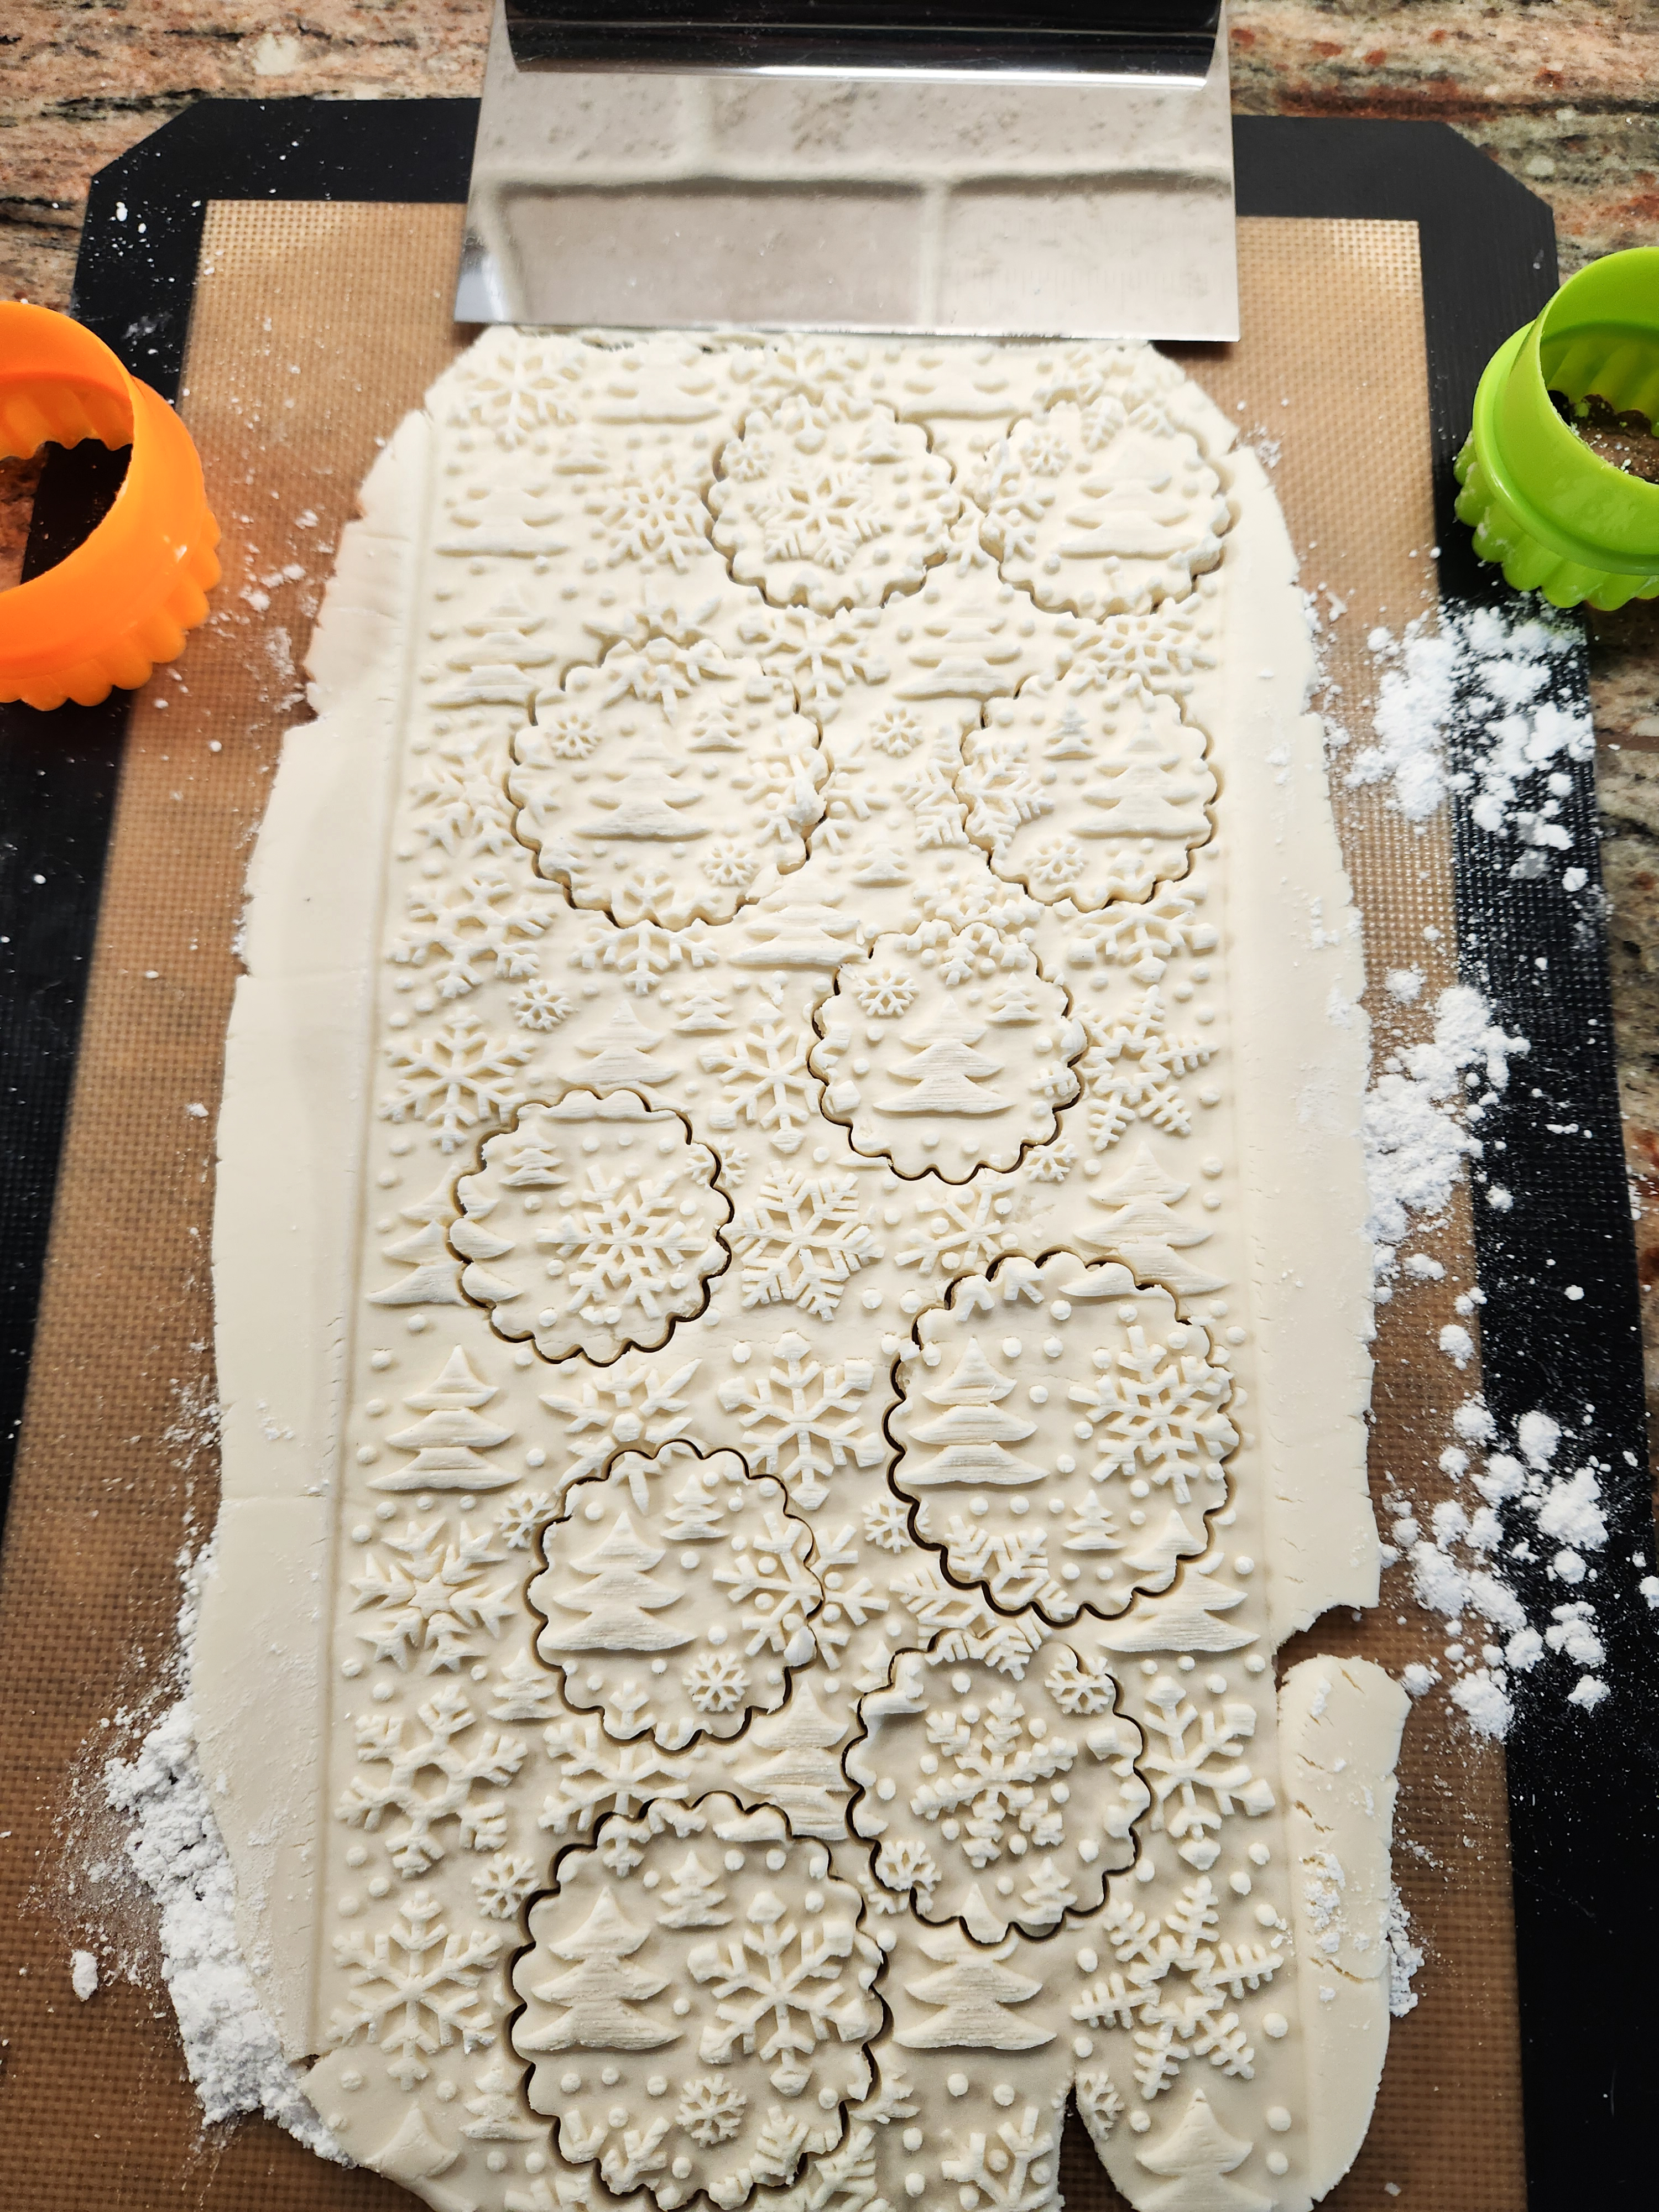
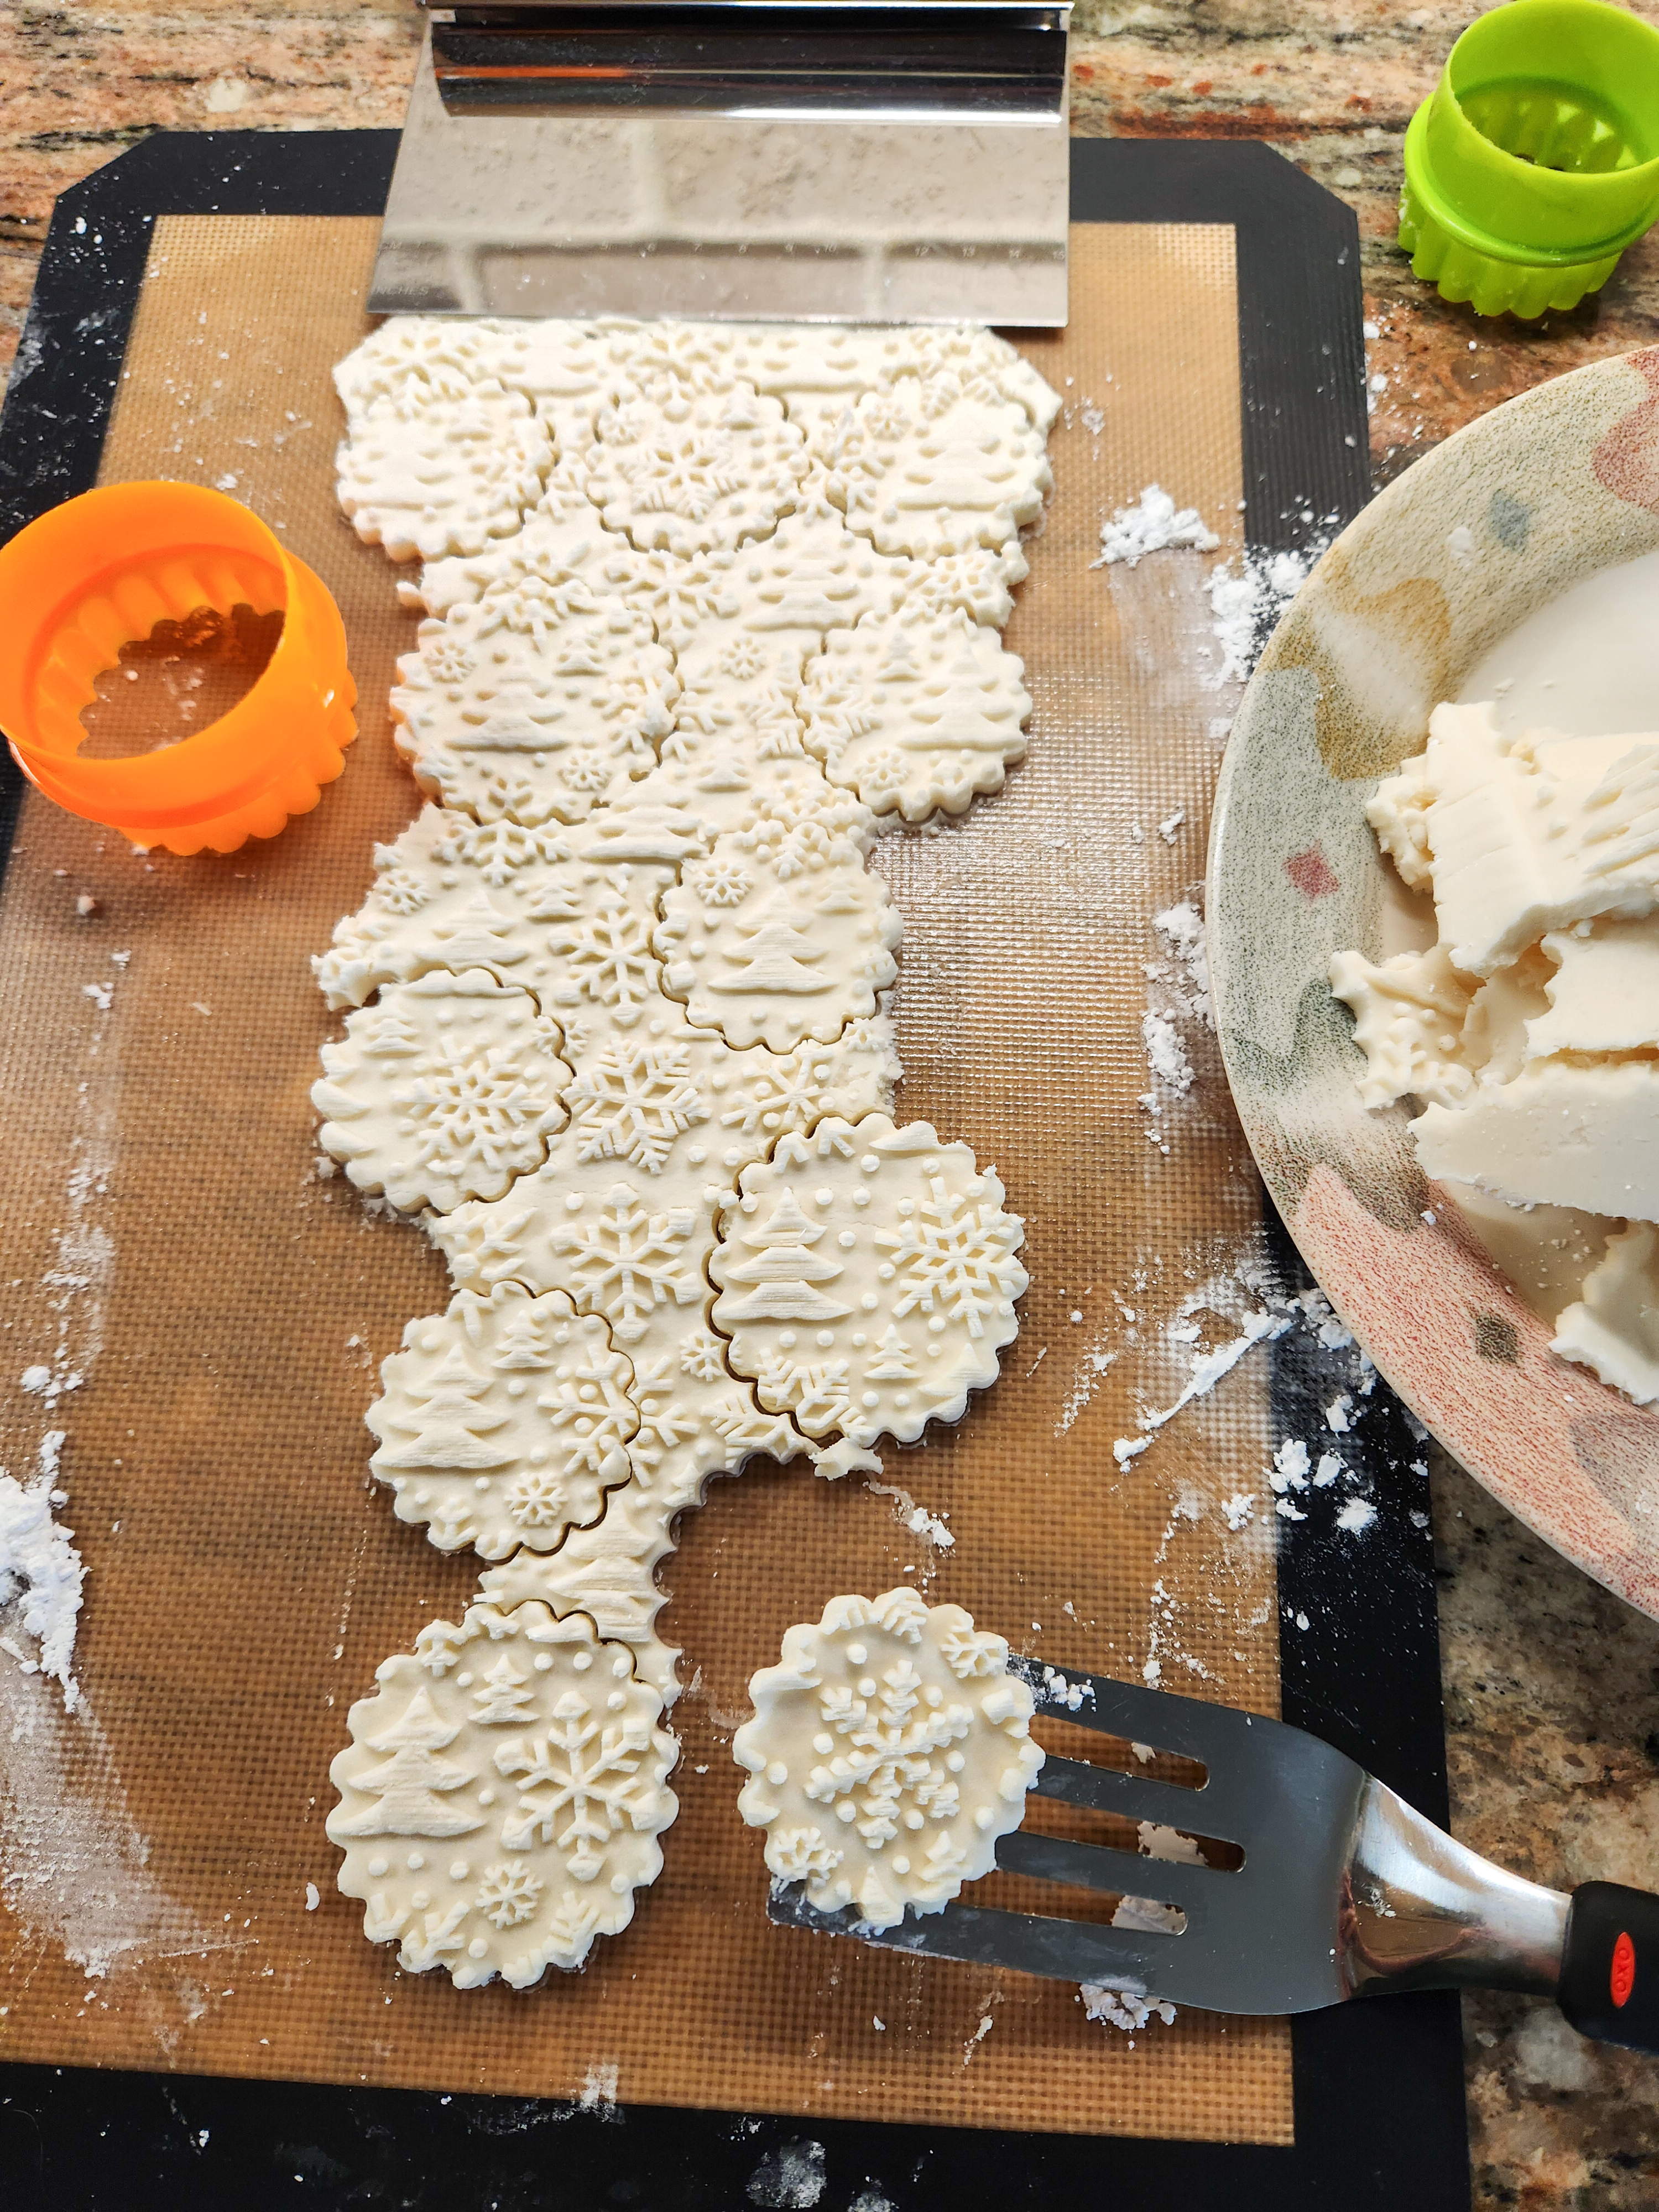
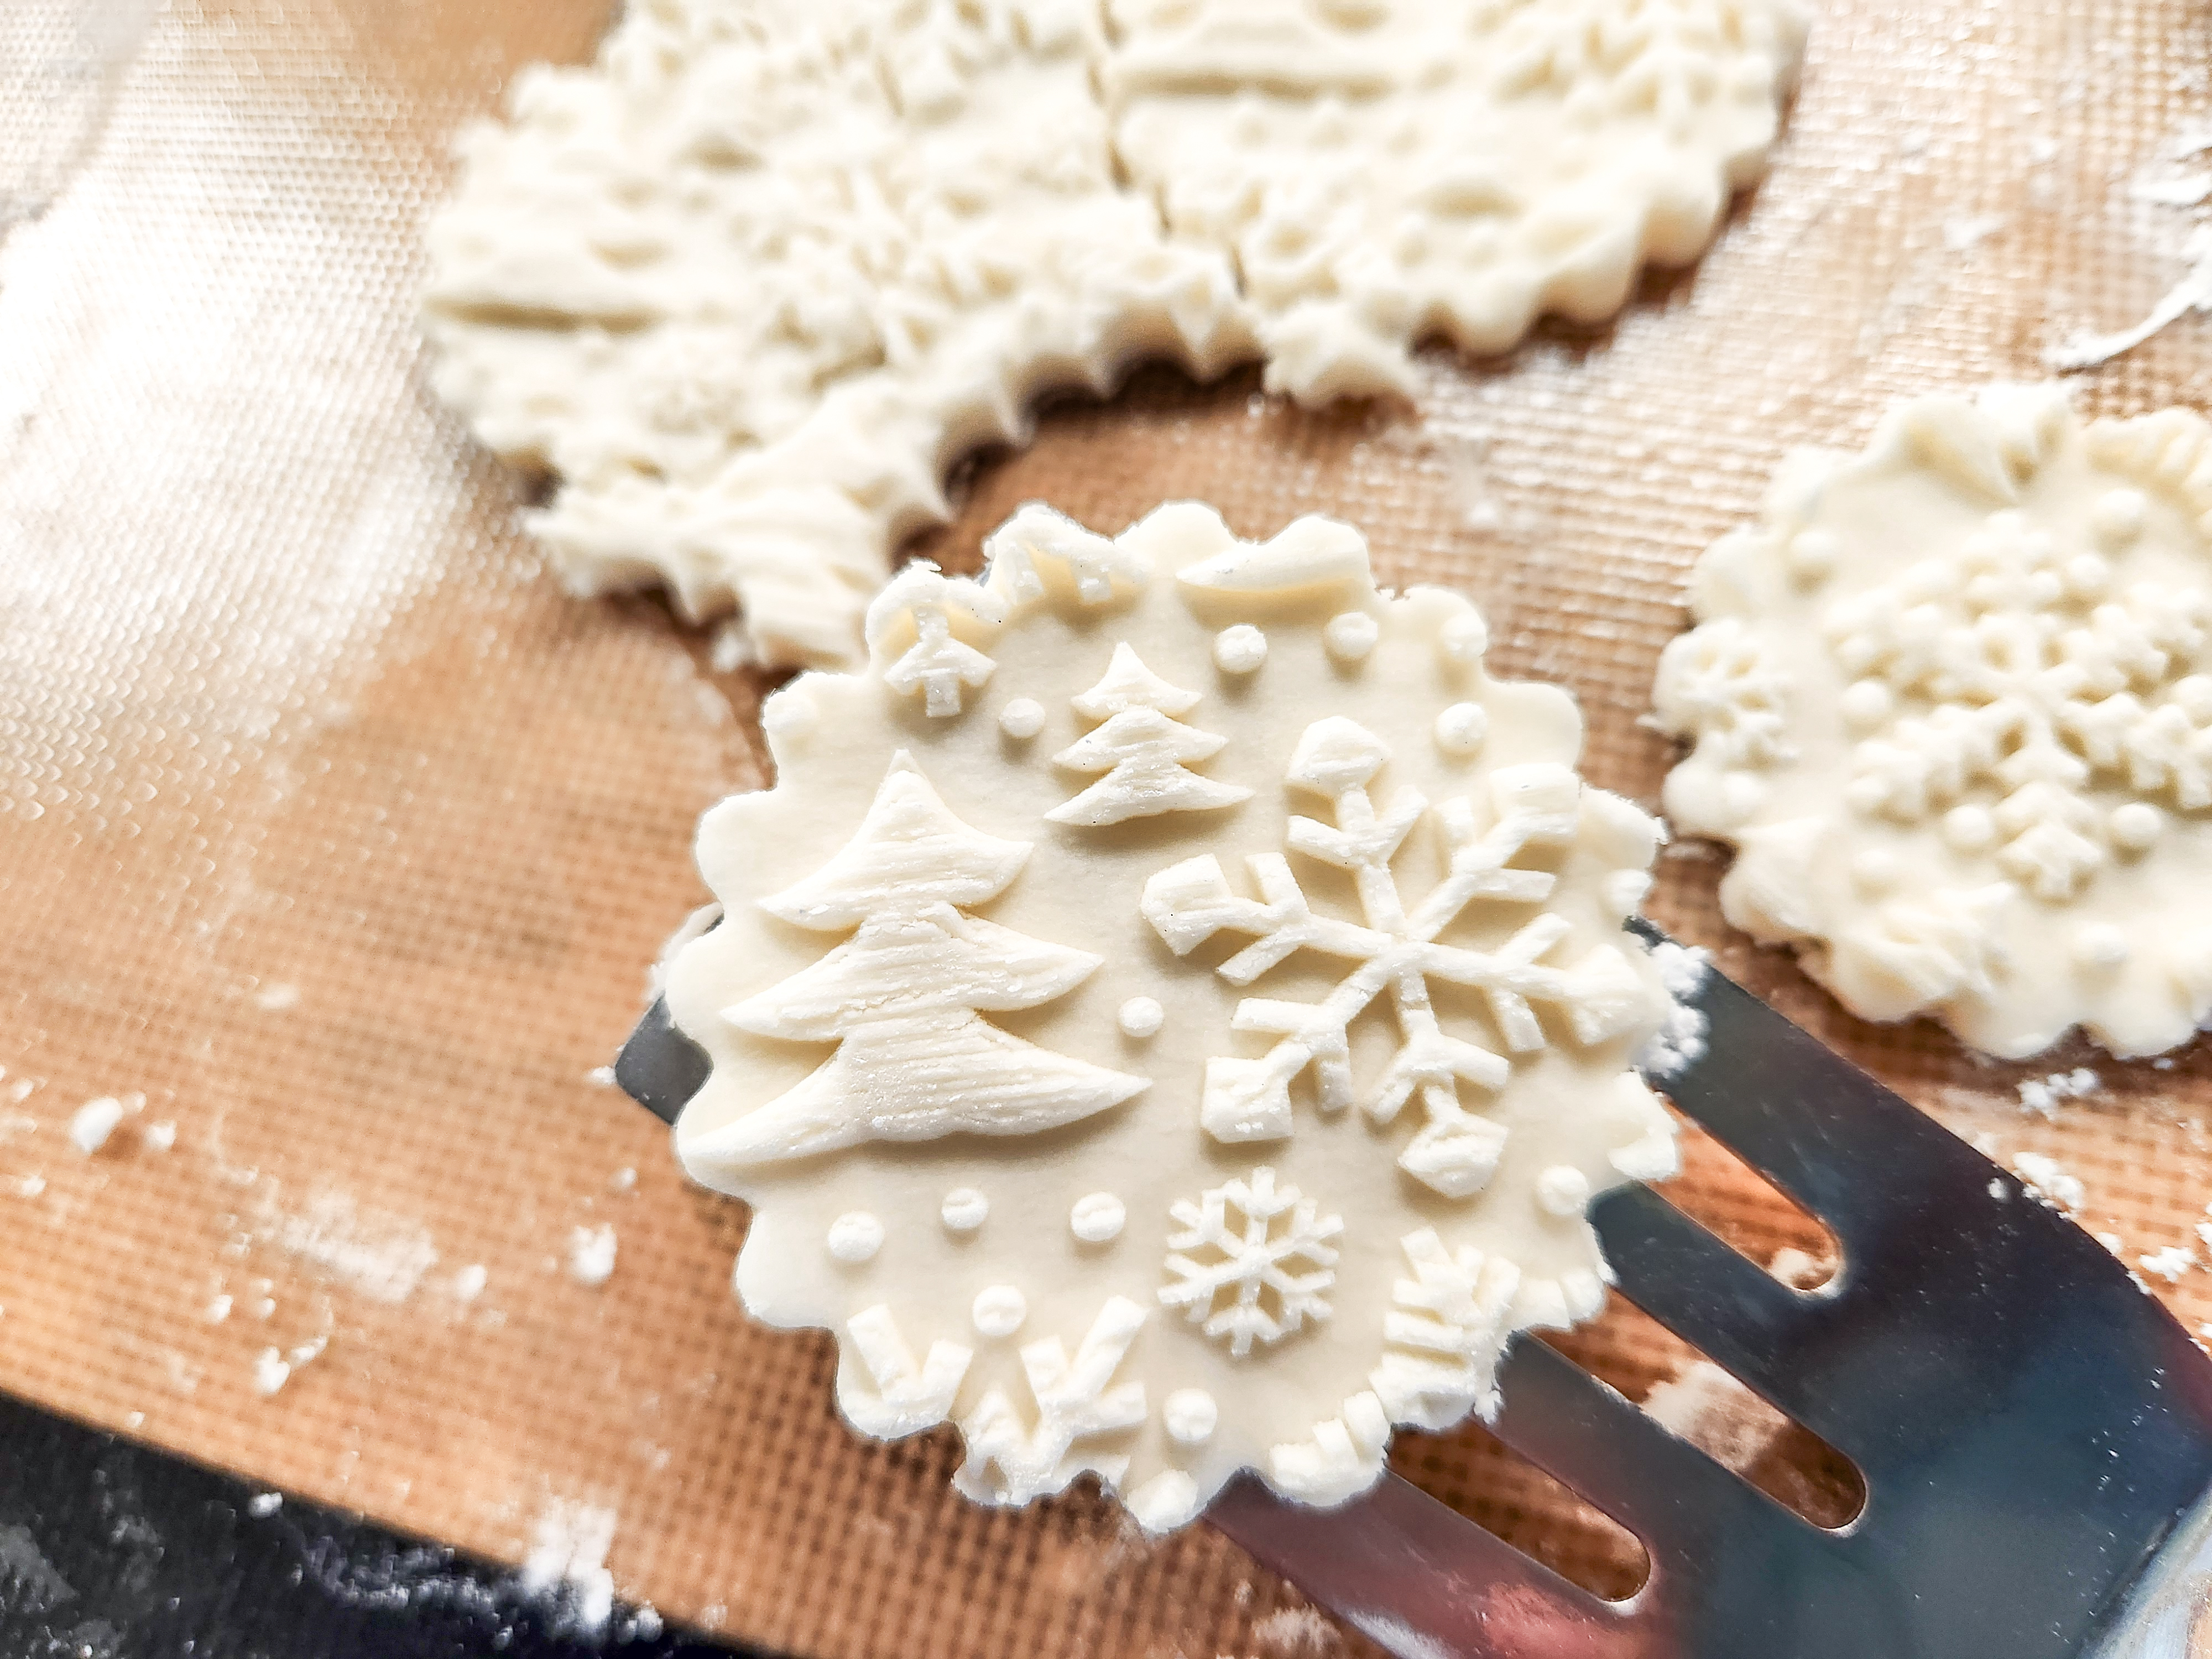
Place the circles on top of brownie bites or pre-frosted cupcakes. You can wet the bottoms of the shapes to help them stick to brownies. Get a few drops of water on your fingertip and spread it around. It softens the buttercream and makes it stickier.
For the cupcakes I made a thin swirled layer of frosting for the ones that would hold these embossed circles. They need to sit flat unlike the pressed shapes. I like the way it looks like a colorful frosting “frame” around the patterned circle.

Here’s a side view of all 4 combinations to see how the shapes and circles sit on the brownies or cupcakes. Note the different frosting thickness.

Susie’s Very Vanilla Fluffy Buttercream for Frosting
1 1/2 cups butter, softened to room temperature but not melty or overly mushy
6 cups powdered sugar
2 tablespoons vanilla extract
¼ cup plus 2 tablespoons heavy cream
This buttercream is light and fluffy for frosting cupcakes. You can use a knife to spread it on, or use a decorating bag with big star or flower piping tips like I did. Start by creaming the butter with an electric mixer. Add the vanilla, heavy cream, and one cup of the powdered sugar. Slowly start mixing, and add the rest of the sugar a cup at a time. After each addition of sugar is combined enough to not fly out of the bowl, mix it at high speed to keep making it fluffy and creamy as you go.
When all of the sugar is incorporated and you’ve got a great creamy texture, divide the frosting into different bowls and color them any colors you like using GEL food dye. Liquid changes the consistency too much so gel is preferred. Always start with a little bit of color and add more until you reach the color you want. You can always add more but you can’t take it out, so start small! I made green red, and blue. I left a little bit white to make just a couple of white cupcakes.
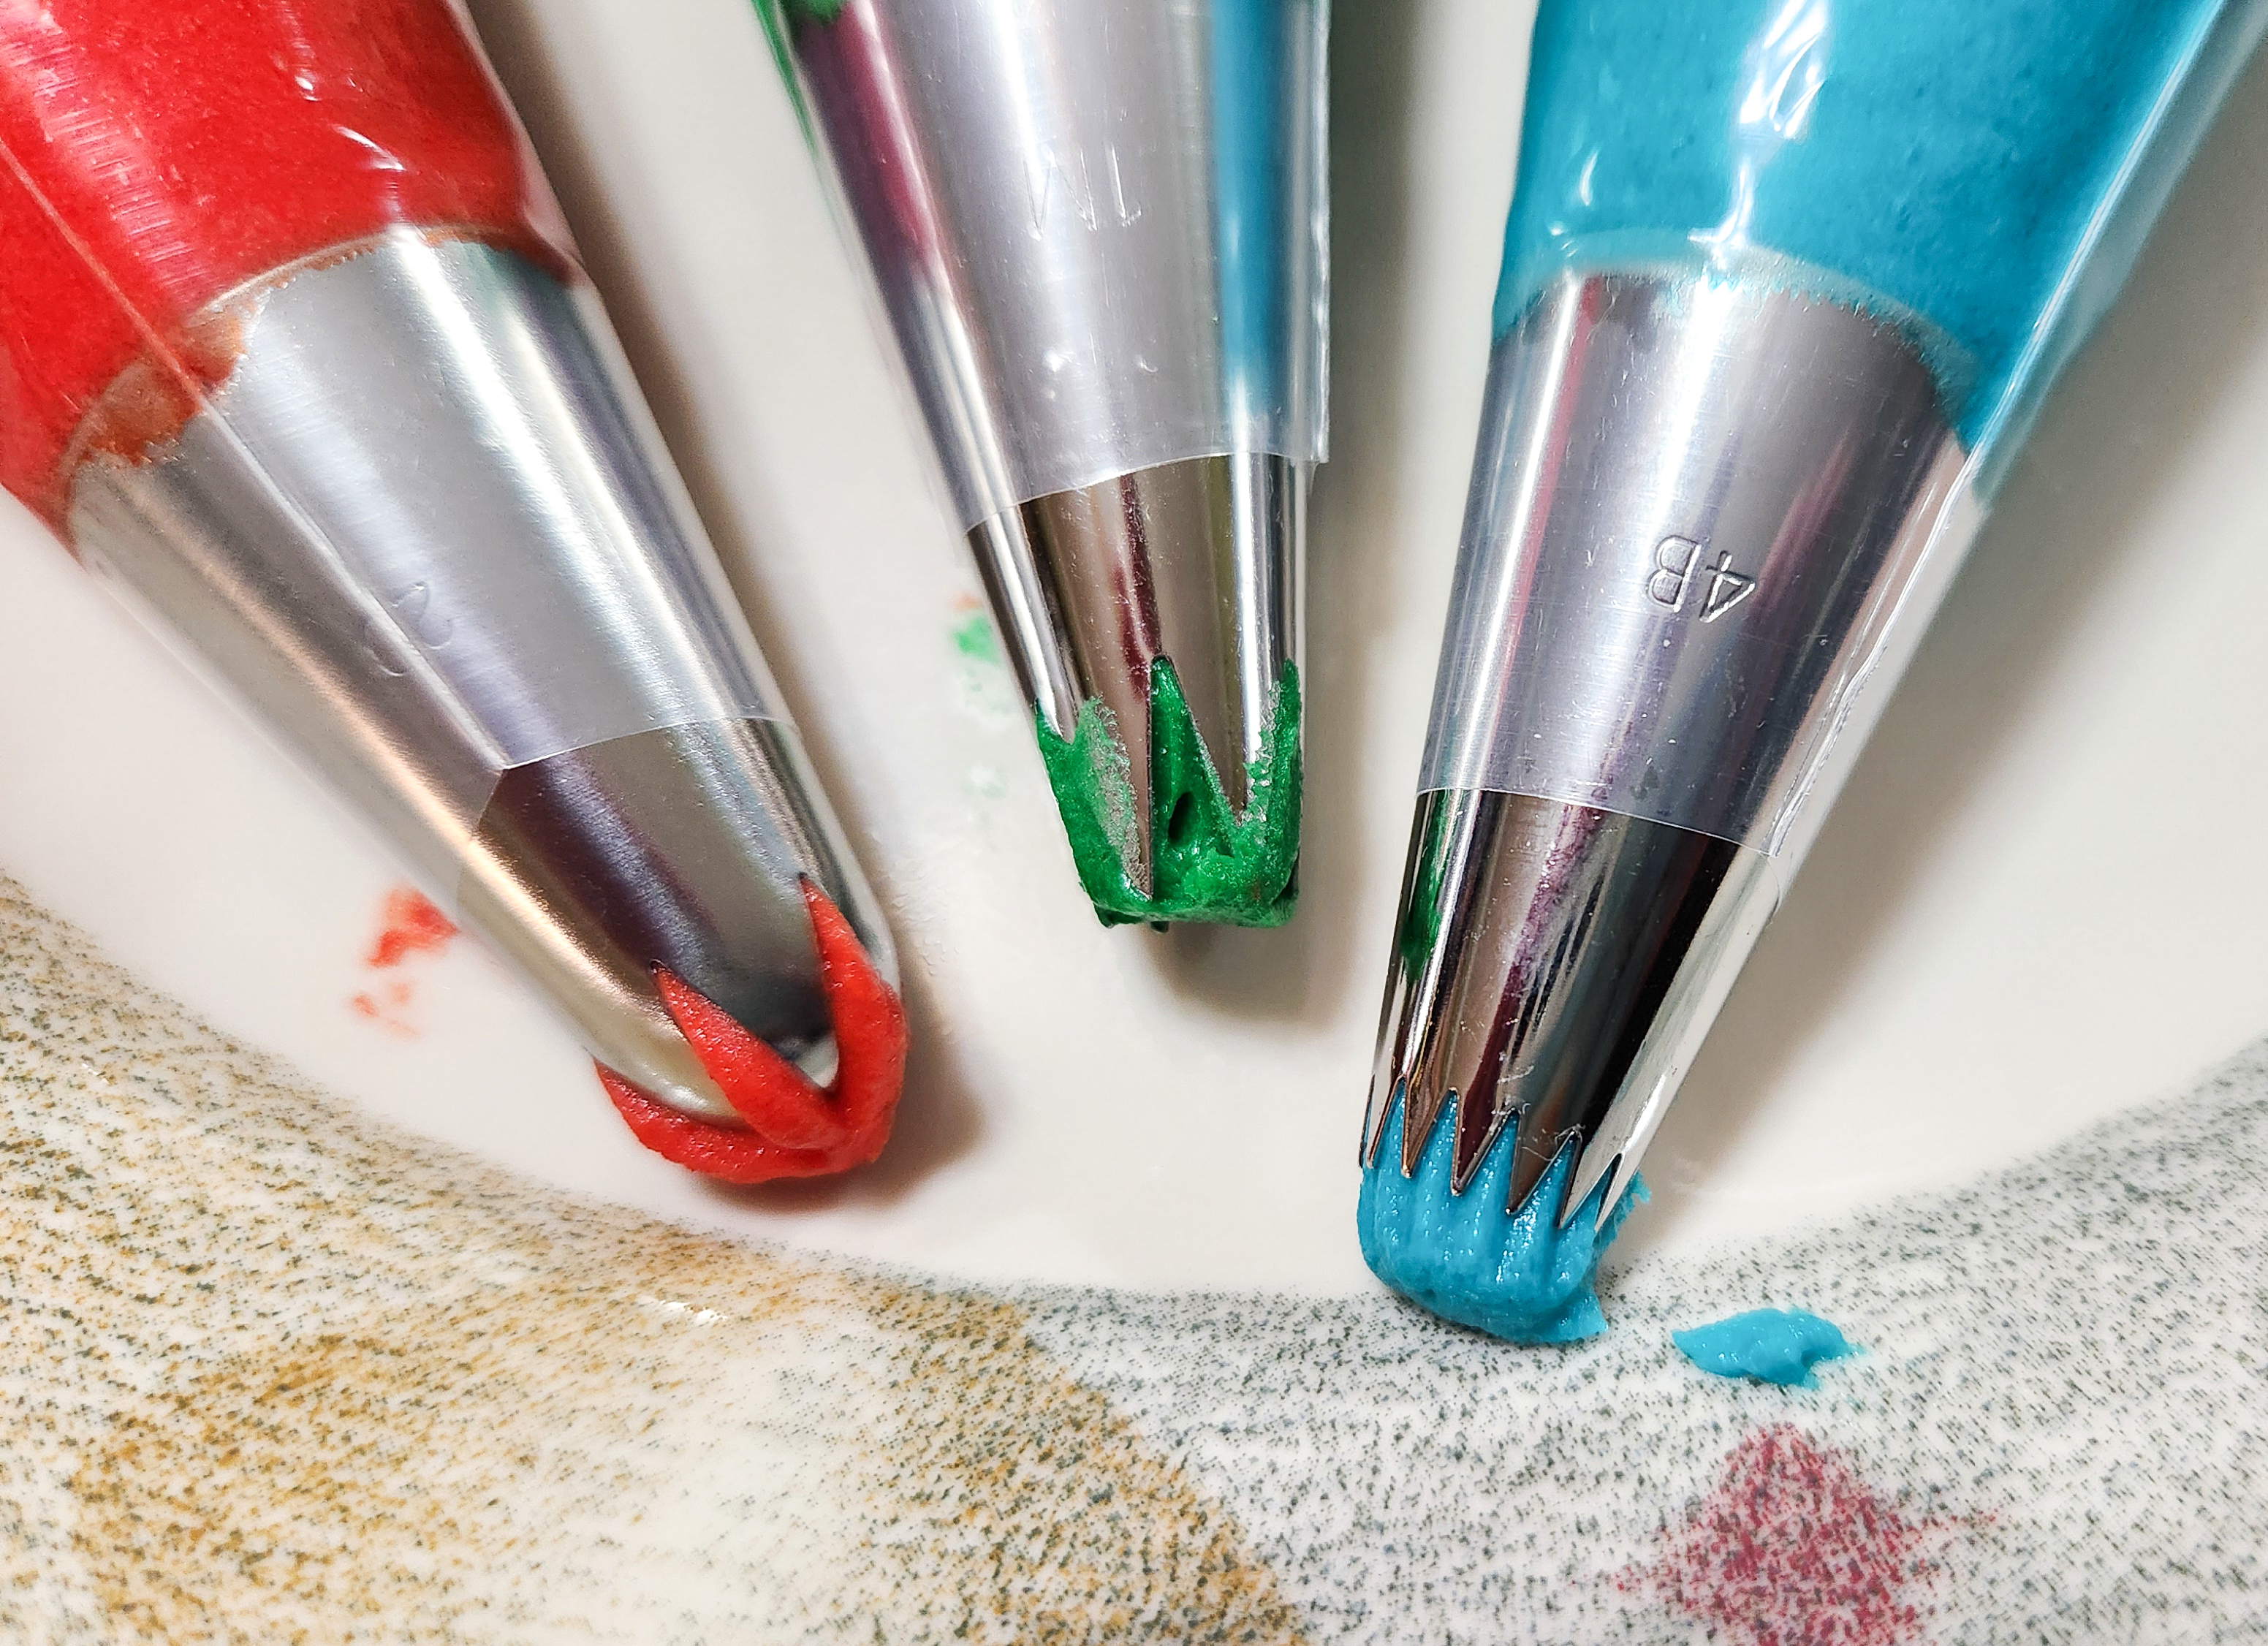
Use decorating bags and big tips for cupcakes to make beautiful swirly tops!
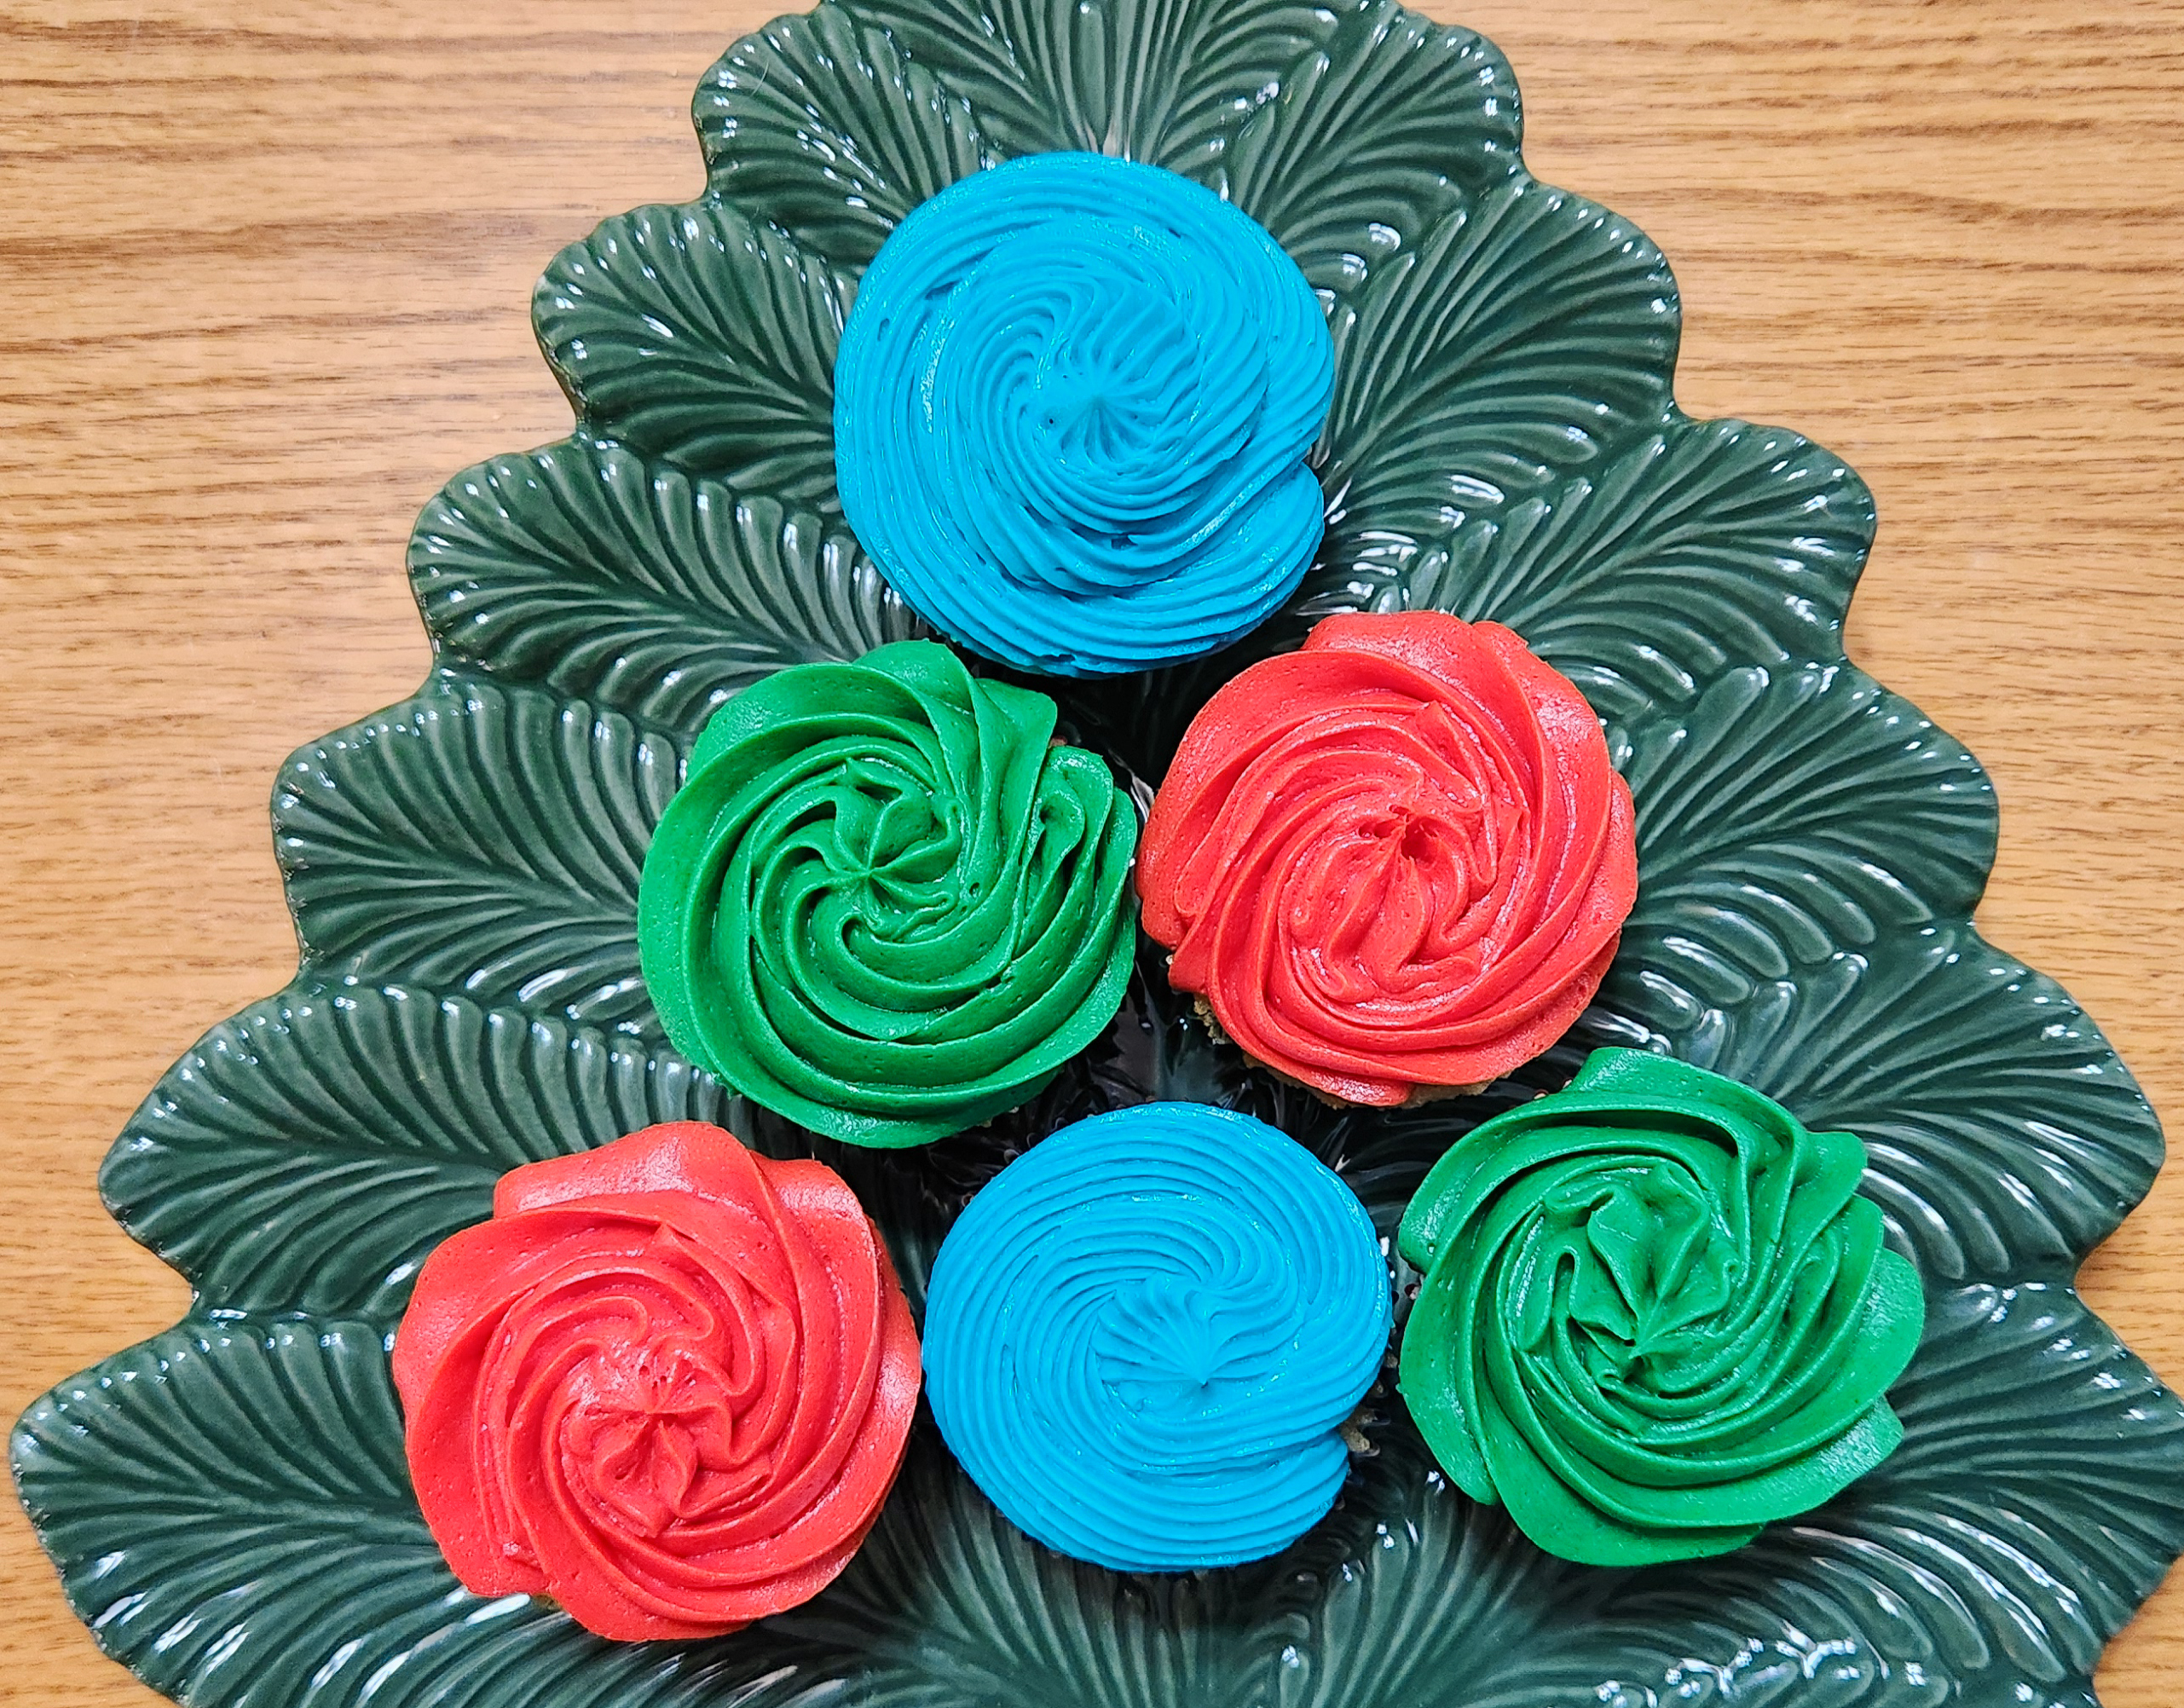
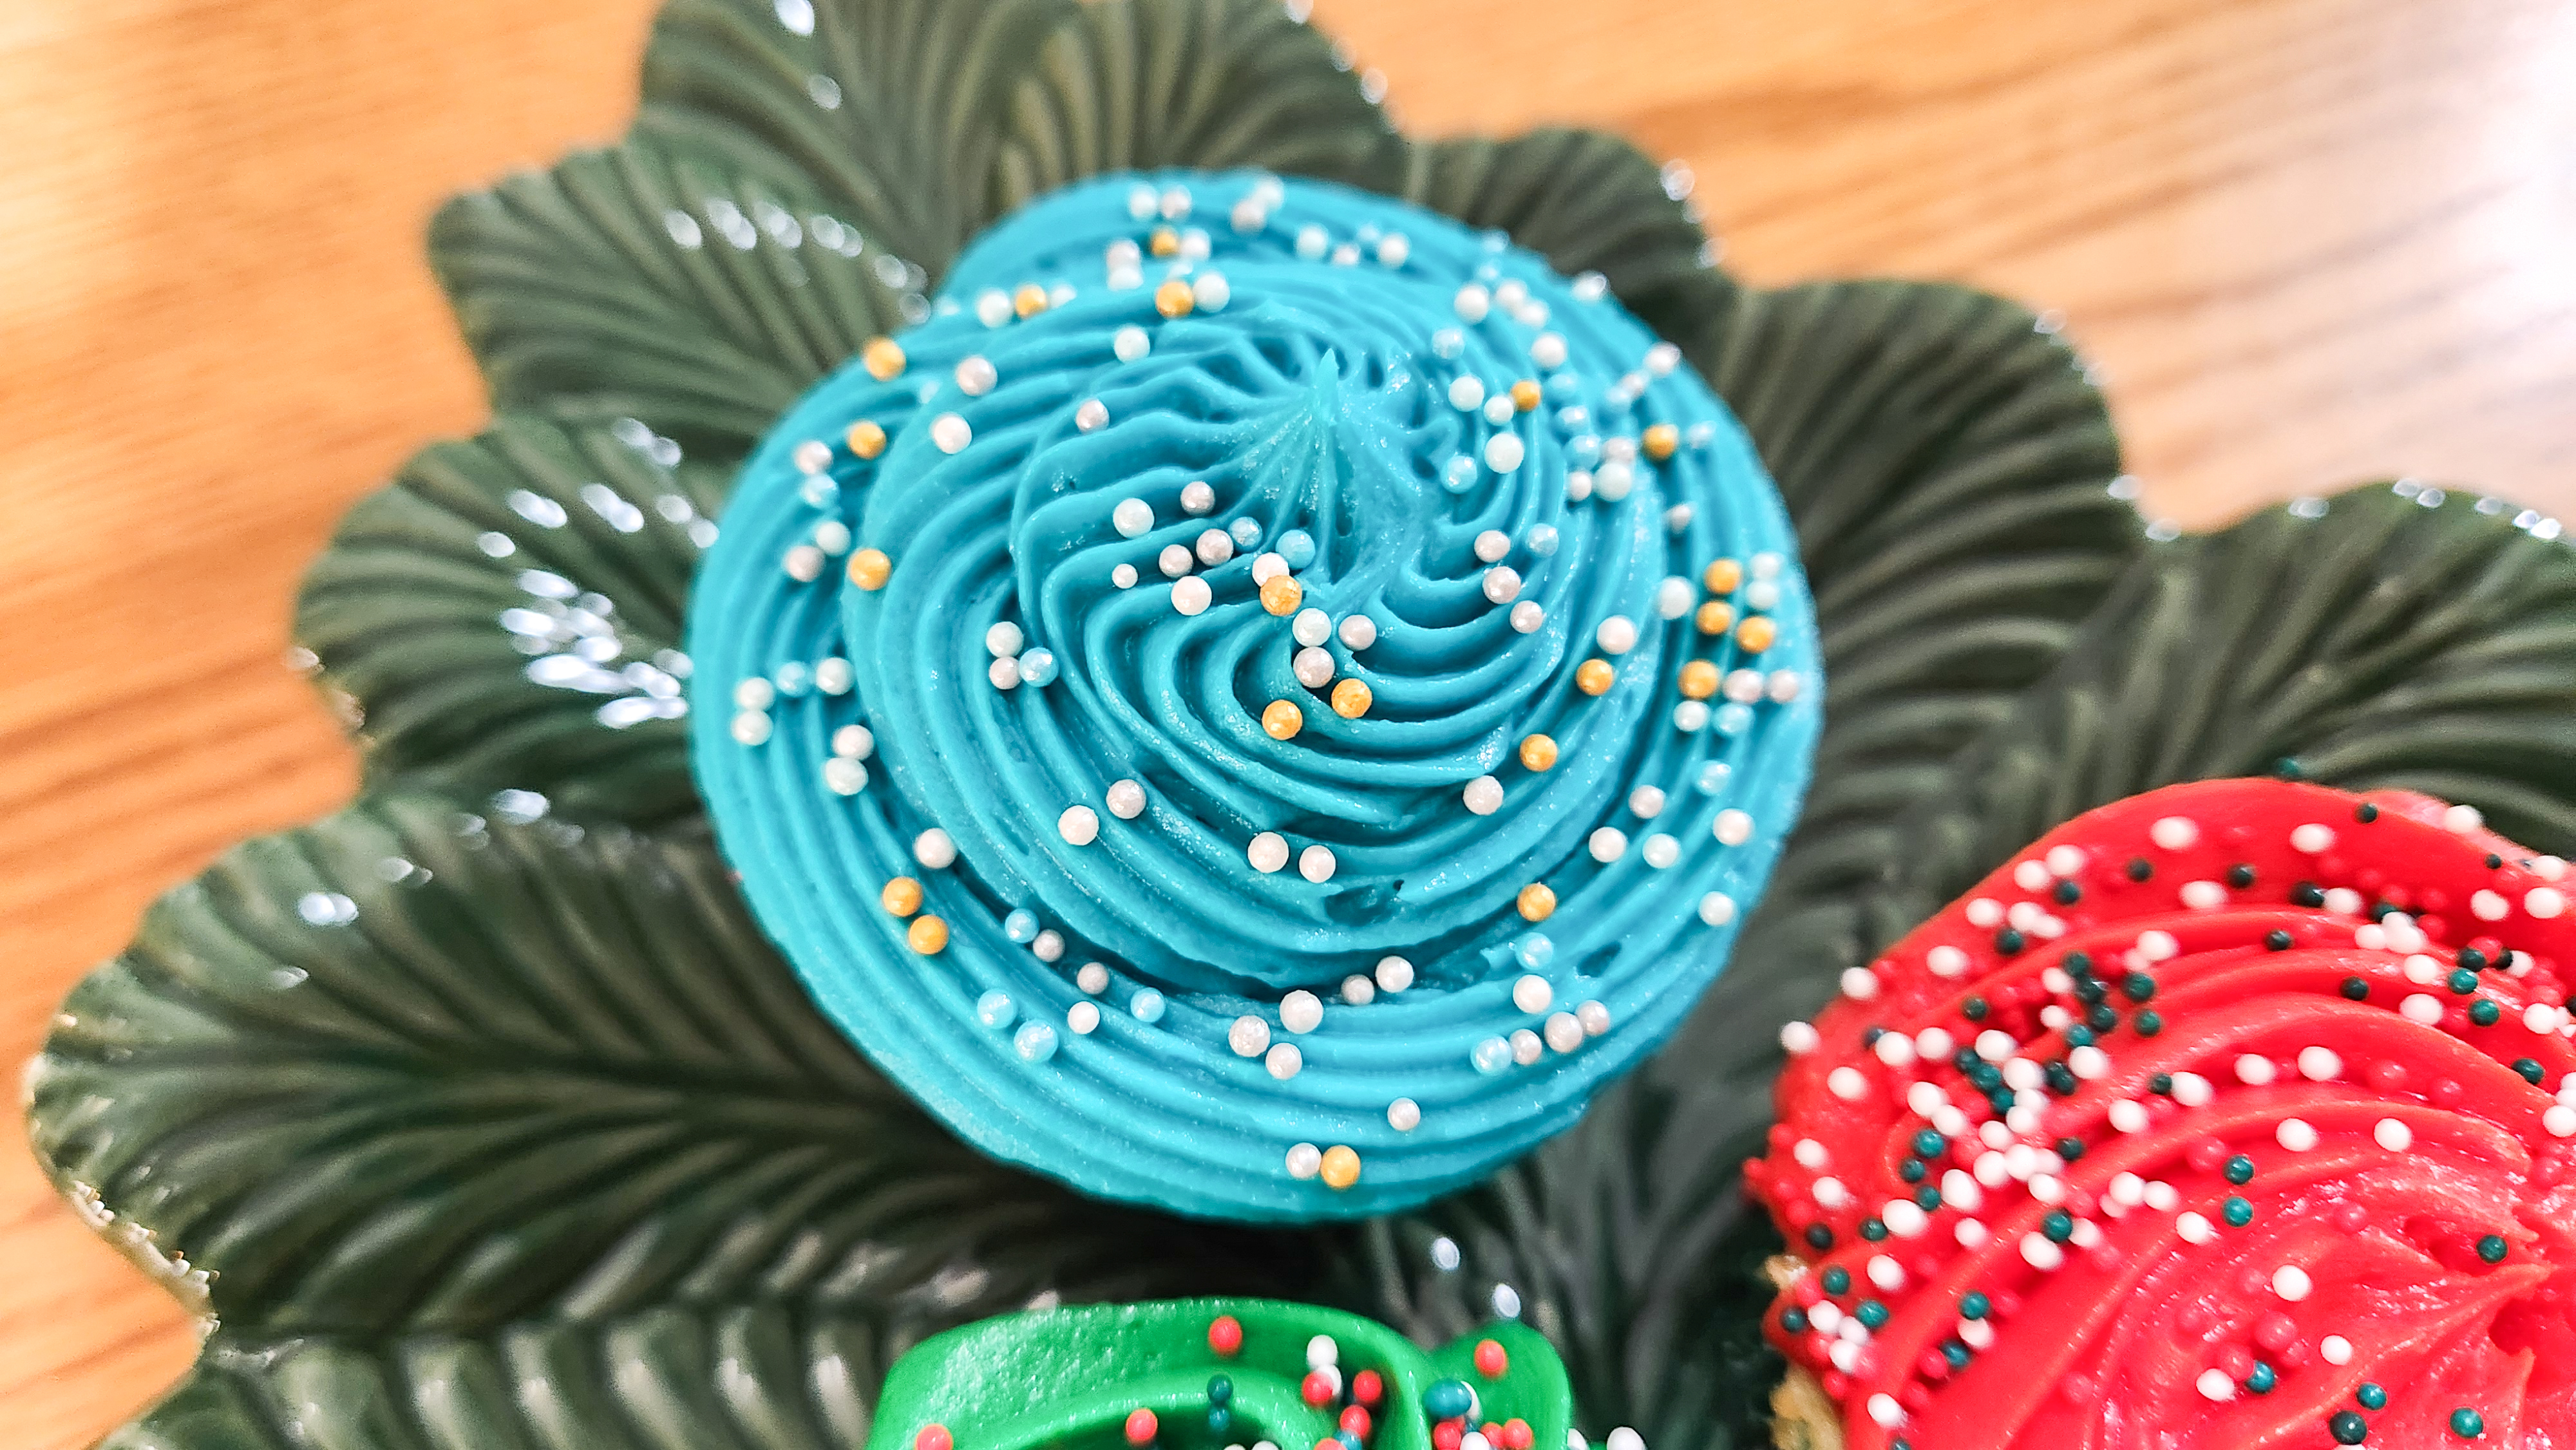
You can add sprinkles on top for a color pop!
Add your buttercream shapes or circles as described above!

Whichever way you choose to do this buttercream adventure, I hope it turns out fabulous! This is my last recipe post for 2025, so I want to thank you all for your support of our small family business! Jill (my sister-in-law) and I are truly grateful to do what we do. Thank you for your purchases that keep us in business, and for your enthusiasm for my recipes! Wishing you all health and happiness. ❤
🙏We have a request💕 If you’re enjoying our recipes, *EVERY DISK & PIN PURCHASED helps us stay in business* & supports our families! Impress is a women/family-owned USA small business in Colorado. We design, make, & sell over 300 shapes of cookie press disks & dozens of embossed rolling pins. The recipes we share are free – we have no ads on this recipe blog – we make our money selling disks & pins. The recipes give our customers creative ideas and attract new customers!💕 THANK YOU! 💕~Susie the Disk & Pin Designer
As always, Happy baking!
~Susie
Disk & Pin Designer/Co-Owner at Impress! Bakeware, LLC
Our website has all of our 300+ disk shapes, cookie press, embossed rolling pins, baking accessories plus more about our Women/Family Owned company! impressbakeware.com
All products are on our Etsy shop.
Our Amazon shop has our cookie press and disks and embossed rolling pins.
Follow us on facebook!

Susie, for a few years now I’ve been making a Icing Sugar ‘Clay’ that can be rolled or molded like Fondant. Only it’s not as sweet as Fondant.
I am soooo looking forward to trying both the Rolled and the Pressed Buttercream.
Thank You Thank You Thank You!!!
LikeLike
Thanks for this awesome comment! I really love working with modeling chocolate and these two recipes are quite similar to that in texture. They’re very vanilla and pretty sweet. I hope you have fun playing with them! If you’re used to doing this kind of thing you’ll know what I mean where I say knead it till its smooth. That stuff is so fun to handle when it’s got that epic smoothness. Let me know what you think! ~Susie
LikeLiked by 1 person