
Spring melts my heart with its pastel cuteness! These cream cheese spritz cookies with buttercream icing are delicately sweet and downright adorable.

Easter is my favorite holiday and Spring is my favorite season, so I went all out on this recipe. The result was so yummy!
And super cute!
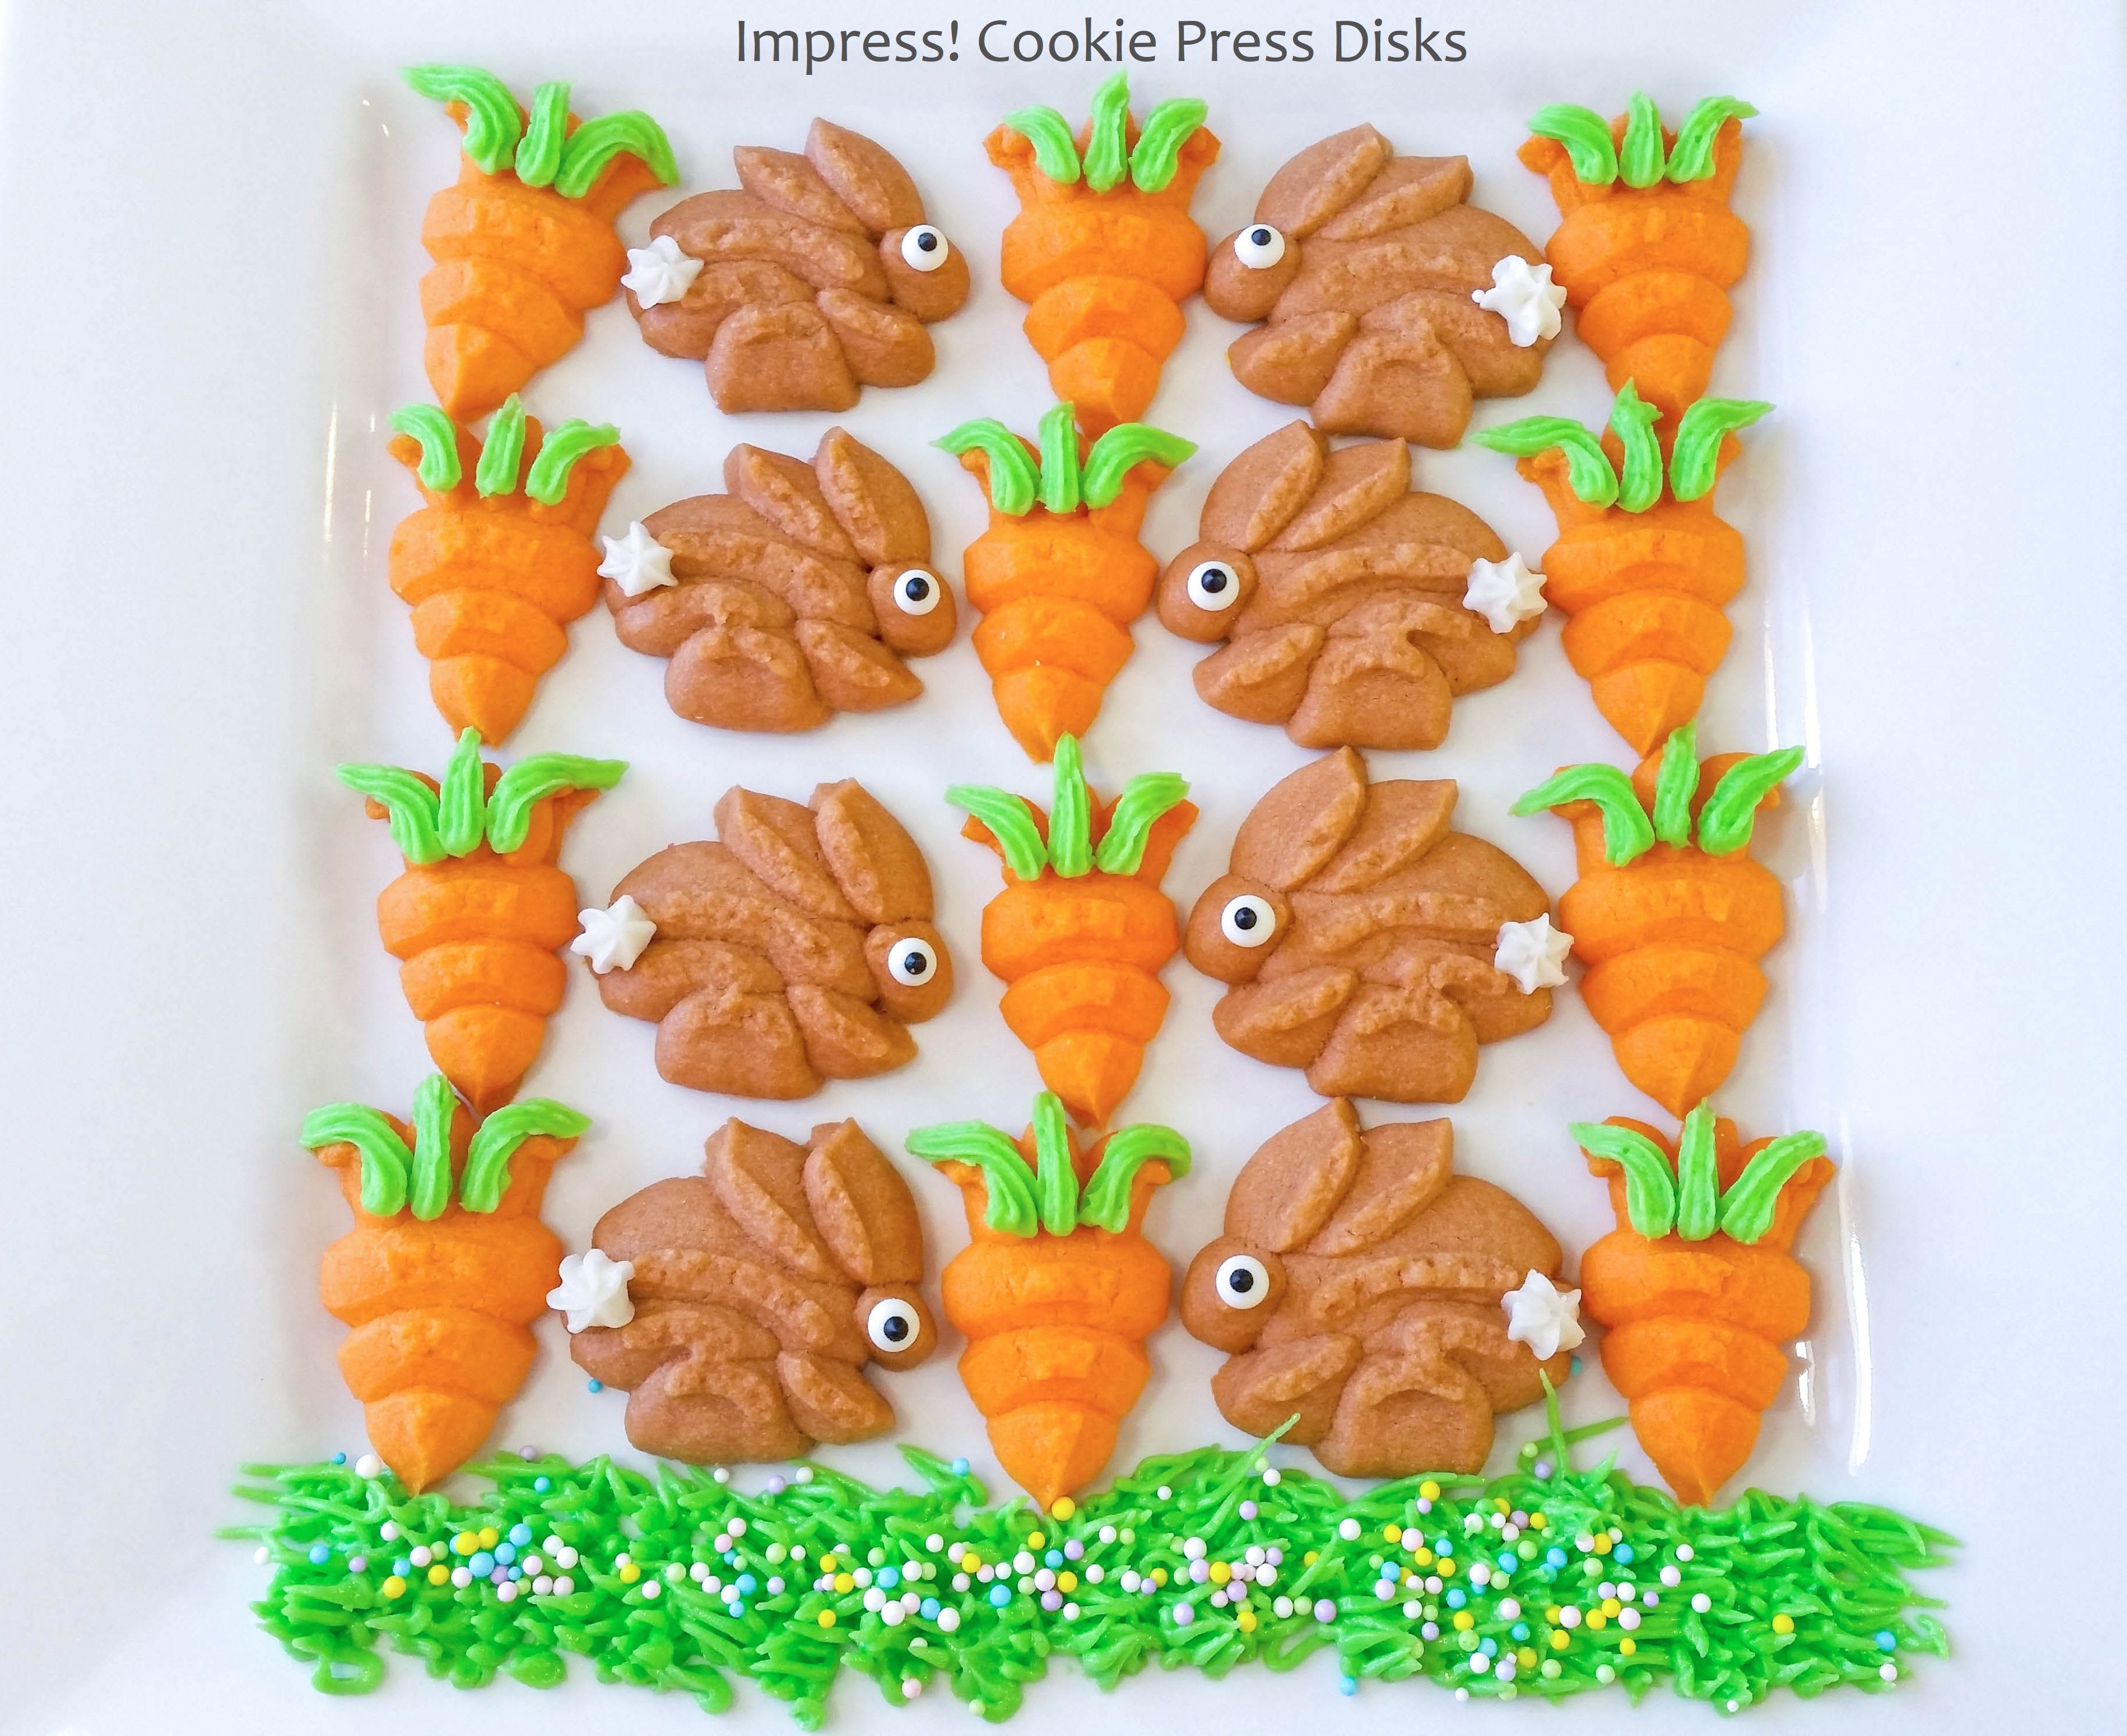
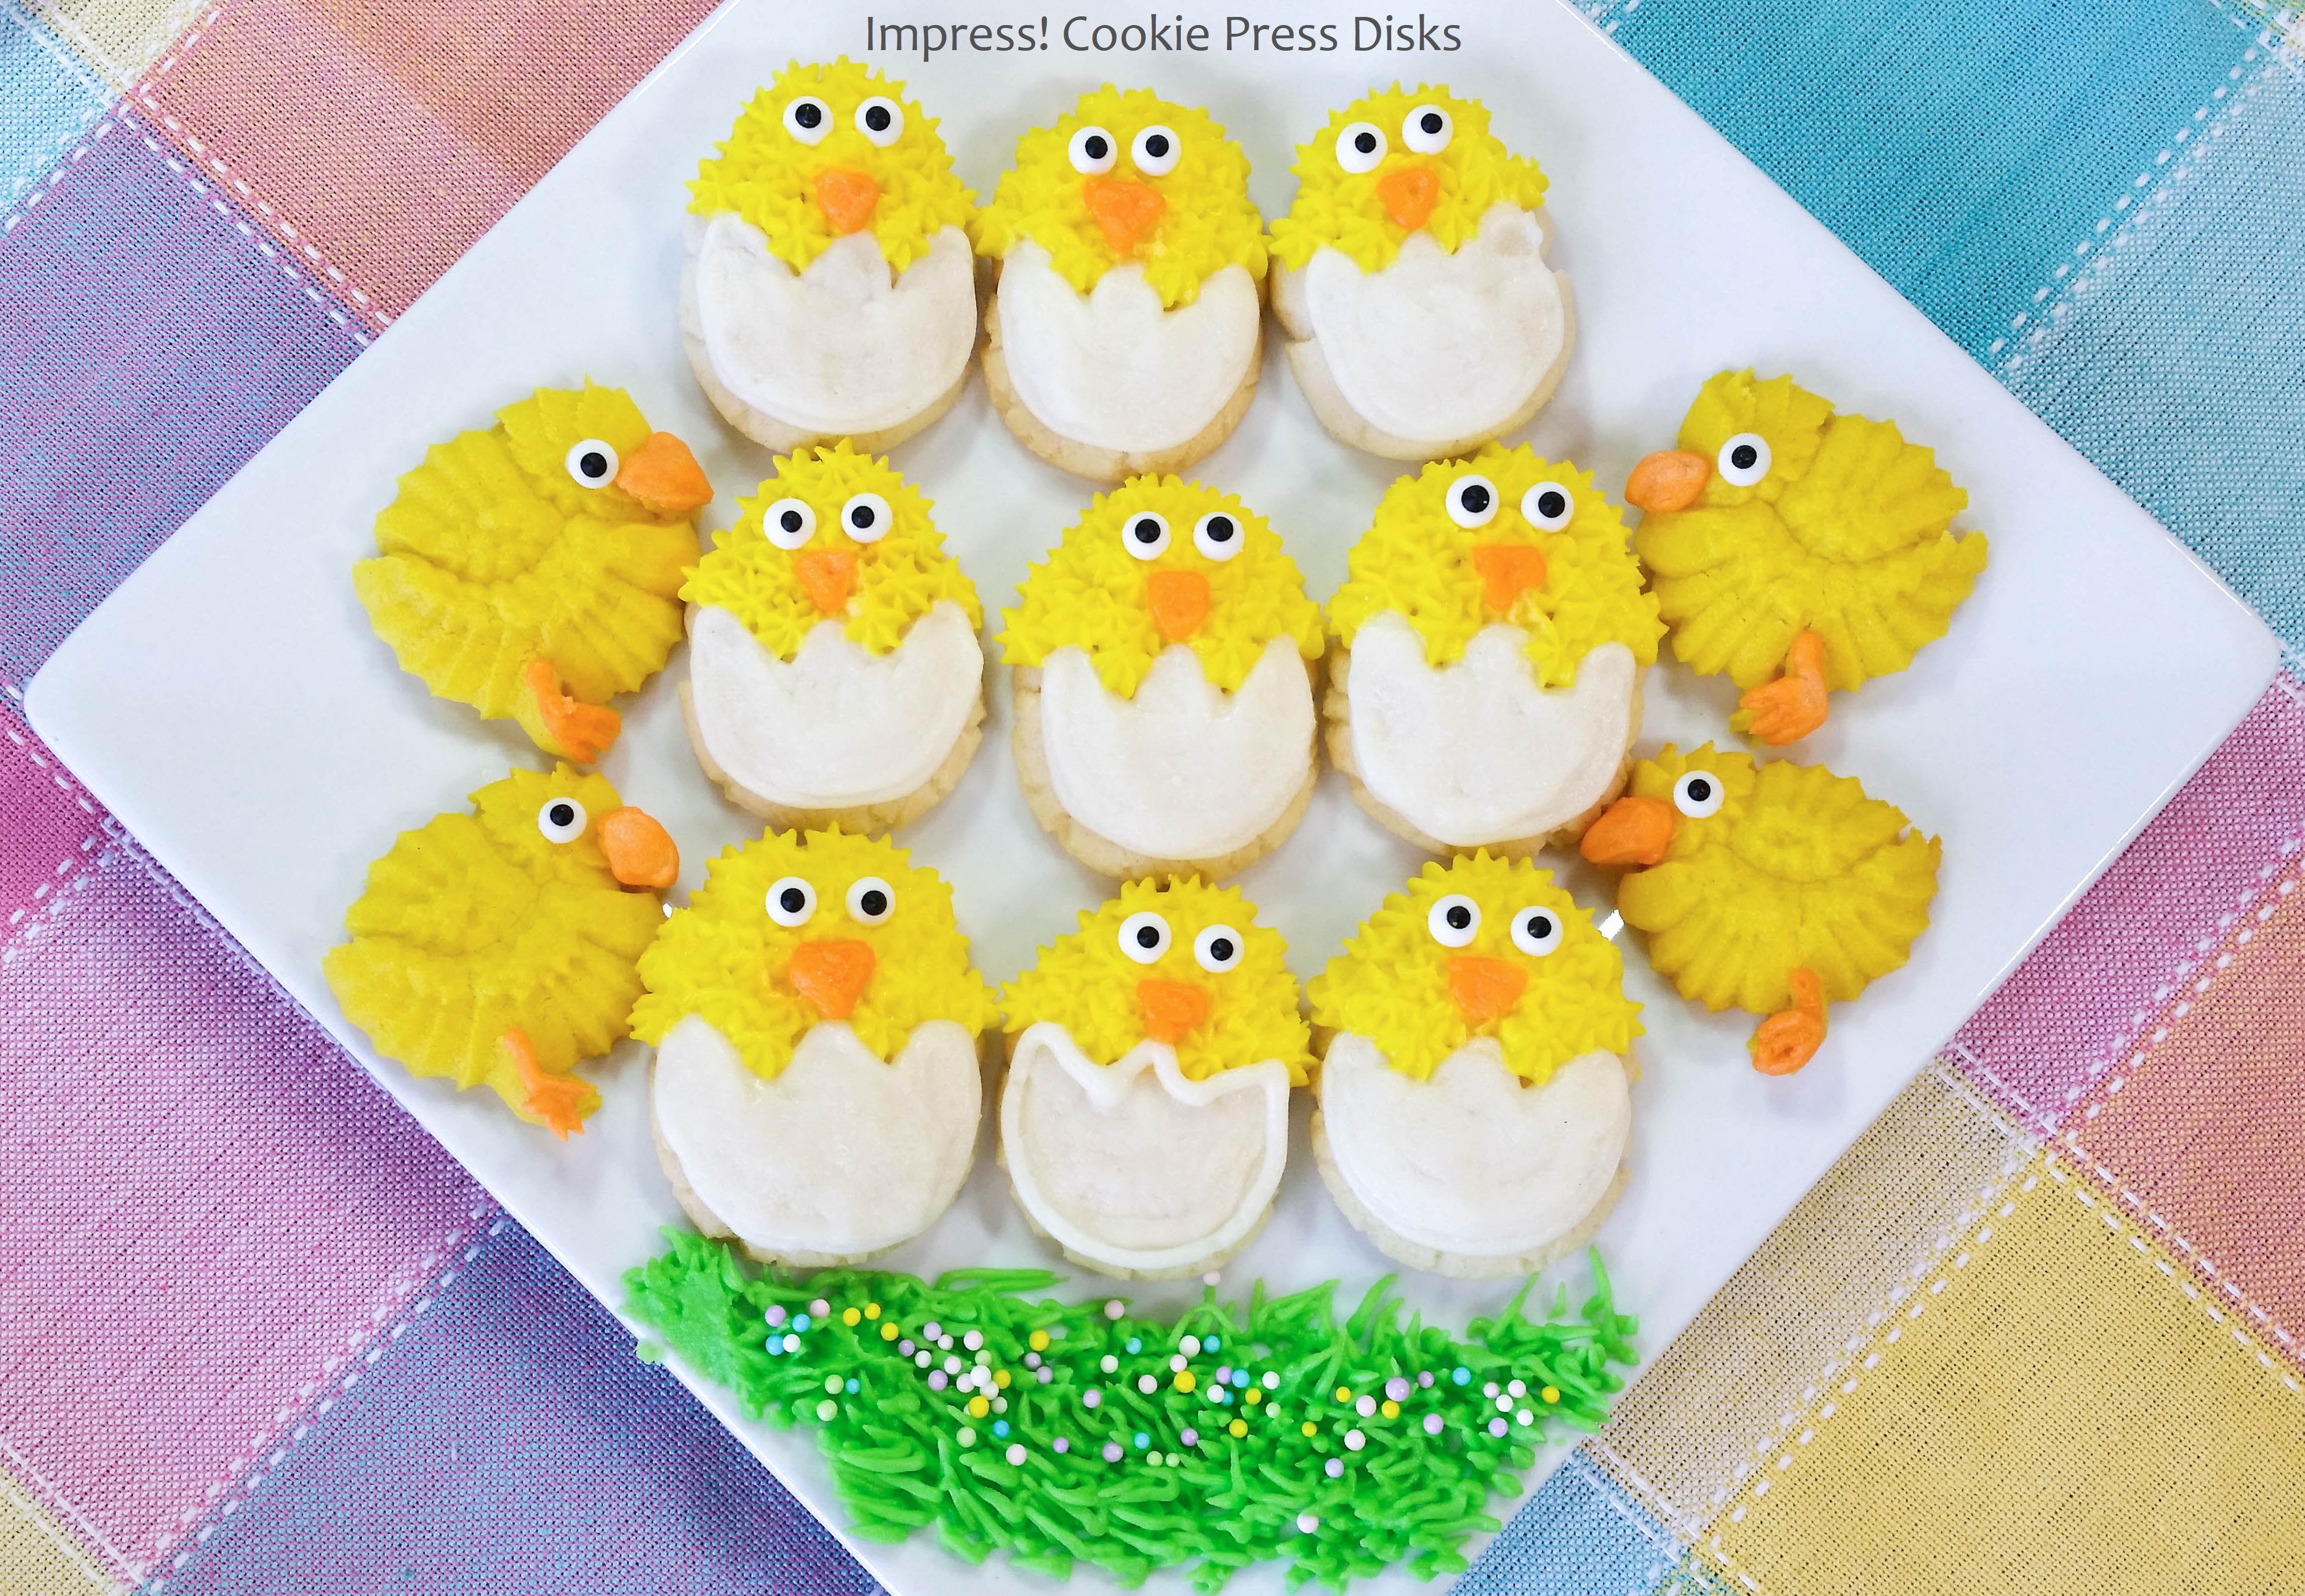
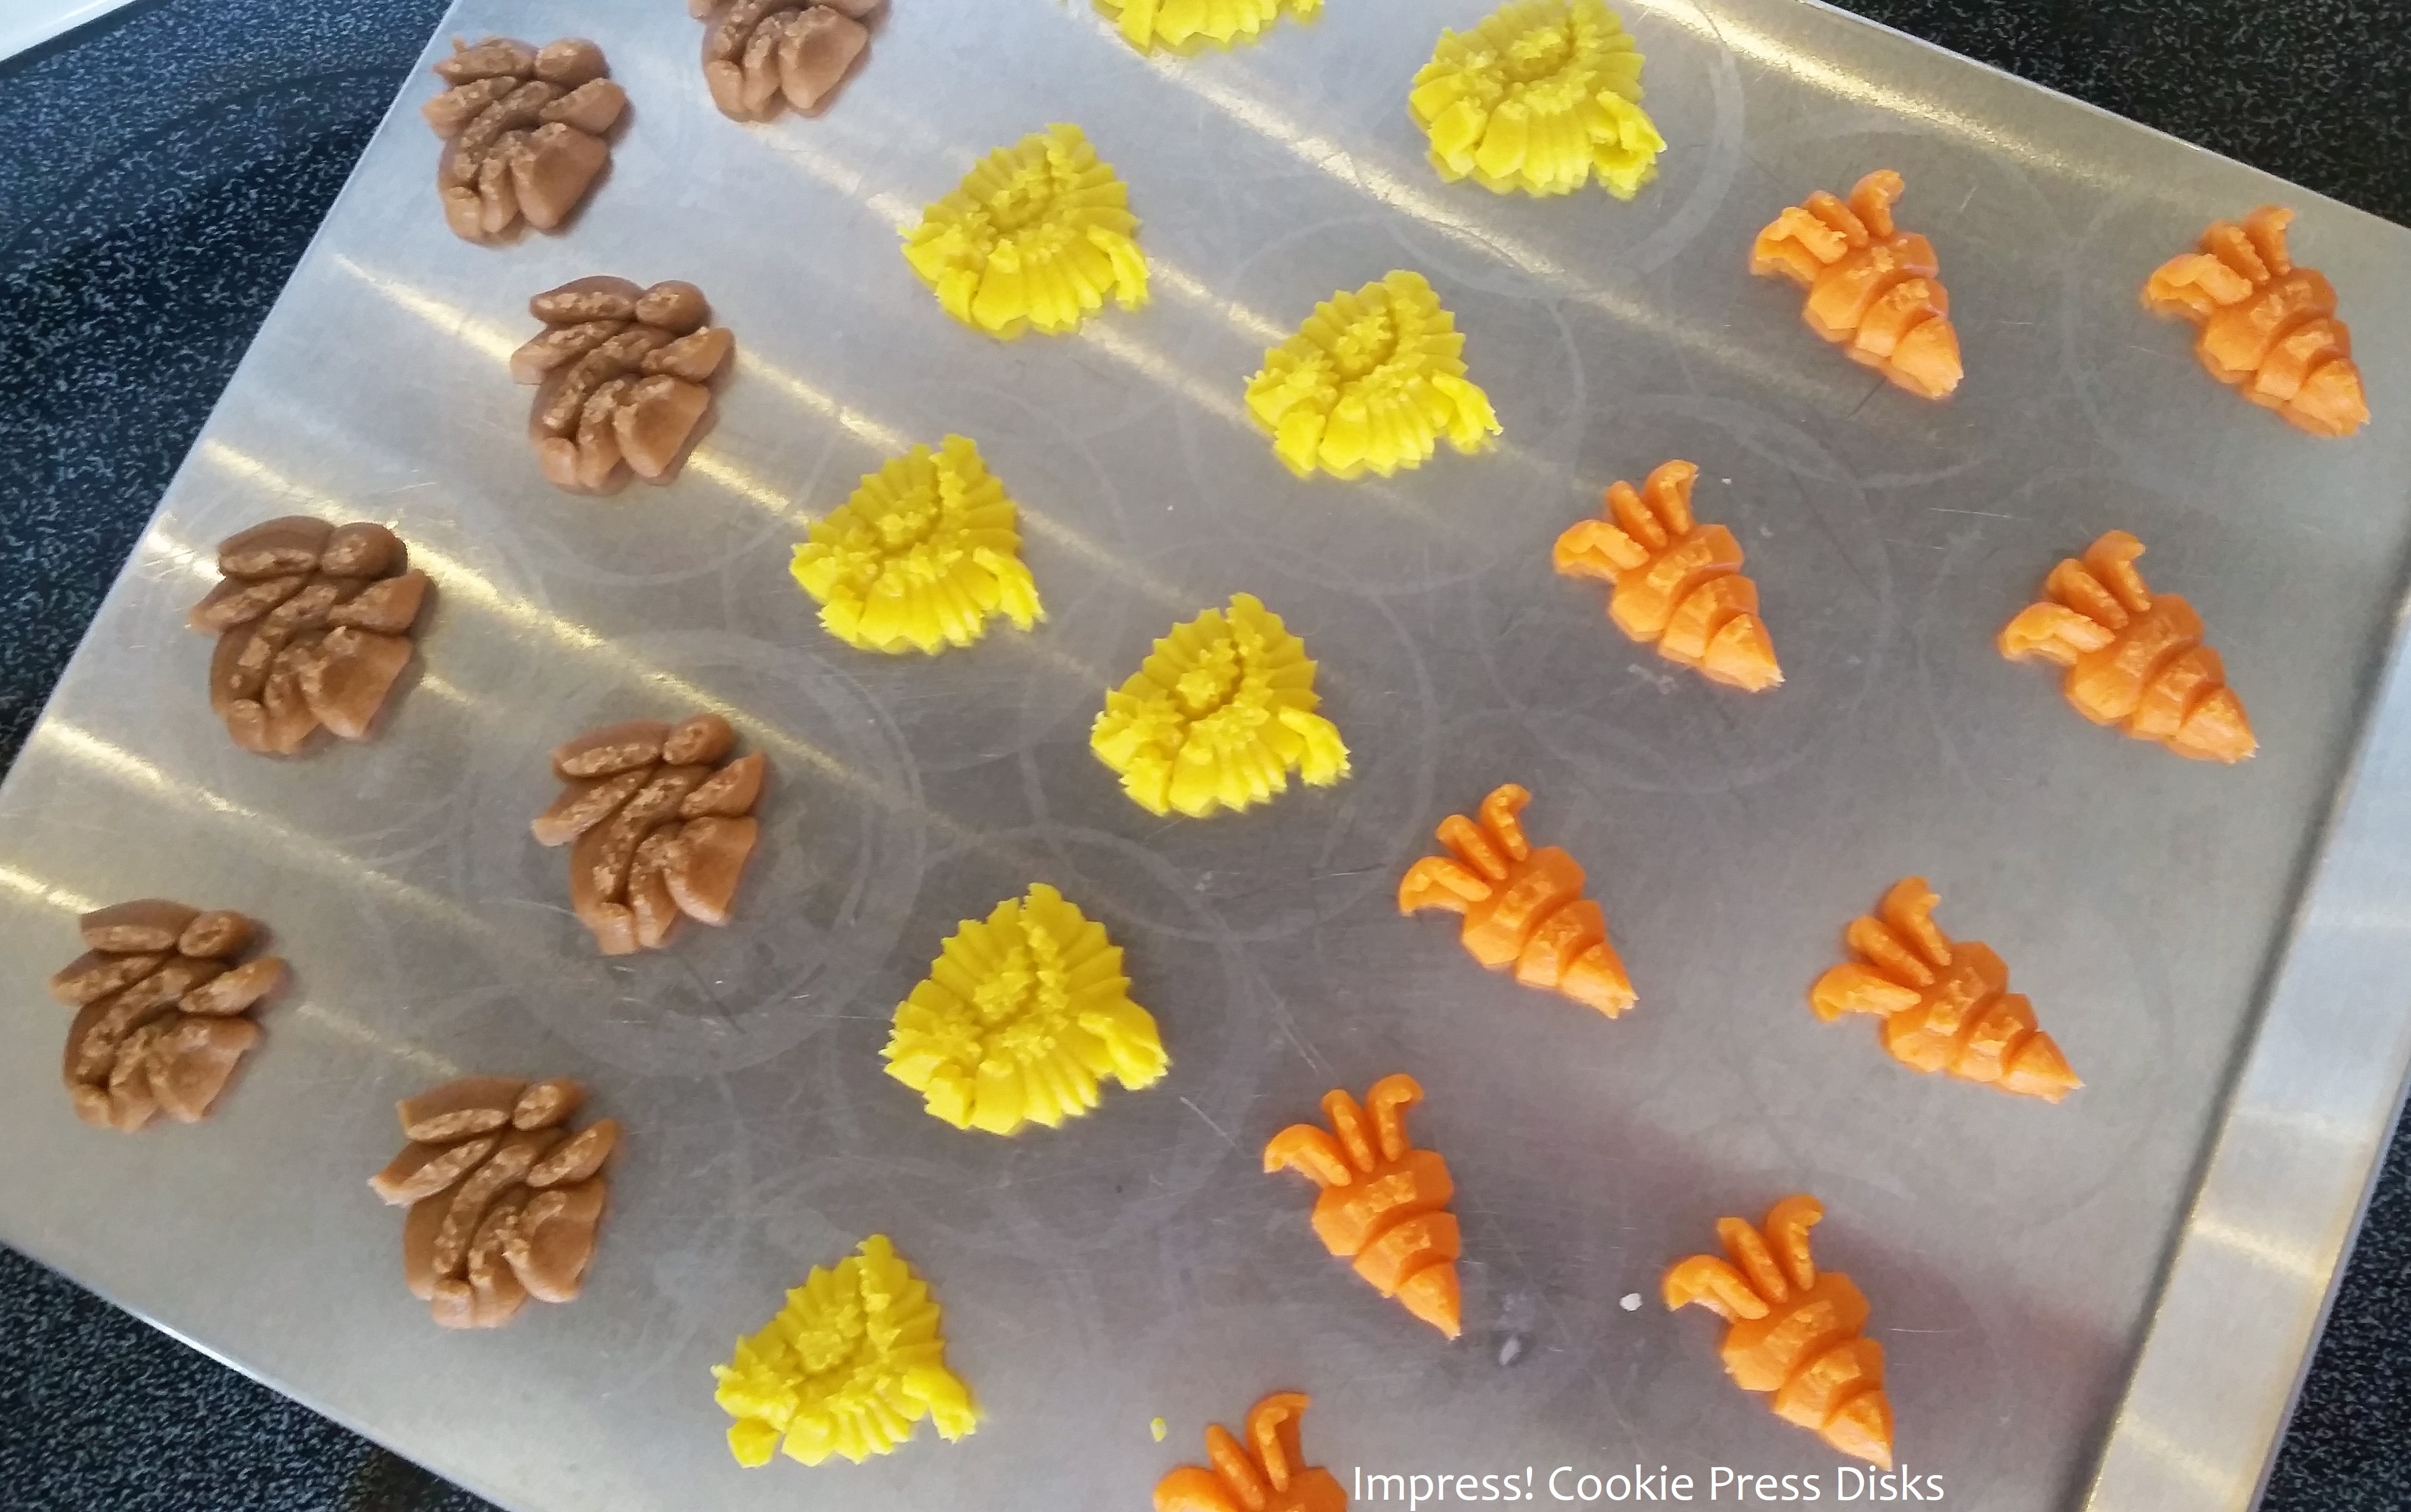
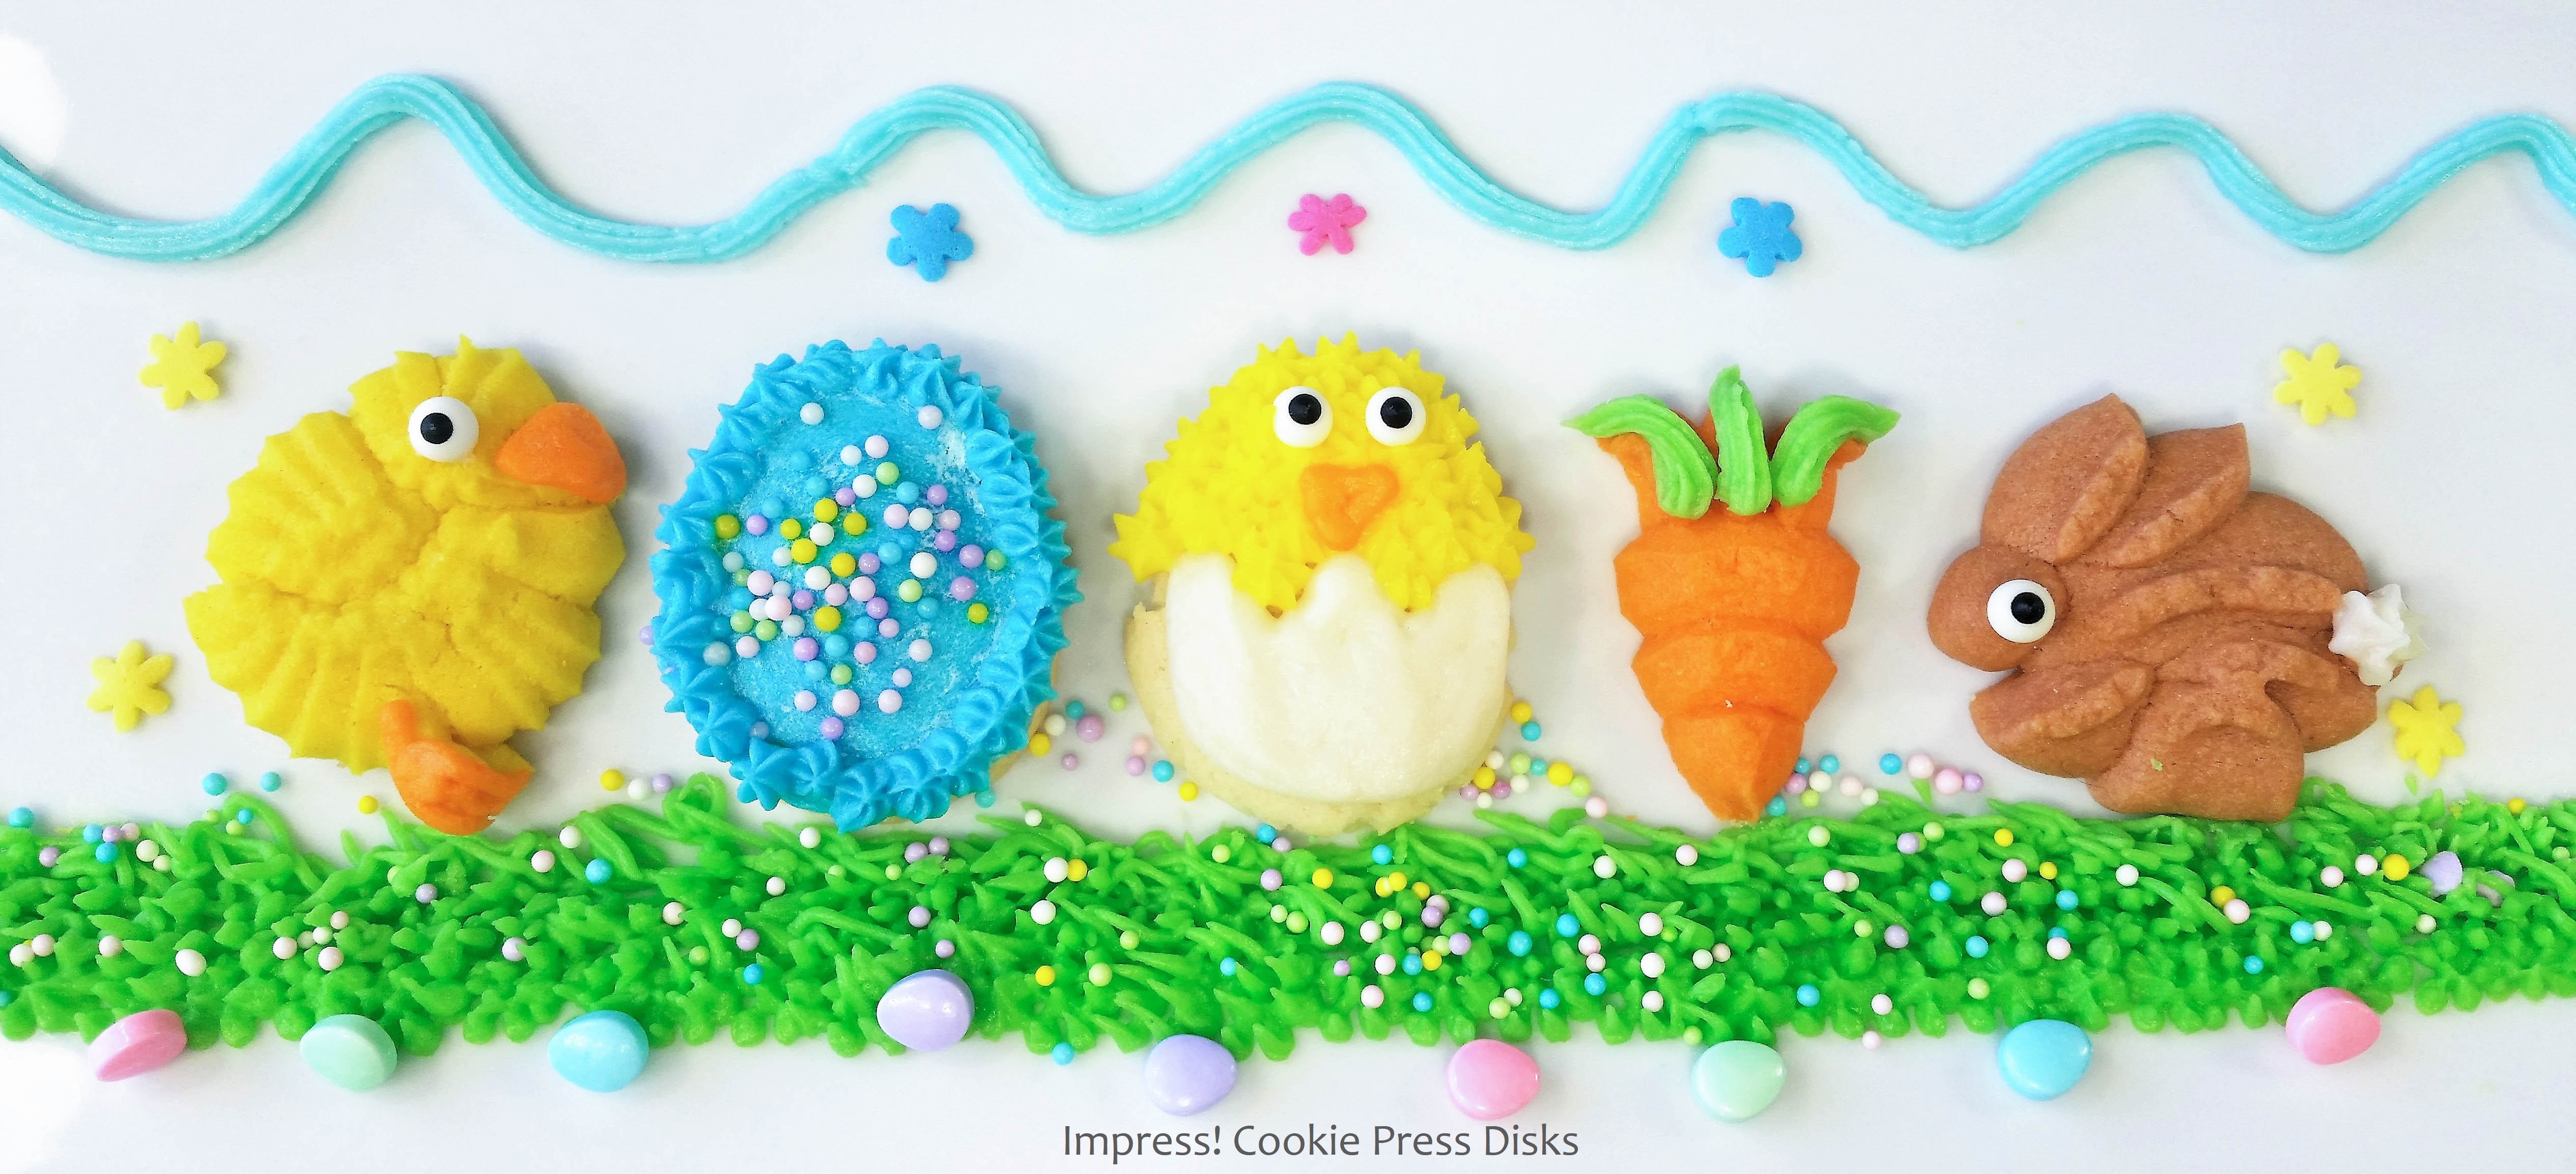
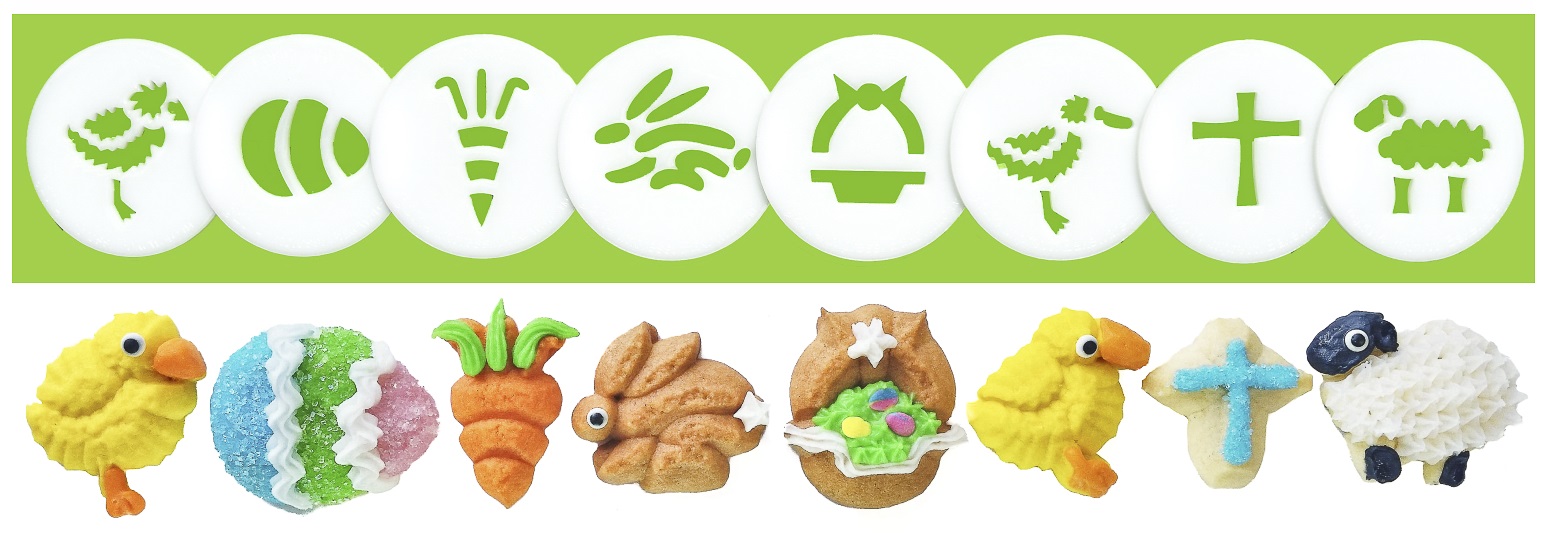
I used the Chick, Easter Egg, Bunny, and Carrot disks from our 8 Disk Easter Set.
*NOTE: As of our 2019 Re-Opening our new disks are made of a solid white material, but the designs are exactly the same, and press identically.


Our website has all of our 200+ disk shapes, cookie press, embossed rolling pins, stamps, baking accessories plus more about our Women/Family Owned company! impressbakeware.com
All products are on our Etsy shop.
Our Amazon shop has our cookie press and disks and embossed rolling pins.
![]() “Spring Into Baking” 15% off SALE!
“Spring Into Baking” 15% off SALE!![]() Create unique treats this Spring, because baking should be fun!
Create unique treats this Spring, because baking should be fun!![]() Discount on our cookie press disks, cookie press, embossed rolling pins, luster dusts, cookie cutters & baking accessories. Sale March 28- April 13 2025, on our website and Etsy shops ONLY! (Links above) Sale excludes holiday gift sets and our recipe book.
Discount on our cookie press disks, cookie press, embossed rolling pins, luster dusts, cookie cutters & baking accessories. Sale March 28- April 13 2025, on our website and Etsy shops ONLY! (Links above) Sale excludes holiday gift sets and our recipe book.
Here’s the cookie dough recipe, decorating directions, and some more photos of the pressed cookies and baked results. To follow the whole process along with me, and to watch my pressing techniques, watch the video above!
Cream Cheese Spritz Cookies
1 cup (2 sticks) butter, softened (not melted)
3 ounces softened cream cheese
1 cup granulated sugar
1 egg
1 teaspoon vanilla extract
3 1/4 cups all-purpose flour
1/2 teaspoon baking powder
1/4 teaspoon salt
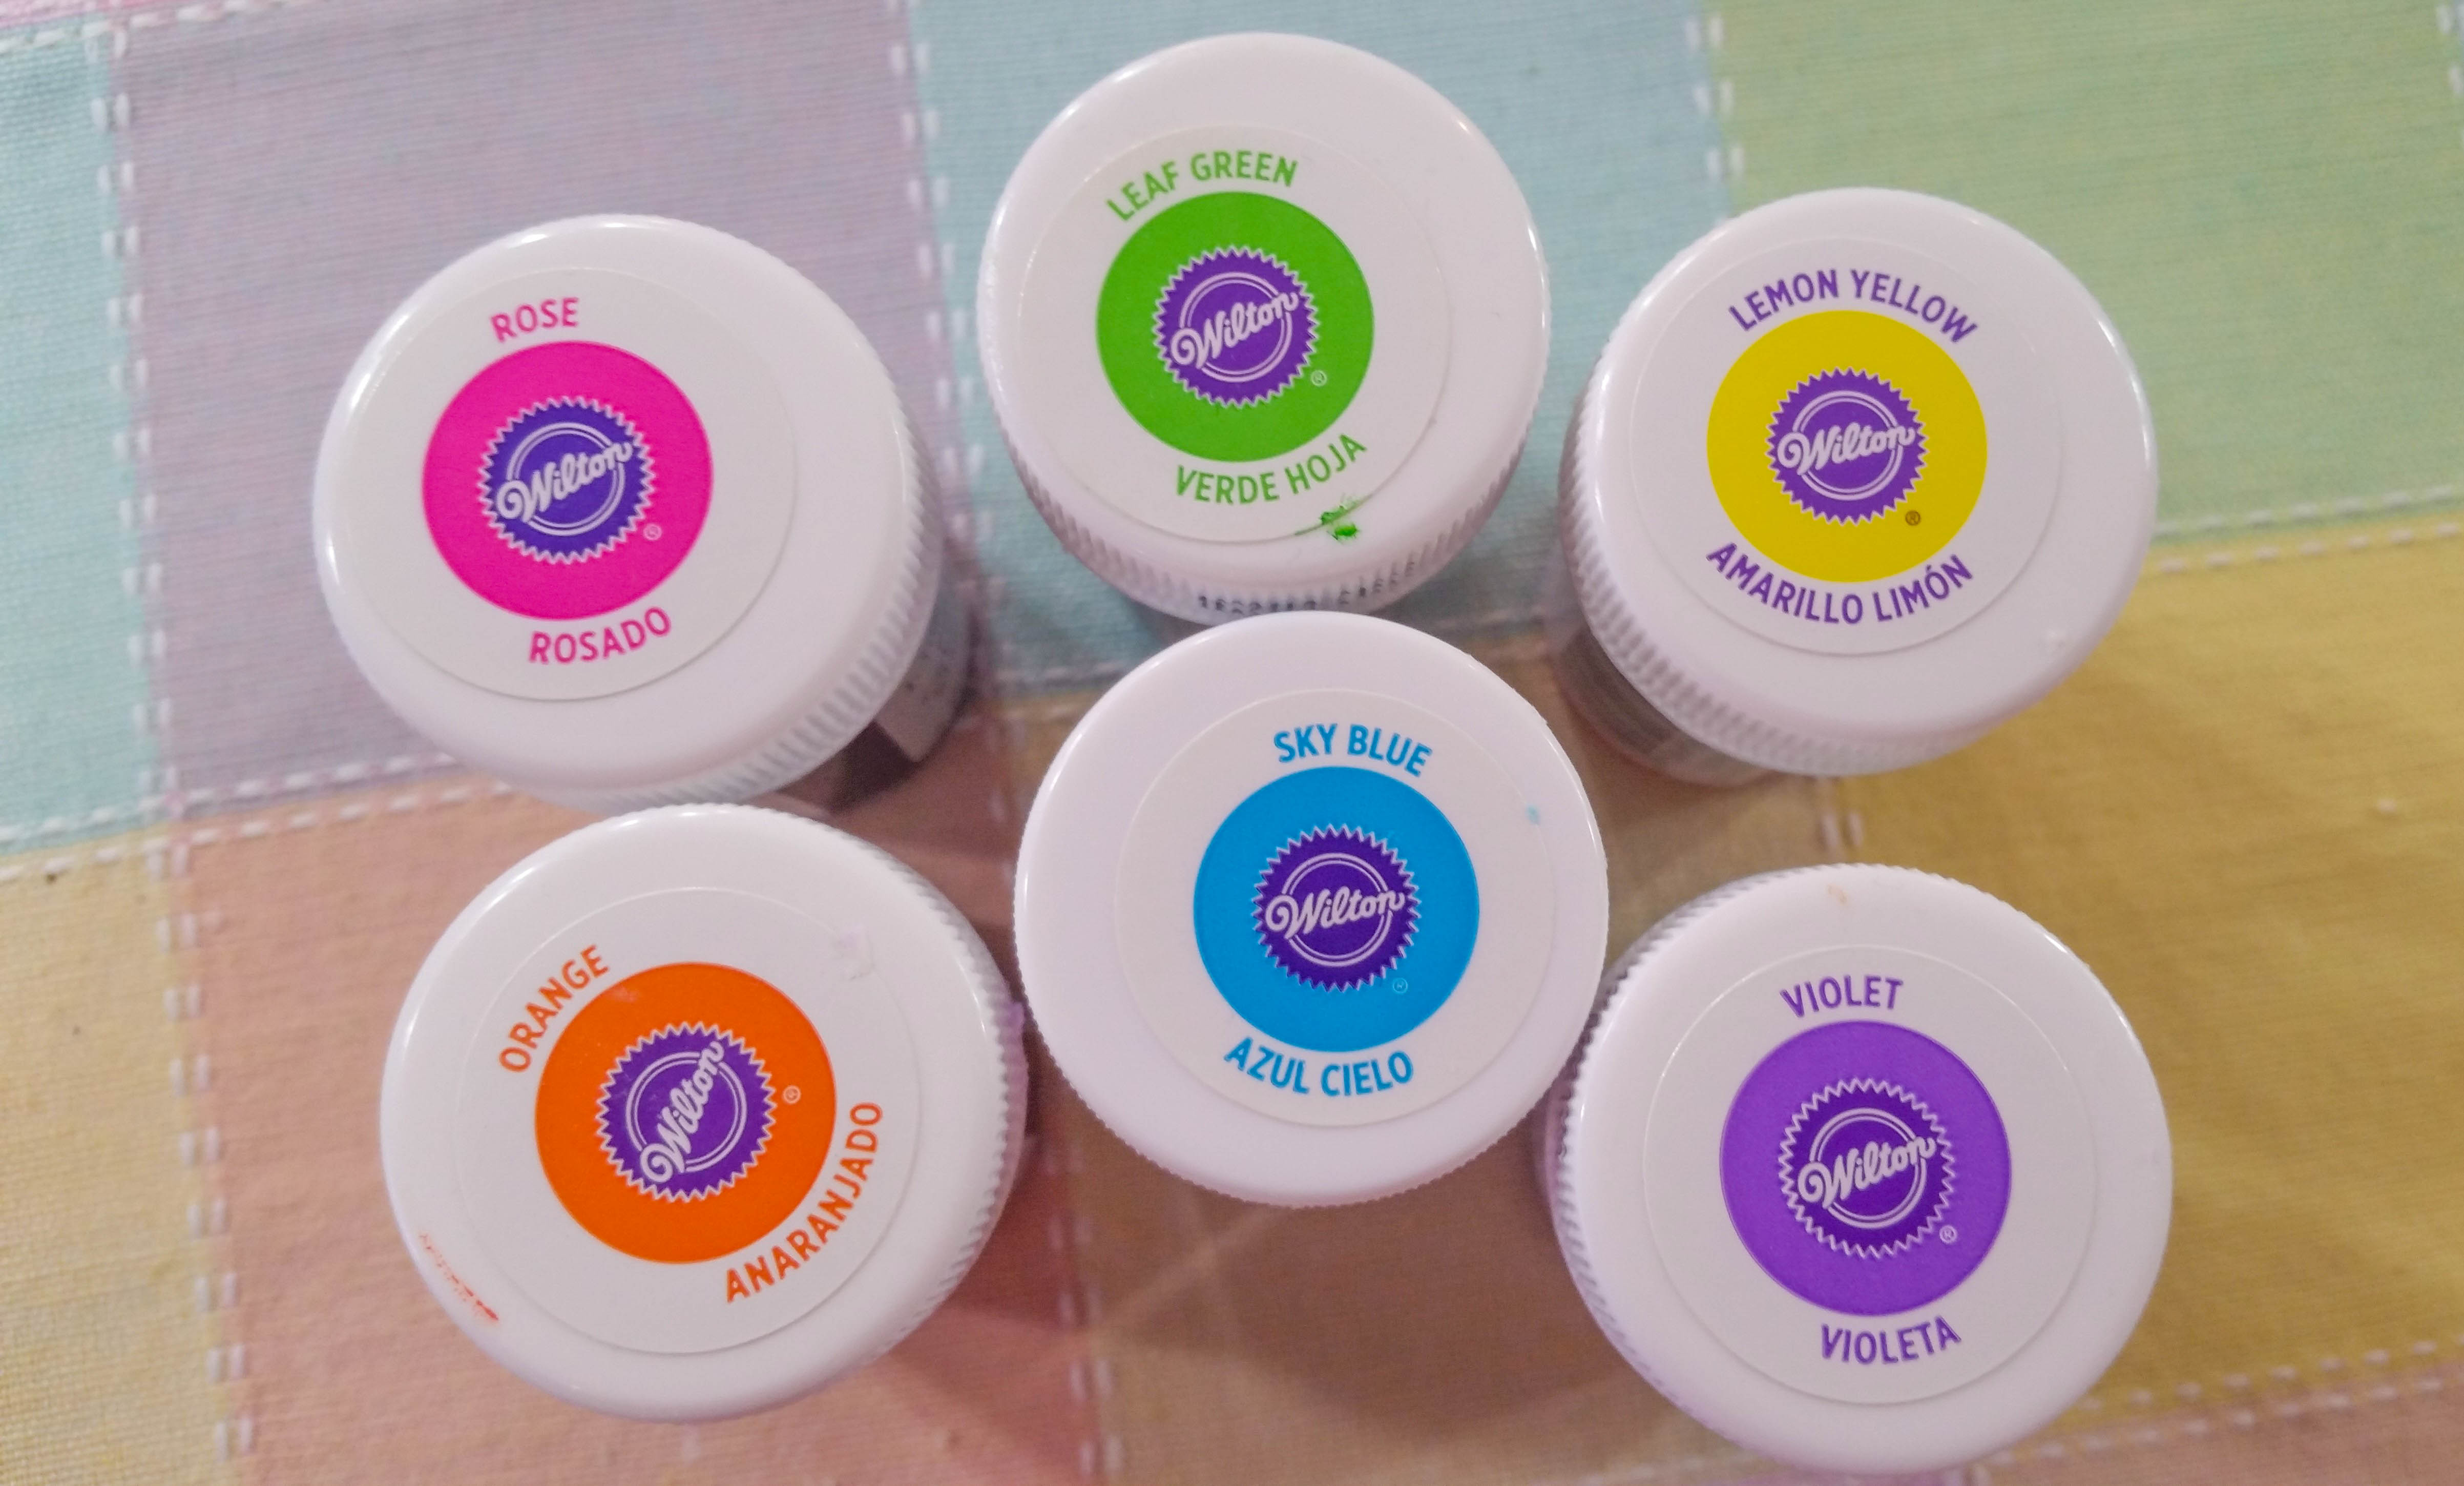
Gel food coloring (liquid changes dough consistency too much)
Preheat oven to 400 degrees
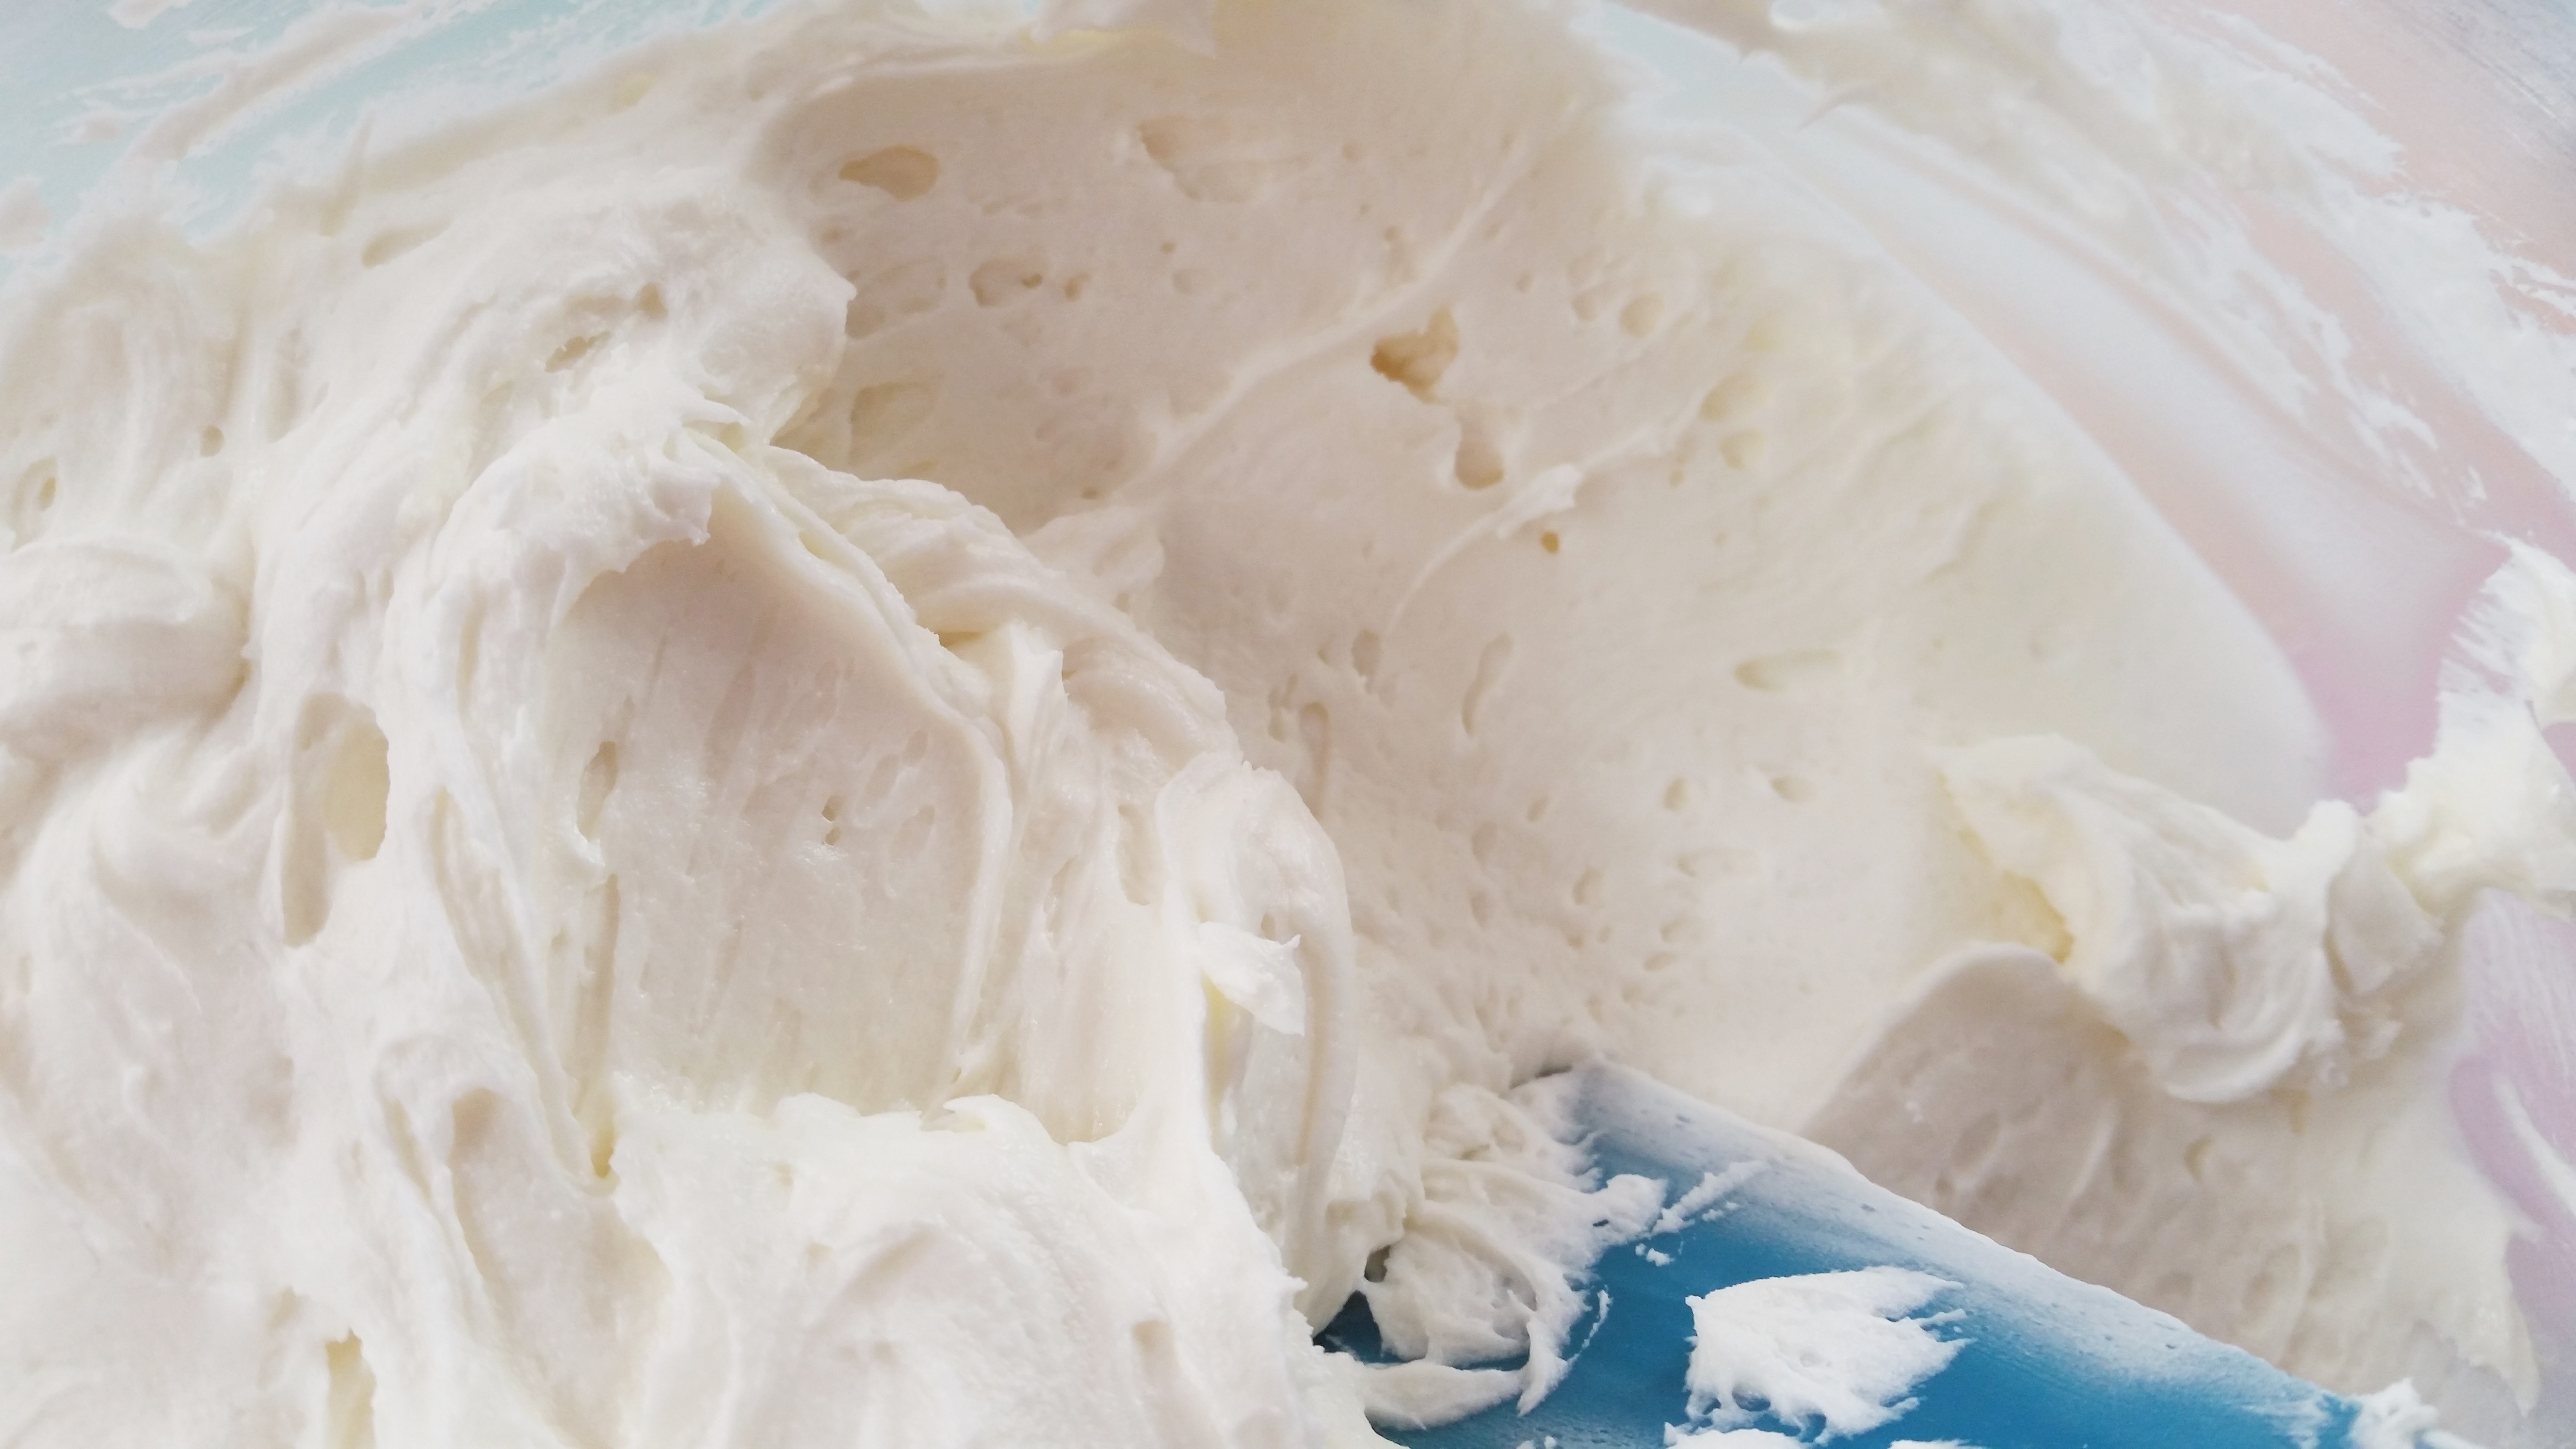
Combine the flour, salt, and baking powder and set aside. Cream the butter and cream cheese very well with an electric mixer on its highest setting. Awesomely creamed butter is the basis of great spritz recipes that melt in your mouth. Next add the sugar and cream again until light and fluffy. Add the vanilla and egg and mix thoroughly. Add the flour mixture a little at a time and mix until all ingredients are evenly combined , but do not over-mix as that can make spritz dough too stiff.
You can always troubleshoot a spritz dough by adding vanilla or water a teaspoon at a time to stiff dry dough or adding flour a tablespoon at a time to overly sticky or soft dough. Perfect spritz dough has a soft malleable texture that is not too sticky or too stiff.
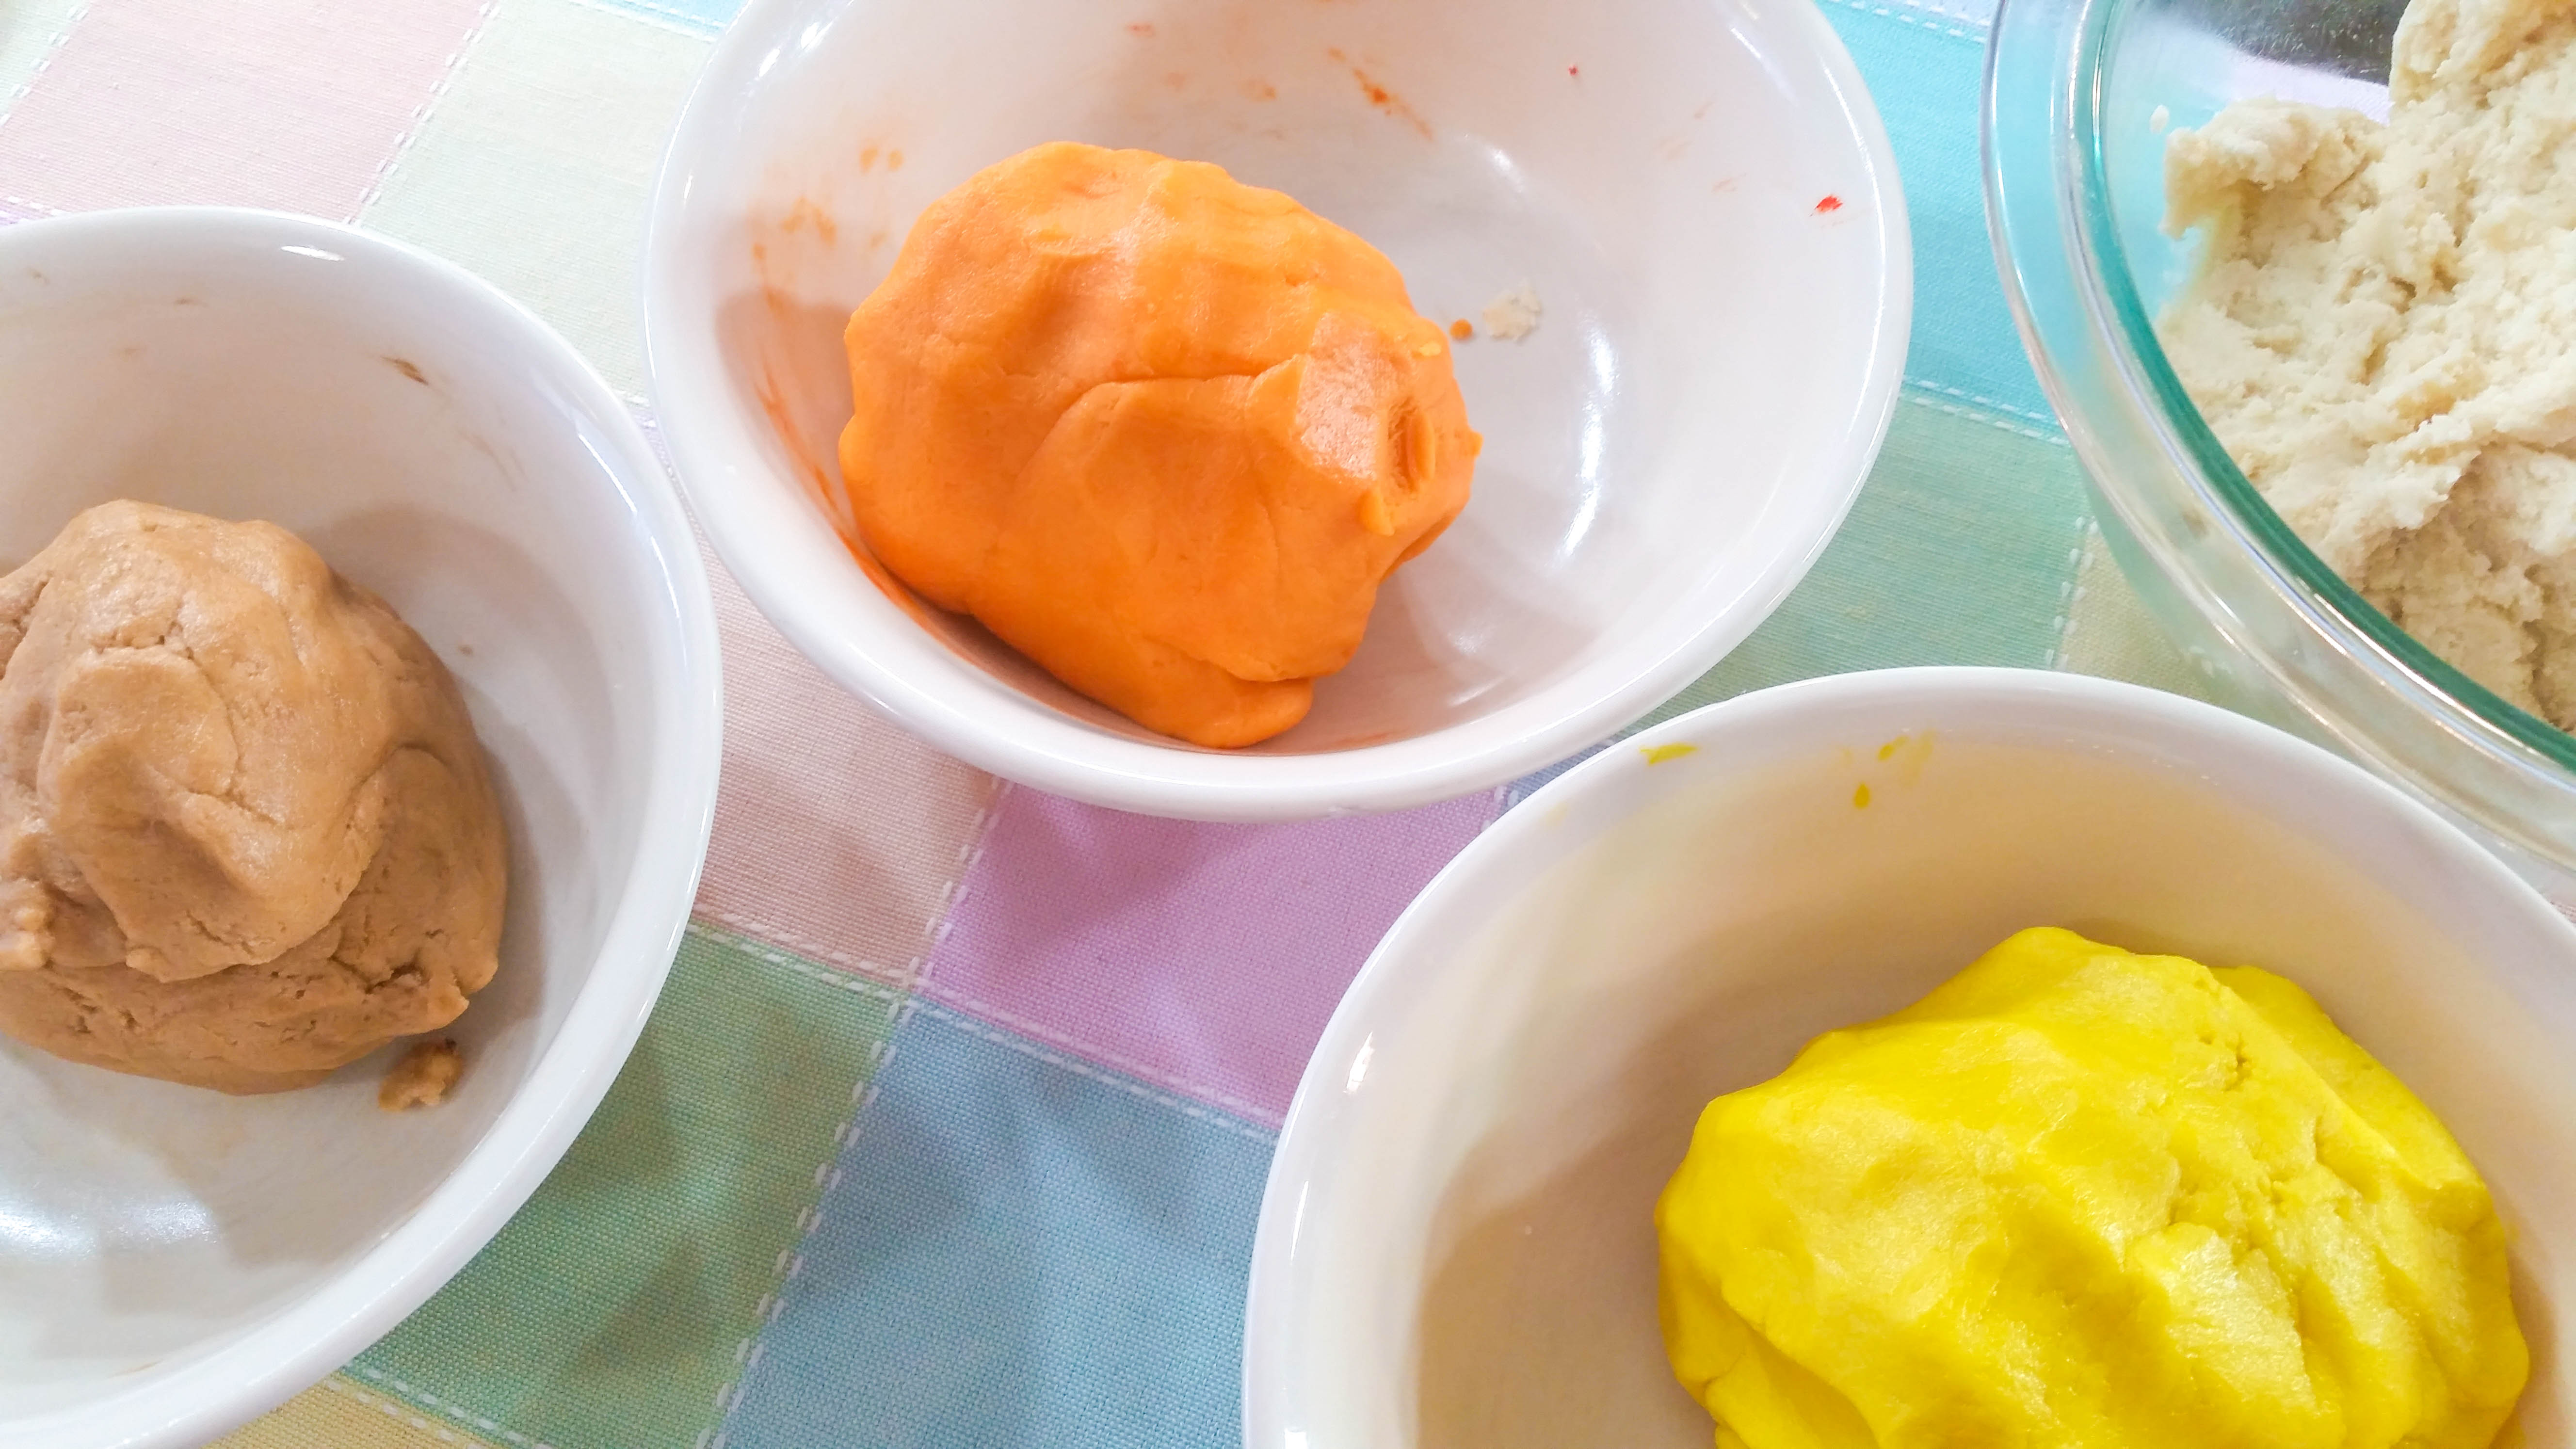
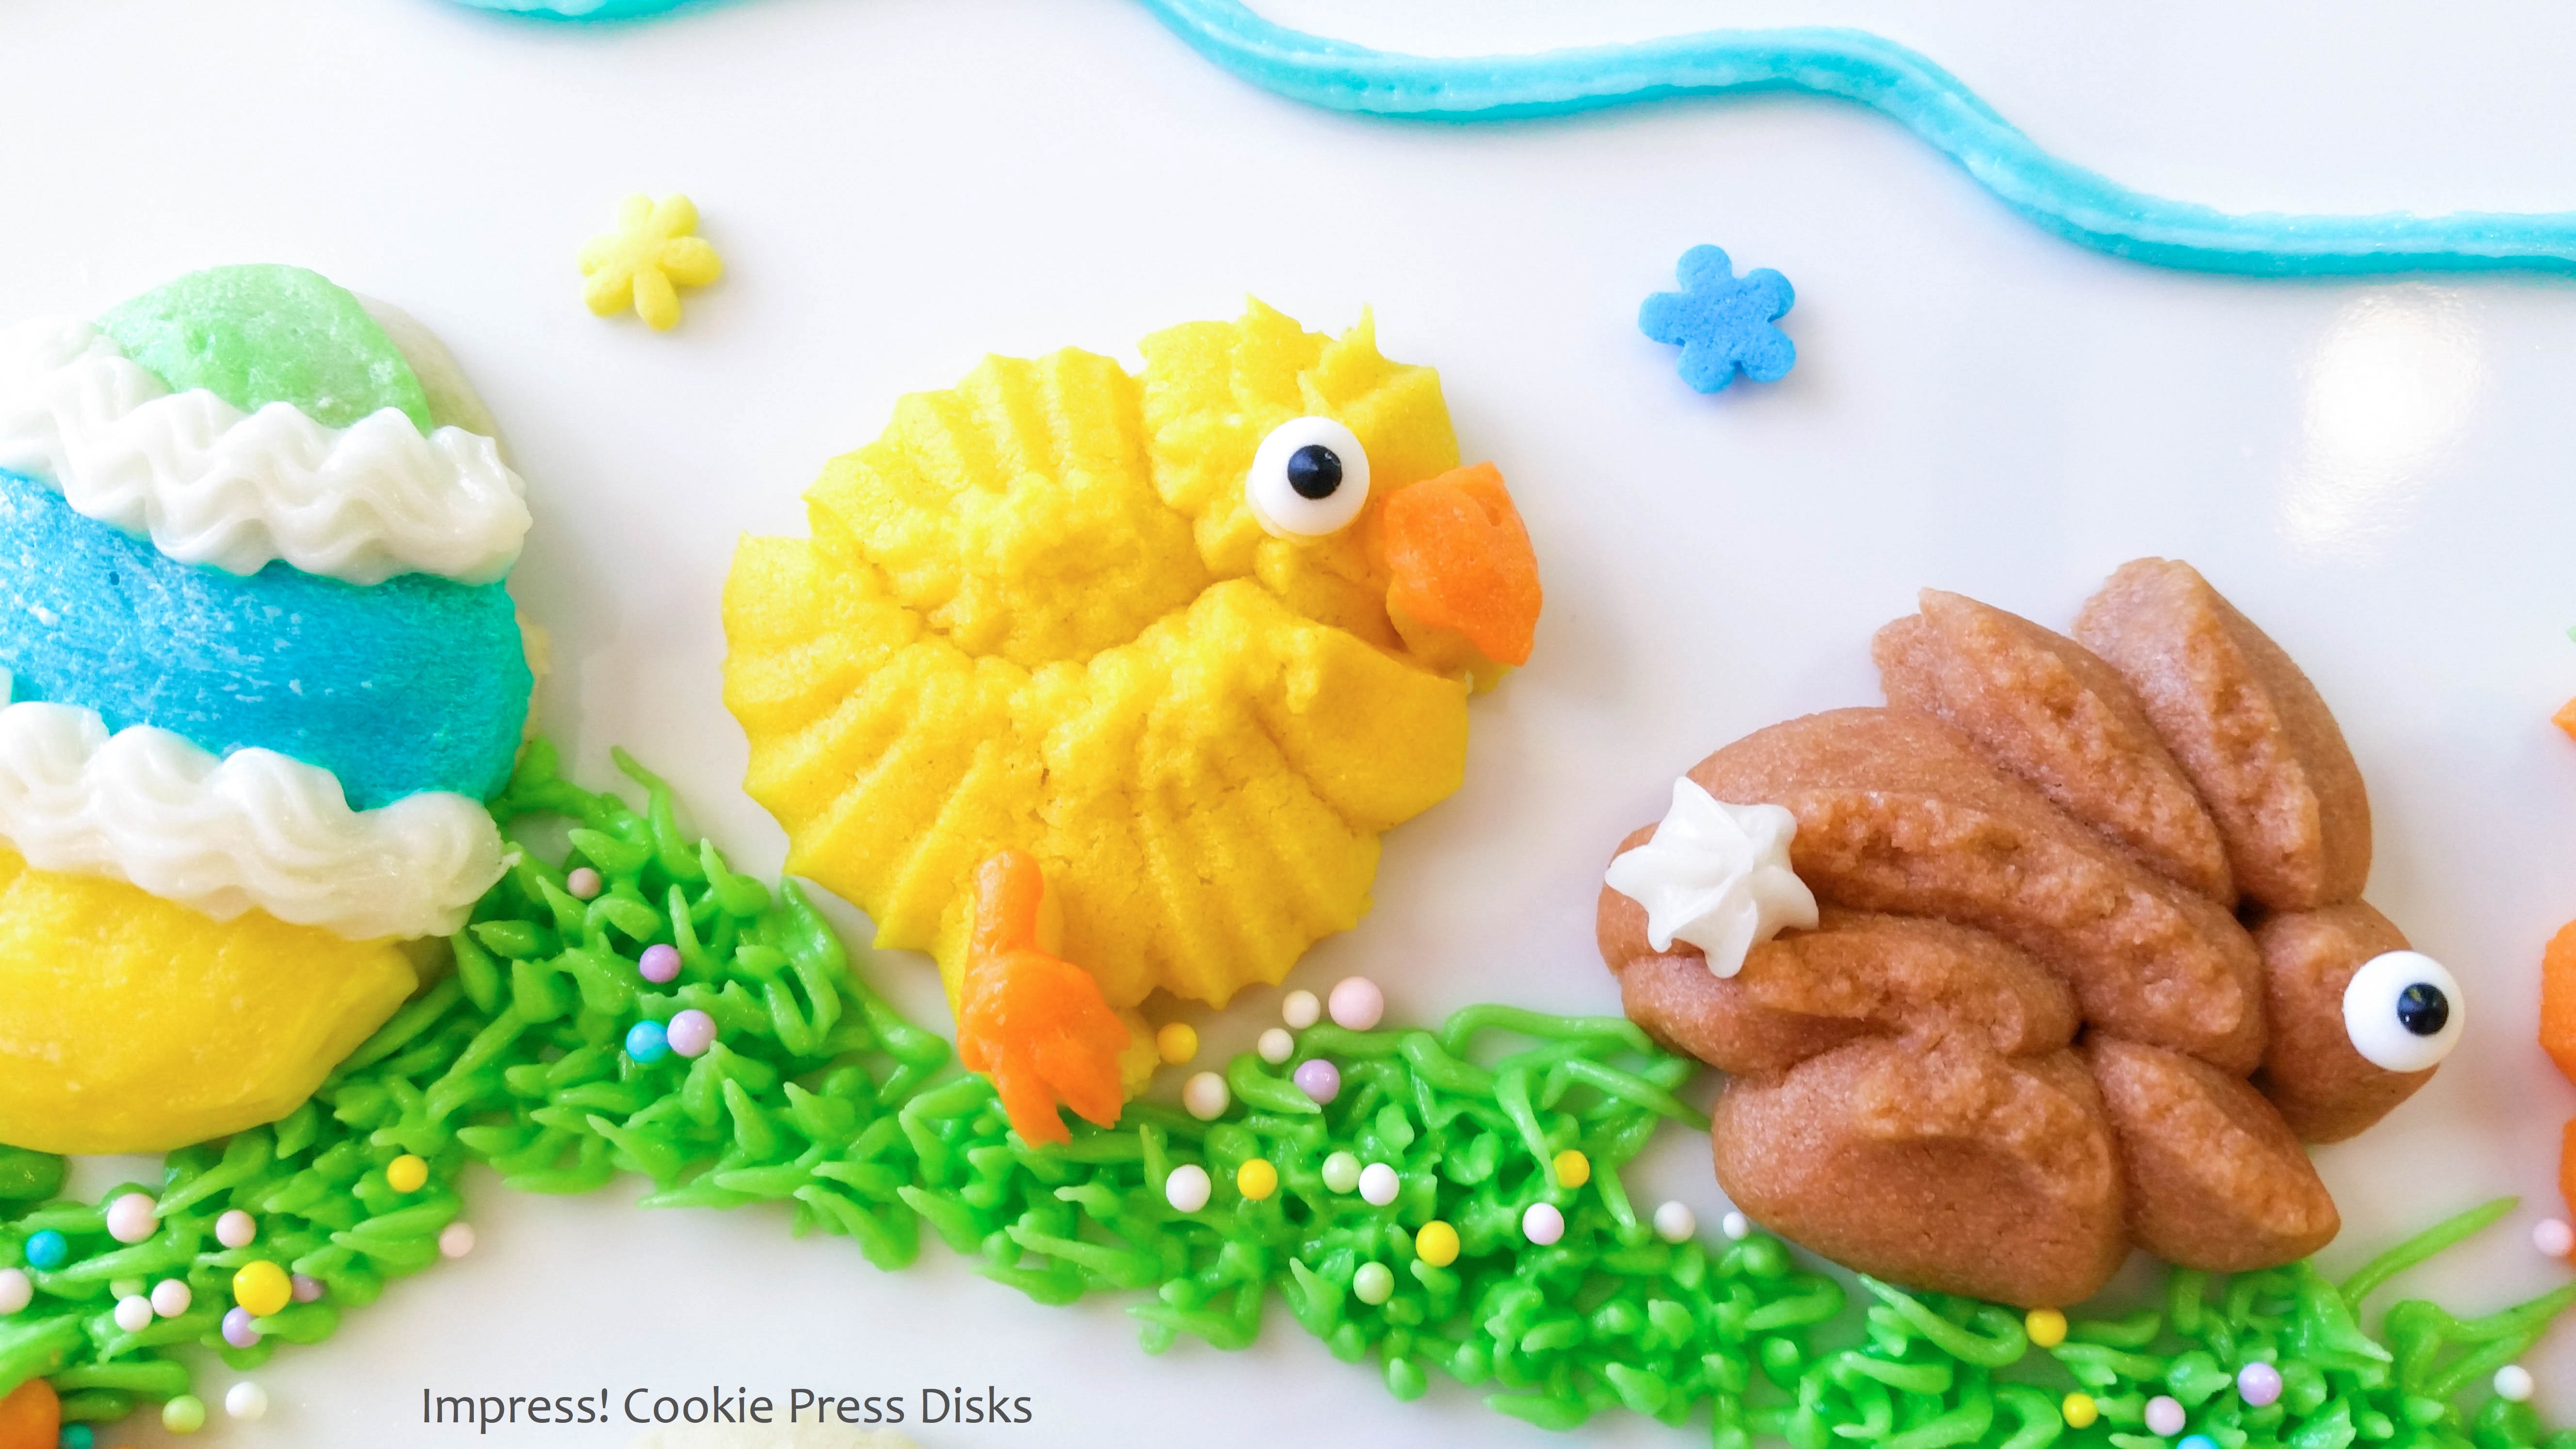
Use gel food coloring to tint your dough whatever colors you like. I used yellow for chicks, brown for bunnies, and orange for carrots, leaving half of my dough plain for lots of eggs to be decorated with icing later.
I use toothpicks to add the color to my dough and knead it by hand. Remember to start with just a little color. You can always add more but you can’t take it out.
Get your disks and pack your dough into your cookie press barrel, using the back of a spoon to press the air bubbles out. This helps create consistent pressure to press with. Place the disk in the bottom ring and start pressing onto an un-greased cookie sheet. Use a consistent rhythm to keep the shapes a uniform size.
If you’re having trouble pressing (mis-shaped cookies, trouble sticking to the pan, etc) press one cookie into the air and wipe it off and toss back into the bowl to re-set your pressure in the press. You can also refrigerate your cookie sheets for 5 minutes if sticking is an issue. It’s ok if the first few shapes come out weird. That happens as pressure builds. Have patience! And if any shapes ever come out wrong, just toss them back in the bowl to be re-pressed.
For the eggs, dip a fingertip in a small dish of water and gently tap on the ridges to flatten some of the cookies. For the smoother icing designs it will make decorating easier. The cookies on the right are how they press, the left ones have been flattened a bit.

Bake for about 7 to 11 minutes. Check them early and often as all ovens are different and spritz brown quickly once the browning begins. You don’t want burned cookies!
Let them sit for 4 or 5 minutes on the cookie sheet before removing to a cooling rack. This lets them set enough to prevent breaking. This recipe makes about 135 cookies.
While they’re cooling, make the icing.
Buttercream Decorating Icing
1/2 cup softened butter
4 1/2 to 5 cups powdered sugar- add more or less to get a good thickness
1 teaspoon vanilla extract
6 Tablespoons heavy whipping cream
Cream the butter with your mixer and add the other ingredients slowly, a little of each at a time and then really whip the mixture well. This should be fairly stiff, as it’s not for spreading on a cake but to make little stars for decorating. So keep it stiff so your icing shapes hold.
This is a beautiful, wonderfully tasty recipe. I had trouble not eating it as I worked!
Use gel food colors once again to color small bowls of icing. Same principles apply- add a little at a time because you can always add more but you can’t take it out.
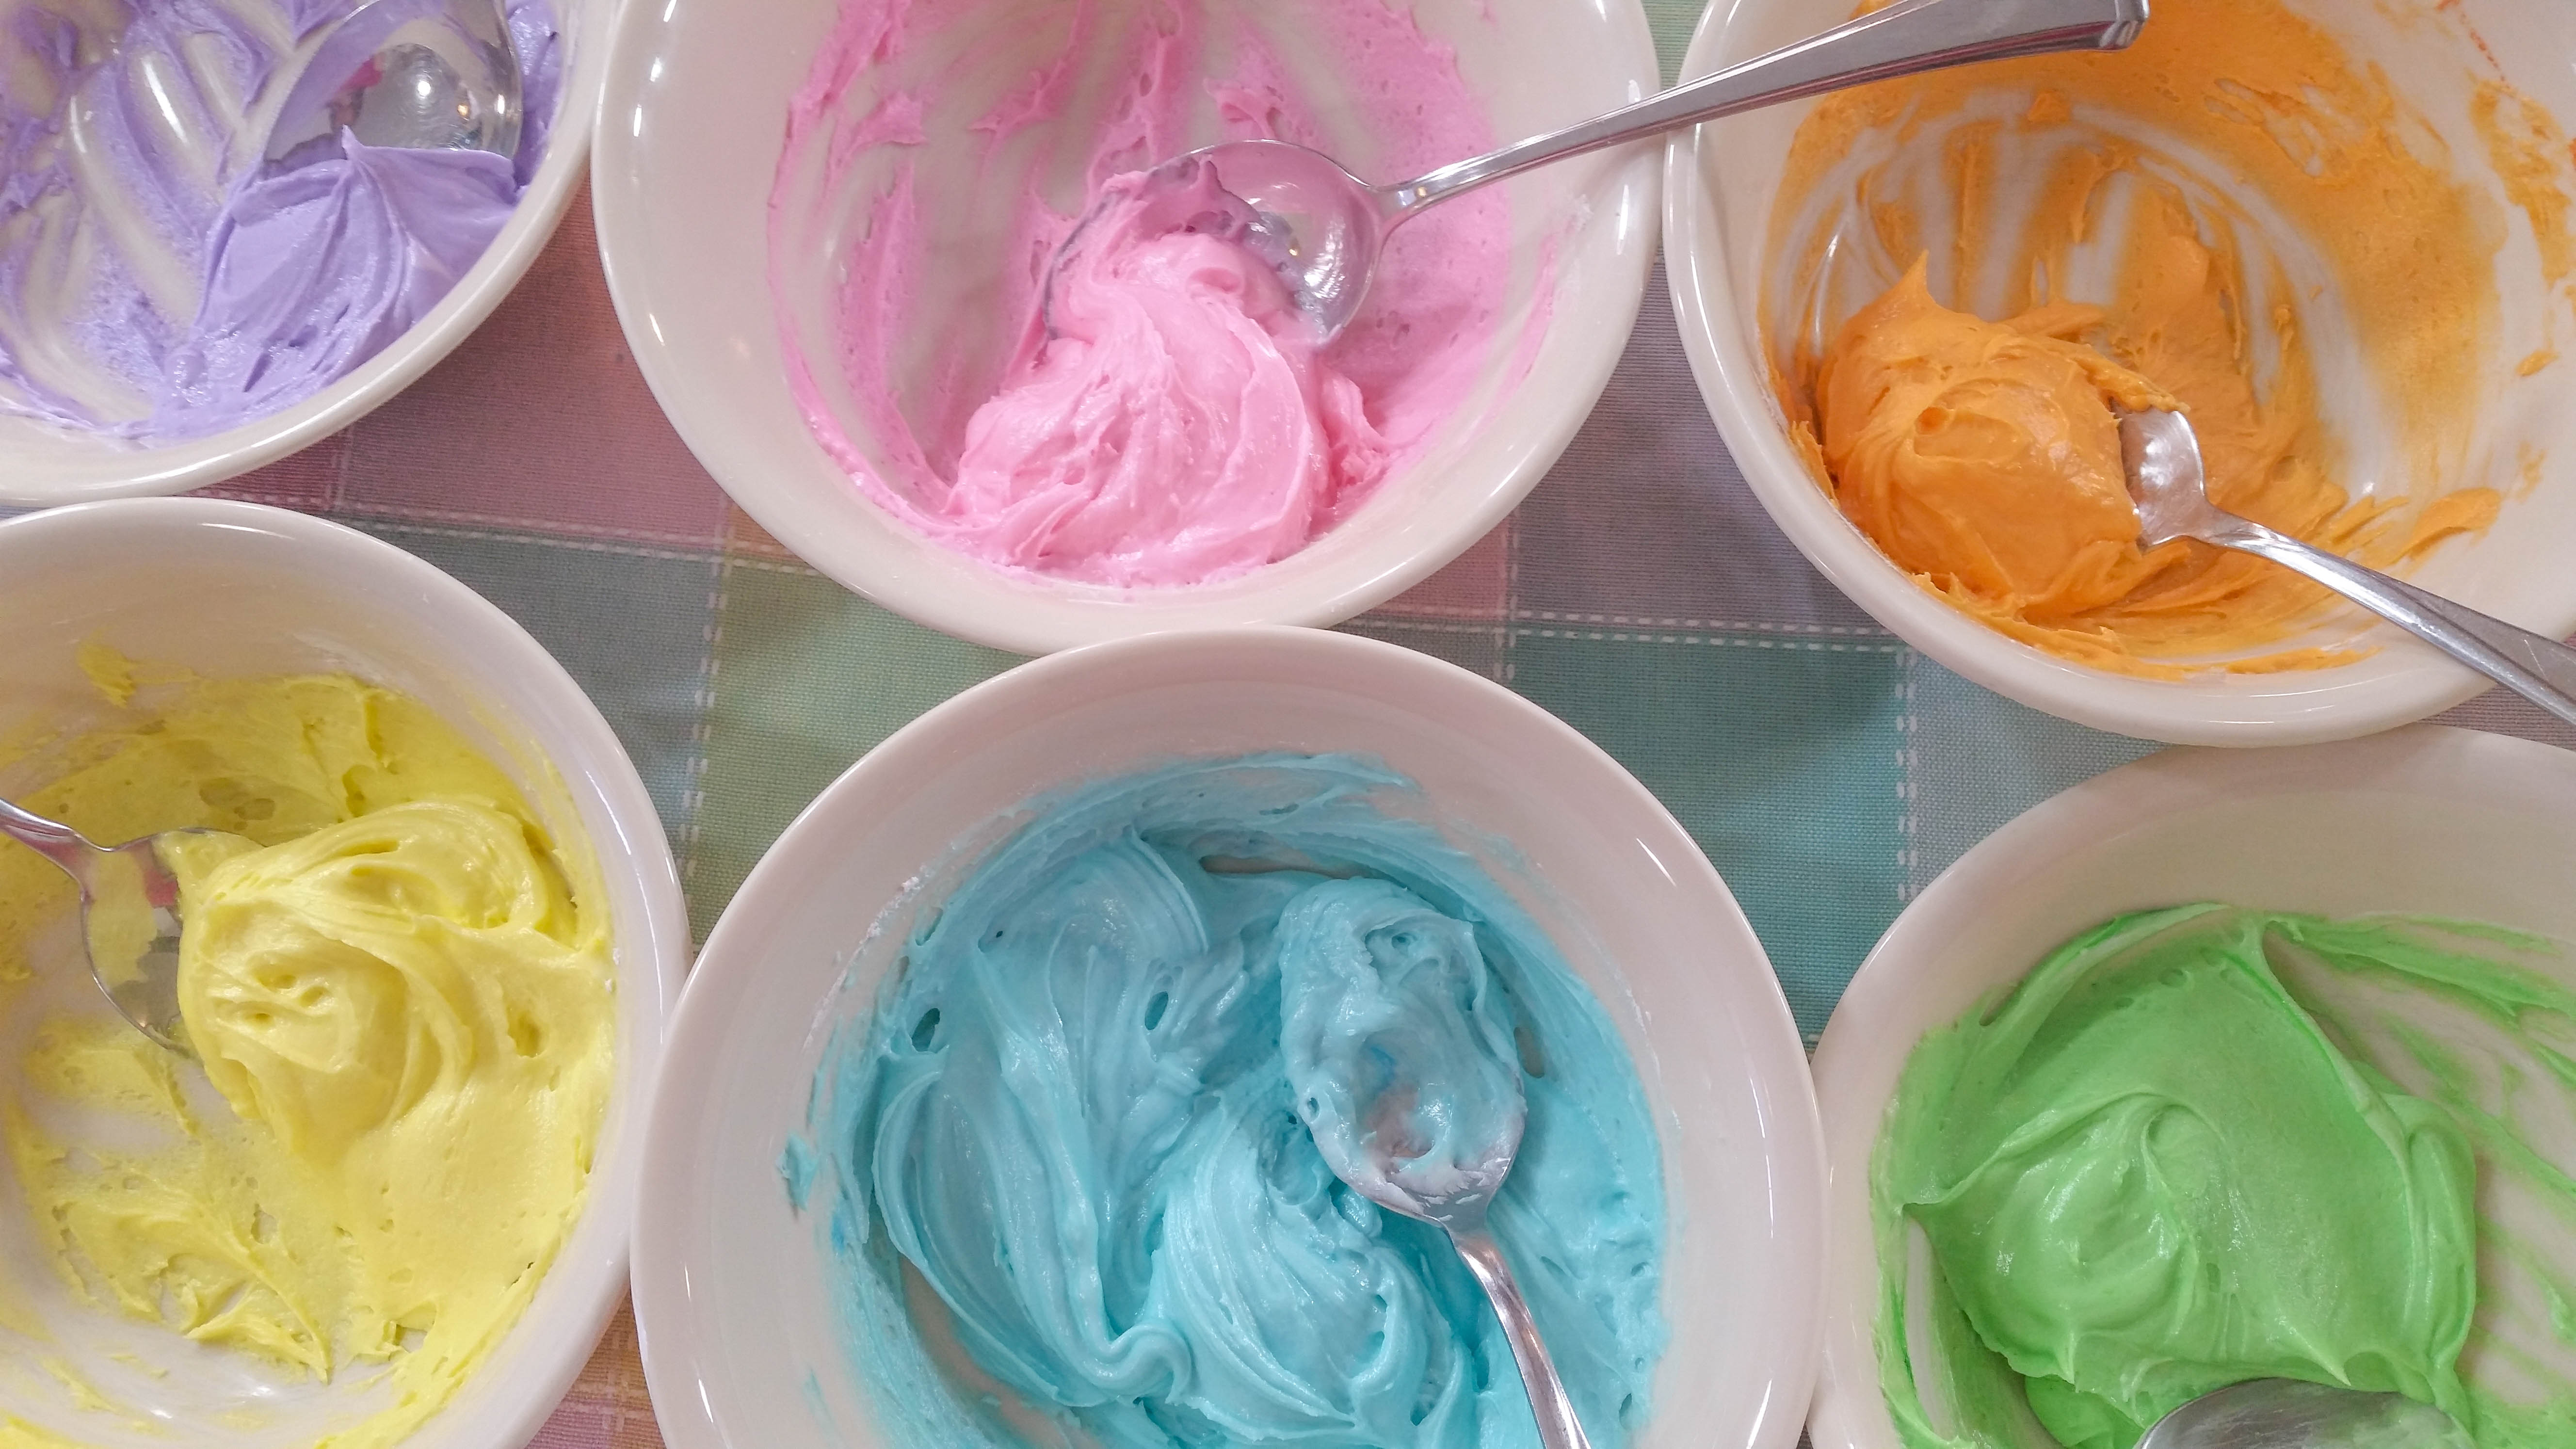
I just love the pastel colors!
Load the icing into decorating bags and use star tips for decorating and round tips for the chick beaks and if you’re making icing eyes.
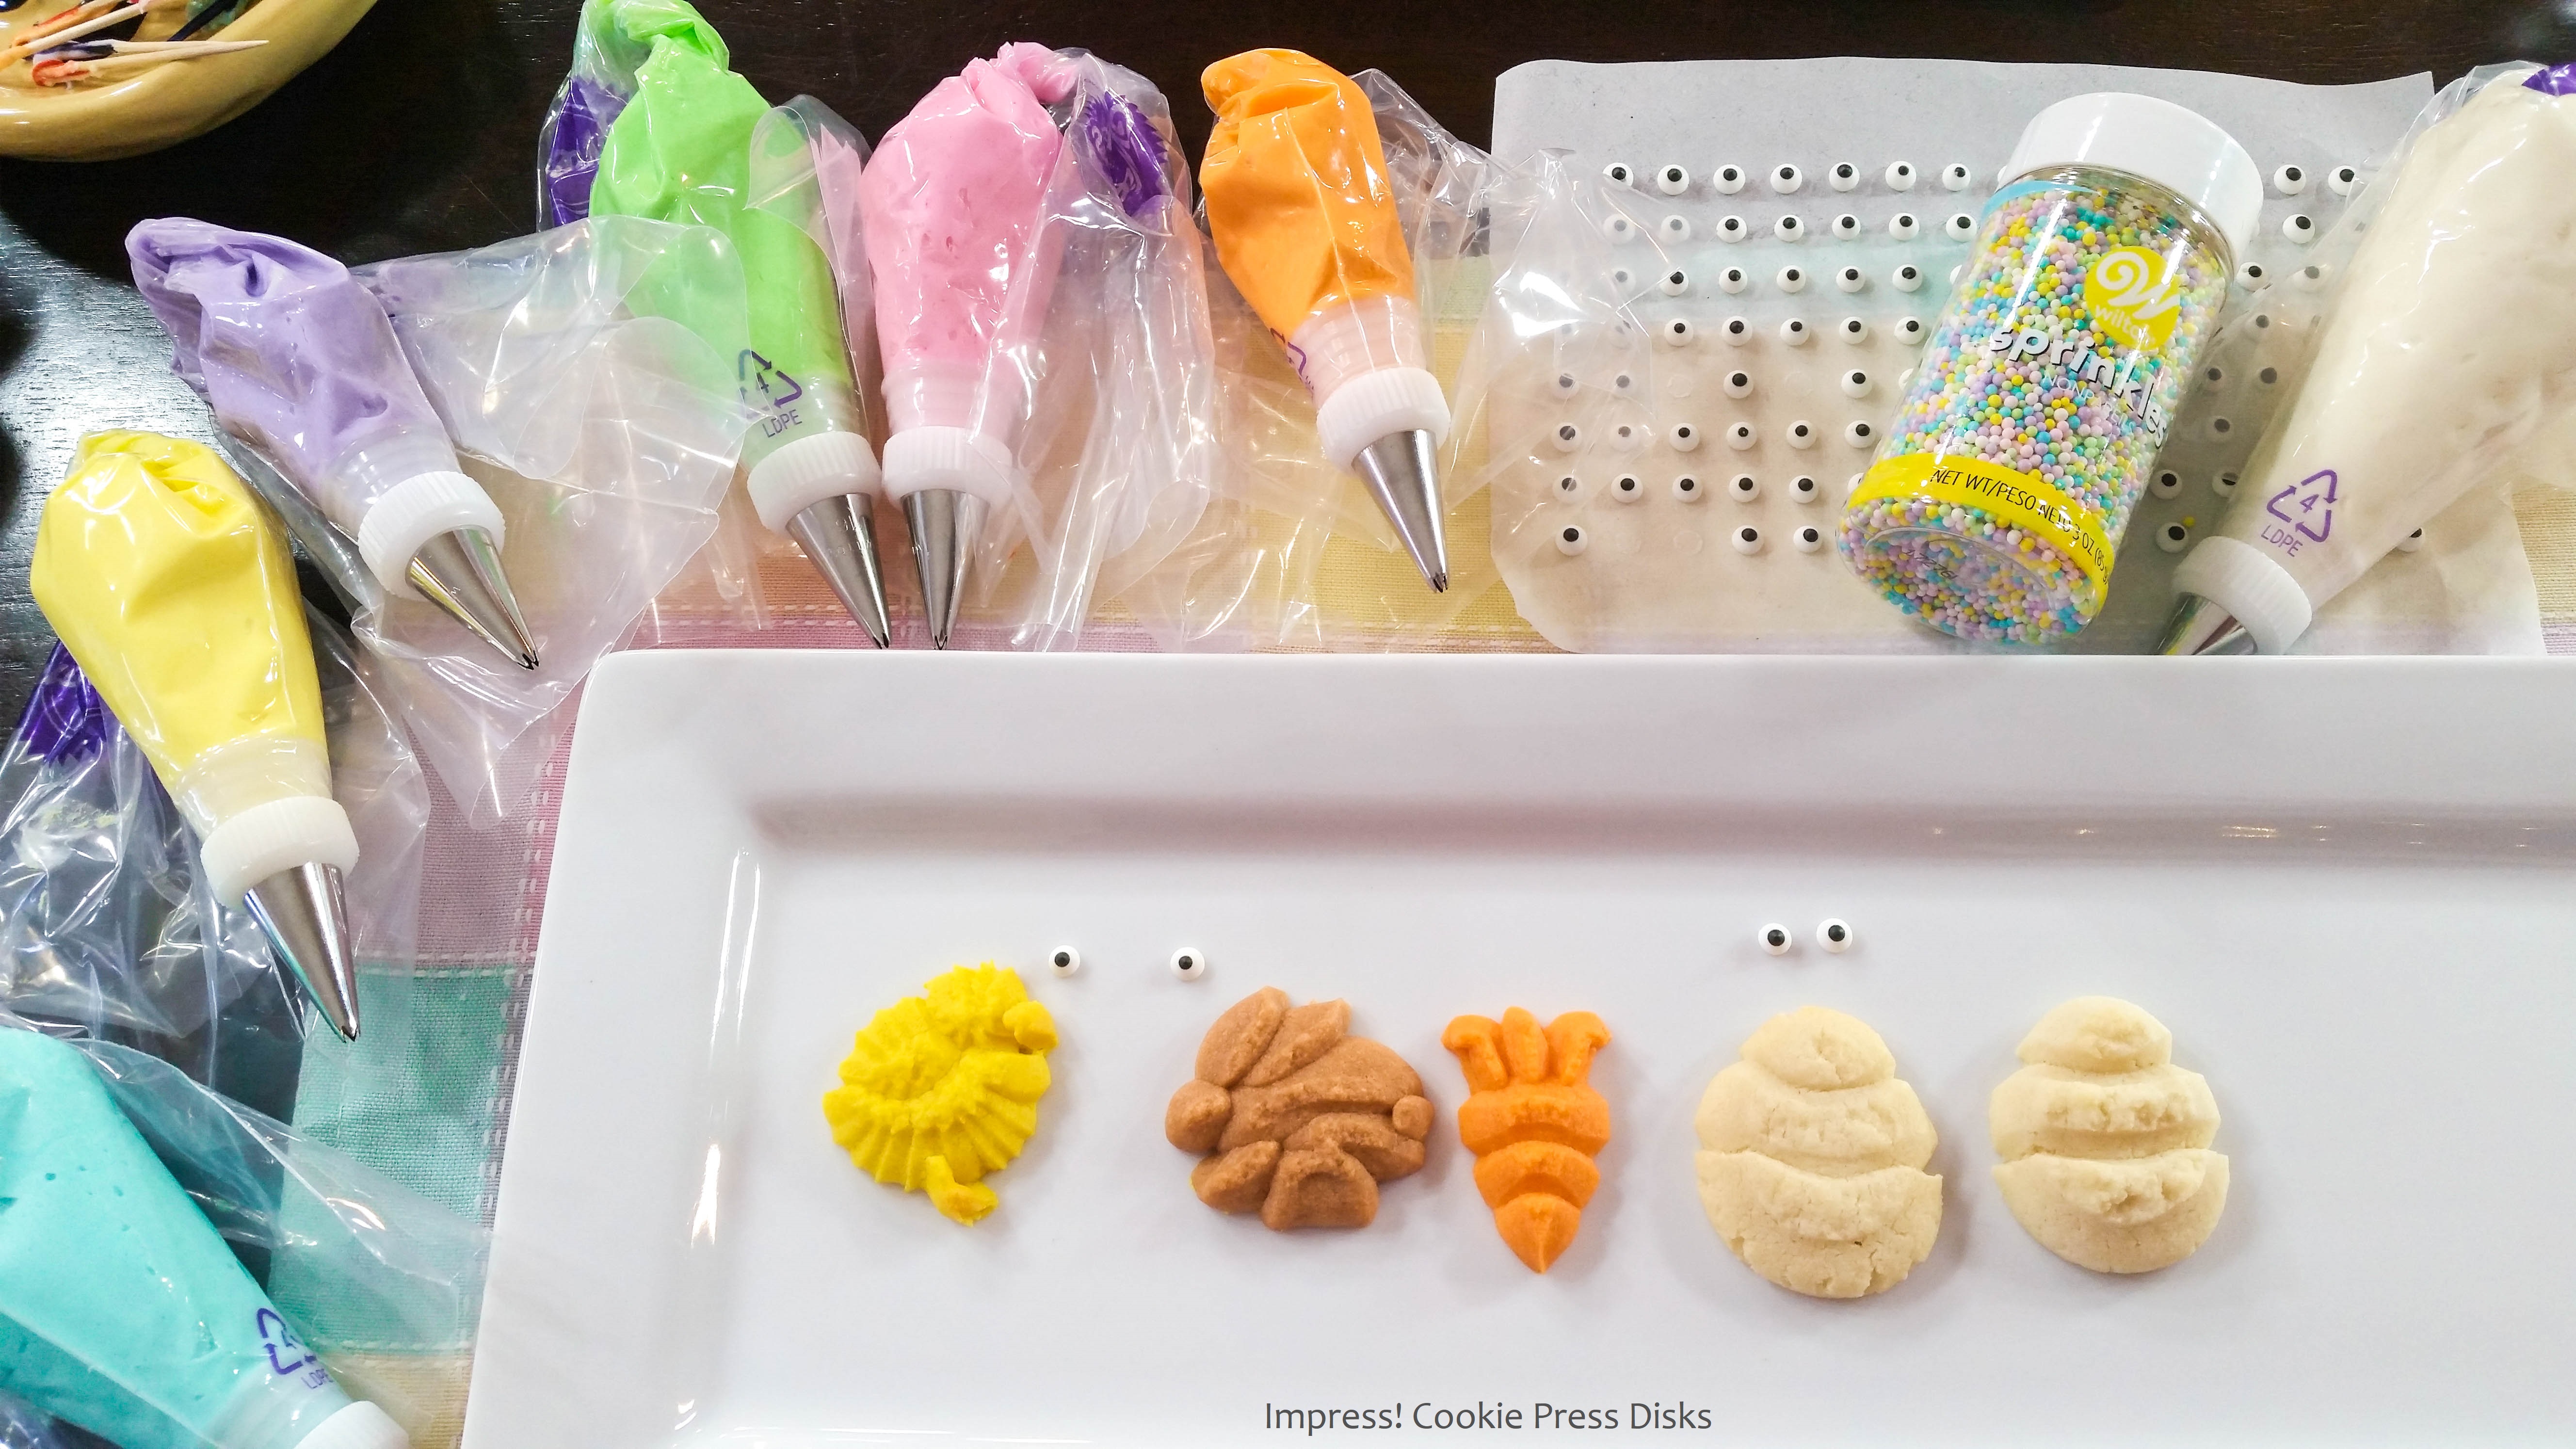
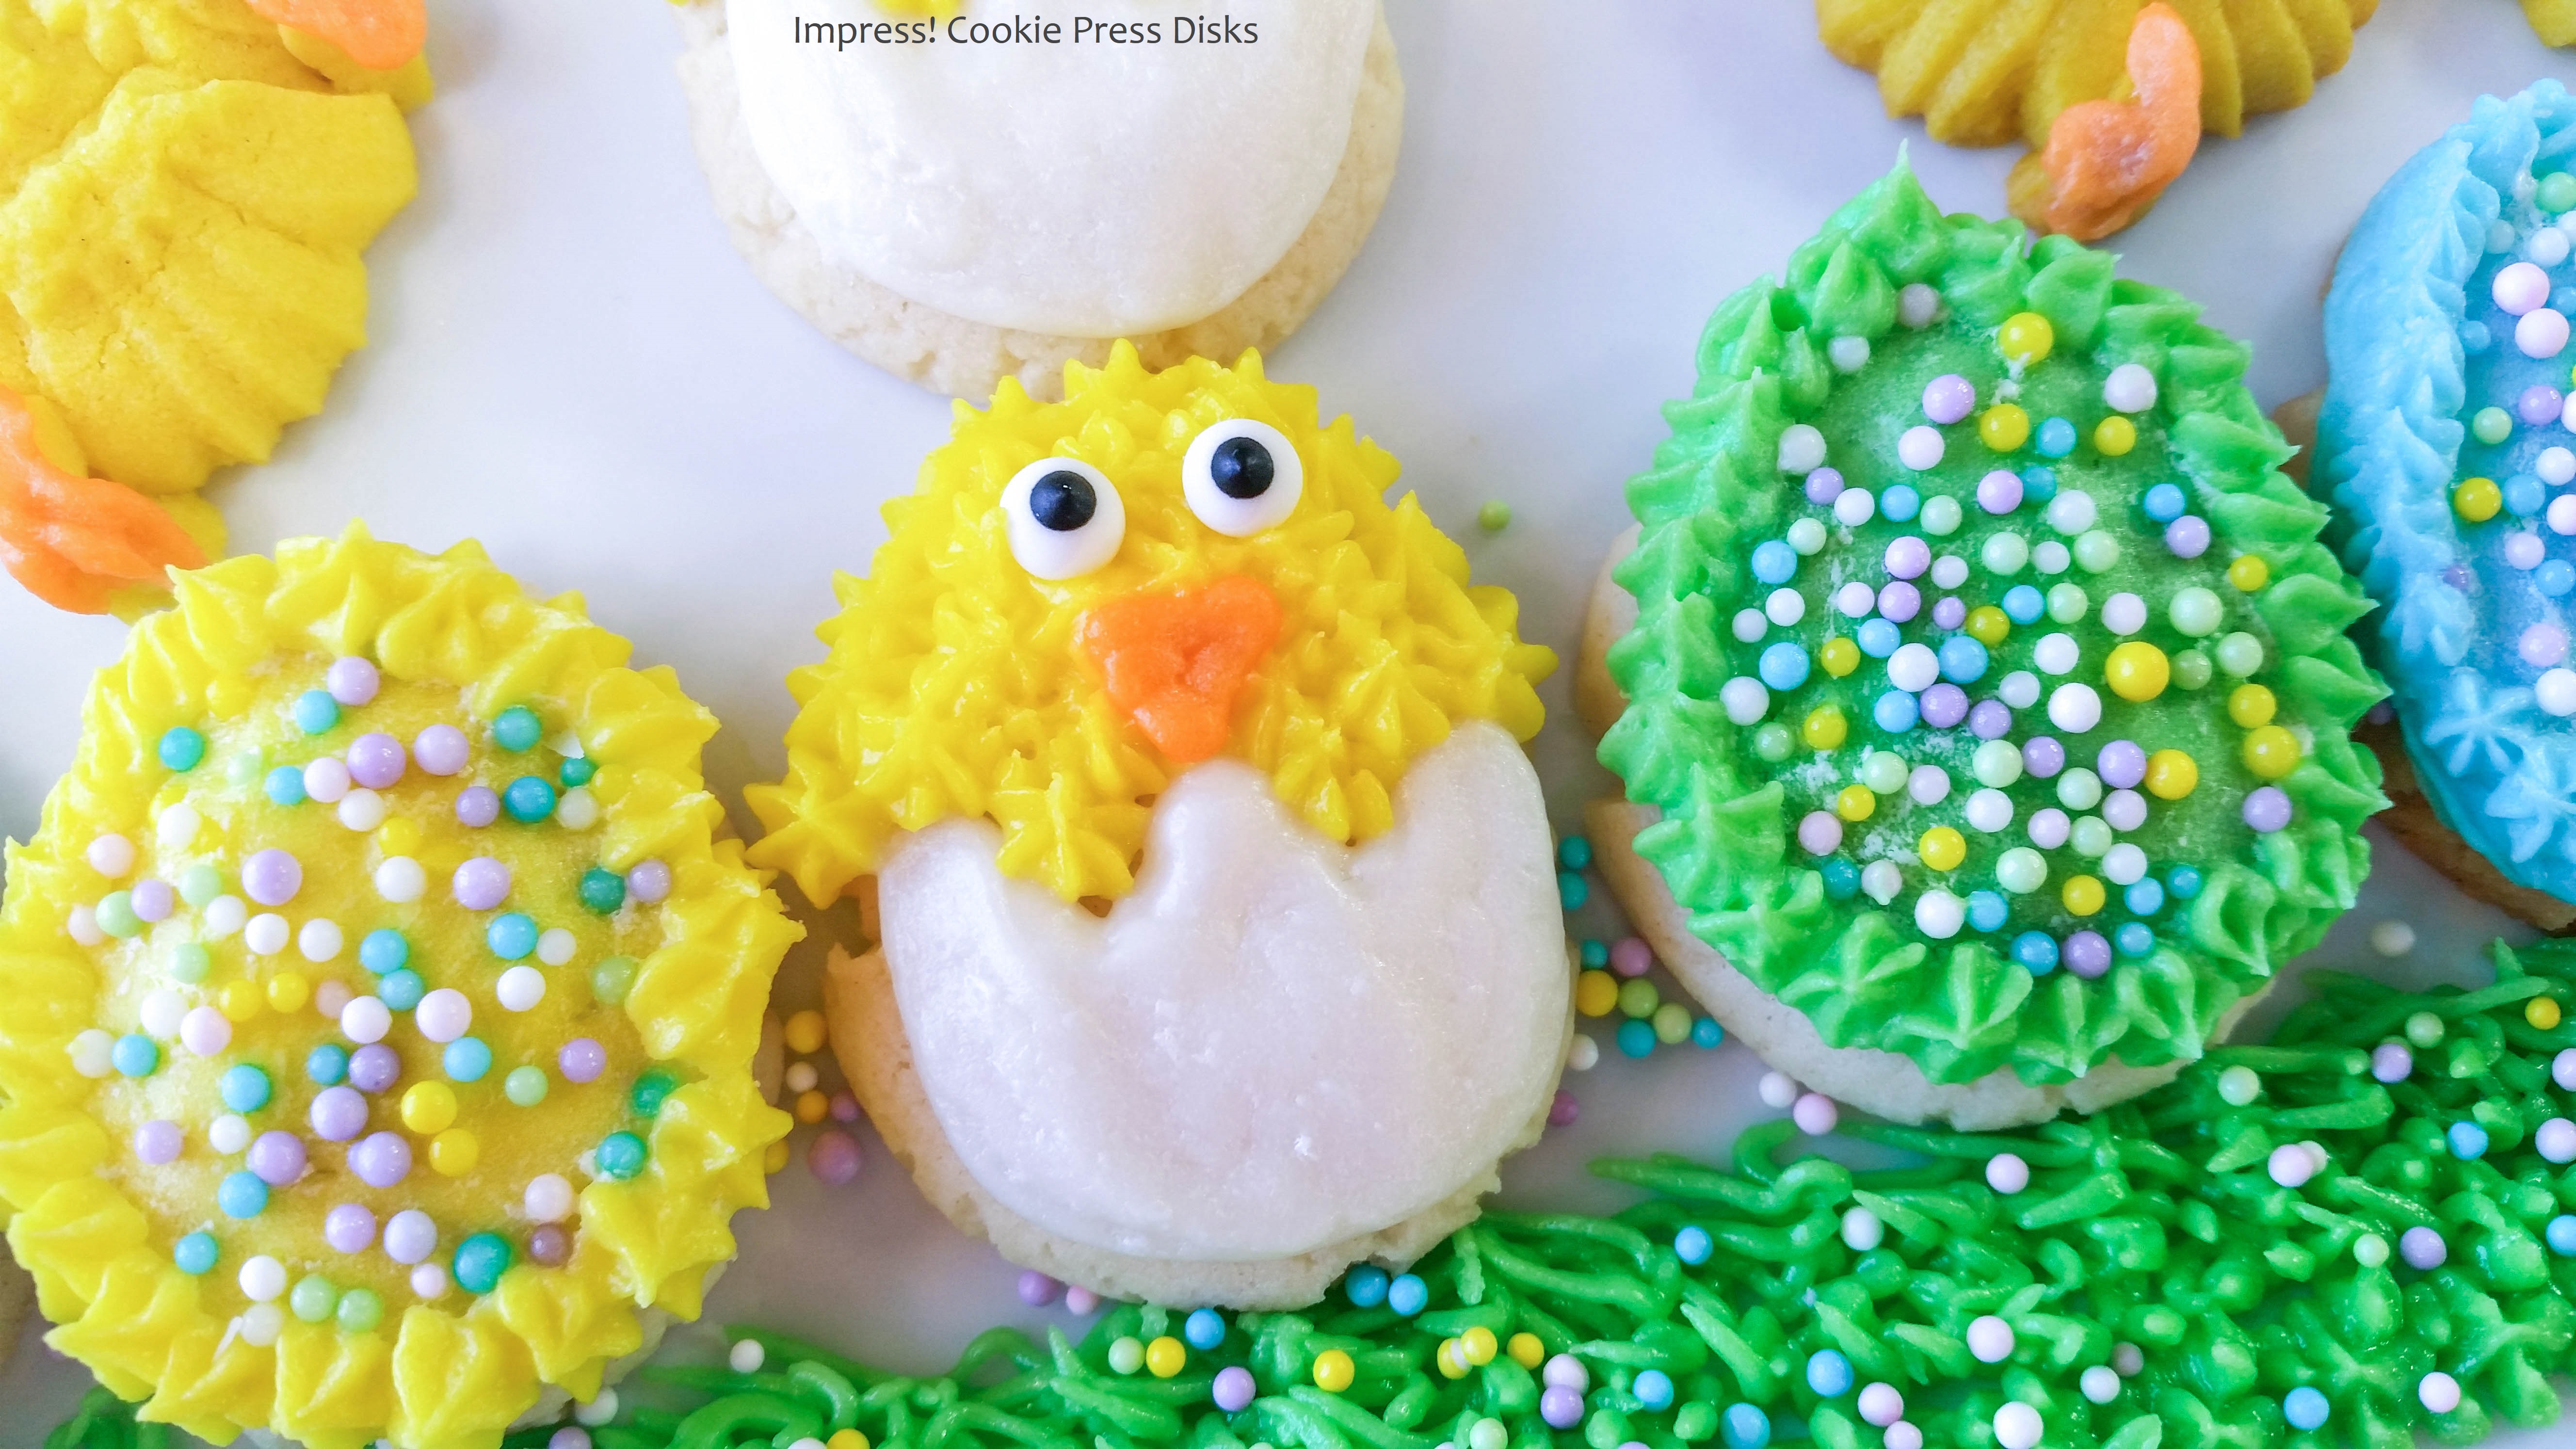
The chick, bunny and carrot require so little- a dab of icing and that’s it, but with the eggs we can turn our creative selves loose! I also use tiny candy eyes from The Baker’s Kitchen but you can use icing for eyes if you like.
Add orange icing to the beak and feet of the chick, and a dot to attach the eye (or use icing to make an eye).
Add a little star of white icing to the bunny tail. Add an eye.
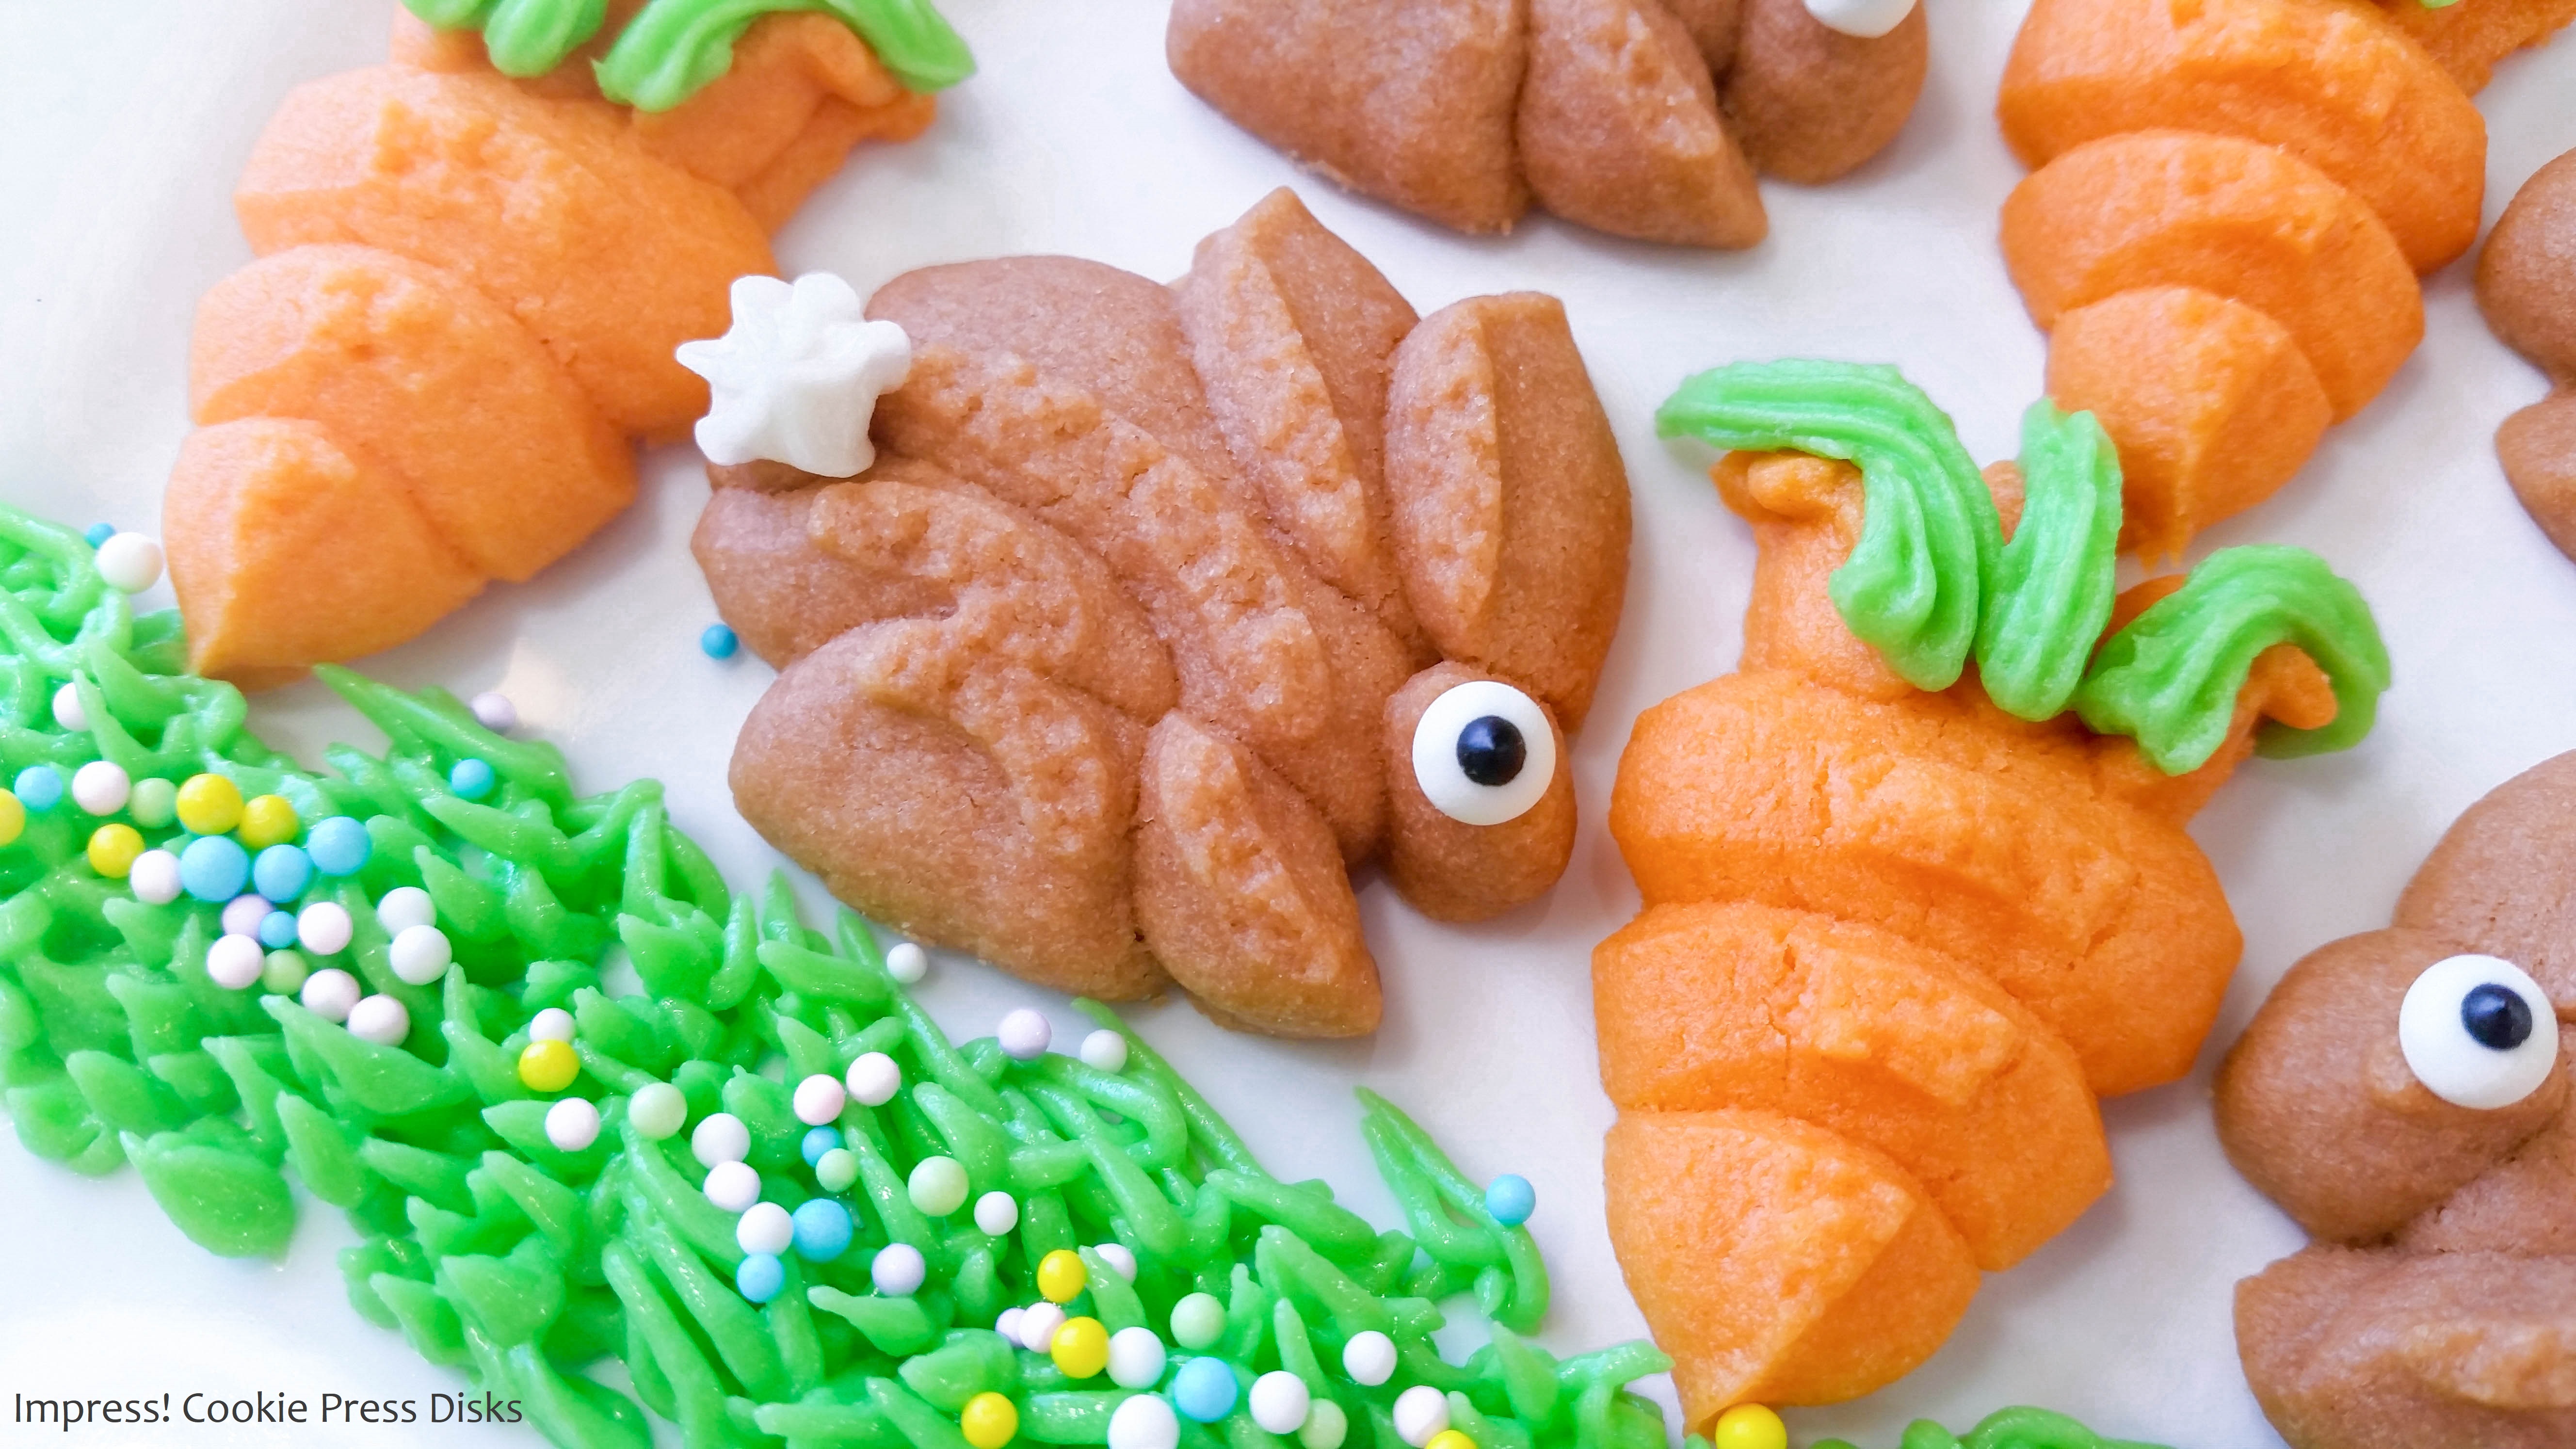
Add 3 green stripes for the carrot tops.
I decorated my plates with a “grass tip” and some green icing just for fun.
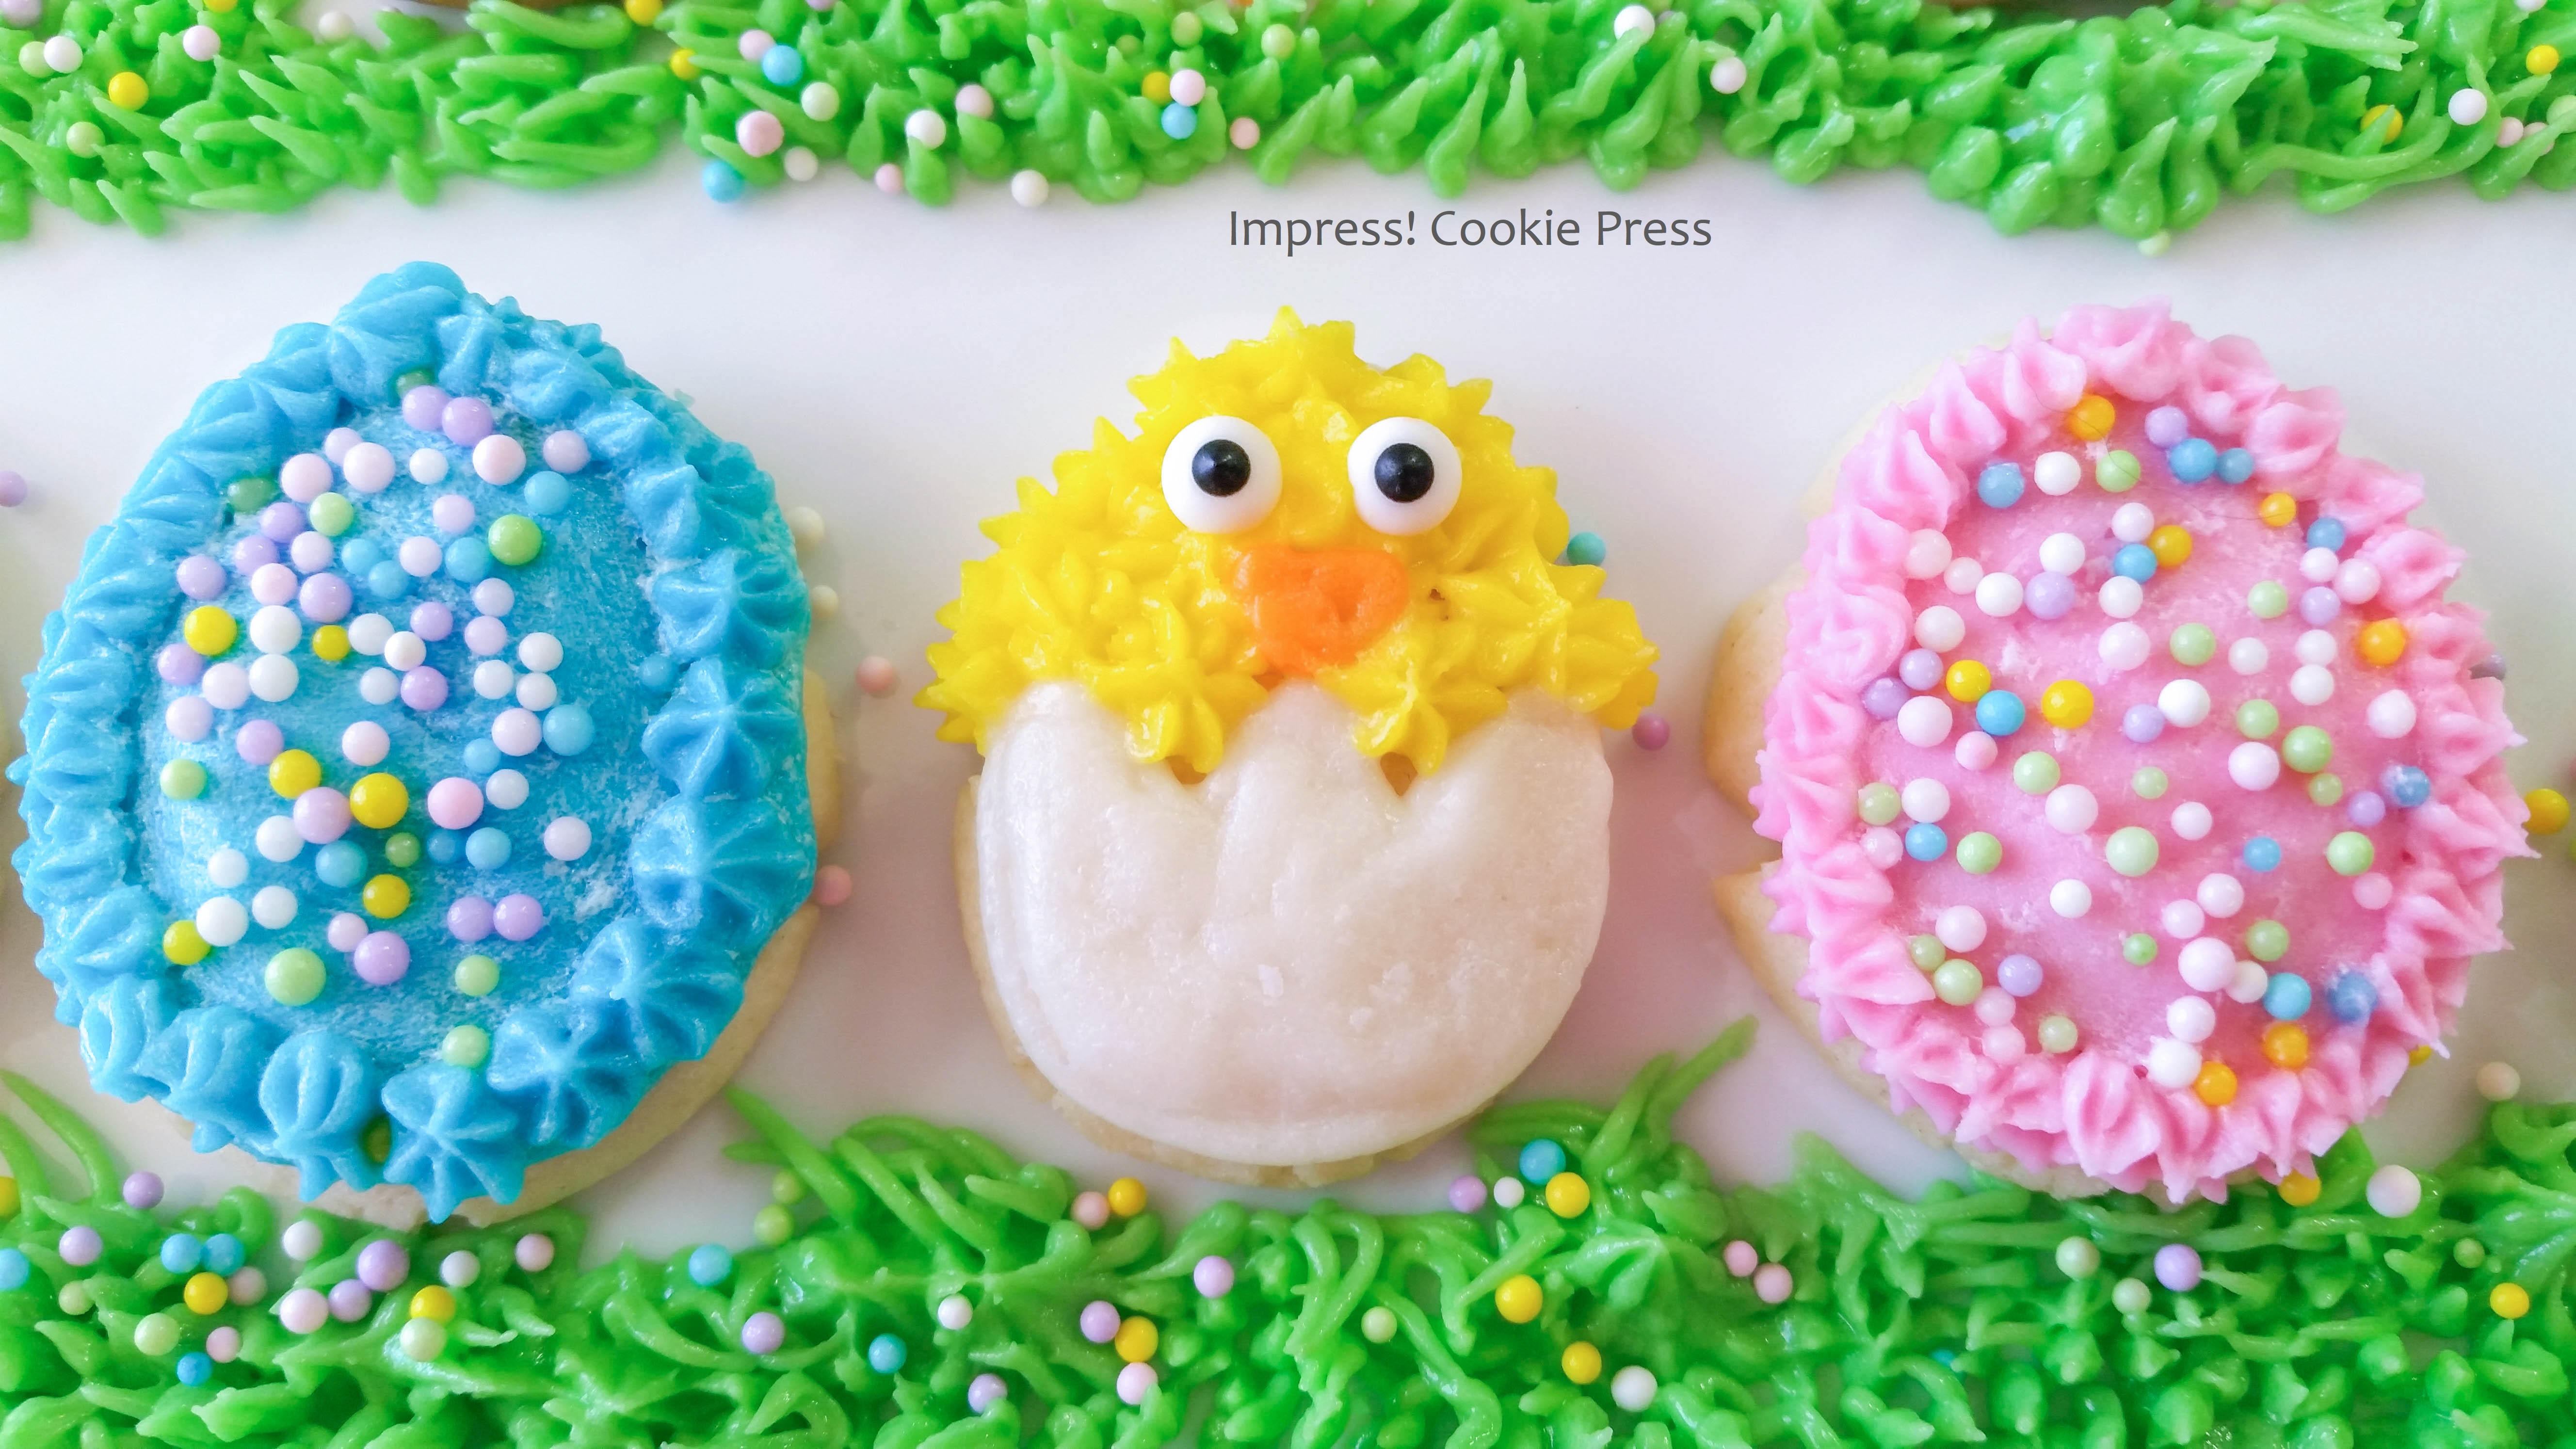
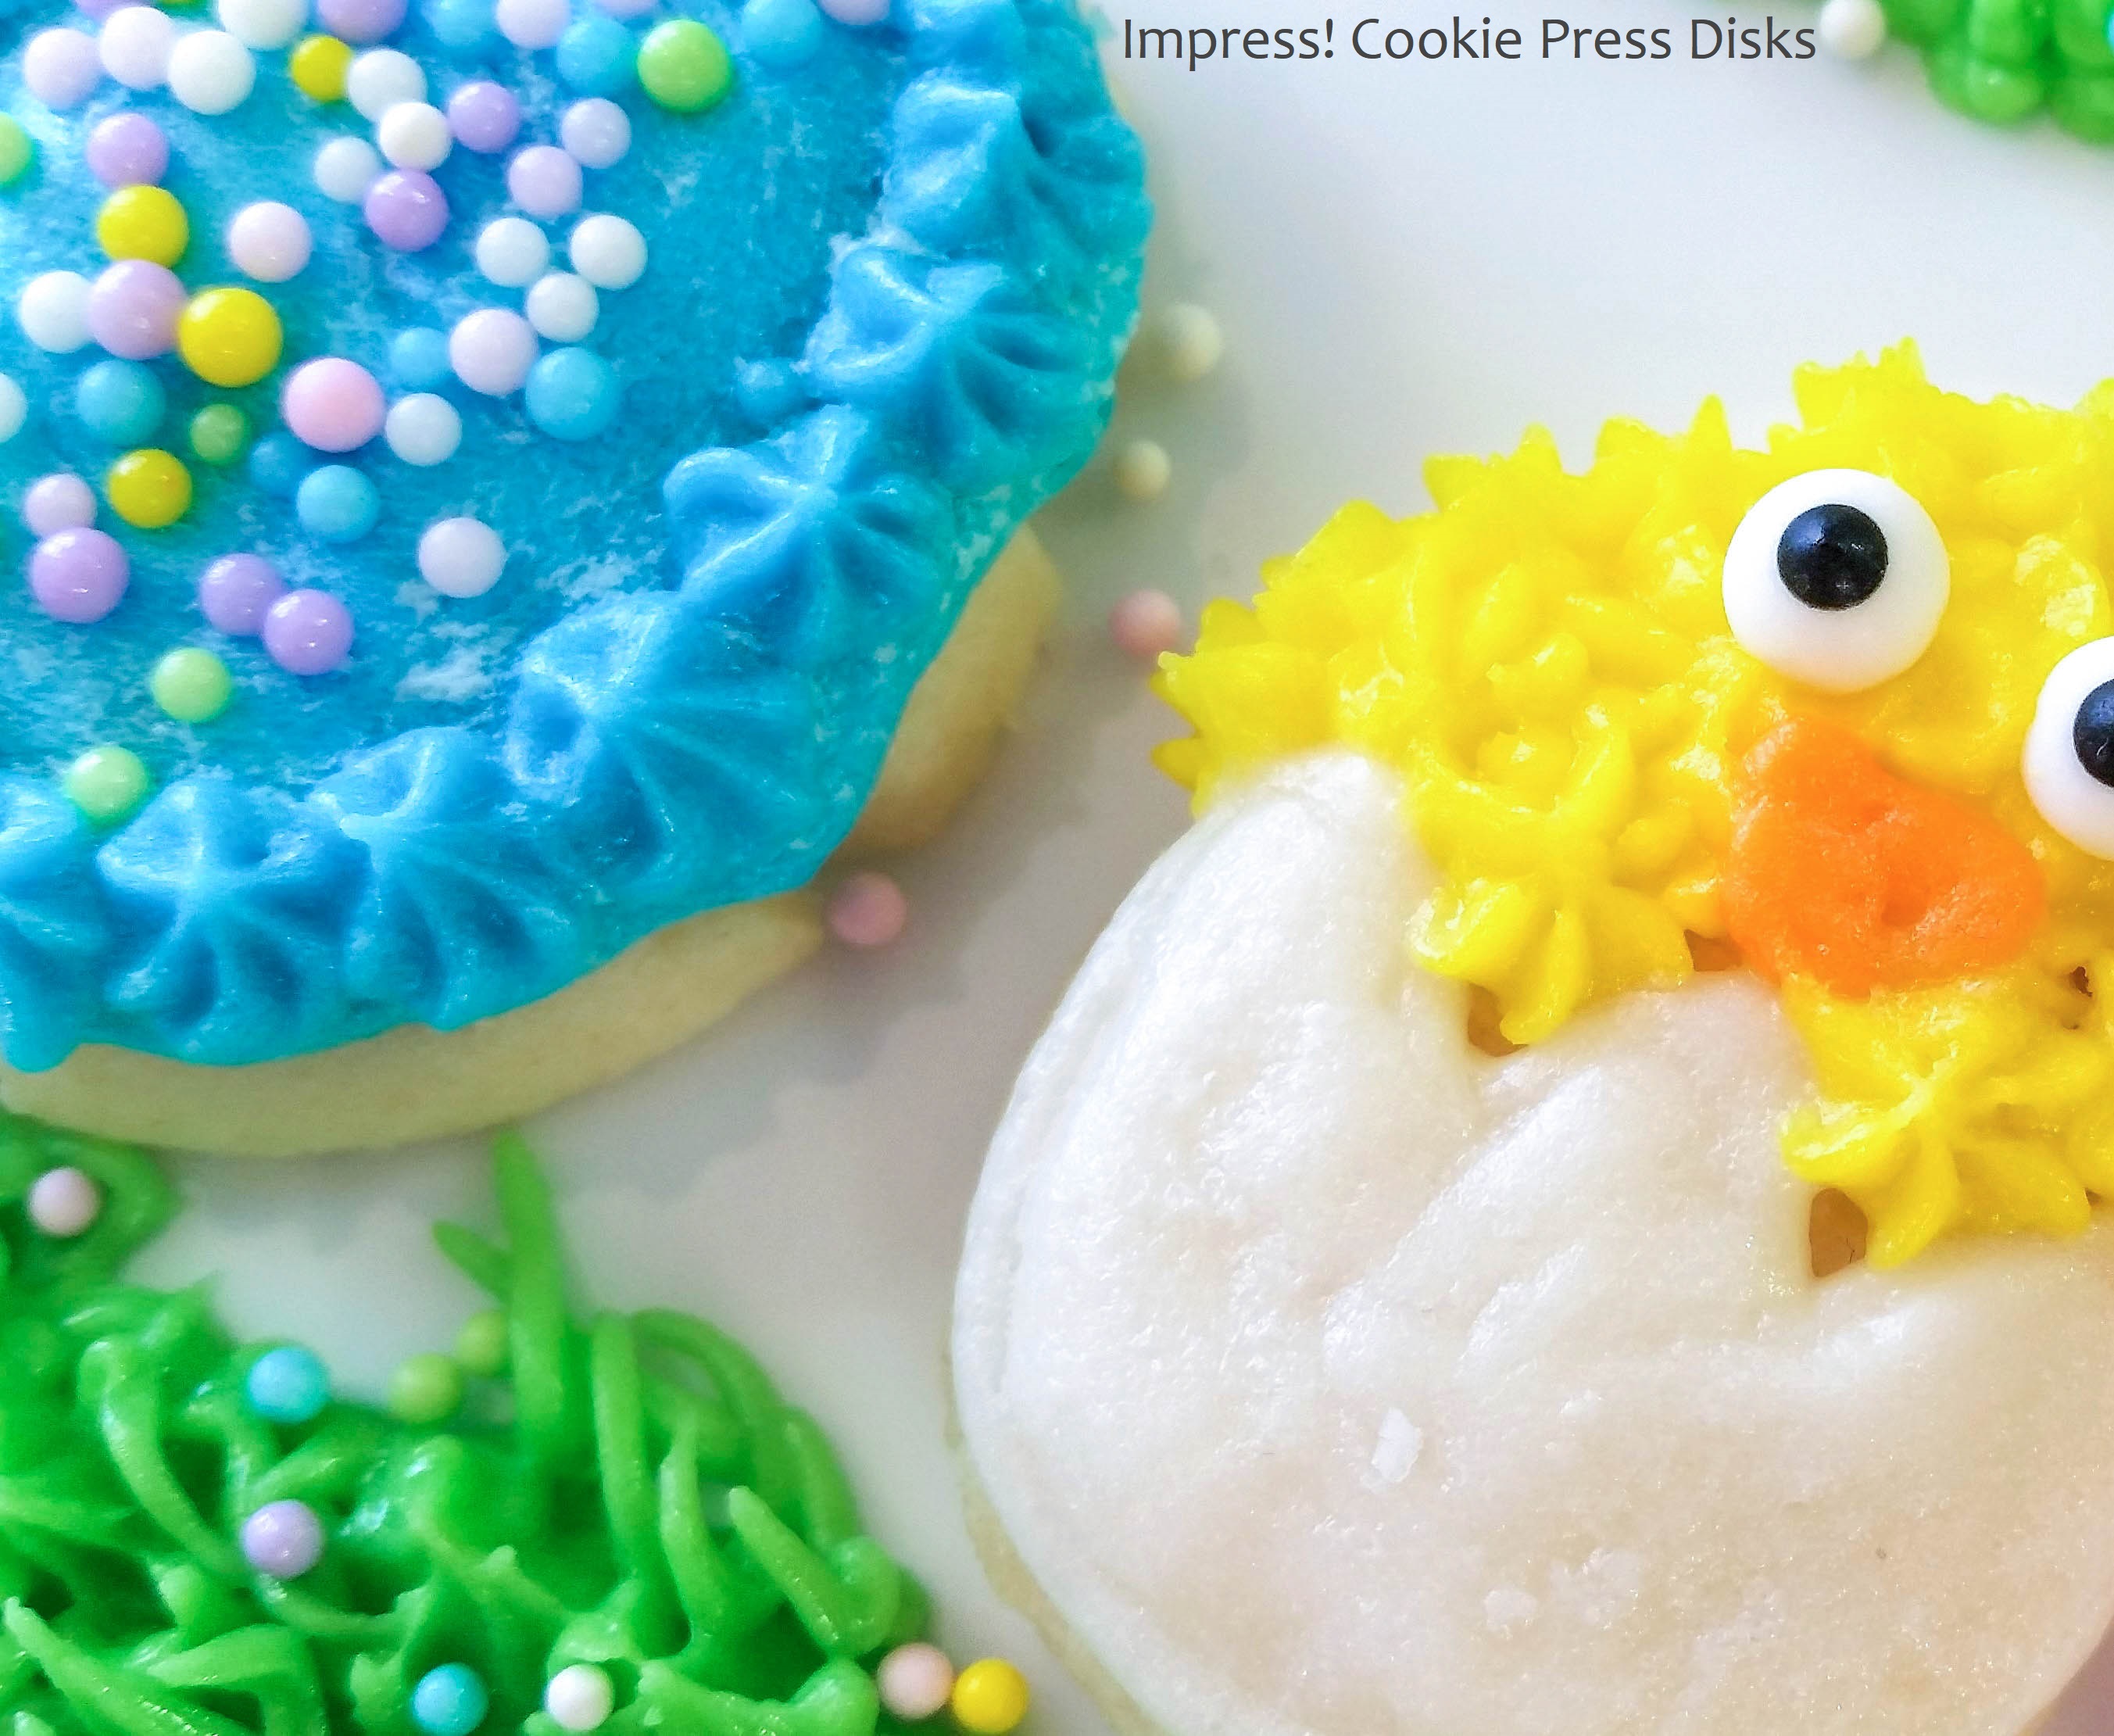
For the eggs, I showed 3 decorating techniques in the photos.
One is to ice the bottom of a smooth egg white, then use a wet fingertip to smooth it out. Then pipe yellow stars on the top, add a beak and eyes.

Another is to ice a whole smooth egg then gloss it over smooth with a wet finger, add sprinkles then add piped stars as a border. Simple! But oh so cute.
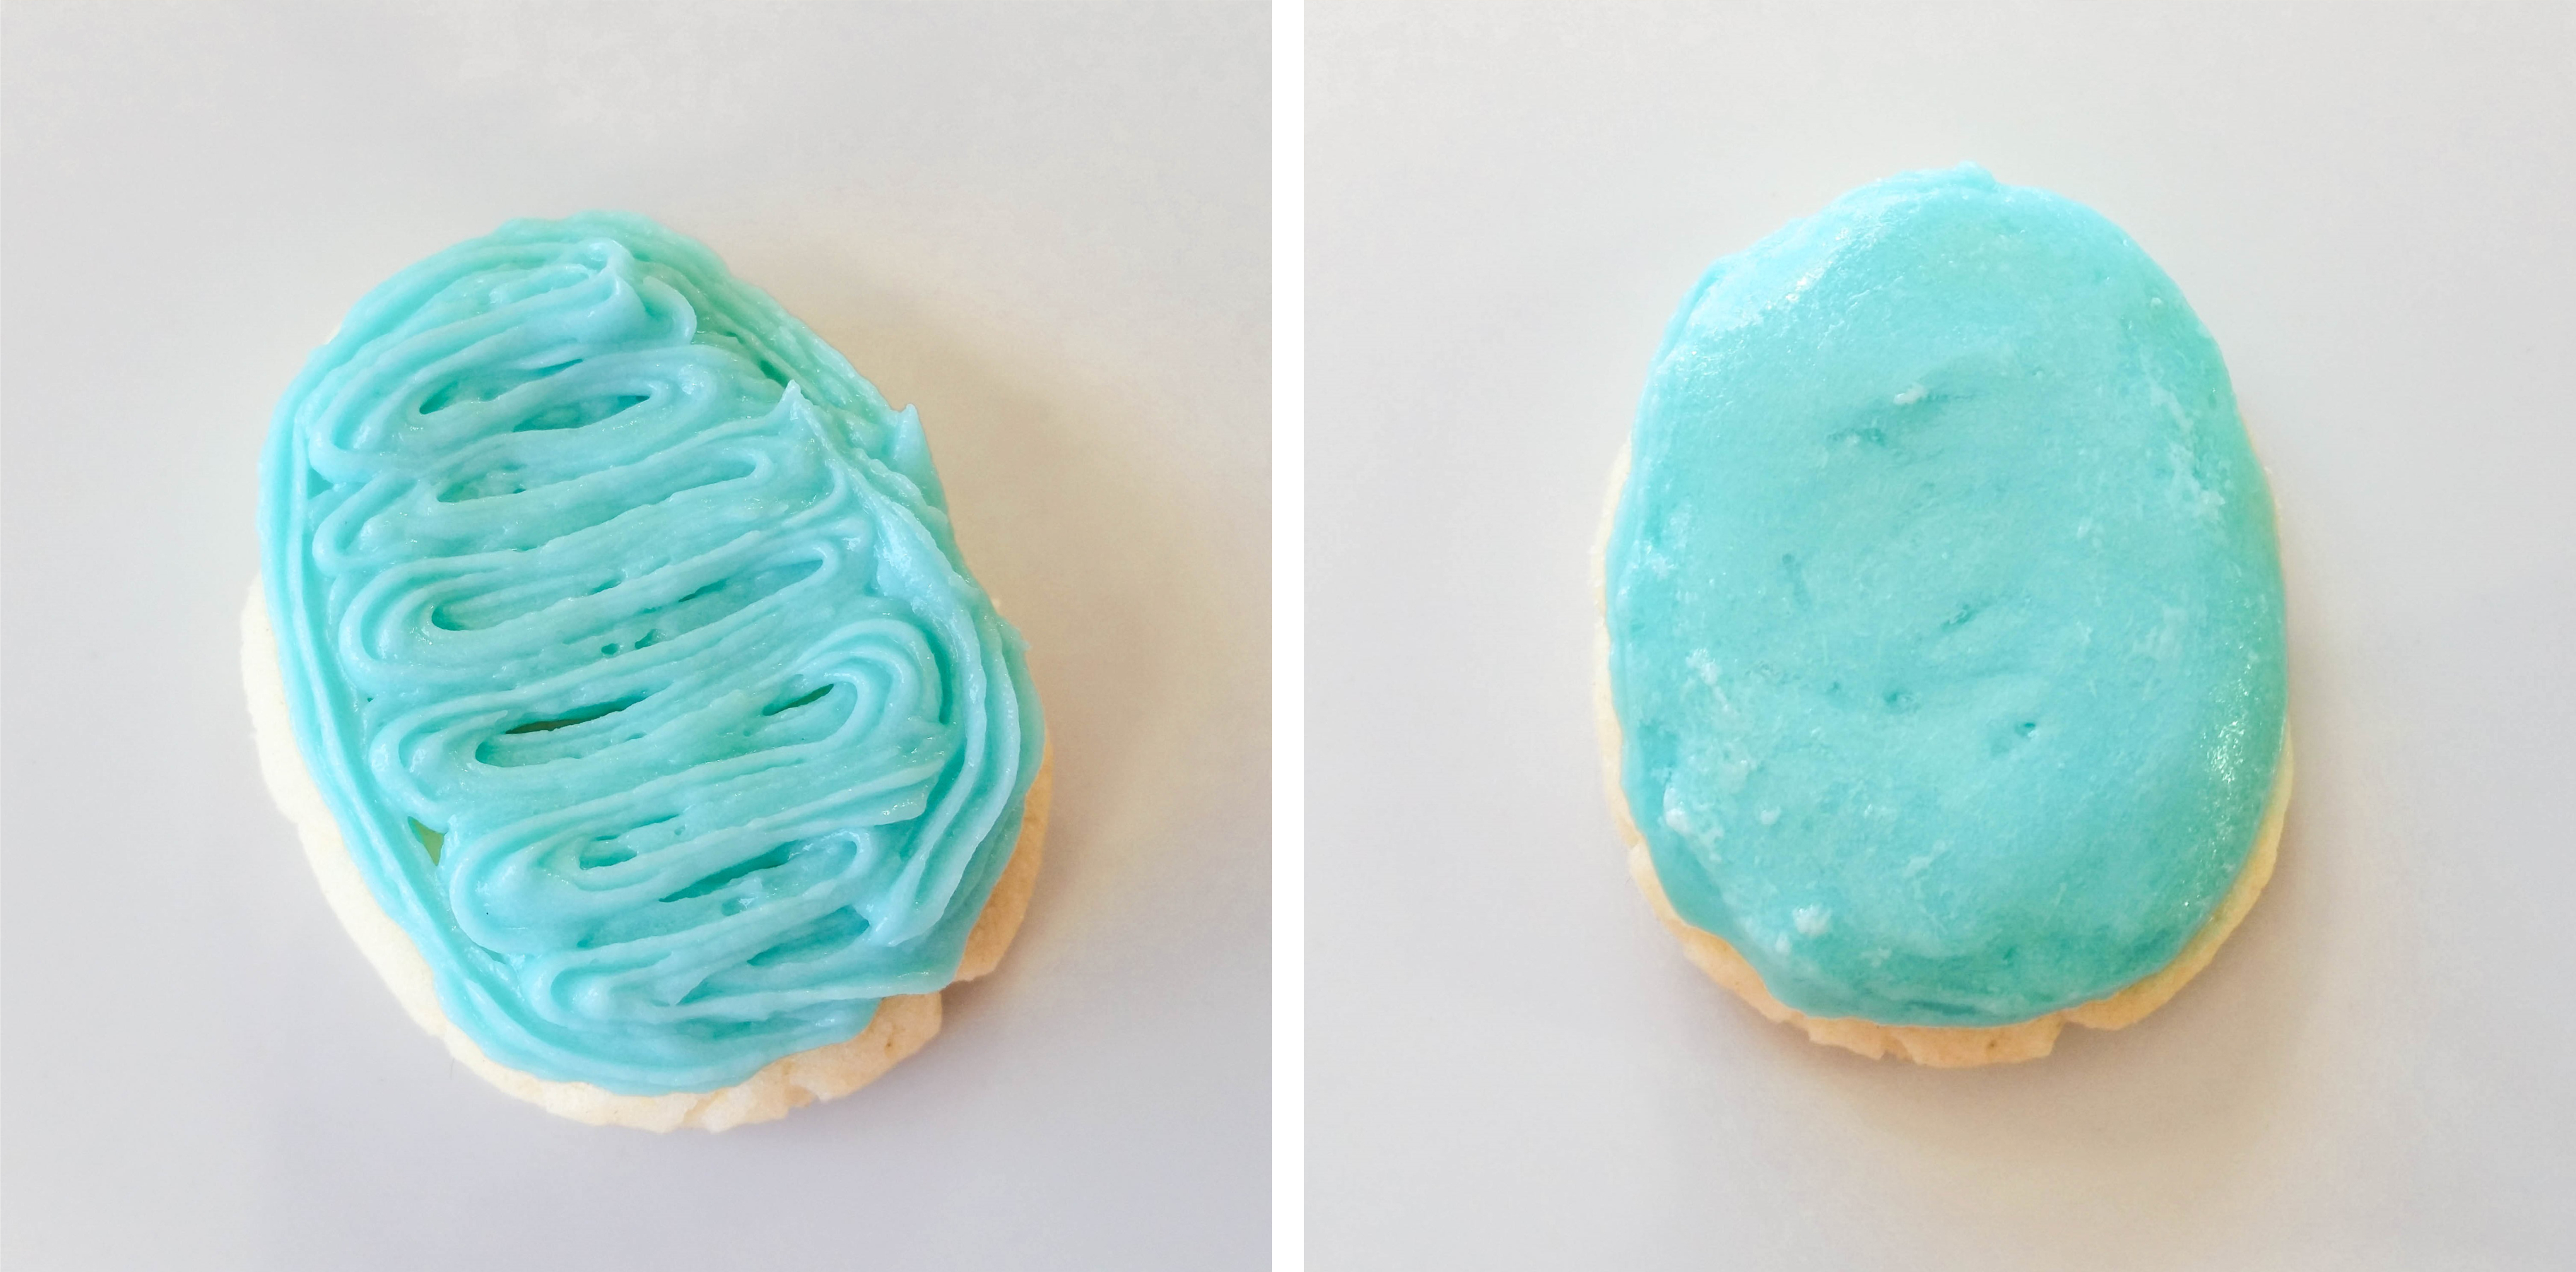

Last, use the 3 ridged divisions of the egg as your guide. Ice the 3 segments different colors, smoothing each with a wet finger as you go. Then use a star tip and white icing to add a rickrack zigzag design in the cracks.

Again, easy but cute!
Combine any of these techniques, get creative and have fun! If you come up with some cool decorating ideas I’d love to see them! Share in the comments or on our facebook page to inspire others.
A few last views of what I came up with:

Happy Easter and a very Happy Spring to you all!
And as always, Happy Baking!
~Susie
Disk Designer/Co-Owner at Impress! Bakeware, LLC
Our website has all of our 200+ disk shapes, cookie press, embossed rolling pins, stamps, luster dusts, baking accessories plus more about our Women/Family Owned company! impressbakeware.com
All products are on our Etsy shop.
Our Amazon shop has our cookie press and disks and embossed rolling pins.
Follow us on facebook!
The Easter set:

The candy eyes I used here can be found at: http://www.thebakerskitchen.net/3/16-in-Candy-Eyes-Assorted-Colors—1000-Count-Pack.aspx

Adorable! The bunnies and carrots look great together:@)
LikeLike
Thanks Lynn! So glad you like them. 🙂 ~Susie
LikeLike