
Until I did the Apple Pie Spritz cookie recipe last month, it never occurred to me that you could color any spritz dough that wasn’t “plain”. I mean, it makes sense that food dye takes well and looks good in a basically beige dough, but I assumed that more interesting flavors like pumpkin, peanut butter, or my new apple pie would be too tan, too colorful already to look good with food dye. I’m SO happy that I was wrong! I assume that chocolate and red velvet are still a no-go 😉, but how exciting to be able to color more flavors! I know growing up around spritz cookies at the holidays, most friends and family did minimal decorating but most of the time they colored green trees and red and green wreaths and such. I remember making yellow butterflies with my mom every spring.
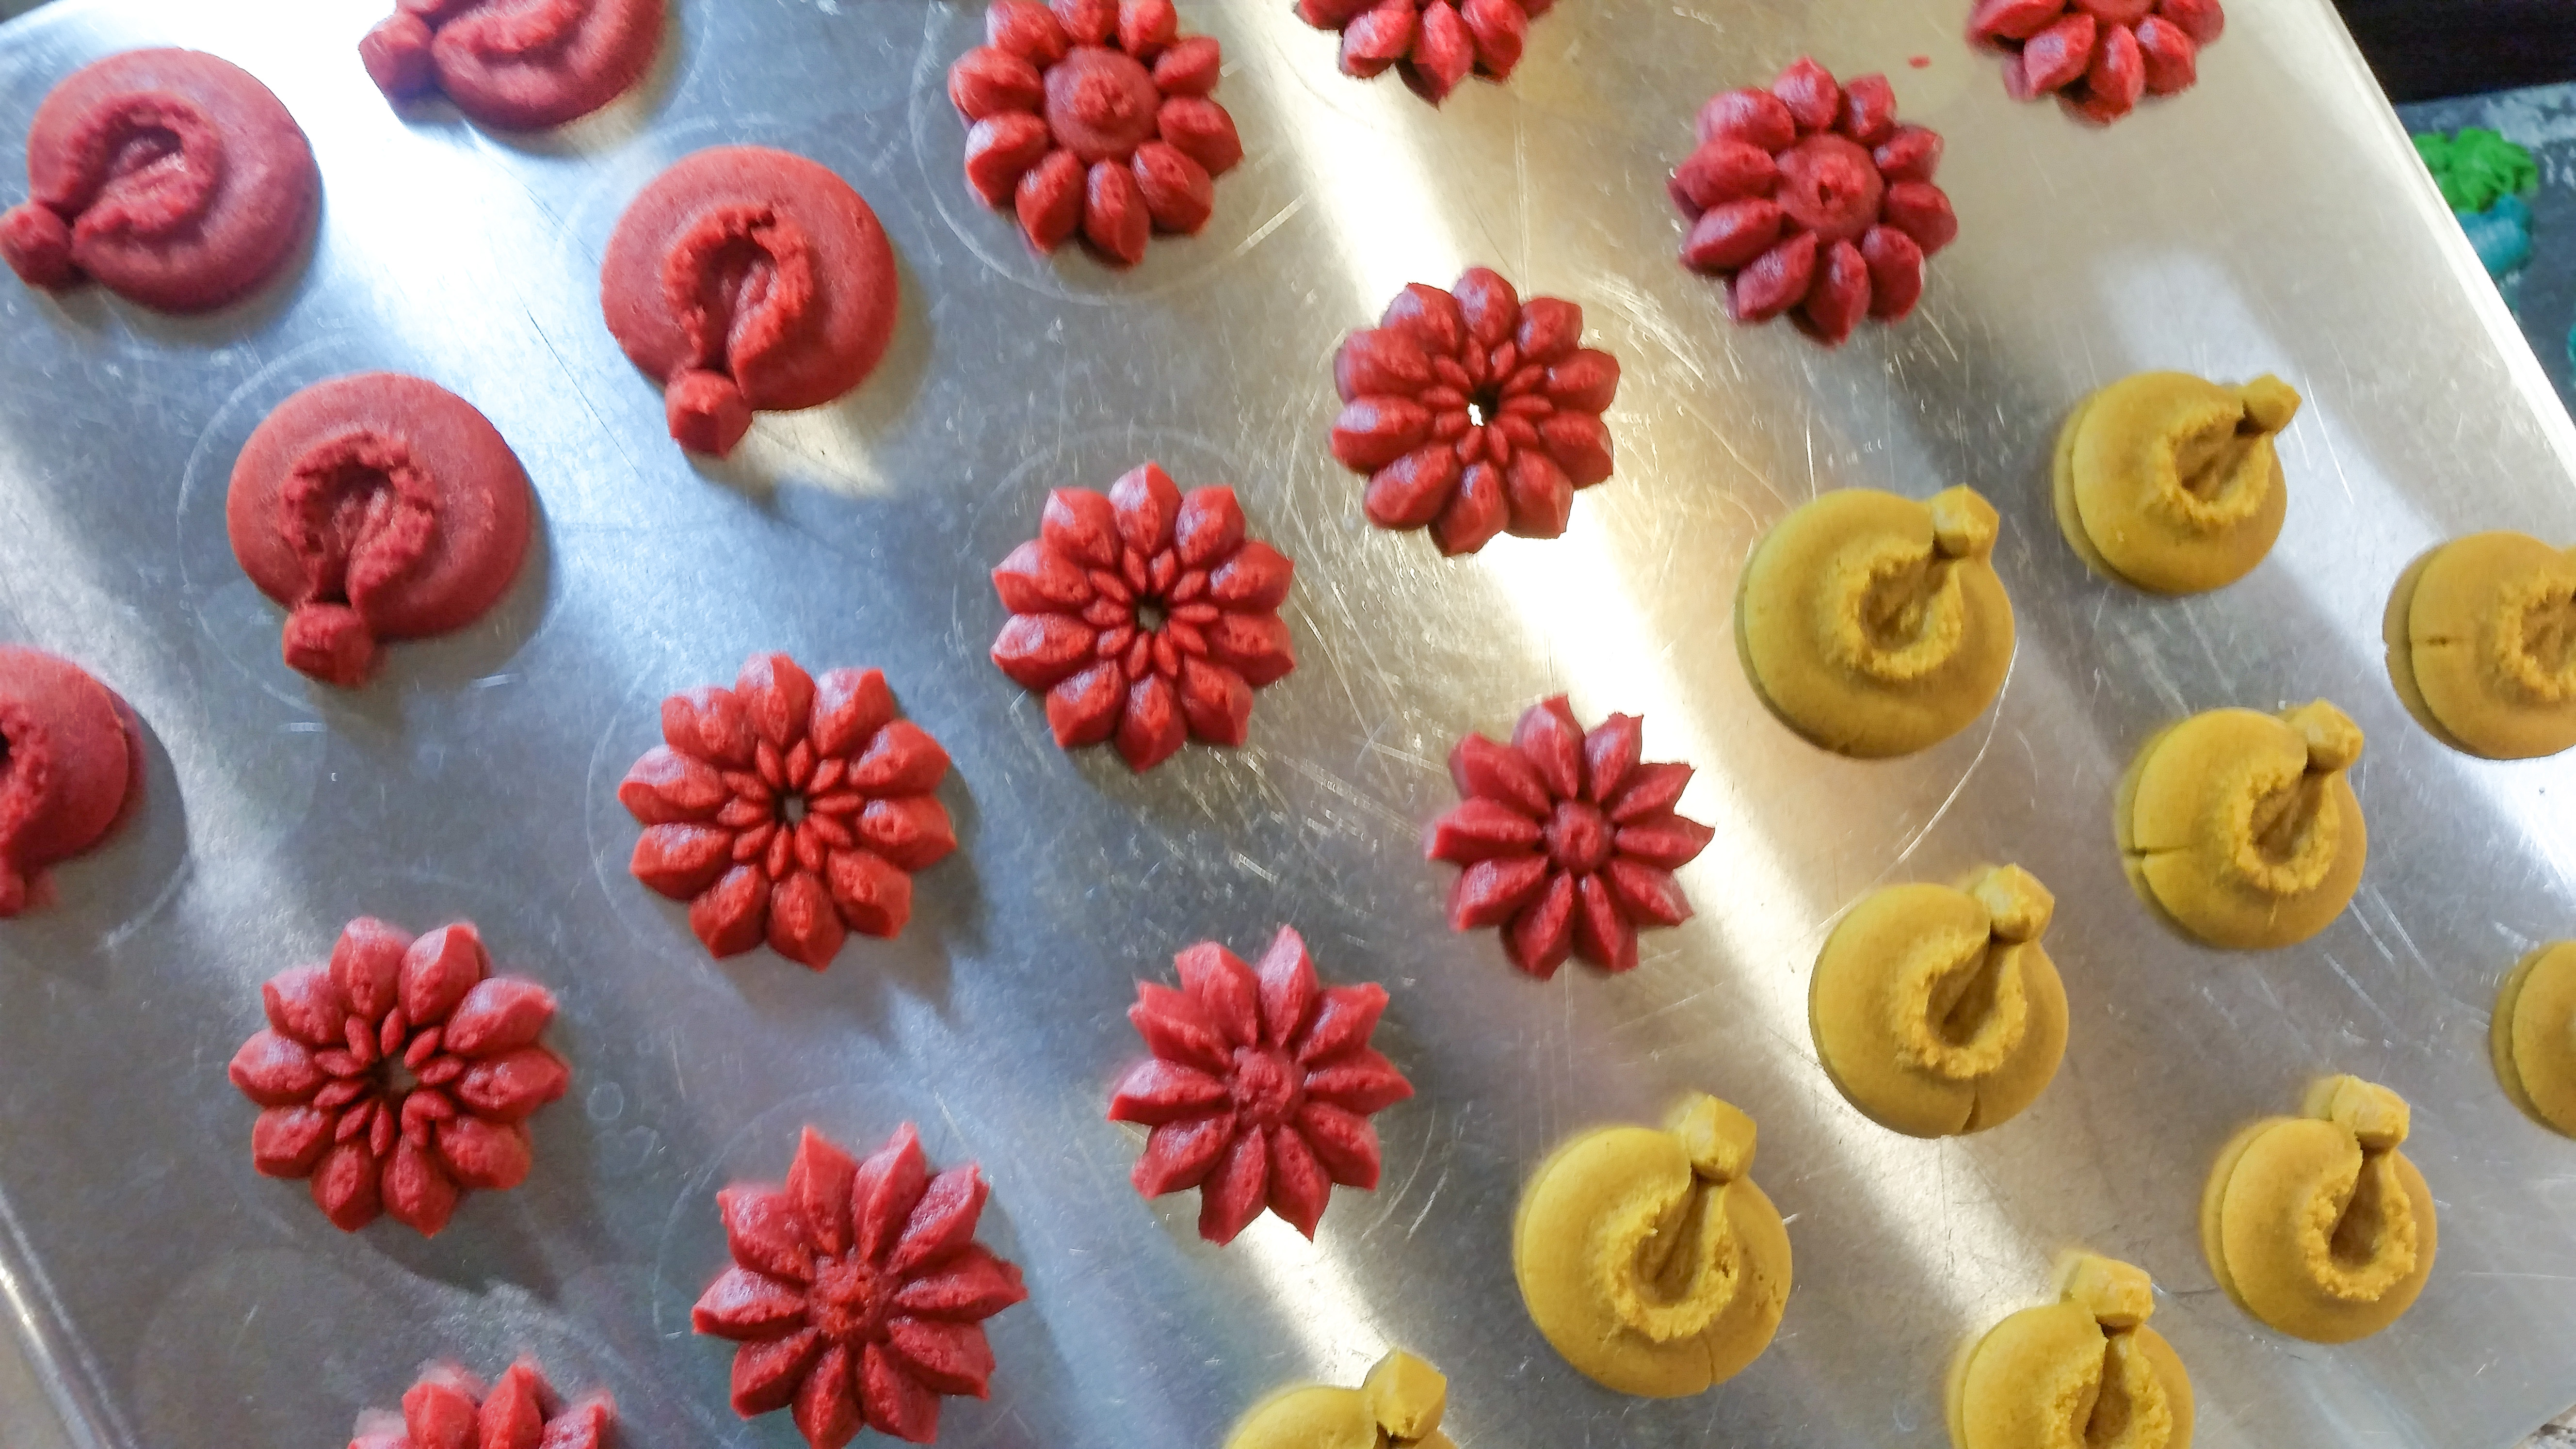
So when I read somewhere that “Peanut Blossoms” are the most popular Christmas cookie, and realized that pressing them as shapes was a super easy and fun way to make them, I thought well heck, I’m going to try coloring my peanut butter spritz cookie dough and see what happens. Obviously they turned out gorgeous and I am thrilled! I present to you a great peanut butter spritz recipe that all you have to do to make it fancy is color the dough, press it, bake it, and put a chocolate kiss on top while it’s still warm. Now your peanut butter blossoms can actually be flowers, or wreaths, or Christmas ornaments, or snowflakes! I bet there are more shapes I didn’t even think of.

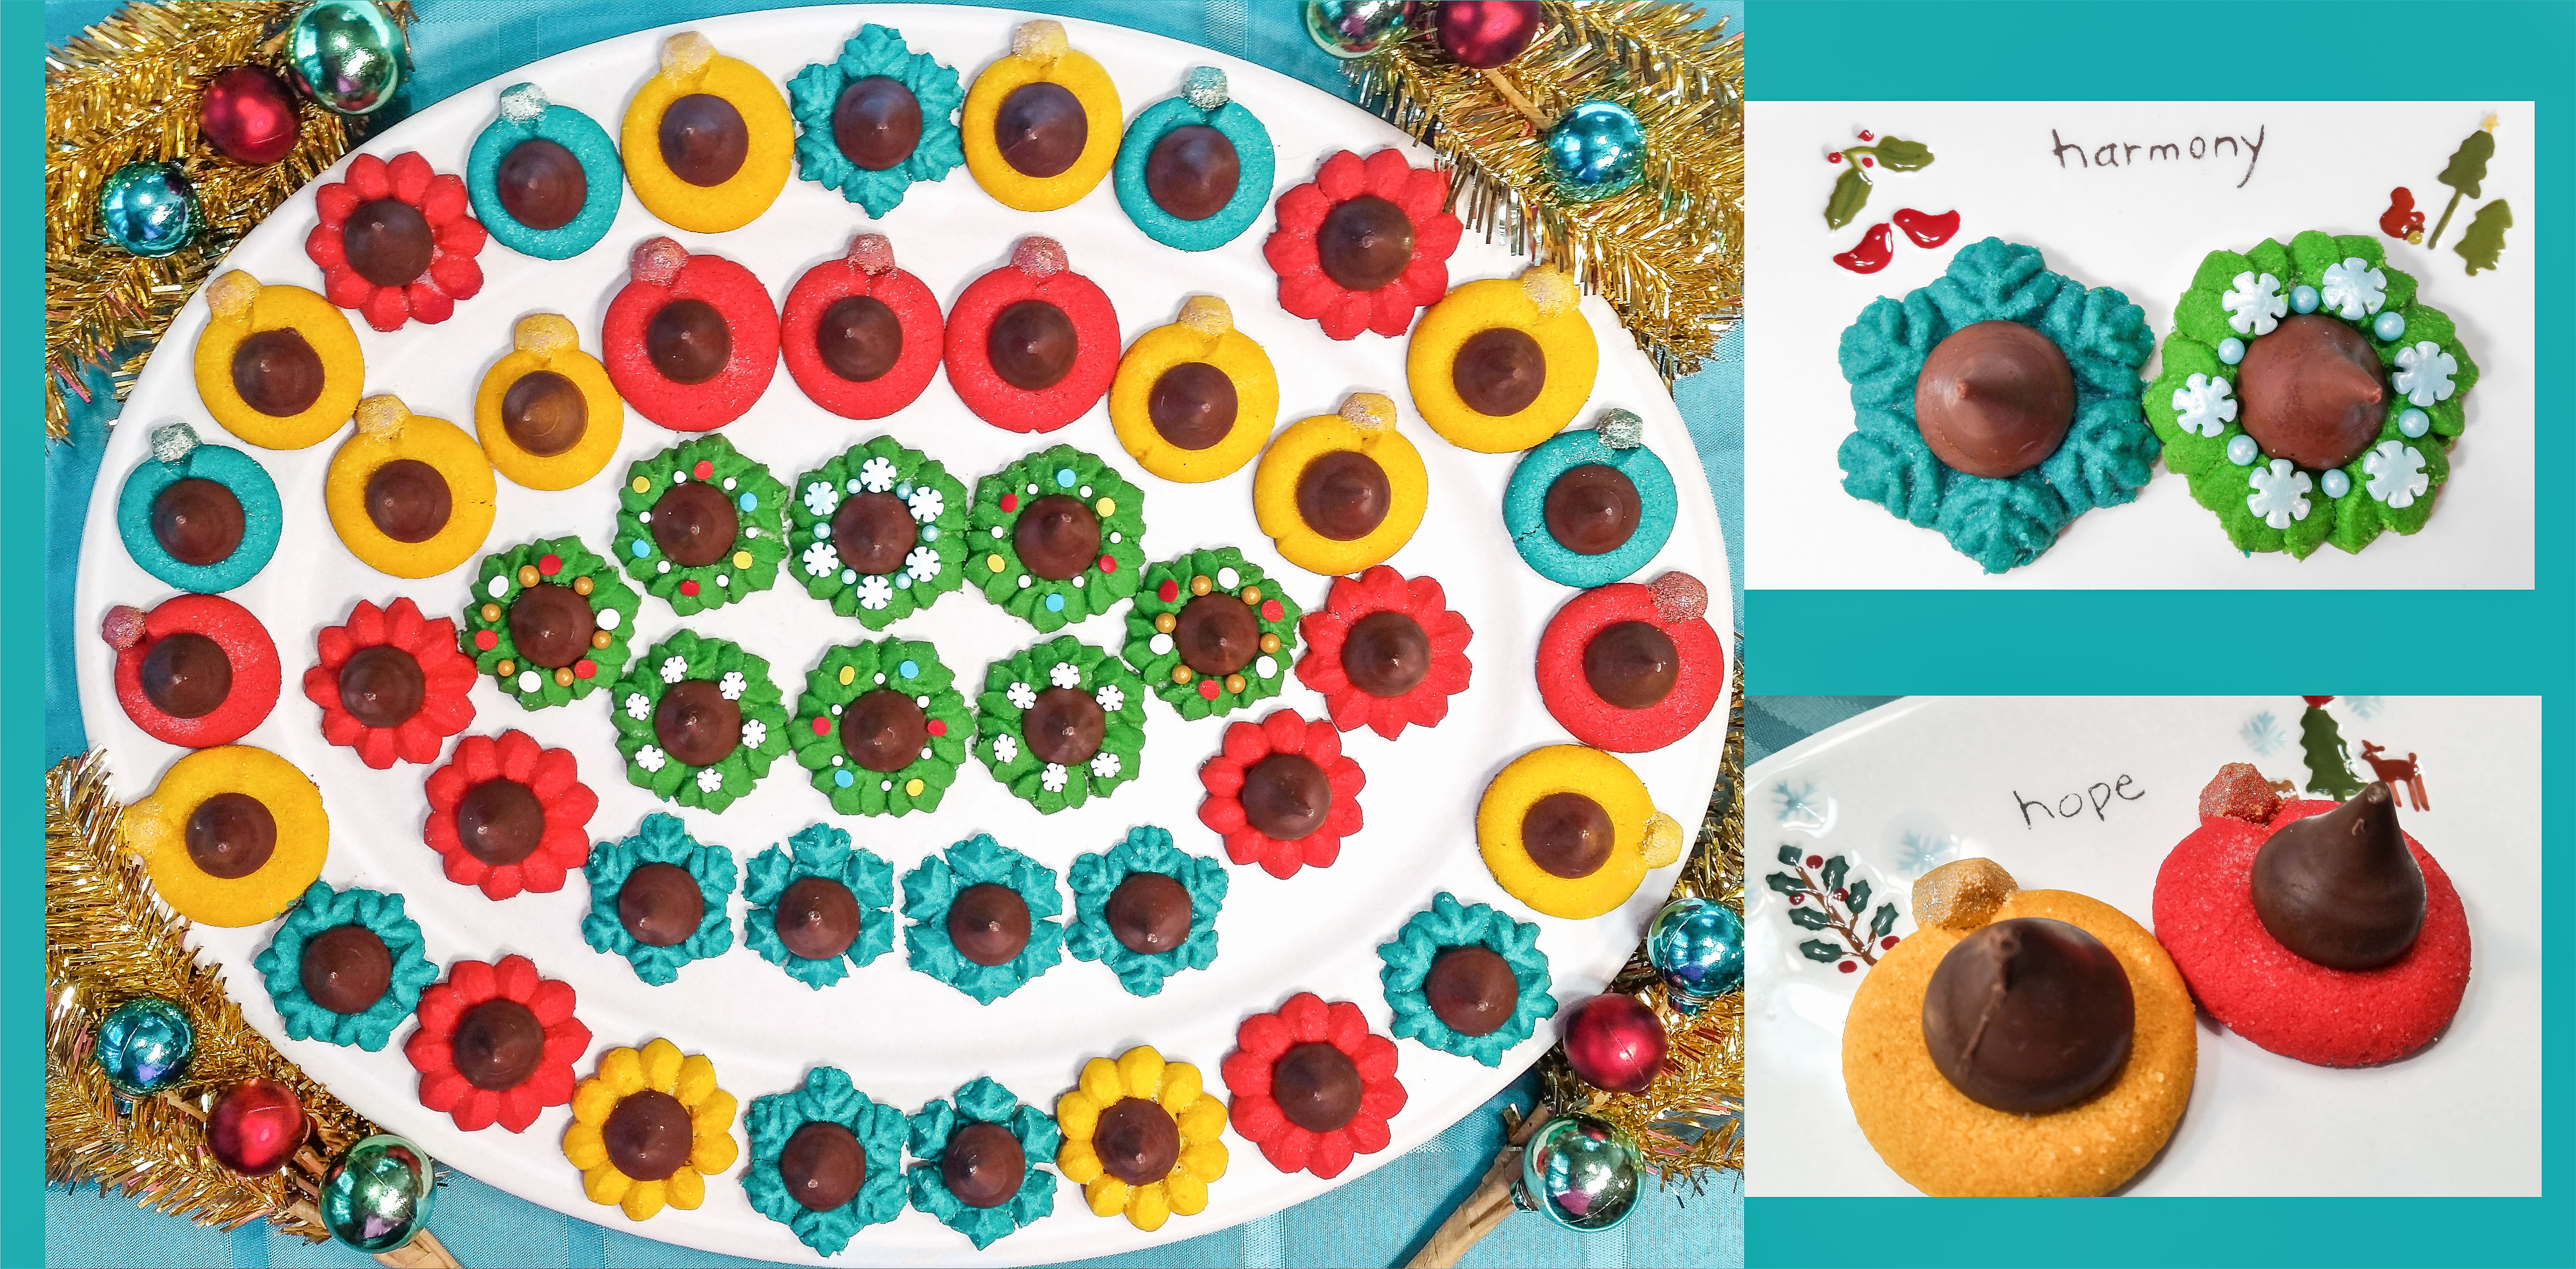
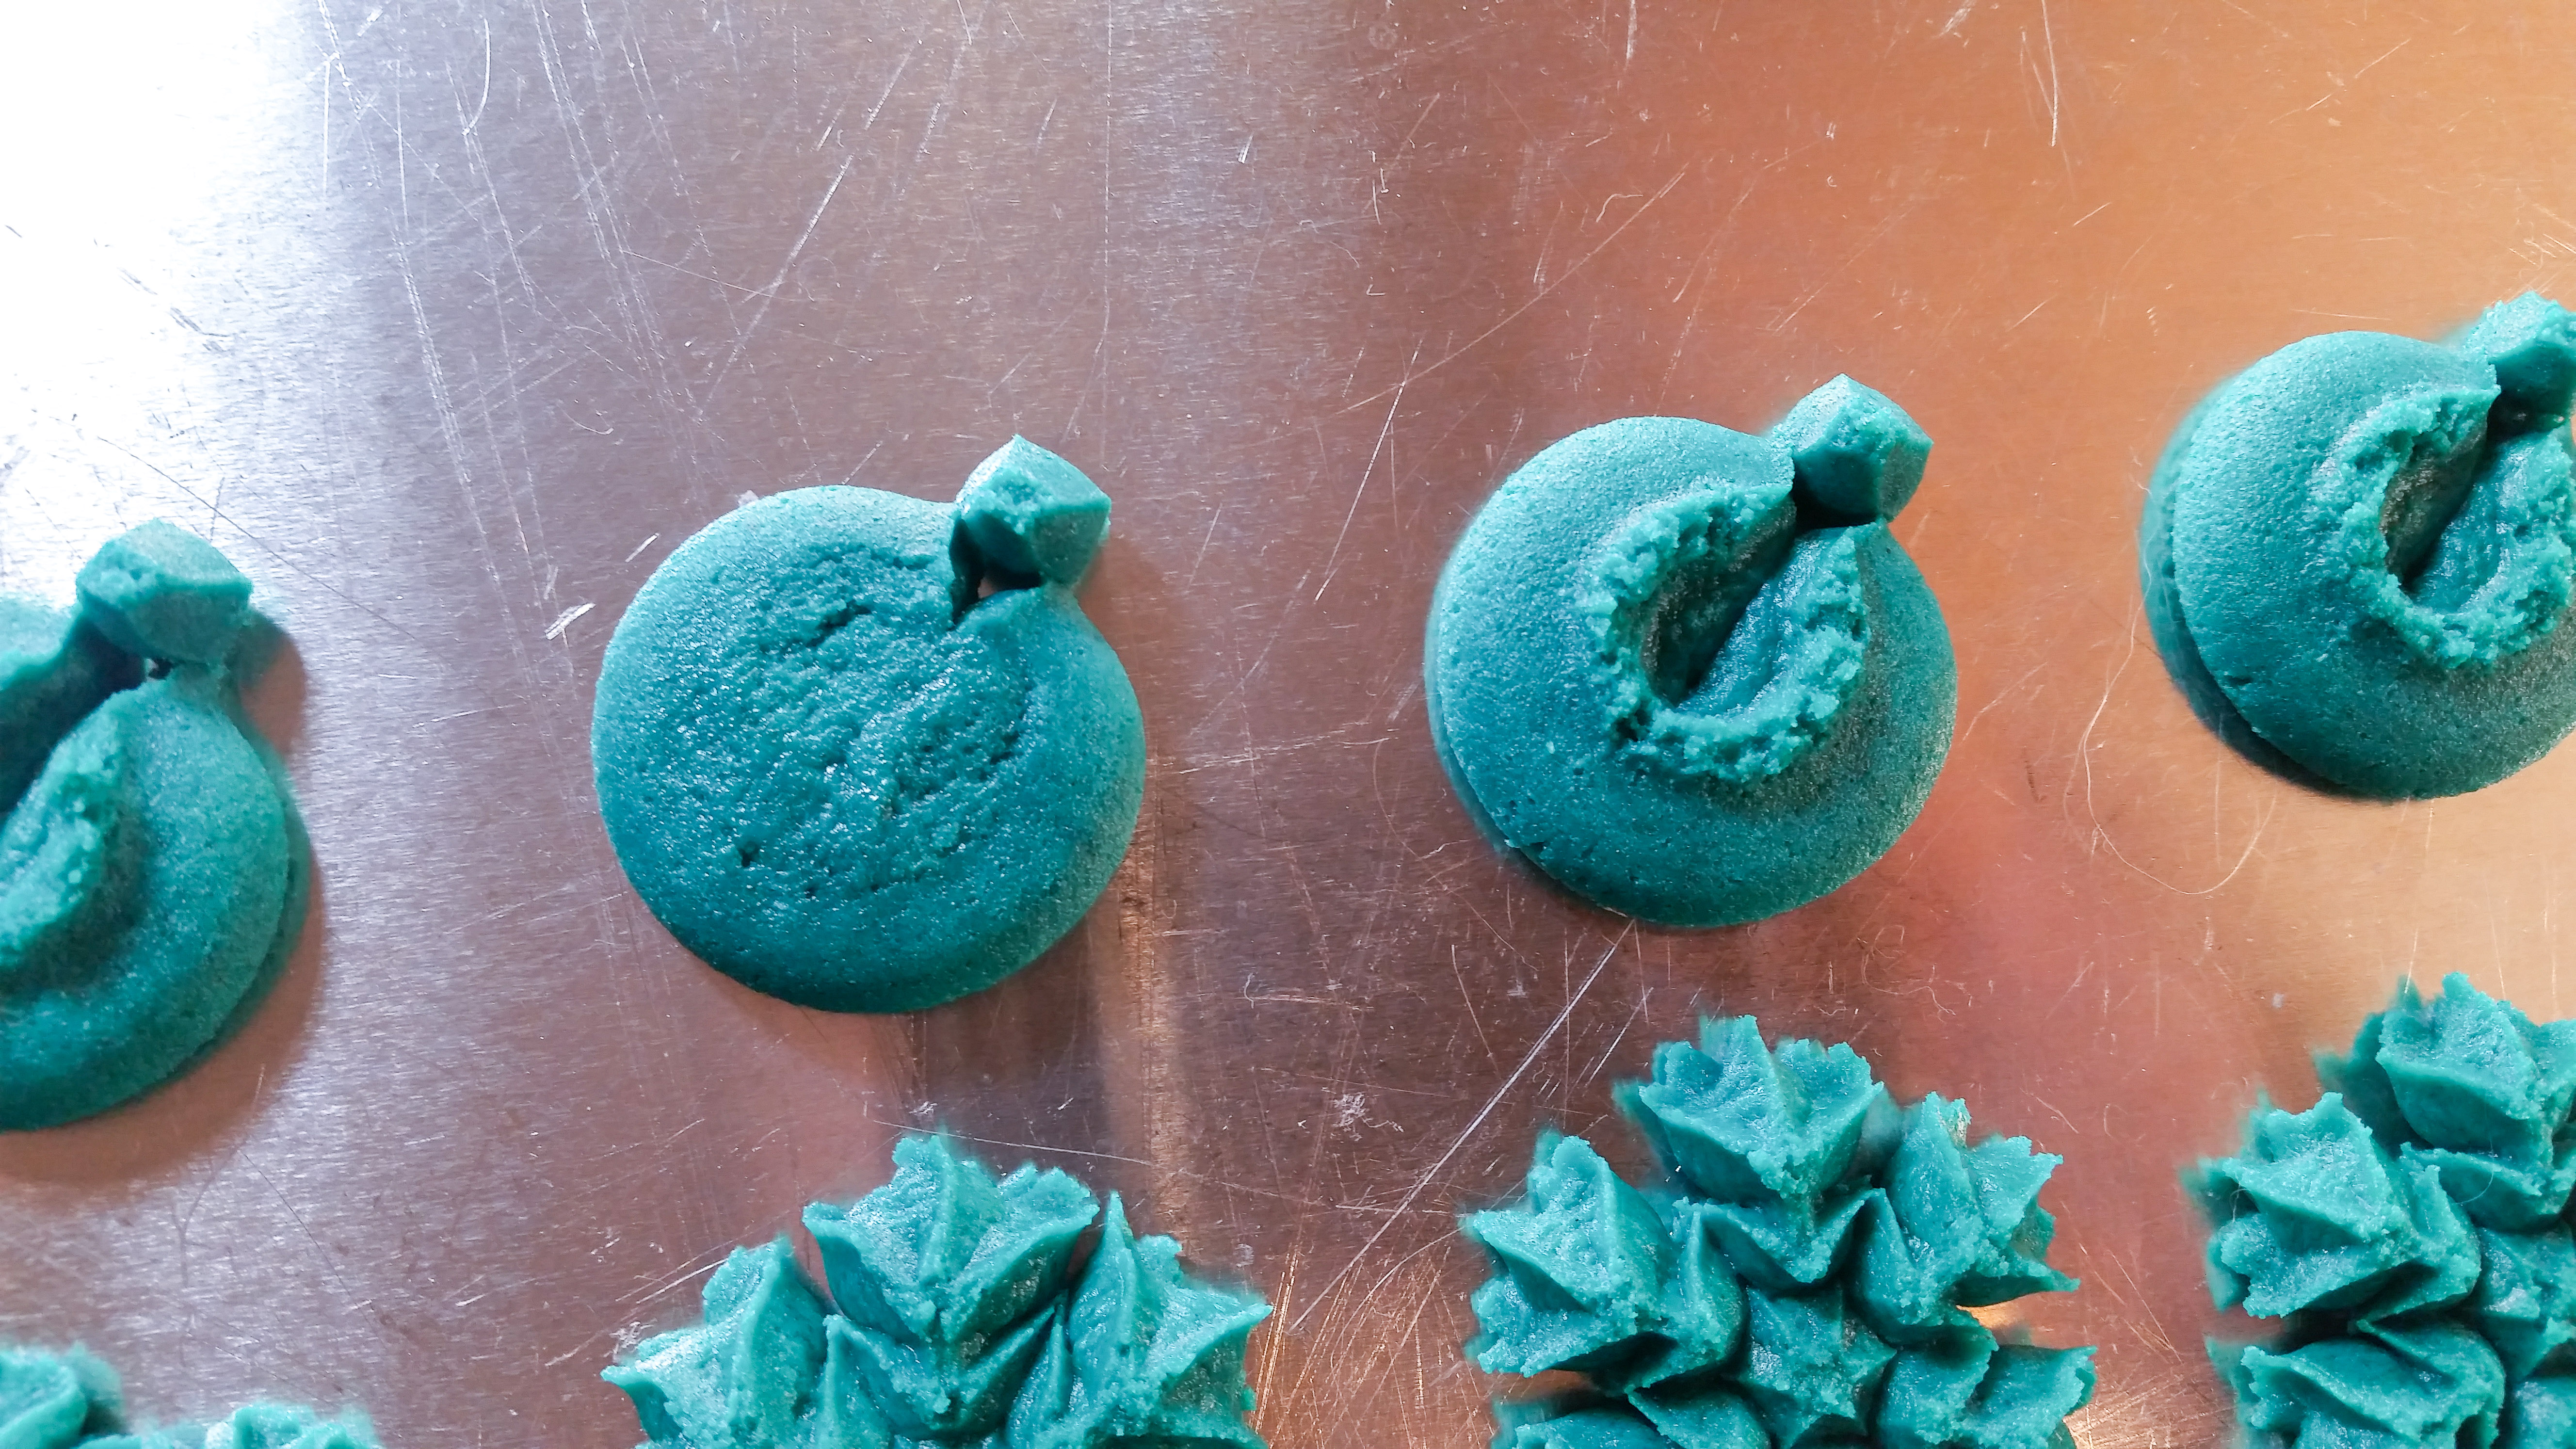
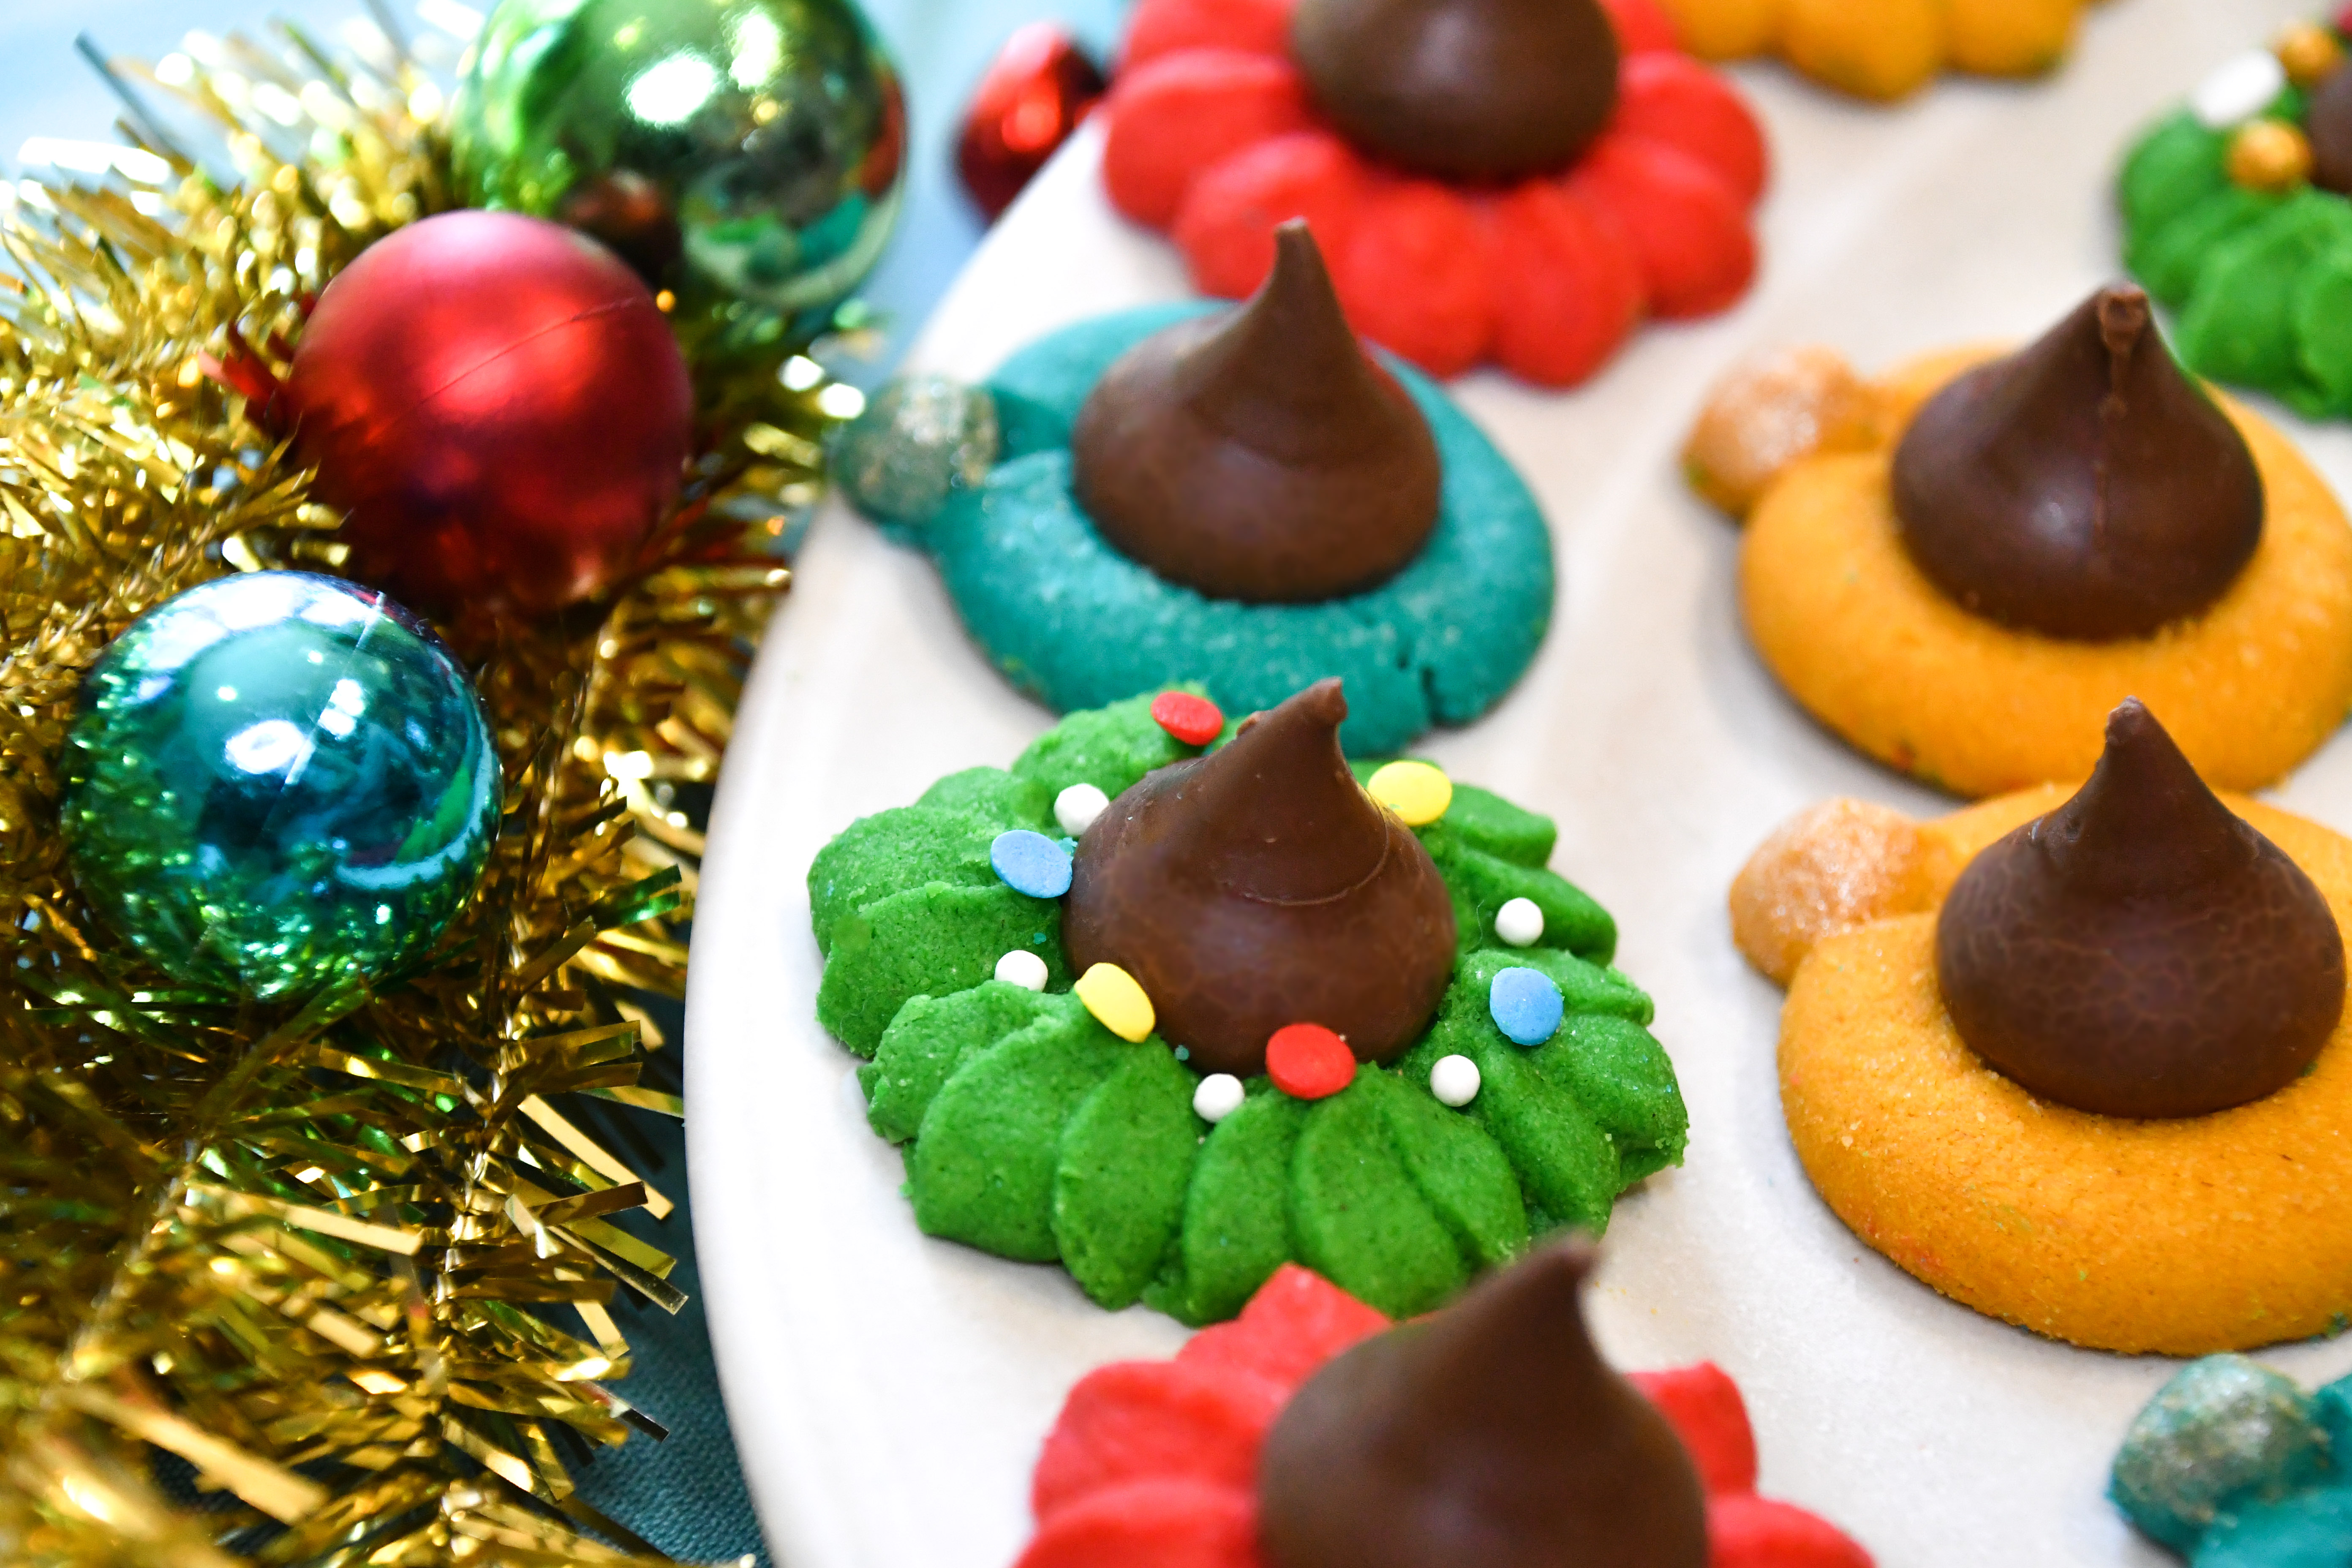
I used disks from several sets so you could see a variety, but any one shape or combination would be awesome. My main focus was on Christmas wreaths, snowflakes, and Christmas ornaments, as their round shapes and detailed edges made for perfect chocolate kiss holders! Since they are called blossoms I also used several of our flowers.

I added little sugar decors to the wreaths and I brushed gold edible luster dust on the top “hanger” part of the ornaments. That really made the “ornament” look! We sell both gold and silver luster dust on our website and Etsy shops. You could also leave the wreaths plain and happily declare this a “no decorating needed!” recipe.

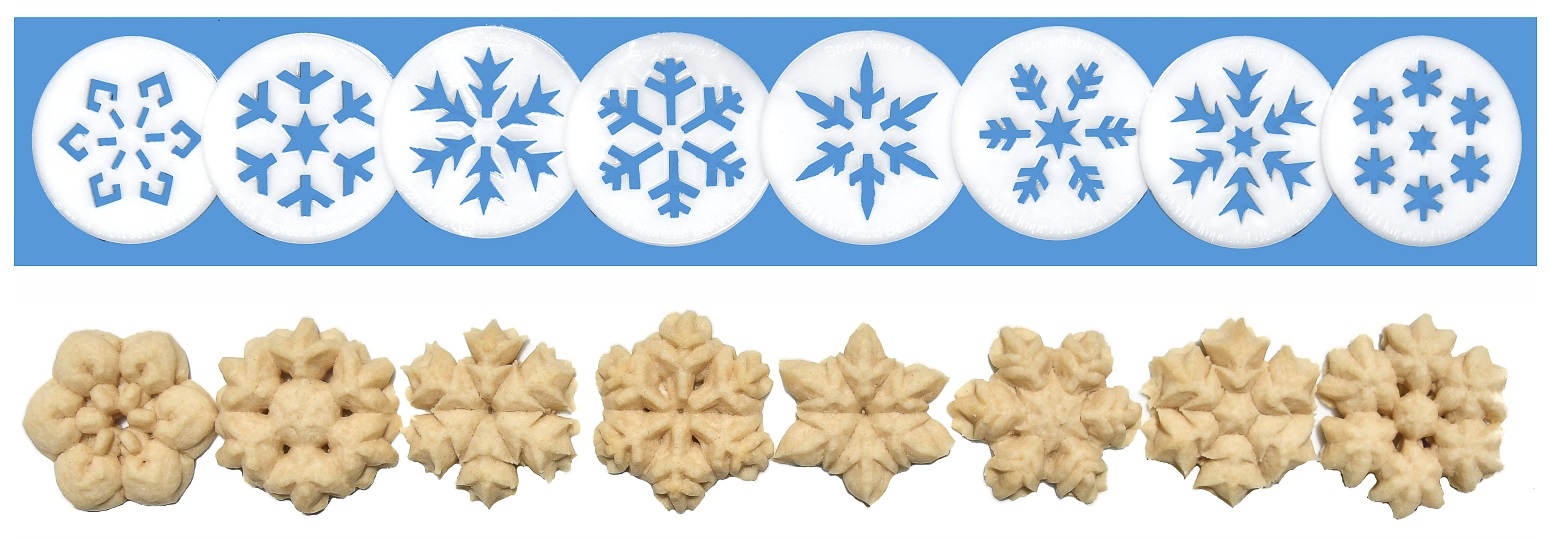
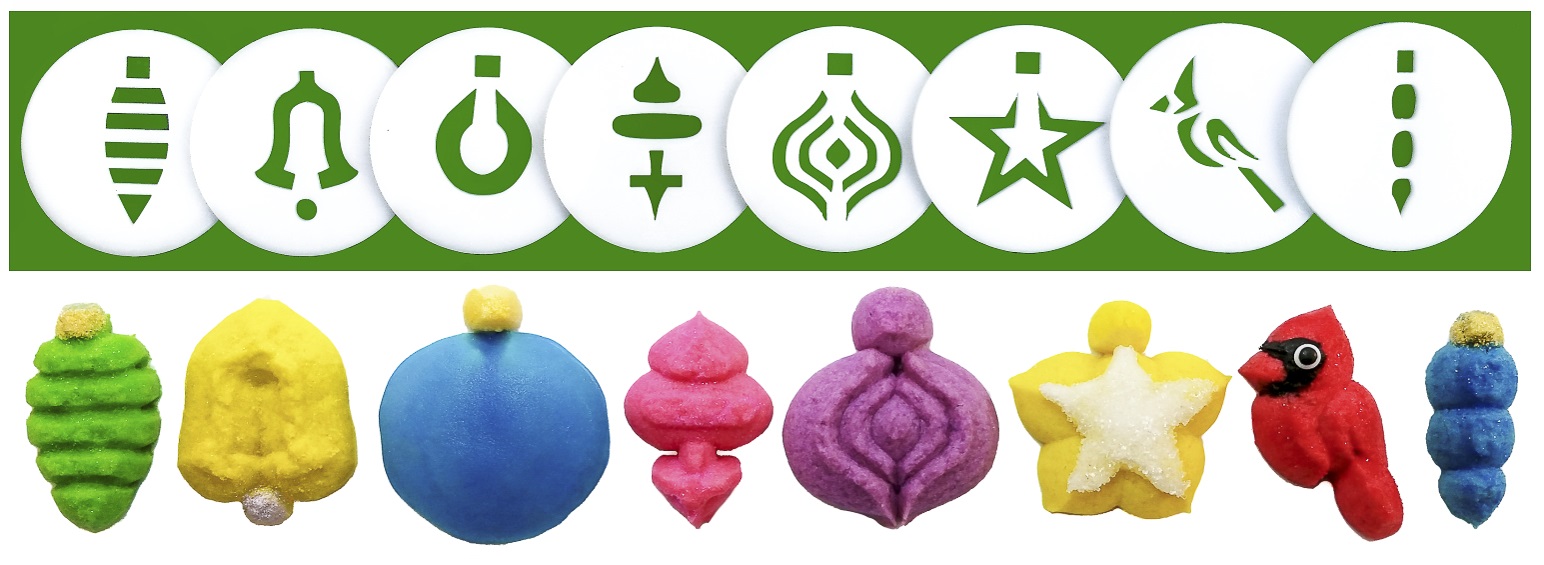
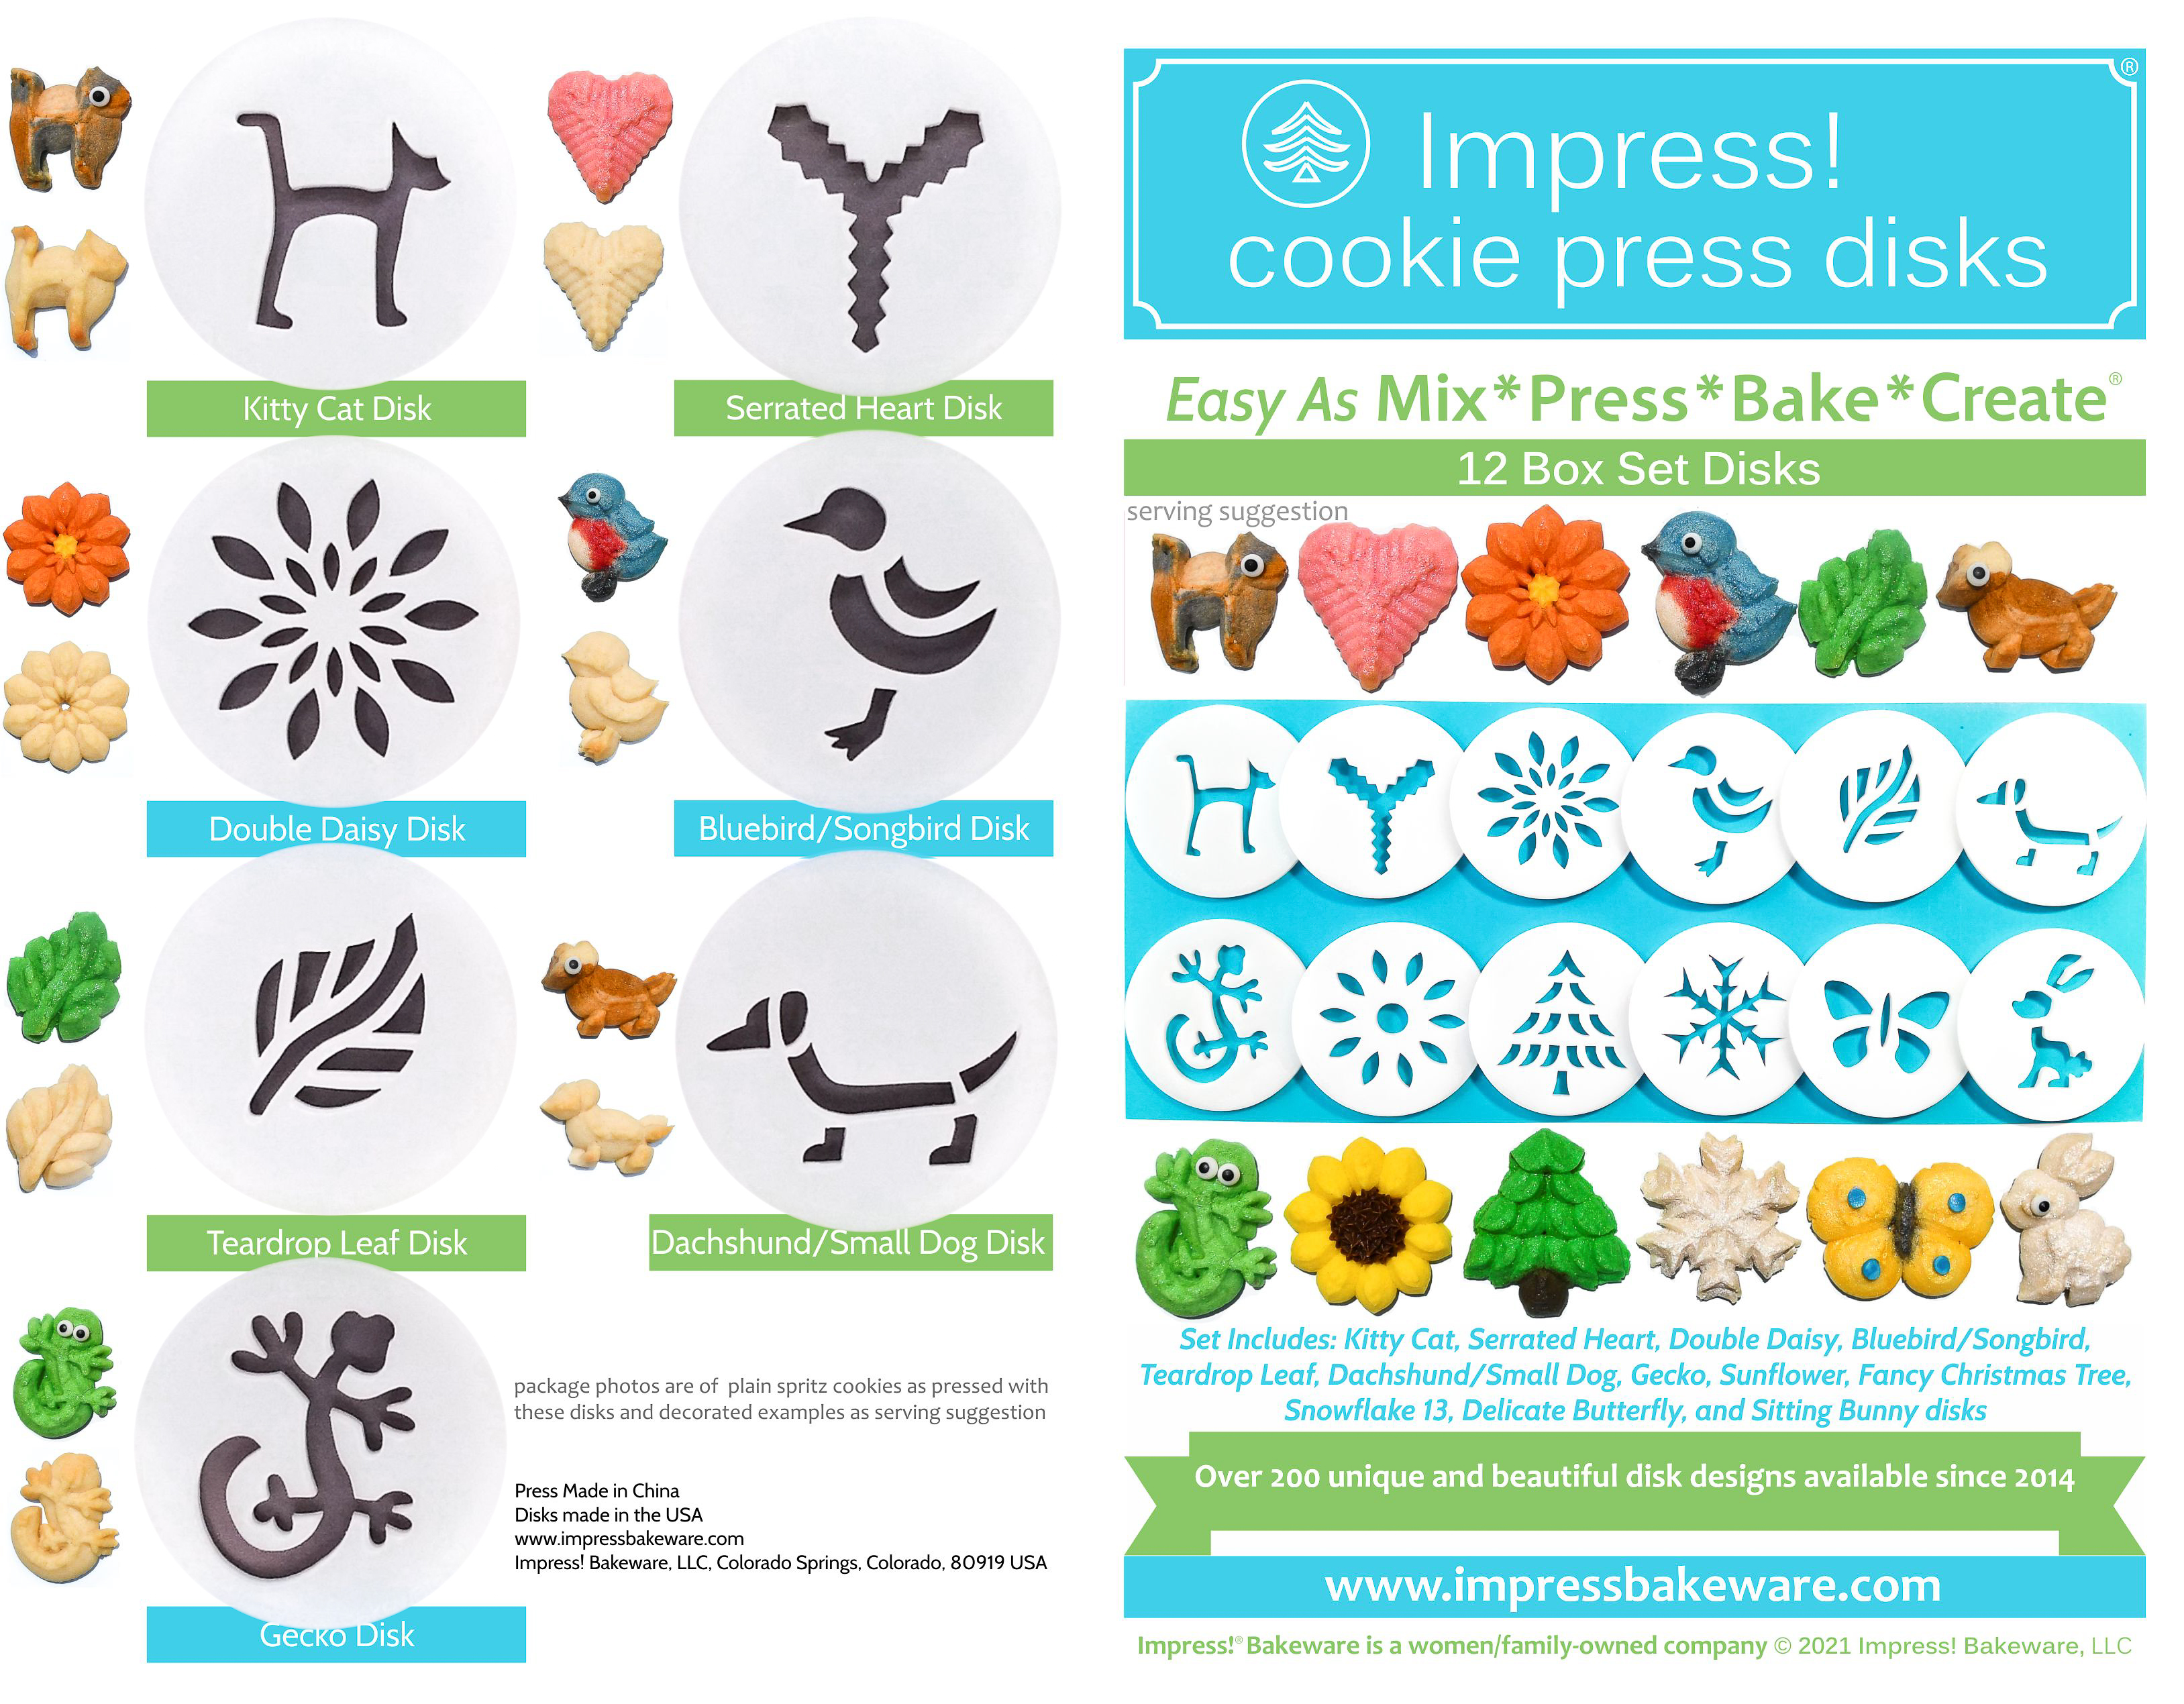
The disk shapes I used (disk sets pictured in more detail at bottom of post): Wreath from Christmas Two, Ornament 2 from Christmas Ornaments, Double Daisy & Sunflower from our Impress! Cookie Press box set, Daisy from Flowers, and Snowflakes 2, 3, 7, & 11 from the Snowflakes set. List of presses our disks fit is on our website. 🙂 Here’s a quick look at Snowflakes, Christmas Two, Christmas Ornaments & Flowers:


Our website has all of our 200+ disk shapes, cookie press, embossed rolling pins, baking accessories plus more about our Women/Family Owned company in beautiful Colorado Springs! impressbakeware.com
All products are on our Etsy shop.
Our Amazon shop has our cookie press and disks and embossed rolling pins.
💕We make our money selling cookie press disks and embossed rolling pins! There are no annoying ads on this recipe blog. Every purchase keeps us in business.🙏 Thank you!
🎉 15% OFF Last SALE of 2025 ❗
🎄Make edible art for the Holidays, because baking should be fun!
Discount on our cookie press disks, cookie press, embossed rolling pins, luster dusts, cookie cutters & baking accessories. Sale December 26 – January 4, 2026, on our website and Etsy shops ONLY! (Links above) Sale excludes holiday gift sets and our recipe book.
Let’s bake!
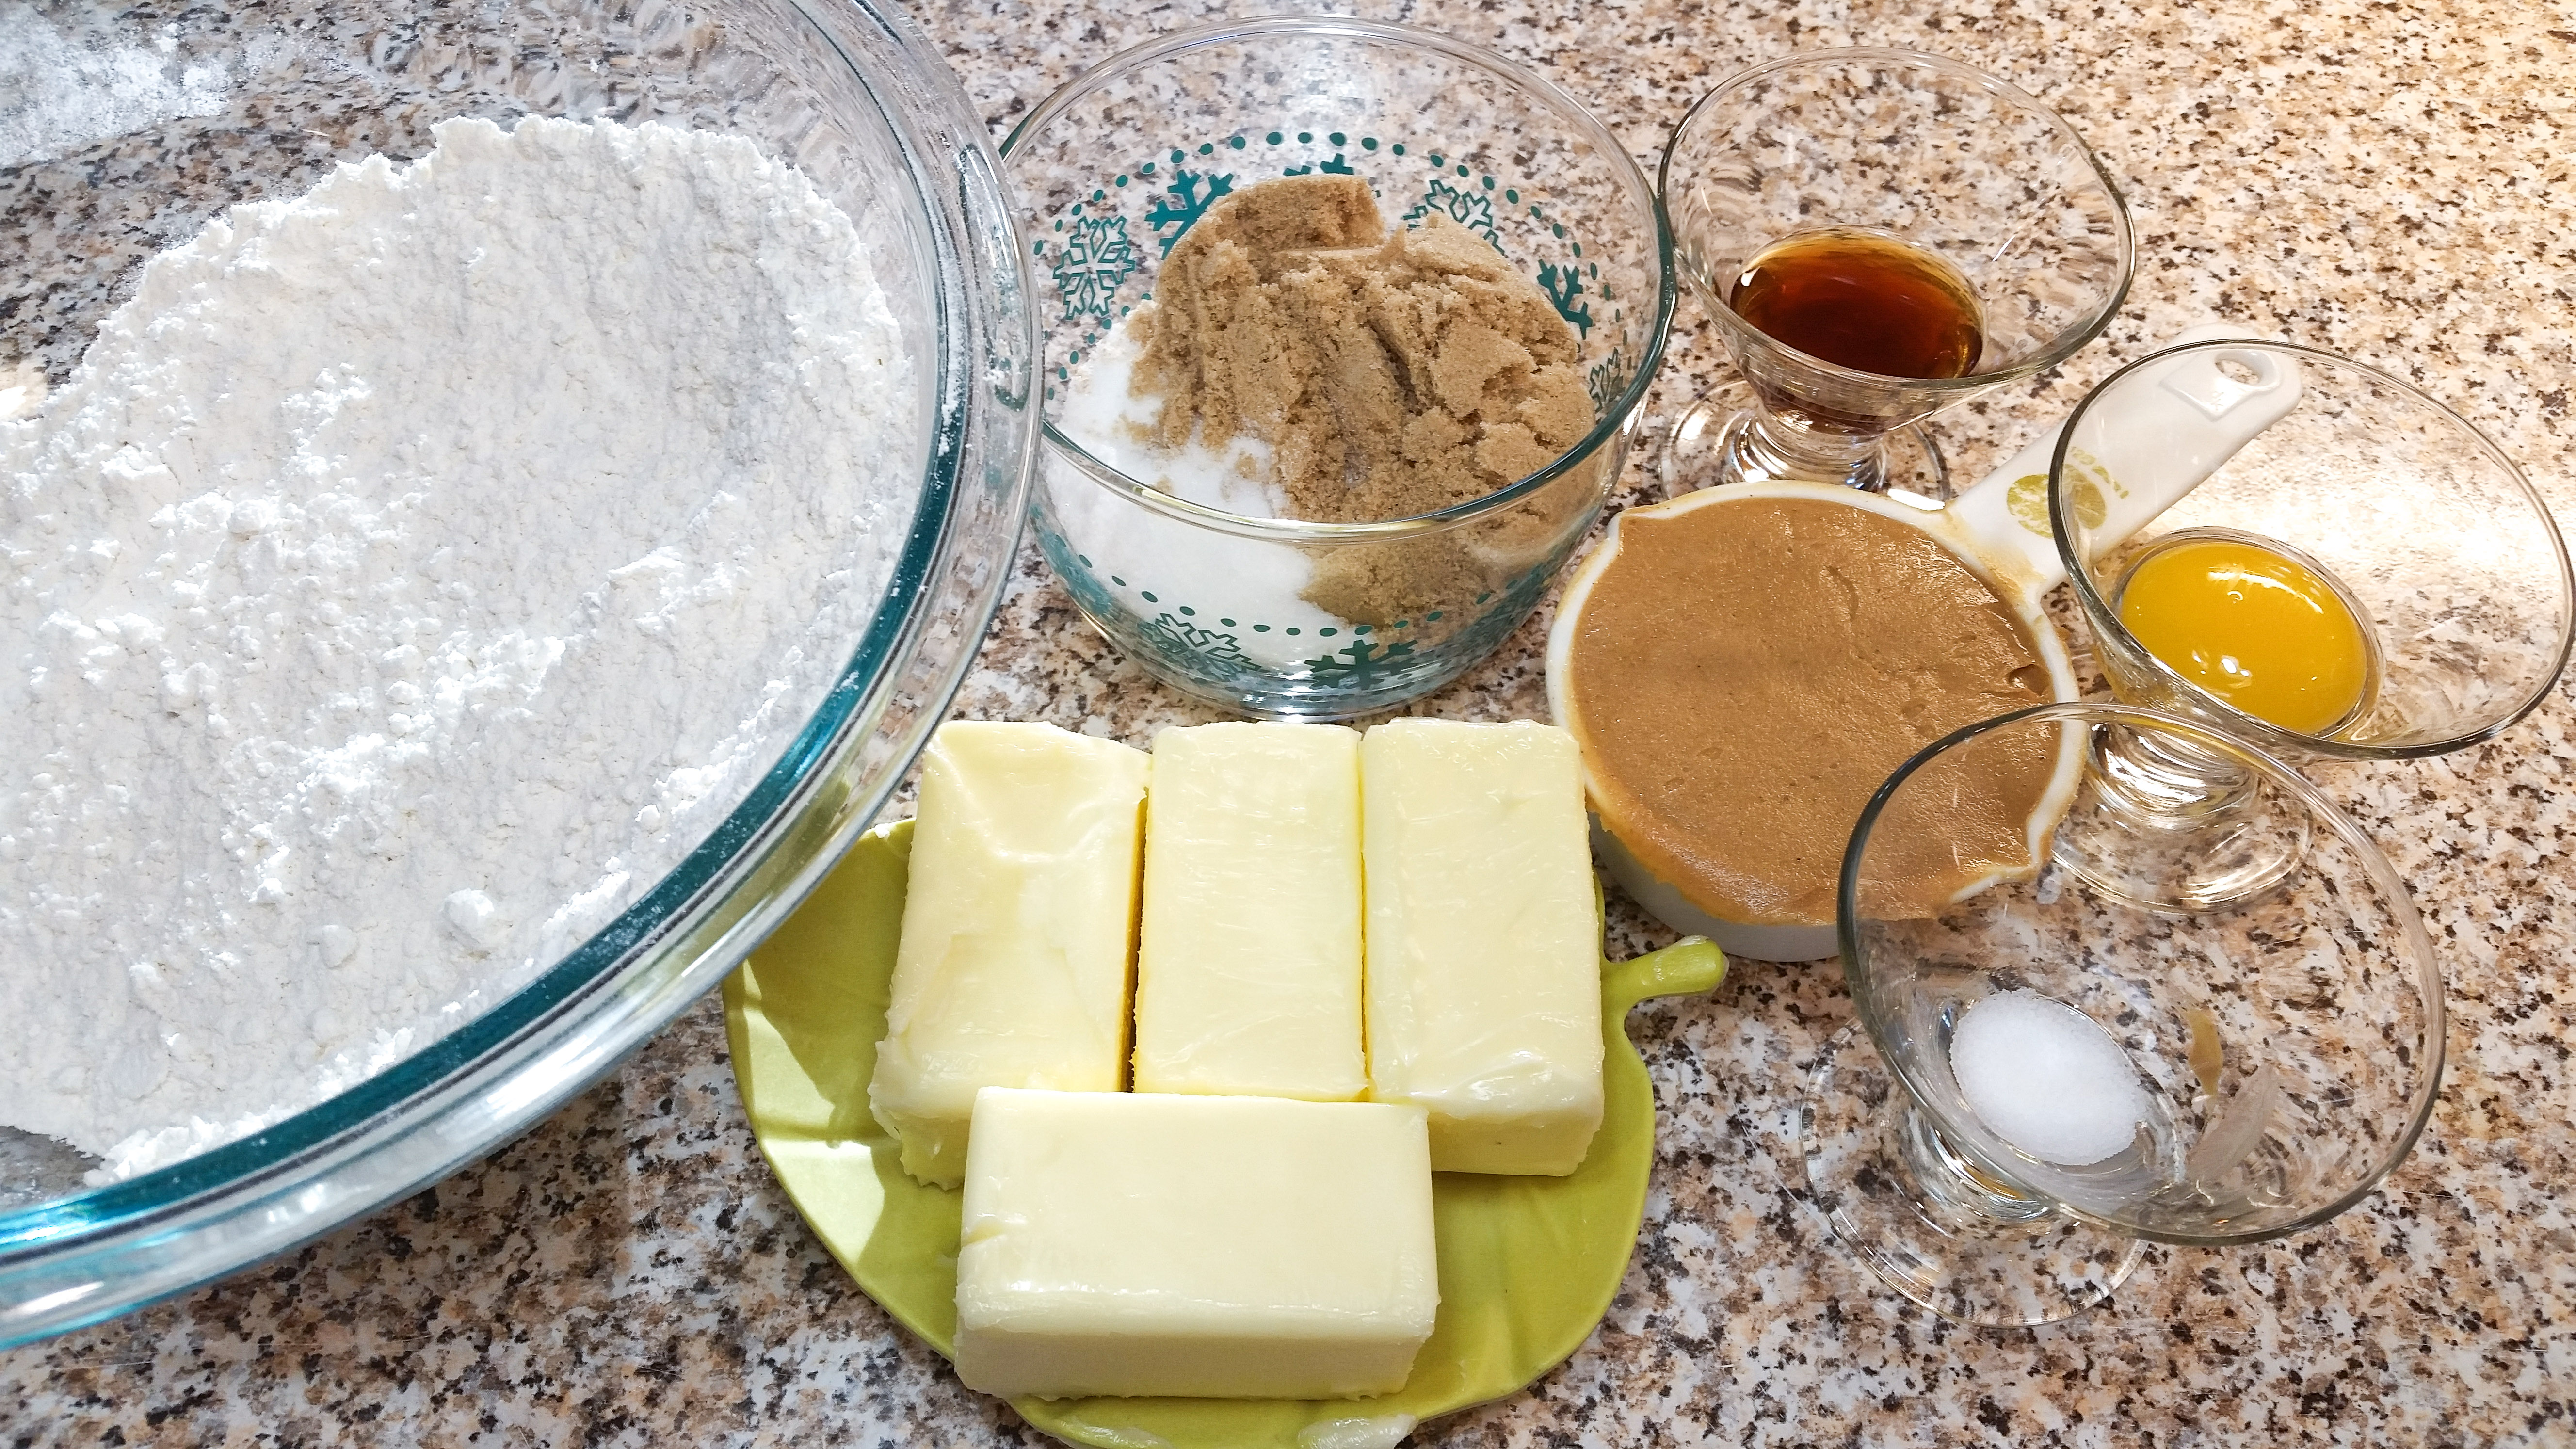
Gather your ingredients.
Peanut Butter Spritz Cookies
1 cups (2 sticks) butter, softened (not melted) (I recommend Land O Lakes brand as I know it creams well. I have had trouble with some generic butters not creaming properly and making the dough hard to press)
1/3 cup granulated (white) sugar
1/3 cup brown sugar
1/2 cup creamy peanut butter (I have not tried natural peanut butter! I Used regular JIF)
1 egg yolk
2 teaspoons vanilla extract
2 1/4 cups all-purpose flour
1/4 teaspoon salt
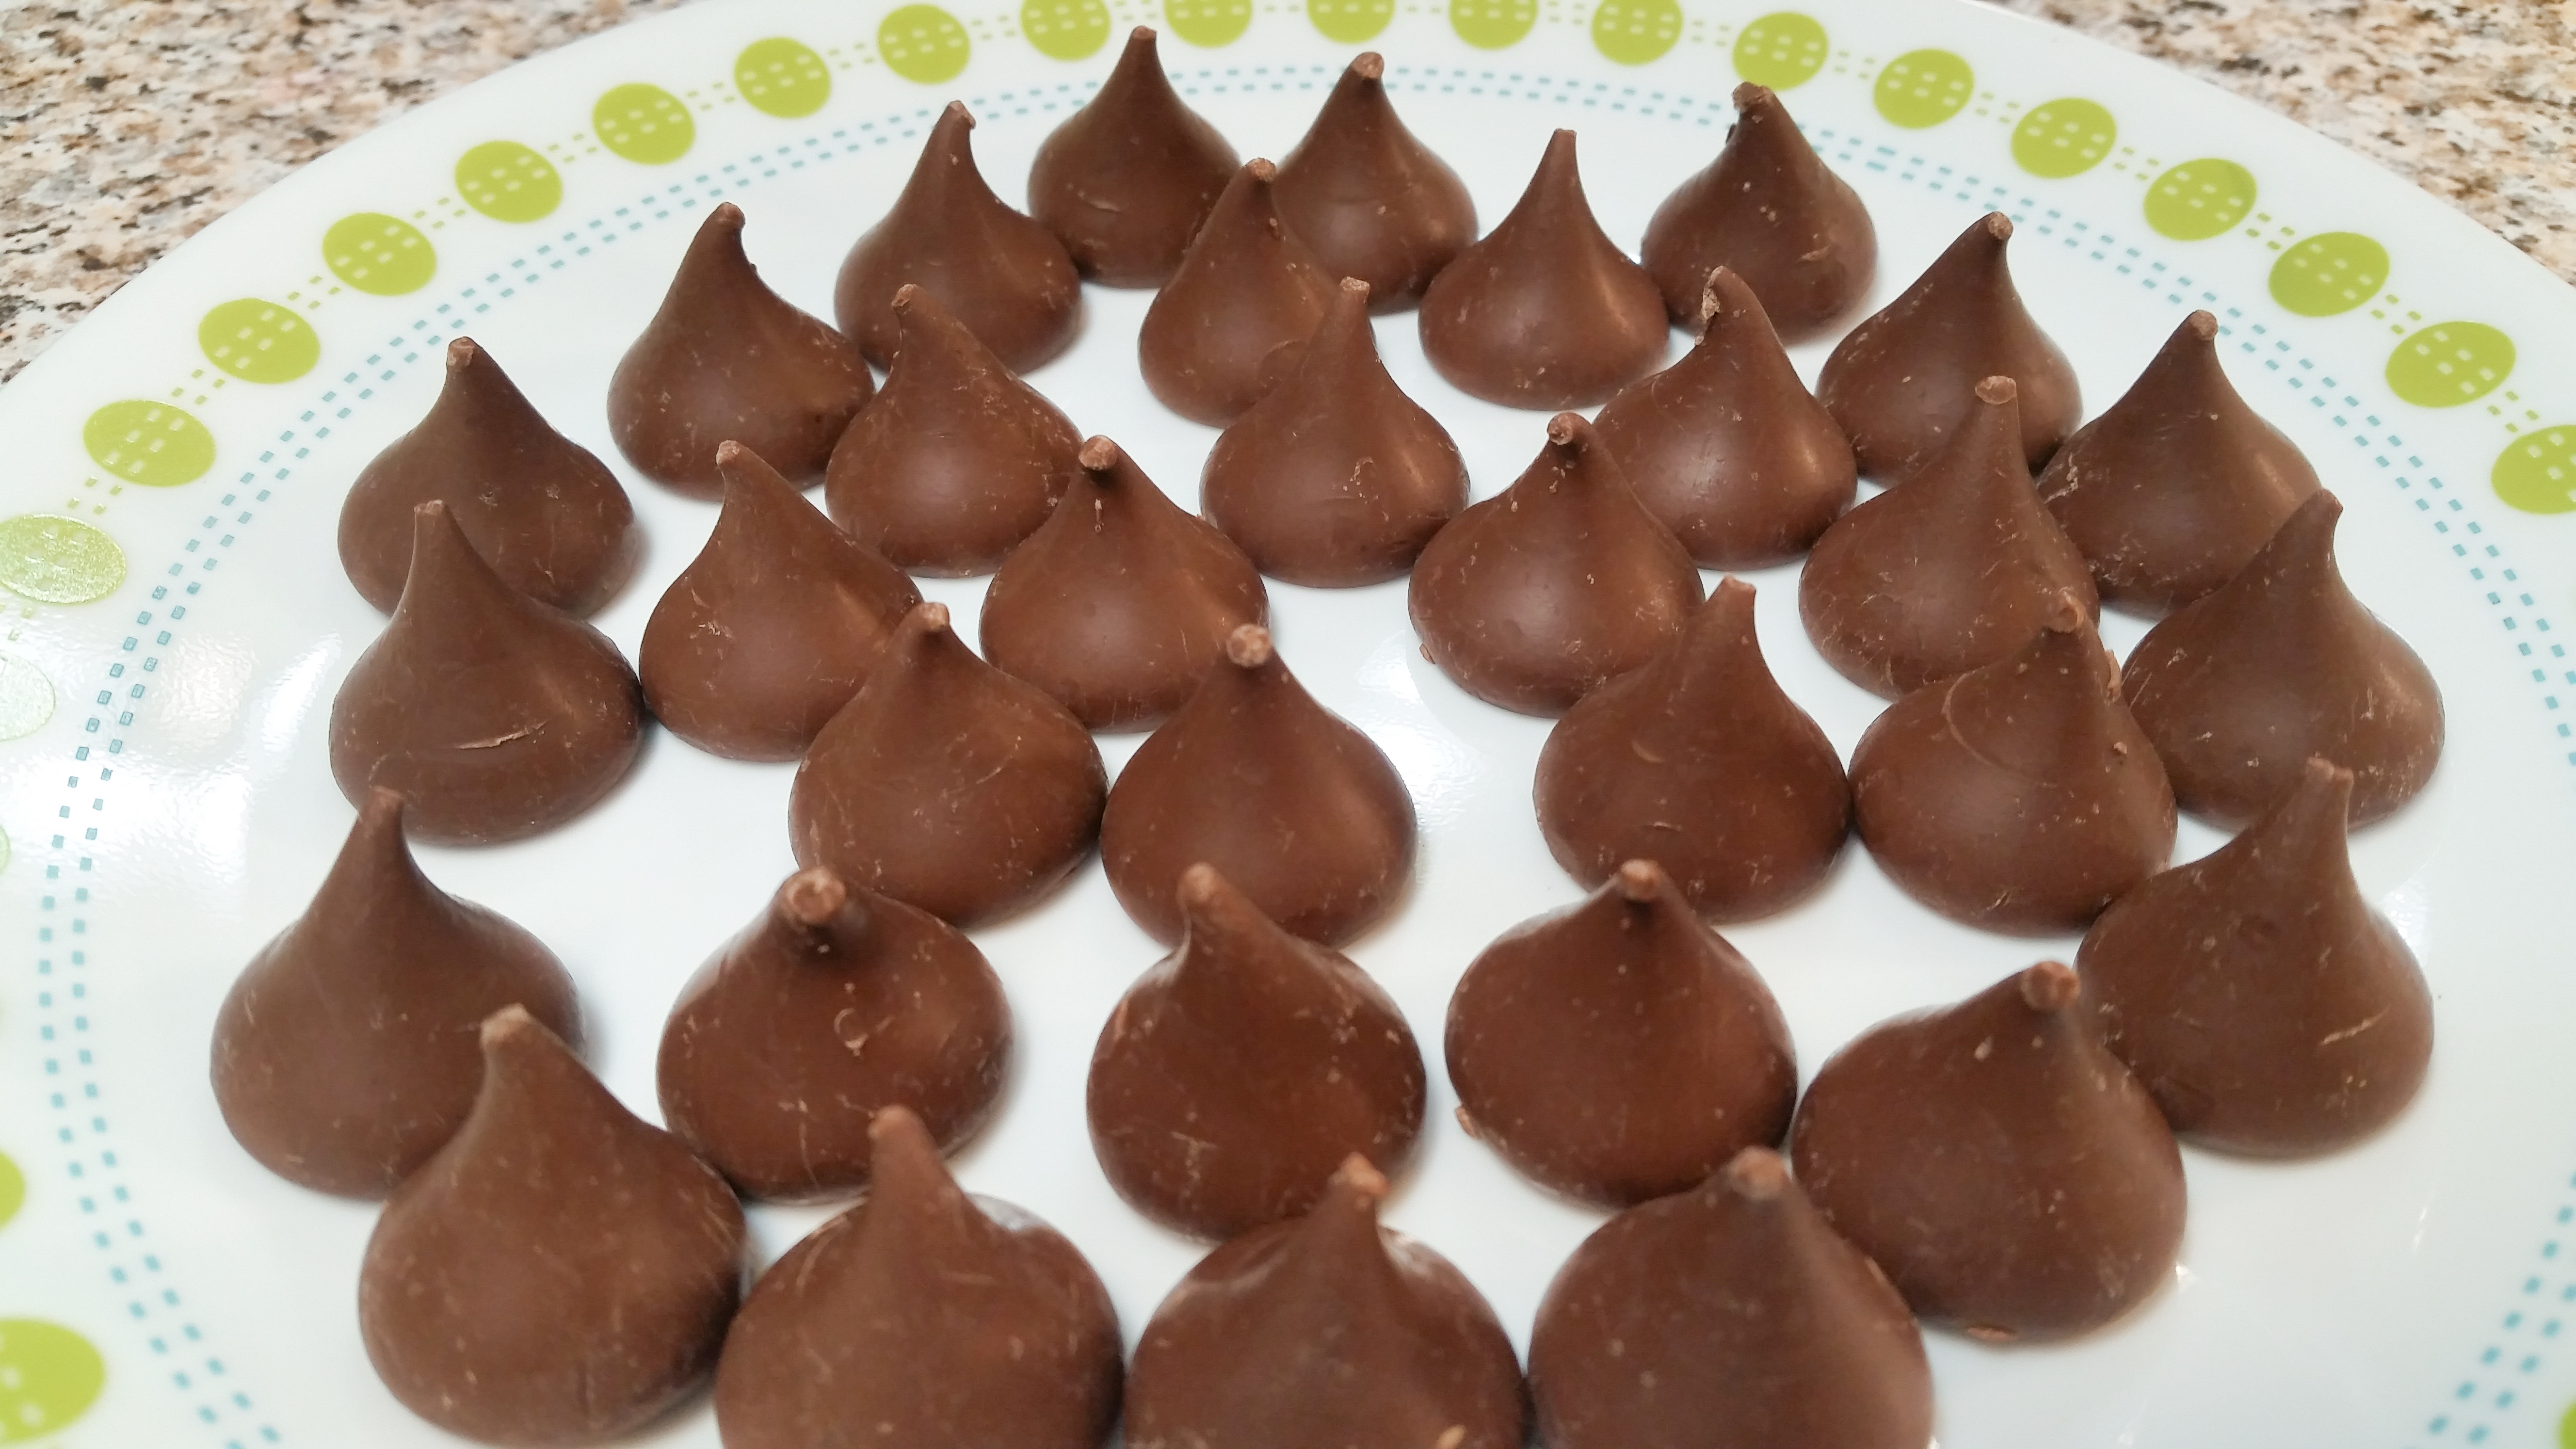
chocolate kisses (you will need over 80 so get a big enough bag!)
Small dish of granulated sugar for sprinkling (a few tablespoons)
Note: For a gluten-free option simply replace the flour with a 1:1 substitute like King Arthur’s Gluten Free Measure for Measure.
Preheat oven to 375°F
In a large bowl, combine the flour and salt. Using a big wire whisk is a good way to mix them evenly. Set aside.
**UNWRAP your chocolate kisses!** You have to add them quickly and there’s no time to unwrap them after baking. My daughter and I found this out the hard way. Our scrambling to quickly unwrap was hilarious, if rather unfortunate. LOL
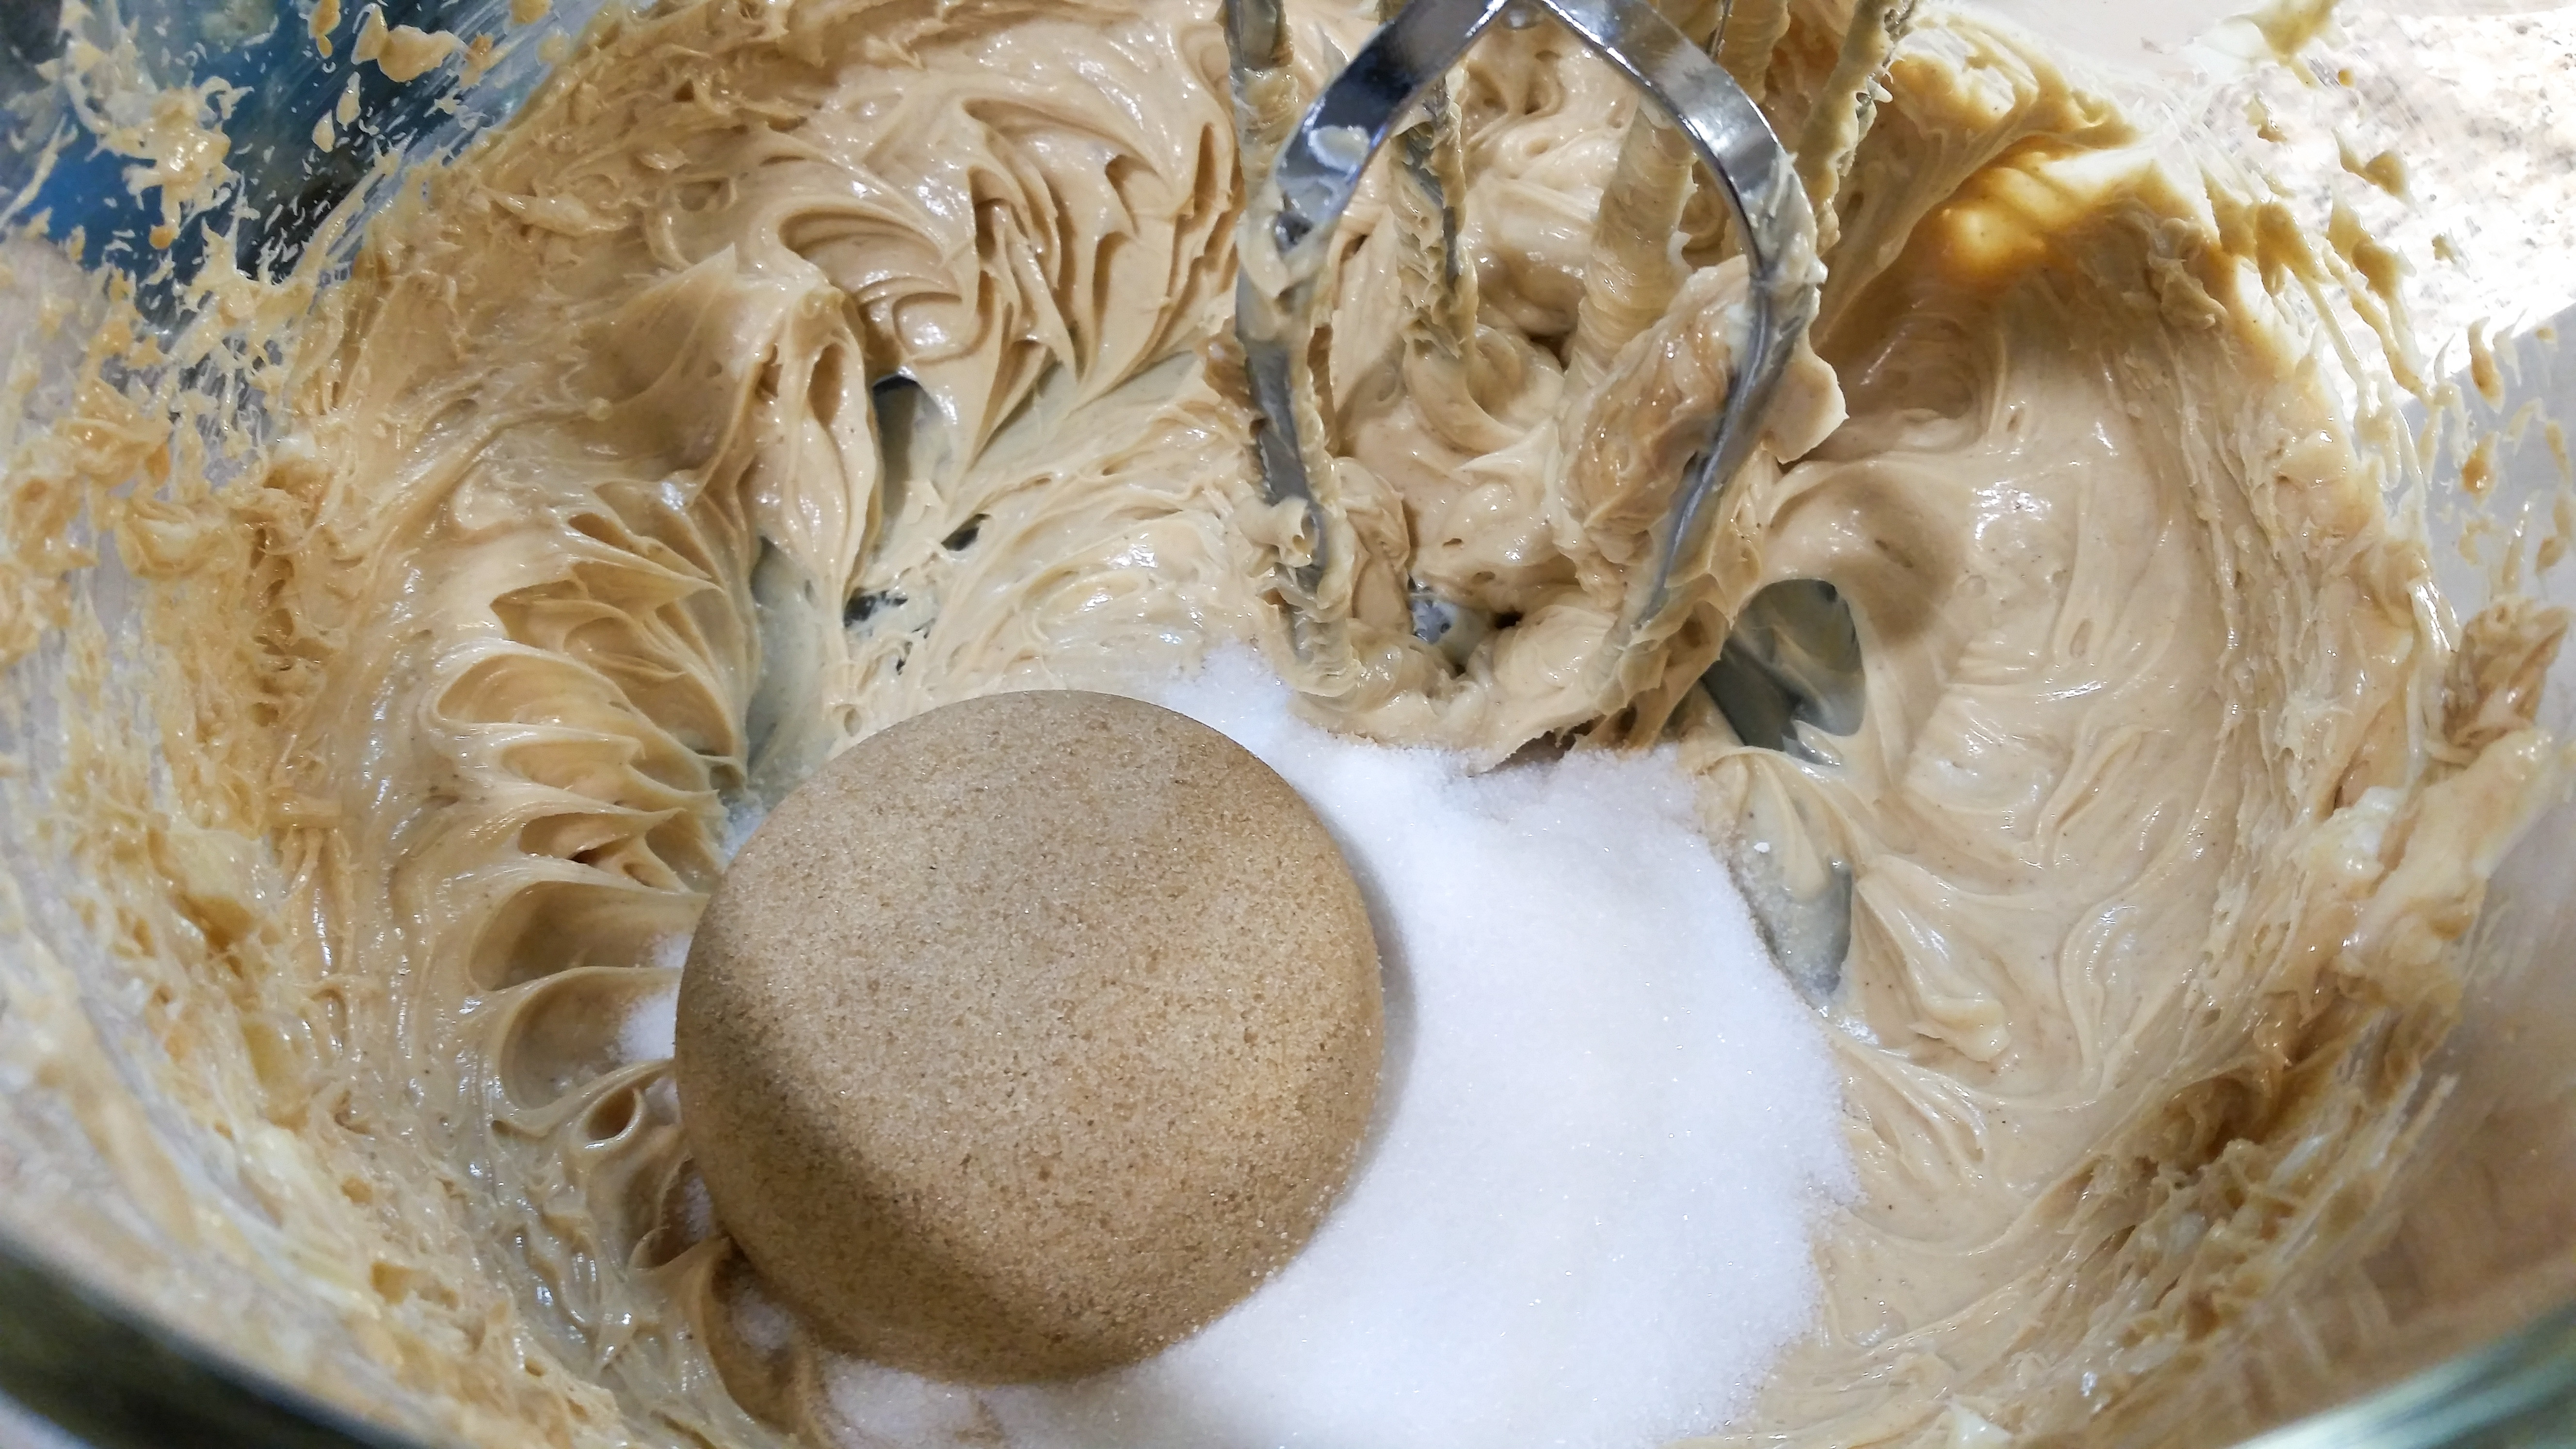
Using an electric mixer, cream the butter very well. I say this in every post so sorry for being repetitive! Creaming your butter until it is fluffy is the key to great spritz cookies. I like to pretend I’m making frosting and use the “whip” setting on my mixer. Butter turns a slightly lighter color when it’s creamed well. Add the peanut butter and cream it again.
It’s so pretty as it comes together!

Add the sugar and brown sugar and cream it very well again.
Add the vanilla extract, and egg yolk, re-creaming the mixture after each new addition. Next add the flour mixture a little at a time, mixing on a slow speed until a soft dough forms. Perfect spritz dough has a soft malleable texture that is not too sticky or too stiff. You can always knead it by hand at the end if your mixer is leaving any flour unincorporated. Smooshing it into a play-dough like texture by hand is actually pretty fun.
This dough does well and presses better if you let it sit for 10 minutes or so. It absorbs the liquids and “sets up”, making it easier to press.
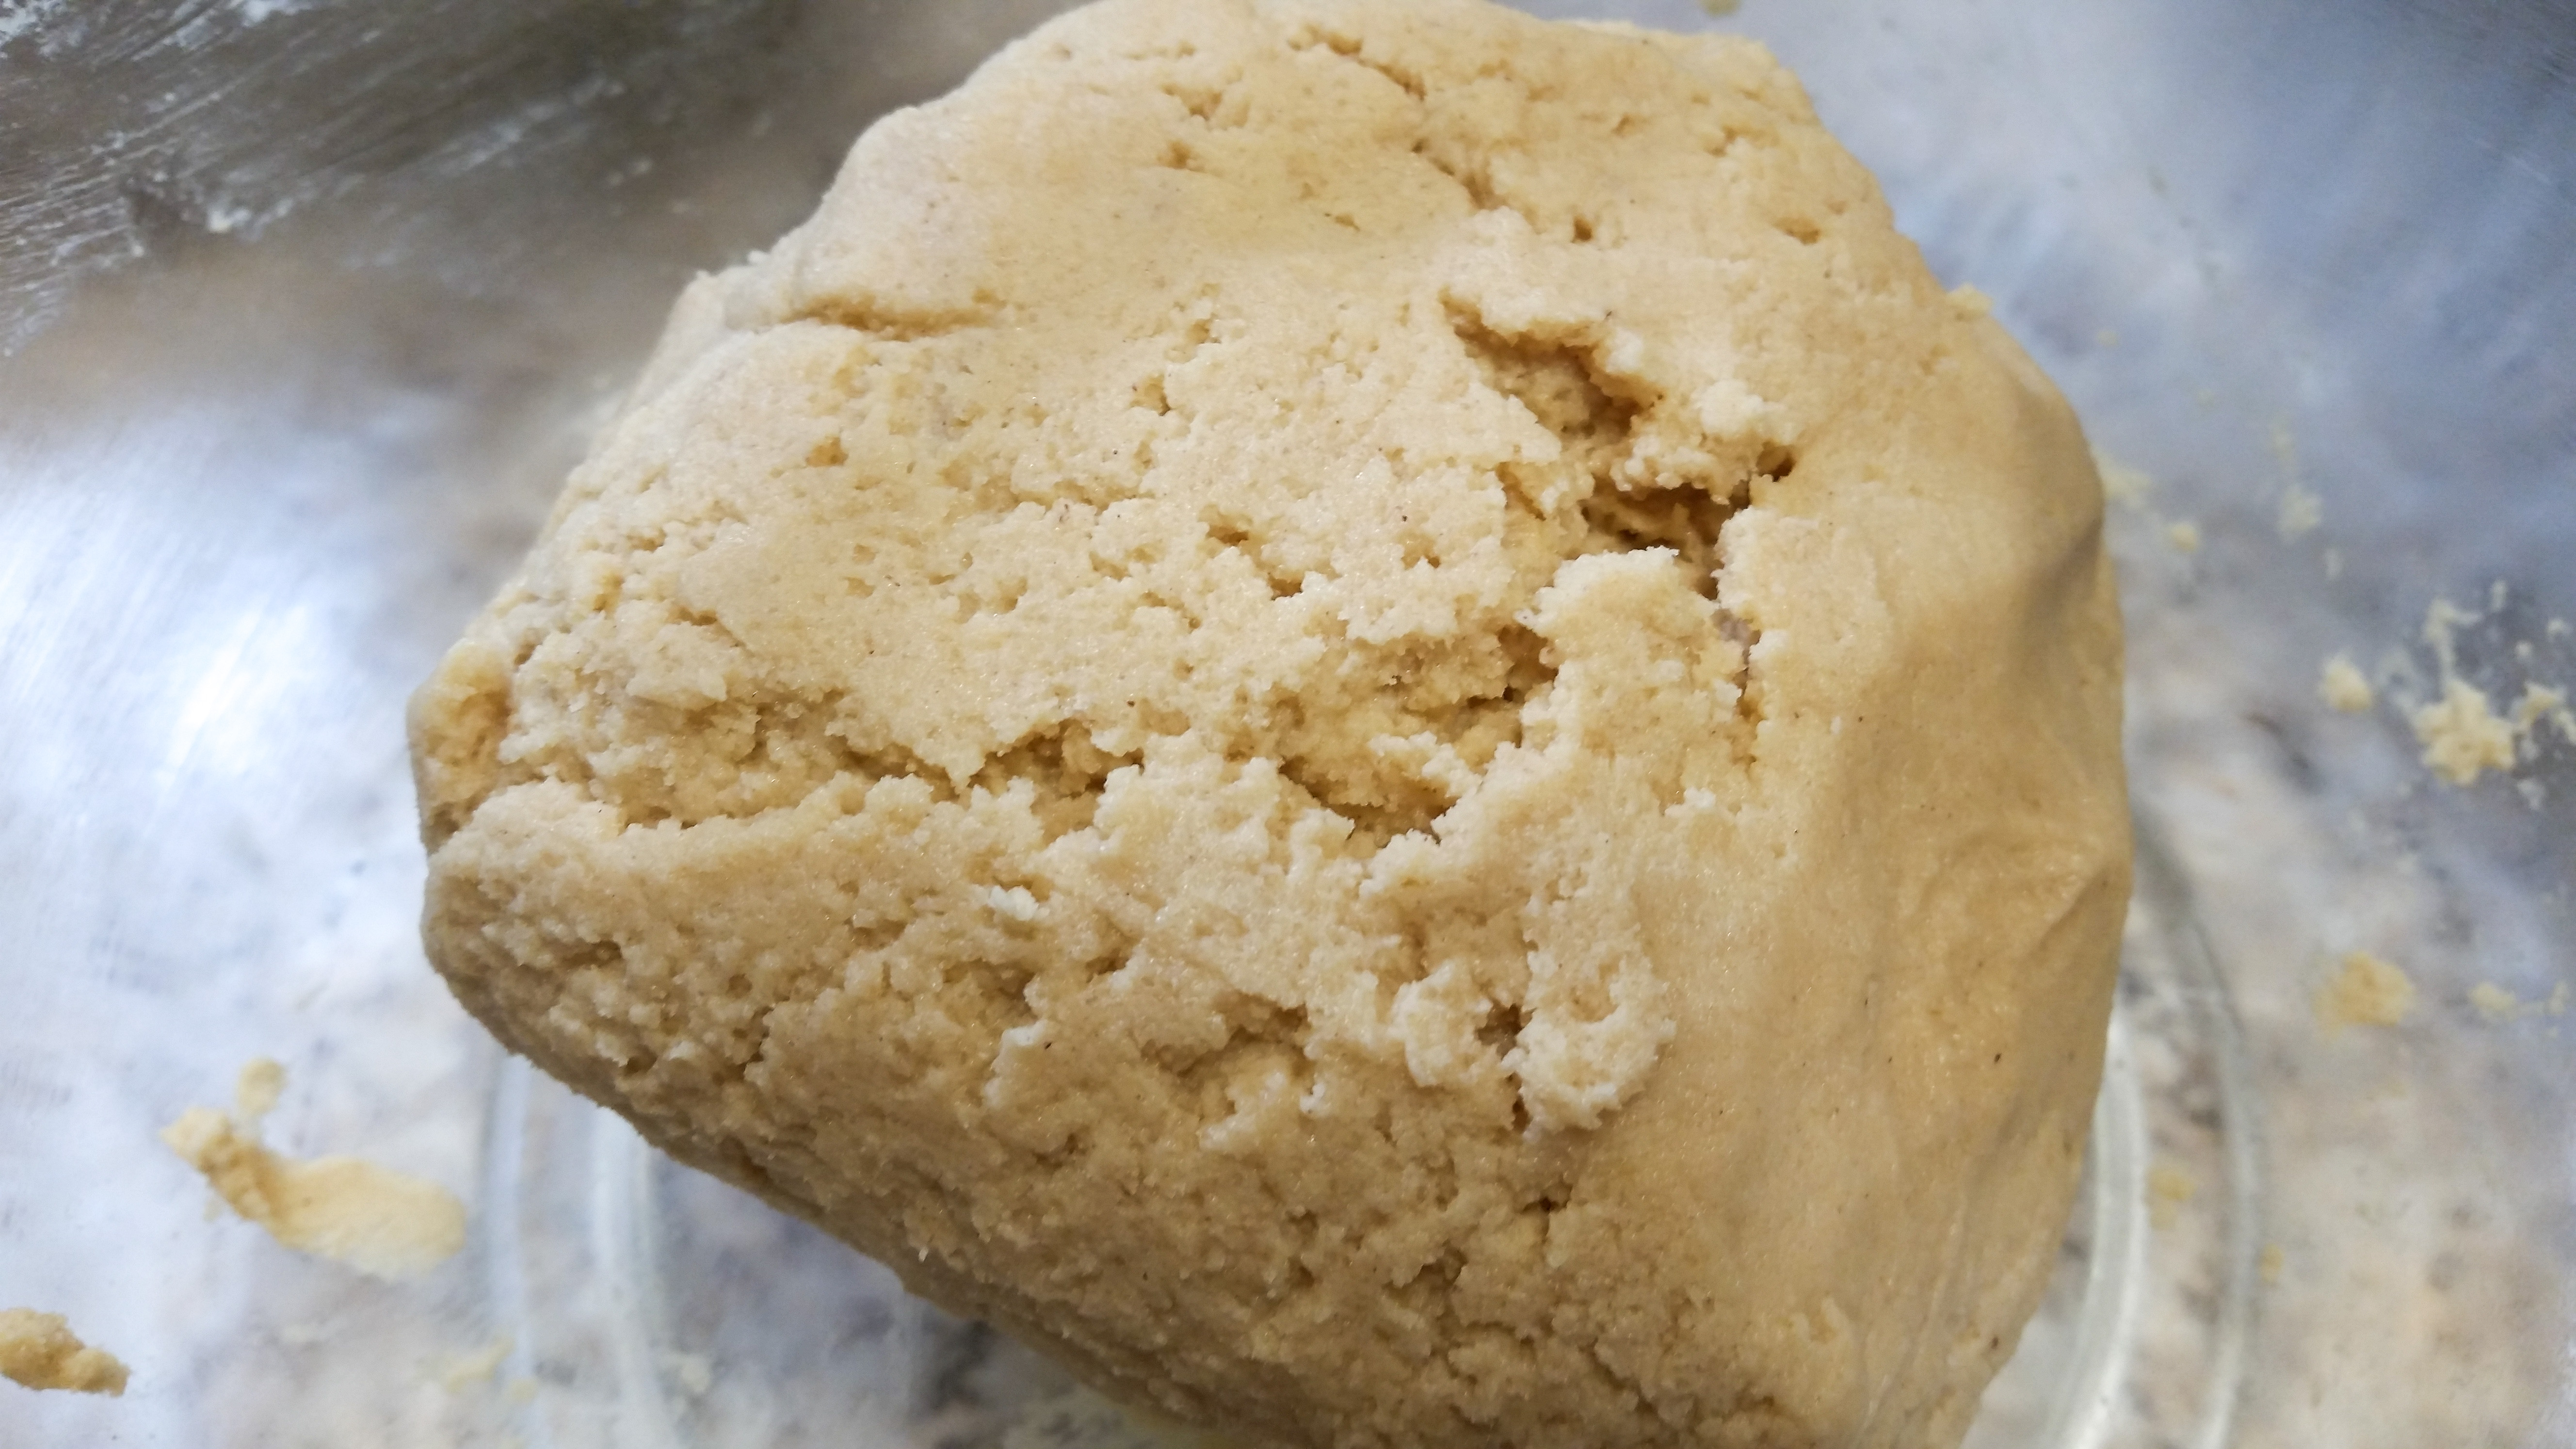
Always remember that you can tweak overly stiff dough by adding more vanilla a teaspoon at a time (or by the tablespoon if it’s particularly stiff), or tweak overly soft or sticky dough by adding flour a tablespoon at a time. Watch some of my videos to see what a correct spritz dough texture looks like.
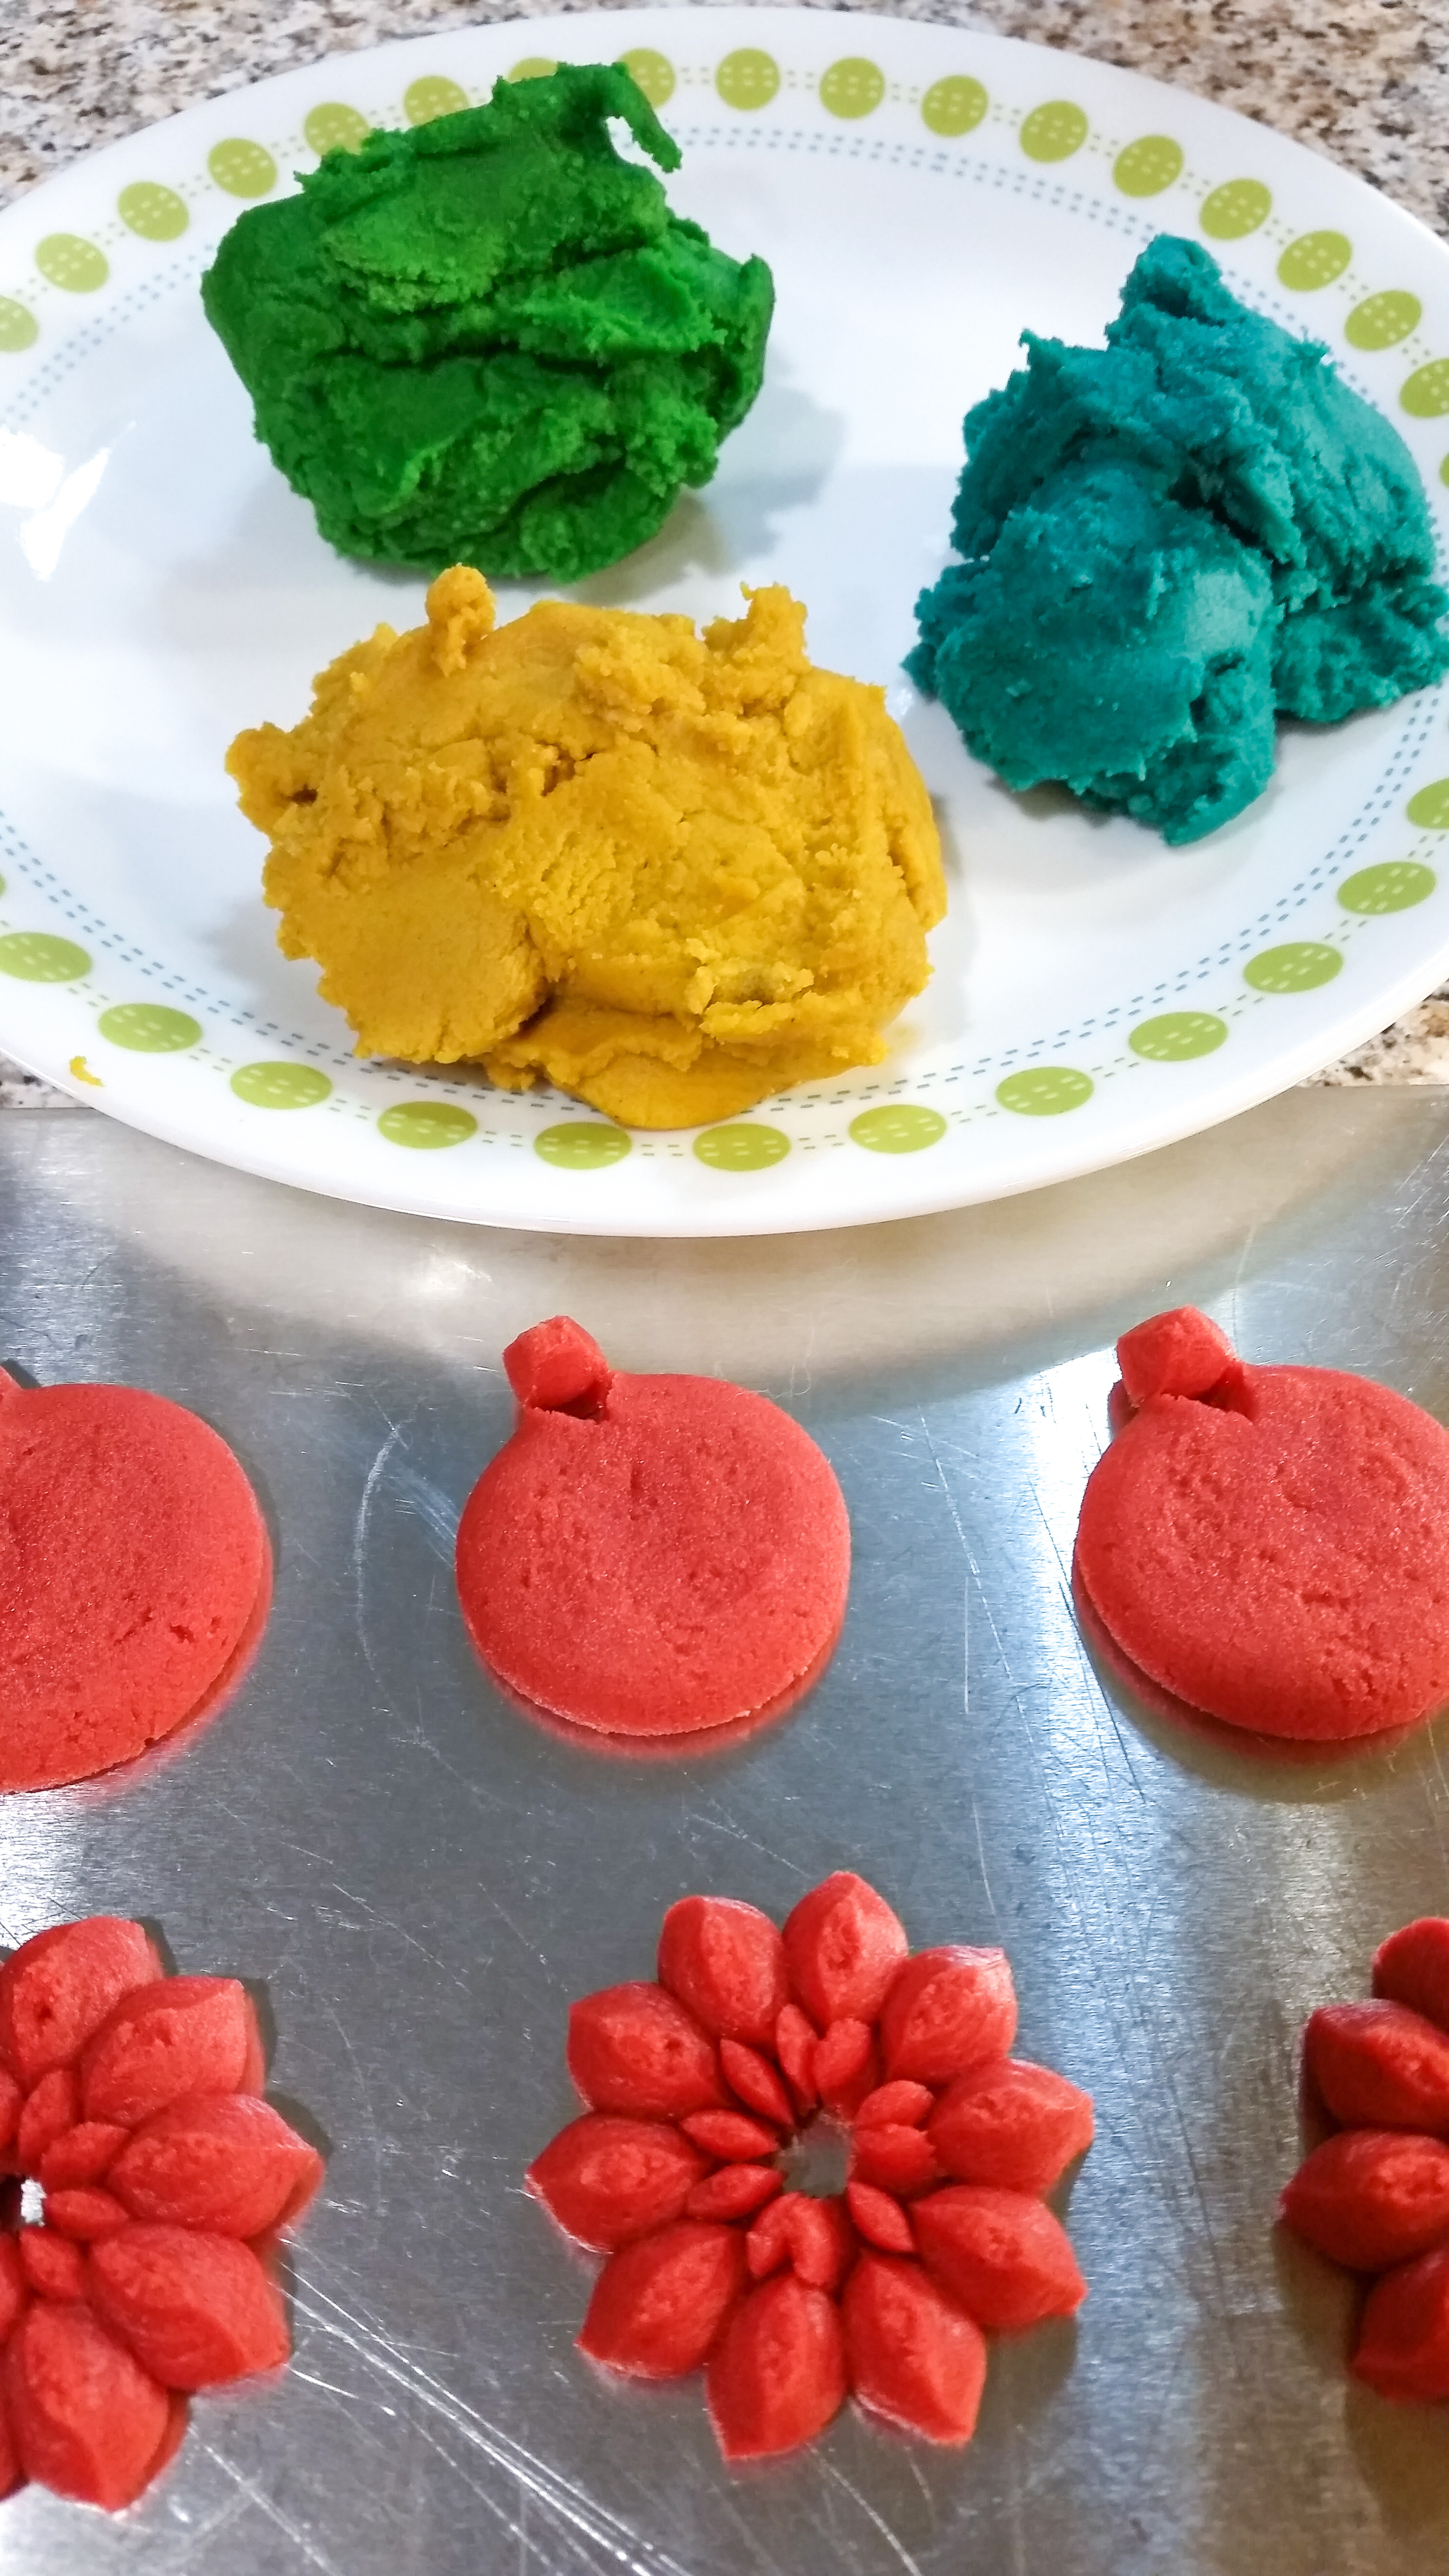
Color the dough whatever colors make you happy, using gel food dyes because liquid affects consistency too much, especially for these deeper, brighter colors. Simply separate whatever amounts you want of each color into separate bowls and use a spoon or your hands to work the color in, a little at a time. TIP: you can always add more color but you can’t take it out! I use a toothpick to pick up the gel and add it to the dough. Don’t double-dip with a toothpick that’s touched dough; you don’t want to contaminate your color. Grab a new toothpick. 😉
Get your disks and pack your dough into your cookie press barrel, using the back of a spoon to press the air bubbles out as you add dough. This helps create consistent pressure to avoid mis-shaped cookies.
Place the disk in the bottom ring, attach to your press, and start pressing onto an un-greased cookie sheet. Use a consistent rhythm to keep the shapes a uniform size. It’s not at all uncommon for your first few cookies to be mis-shaped, as pressure needs to build in the barrel to make consistent shapes. It’s totally ok! Just throw them back in the bowl to be re-pressed. If you’re still having trouble pressing (mis-shaped cookies, trouble sticking to the pan, etc) press one cookie into the air and wipe it off and toss back into the bowl to re-set your pressure in the press. You can also refrigerate your cookie sheets for 5 minutes if sticking is an issue. (There are more troubleshooting tips on the Troubleshooting and Decorating Tips page- see the top menu on the blog homepage. 🙂 )

All of these shapes pressed quite easily. If using a one-click-per-cookie type press remember that you don’t always have to follow that guideline. Some shapes may take more or less than one click and that’s ok! Cookies don’t have to come out in even “clicks”. One click, half a click, it doesn’t matter. A press (any press) is a dough pump (it’s kind of like a caulking gun). It’s simply a mechanism for pumping dough out, however many (or few) “clicks” it takes. Again, you can read all about that in the Troubleshooting and Decorating Tips page if you’re new to this.
For the ornaments, you want to smooth them out to be a flat circle. Use your fingers to quickly push the ring ridges down and tap them flat. It takes a few seconds.
Traditional Peanut Blossoms are rolled in granulated sugar before baking; for this recipe sprinkle a little granulated sugar on the cookies. I just tap it off of a regular spoon.
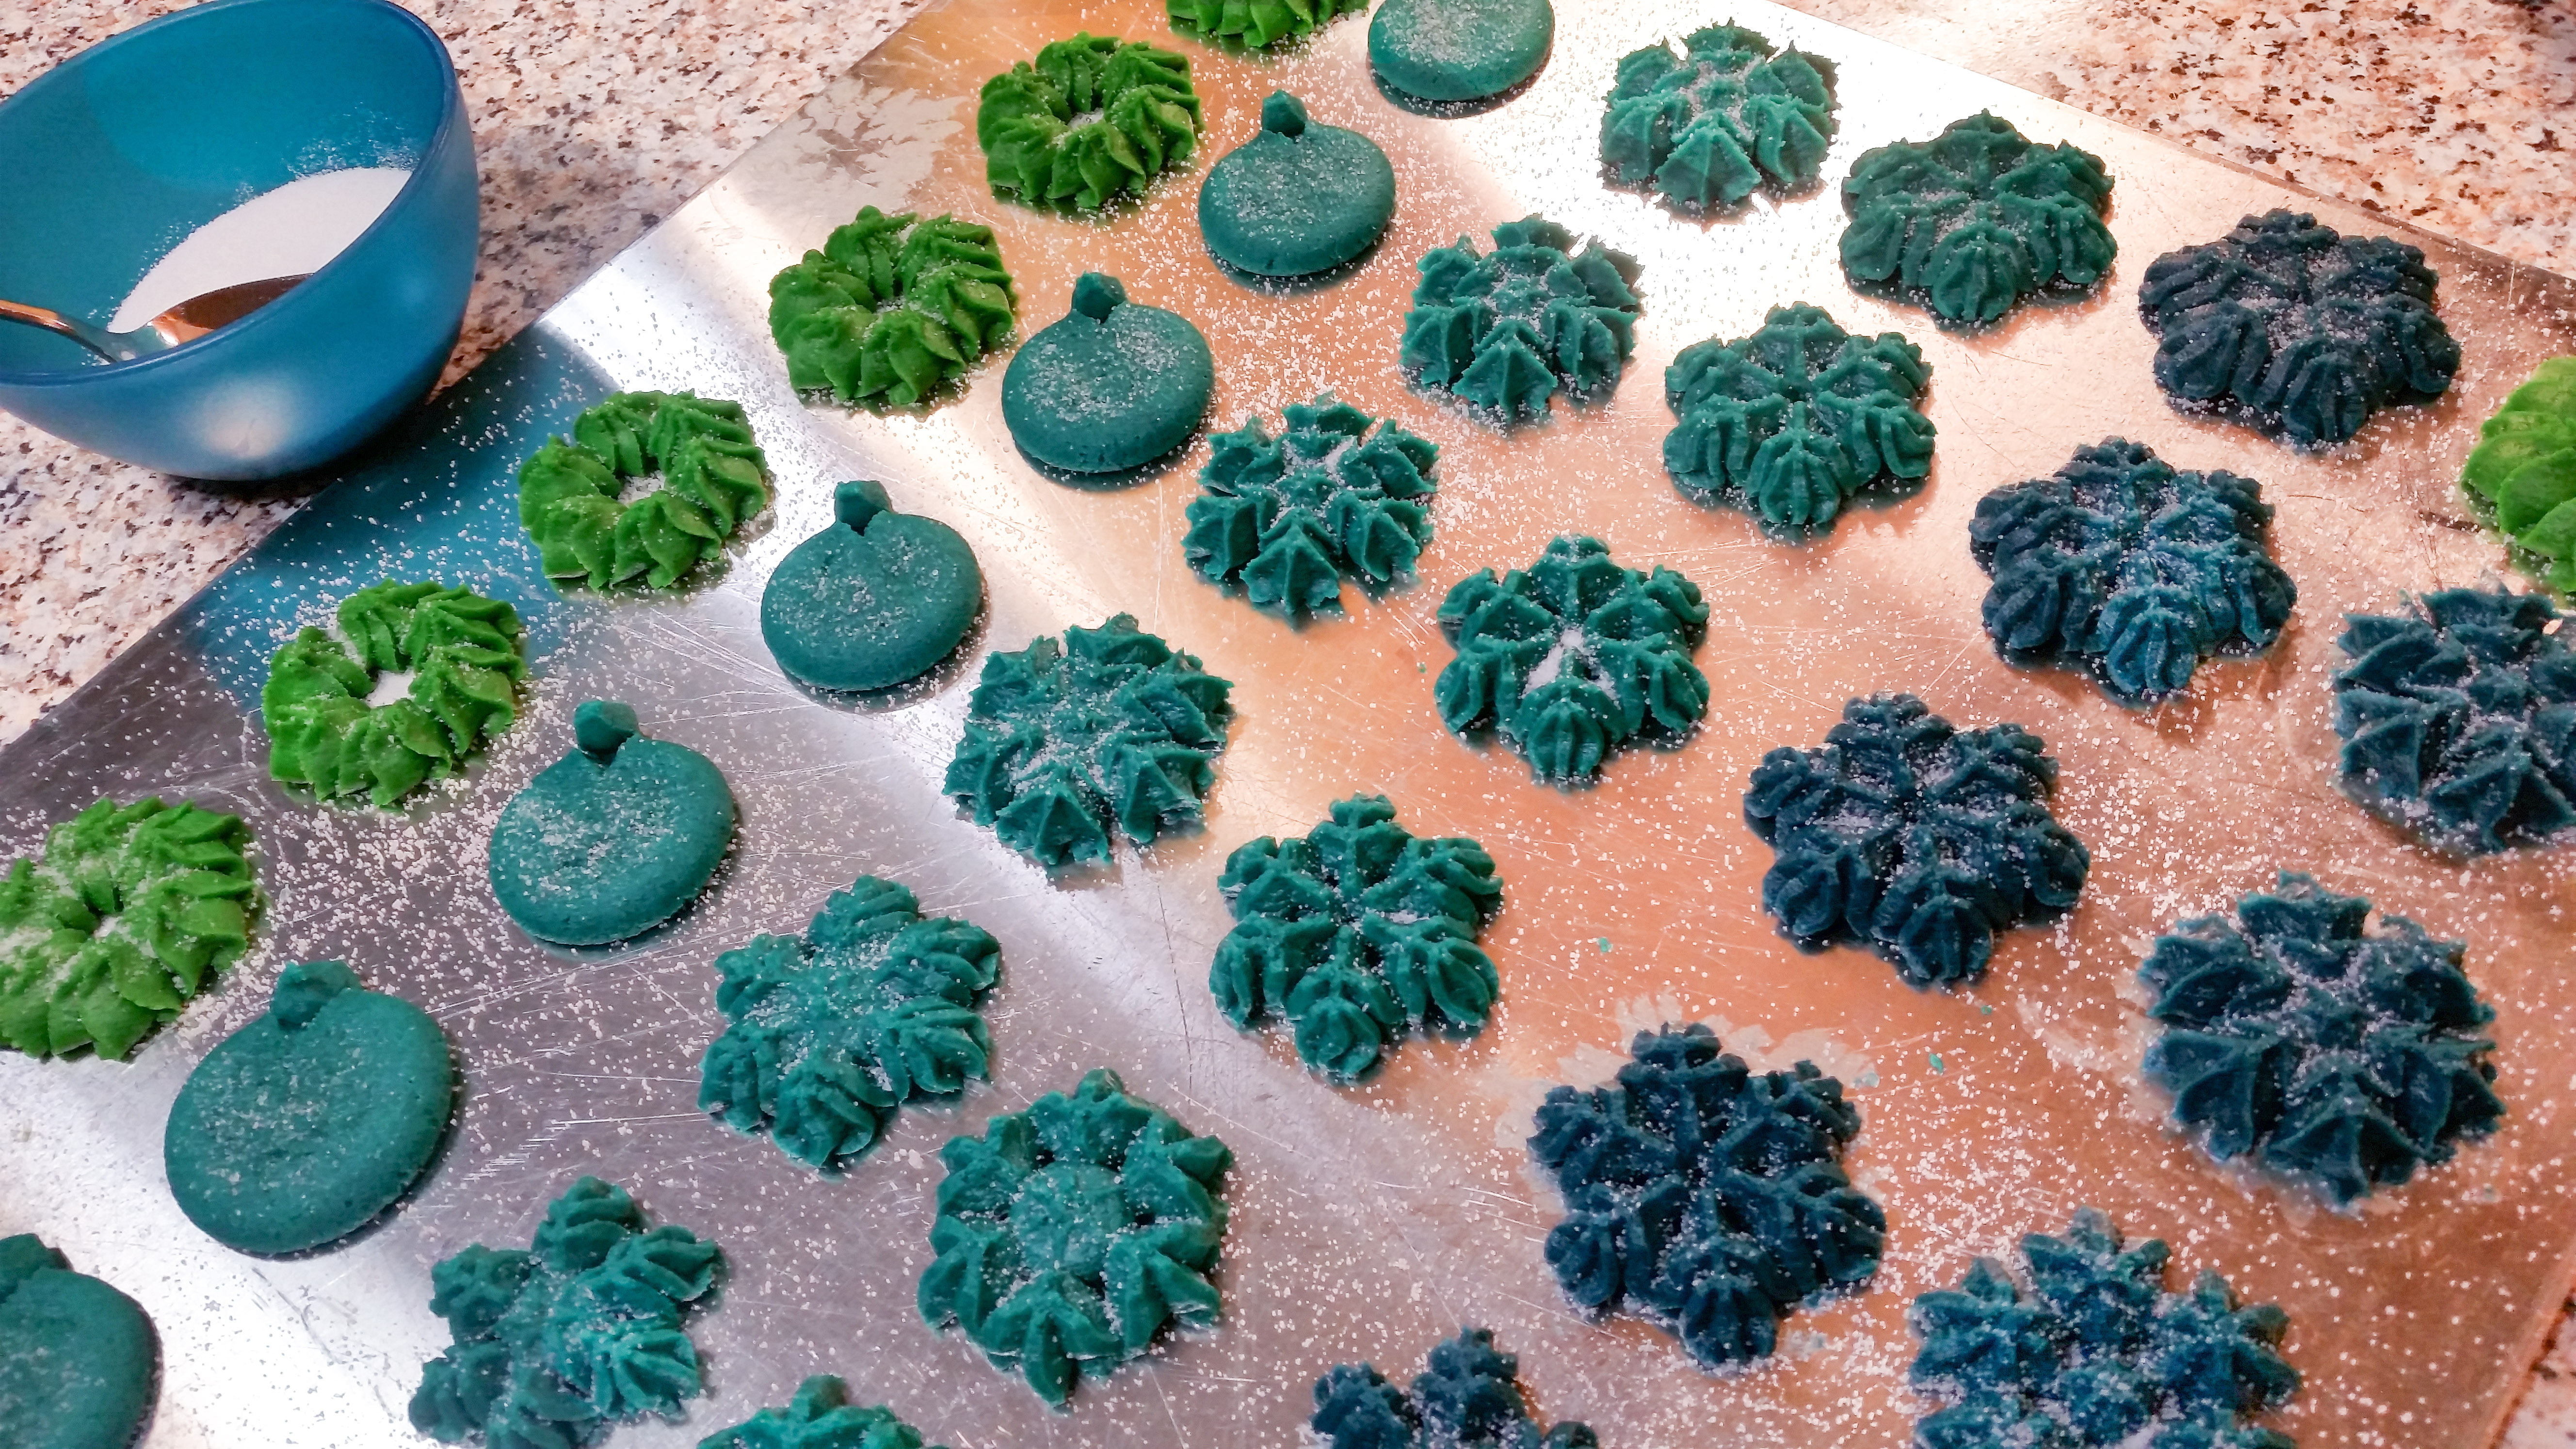
Some more shapes!

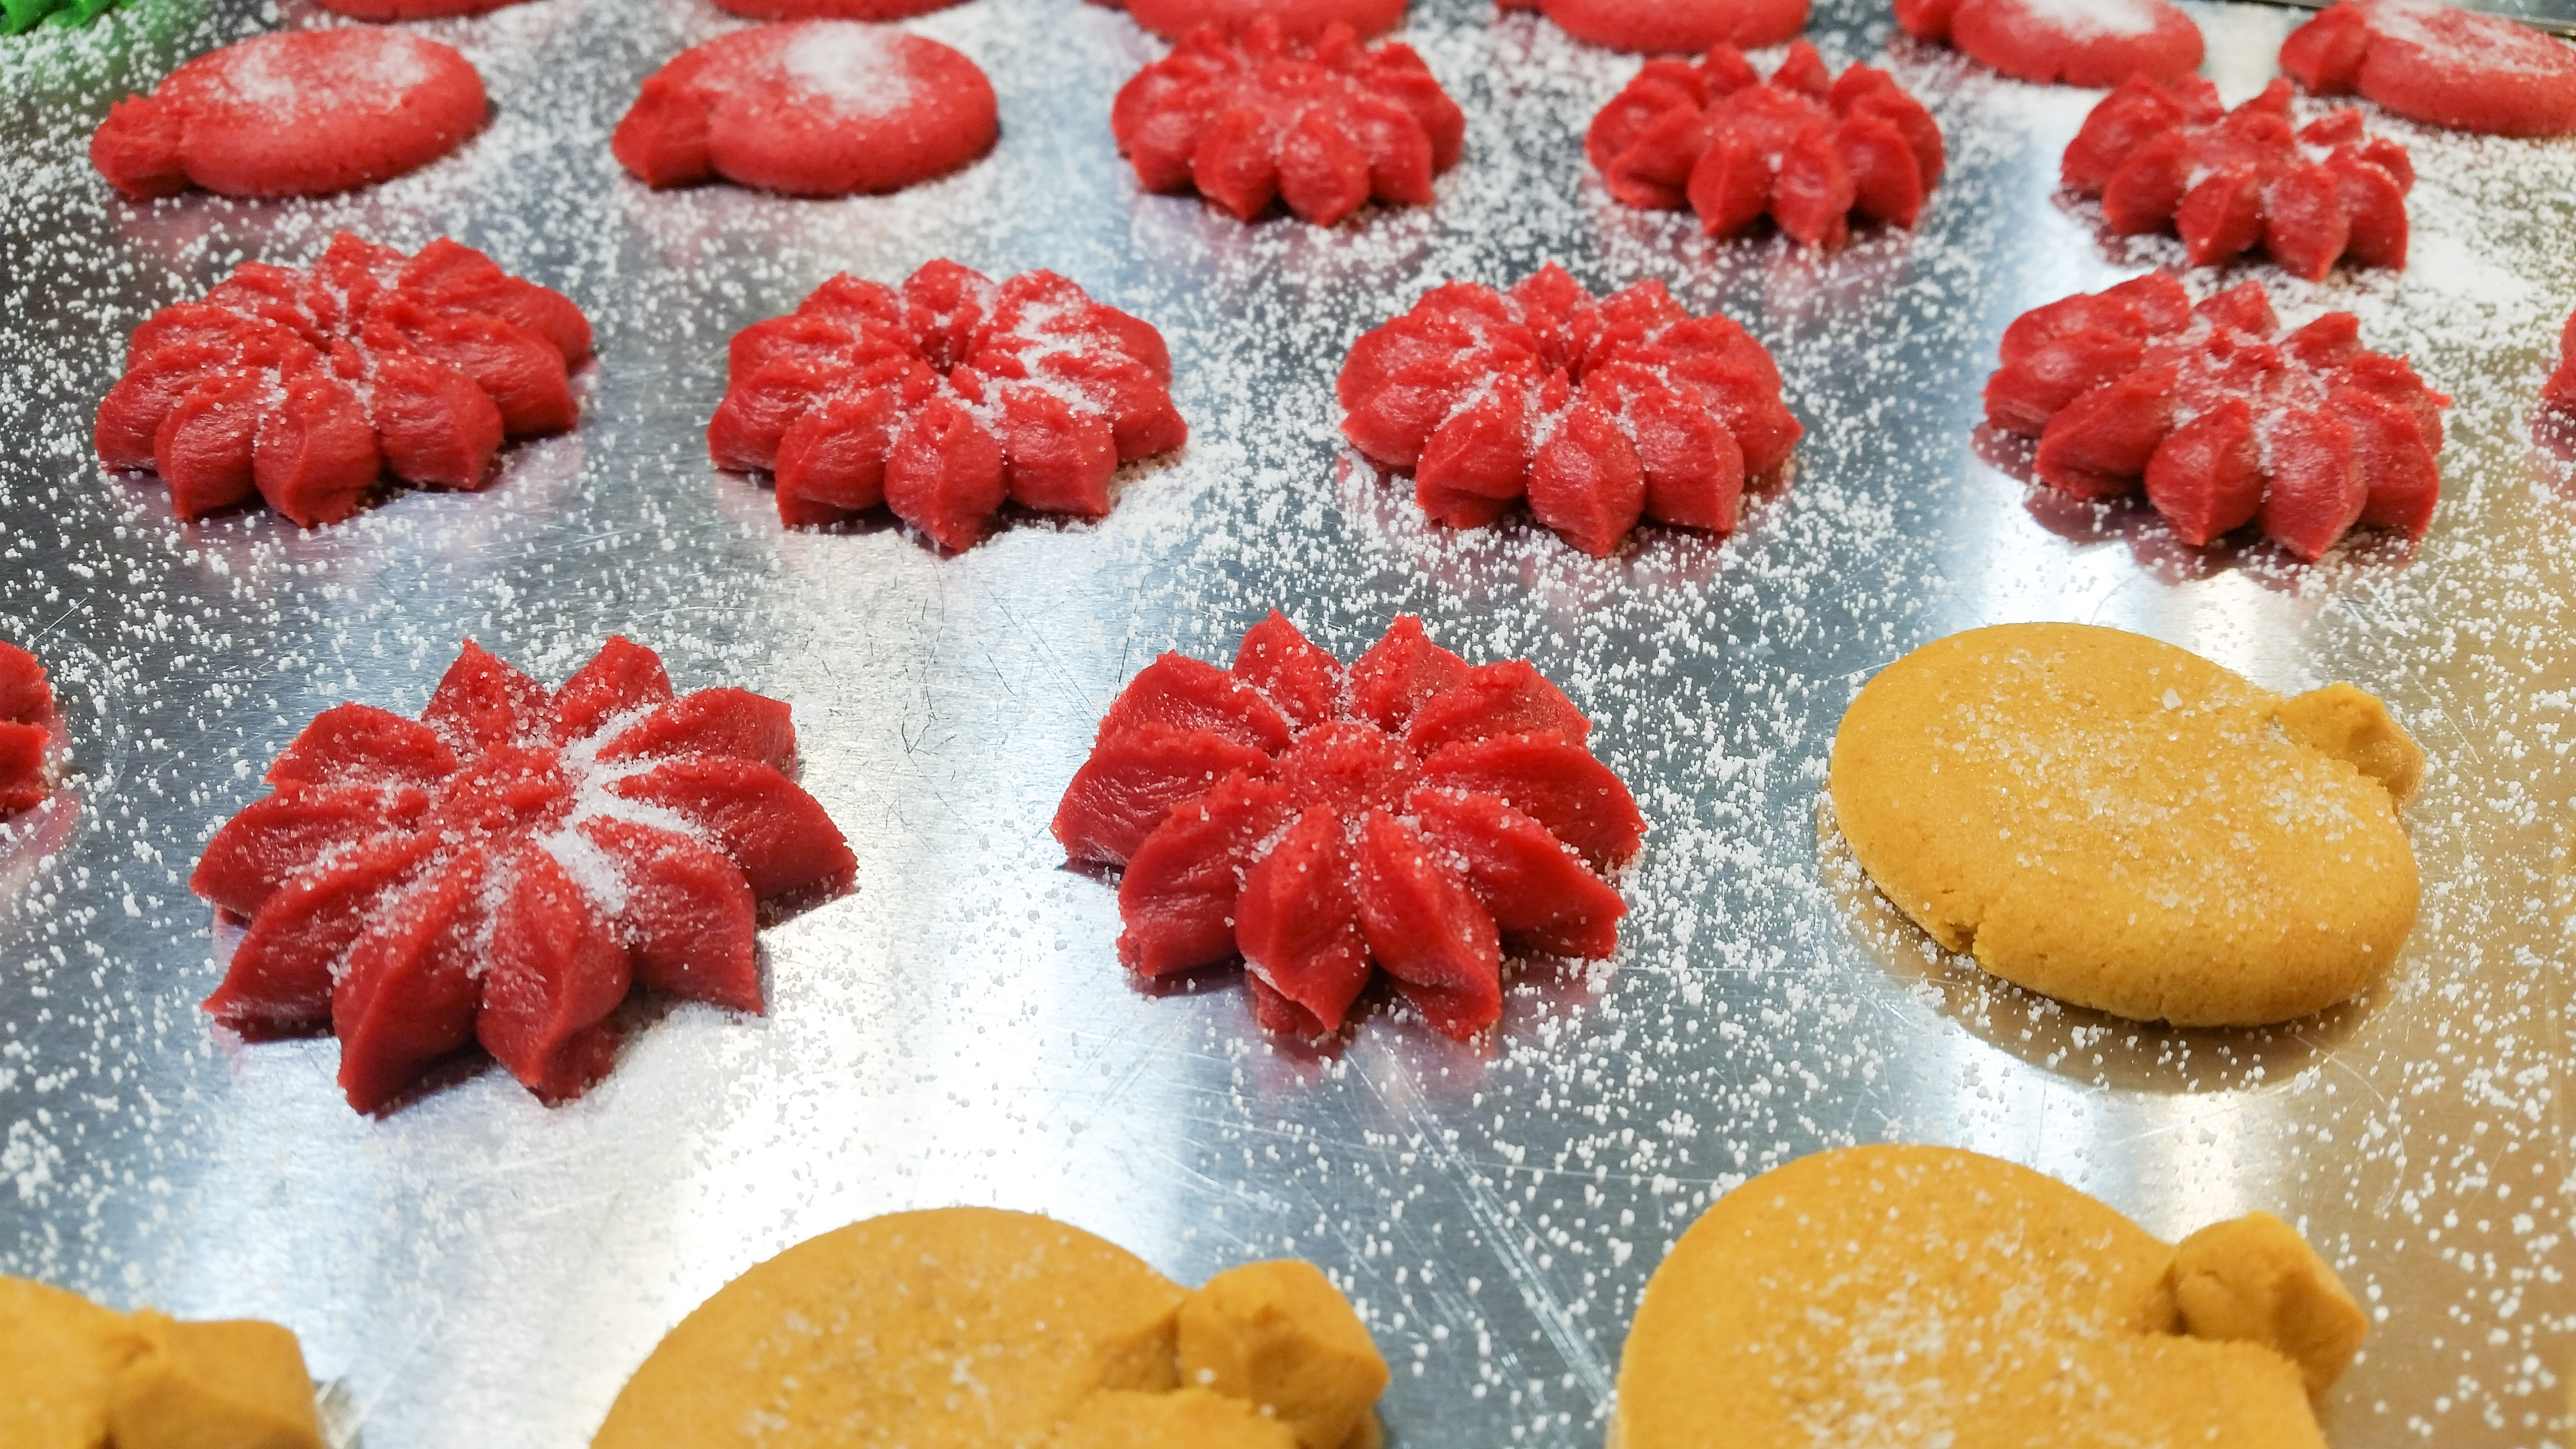
Bake for 8 to 10 minutes or until they look puffed up and dry and “set”. They do not brown much so don’t over-bake! Check them early and often as all ovens are different.
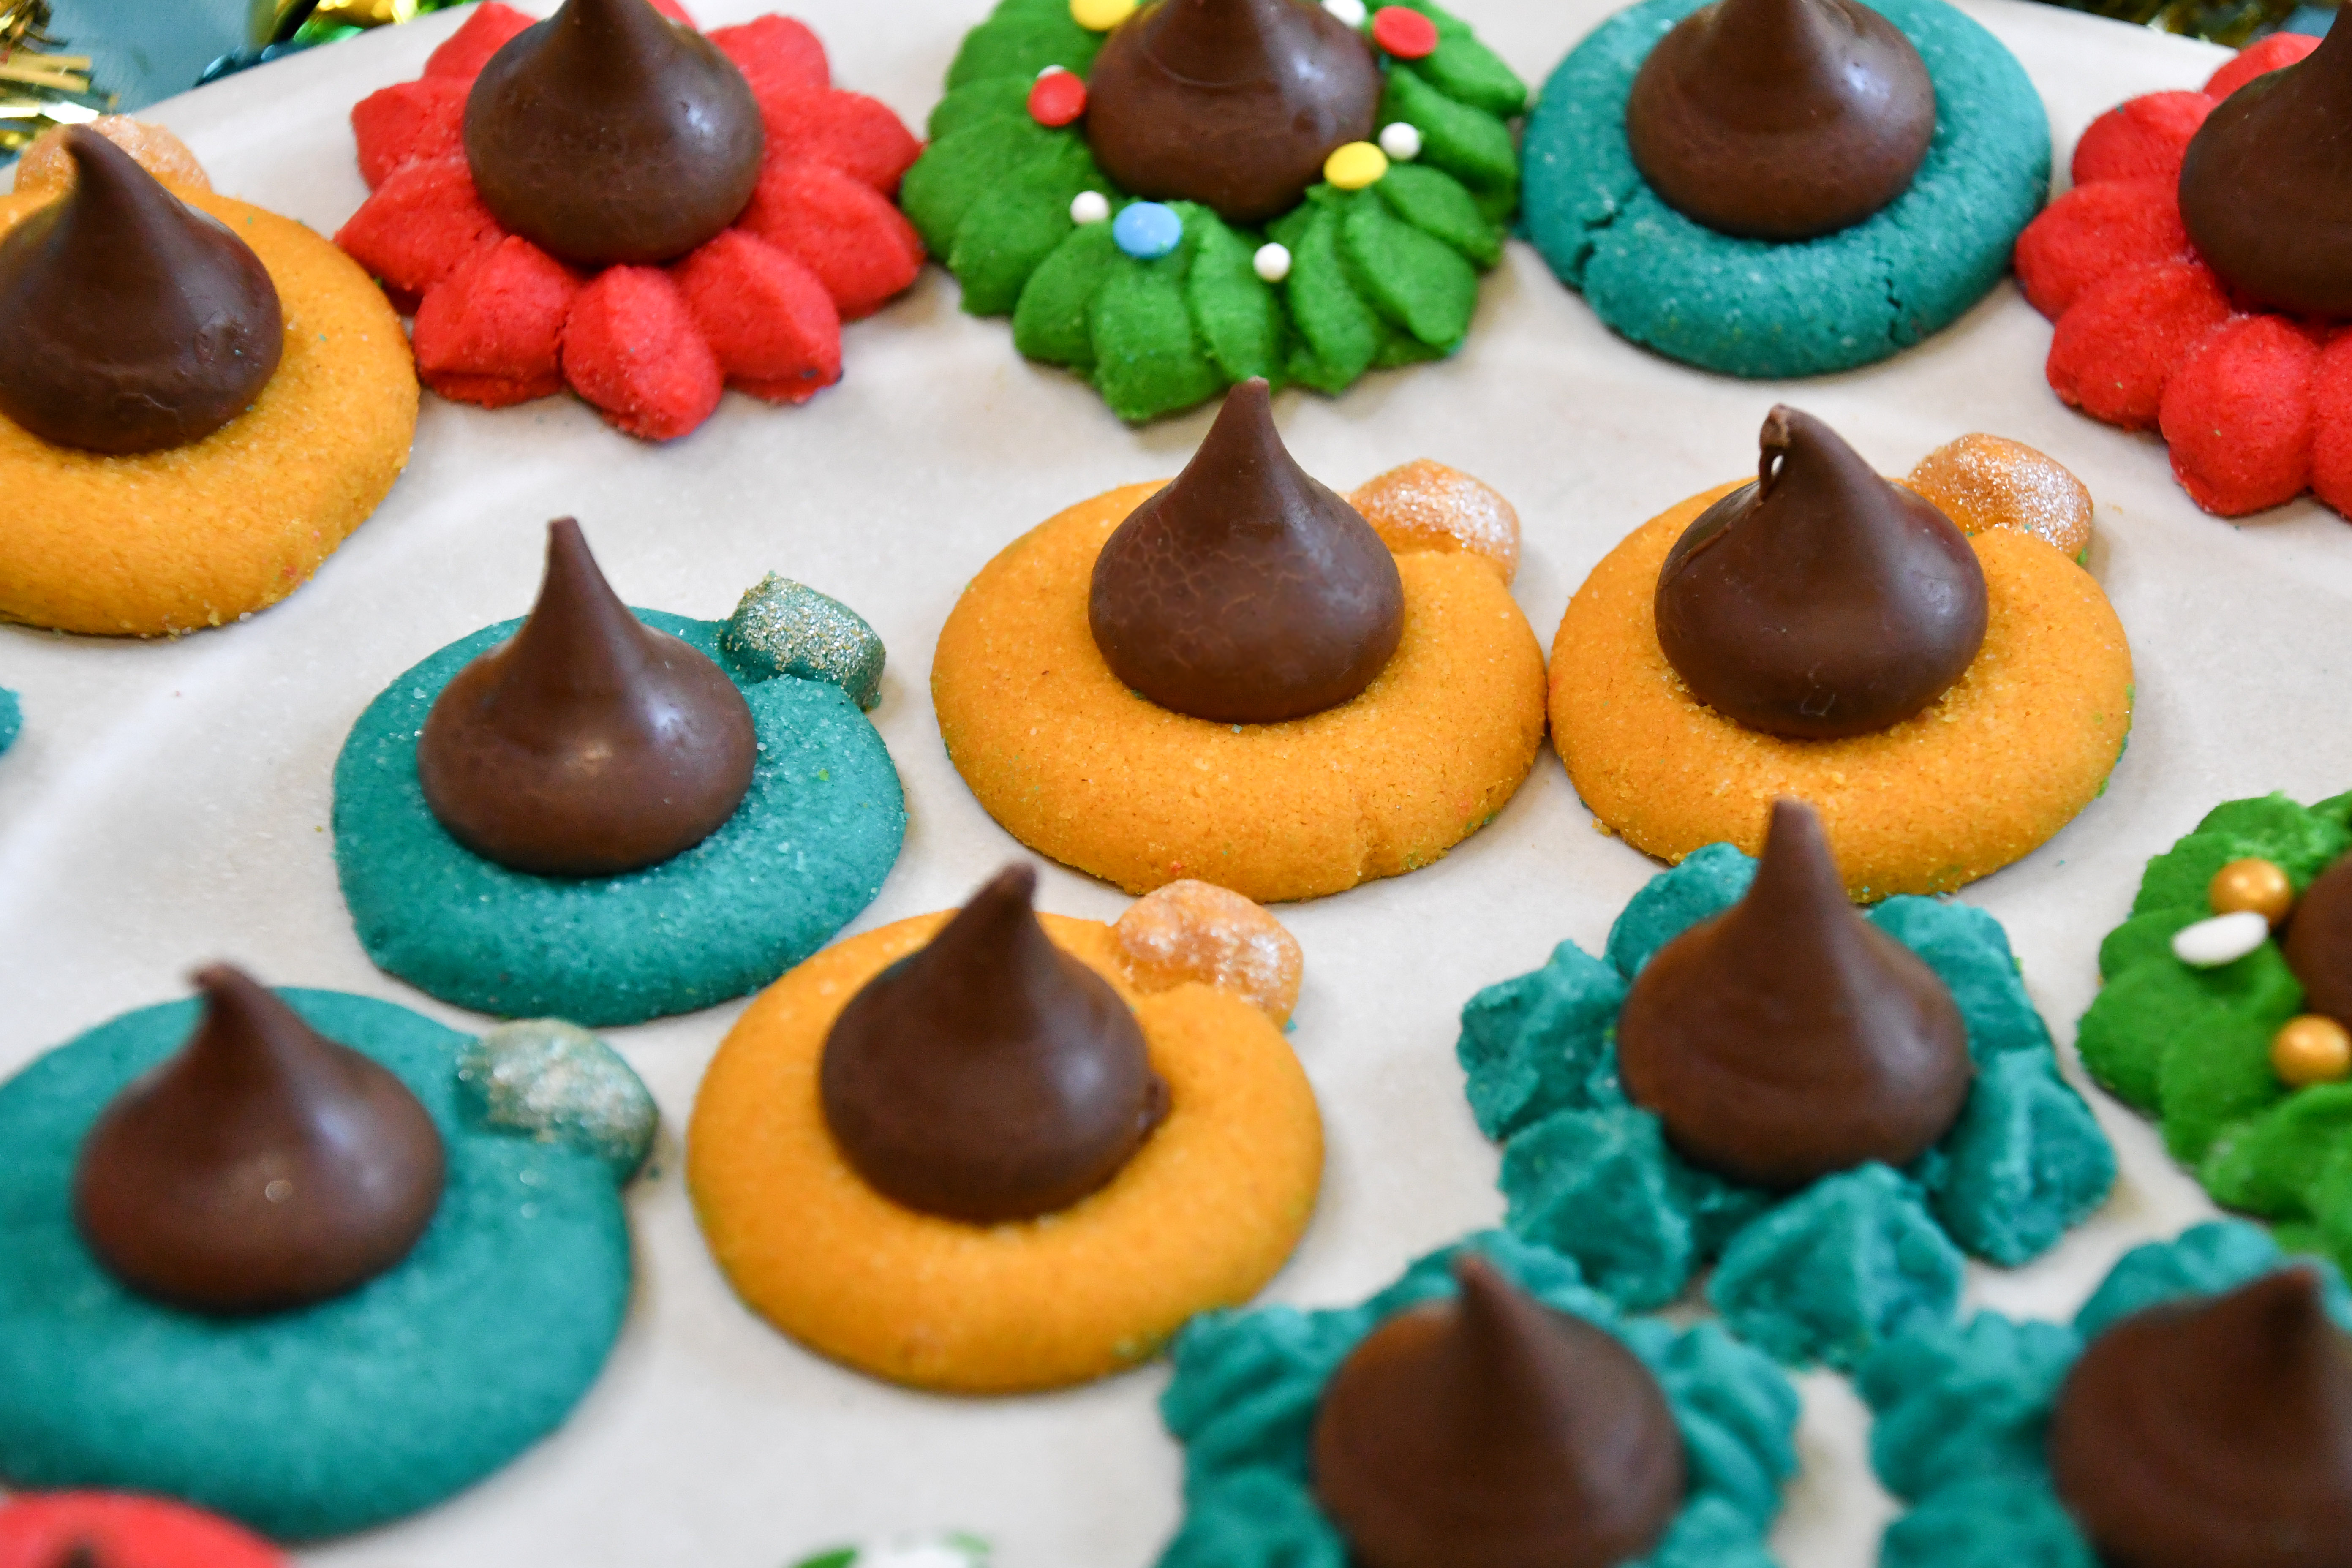
All baked and beautiful!

Now grab those already unwrapped chocolate kisses and start placing them GENTLY in the centers of the cookies while they are still warm!!! If you push too hard you will crack the cookies. Use only enough pressure to “set” the kiss. It doesn’t take much, as they will melt on the bottom and the melting acts like glue. A little push is all it takes. Be especially careful with the wreaths- gently.

See how I took this photo with not all of them “kissed” yet??? Yeah, that was the unfortunate part of Amanda and I being completely unprepared. She was frantically unwrapping but it takes longer than you think! Take our advice: pre-unwrap!
A little note: As you can see I also made a darker blue for snowflakes. I didn’t include them in my final photos as I felt they threw the color balance artistically. But if you’re just doing all snowflakes, go for a bunch of blues or teals and purples or pinks and make a pretty display out of them!
On the cooling racks! Move them here as soon as you get all of your kisses placed. If you put the cookies on the racks and then try to add kisses the cookies may not be warm enough, so do it on the sheet. These came off the pan easily so don’t worry too much about sticking.
See how glossy the kisses look? That’s the slight melting. They will hold their shape though. But don’t accidentally touch them or they can smear. Ooh they smell soooooo good!


Once they’re cooled you can add decors to the wreaths if you like. Use a dab of icing or something like Wilton’s Dab & Hold as “glue”.

Dry brush some gold pearl dust onto the ornament hangers. I found that my silver didn’t work well on this flavor of cookie but gold looks awesome.

Arrange your cookies and wow everyone with these oh-so-delicious delights! I absolutely adore Peanut Blossoms so I’m thrilled to bring you guys this recipe!

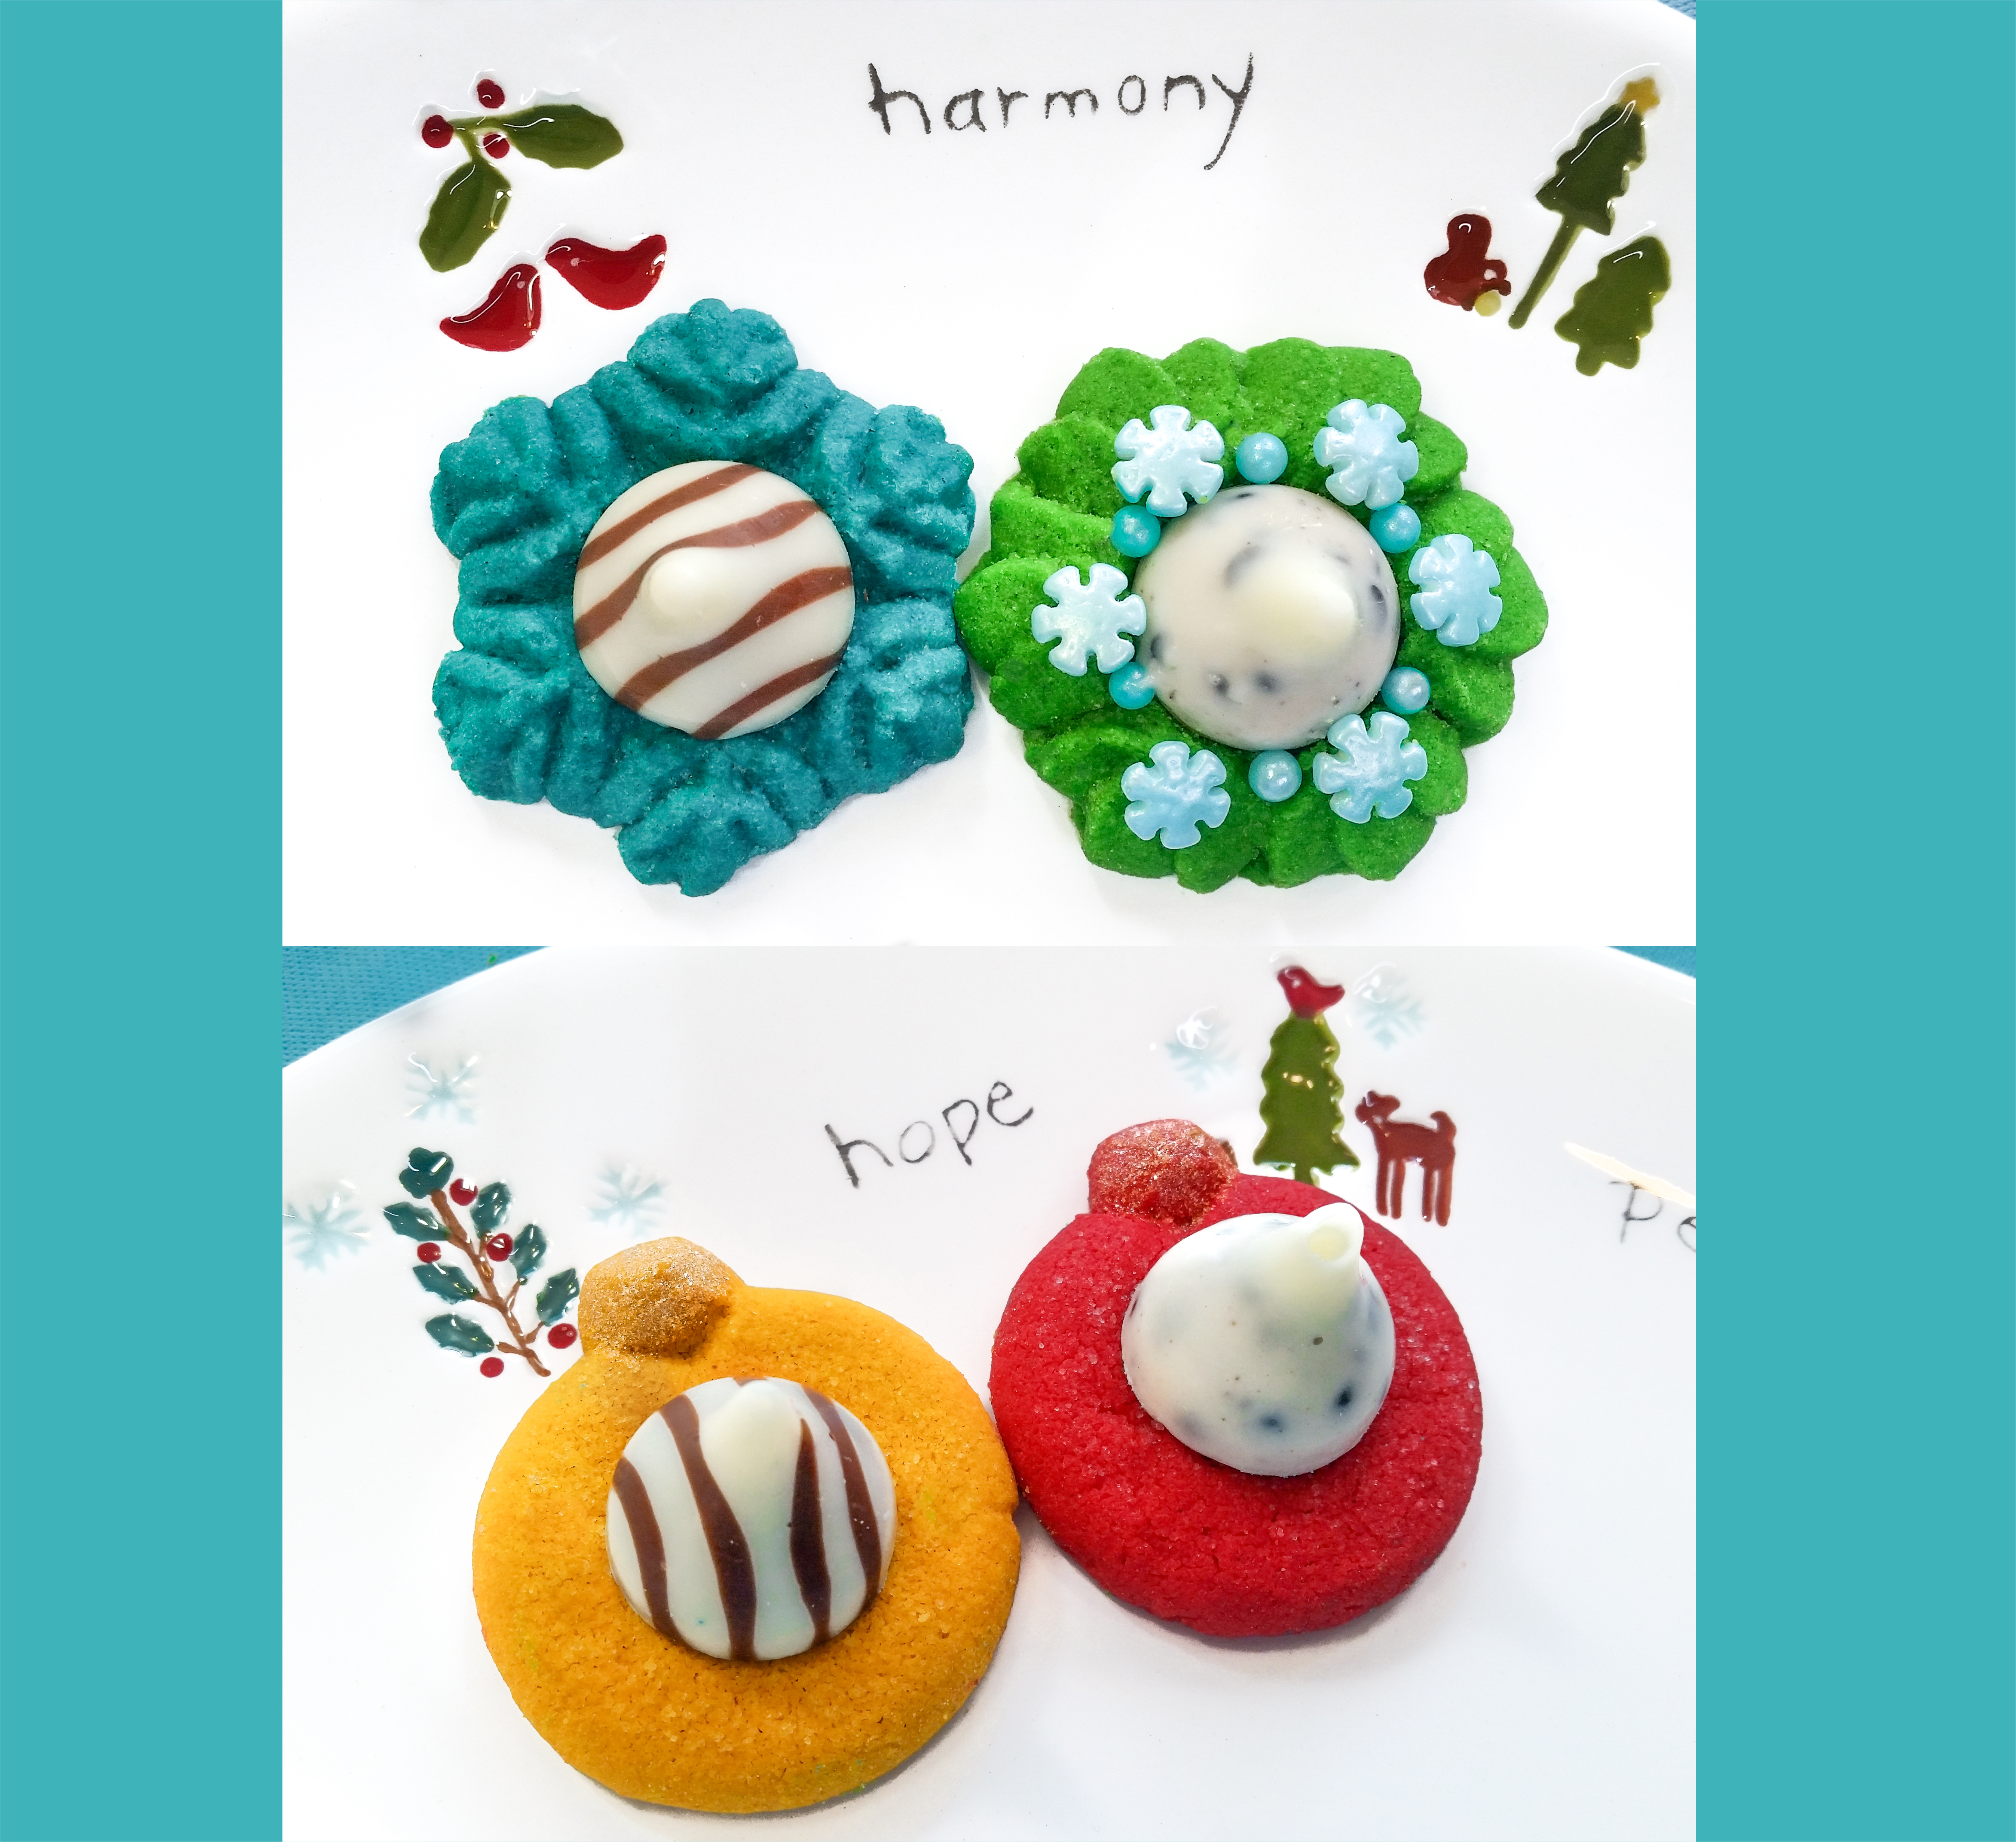
NOTE the day after I posted this! Kay Majesky commented on our Facebook post of this recipe that white chocolate candies would look great, too. I liked her idea so much I ran right out to buy some! I plopped them on the cookies I still had and voila! They look fabulous. There aren’t plain white chocolate versions of these candies, so the ones on the left are “hugs” and the right ones are “cookies and cream”. Thanks for the fabulous idea Kay! You get all the credit for this creativity. 🙂
Disk set pictures below. 🙂
Have a wonderful Christmas and Happy Baking everyone!
🙏We have a request💕 If you’re enjoying our recipes, *EVERY DISK & PIN PURCHASED helps us stay in business* & supports our families! Impress is a women/family-owned USA small business in Colorado. We design, make, & sell over 300 shapes of cookie press disks & dozens of embossed rolling pins. The recipes we share are free – we have no ads on this recipe blog – we make our money selling disks & pins. The recipes give our customers creative ideas and attract new customers!💕 THANK YOU! 💕~Susie the Disk & Pin Designer
~Susie
Disk Designer/Co-Owner at Impress! Bakeware, LLC
Our website has all of our 200+ disk shapes, cookie press, embossed rolling pins, baking accessories plus more about our Women/Family Owned company! impressbakeware.com
All products are on our Etsy shop.
Our Amazon shop has our cookie press and disks and embossed rolling pins.
Follow us on facebook!
The Christmas Two Disk Set:

The Snowflakes Set:

The Flowers Set:

The disks that come with the Impress! Cookie Press:

I love the look using the snowflake discs-very pretty!
LikeLike
Thanks Lynn! I’m so happy with how they turned out! ~Susie the Disk Designer
LikeLike
I have your press and many of your disks, from Amazon. I get your emails and postings on FB. I enjoy seeing them. Gives me ideas. I save my recipes on Pinterest. I haven’t found a way to transfer your recipes to Pinterest. Susie, would you please consider putting your recipes on Pinterest??? You would reach another large audience. Thanks
LikeLike
Hi BJ! Thanks for the nice comment. We appreciate your business and enthusiasm for our products. We did Pinterest years ago and it never helped us at all. I honestly gave up on it because we were wasting effort and money. If I can find a way to make it actually useful to us and enough customers, I’m open to it! Thanks for bringing it back to my attention, though I’ll take another look next year when things calm down. ~Susie the Disk Designer
LikeLike