The incredible scent of warm gingerbread is filling my home. One of my favorite things about Christmas is making gingerbread cookies, and in my house, as you can guess, they’re spritz cookies! They are a breeze to make when you use a cookie press. This year I decided to do something different and made them into sandwich cookies. If you’ve followed me for a while you know I adore making spritz cookies into sandwiches with thick decadent fillings. Yum!
I kept the decorating pretty simple for this post. I made my favorite decorating buttercream and tinted it red and green, and had some Christmas sprinkles on hand to jazz things up. All in all this is pretty simple.
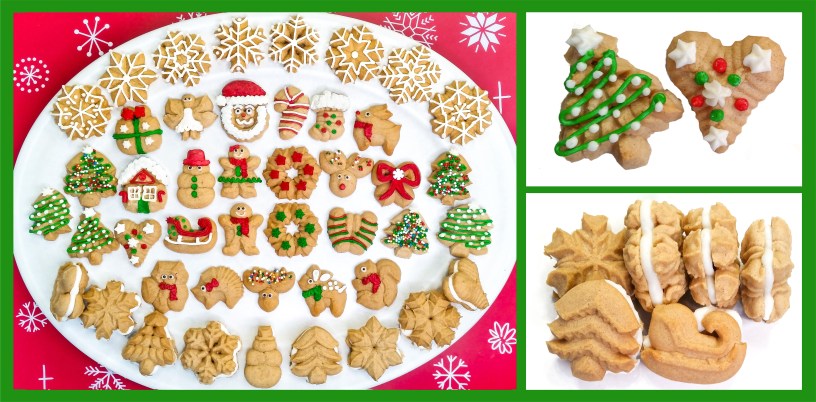
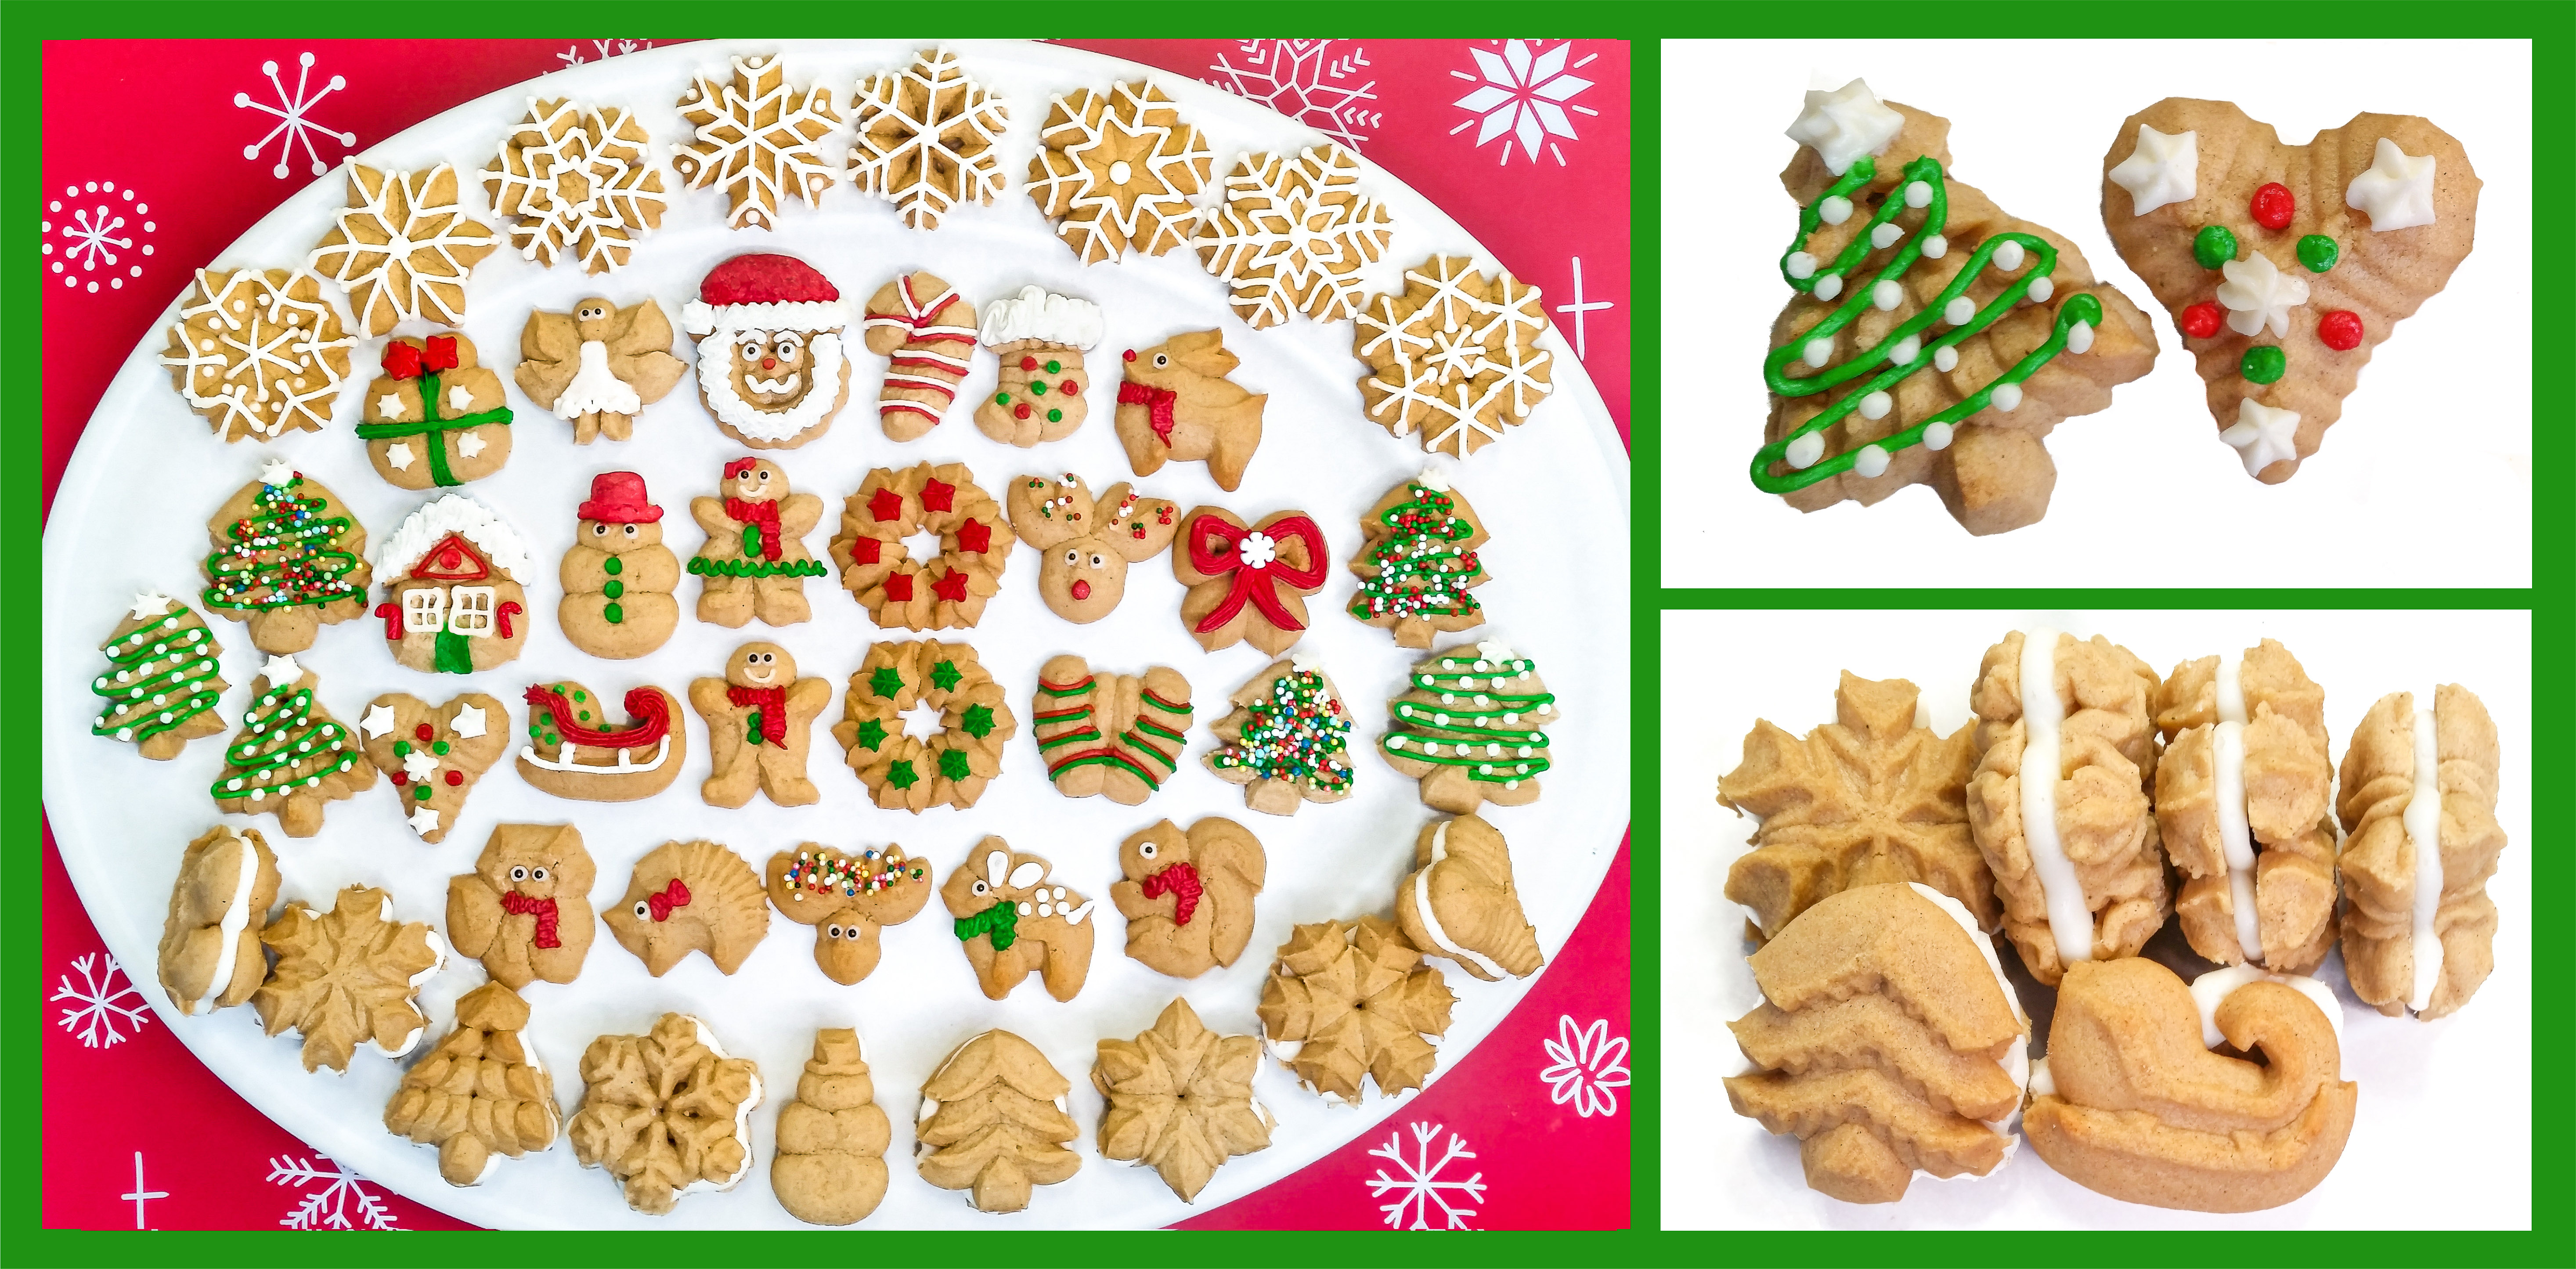
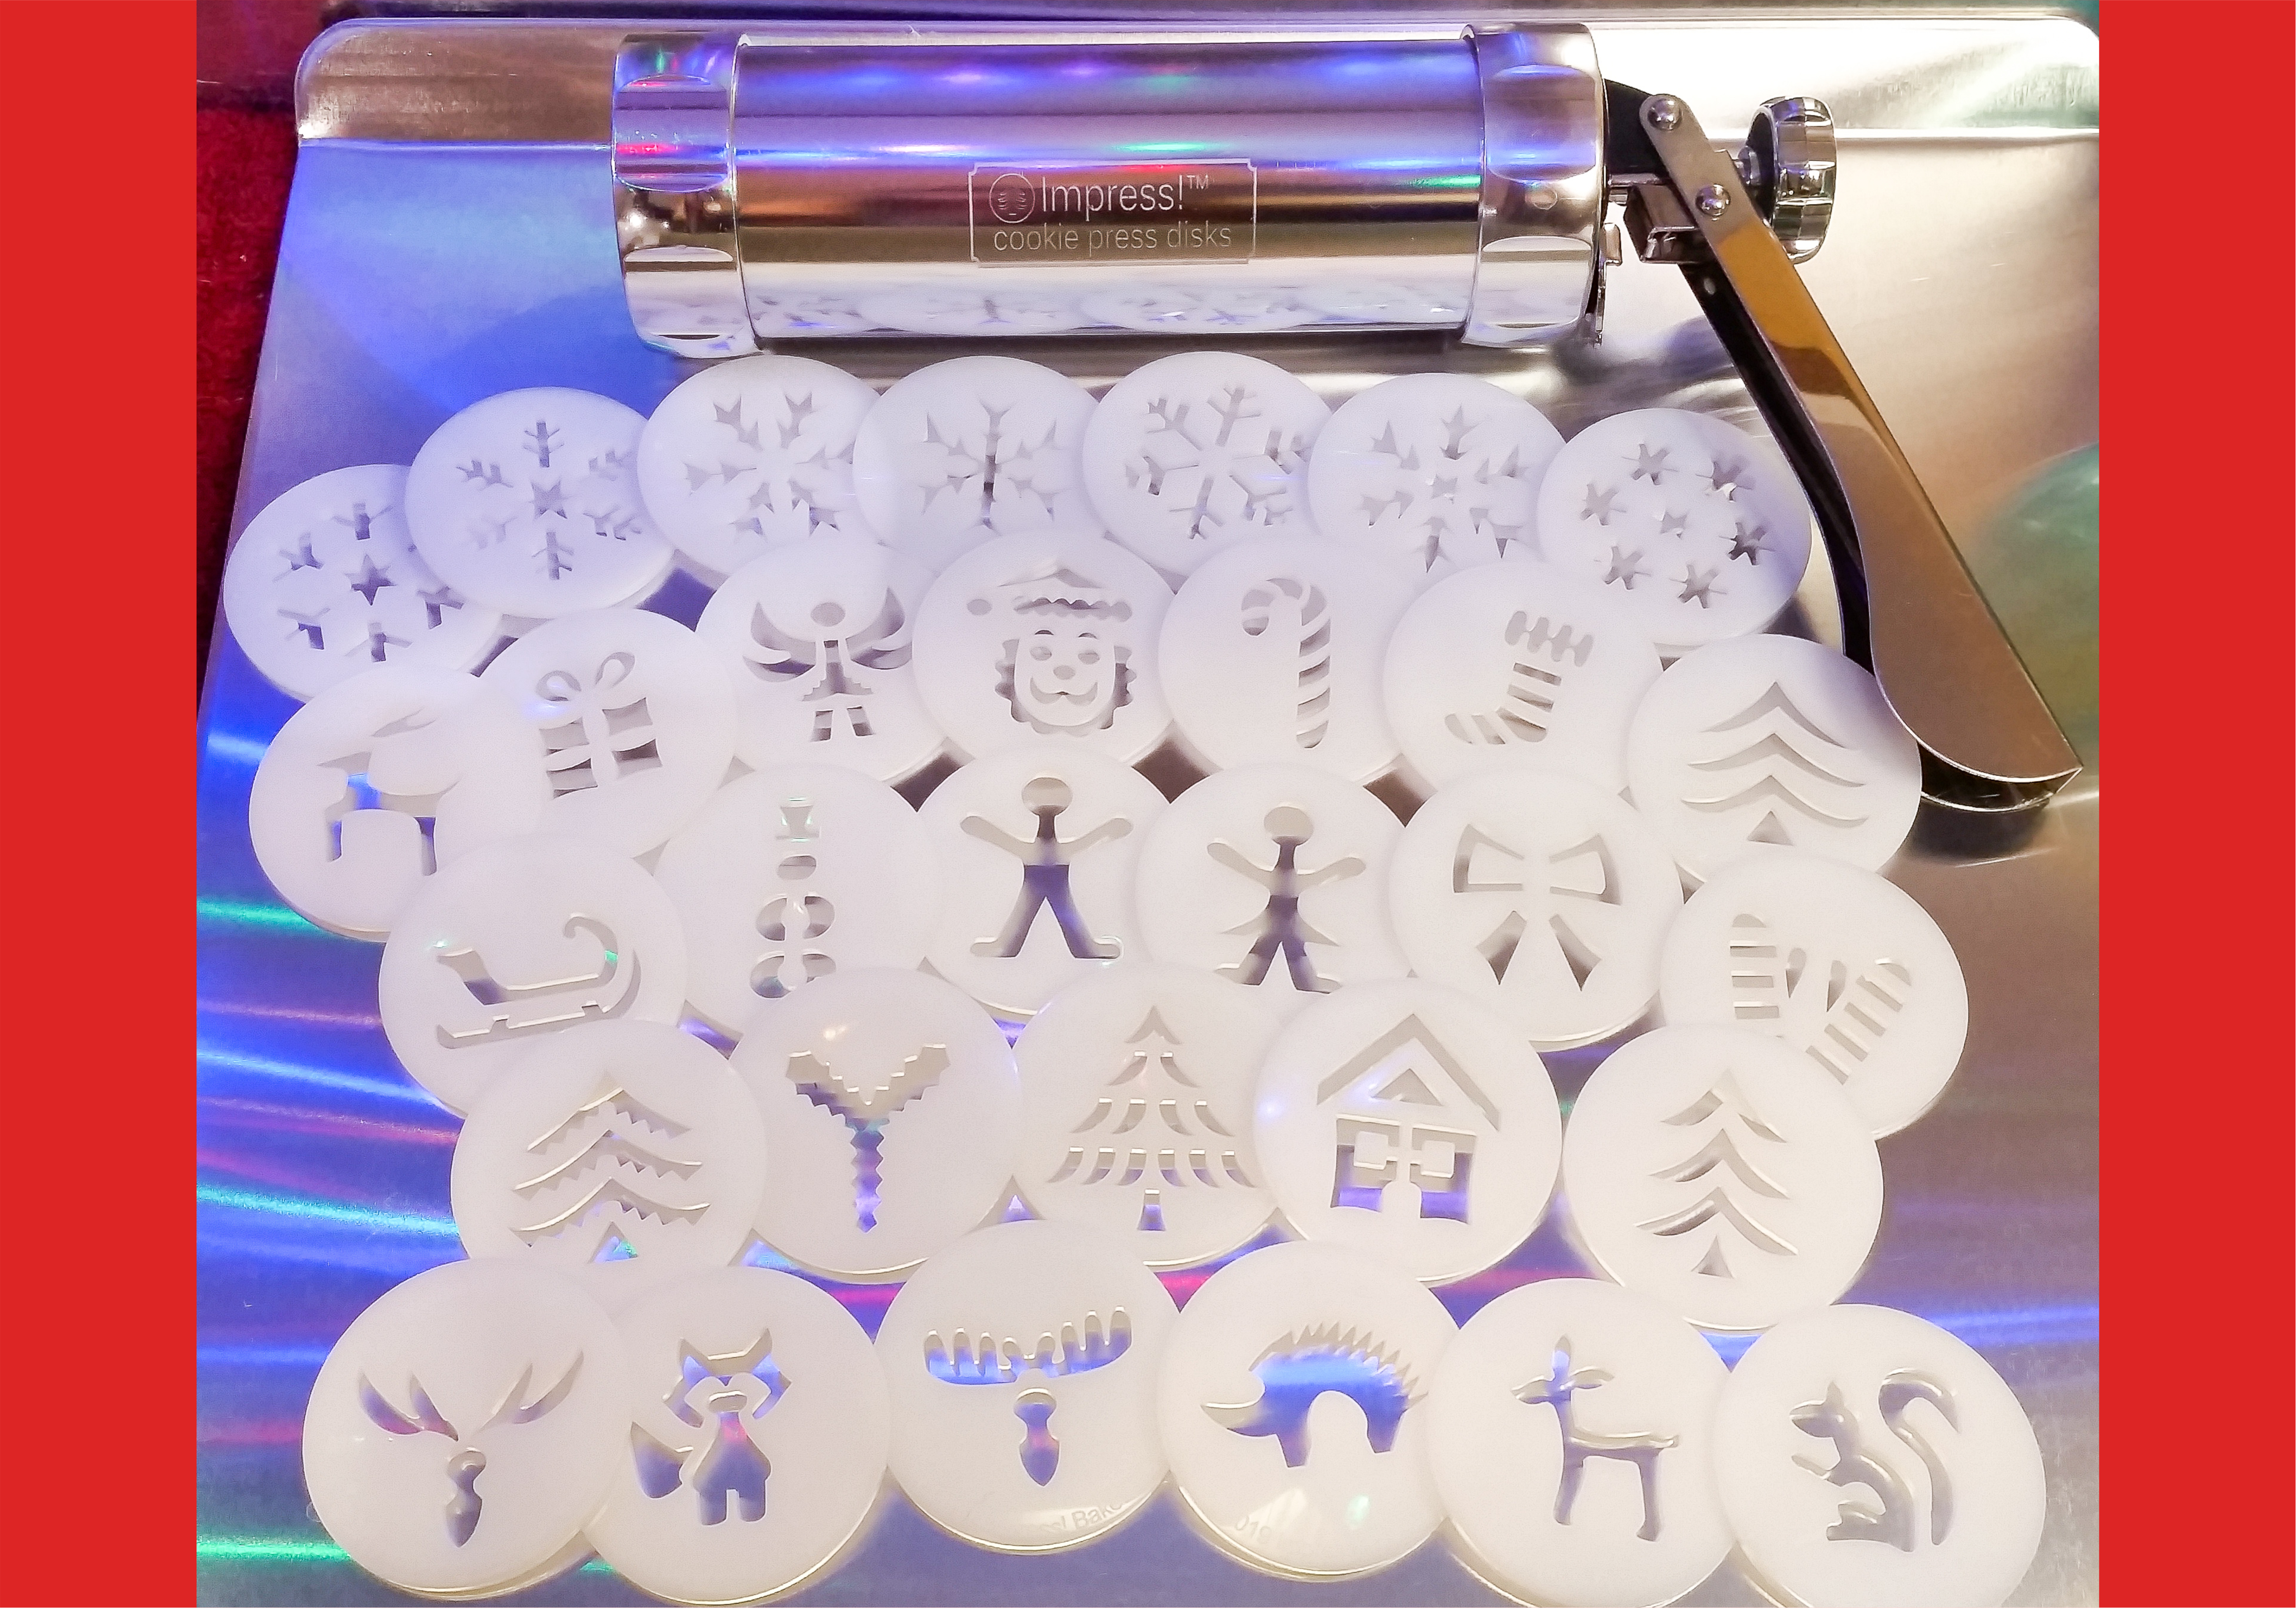
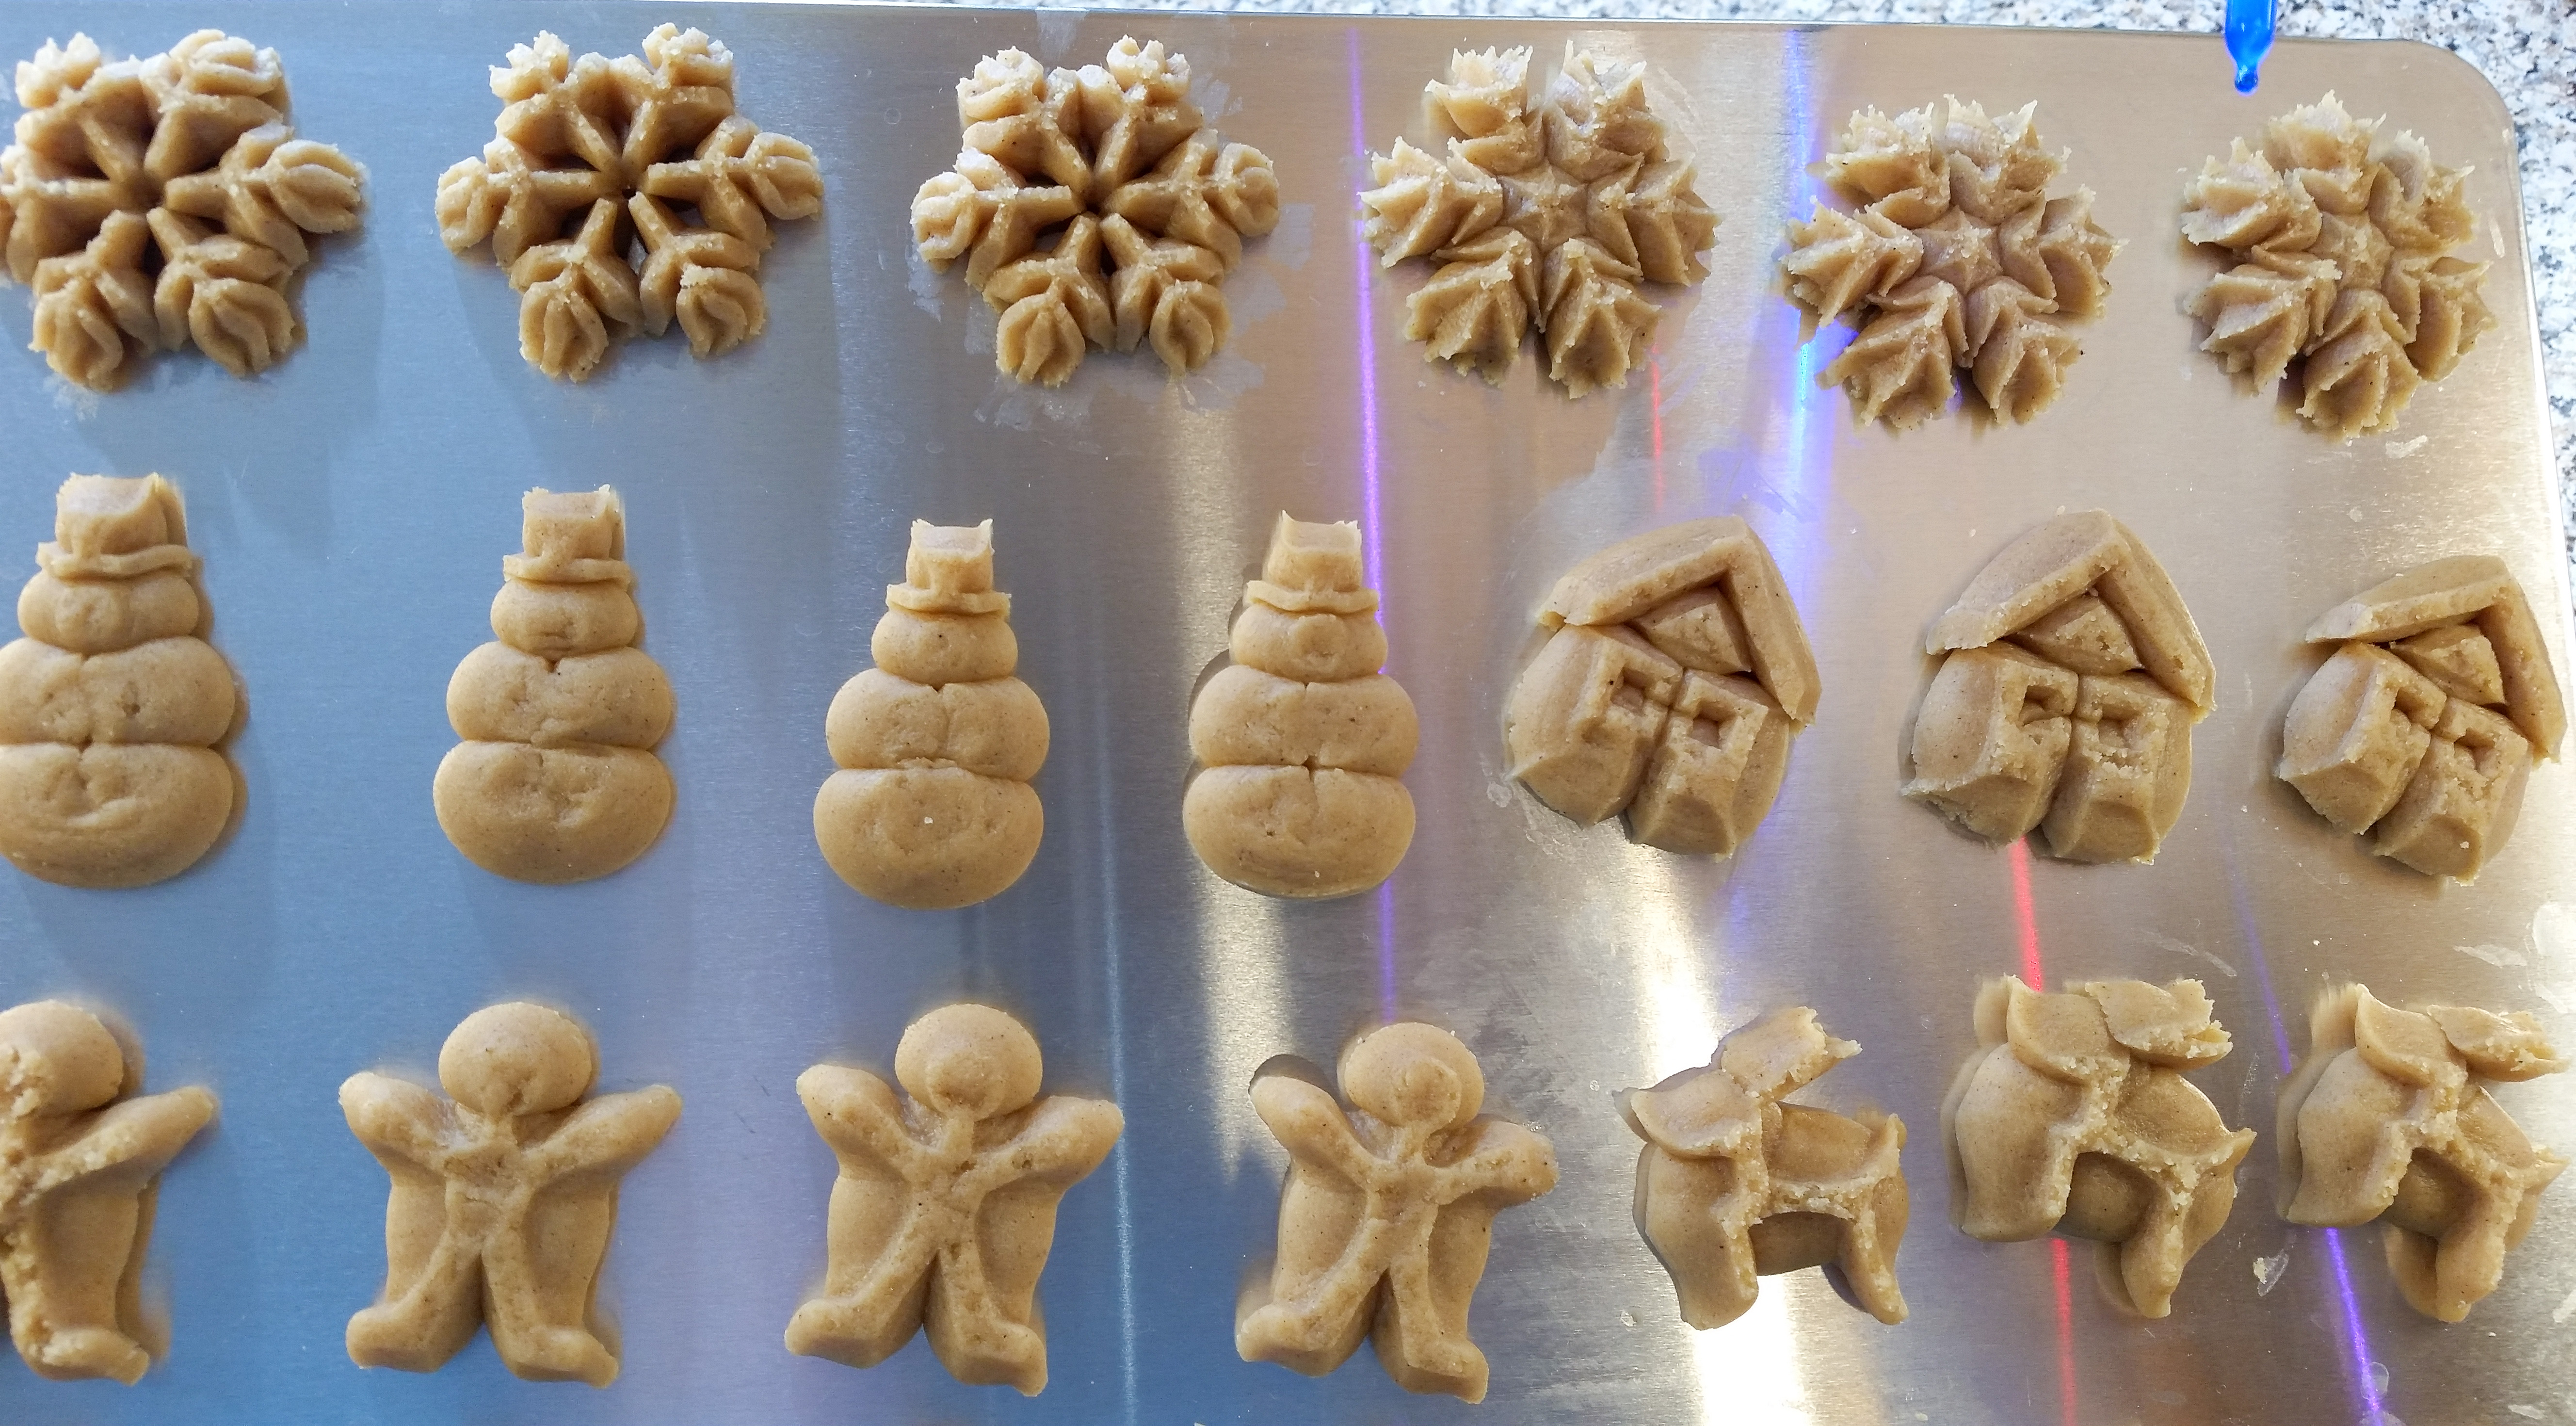
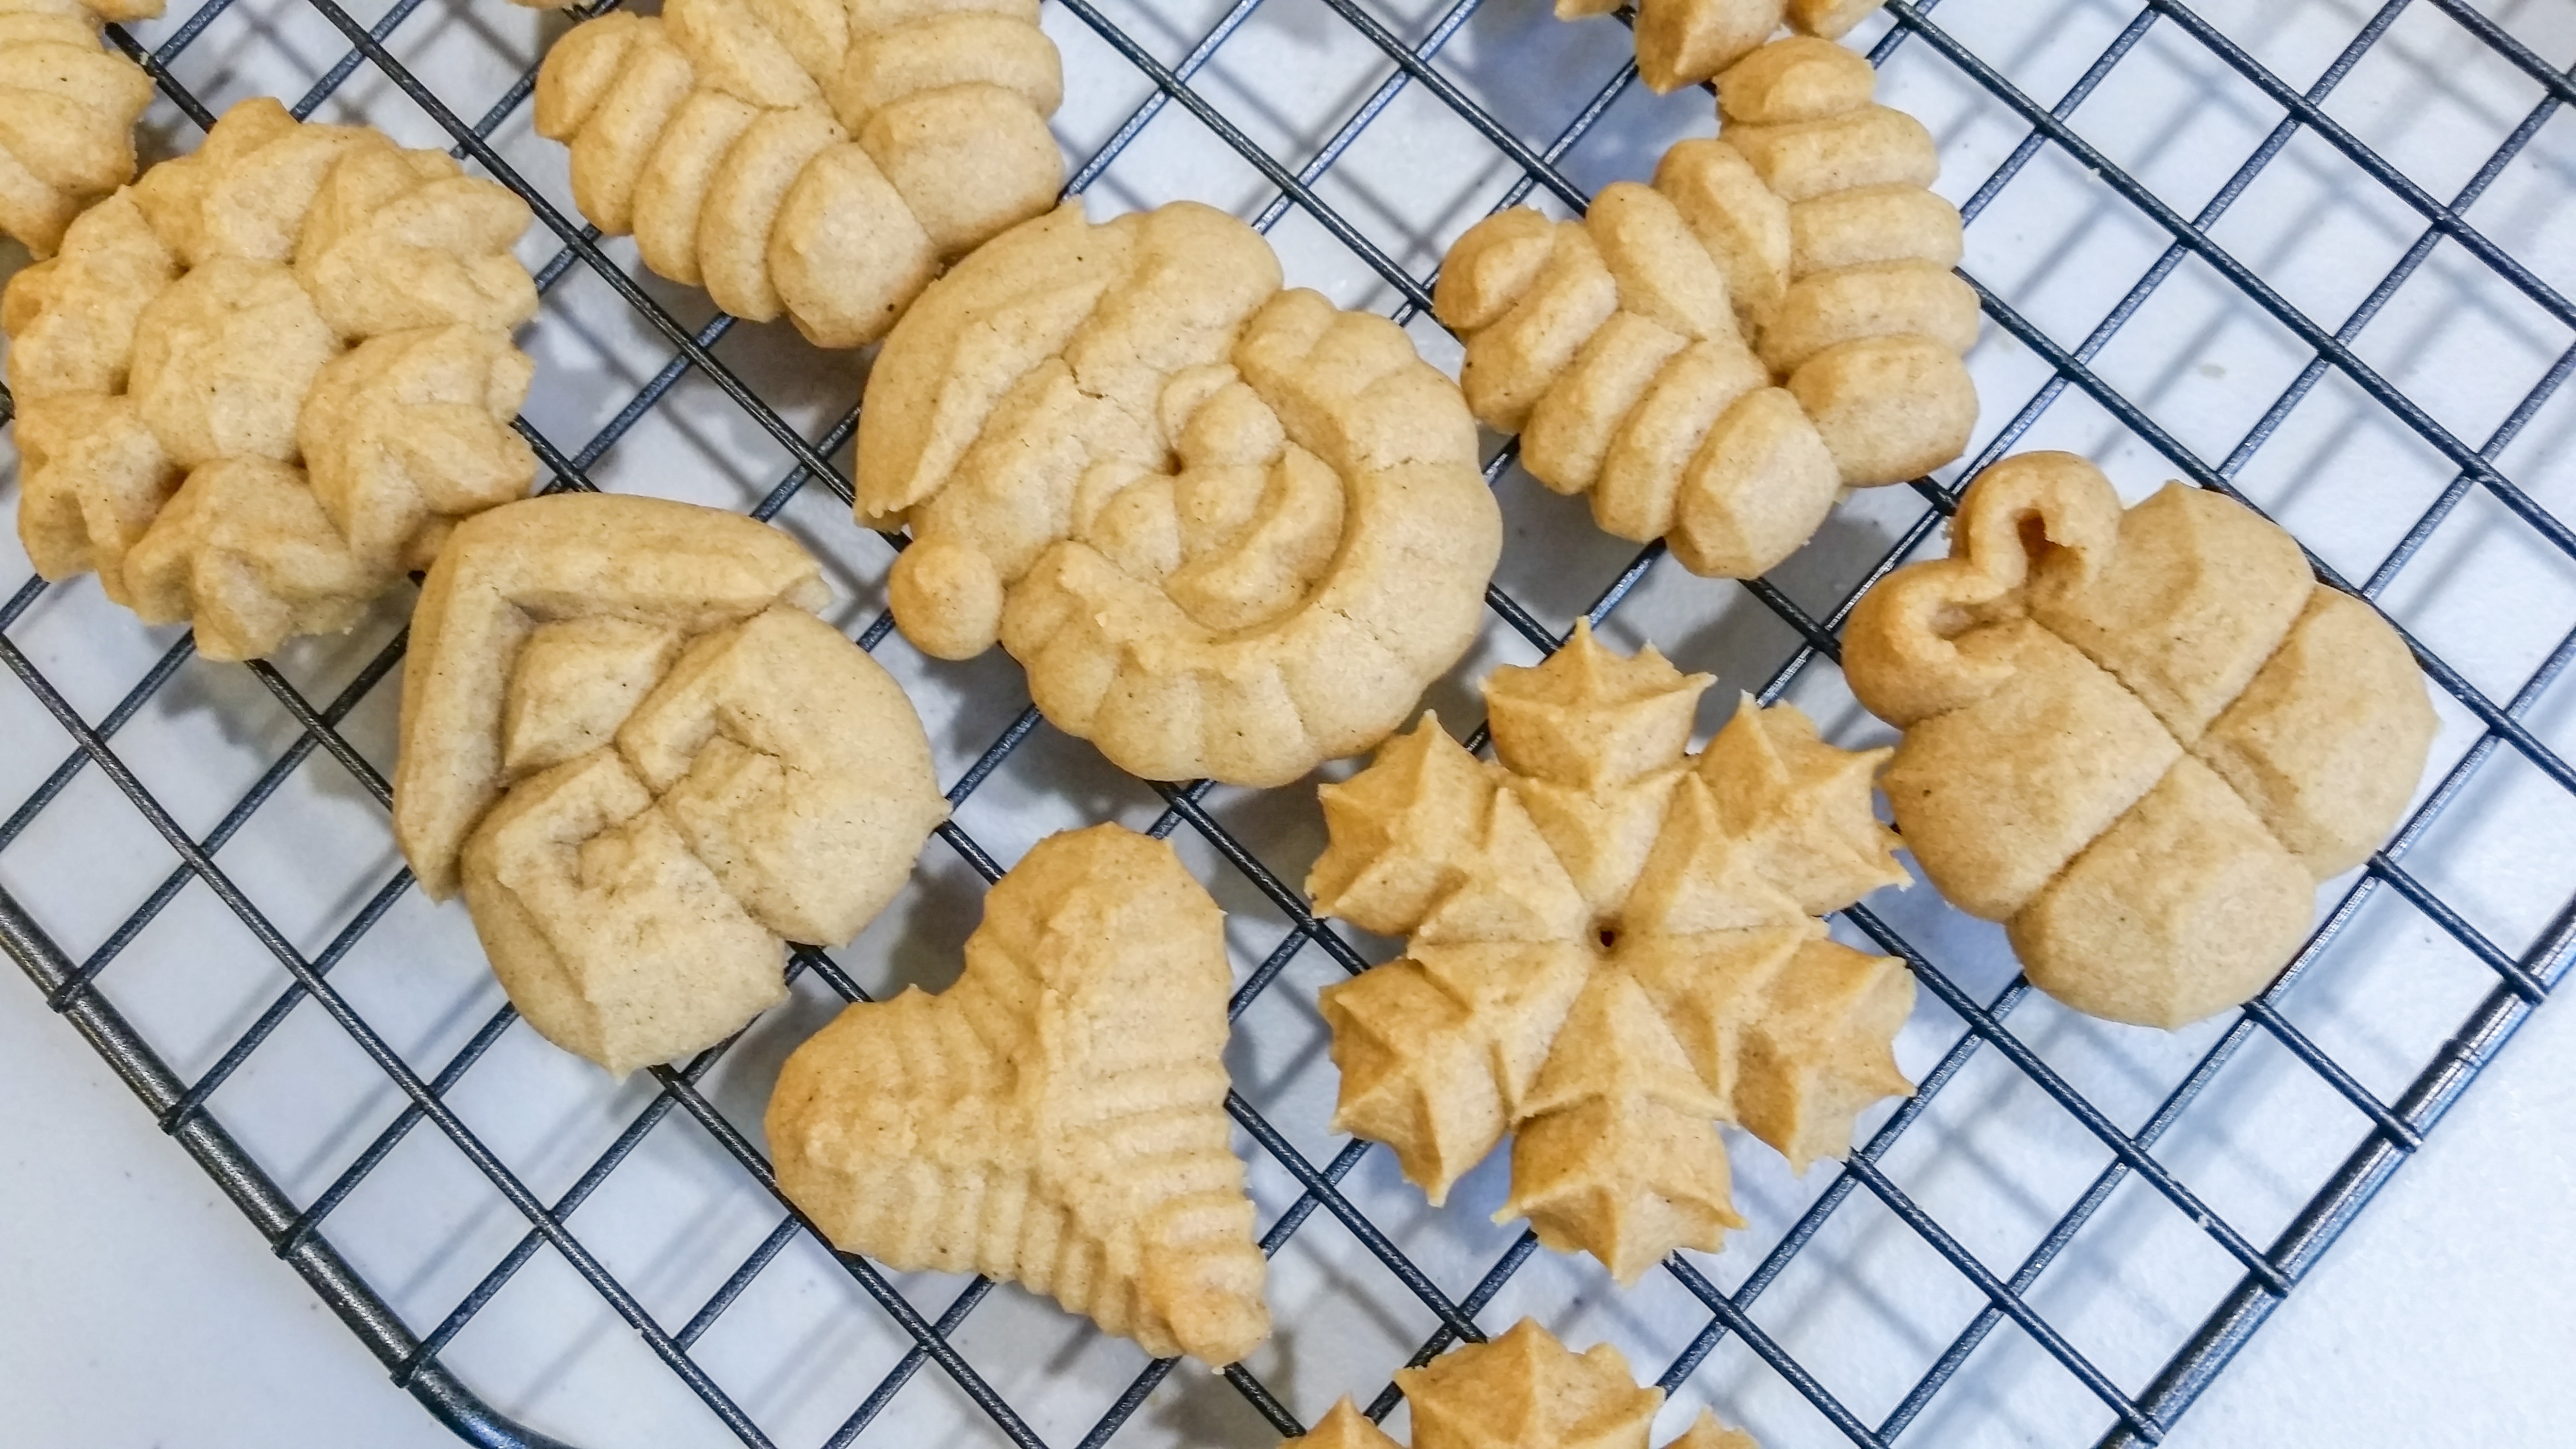
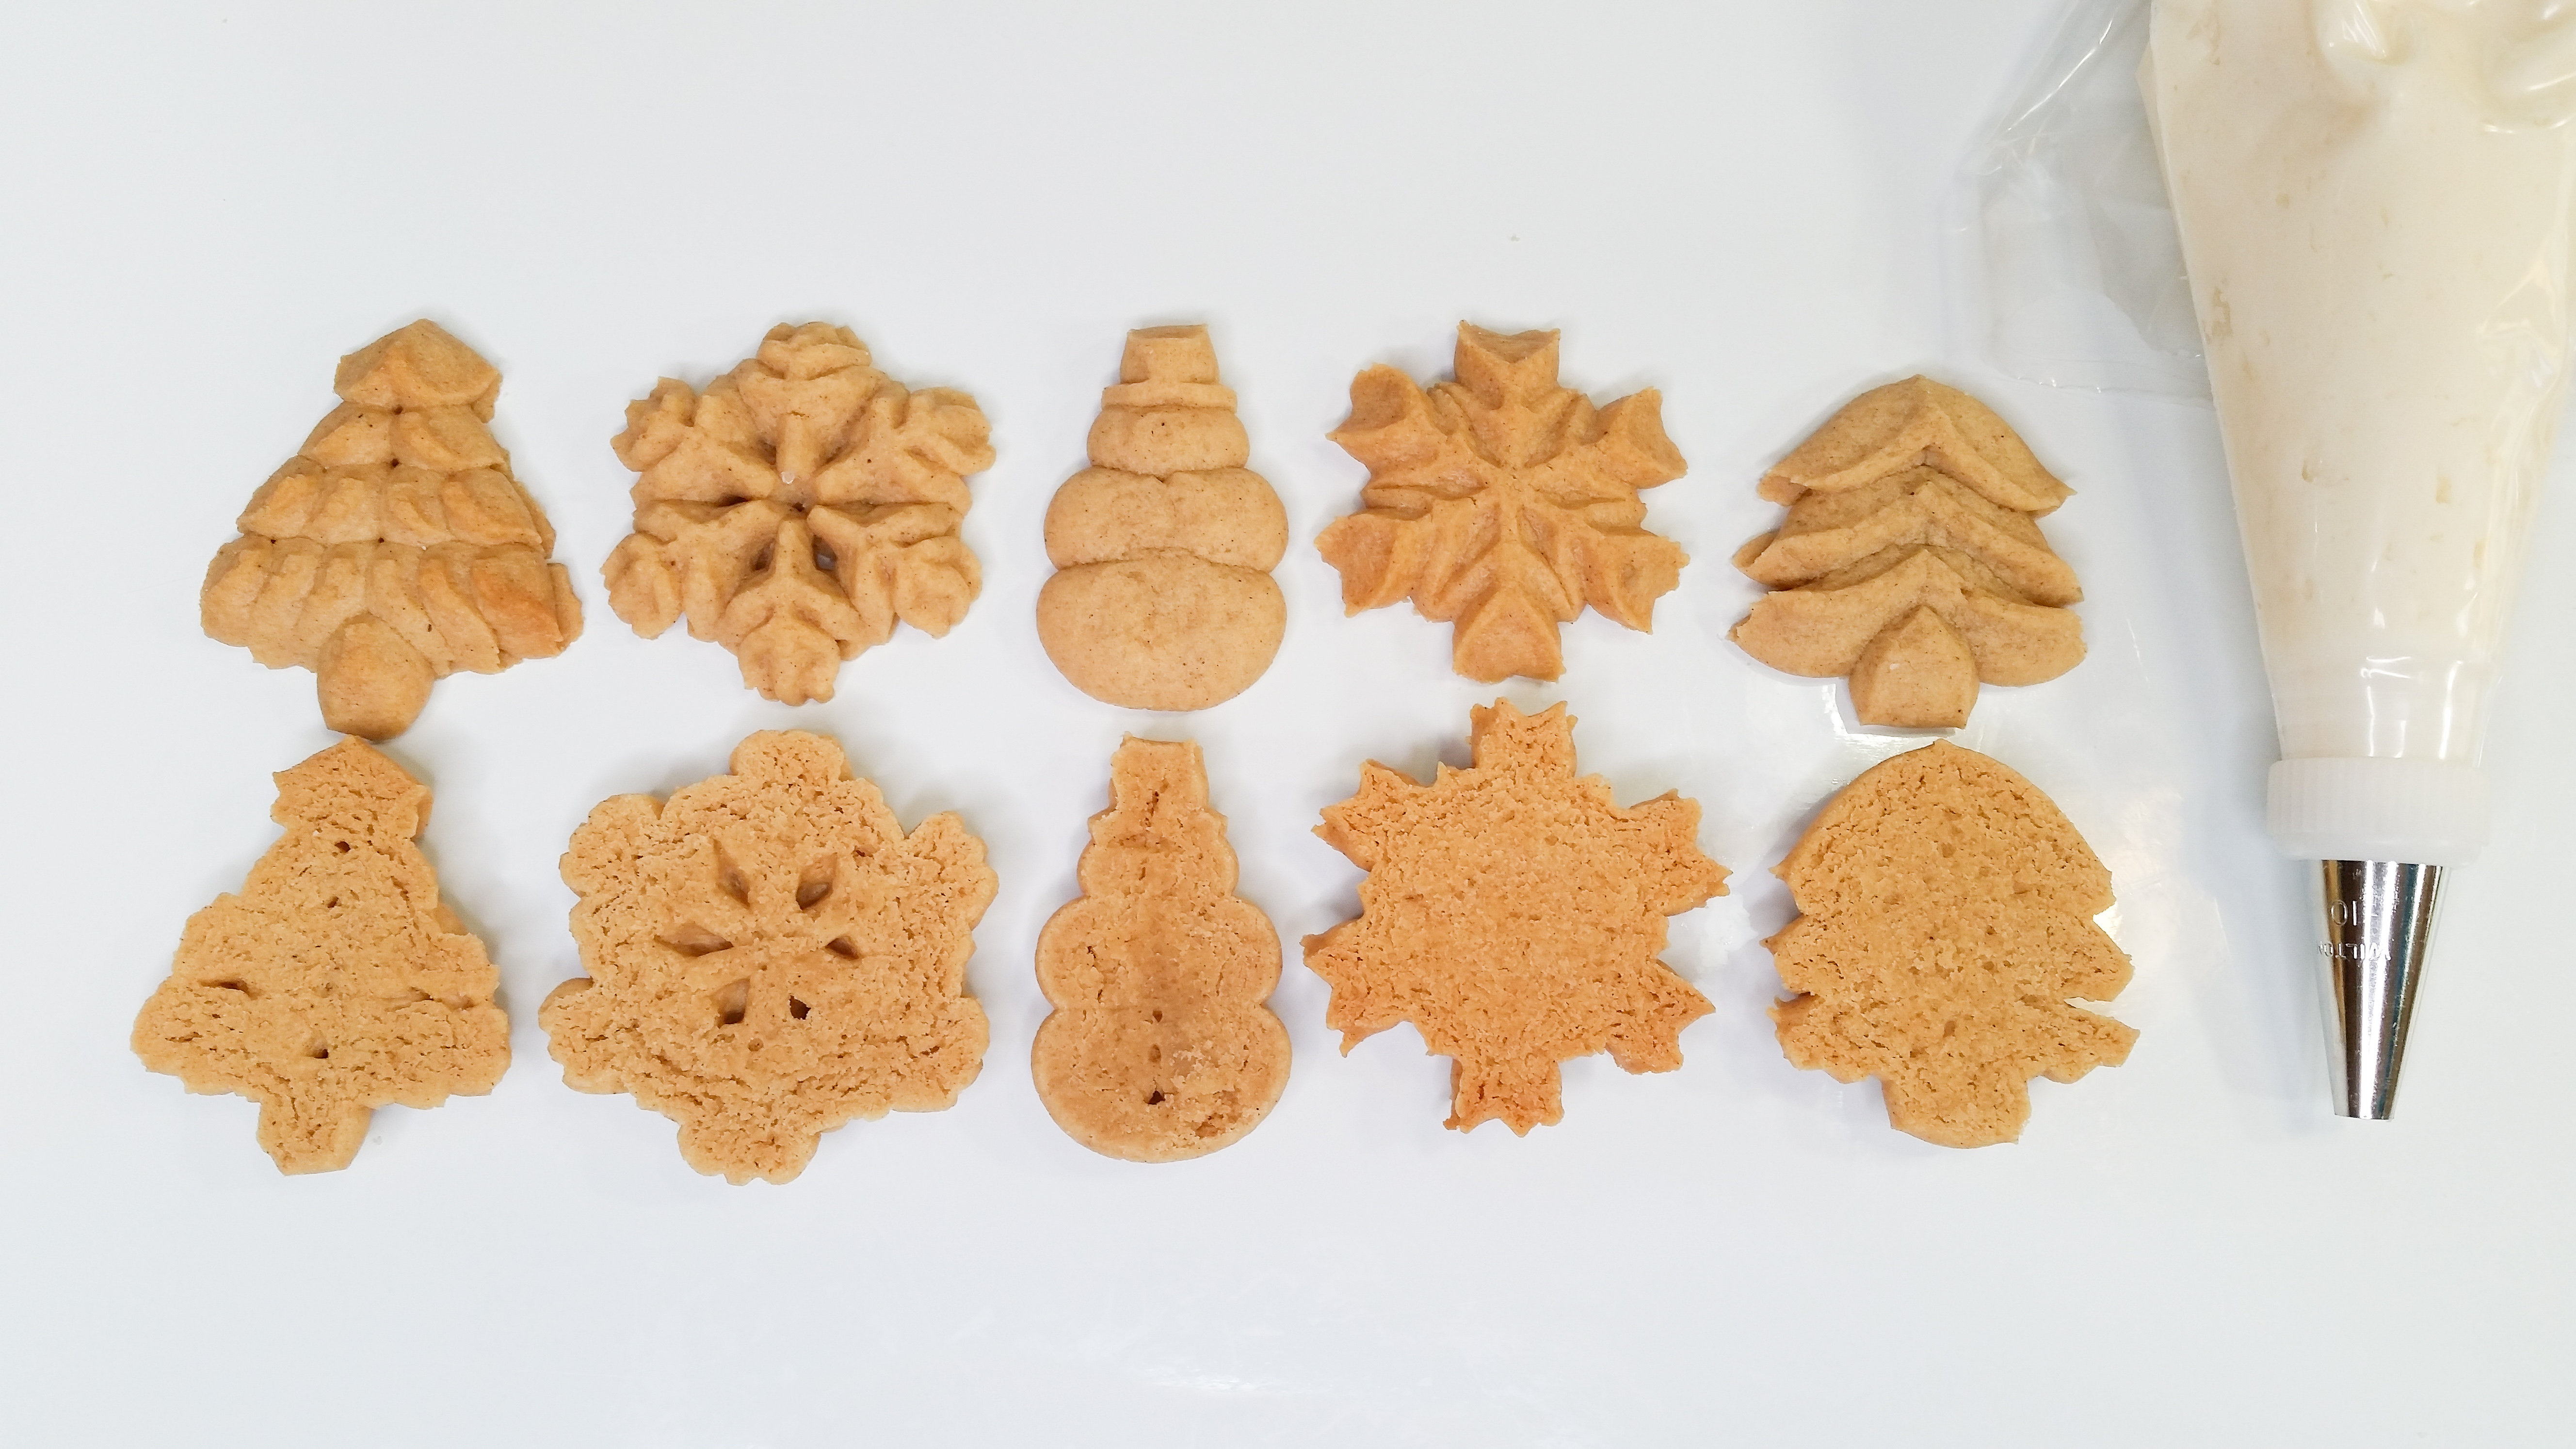
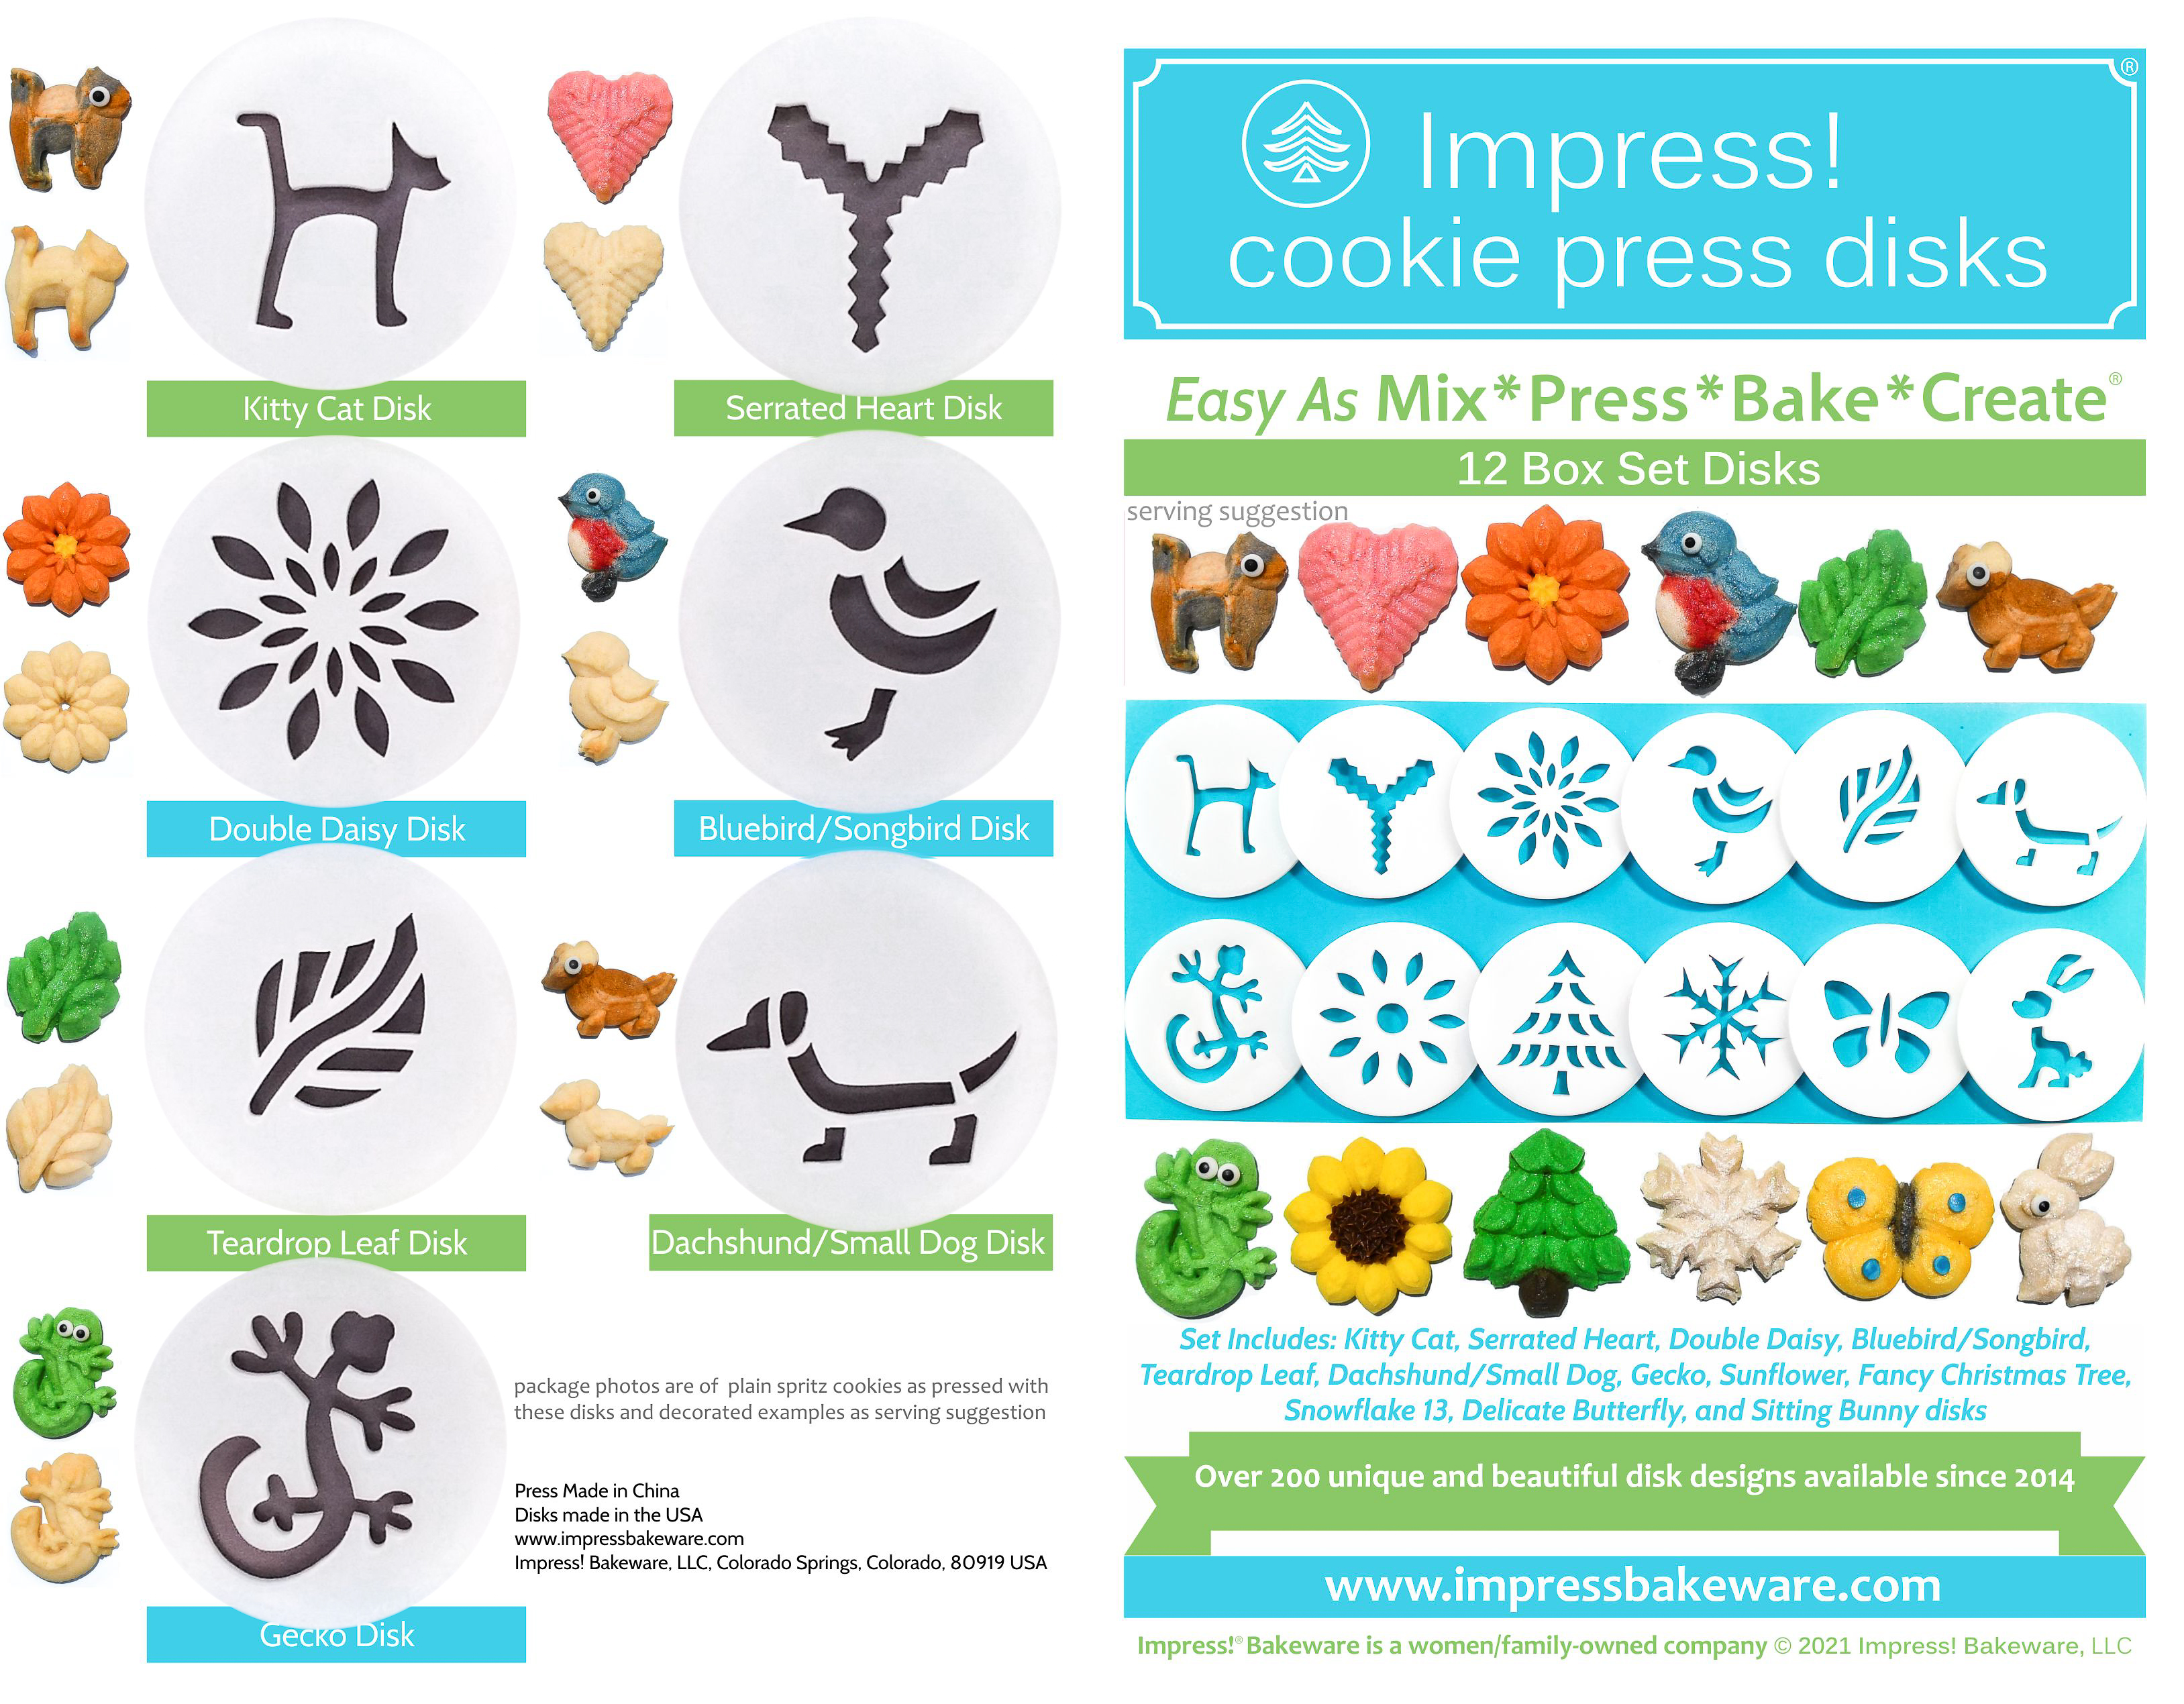
To give you an idea of all the different shapes that might work for Christmas gingerbread I pulled disks from quite a few sets. We have many Christmas and winter disk sets so check them all out and pick your favorites!
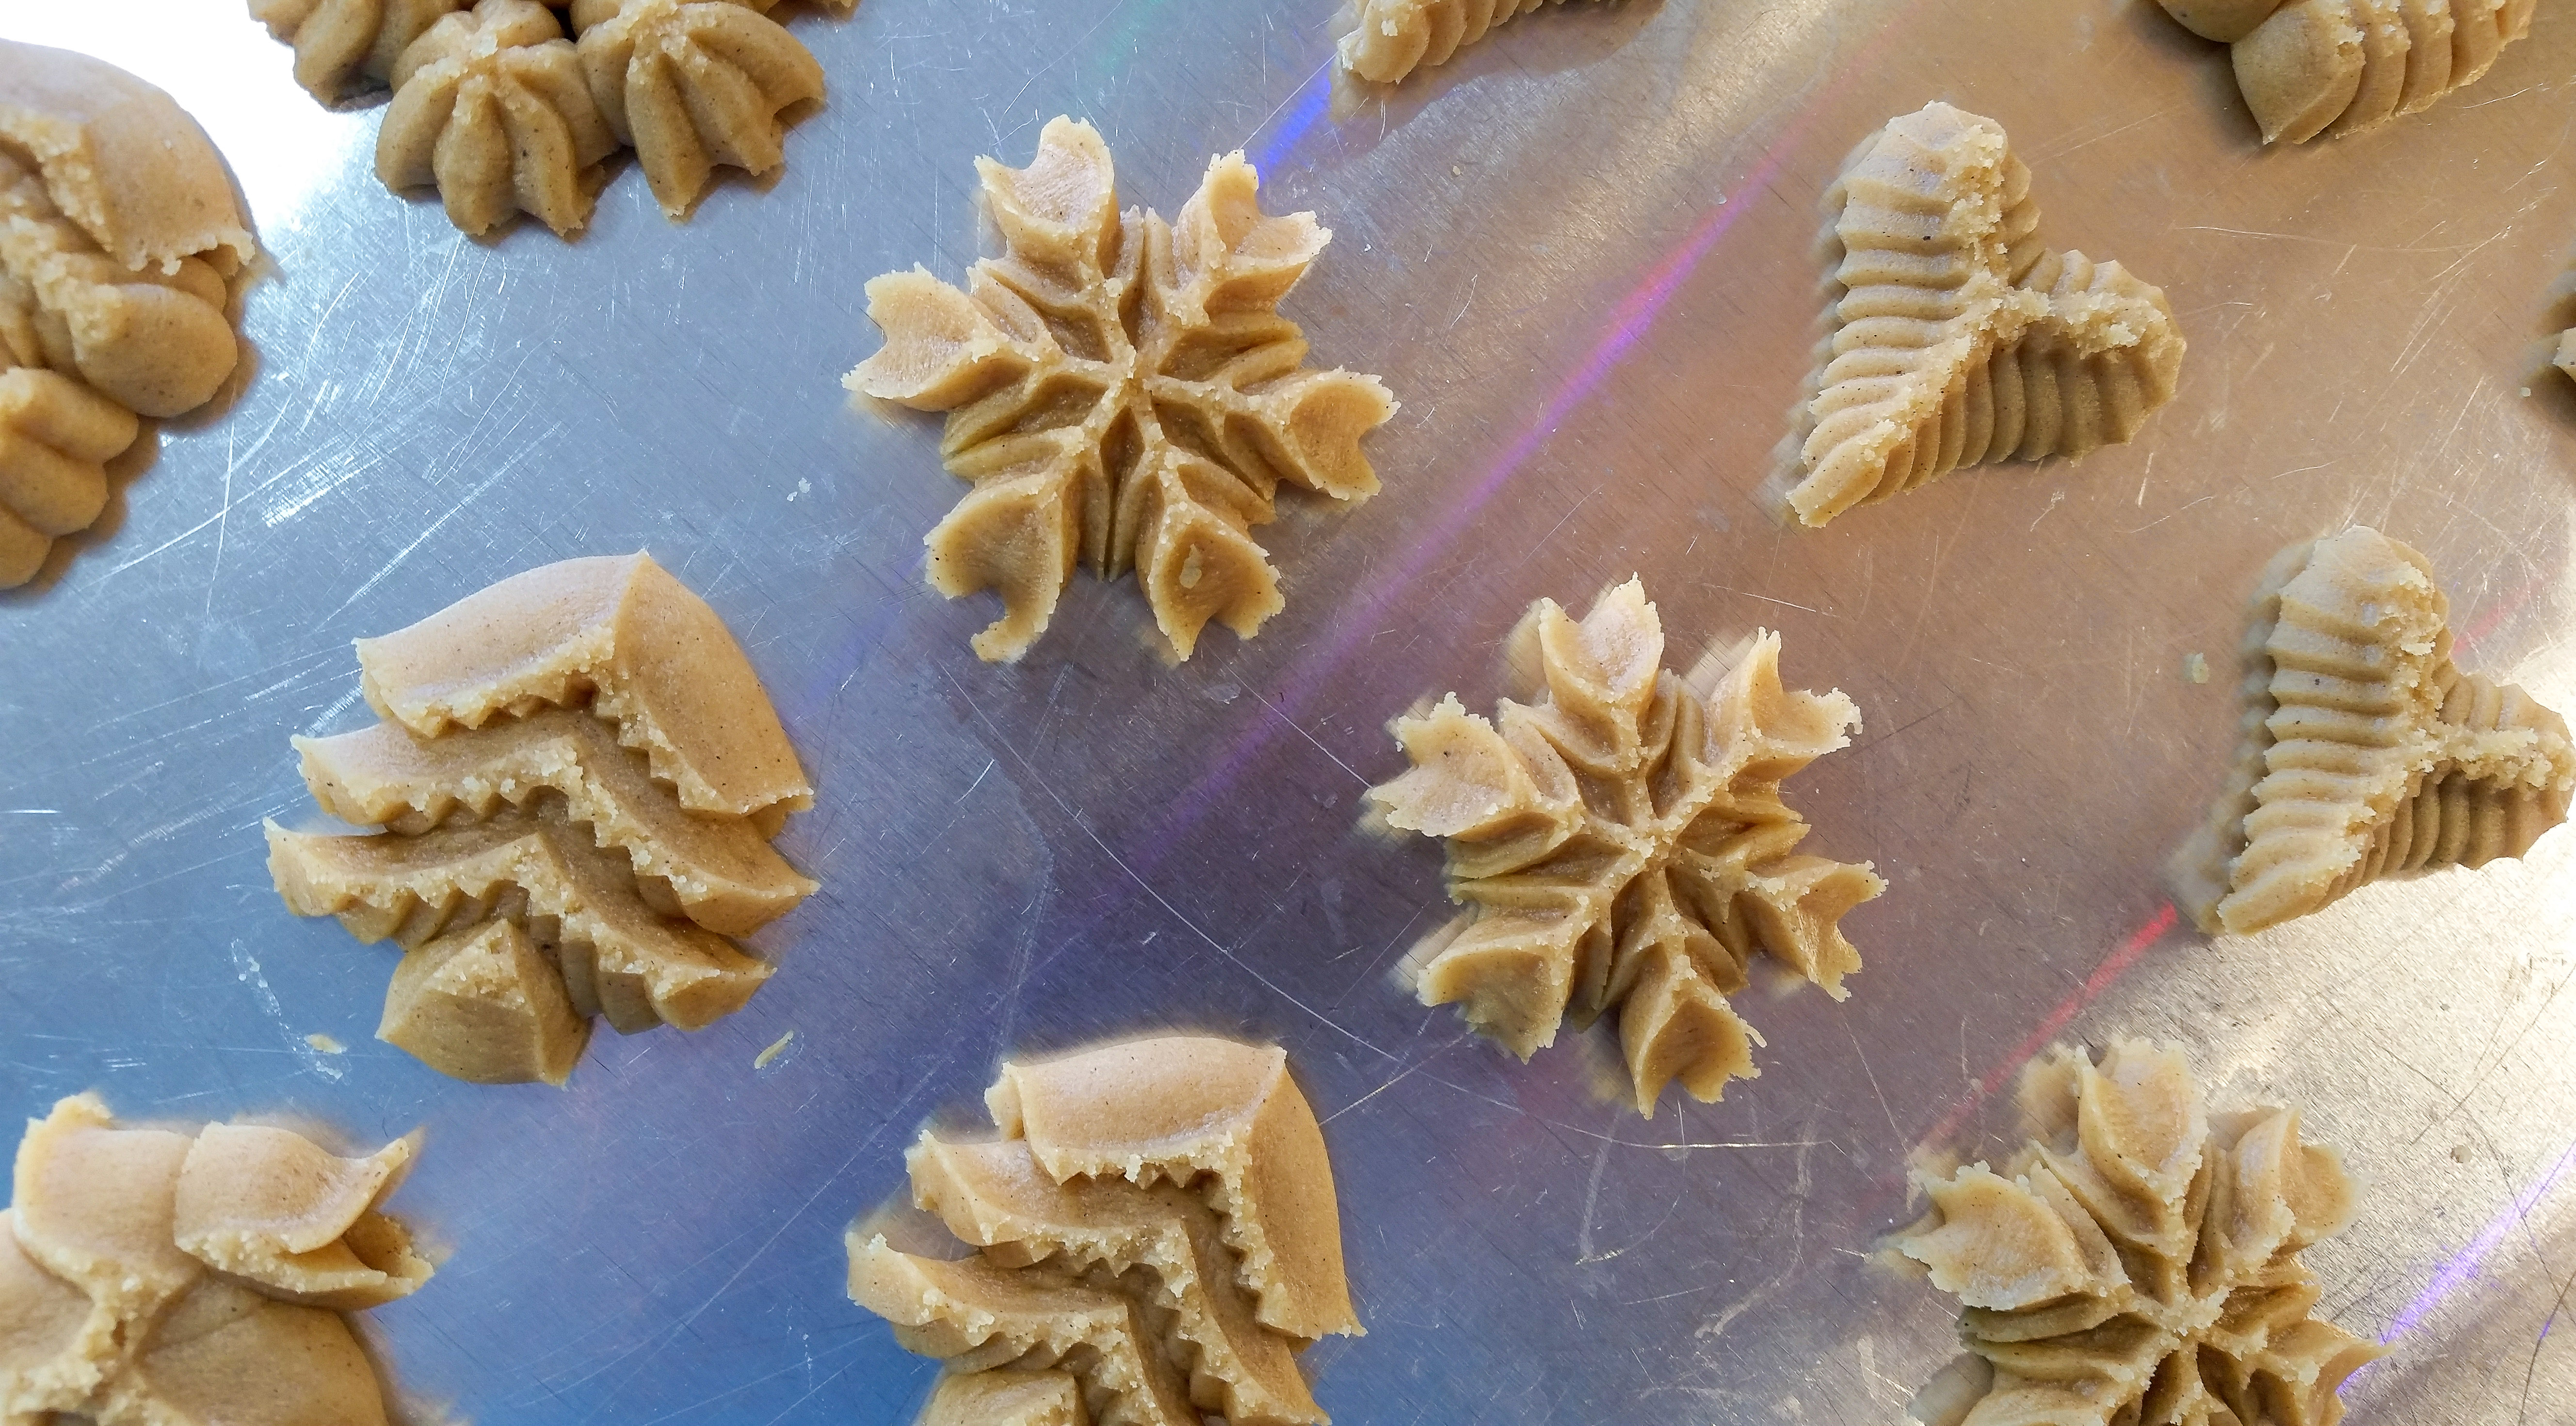
All of the snowflakes are shown except snowflake one, which I found a bit tricky with this dough, so I recommend skipping it. The snowflake from the set of disks that comes with our press did very well in this dough. It’s the most delicate and looks fabulous! (It’s top, center-left of the main photo, above the Santa face.) Right now we’re selling that set on its own without the cookie press, if you’re interested but already have a press that works with our disks. 😀
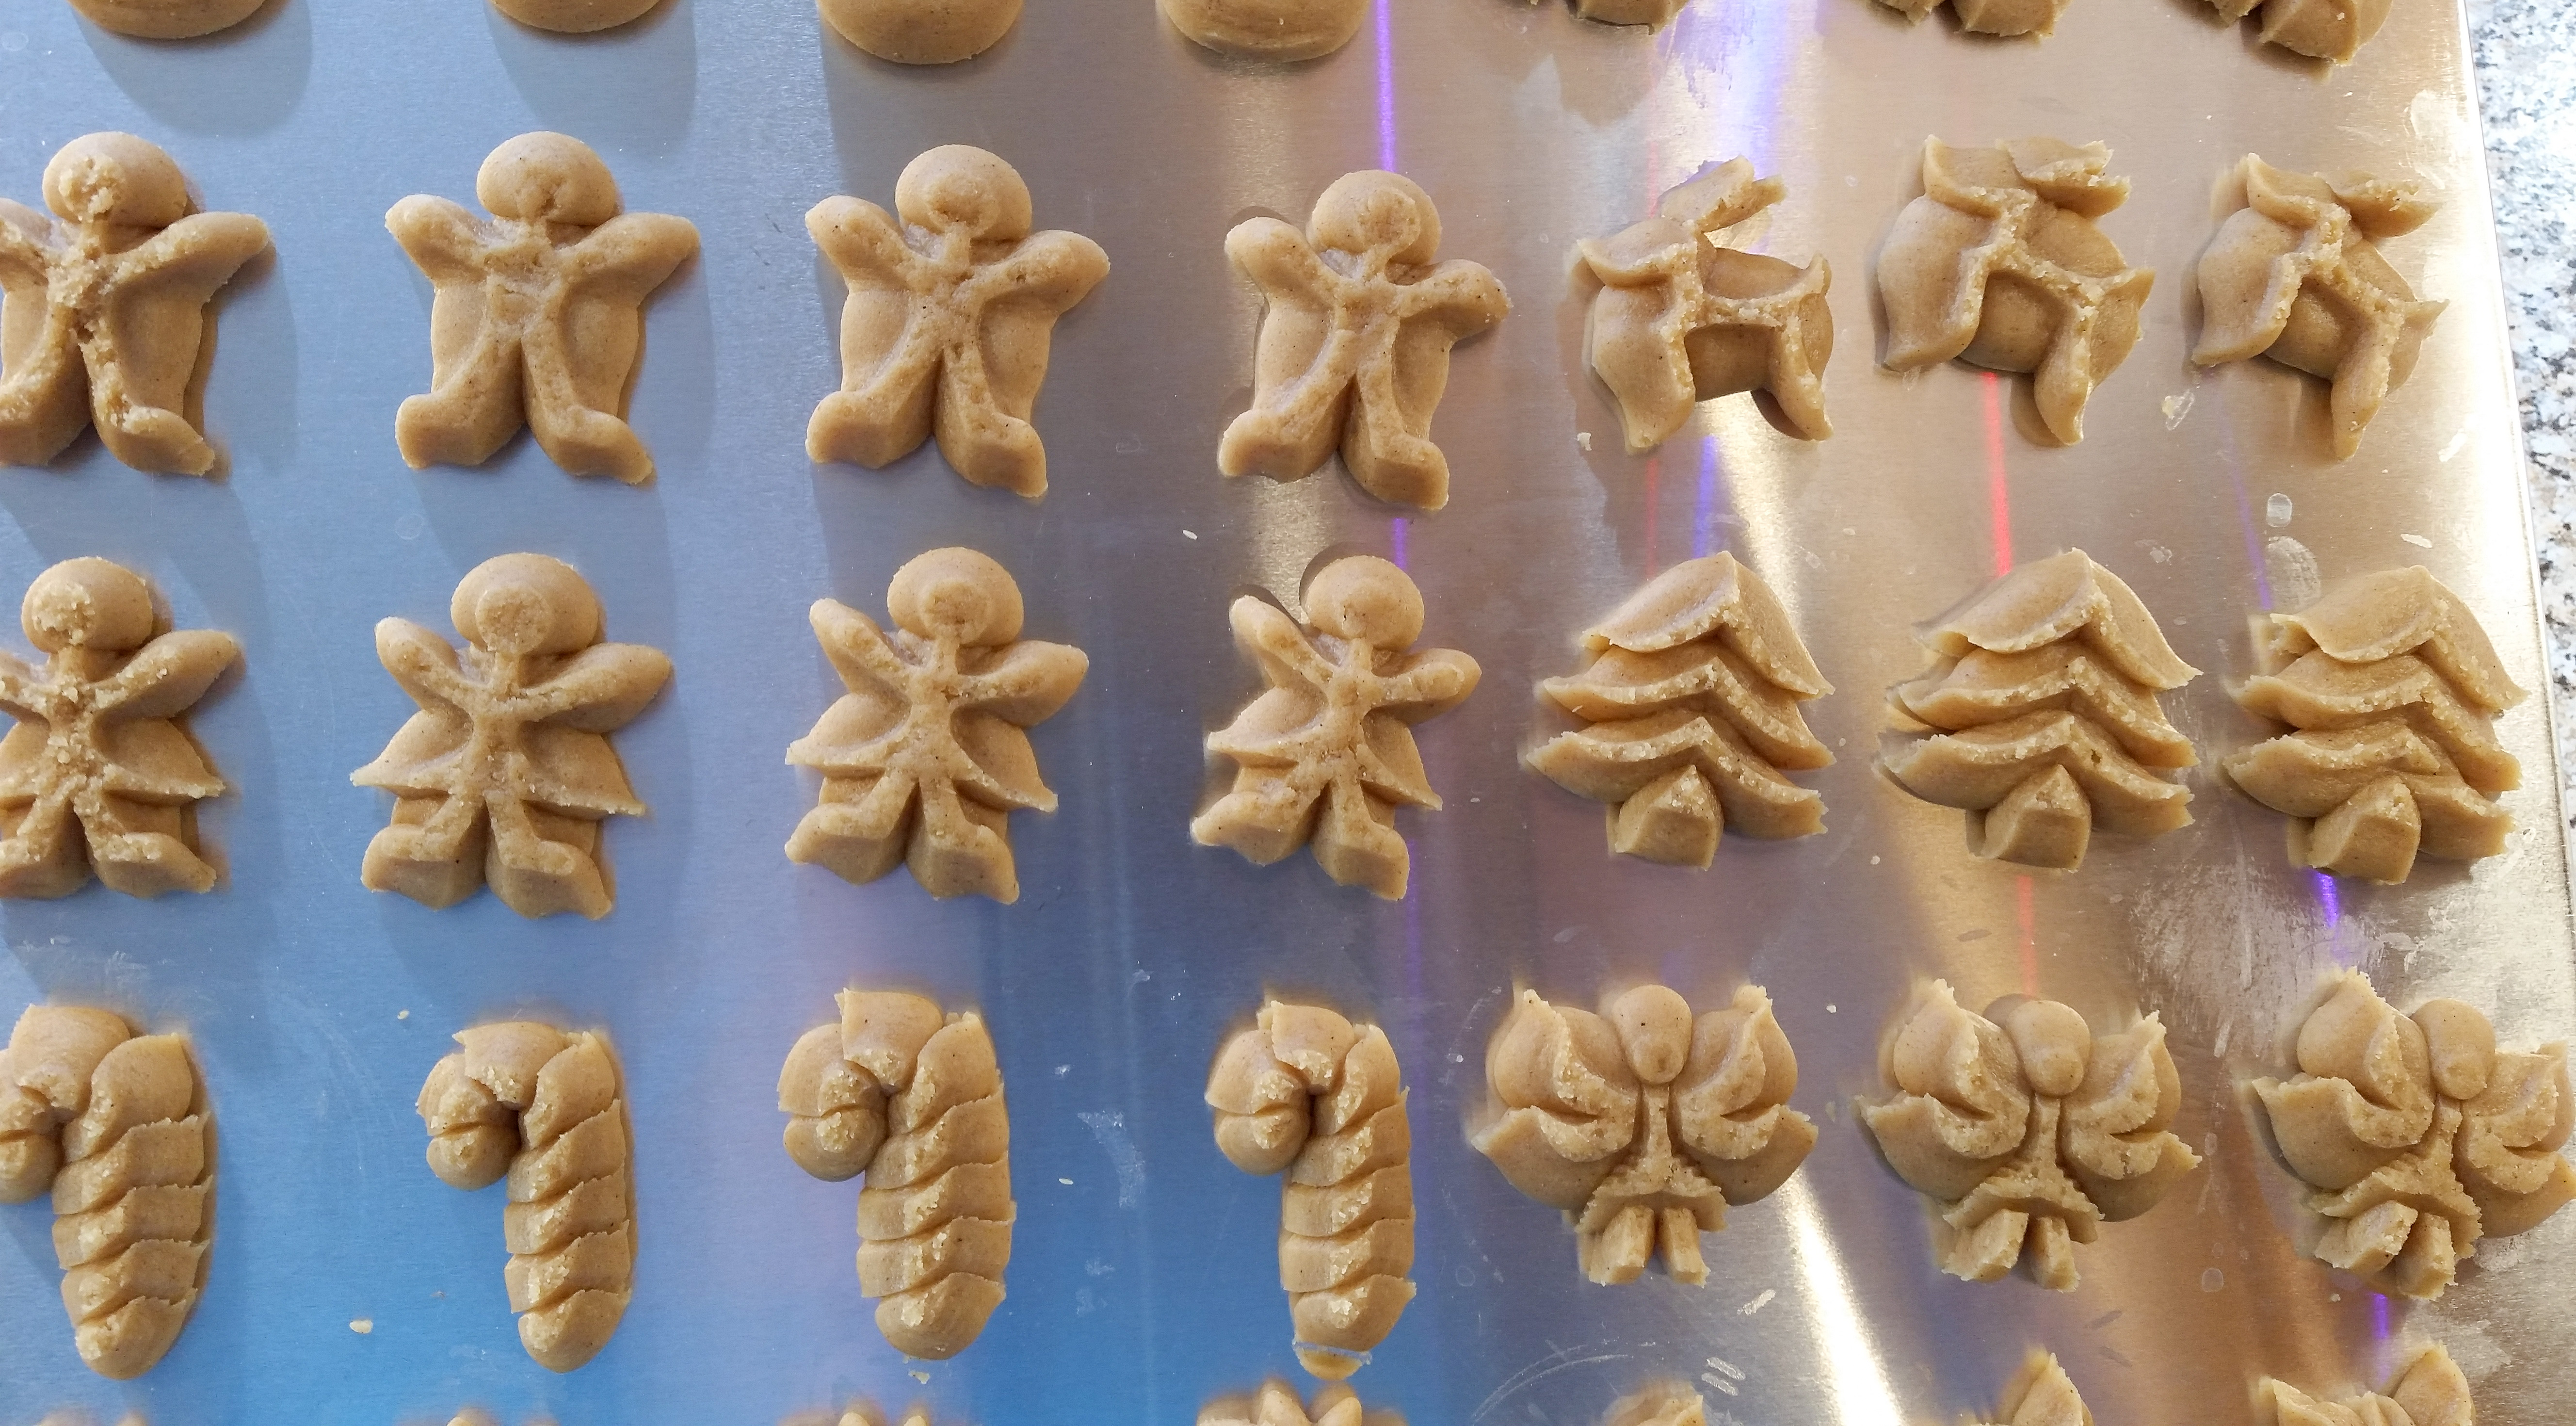
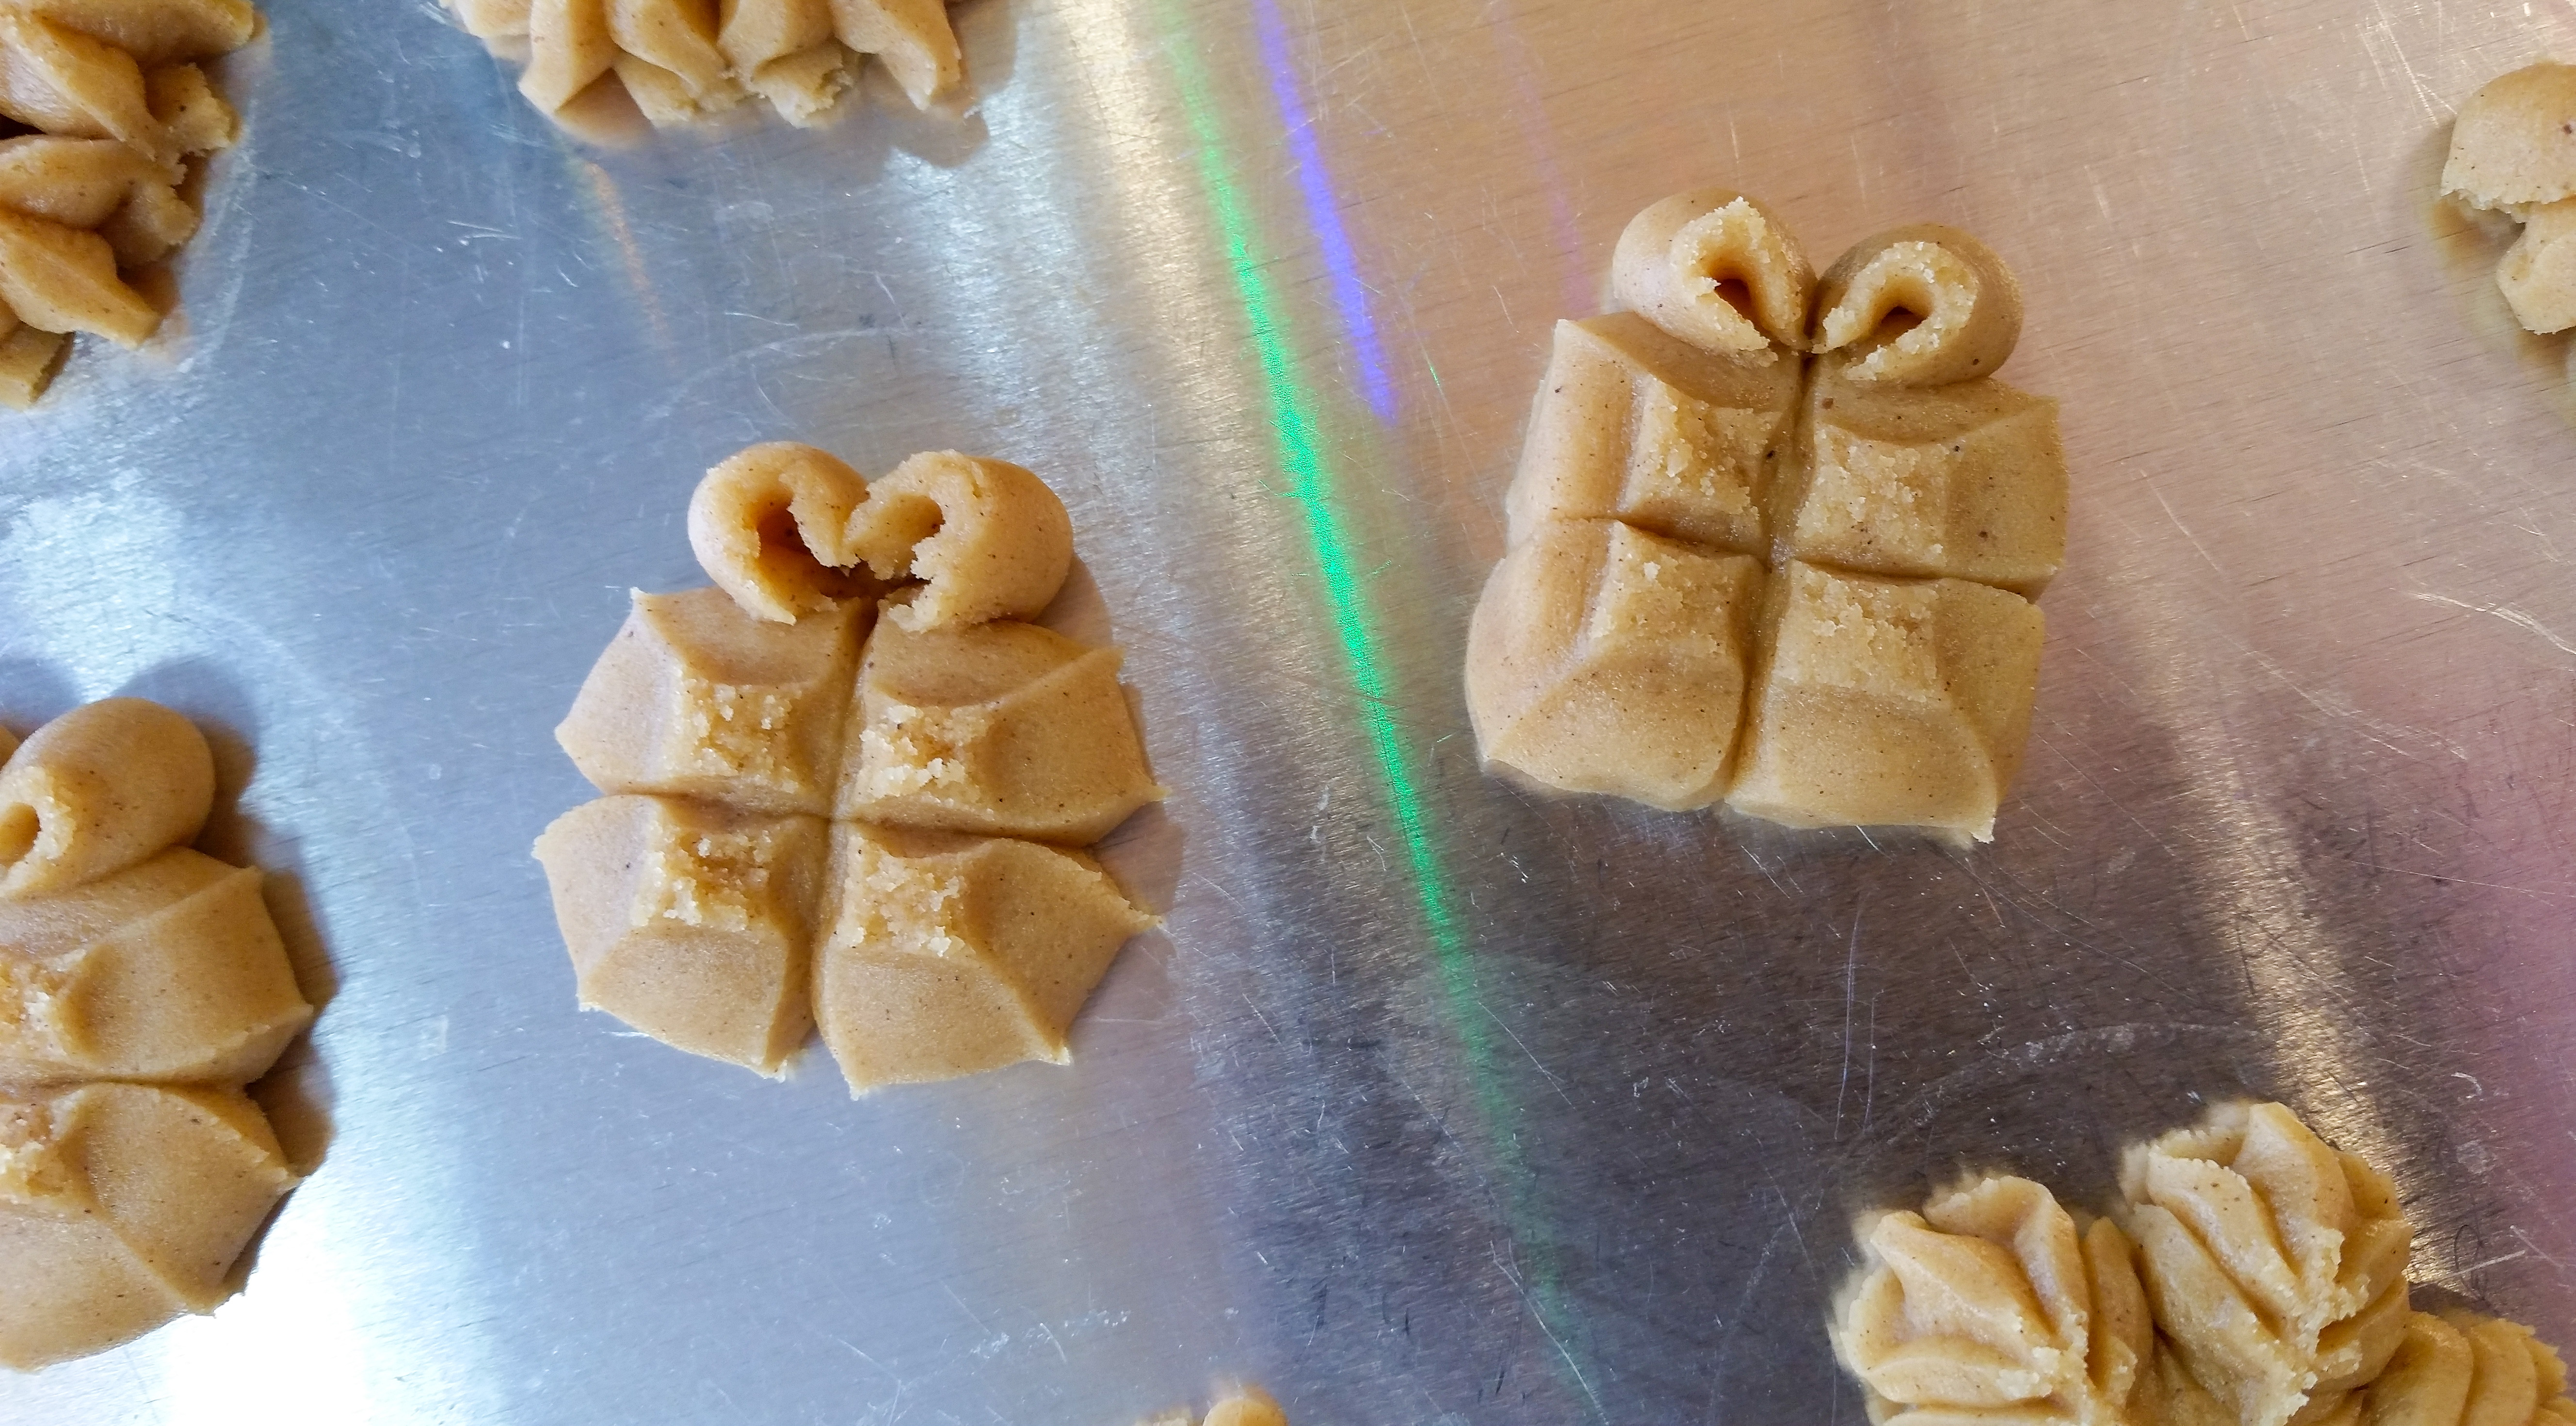
Most of the Christmas Set is shown: Santa Face, Angel, Christmas Tree, Candy Cane, Stocking, Gift, and Reindeer. From the Gingerbread Set I show the Gingerbread Boy, Girl, and House, the Reindeer Head, Snowman, and the Skinny Winter Tree. From the Christmas Two Set I used the Sleigh, the Wreath, and the Bow. From the Impress Cookie Press Set I included the Serrated Heart, Snowflake 13, and the Fancy Christmas Tree. From the Woodland Set I used the Fox/Raccoon, Porcupine/Hedgehog, Moose Head, Fawn, Squirrel, and the Rustic Tree. From the Winter Set I included the Mittens. All sets are pictured at the bottom of this post. Use as many or as few as you like!
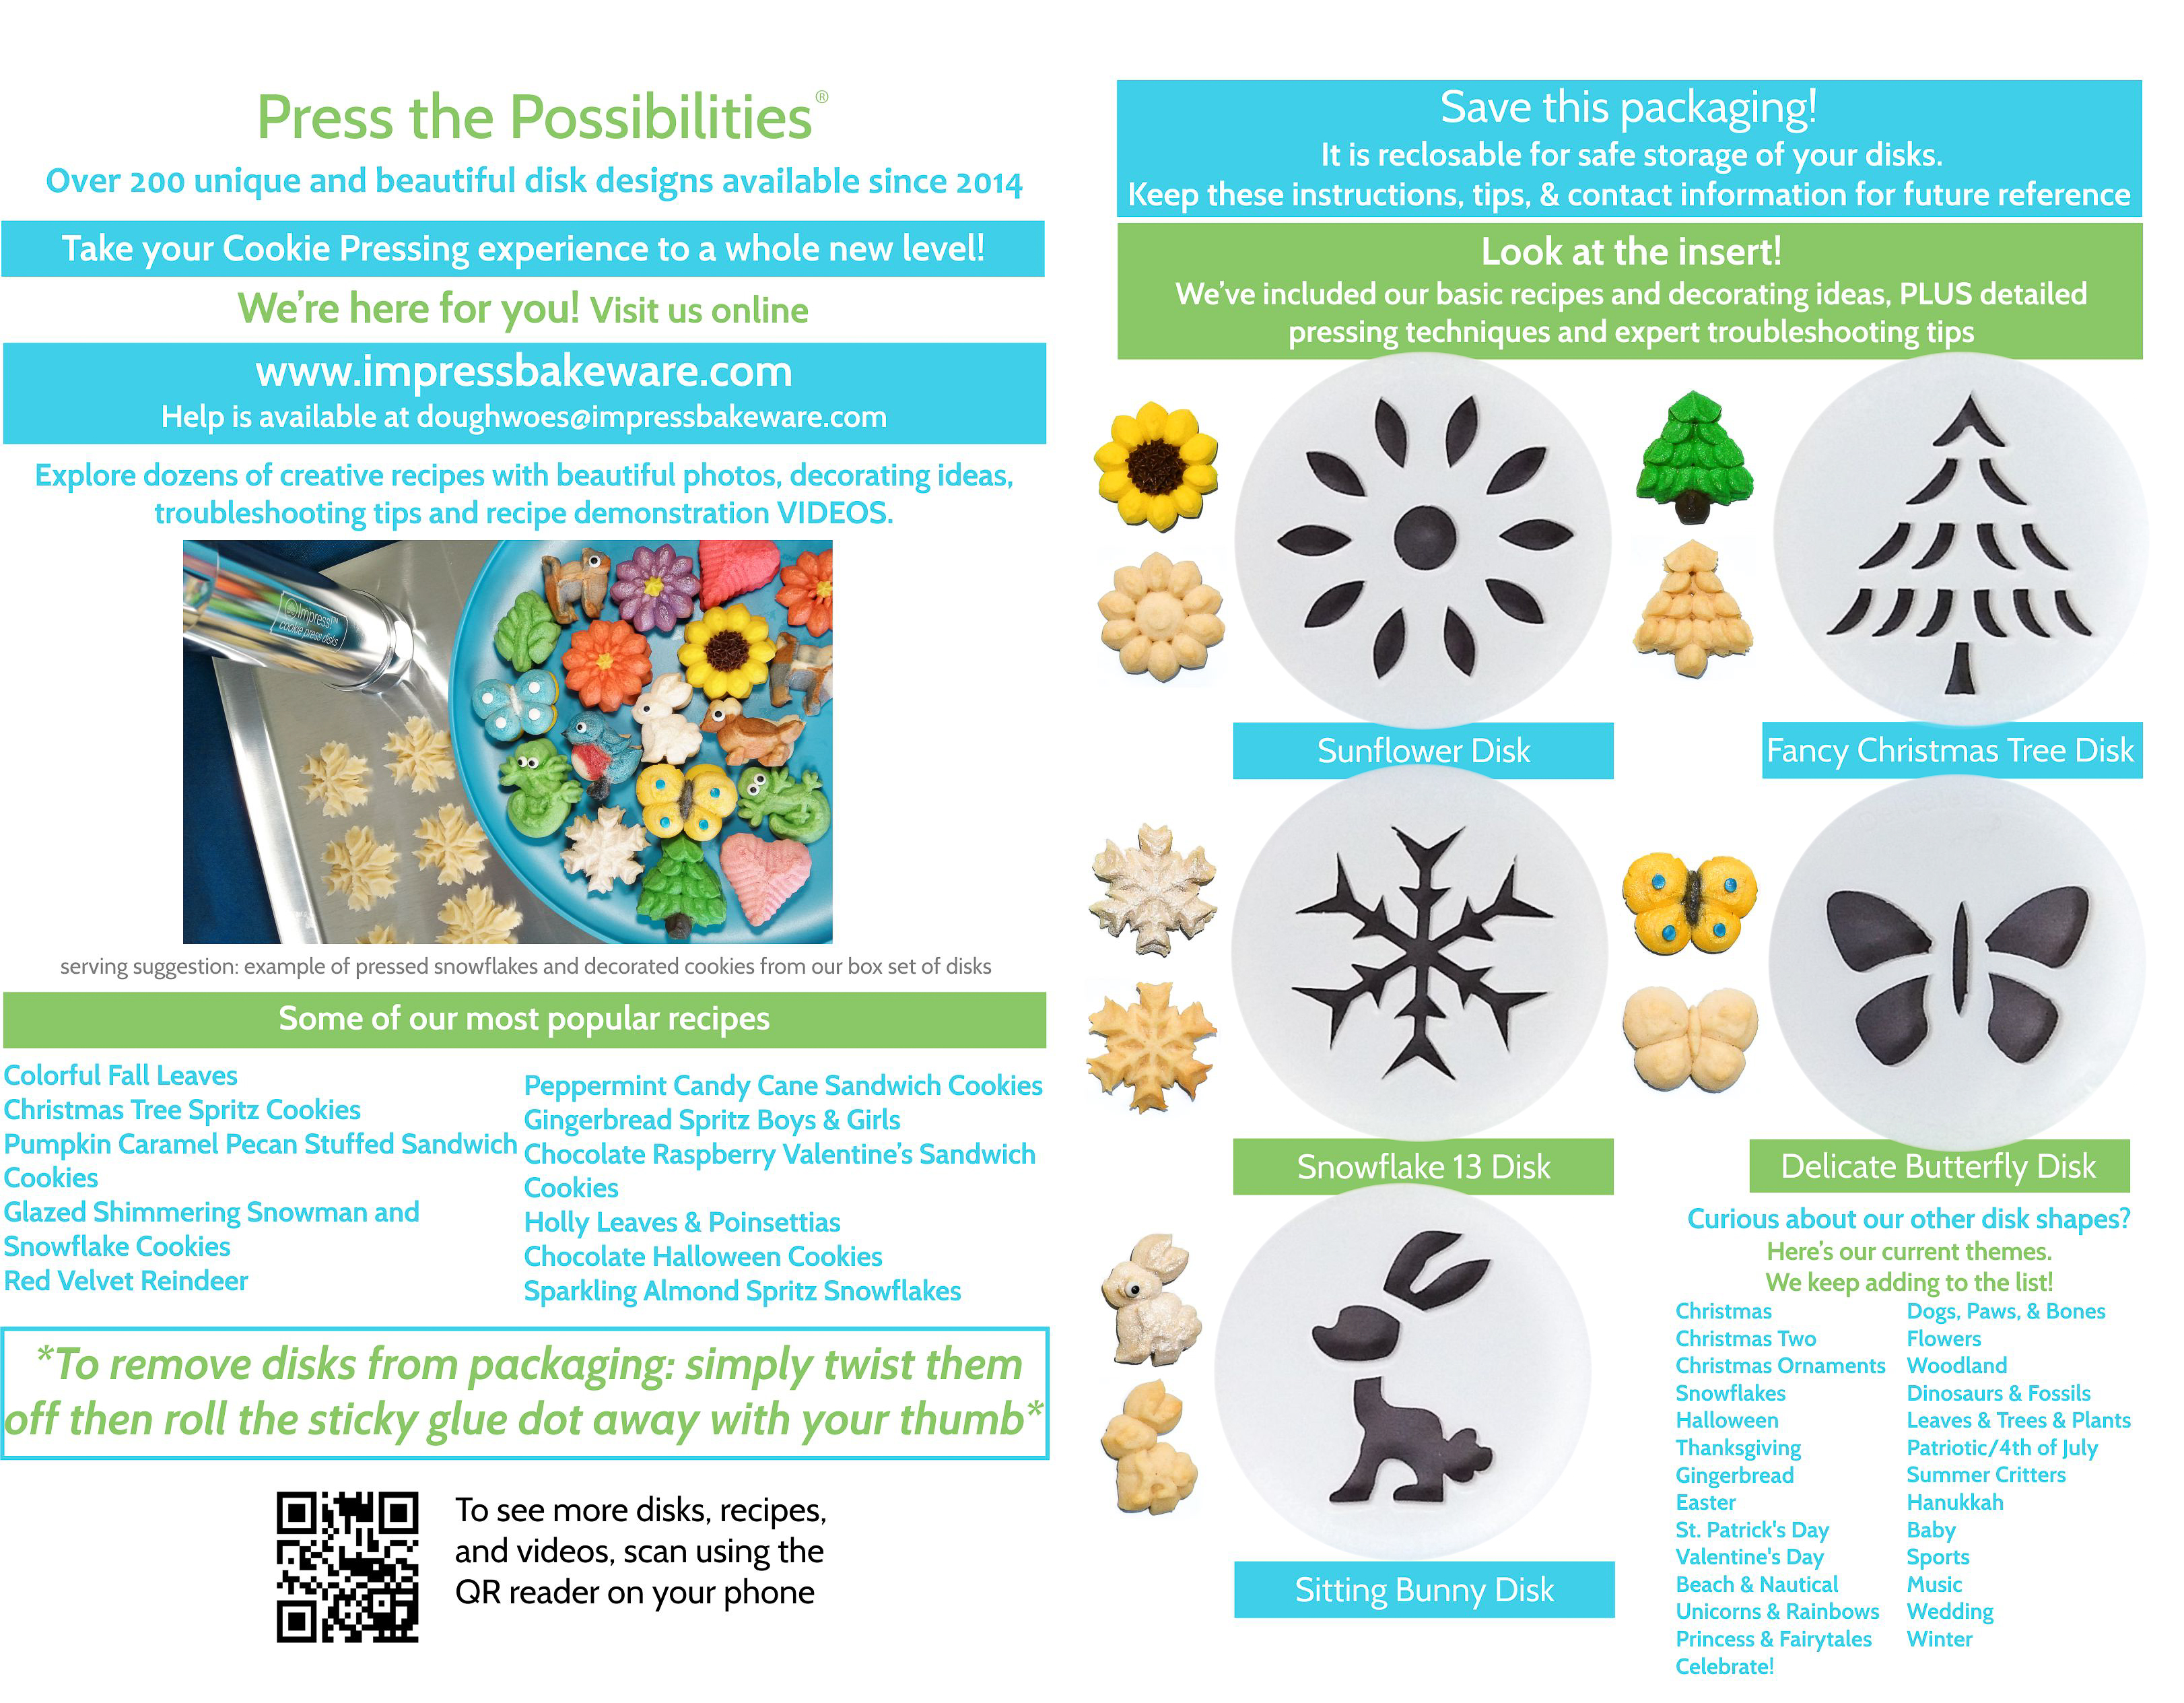
Our website has all of our 200+ disk shapes, cookie press, embossed rolling pins, baking accessories plus more about our Women/Family Owned company! impressbakeware.com
All products are on our Etsy shop.
Our Amazon shop has our cookie press and disks and embossed rolling pins.
💕We make our money selling cookie press disks and embossed rolling pins! There are no annoying ads on this recipe blog. Every purchase keeps us in business.🙏 Thank you!
🎉 15% OFF Last SALE of 2025 ❗
🎄Make edible art for the Holidays, because baking should be fun!
Discount on our cookie press disks, cookie press, embossed rolling pins, luster dusts, cookie cutters & baking accessories. Sale December 26 – January 4, 2026, on our website and Etsy shops ONLY! (Links above) Sale excludes holiday gift sets and our recipe book.
Let’s bake!
Gingerbread Spritz
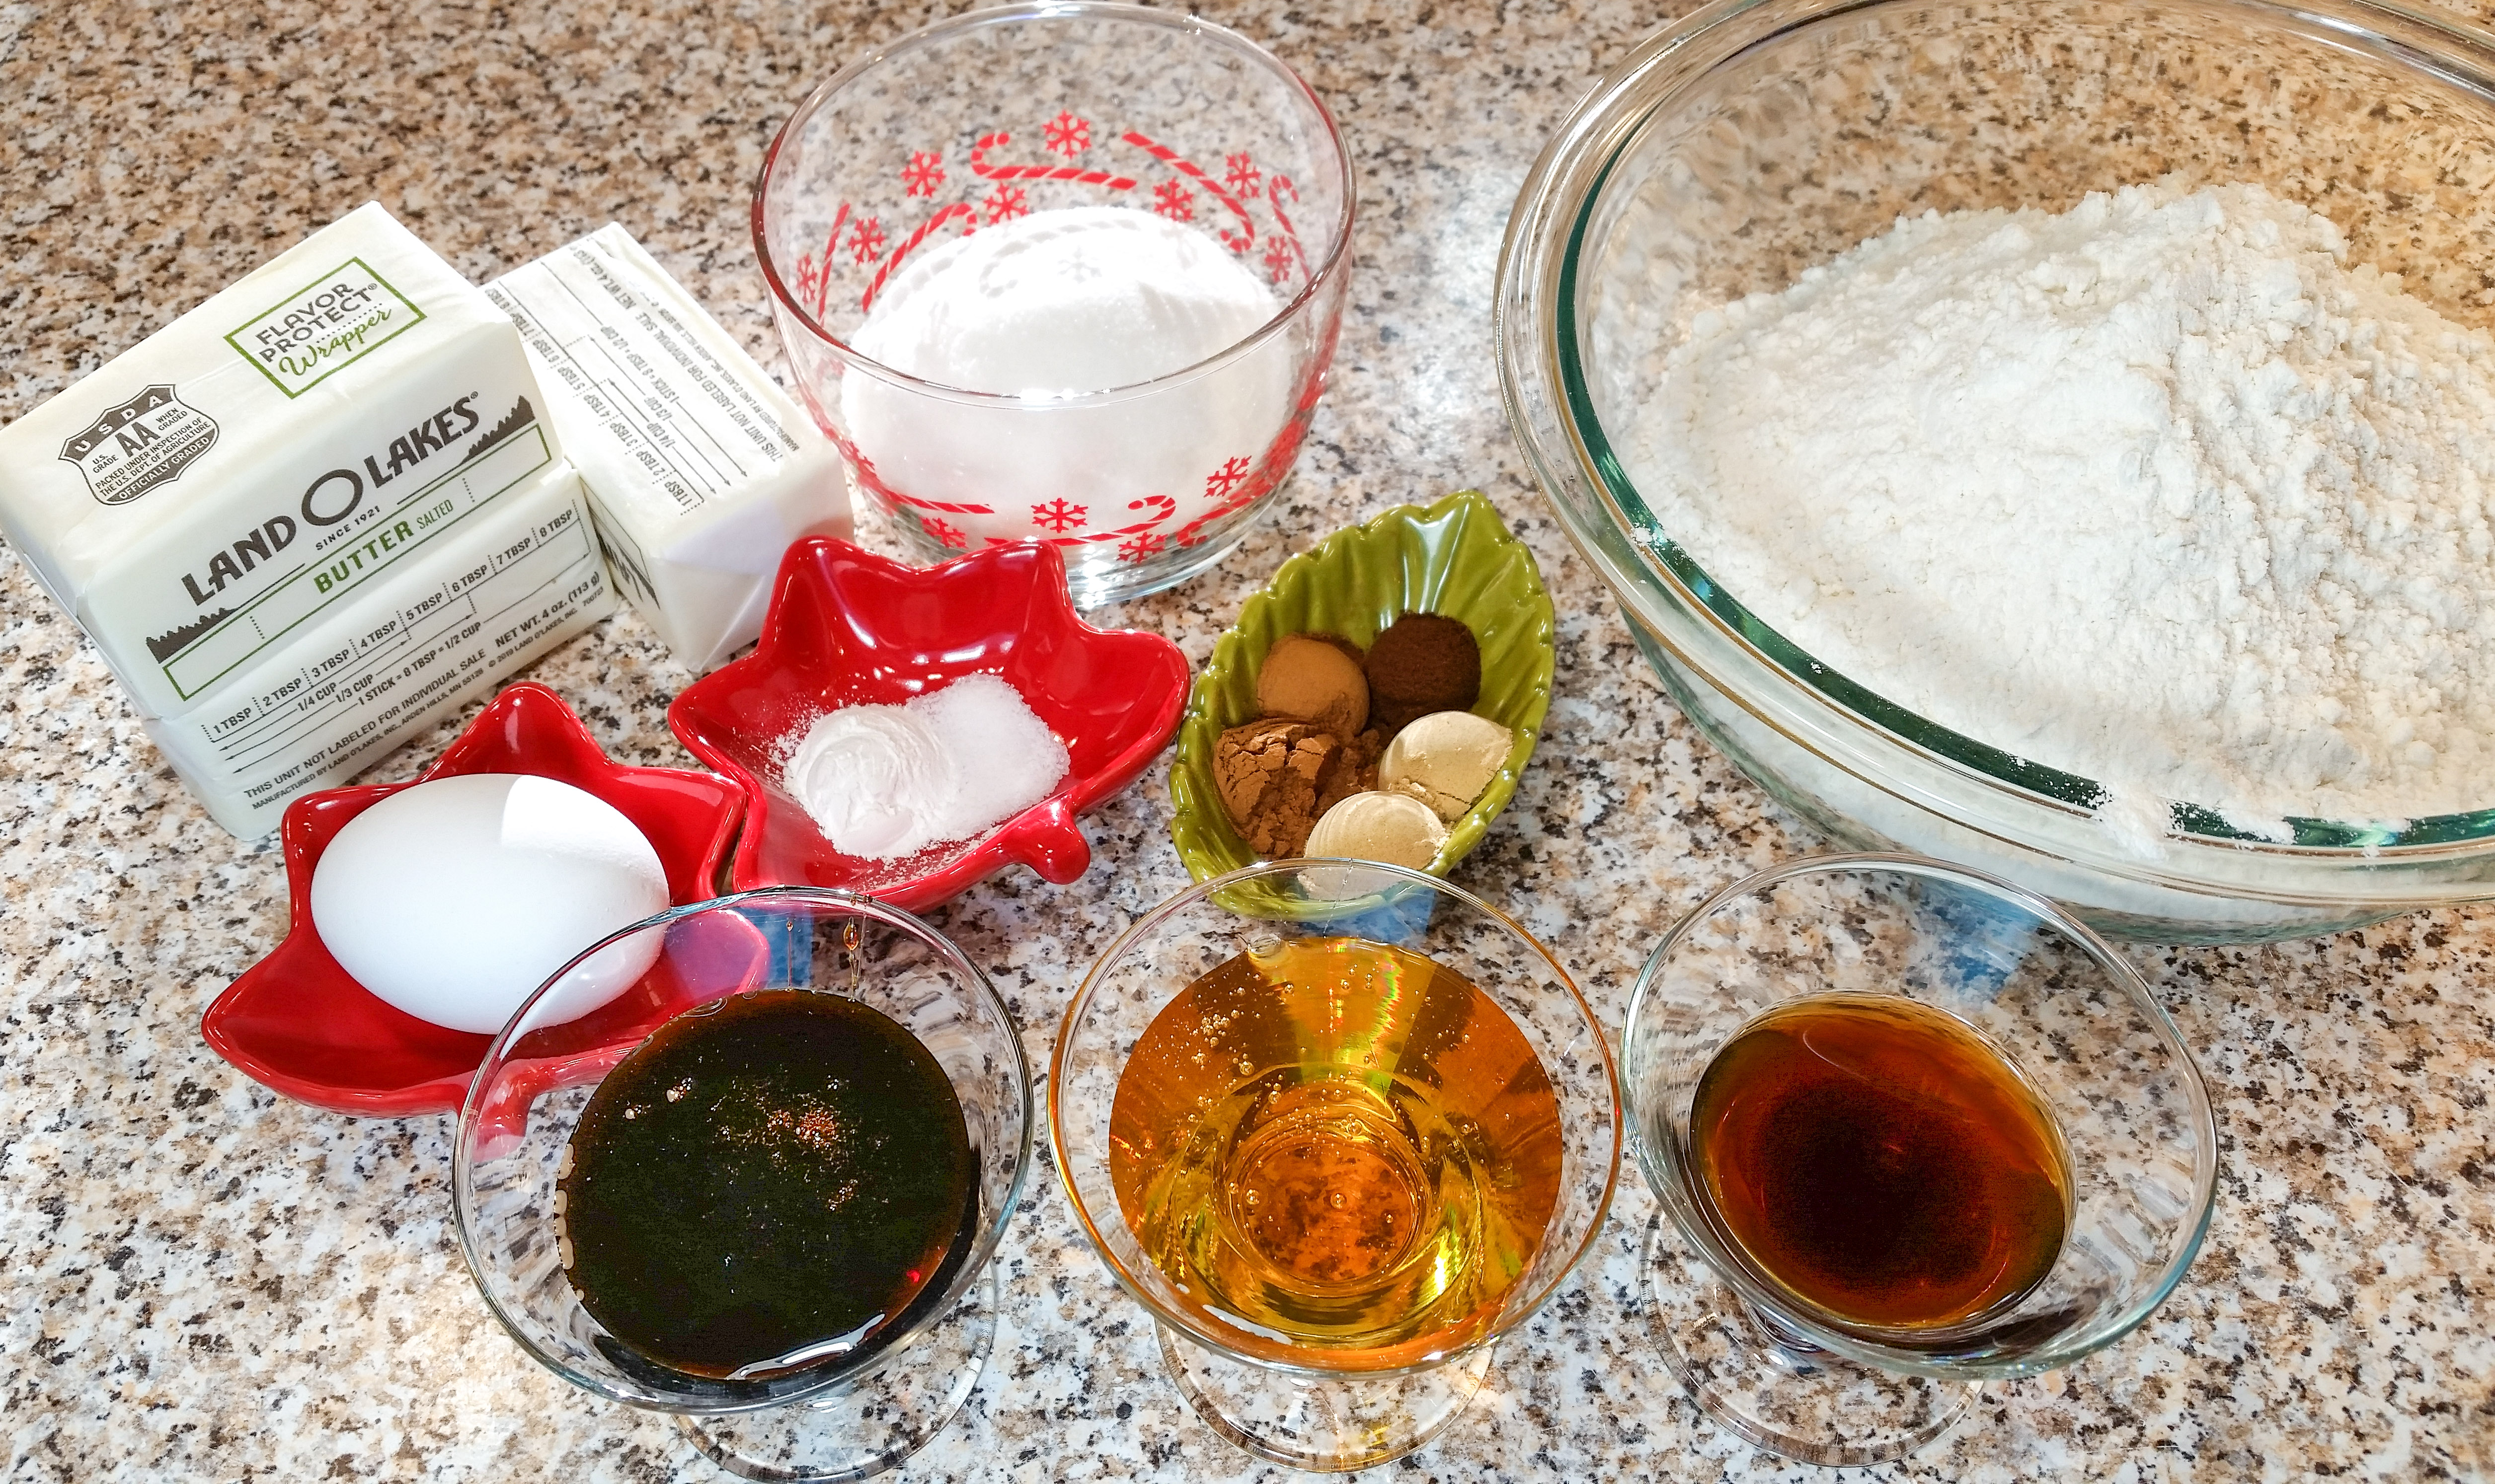
1 ½ cups (3 sticks) butter, softened (not melted) (I recommend Land O Lakes brand as I know it creams well. I have had trouble with some generic butters not creaming properly and making the dough hard to press)
½ cup sugar
3 Tablespoons honey
2 Tablespoons plus 1 teaspoon molasses
1 ½ Tablespoons vanilla
1 egg
3 ¾ cups flour
¼ teaspoon salt
¾ teaspoon baking powder
1 ½ teaspoons cinnamon
½ teaspoon cloves
2 teaspoons ginger
Note: For a gluten-free option simply replace the flour with a 1:1 substitute like King Arthur’s Gluten Free Measure for Measure.
Thinner buttercream recipe for decorating.
½ cup (1 stick) butter, softened (not melted)
2 1/4 cups powdered sugar
1 teaspoon vanilla extract
2 Tablespoons heavy cream
Here is the thick version for centers of sandwich cookies:
Ultra-decadent stuffing
½ cup (1 stick) butter, softened (not melted)
1 teaspoon vanilla
2 Tablespoons heavy cream
1/8 teaspoon salt (optional)
3 ½ cups powdered sugar
Preheat oven to 400°F.
Gather your ingredients
In a medium bowl, combine the flour, cinnamon, cloves, ginger, baking powder and salt and set aside.
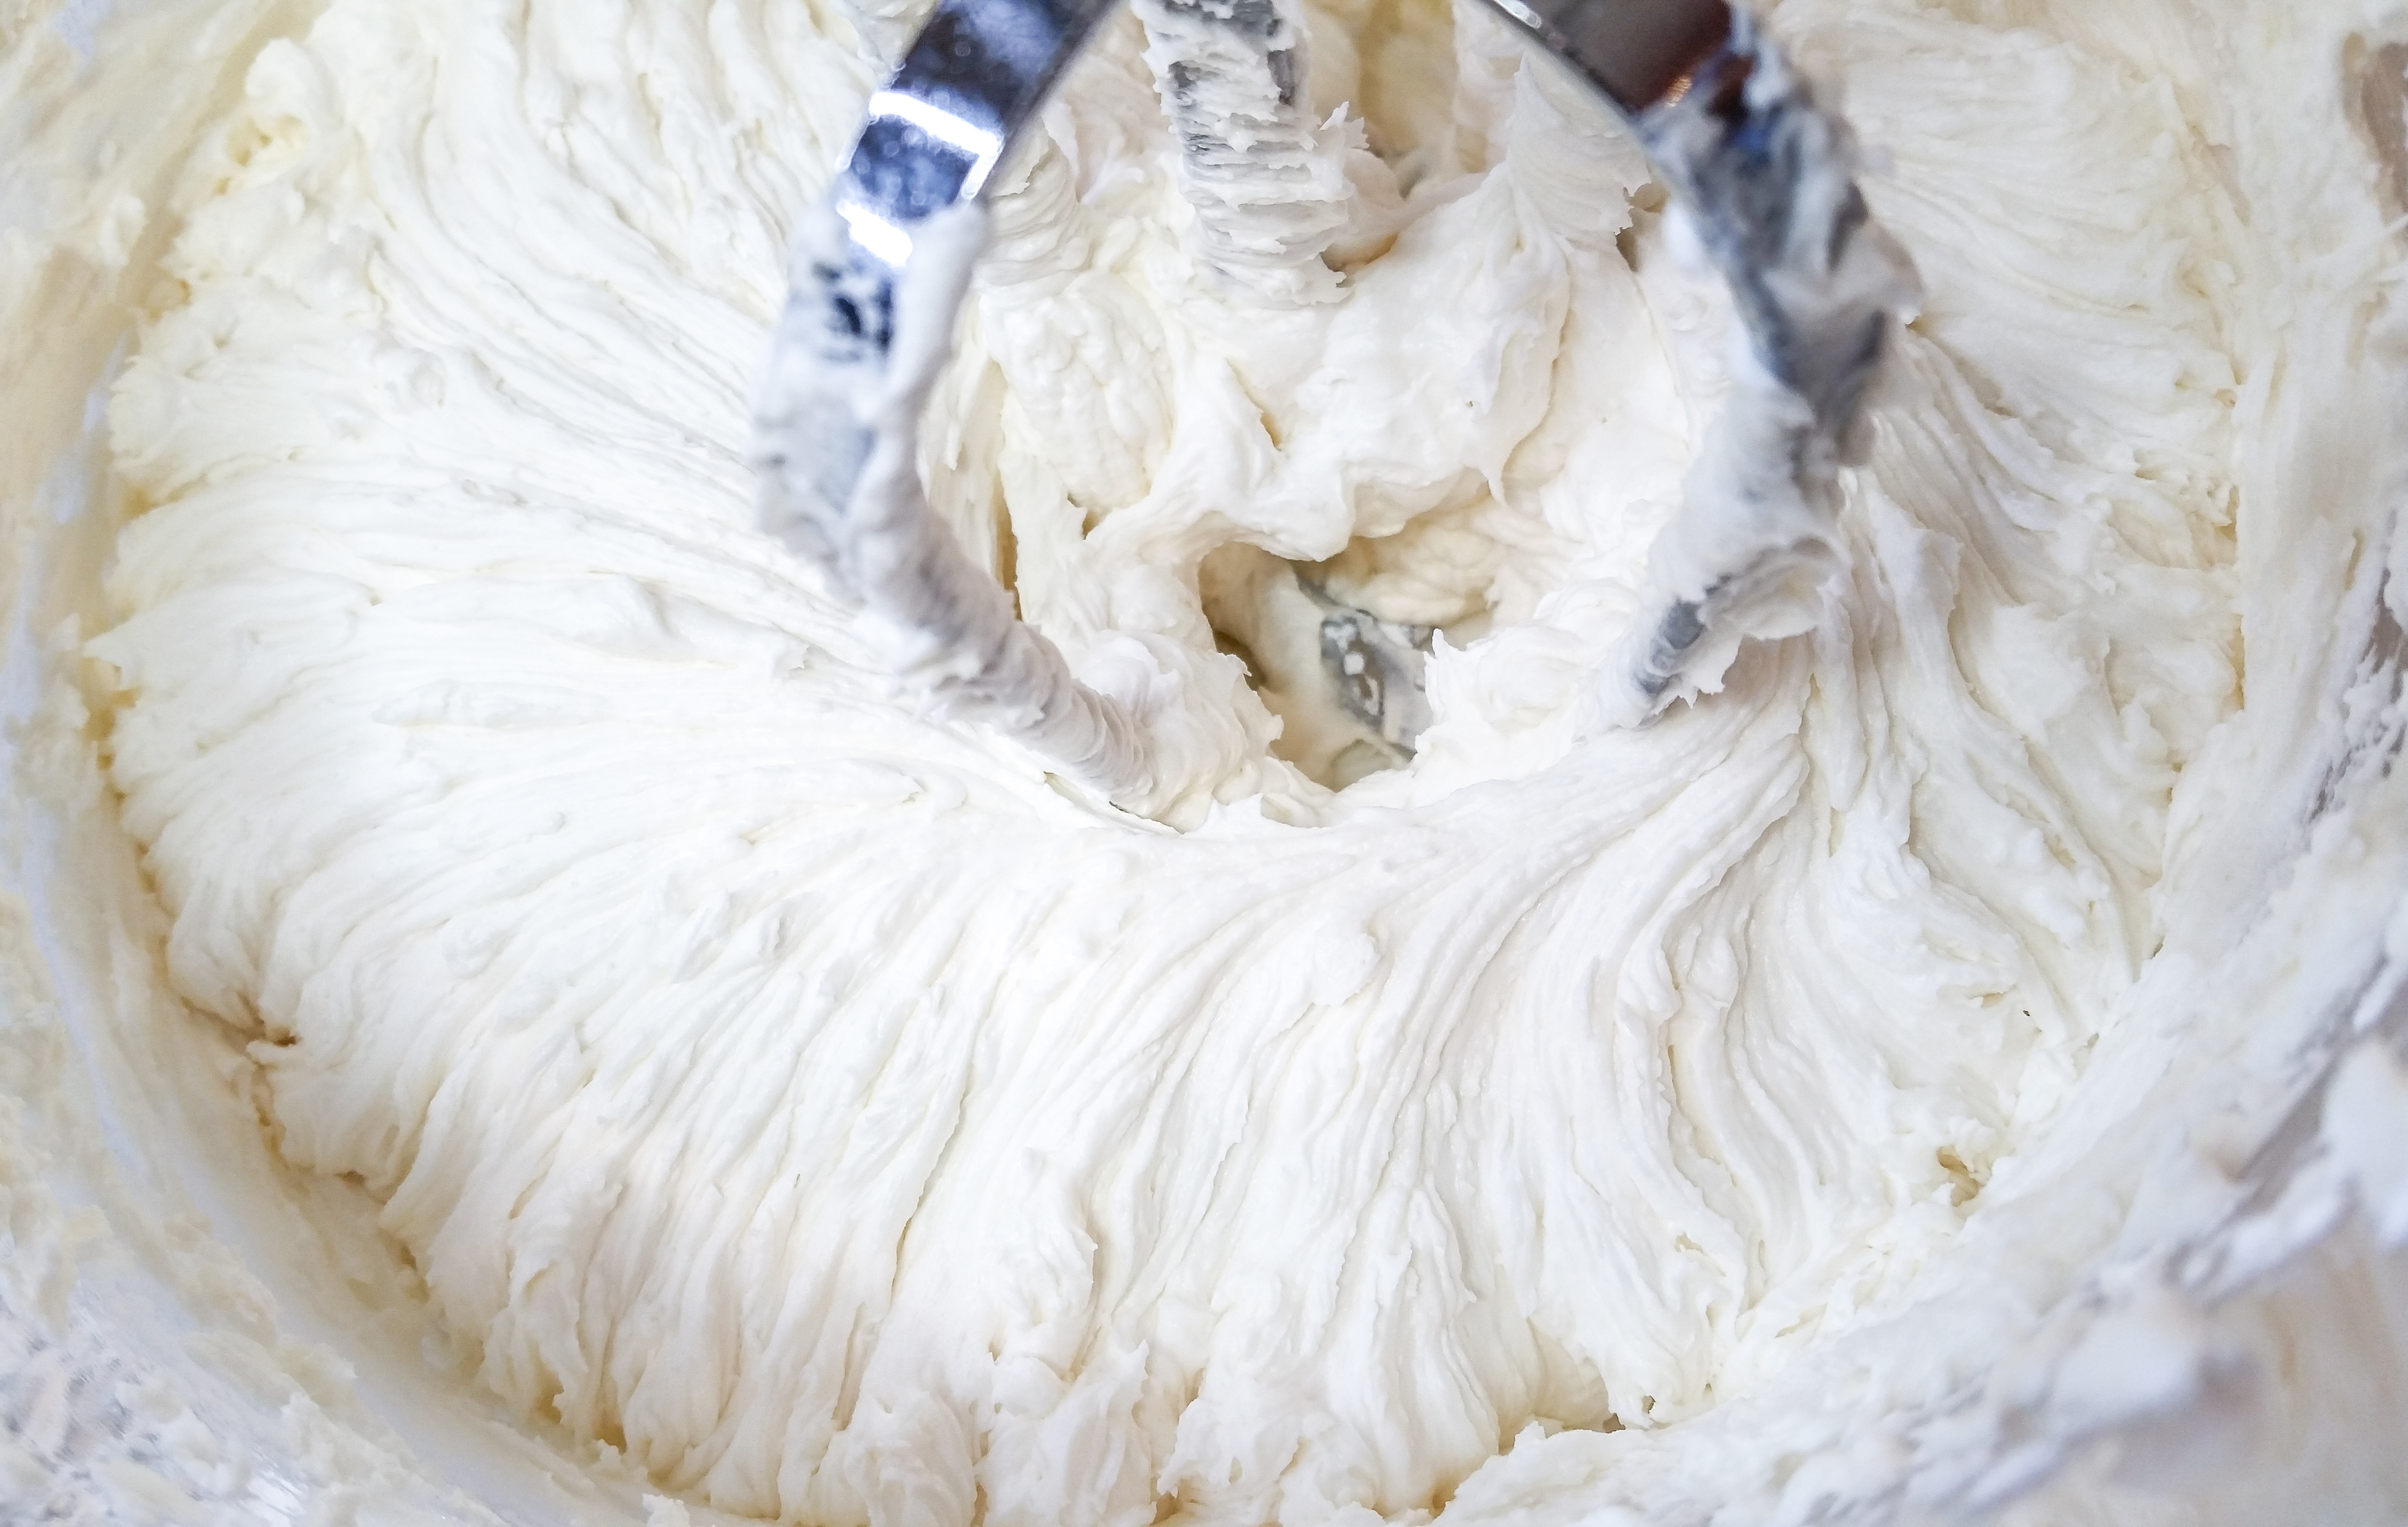
Using an electric mixer, cream the butter very well. I am admittedly rather repetitive about this, but it’s the thing I stress the most about making spritz cookies. Set that mixer on the highest setting and pretend you’re making frosting.
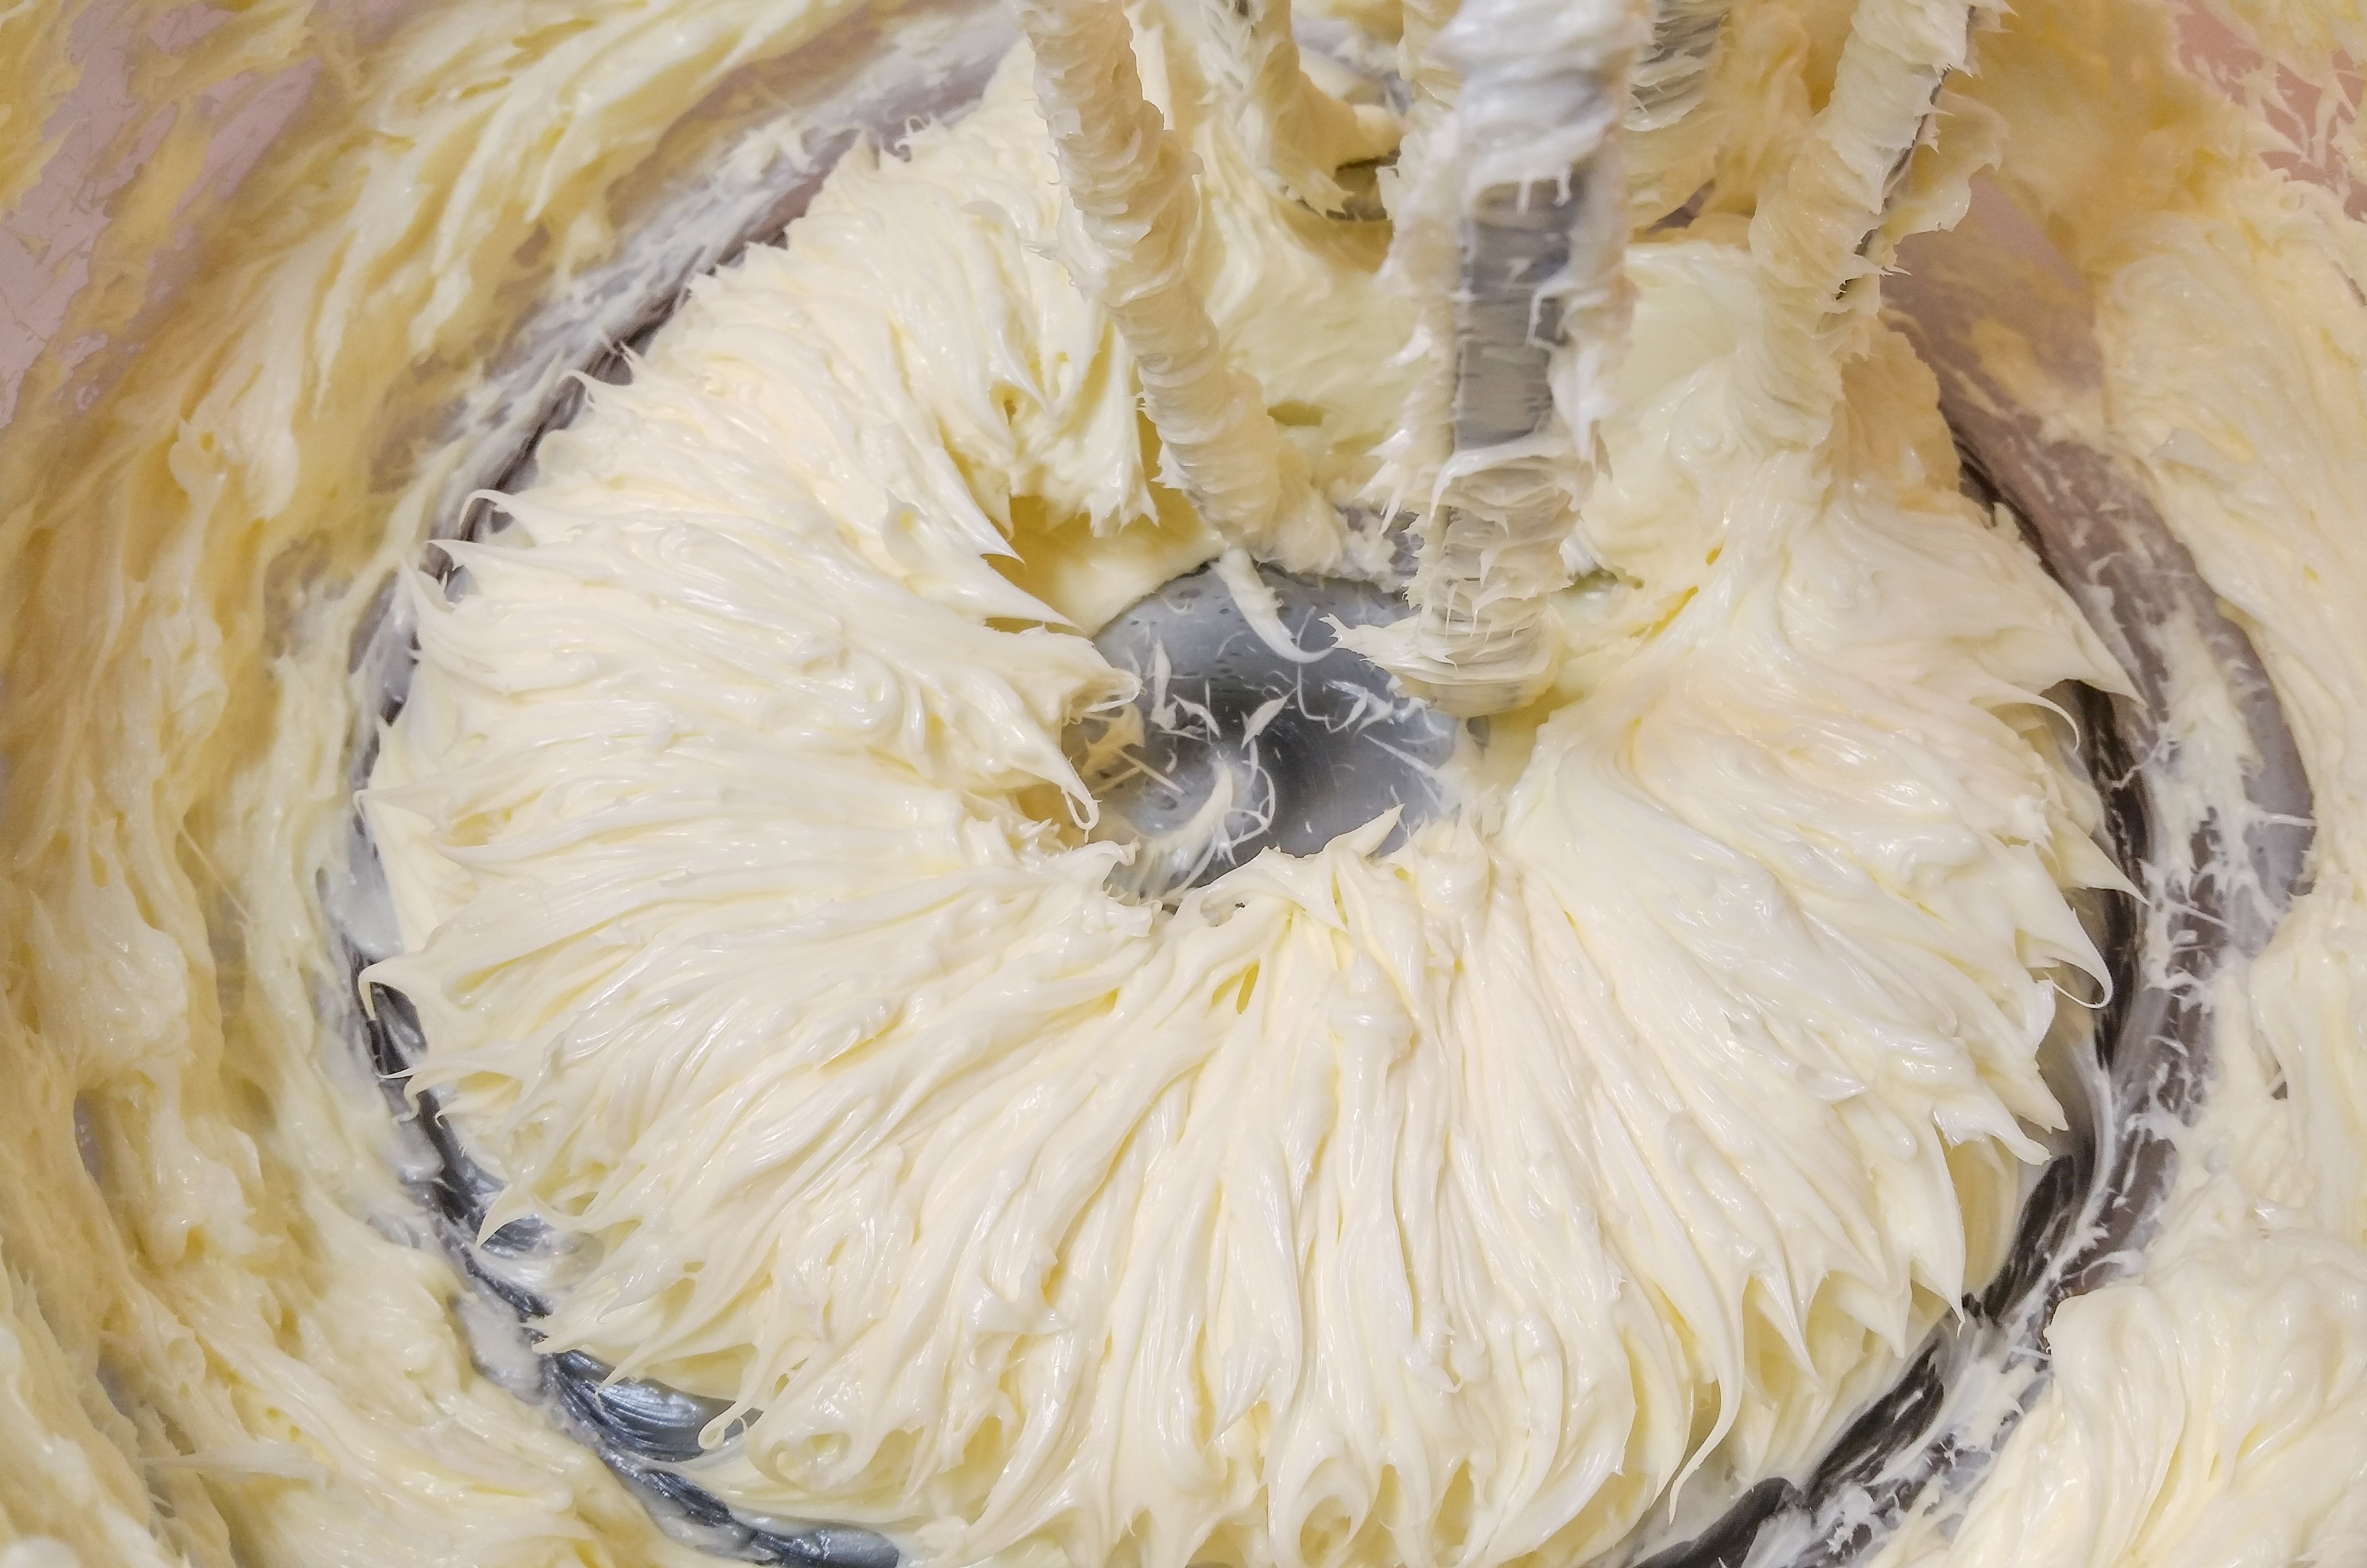
Add the sugar and whip it well until you have a fluffy mixture. Add the honey, molasses, then vanilla and egg. Beat well until light and fluffy. It’s pretty when you add the molasses!

Slowly add the flour mixture on low speed. Mix until the flour is completely incorporated and you have a consistent texture.
Remember you can troubleshoot any dough by adding flour a tablespoon at a time to overly soft dough, or adding vanilla a teaspoon at a time to overly stiff dough. I added 1/2 teaspoon of vanilla to my dough the day I baked, as it was really dry in the house and my dough was just a little too stiff to press. Perfect spritz dough has a soft malleable texture that is not too sticky or too stiff.
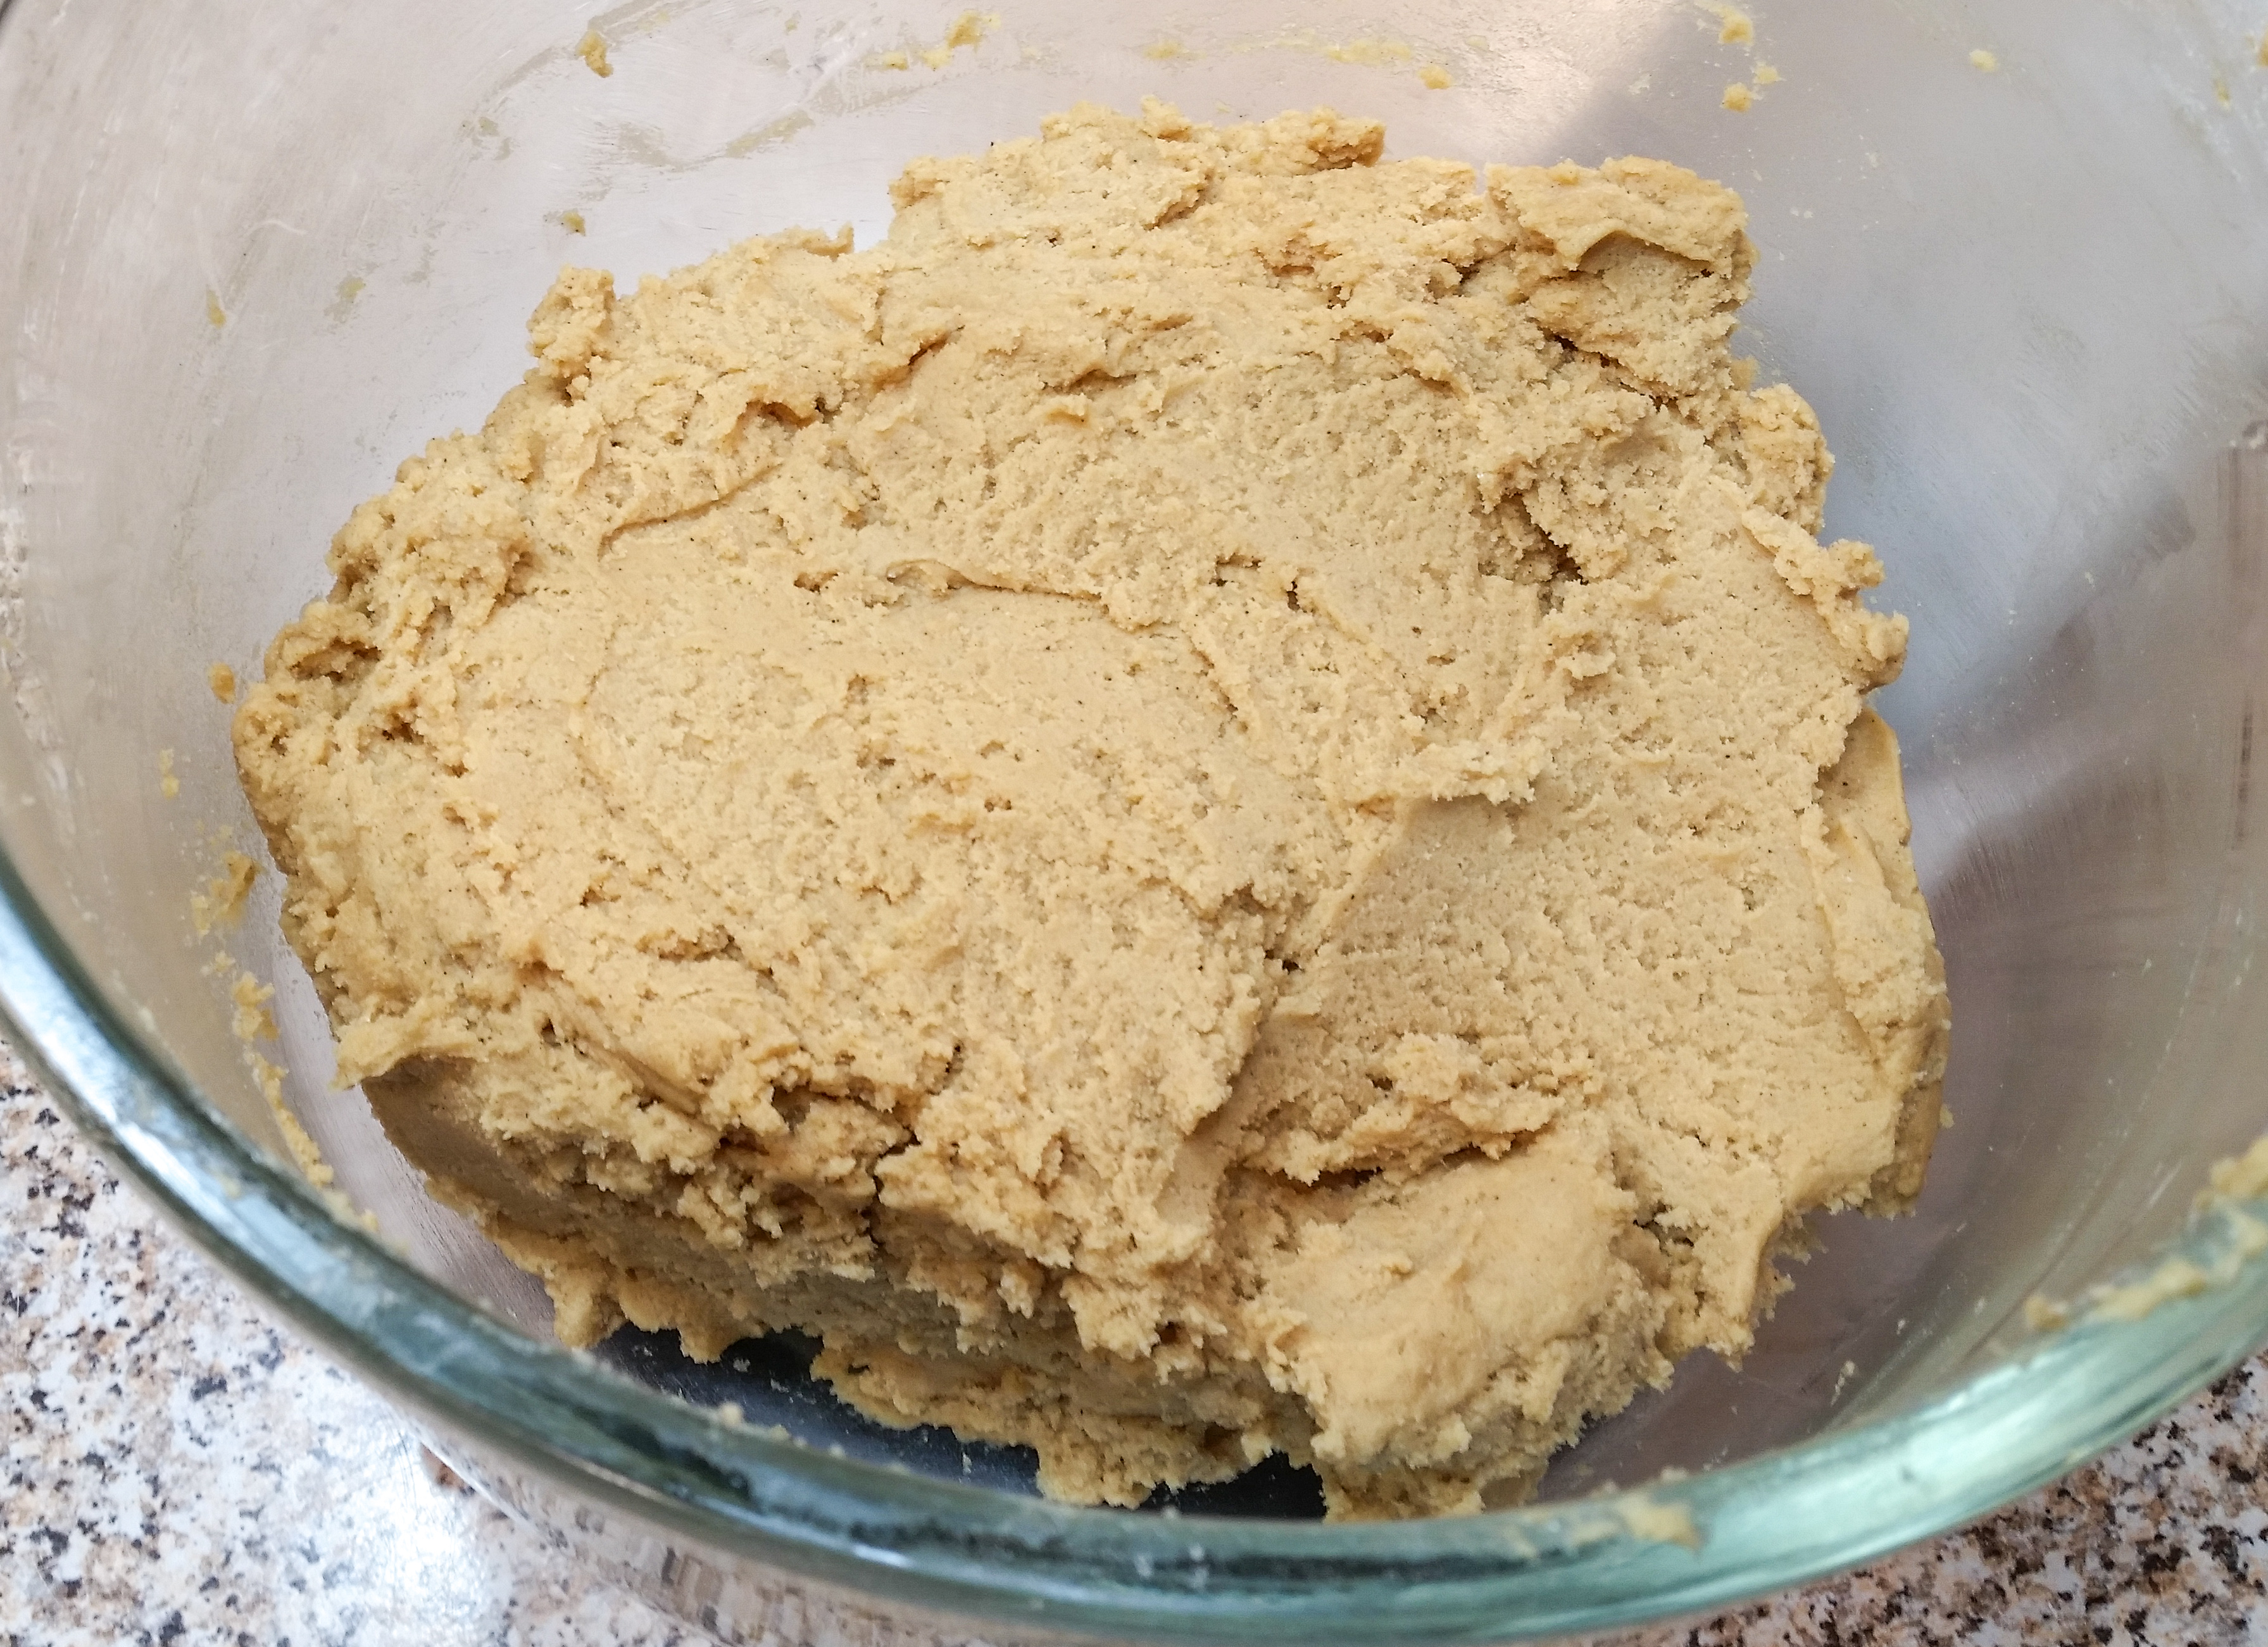
Spritz dough has a beautiful breakable texture. It is workable in your hands but it breaks nicely as you press it. If you’re new to this watch any of my videos to see how it should look and feel.
Get your disks and pack your dough into your cookie press barrel, using the back of a spoon to press the air bubbles out. This helps create consistent pressure to press with.
Place the disk in the bottom ring, attach to your press, and start pressing onto an un-greased cookie sheet. Use a consistent rhythm to keep the shapes a uniform size. It’s not at all uncommon for your first few cookies to be mis-shaped, as pressure needs to build in the barrel to make consistent shapes. It’s totally ok! Just throw them back in the bowl to be re-pressed. If you’re still having trouble pressing (mis-shaped cookies, trouble sticking to the pan, etc.) press one cookie into the air and wipe it off and toss back into the bowl to re-set your pressure in the press. You can also refrigerate your cookie sheets for 5 minutes if sticking is an issue. (There are more troubleshooting tips on the Troubleshooting and Decorating Tips page- see the top menu on the homepage. 🙂 )
A quick tip on pressing, especially for the delicate, intricate snowflakes and the candy canes. Try to press them fairly small and precise. Don’t press big, detail-less blobs. I always say to think of your press as a dough pump. Whether it takes one click, half clicks, a click and a half, any type of press is just a mechanism for pumping out dough. See more tips on the website or in the videos on some of the posts here!
You may want to flatten the dough ridges on your Gingerbread Boys and Girls and snowmen. Dip your fingertip in a little water and tap down the faces, side-to-side then straight down, then tap down their bodies to flatten. Same with the ridges on the snowman’s tummy. The ridges are a natural result of the pressing process and often give a nice, sharp, defined, three dimensional quality to pressed cookies, but gingerbread cookies are traditionally very flat- so feel free to flatten them to attain the look you want!
If you make the gift shapes, make sure you straighten the edges after pressing and before baking. The process of extruding the dough causes them to spread so simply straighten the sides and bottom with your finger or a knife. Quick & easy.
Bake for 6 to 10 minutes until the edges begin to brown. Check early and often as all ovens are different and spritz brown quickly. Let sit for 3 or 4 minutes before removing to cooling rack.
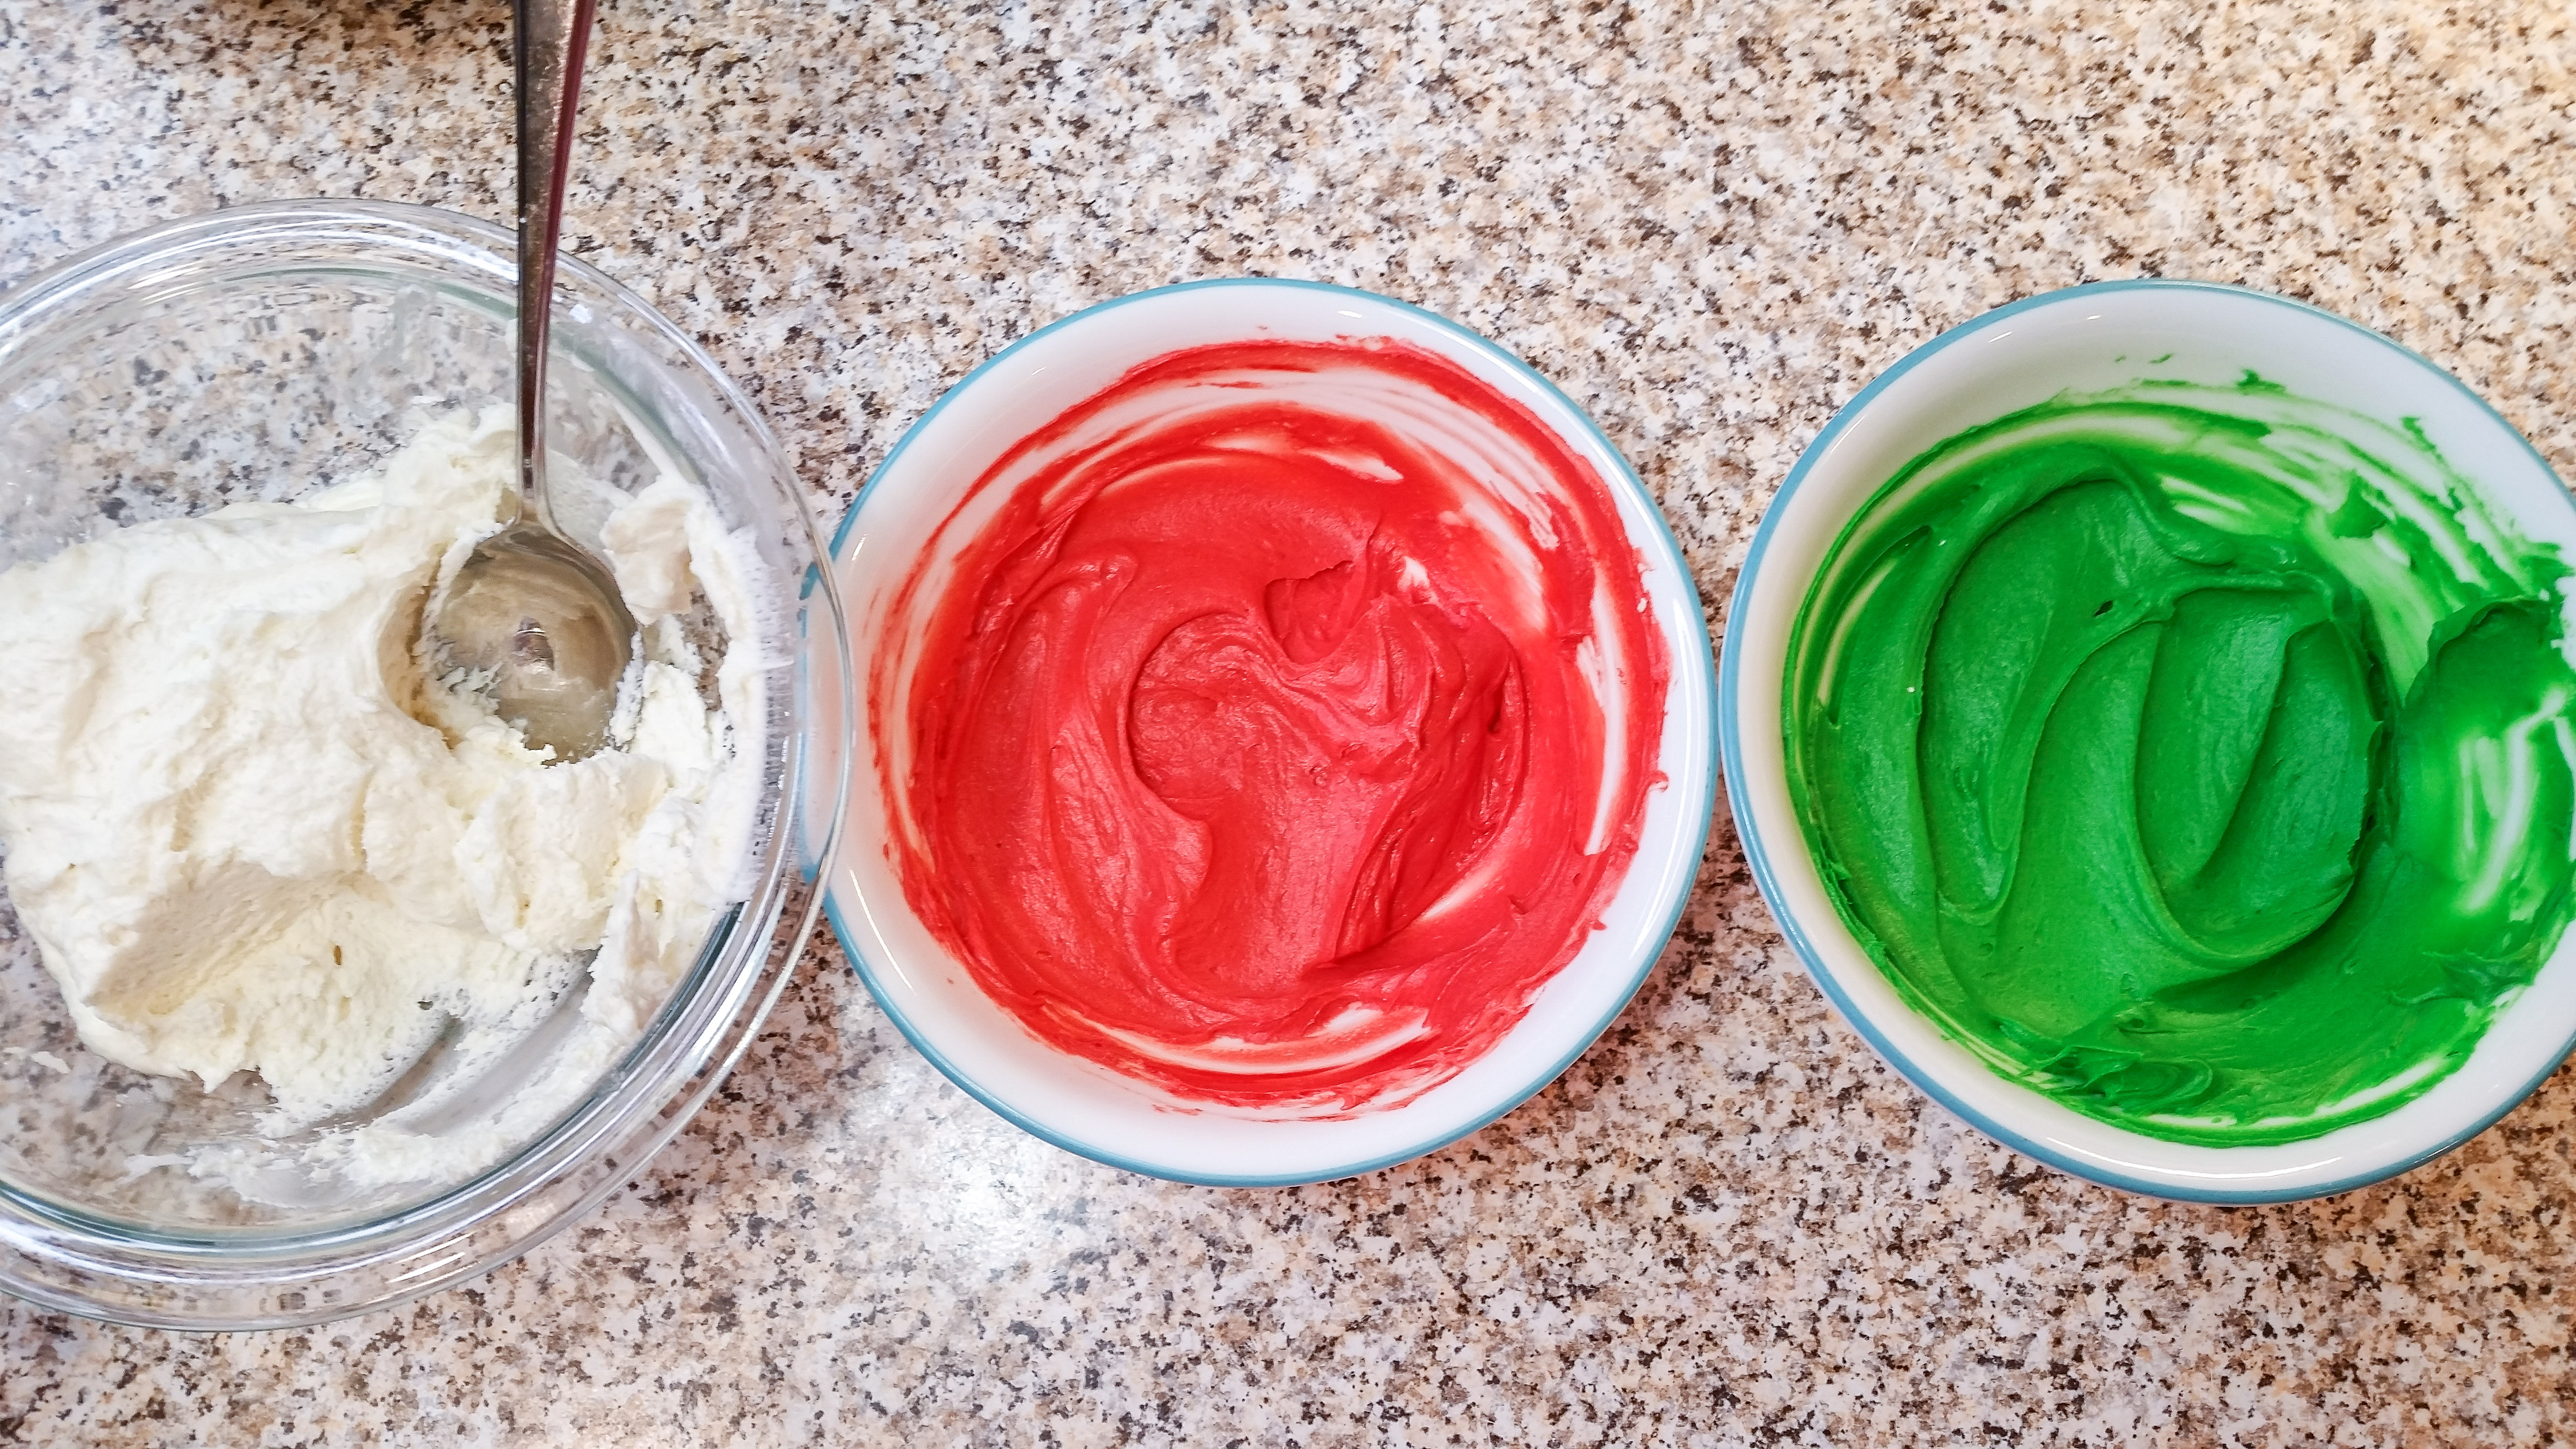
For the decorating I made my favorite decorating buttercream, tinted it red and green and made simple decorations using Wilton’s #2 round tip and the #16 star tip. You could just as easily use store-bought icing. If you’re doing my homemade recipe just combine all of the ingredients (listed above under the cookie ingredients) with an electric mixer.

Whip it and whip it until it is light and fluffy! I love a good fluffy buttercream. My kids always hover waiting for me to be done mixing so they can have the beaters and spatula. 😉
Use GEL food coloring (not gel icing, use gel food dye/coloring) to tint your icing. Liquid affects texture too much. I use a toothpick to add my color. Always start with a little bit- you can add more but you can’t take it away!
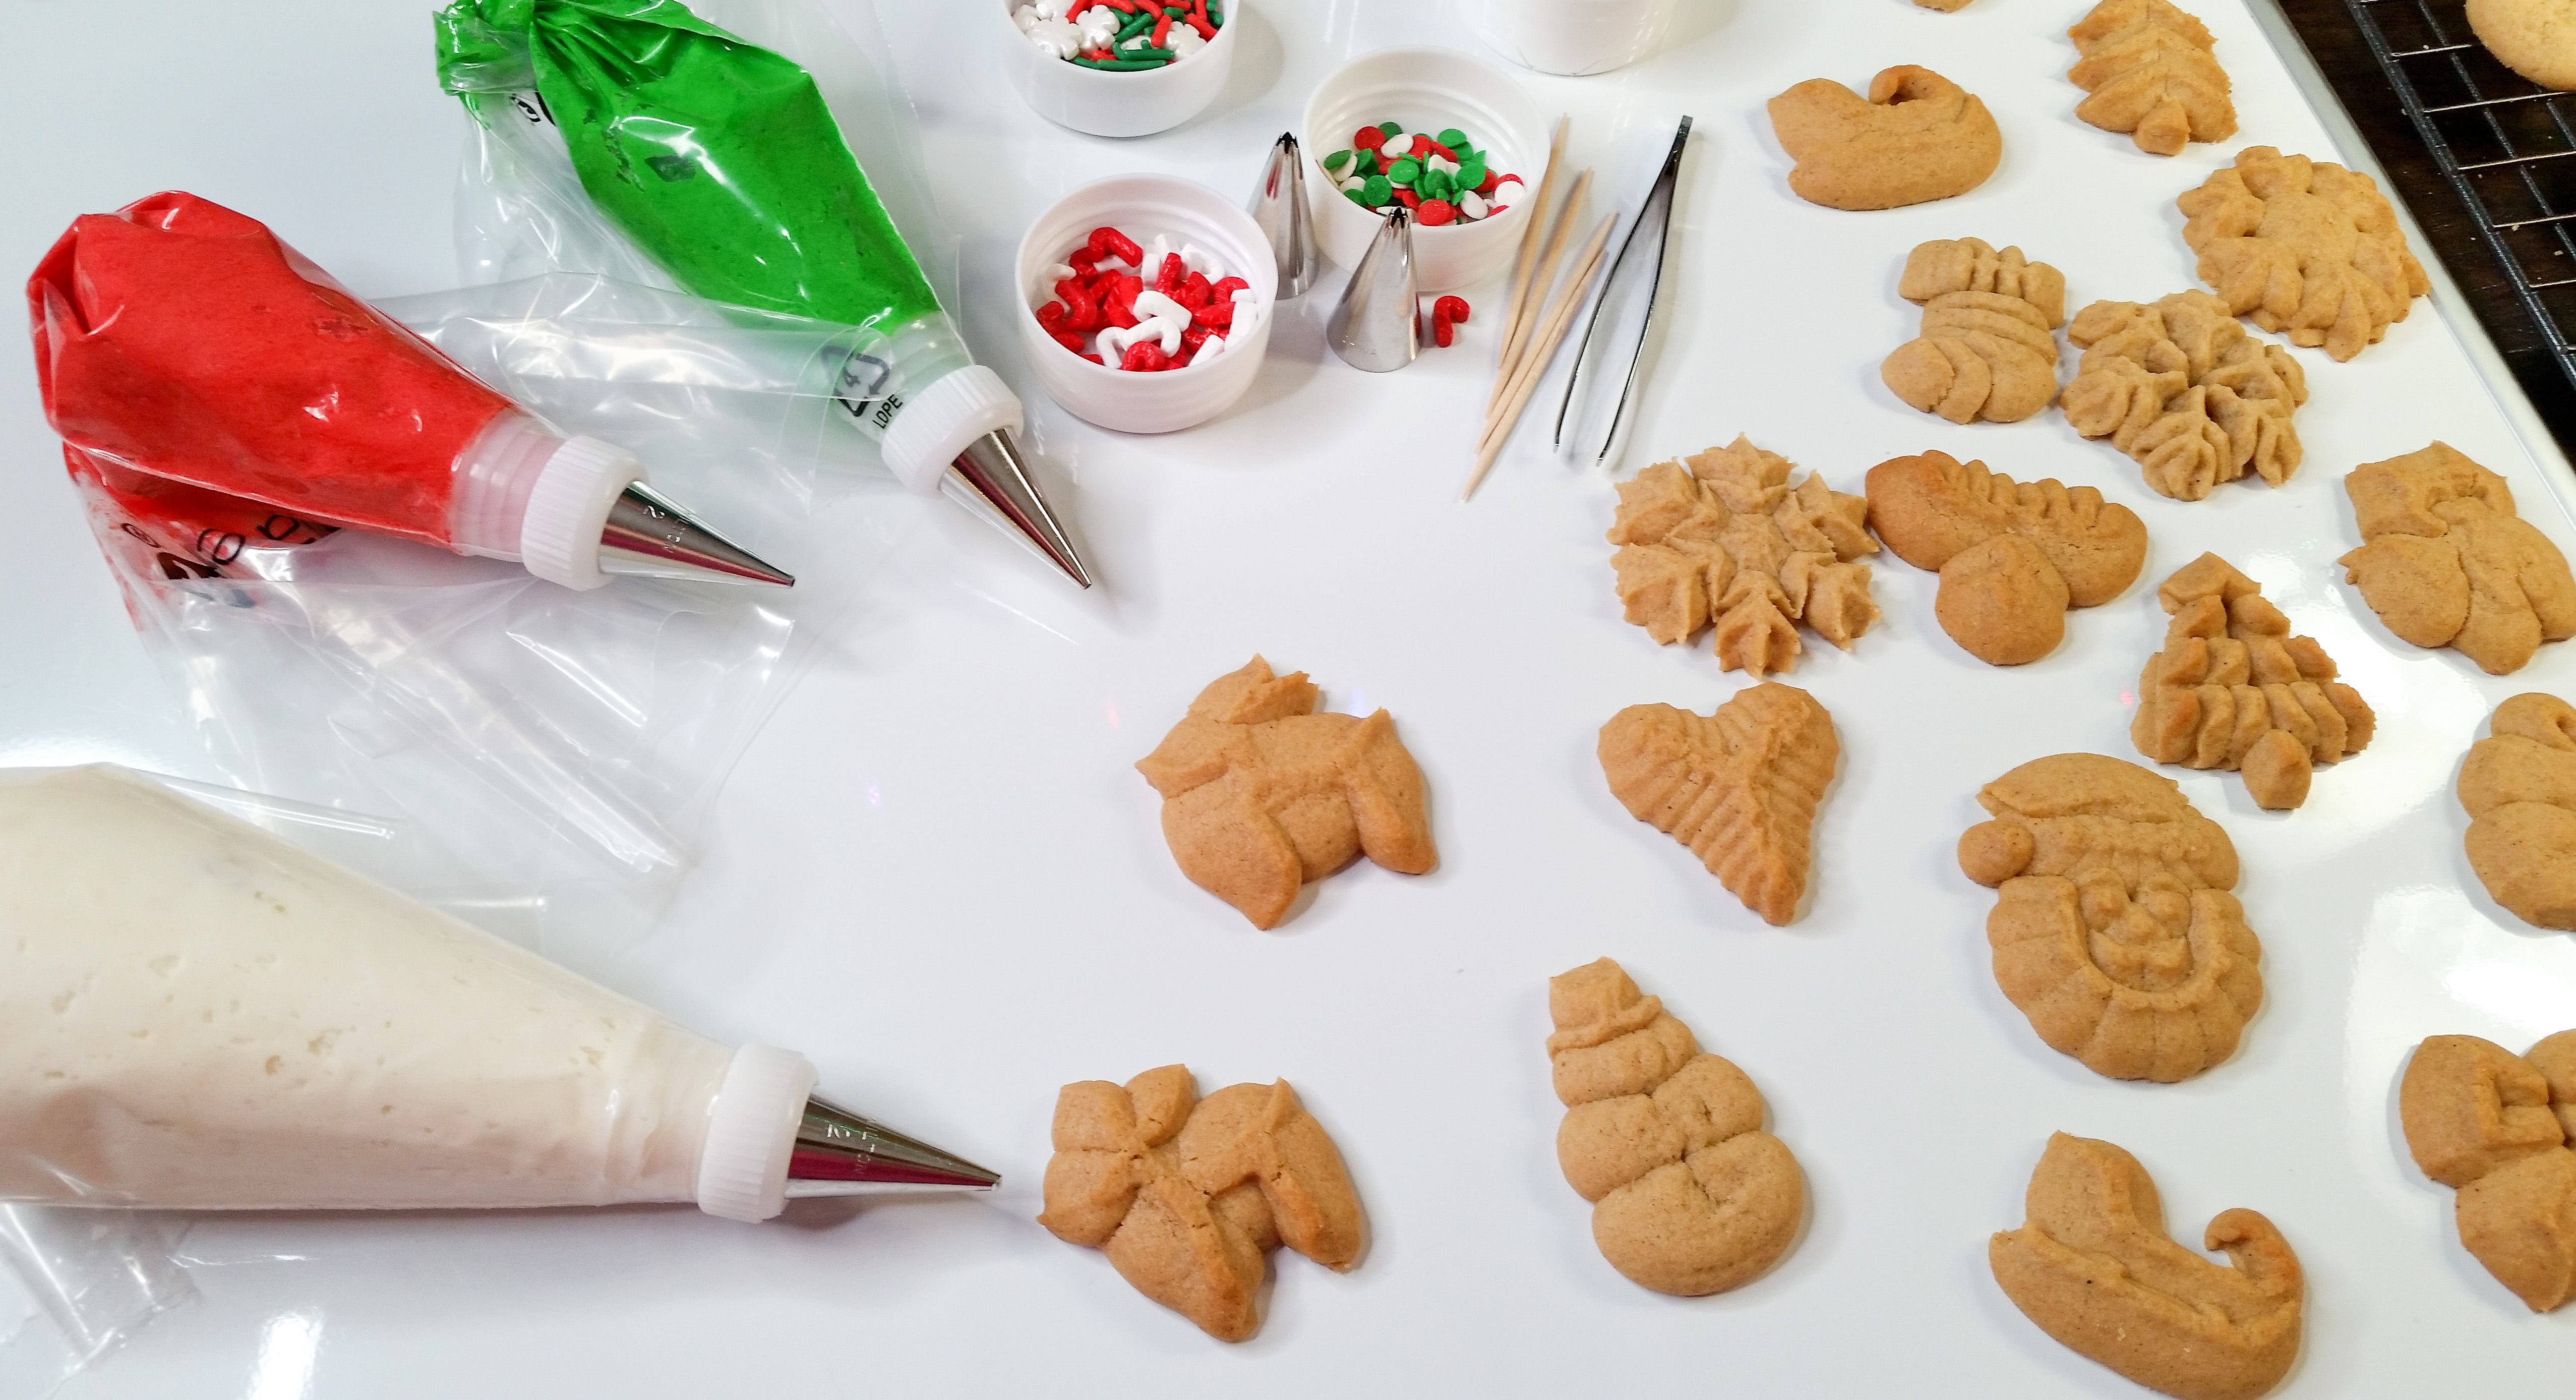
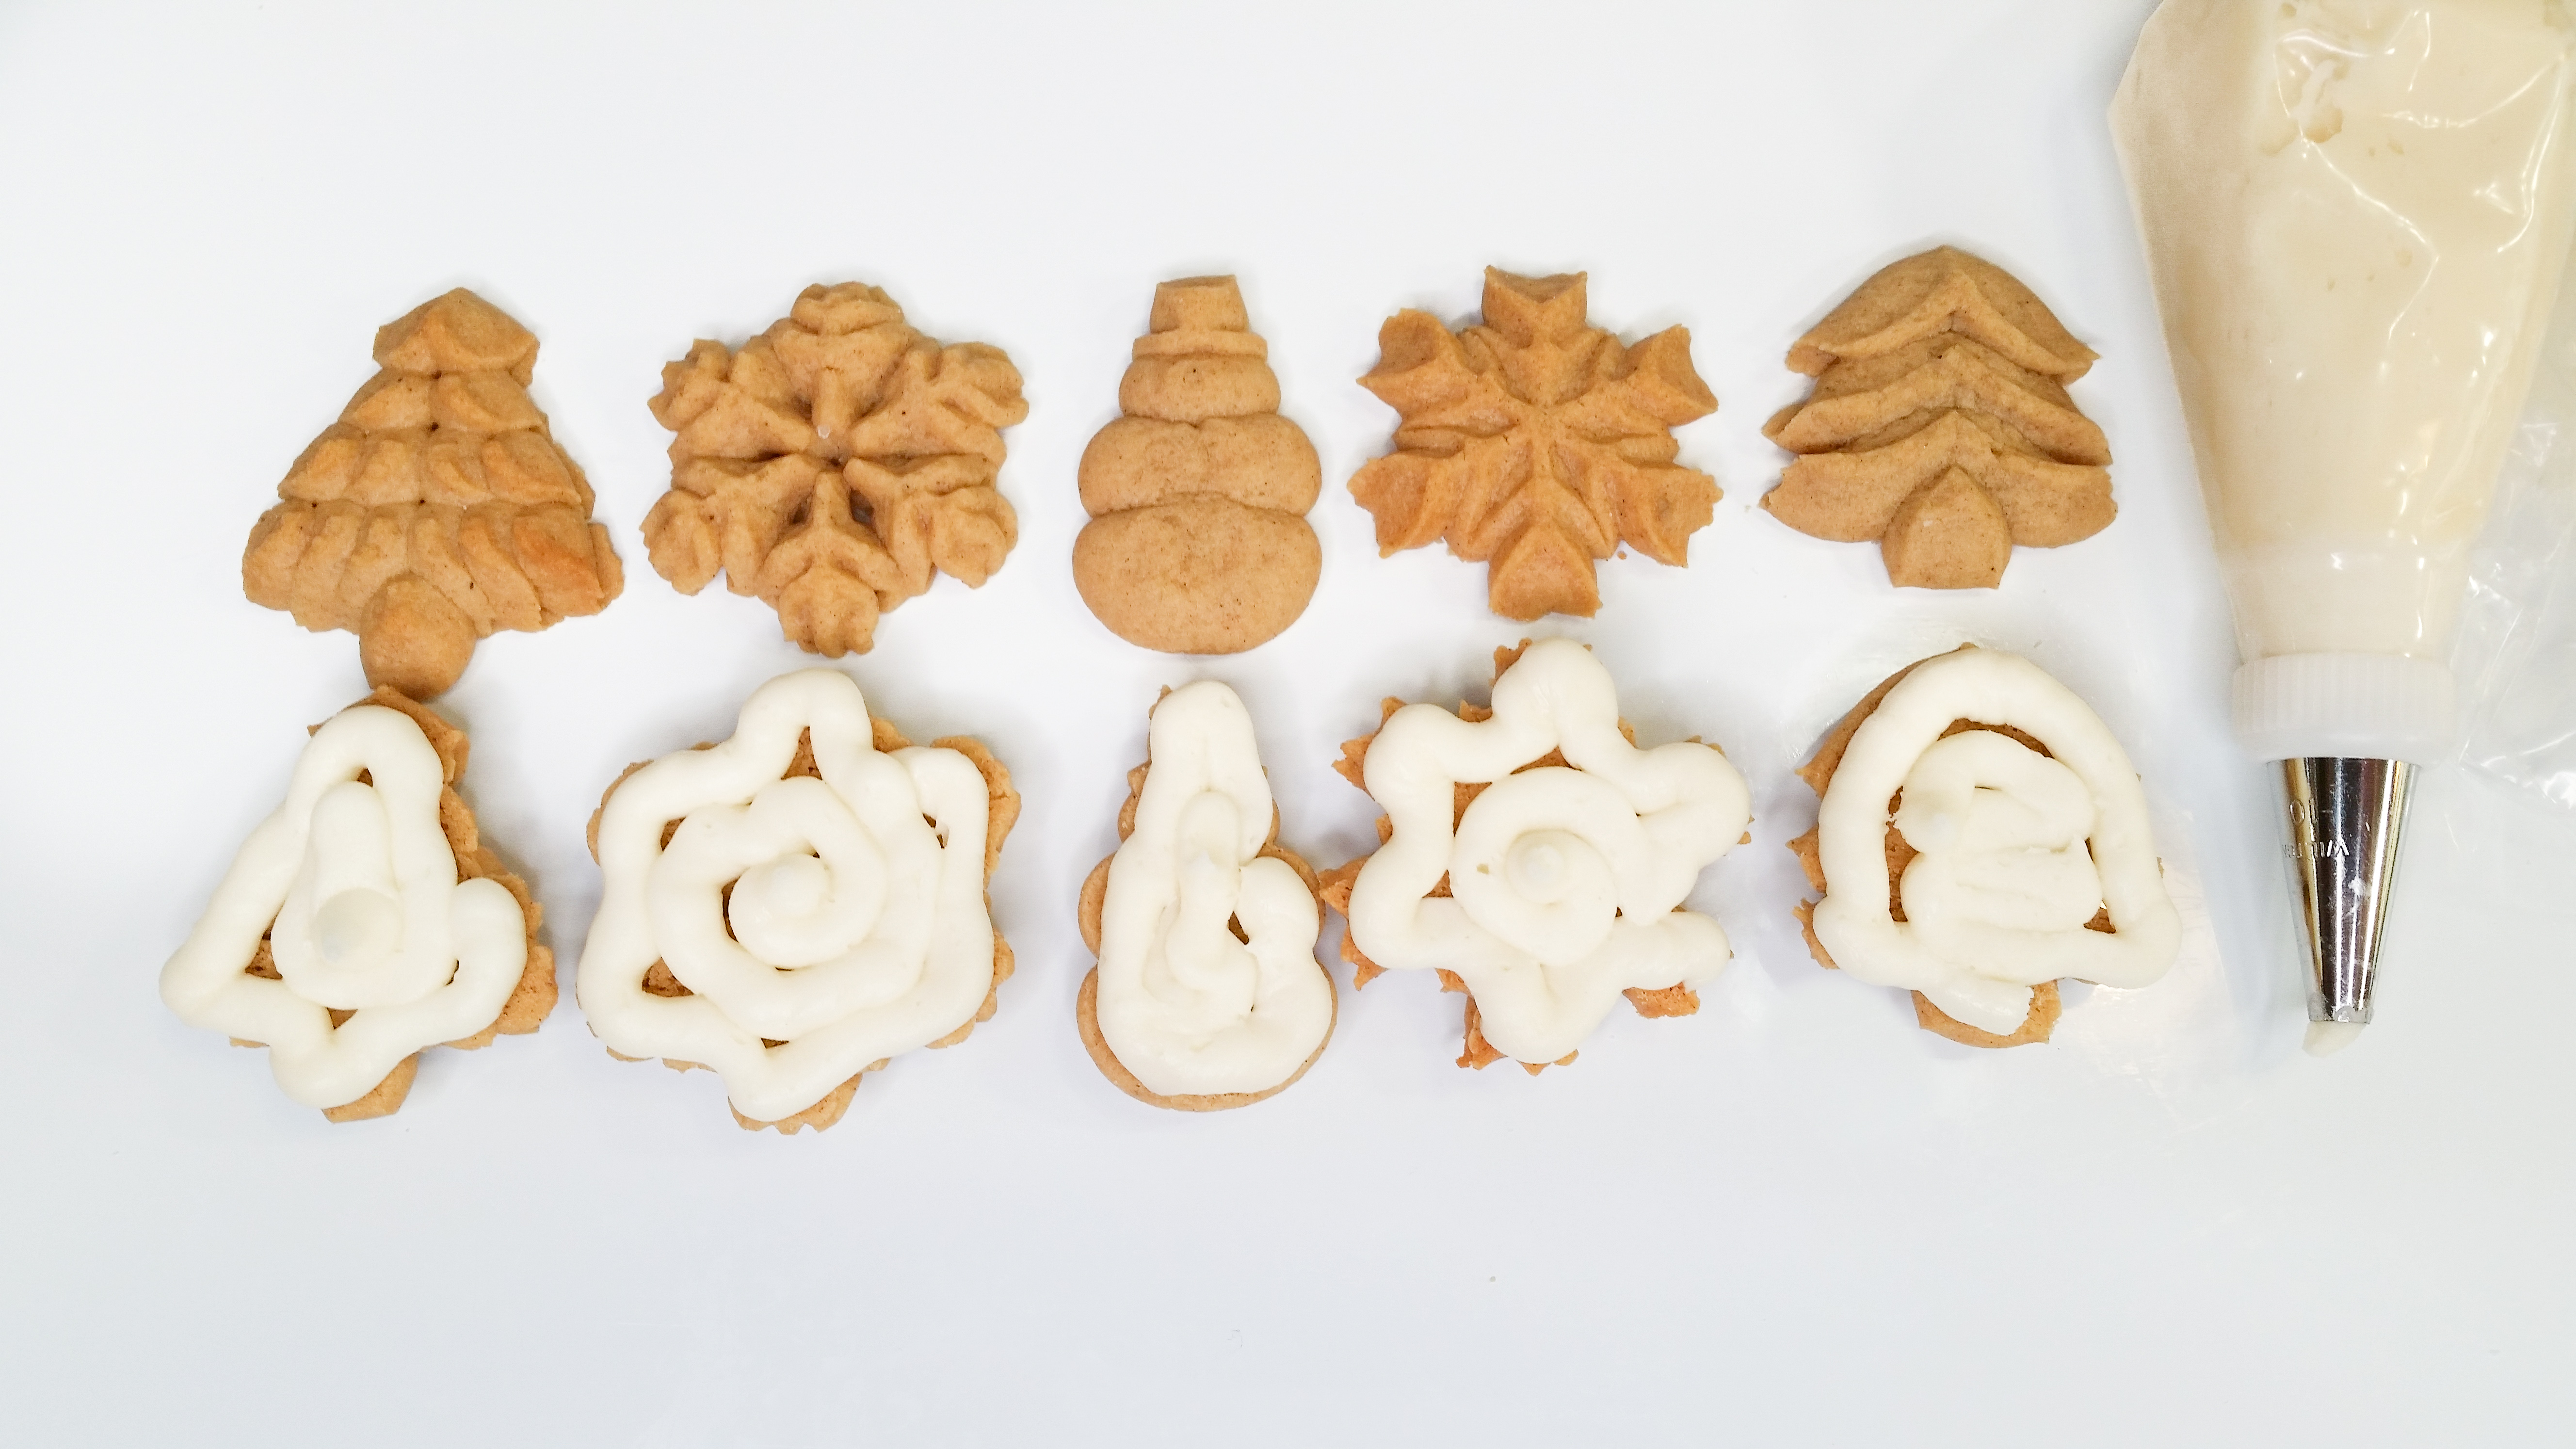
I winged it with the decorating patterns and kept it as simple as I could. Decorate these any old way you like! Here’s a few festive things I did to get your creative juices flowing.

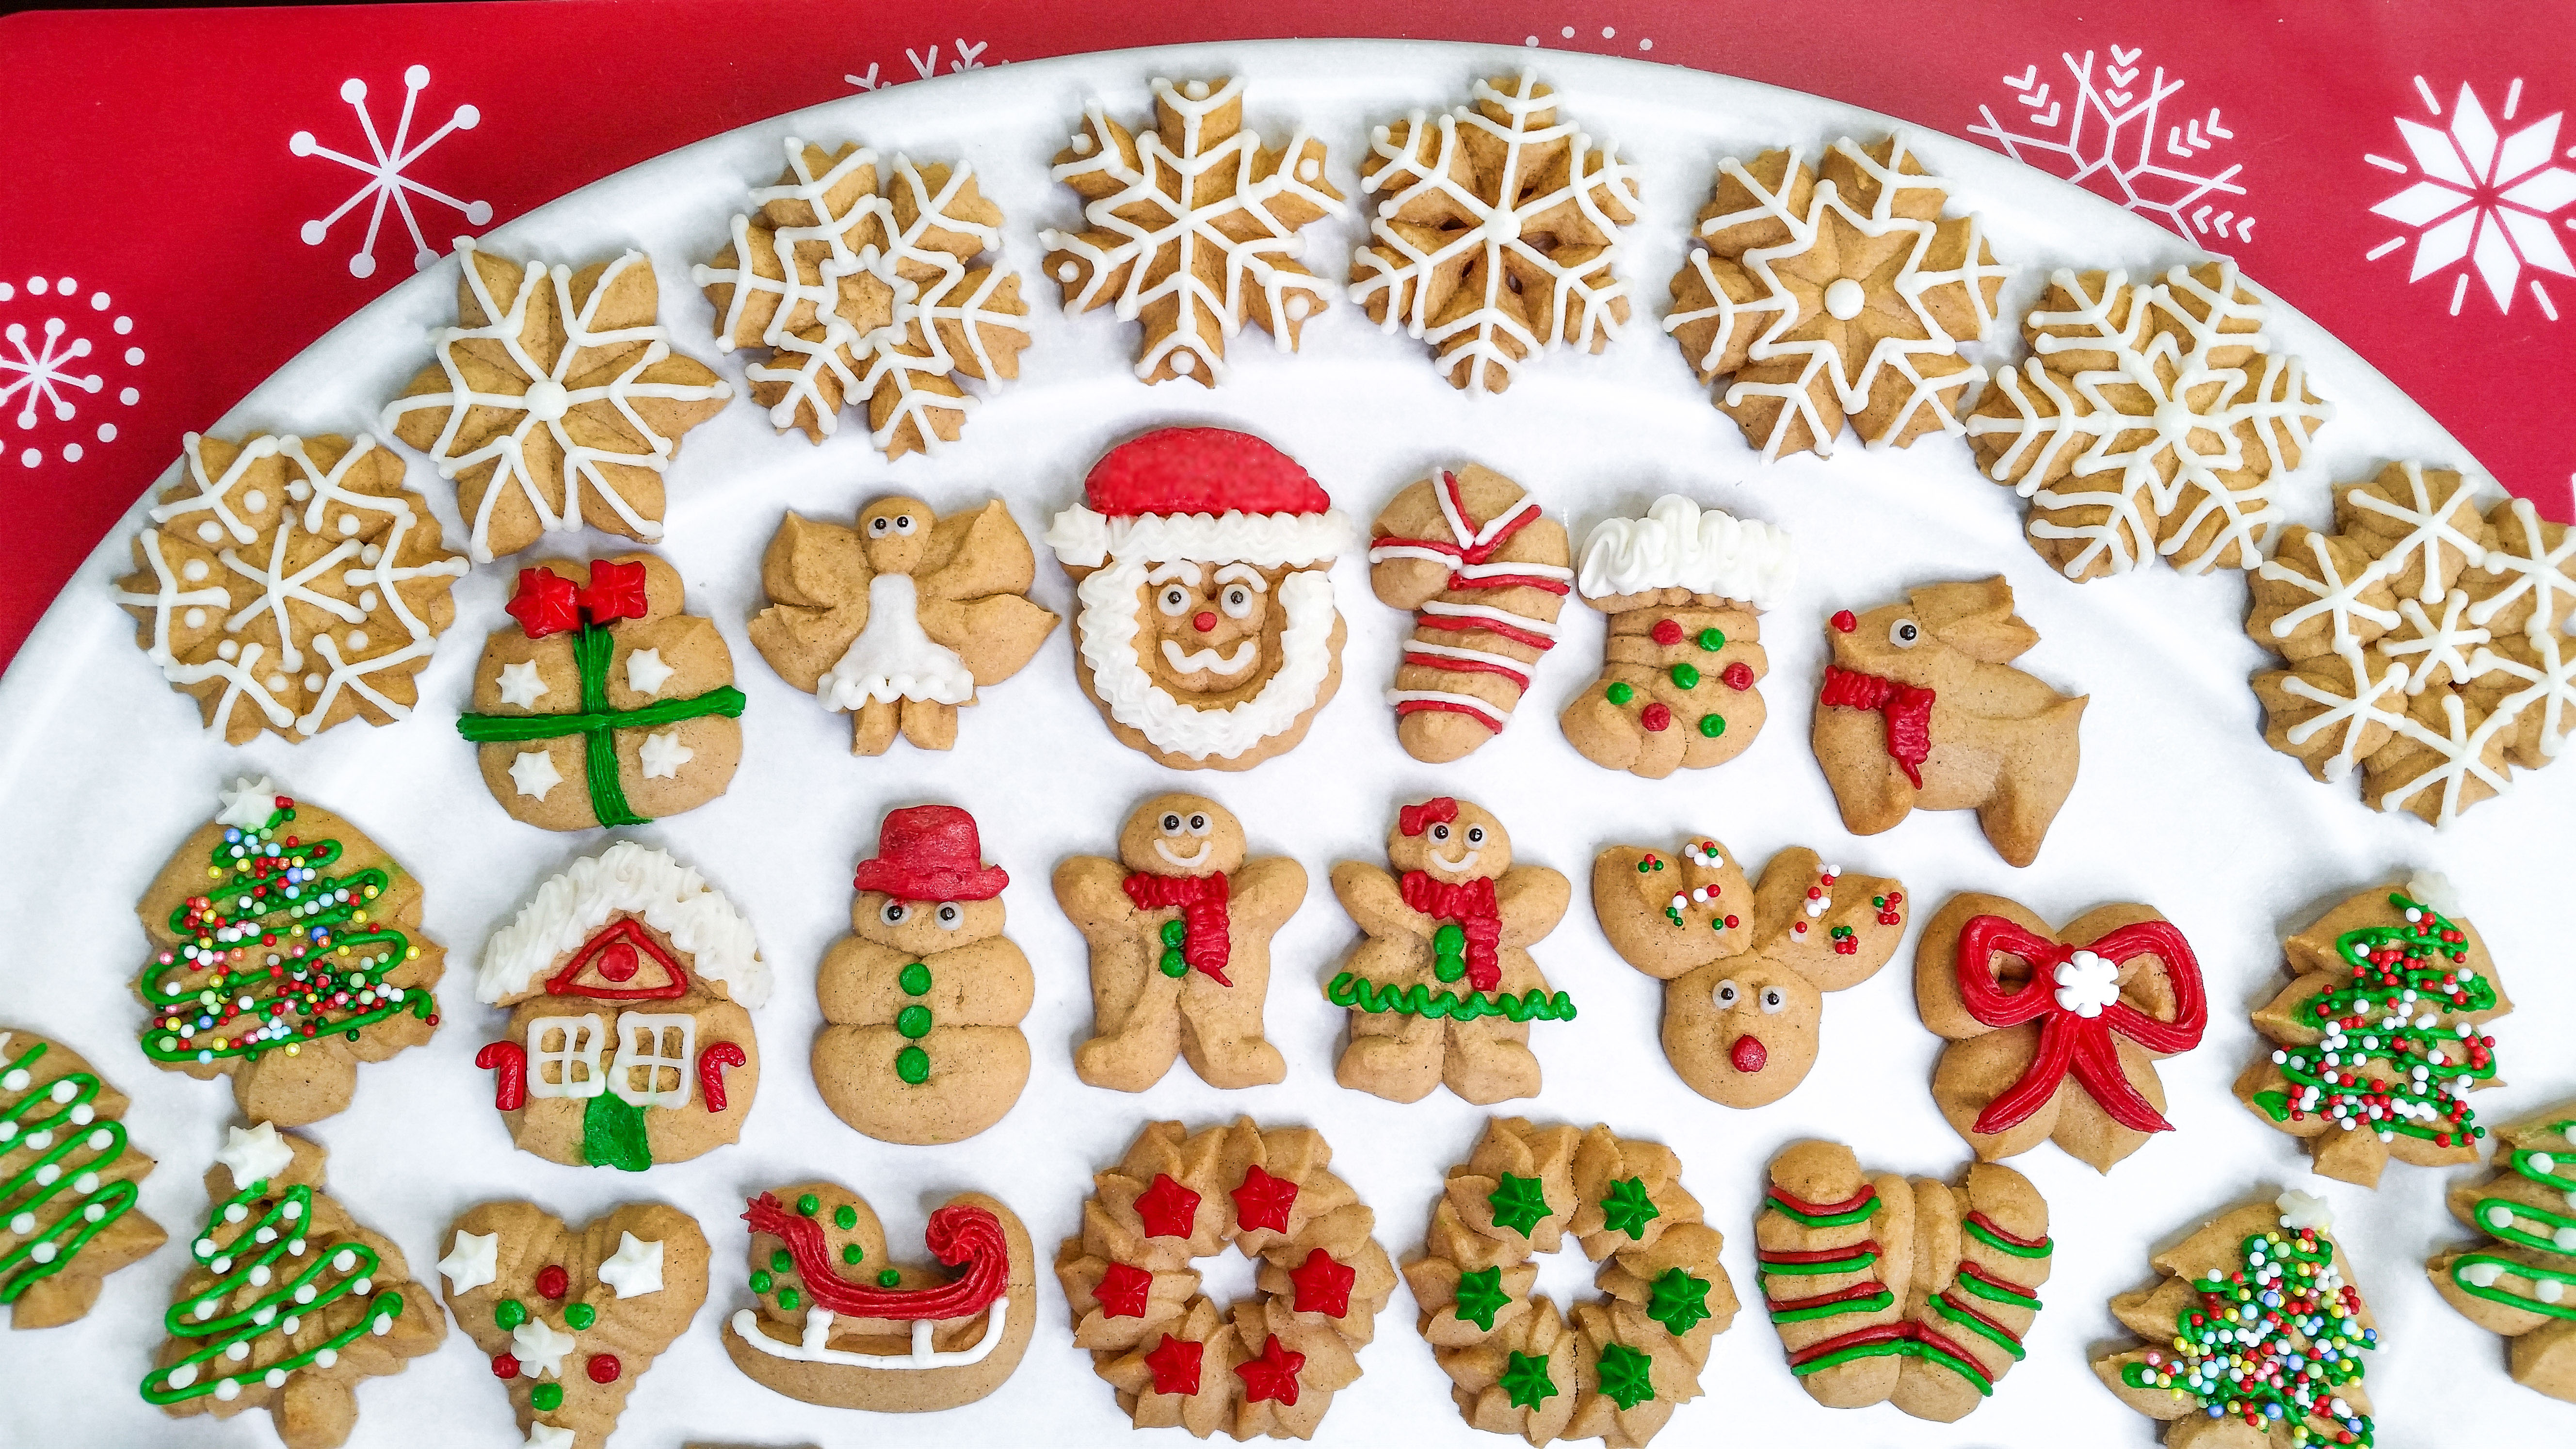
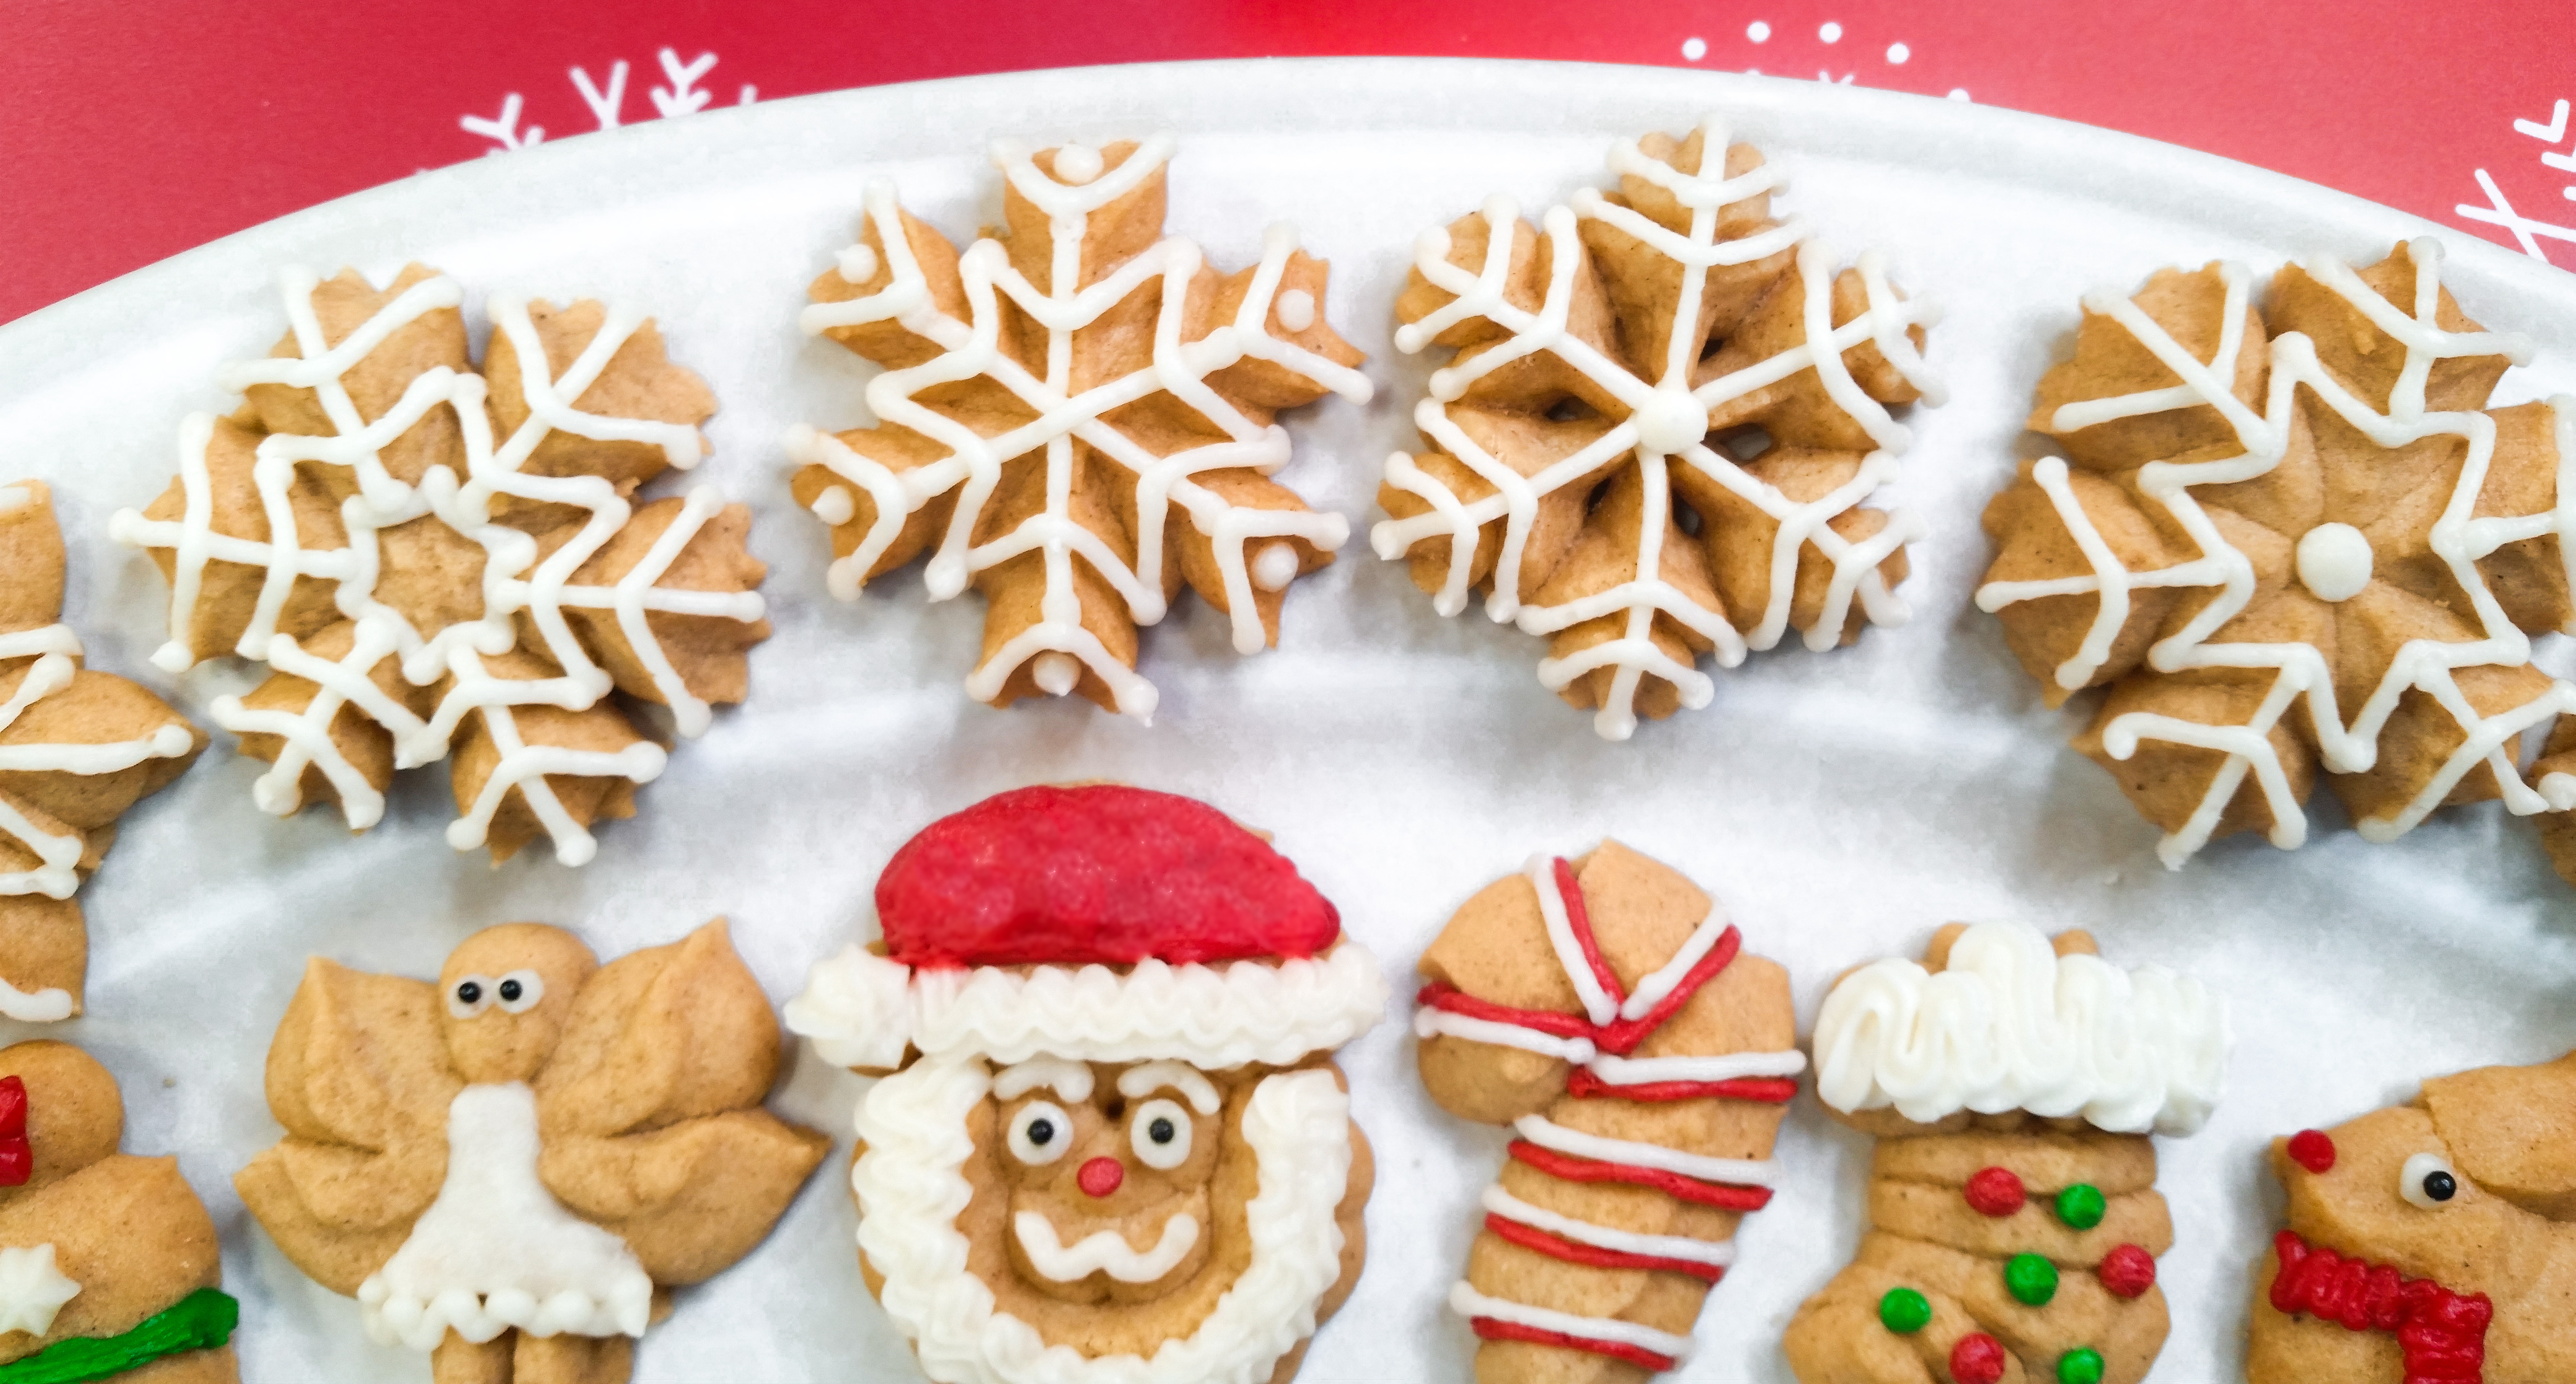
Santa is pretty straight forward. Red hat, white beard, etc. I did one with red icing stars on the hat because it was easy and looked like a furry hat, and another I squiggled lines of red that I then smoothed with a damp fingertip. I gave the snowman a similar red hat. 🙂 Again, pretty easy. A squiggly beard with the star tip, eyes, moustache, eyebrows, and snowman buttons complete the look. For the Christmas trees I squiggled green icing in a zigzag and then added either white dots or round decors – nonpareils. I sprinkled them on and they stuck to the icing.

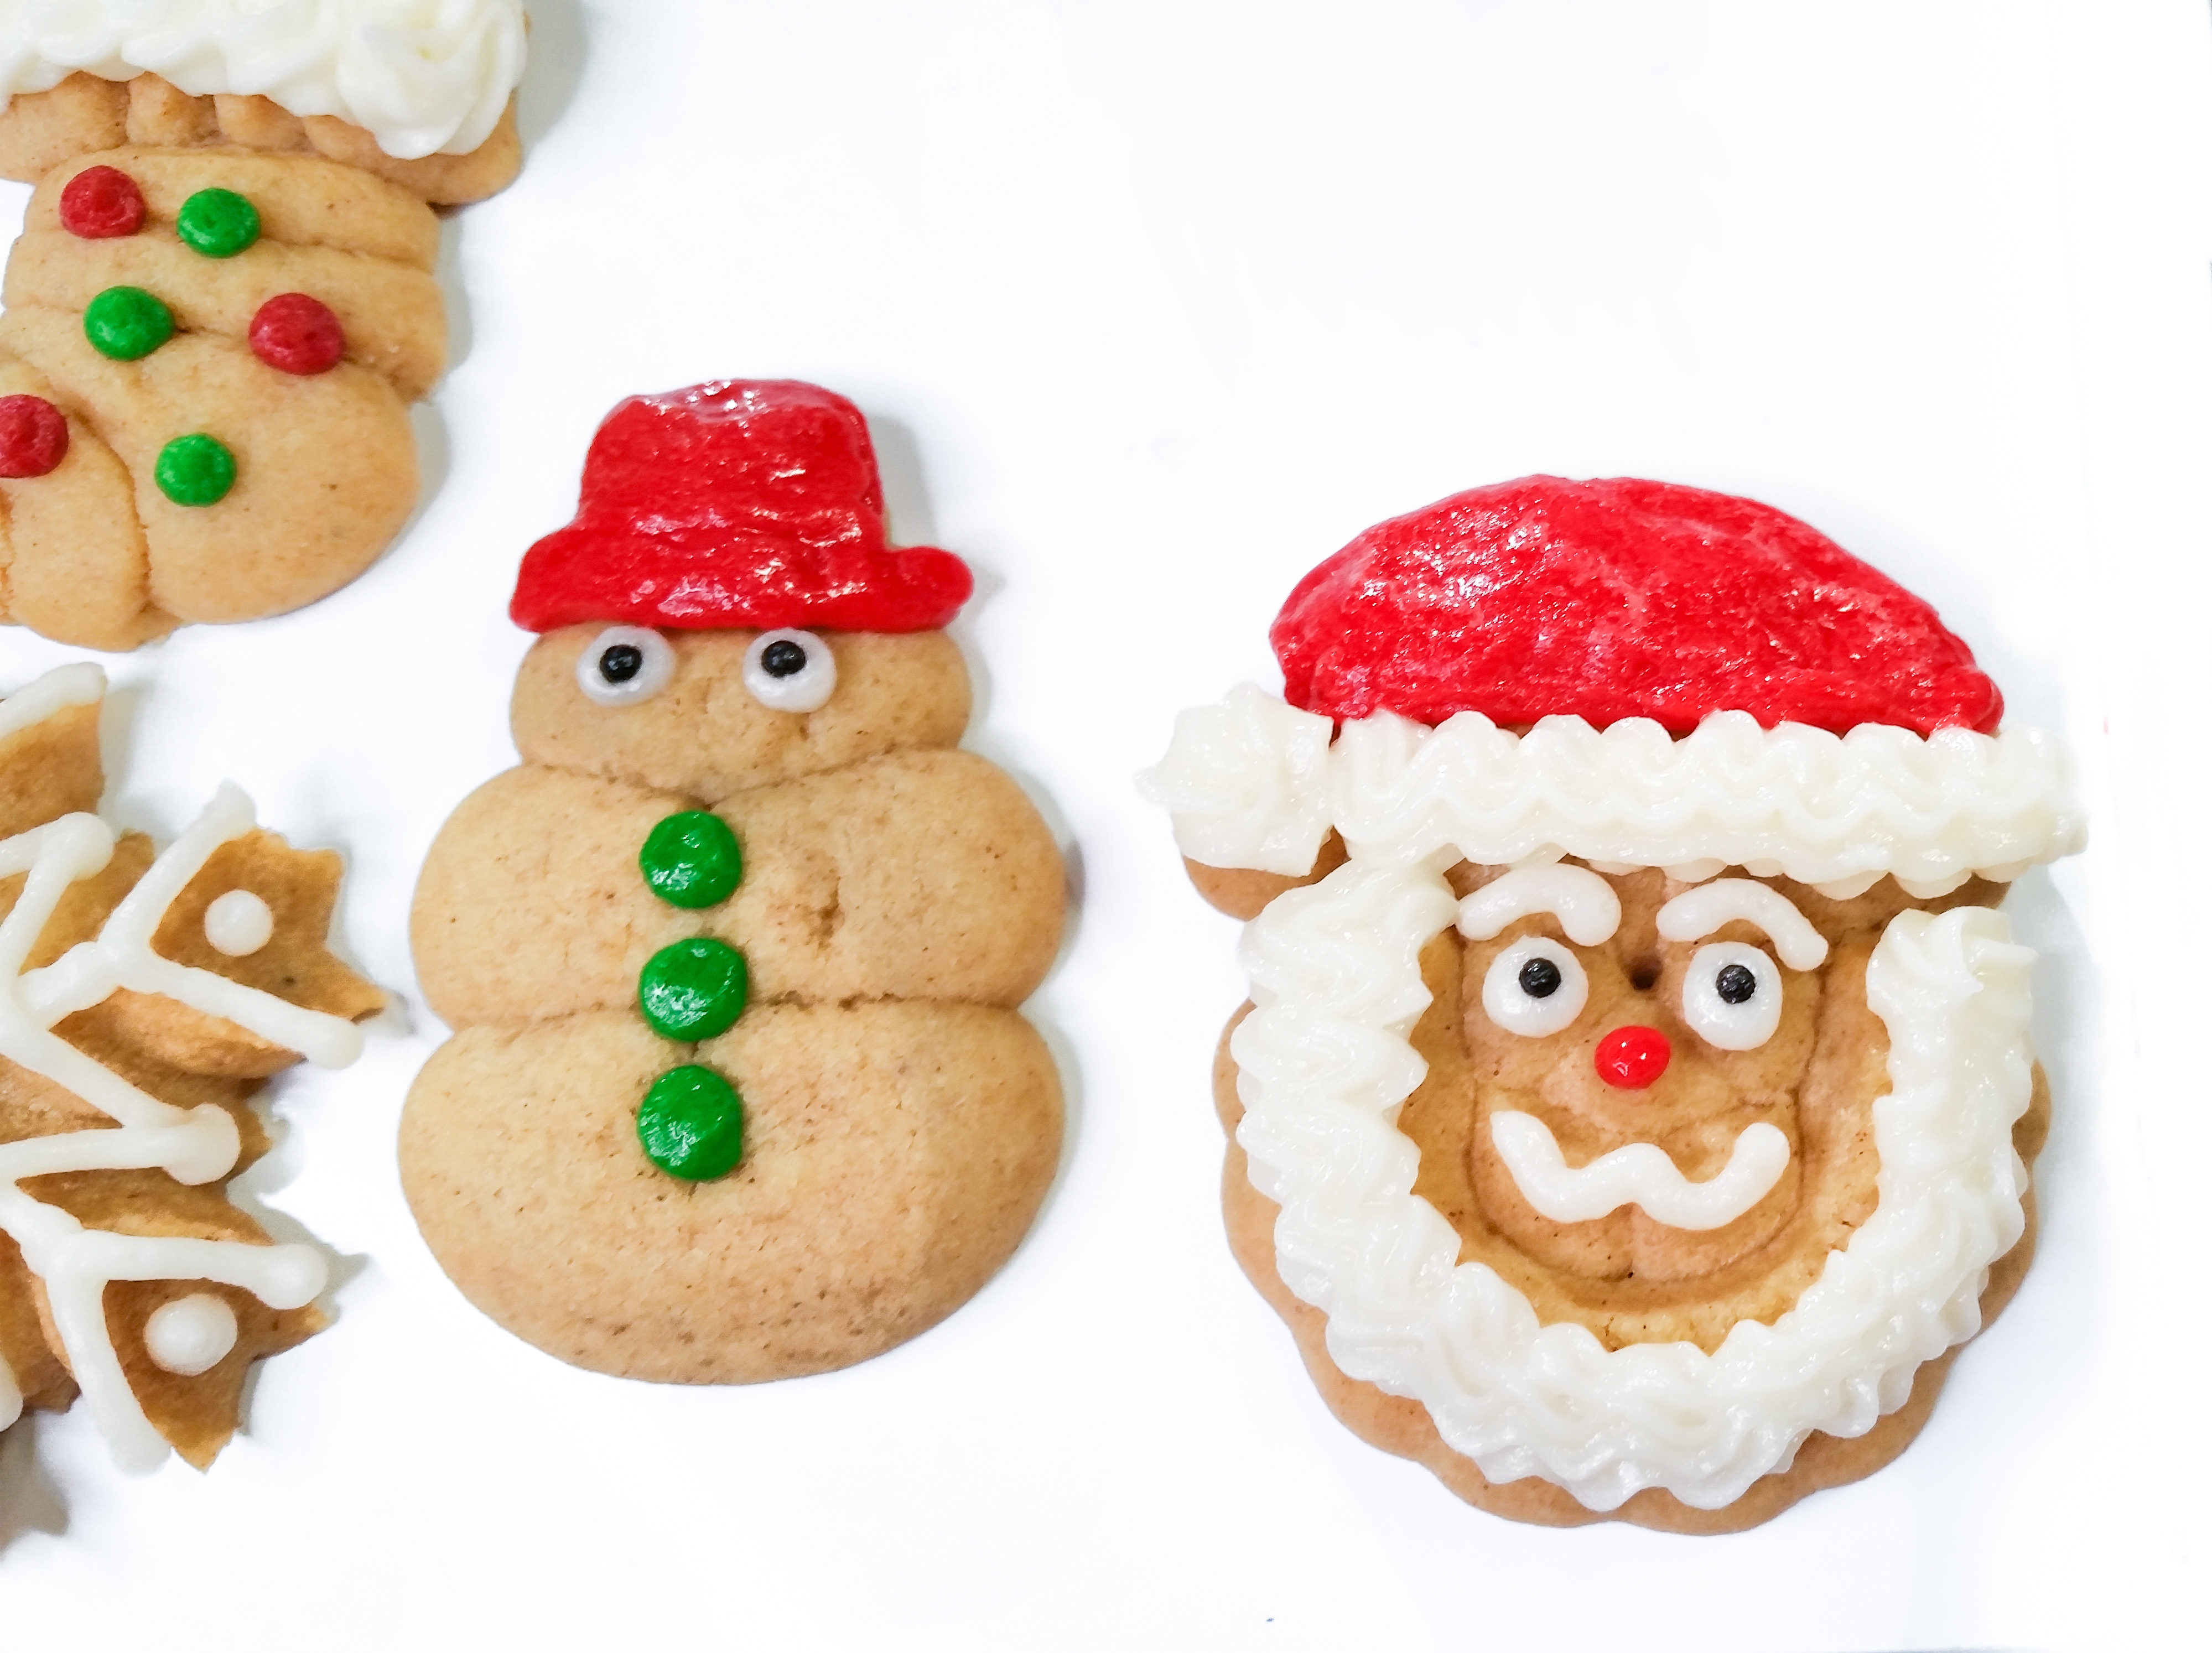
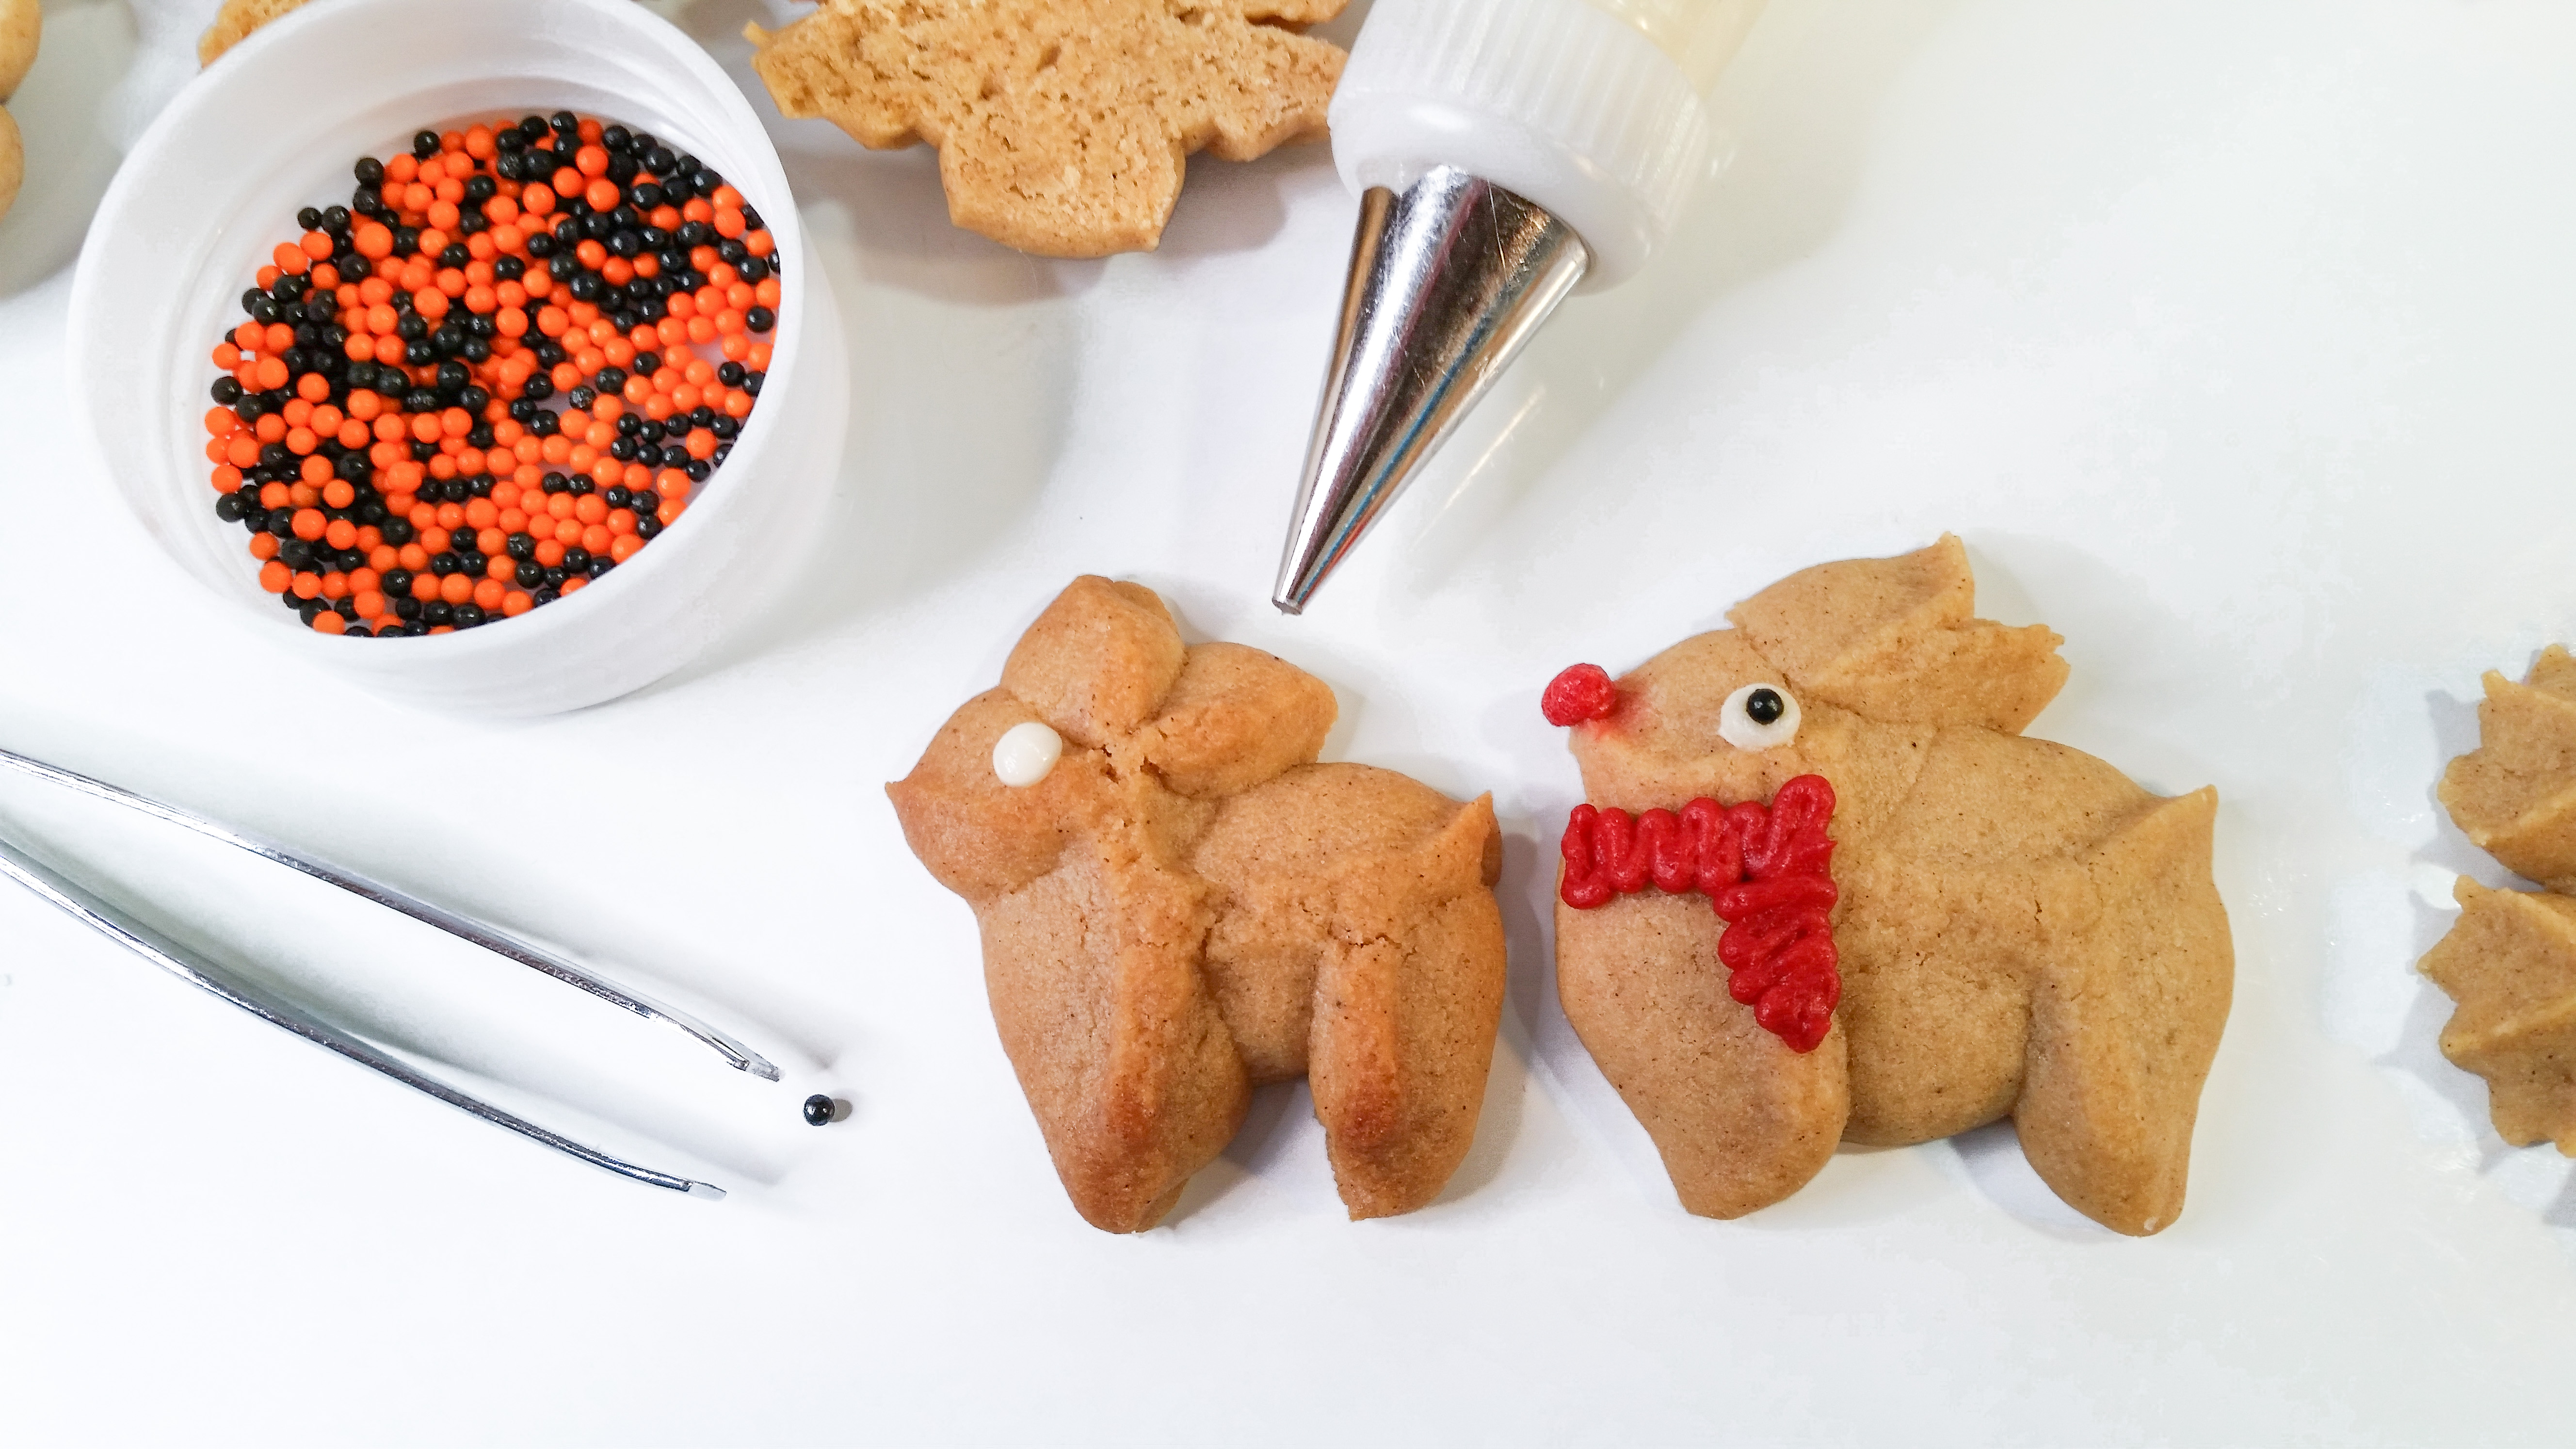
I did something different with the eyes this time! I normally suggest using candy eyes that you buy online, or using simple icing dots. This time I realized I was out of candy eyes. I totally forgot I’d run out when I did the Russian Tea Cake post a couple of weeks ago. So I was doing plain white icing dot eyes on this recipe and I thought well, maybe I can add a black nonpareil/sprinkle from my Halloween decors as a pupil! It worked. 😀 Icing dot, then tweezers to add a black ball in the center. Ta-da! Eyes.

The beautiful thing about our snowflakes is that you don’t have to freehand the lines. Just follow the ridge lines of the cookies! You can connect them different ways and make multiple patterns for each cookie. I show a few closer-up here. I did two previous posts with drawing on snowflakes with icing. If you need ideas or a more detailed tutorial look at the homepage for Snickerdoodle Snowflakes and Angels and Colorful Iced Snowflake Spritz Cookies.
The last thing is the sandwich cookie option. If you really want to indulge you can stuff these fabulous cookies with a luscious filling to double the yum! If you’re doing this option, press any non-symmetrical disks both ways so you’ll be able to pair them up. In other words, flip the disk over and press, for example, reindeer that face left and others that face right. That way you can stuff them bottom-to-bottom sides and the shapes will match up. I forgot to do it so my photos here only show symmetrical cookies like snowflakes and trees. If this is confusing look at any of my other “sandwich cookie” recipe posts and I show what I mean by “press both ways”.
Make the sandwich filling by combining the ingredients (listed above under the cookie ingredients) with an electric mixer. You’ll see that this is much, much thicker than the decorating icing. Whip it all together until it is smooth and creamy, but it will be fairly stiff.
You certainly can slather this on the cookie with a knife, but I like to make my sandwiches neat and pretty by using a big round tip like Wilton’s # 10. It makes applying the stuffing fast and easy and gives it a super clean edge.
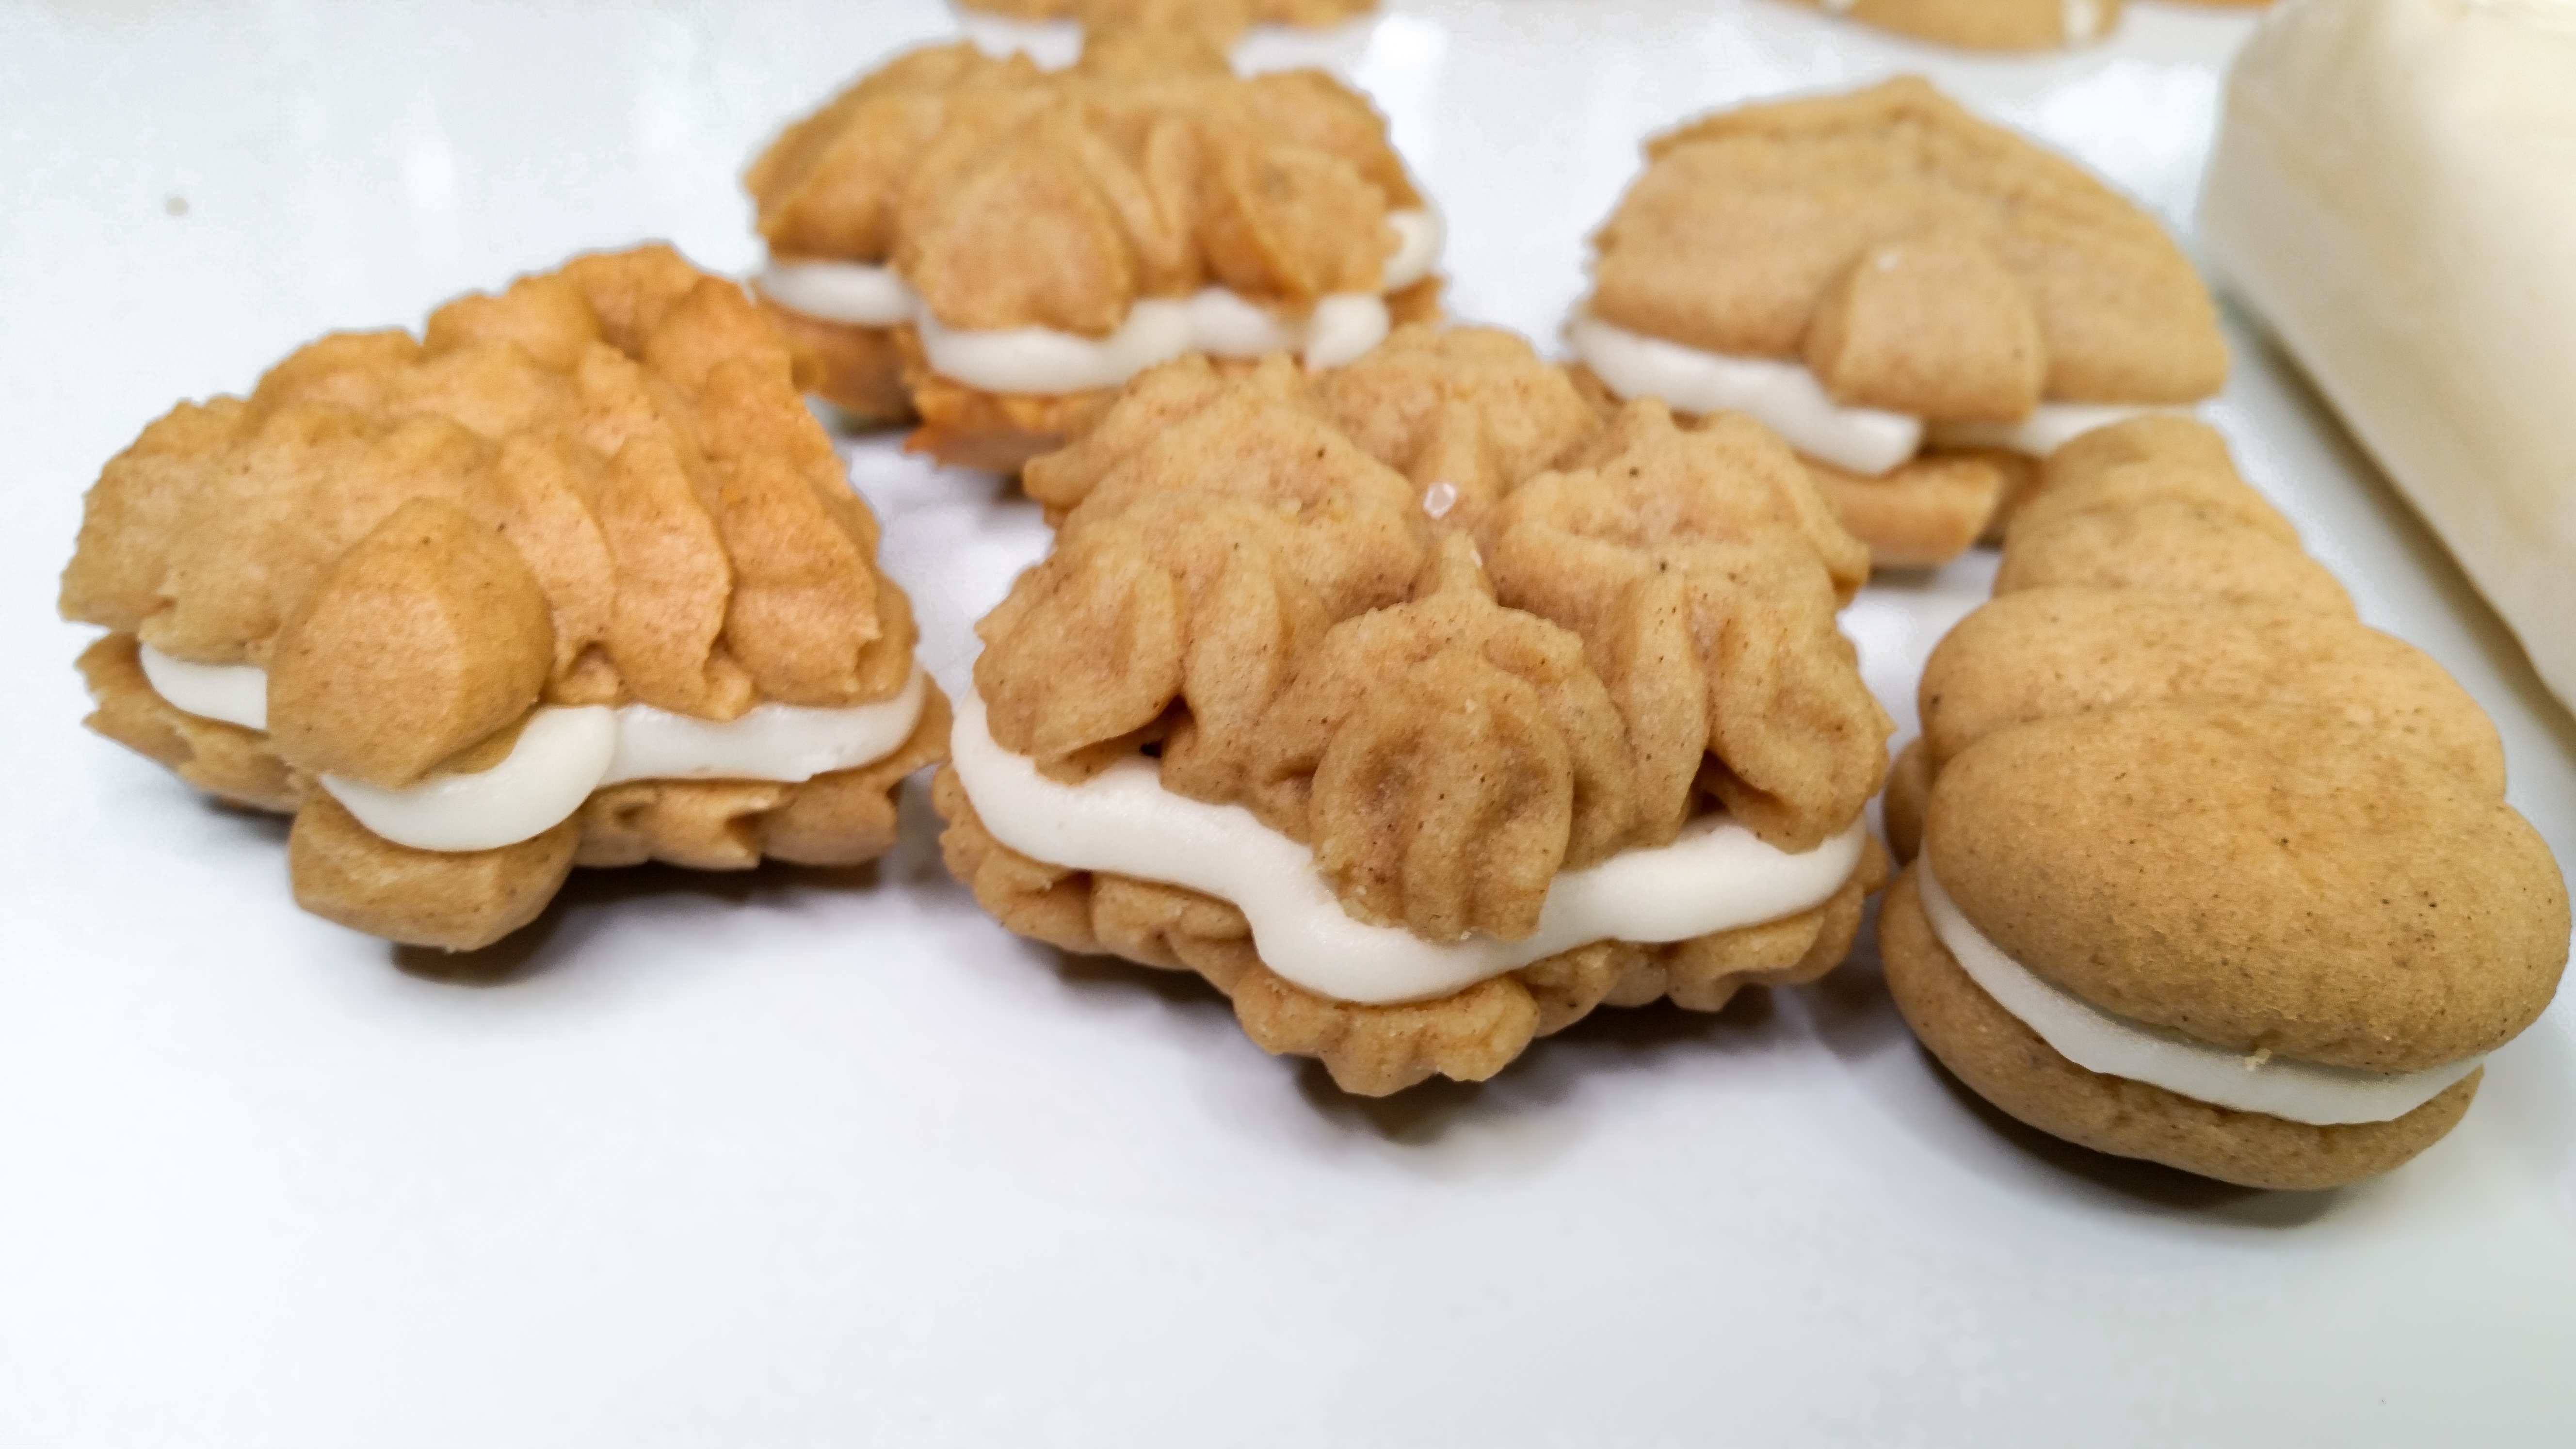
You can either leave them plain like I did or go ahead and decorate them!

That’s it! Christmas Gingerbread Spritz Cookies!
🙏We have a request💕 If you’re enjoying our recipes, *EVERY DISK & PIN PURCHASED helps us stay in business* & supports our families! Impress is a women/family-owned USA small business in Colorado. We design, make, & sell over 300 shapes of cookie press disks & dozens of embossed rolling pins. The recipes we share are free – we have no ads on this recipe blog – we make our money selling disks & pins. The recipes give our customers creative ideas and attract new customers!💕 THANK YOU! 💕~Susie the Disk & Pin Designer
Merry Christmas!
Disk set pictures below. 🙂
~Susie
Disk Designer/Co-Owner at Impress! Bakeware, LLC
Our website has all of our 200+ disk shapes, cookie press, embossed rolling pins, baking accessories plus more about our Women/Family Owned company! impressbakeware.com
All products are on our Etsy shop.
Our Amazon shop has our cookie press and disks and embossed rolling pins.
Follow us on facebook!
The Christmas Set:

The Gingerbread Set:

The Snowflakes Set:

The Woodland Set:

The Christmas Two Set:

The Press Disk Set:
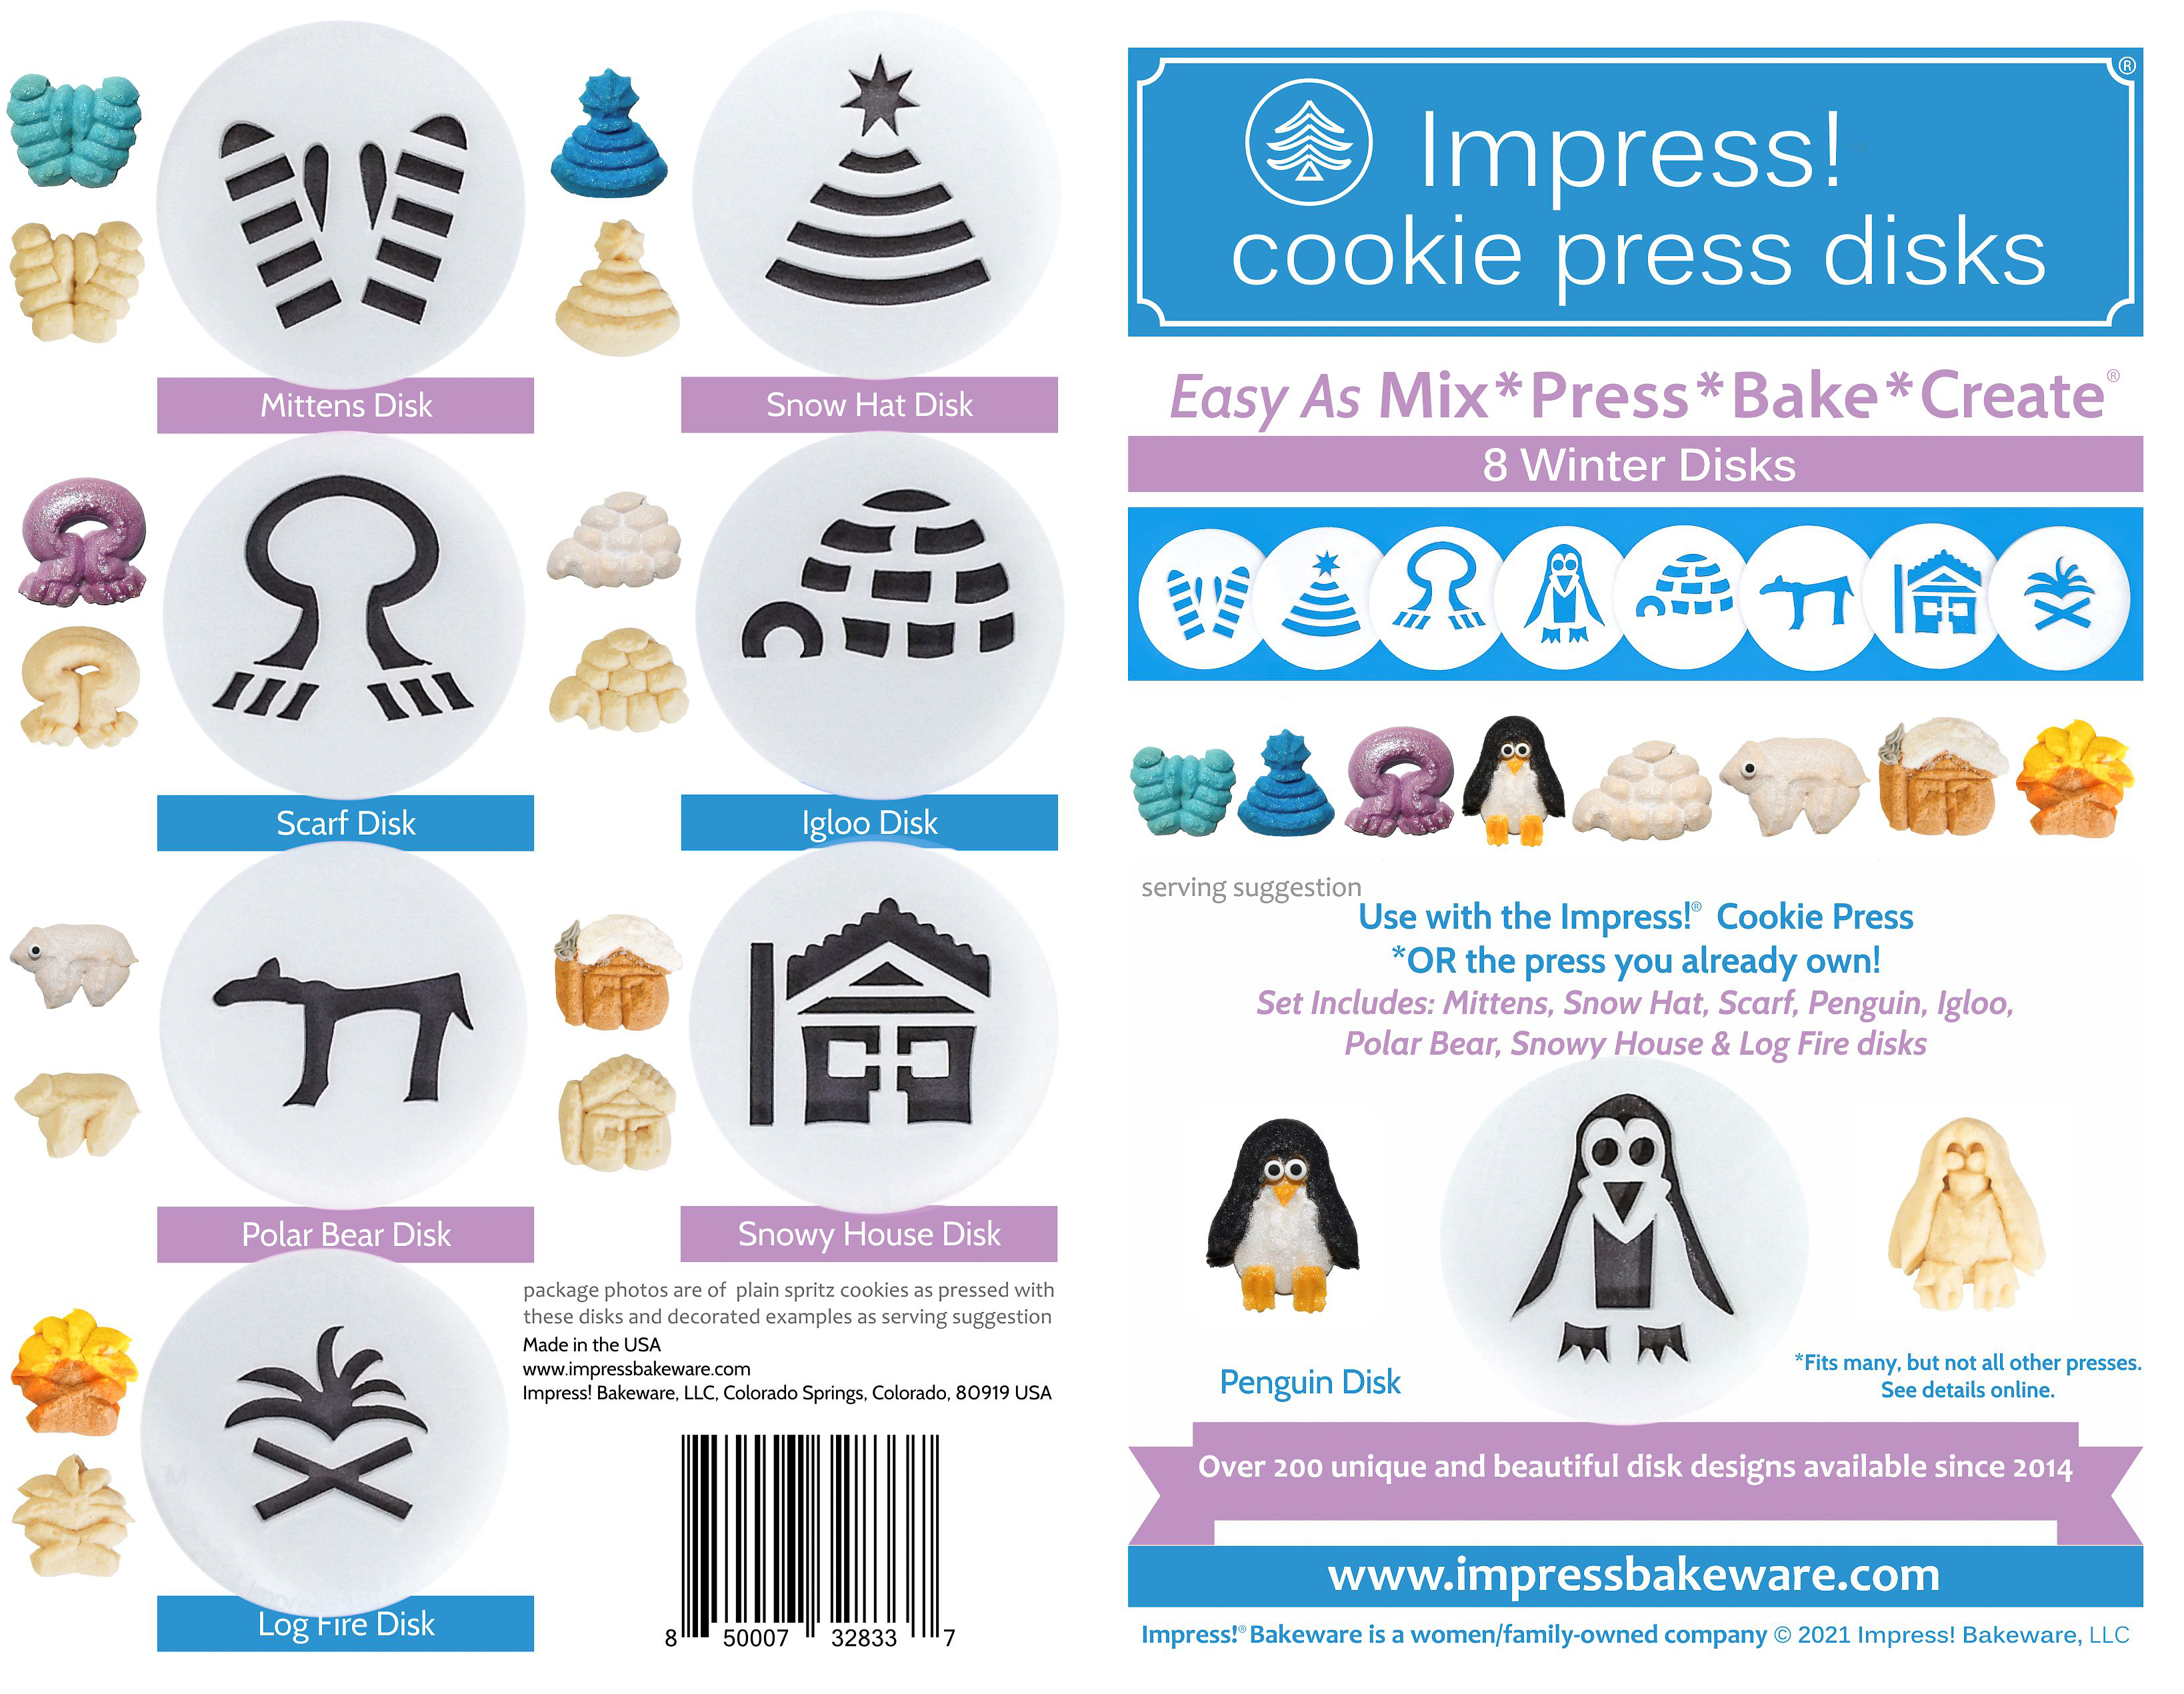
The Winter Set: