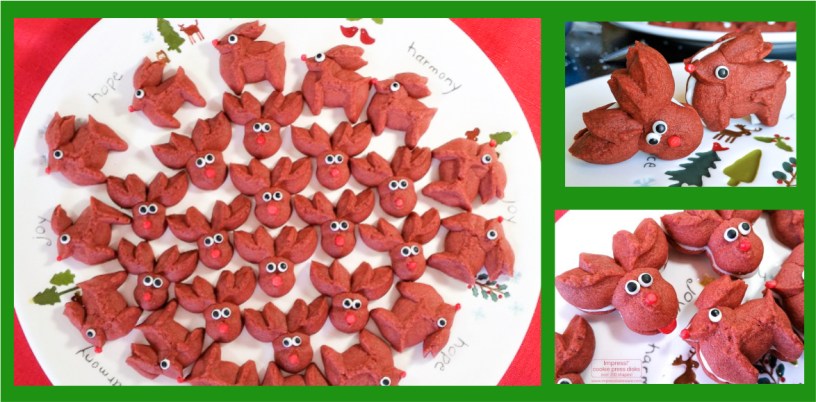

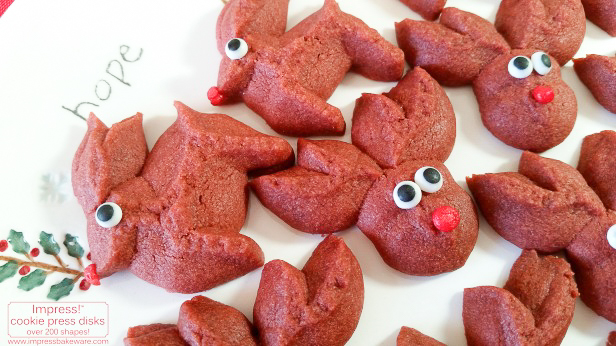

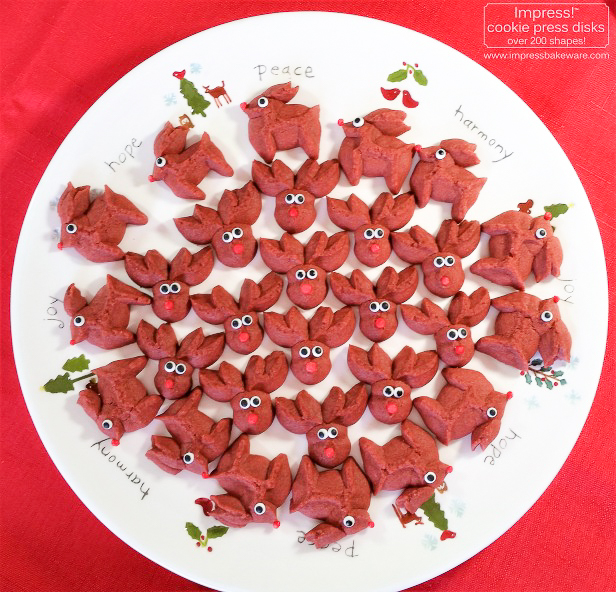
Rudolph’s back in town and this year he’s sporting a red velvet look! These easy eye-catching spritz cookies will guide your guests to Christmas joy. Serve as-is or sandwich them with cream cheese filling.
I had the idea for red velvet reindeer a year ago but just couldn’t get the recipe right. I tried eight times and never felt it was good enough to use. This year my baking and red-velvet obsessed niece took a crack at it and hit it out of the park! I made a couple of minor adjustments, but she gets all the credit for this creation. It presses beautifully and has a smooth taste and texture. Watch for some of her disk designs in the coming year, too. She’s a talented teen. All three of our kids have helped with this business, but she’s the only baker/disk designer in the bunch!
This recipe calls for a few more ingredients than my usual spritz, but the decorating is ridiculously simple so this project is a breeze.
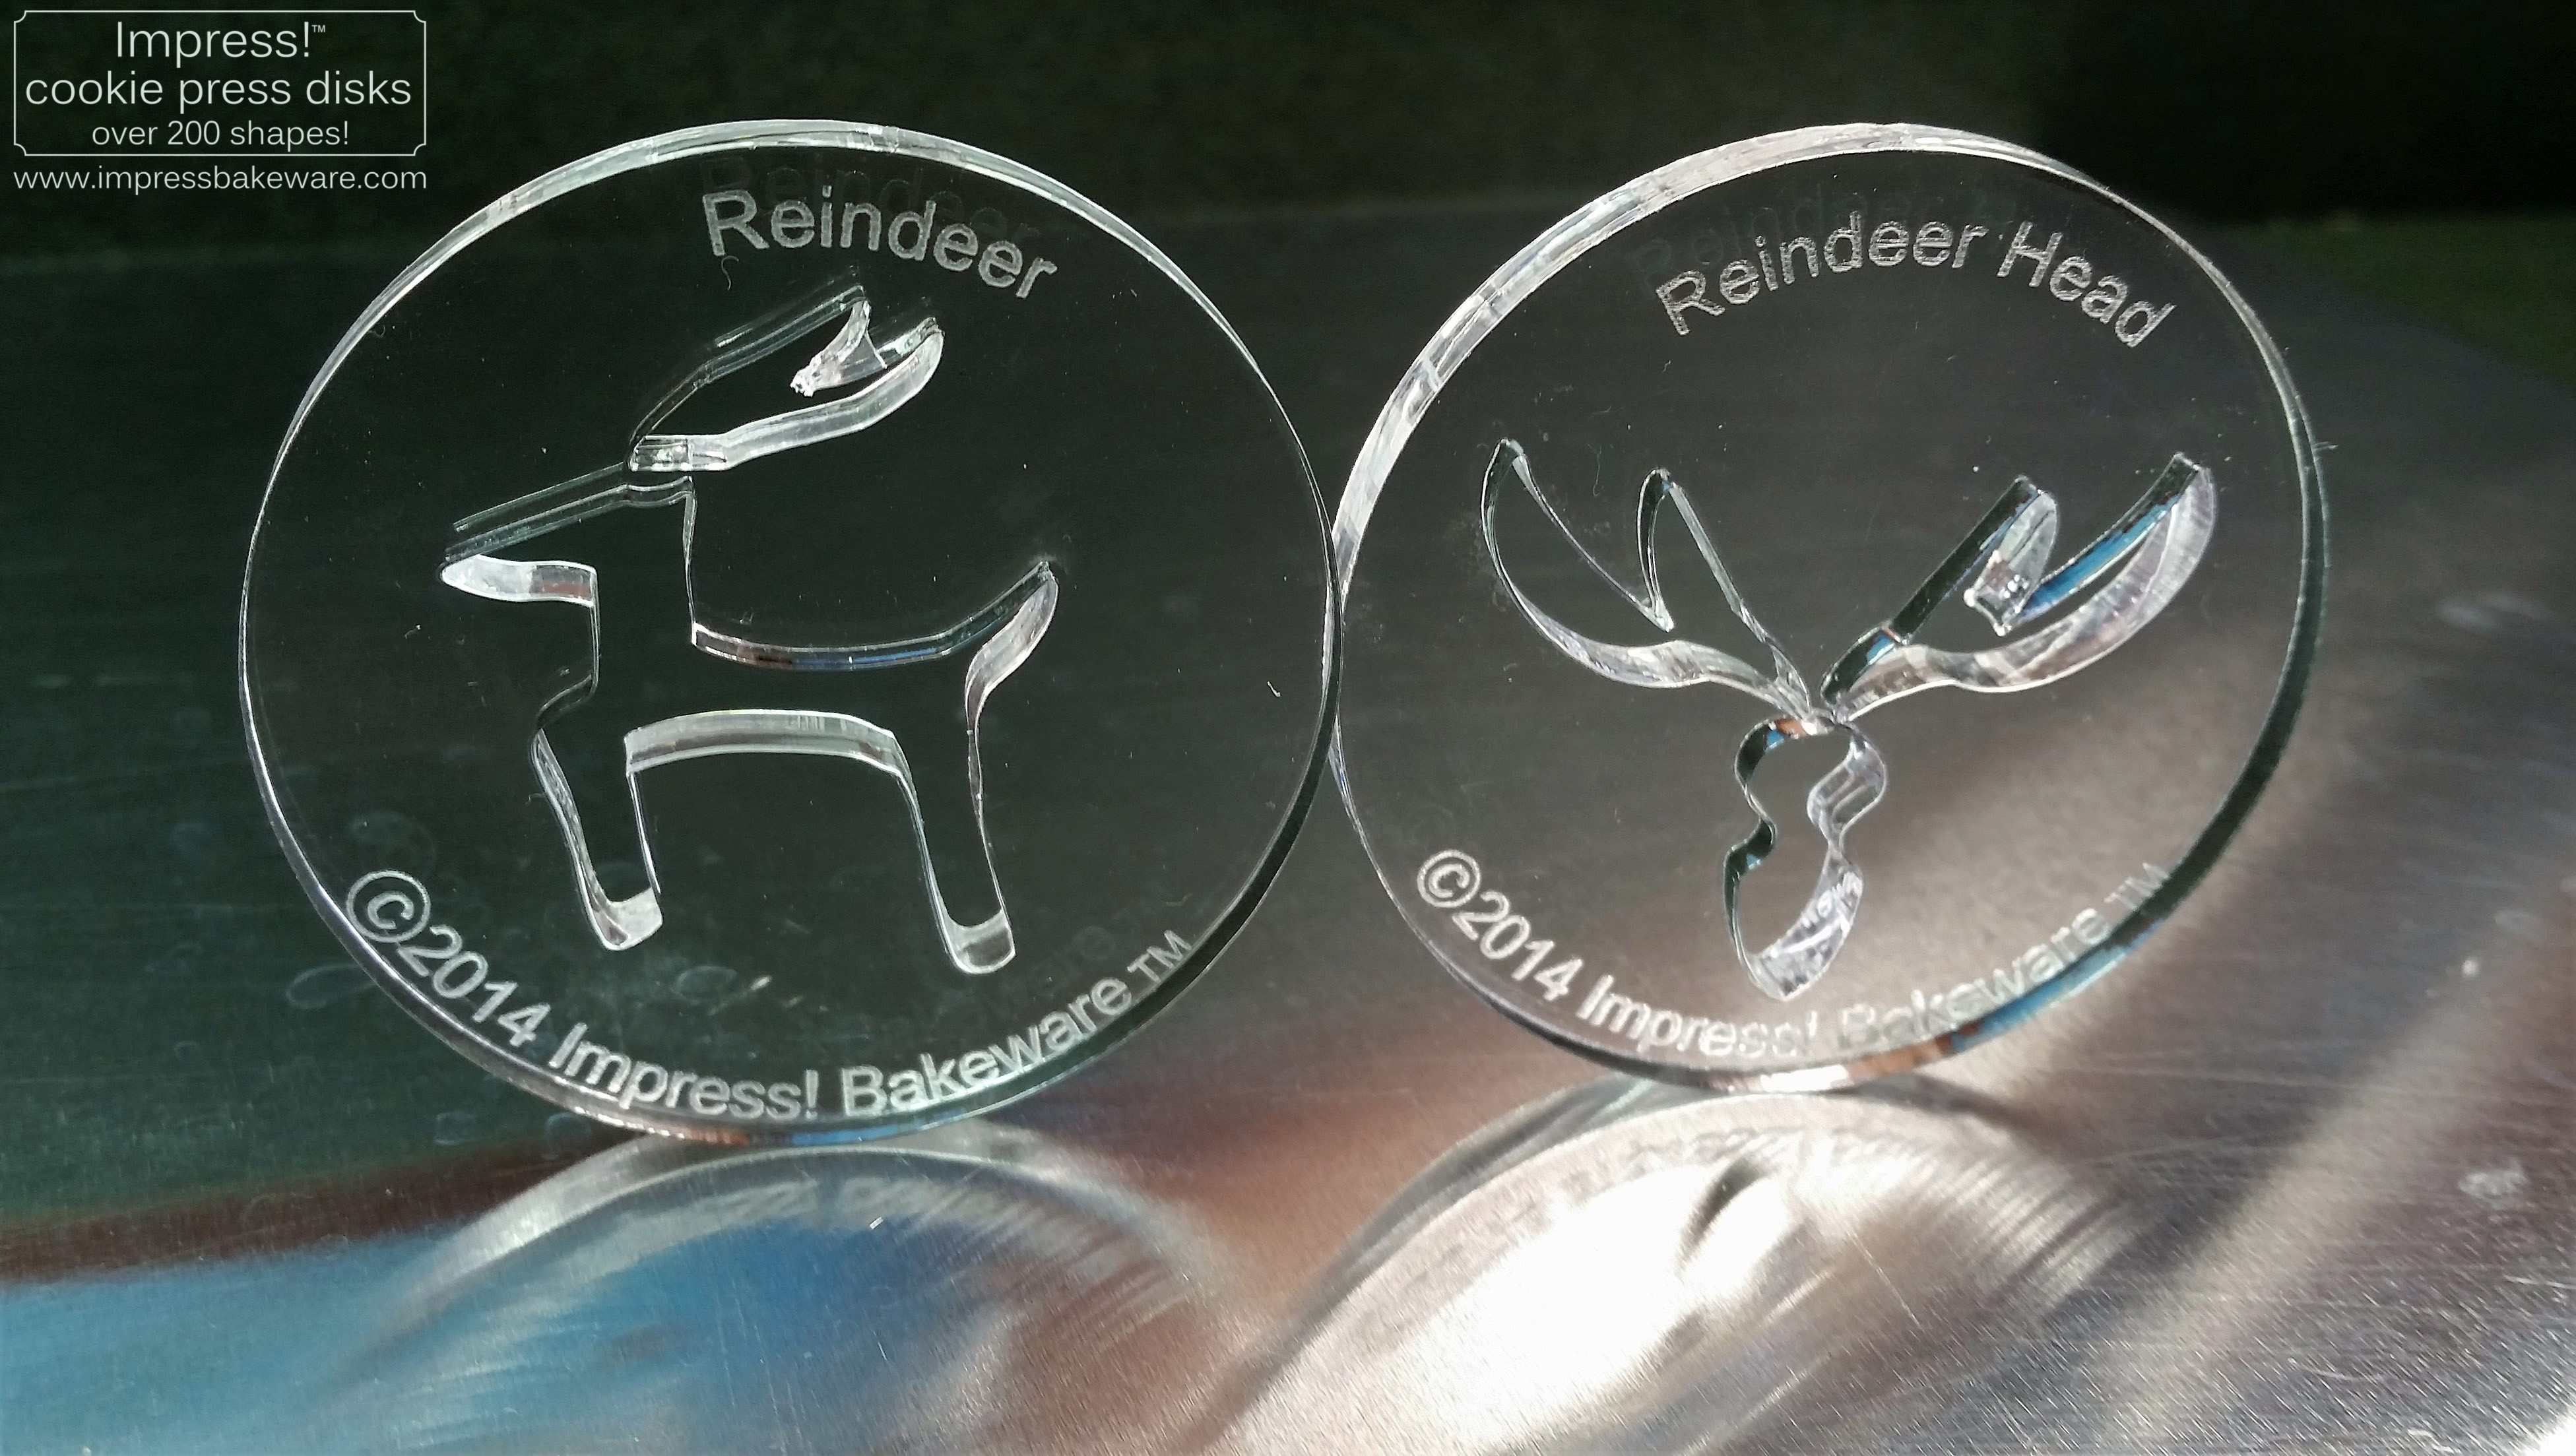
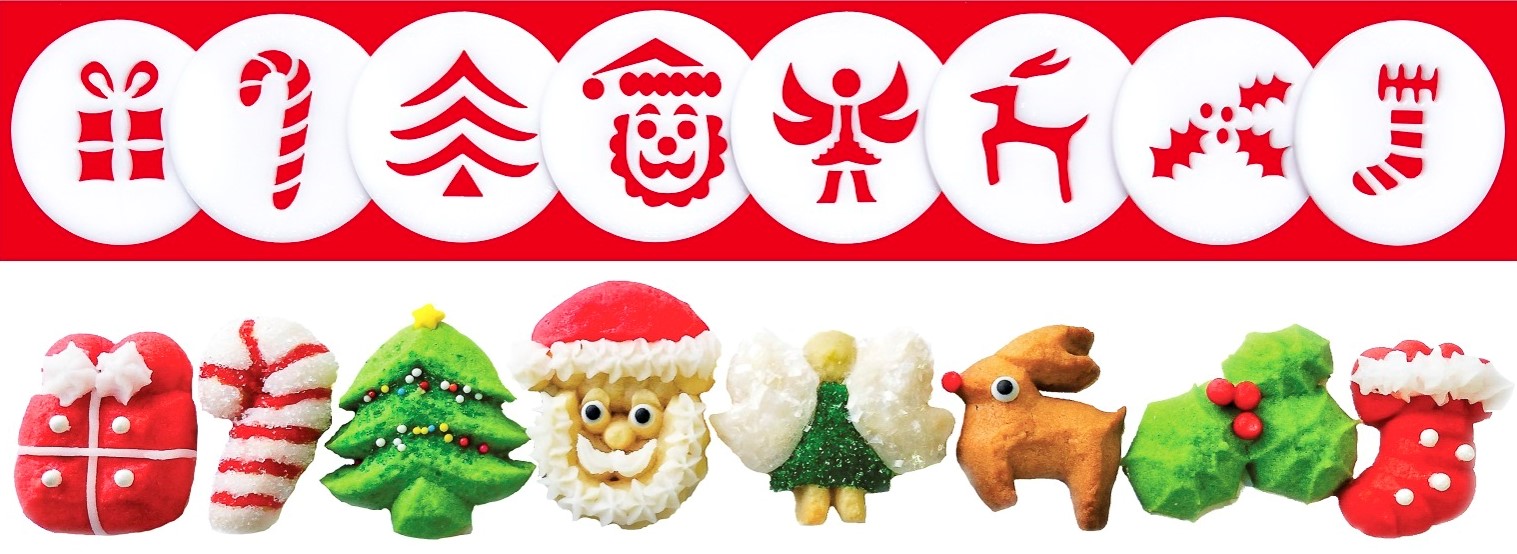
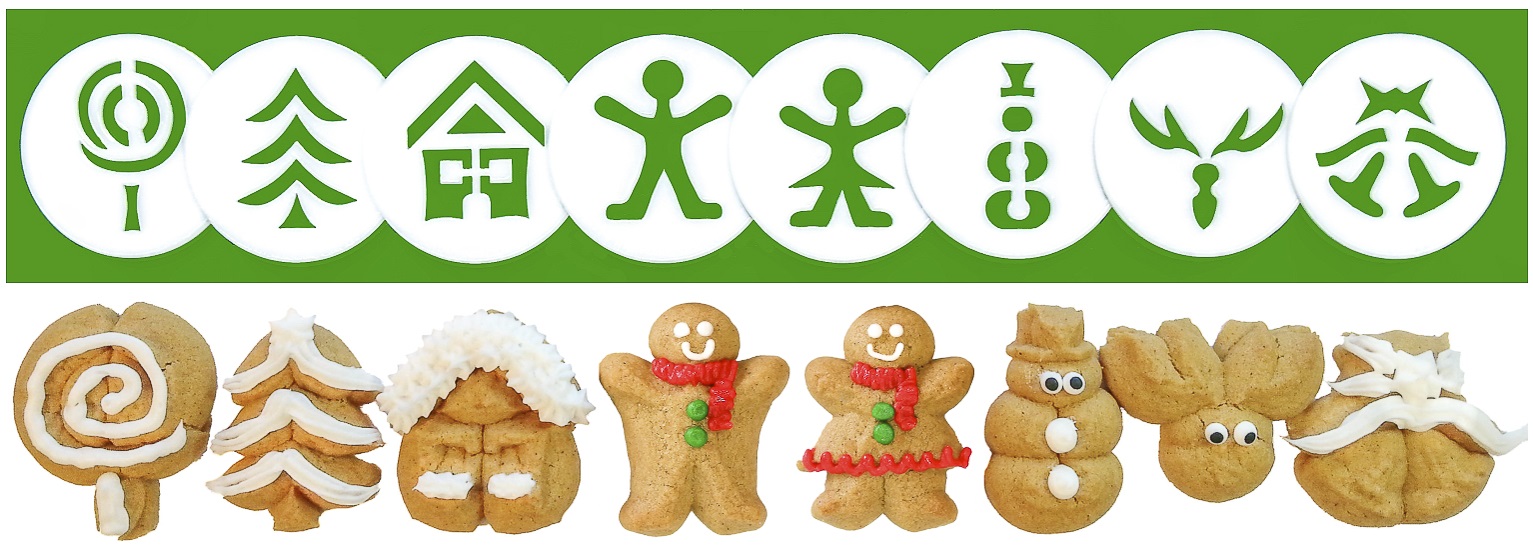
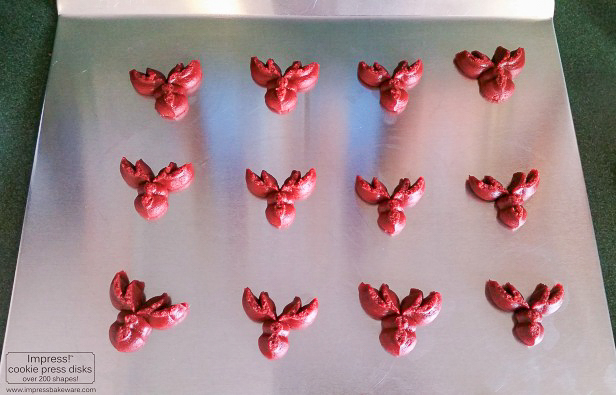
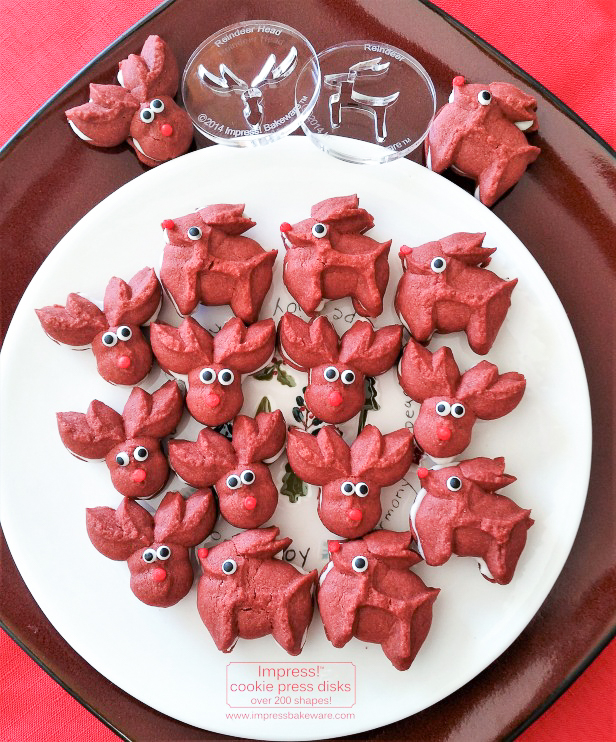
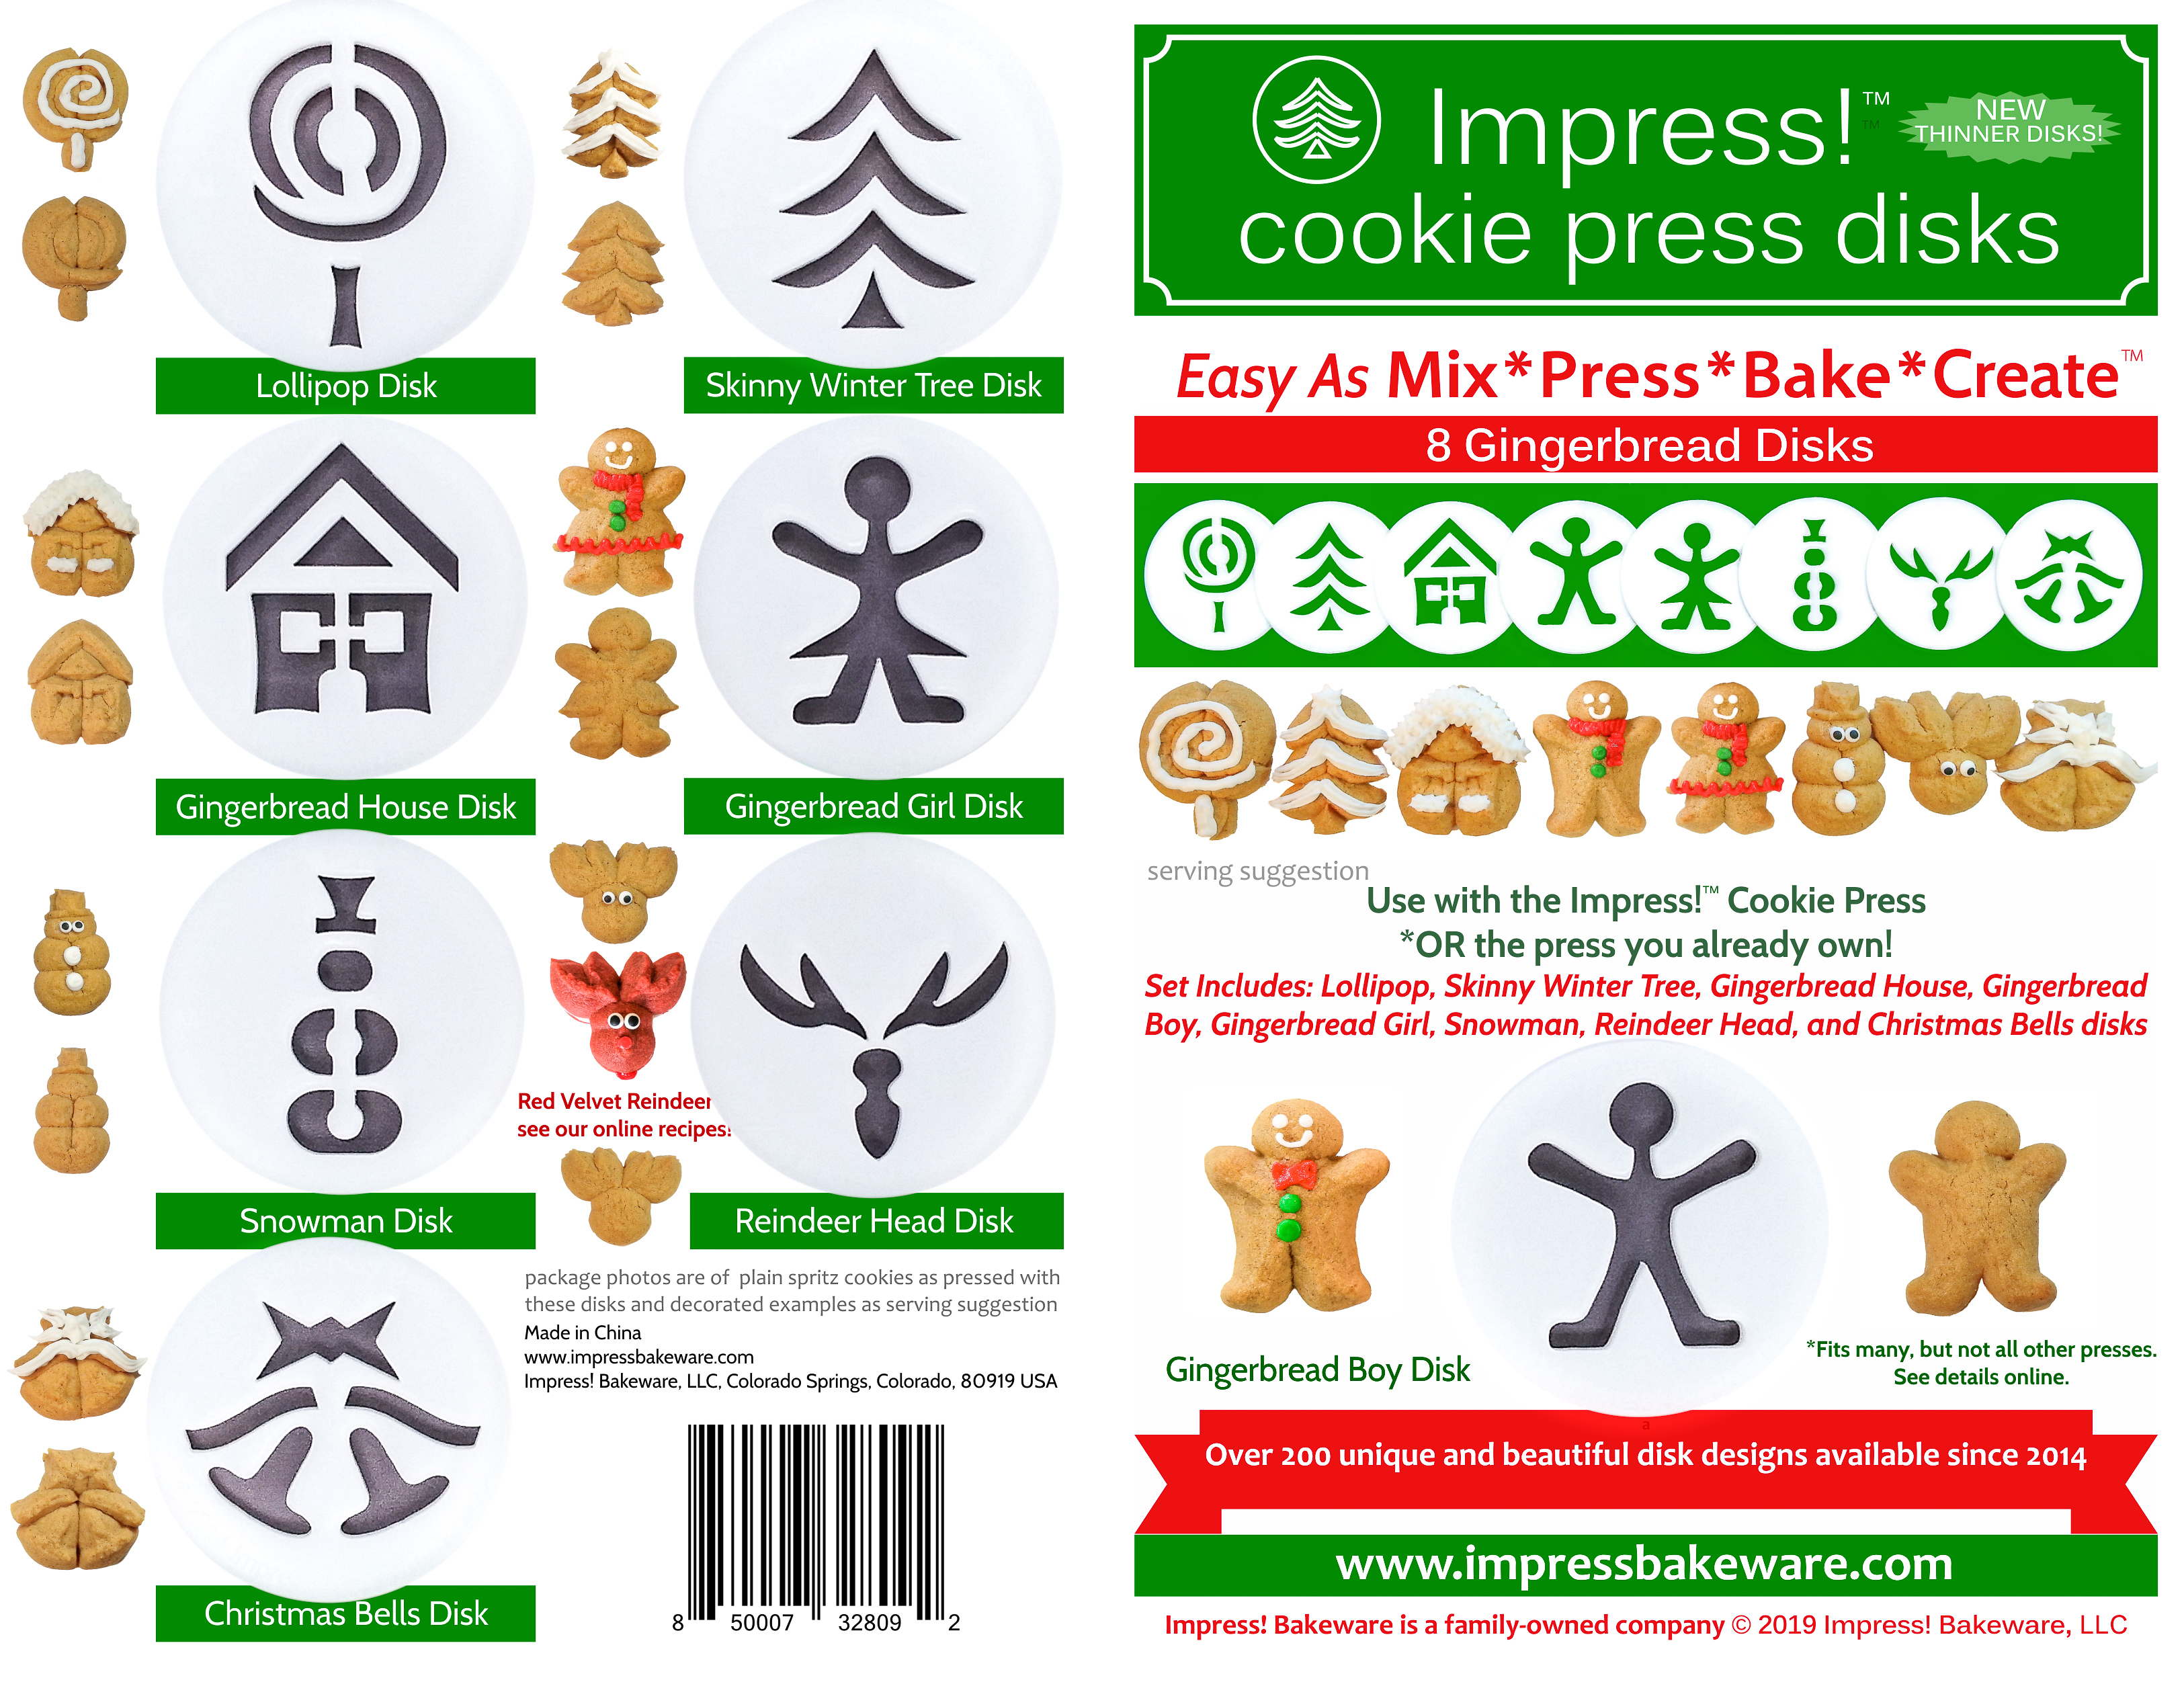
For this blog I used both of our reindeer disks. The side-view is from the Christmas 8 Disk Set and the reindeer head is from our Gingerbread 8 Disk Set (pictures/links to purchase below on our website or Amazon). Look at the top menu tab to read more about our unique disks.
(*NOTE: As of our 2019 Re-Opening our new disks are made of a solid white material, but the designs are exactly the same, and press identically.)
Our website has all of our 200+ disk shapes, cookie press, embossed rolling pins, baking accessories plus more about our Women/Family Owned company in beautiful Colorado Springs! impressbakeware.com
All products are on our Etsy shop.
Our Amazon shop has our cookie press and disks and embossed rolling pins.
💕We make our money selling cookie press disks and embossed rolling pins! There are no annoying ads on this recipe blog. Every purchase keeps us in business.🙏 Thank you!
🎉 “Tis the Season!” 15% off SALE❗ EXTENDED 🙂
Discount on our cookie press disks, cookie press, embossed rolling pins, luster dusts, cookie cutters & baking accessories. Sale November 26 – December 17, 2025, on our website and Etsy shops ONLY! (Links above) Sale excludes holiday gift sets and our recipe book.
Let’s bake!
Red Velvet Spritz Cookies
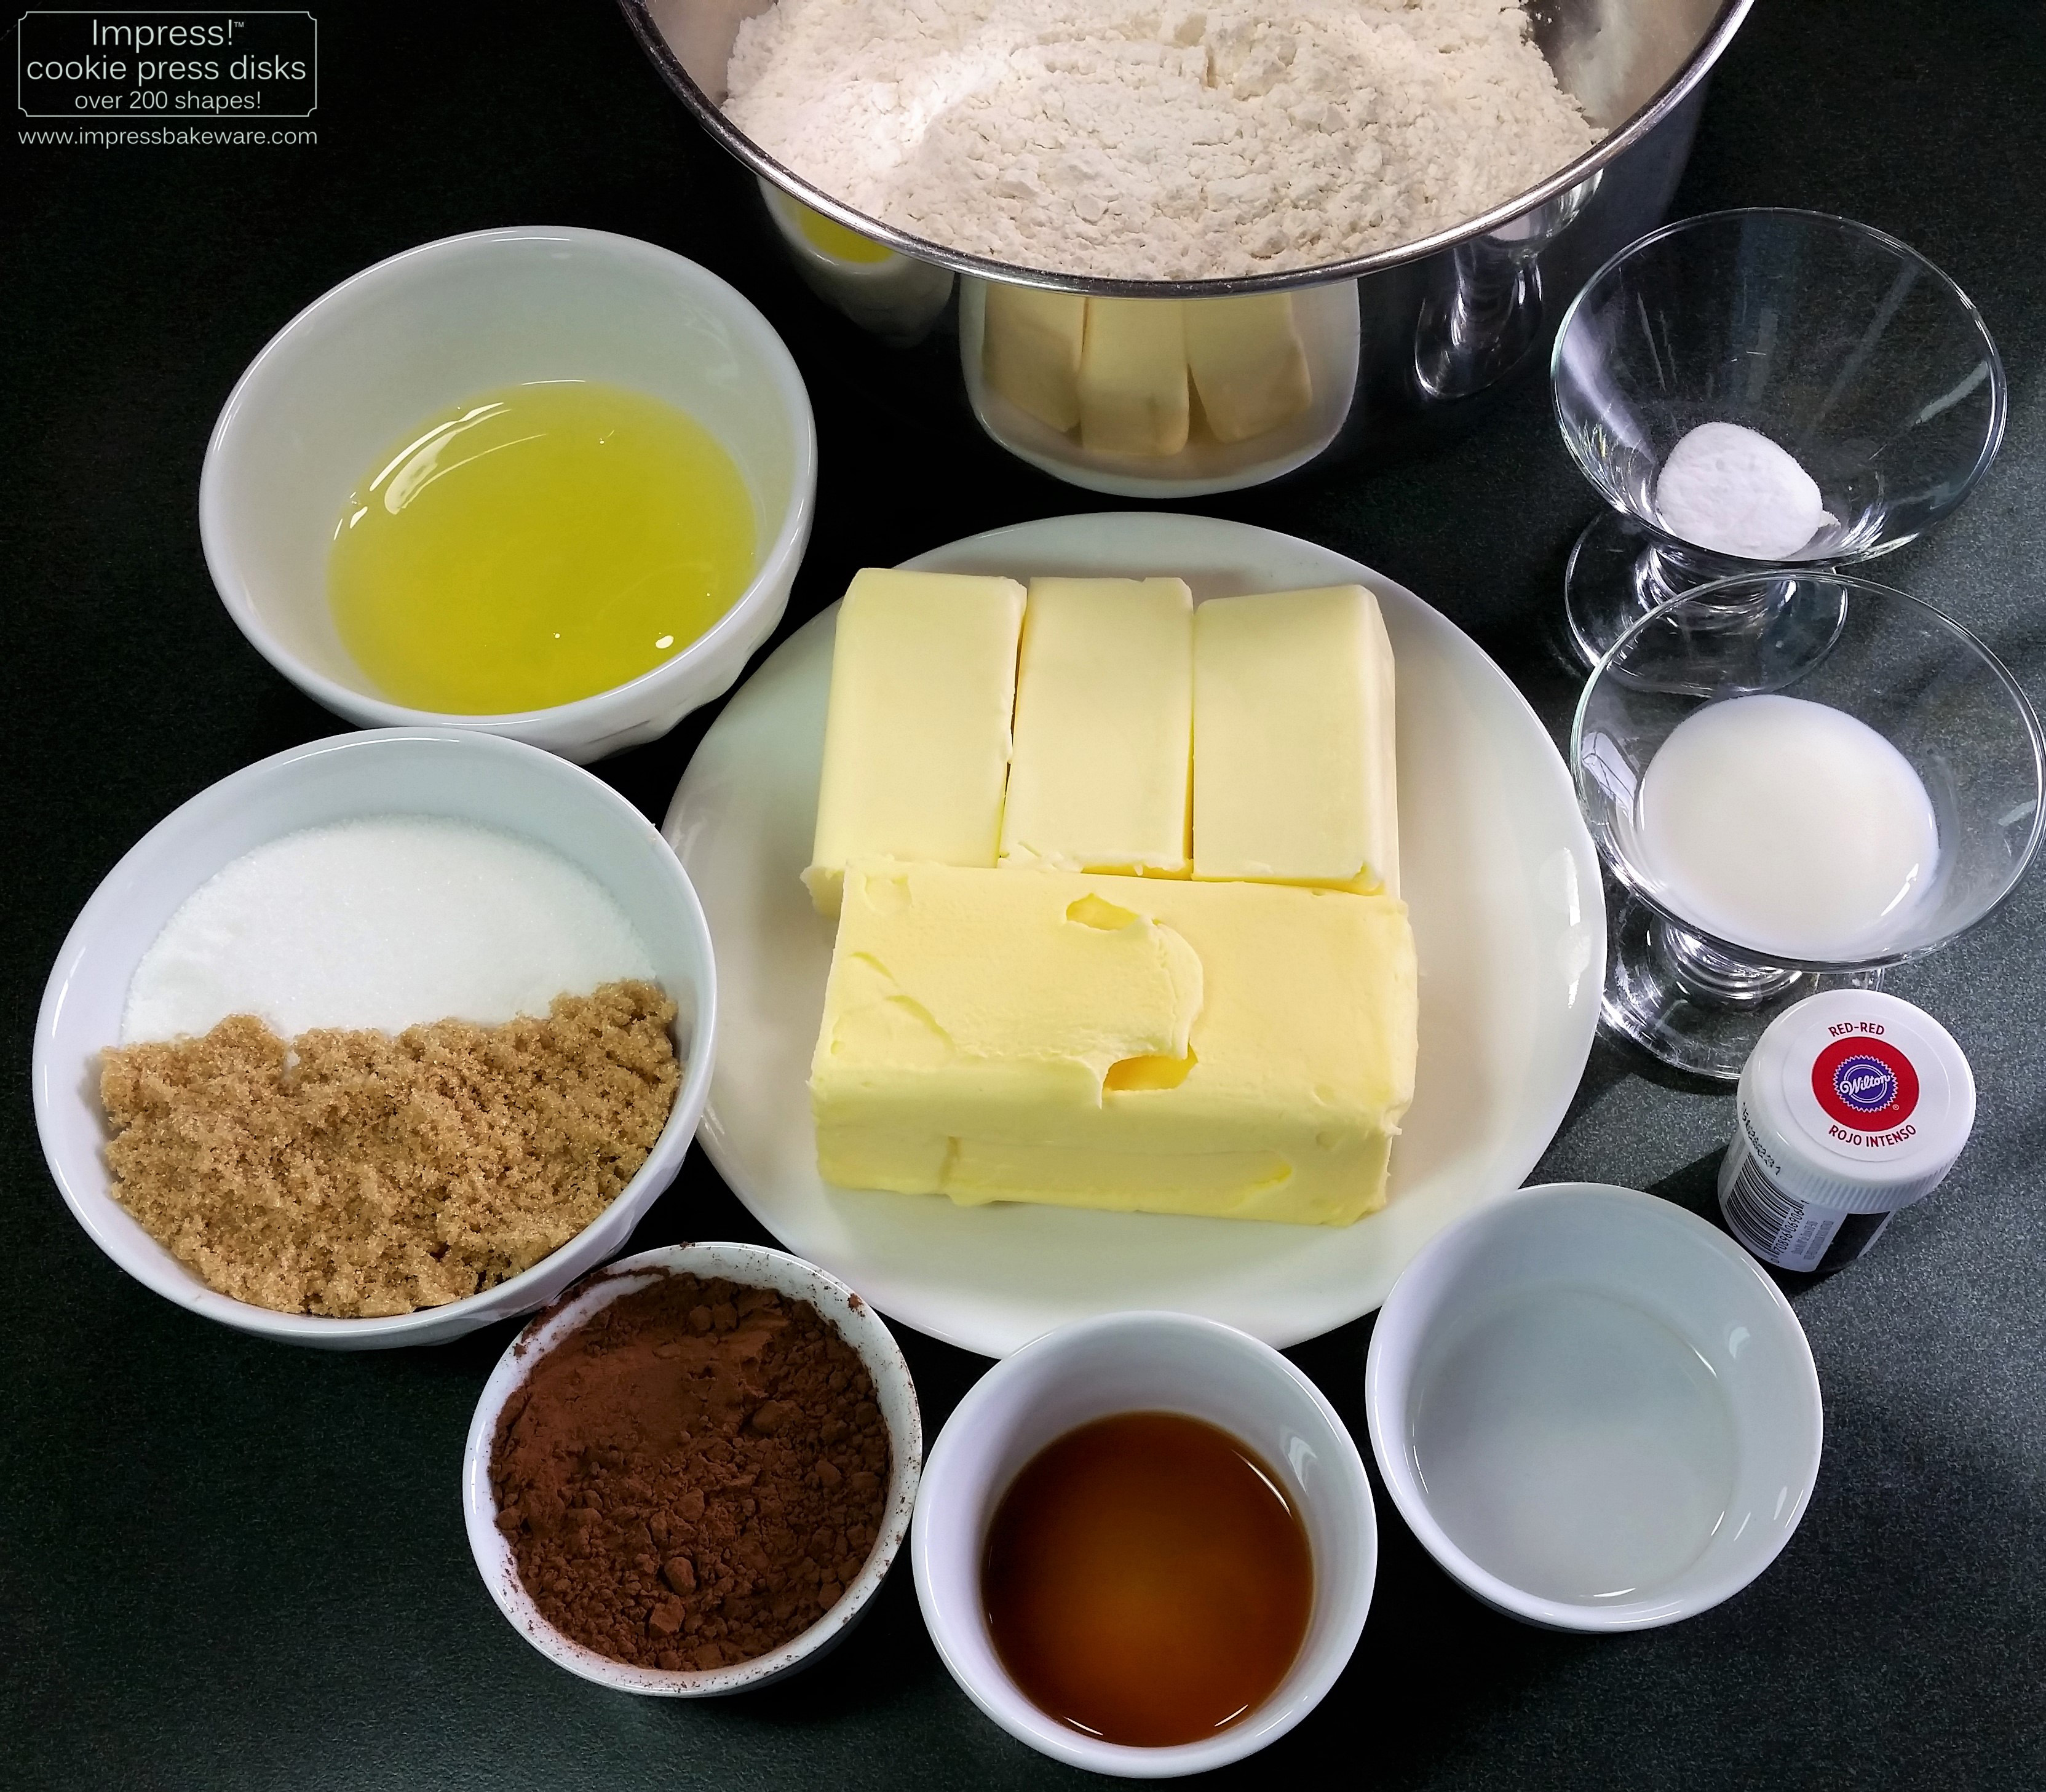
3/4 cup (1 1/2 sticks) butter, softened (not melted)
3/4 cup butter flavored shortening
1/2 cup white granulated sugar
3 Tablespoons brown sugar
1 Tablespoon warm buttermilk
1 Tablespoon white vinegar
2 egg whites
3/4 teaspoon red gel food coloring
1 teaspoon vanilla extract
3 1/3 cups plus 2 Tablespoons all-purpose flour
1/4 cup unsweetened cocoa powder
1/2 teaspoon baking soda
Cream cheese filling (for sandwich cookie version)
3 Tablespoons butter, softened not melted
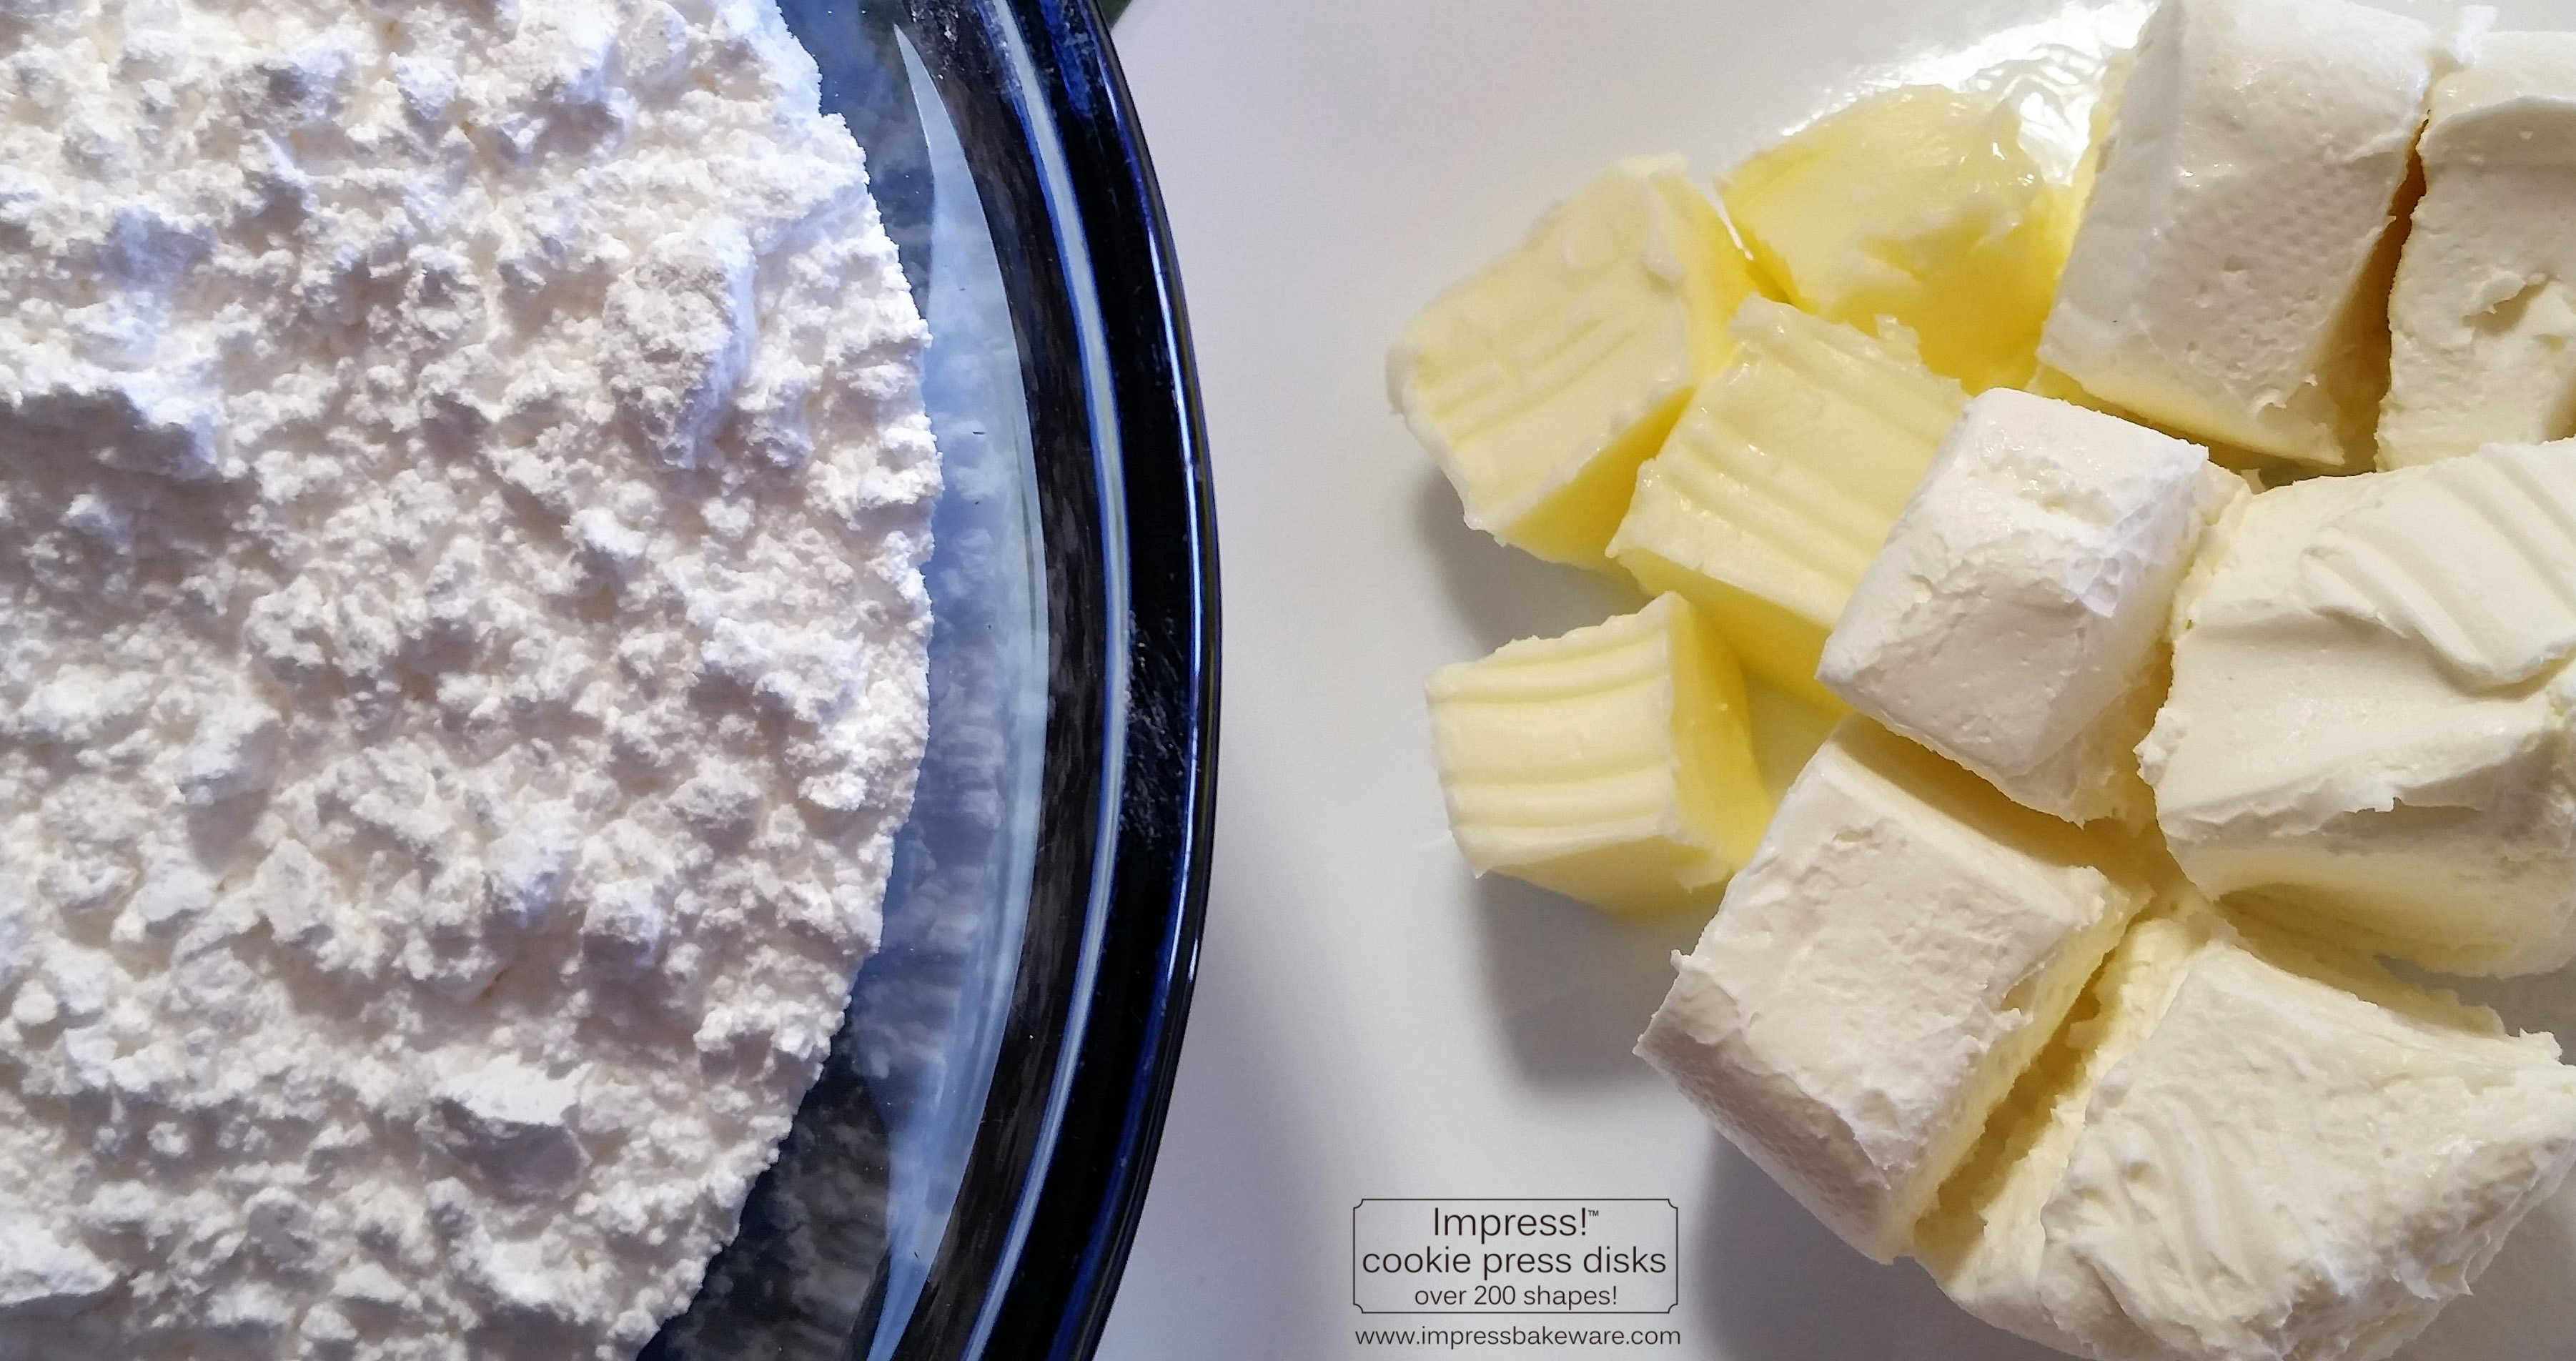
6 ounces of cream cheese (brick, not tub)
4 1/2 cups of powdered sugar
For decorating
Small candy eyes (link to purchase from The Baker’s Kitchen below) or black icing for eyes and red icing for the noses.
Preheat your oven to 400°F.
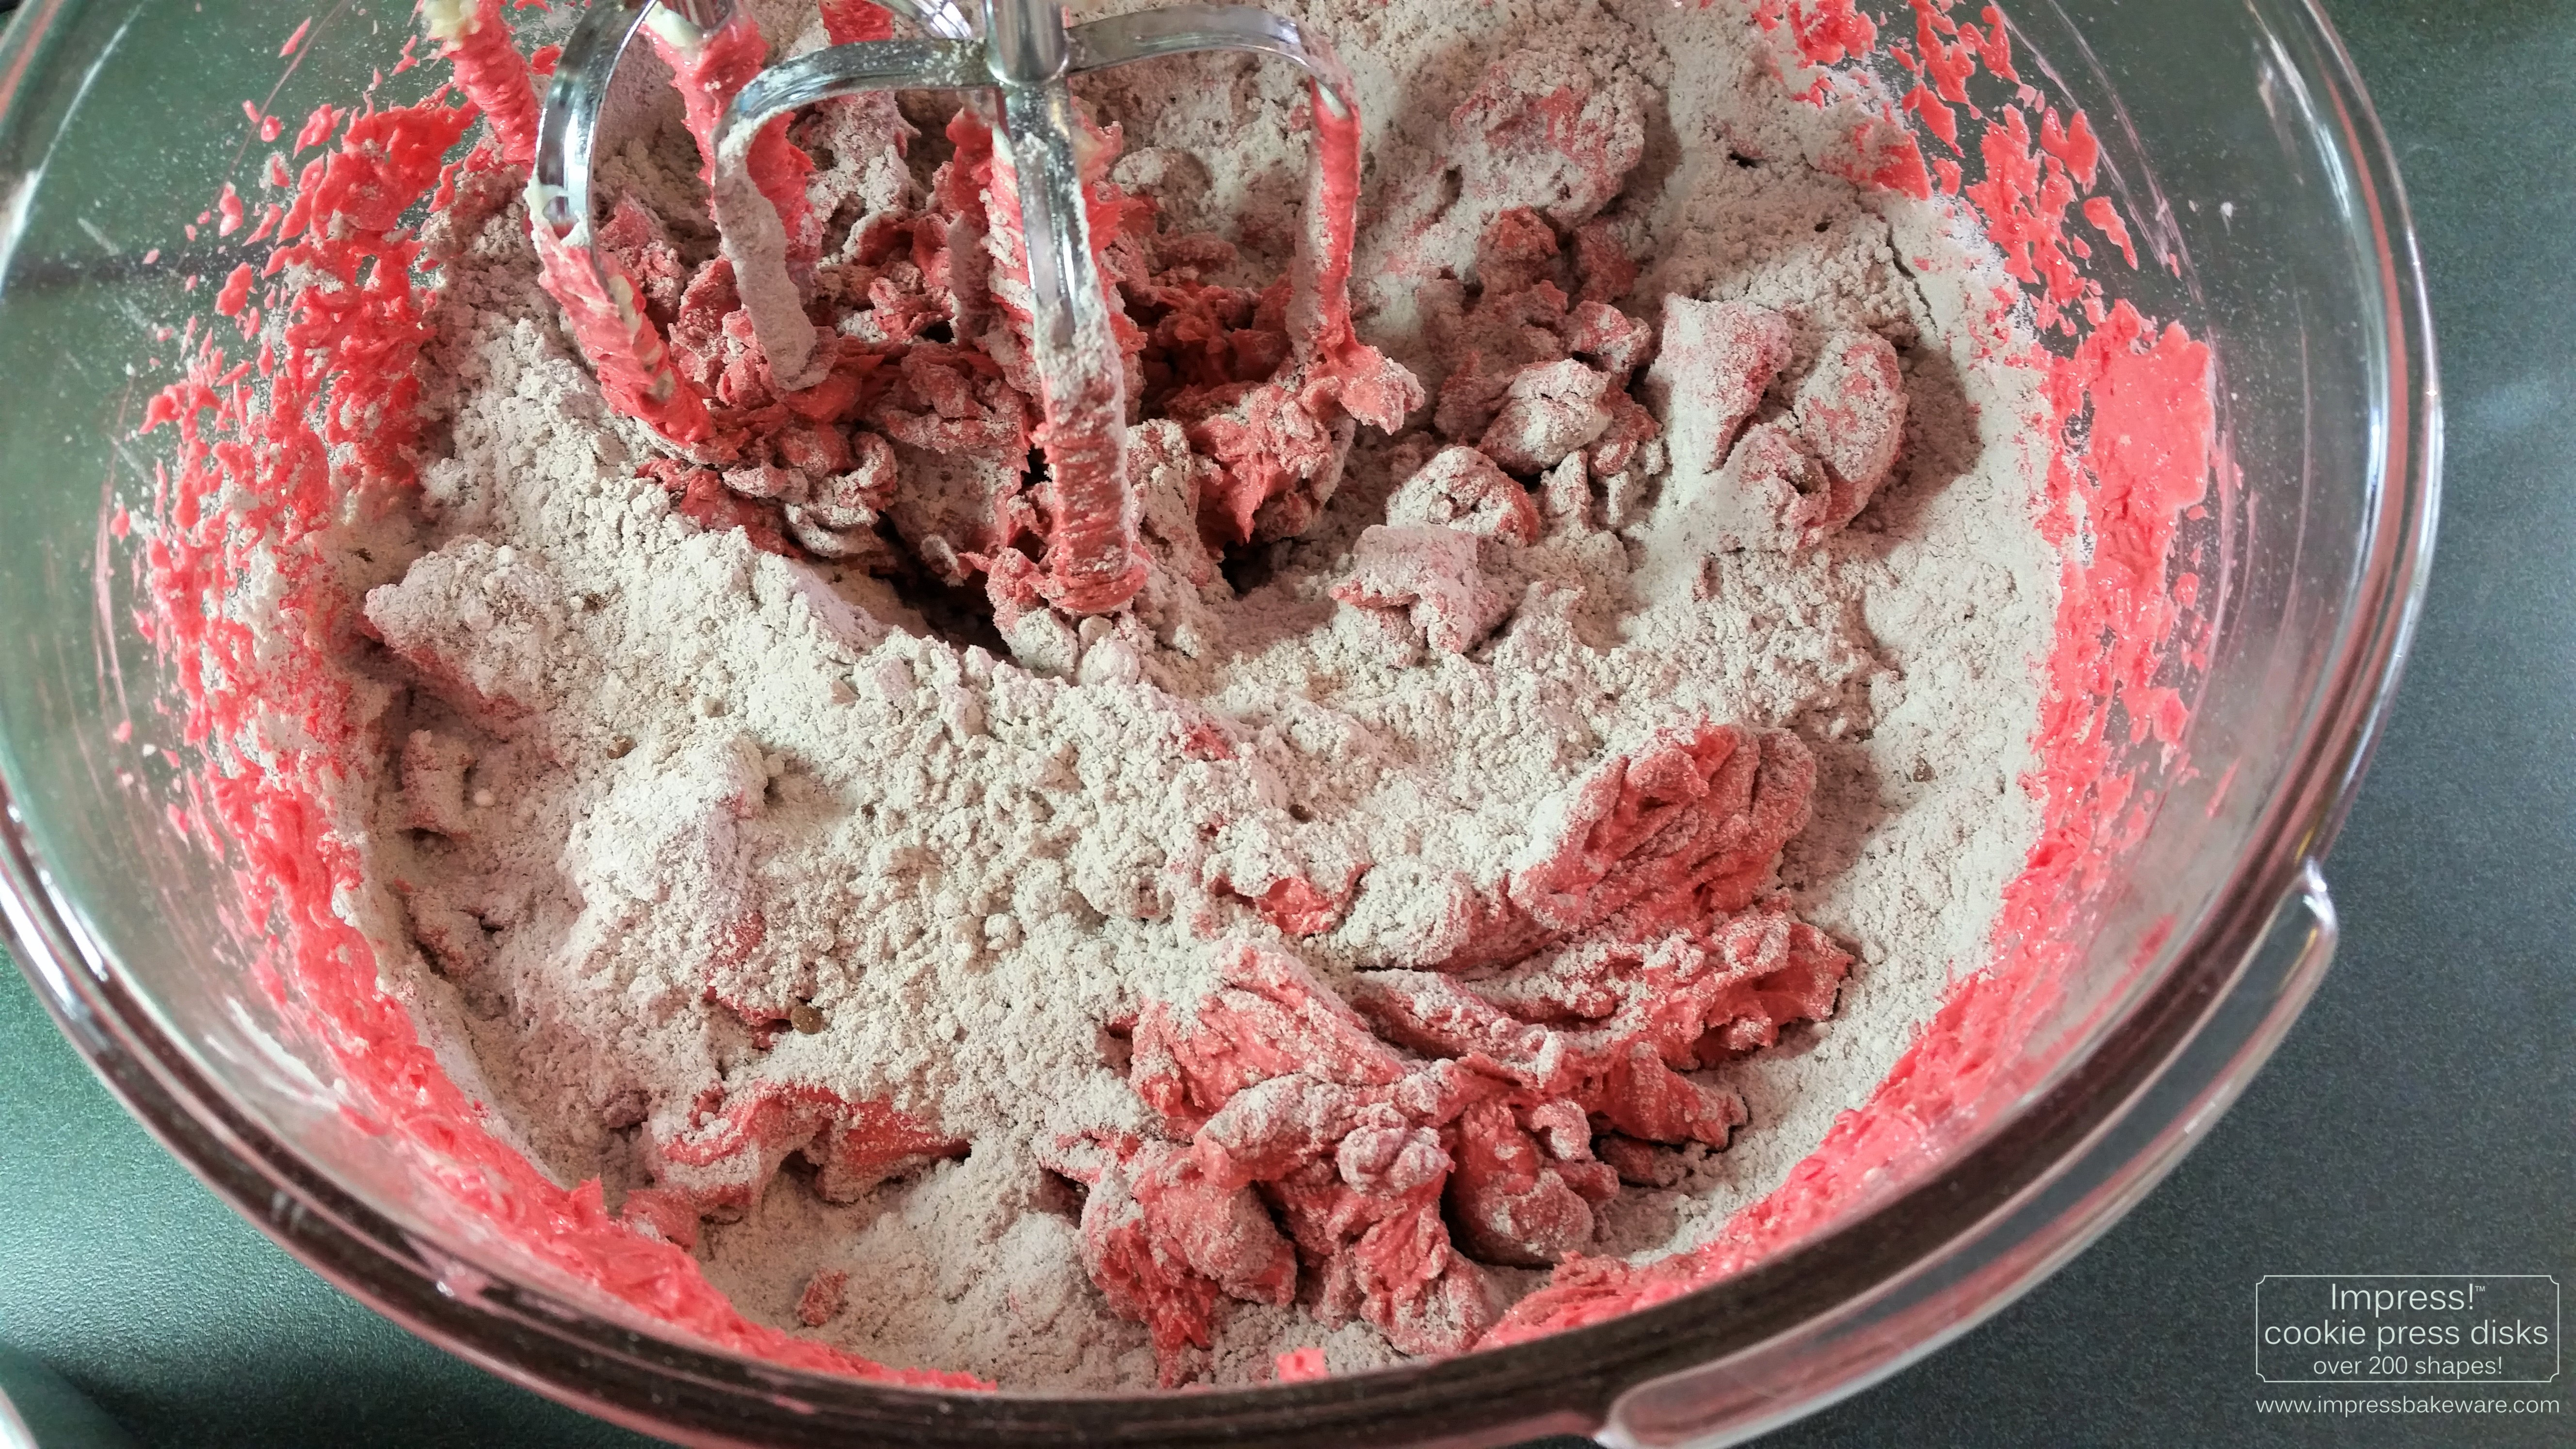
Thoroughly combine the flour, cocoa powder and baking soda in a large bowl and set aside.
The most important step to excellent spritz cookies is always to cream the butter very well. Pretend you are making a buttercream frosting and cream/whip your butter until it is wonderfully smooth. It has a slightly different feel when it’s half shortening, but the principle is still the same. It will just be a tad less fluffy.
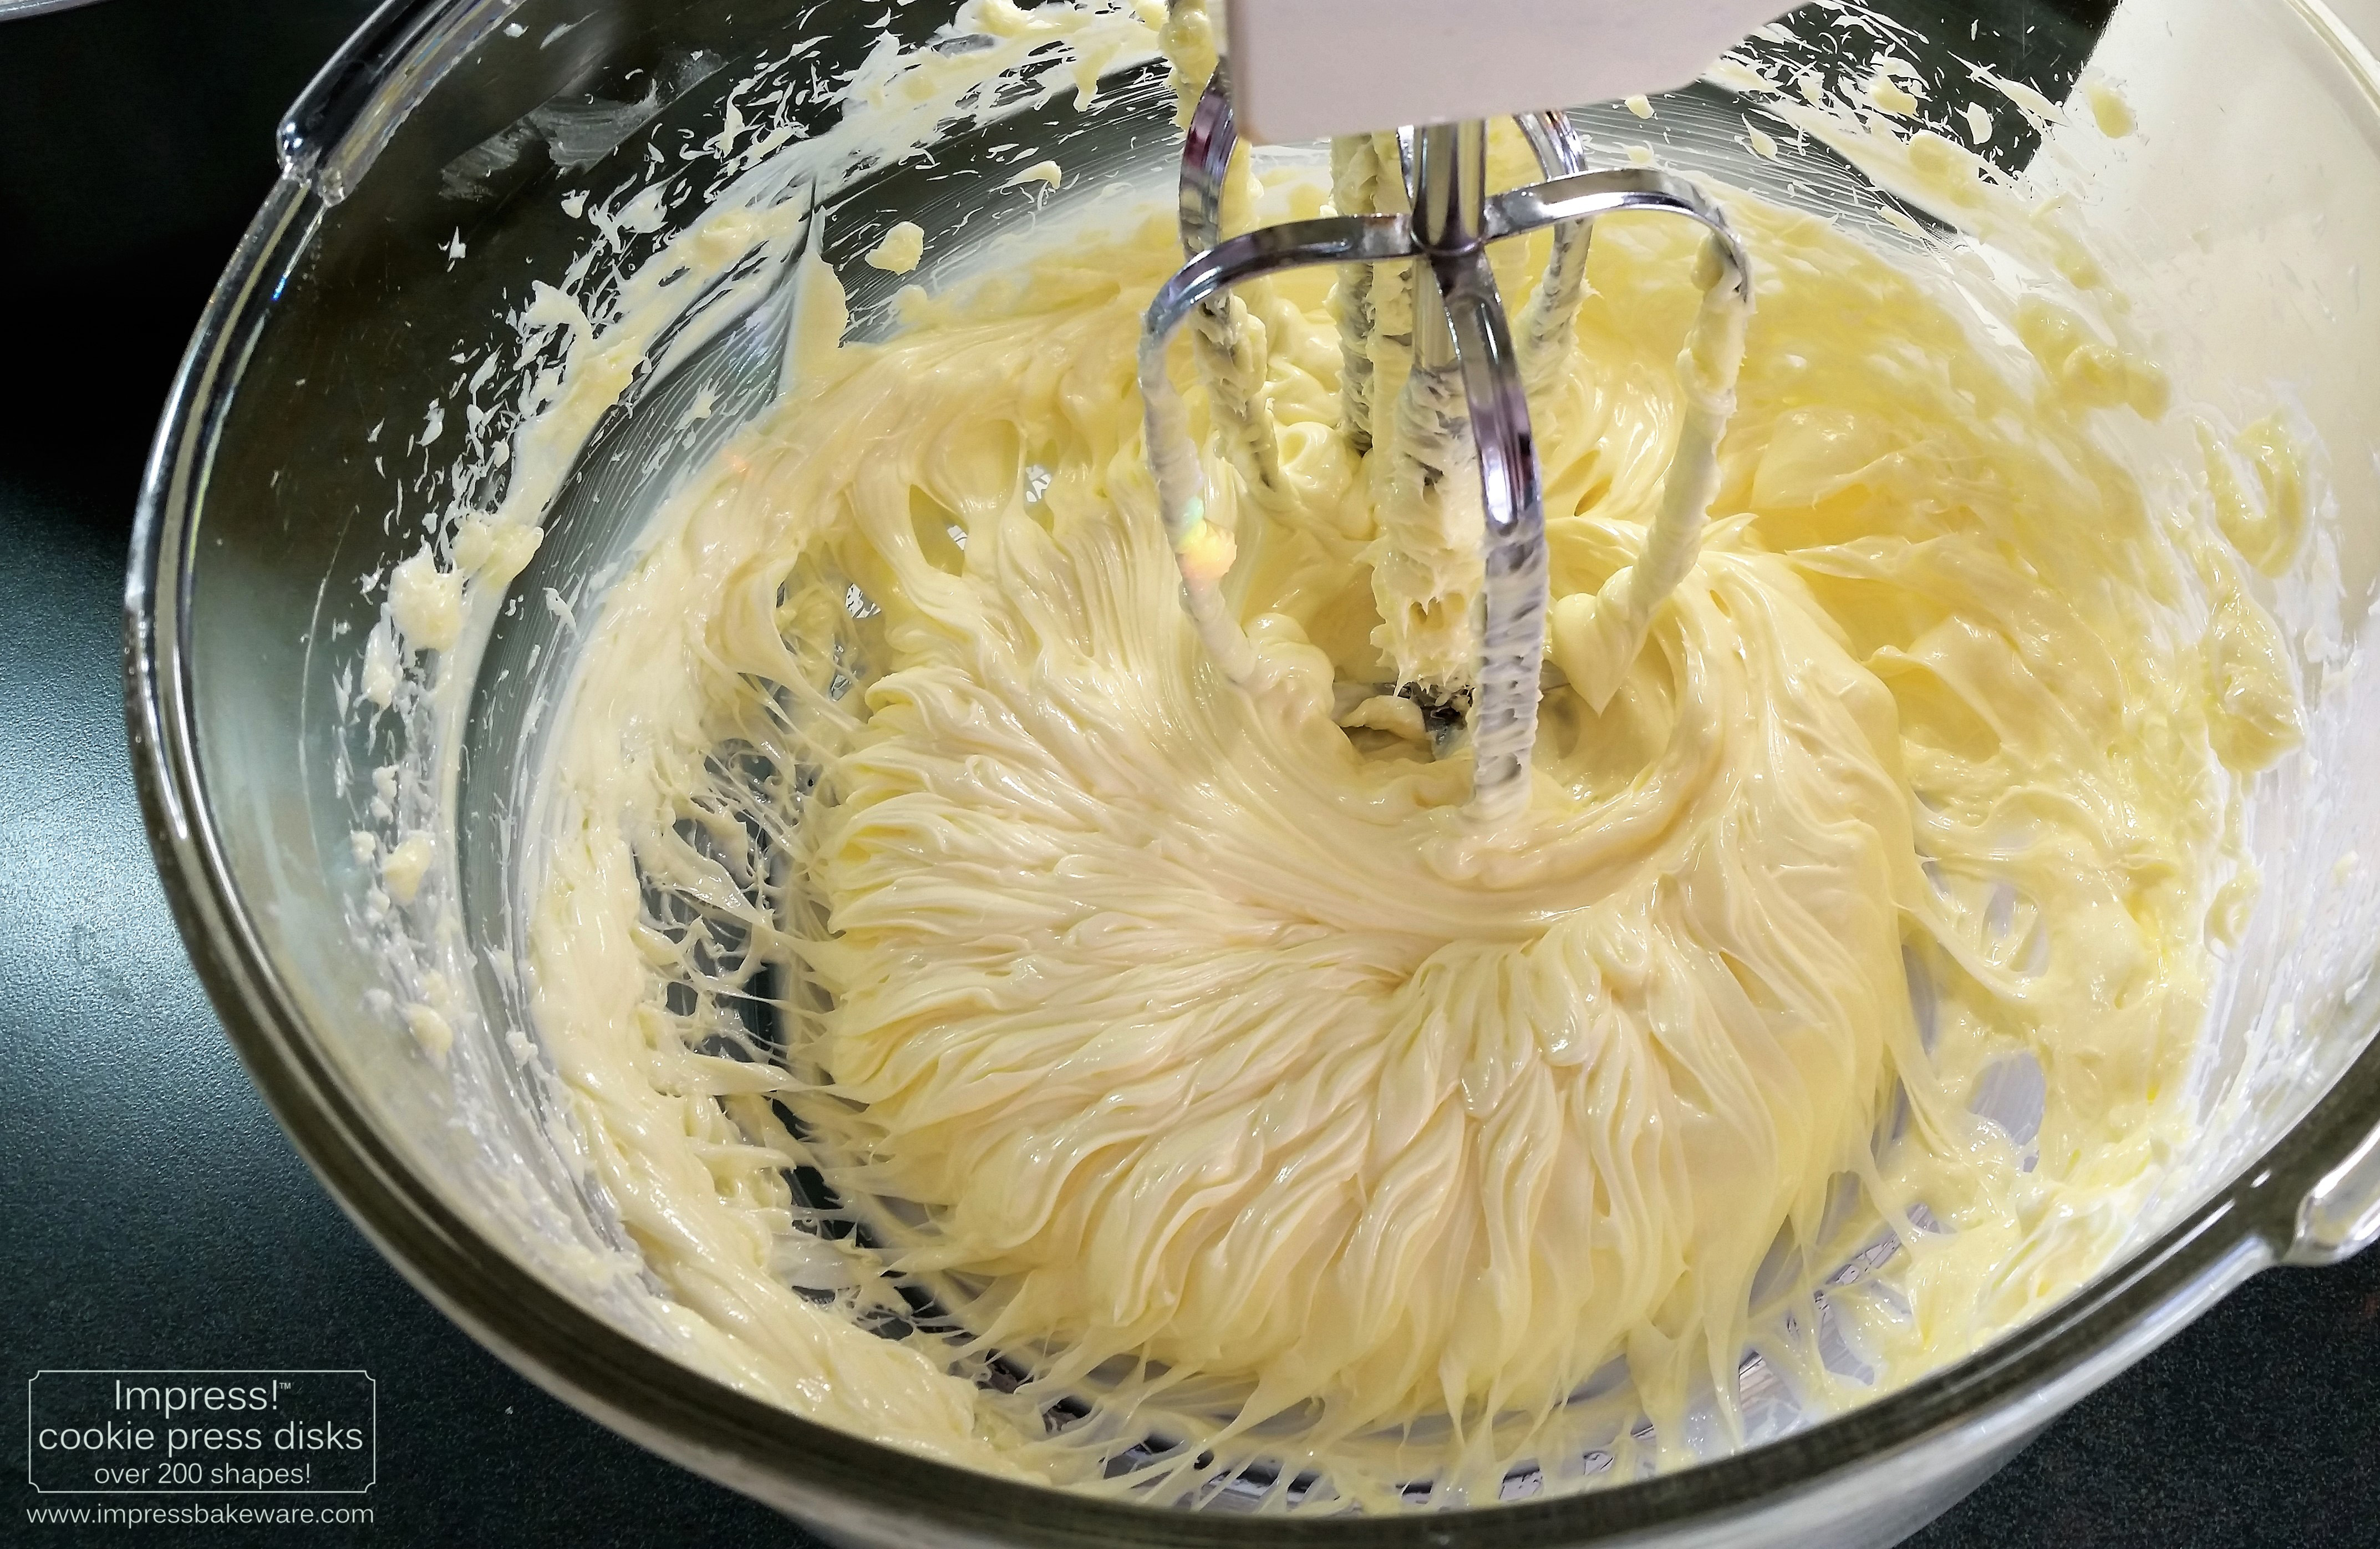
Now add the sugars and cream it very well again. Then add the other wet ingredients: buttermilk, vinegar, vanilla extract, egg whites, and food coloring. You must use gel coloring. Liquid will affect the dough consistency. You can find gel colors at Wal-Mart, Hobby Lobby, etc, or online.
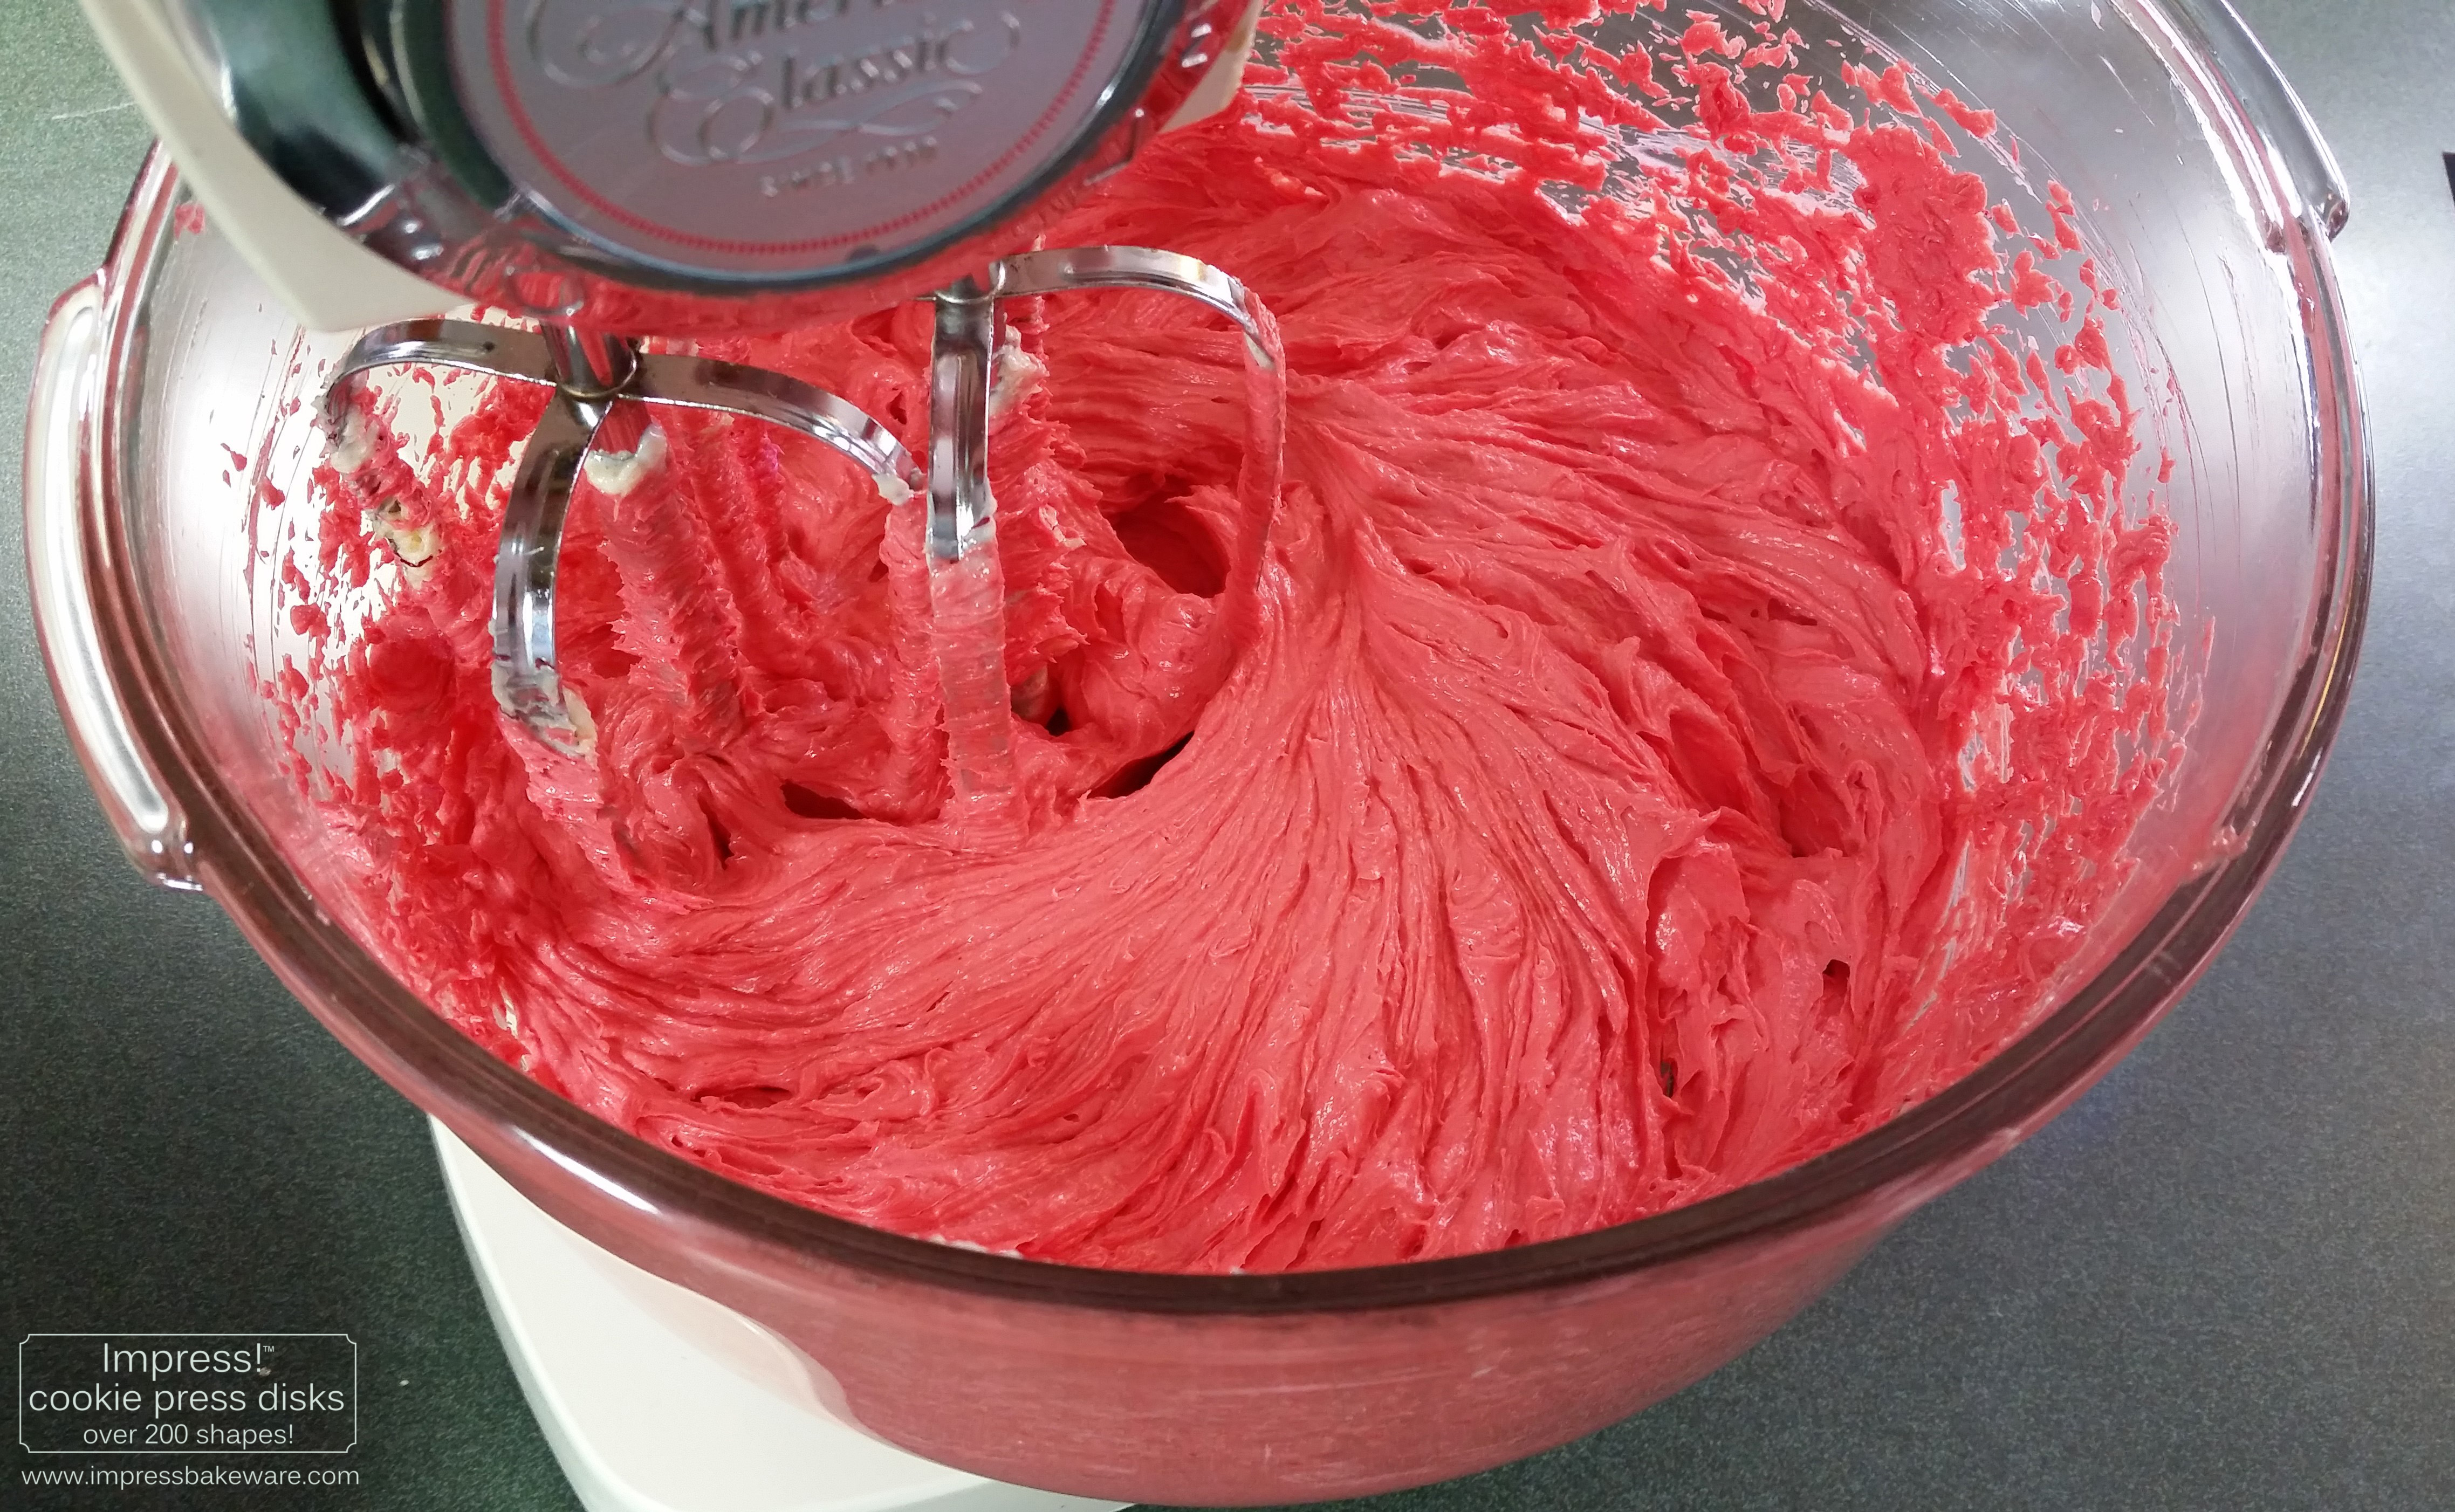
At this stage it is a shocking bright red/pink. Pretty!
Add the dry ingredients until thoroughly combined. Great spritz dough has a firm feel and does not stick to your fingers terribly. There is a dryness to it that makes it easy to handle.
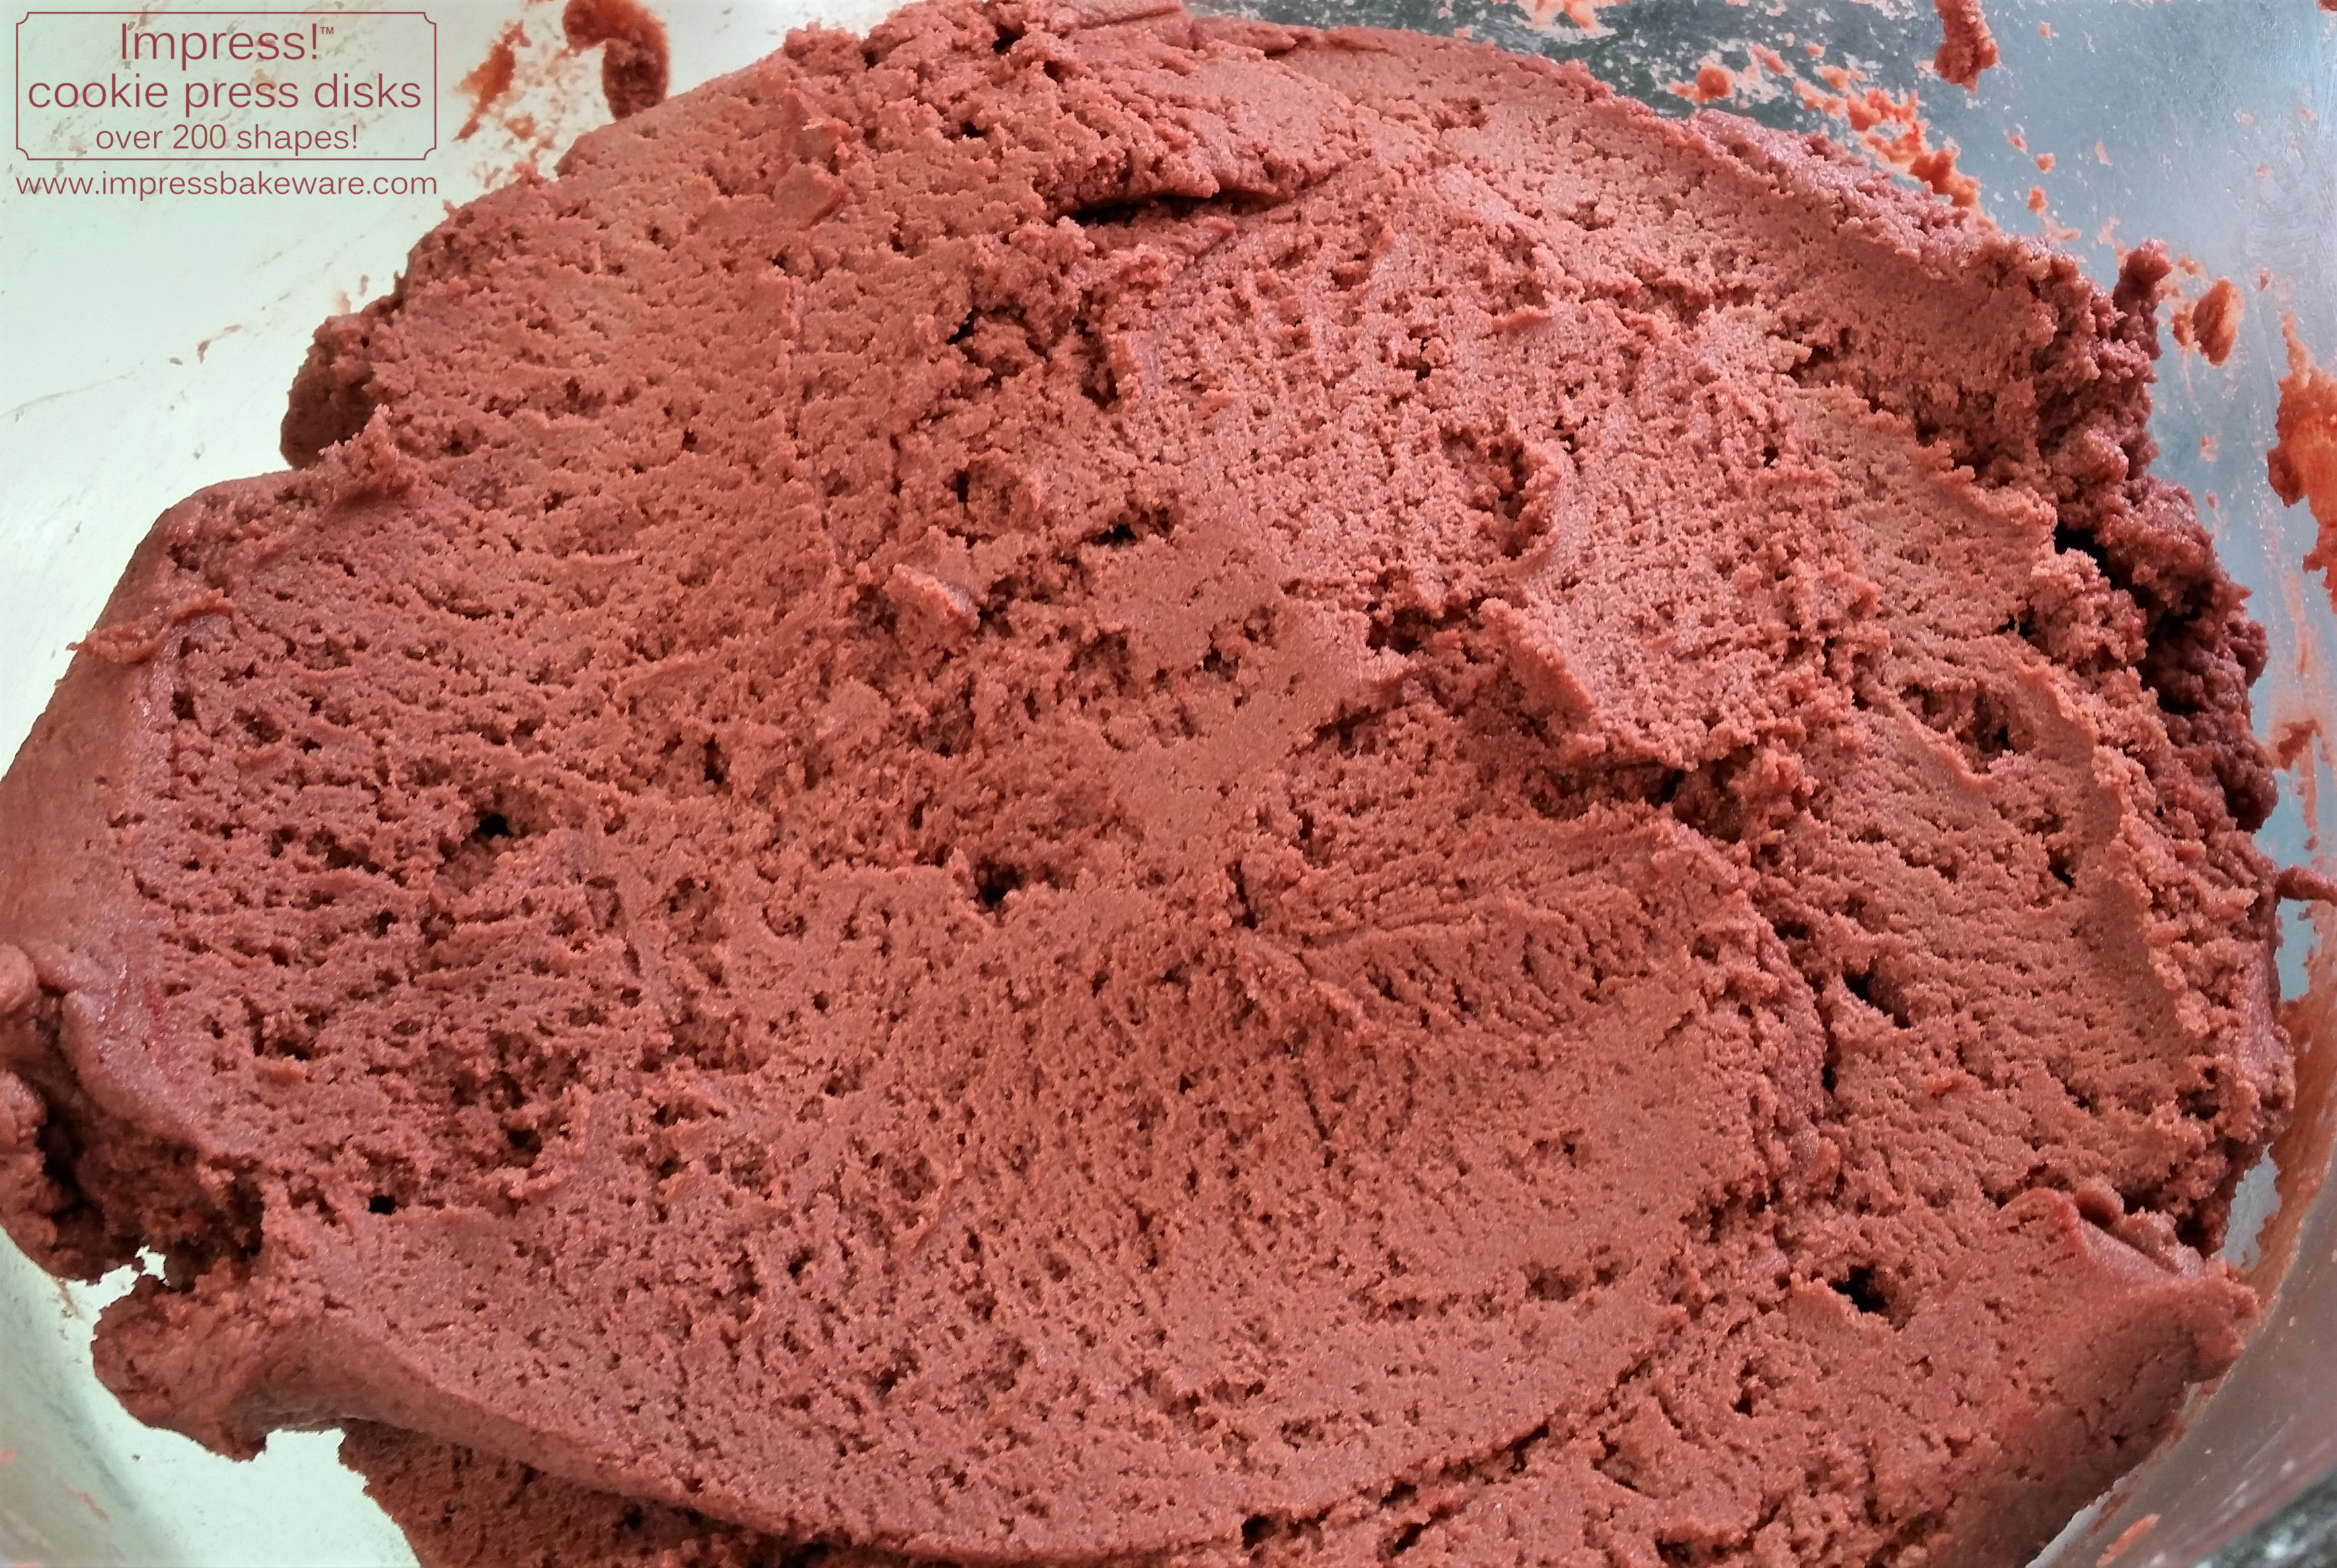
You can always troubleshoot a spritz dough by adding water or vanilla extract a teaspoon at a time to stiff, dry dough, or adding flour a tablespoon at a time to overly sticky or soft dough. Perfect spritz dough has a soft malleable texture that is not too sticky or too stiff.
When you run a spatula along the dough and it makes this pattern on the surface, you know it’s good dough. It’s so quintessentially spritz-like it always makes me smile.
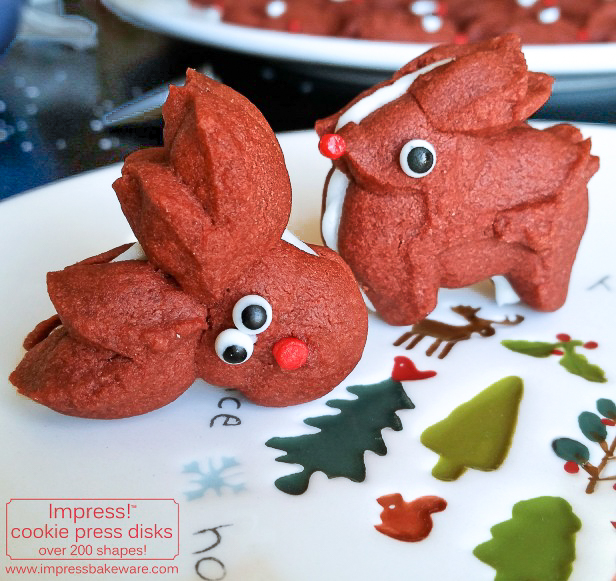
The reindeer heads press perfectly in this dough. I mean perfectly. You will be able to just pop them out, no problem. With the side-view disk, once in a while the antlers didn’t release and I just gently lifted them from the disk and placed them by the reindeer’s head. It didn’t make that much of a difference in the look. This dough is a little soft to release the antlers. They press more easily in regular dough, but are too cute to have left out of this blog! So if the antlers give you trouble, honestly, just pull them off and hand place them. No biggie.
Load your press barrel with dough, using the back of a spoon to remove and air bubbles as you go. Press onto cookie sheets (un-greased and they must not be nonstick- the dough has to stick to the sheets). The first few shapes may come out goofy. Just throw them back into the dough bowl to be re-pressed. Pressure has to build in the barrel before you can pop out consistent shapes. Once you’ve got a good shape, try to use a consistent rhythm.
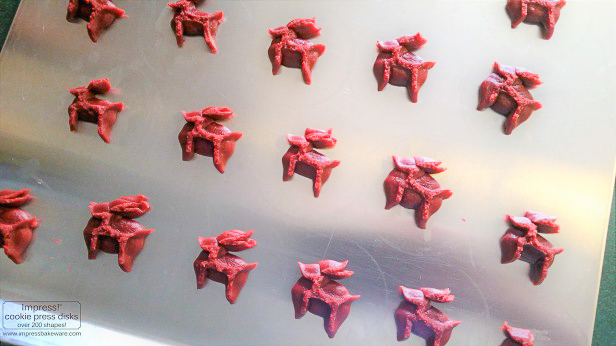
Try to keep your side view reindeer skinny. They are more distinct that way. If you’re using a one-click-per-cookie press, don’t feel that you have to use one click each time. Think of “clicking” as just a pumping mechanism for the dough. Sometimes one click is just right, but sometimes less than one will do or you need to give a little more squeeze after the click to get the shape right. With time this becomes easy and intuitive, as you learn to feel the dough sticking. Be patient and remember, this is supposed to be fun, always!
If you’re planning on making the sandwich cookies with the side-view reindeer, make sure you press an even number of that shape facing both ways. In other words, press some and then turn the disk over. This way you can match up a top cookie to an upside-down bottom cookie that ends up with the heads pointing in the same direction. See below for how they match up.
Bake for 7-10 minutes or until they have a “set” look. Check them early and often especially on the first batch as all ovens are different. There’s no need to let them brown much, if at all, depending on how you like the taste. They’re best when not over-baked. They have a richer texture when just done. Let them sit on the cookie sheet for about 2 minutes then remove to a wire cooking rack.
Let the cookies cool down before filling and decorating. Simply add candy eyes with a dot of icing as glue, or pipe black dots for eyes, and pipe red noses. Use a slightly wet fingertip to round out the noses if they look pointy.

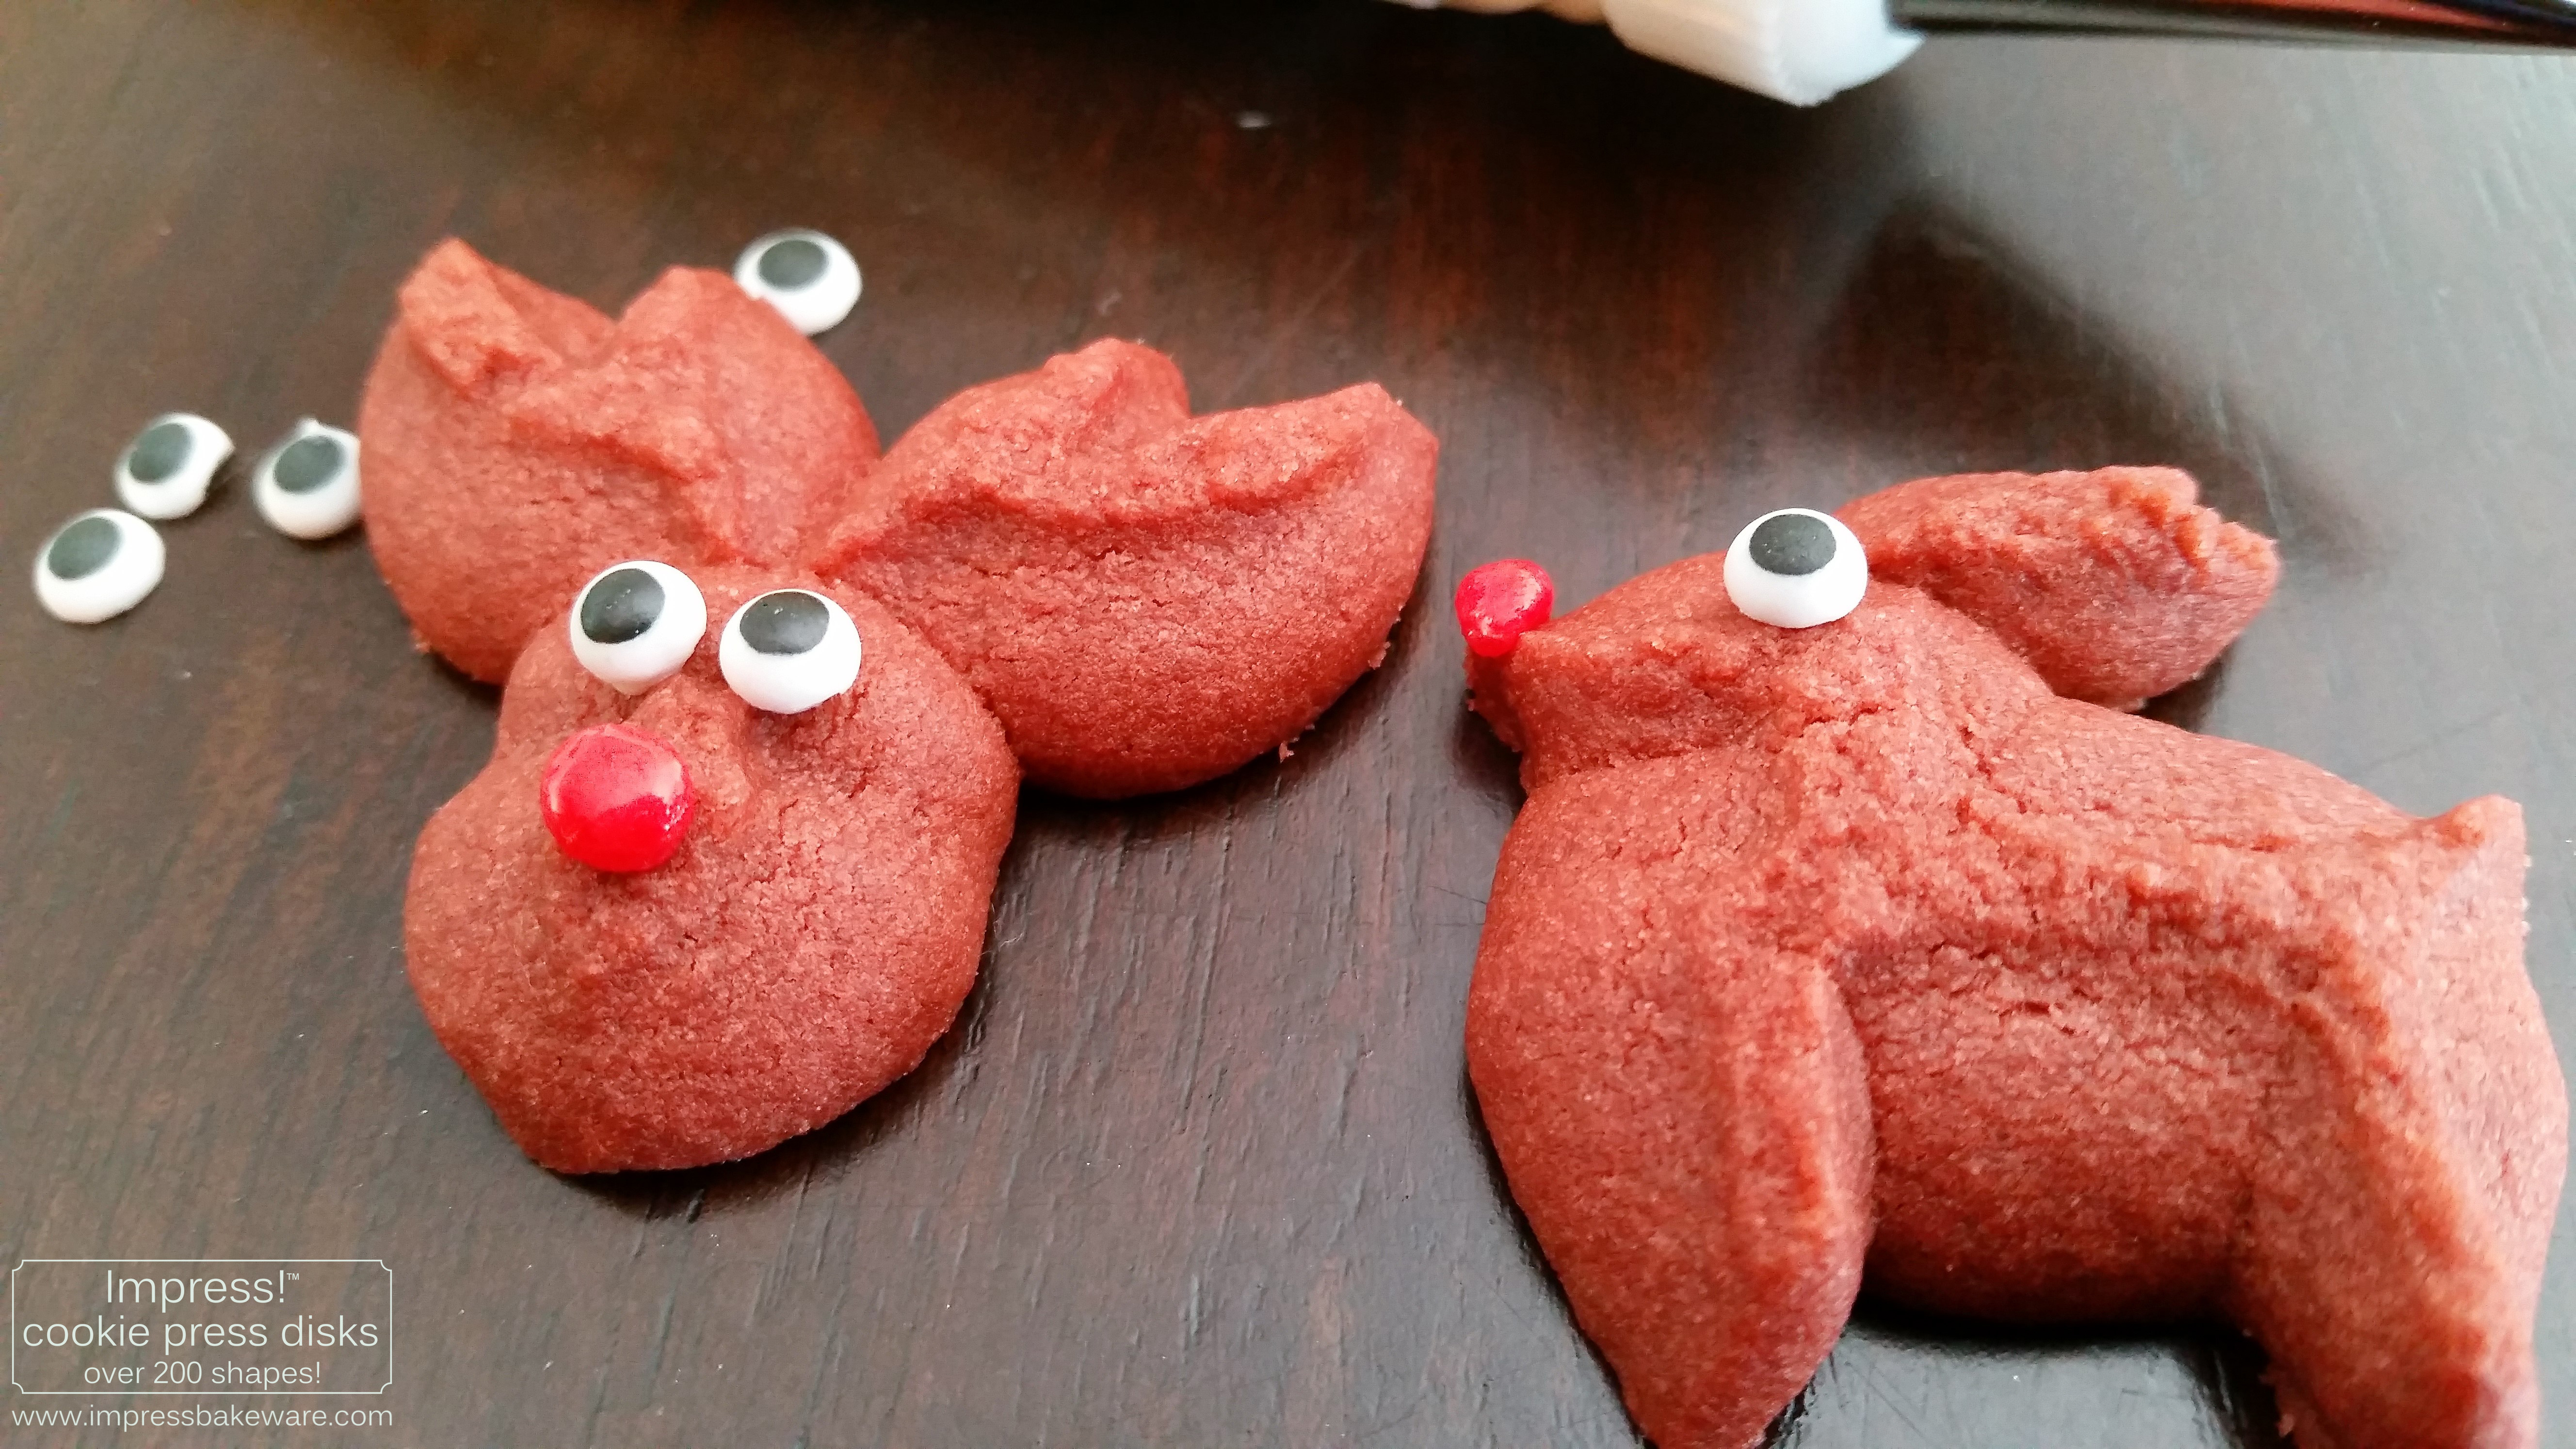
Let the eyes and noses set for a couple of hours before handling too much. If you’re making sandwich cookies, you can sandwich first, then do the eyes and noses.
If you’re not making sandwich cookies, that’s it!
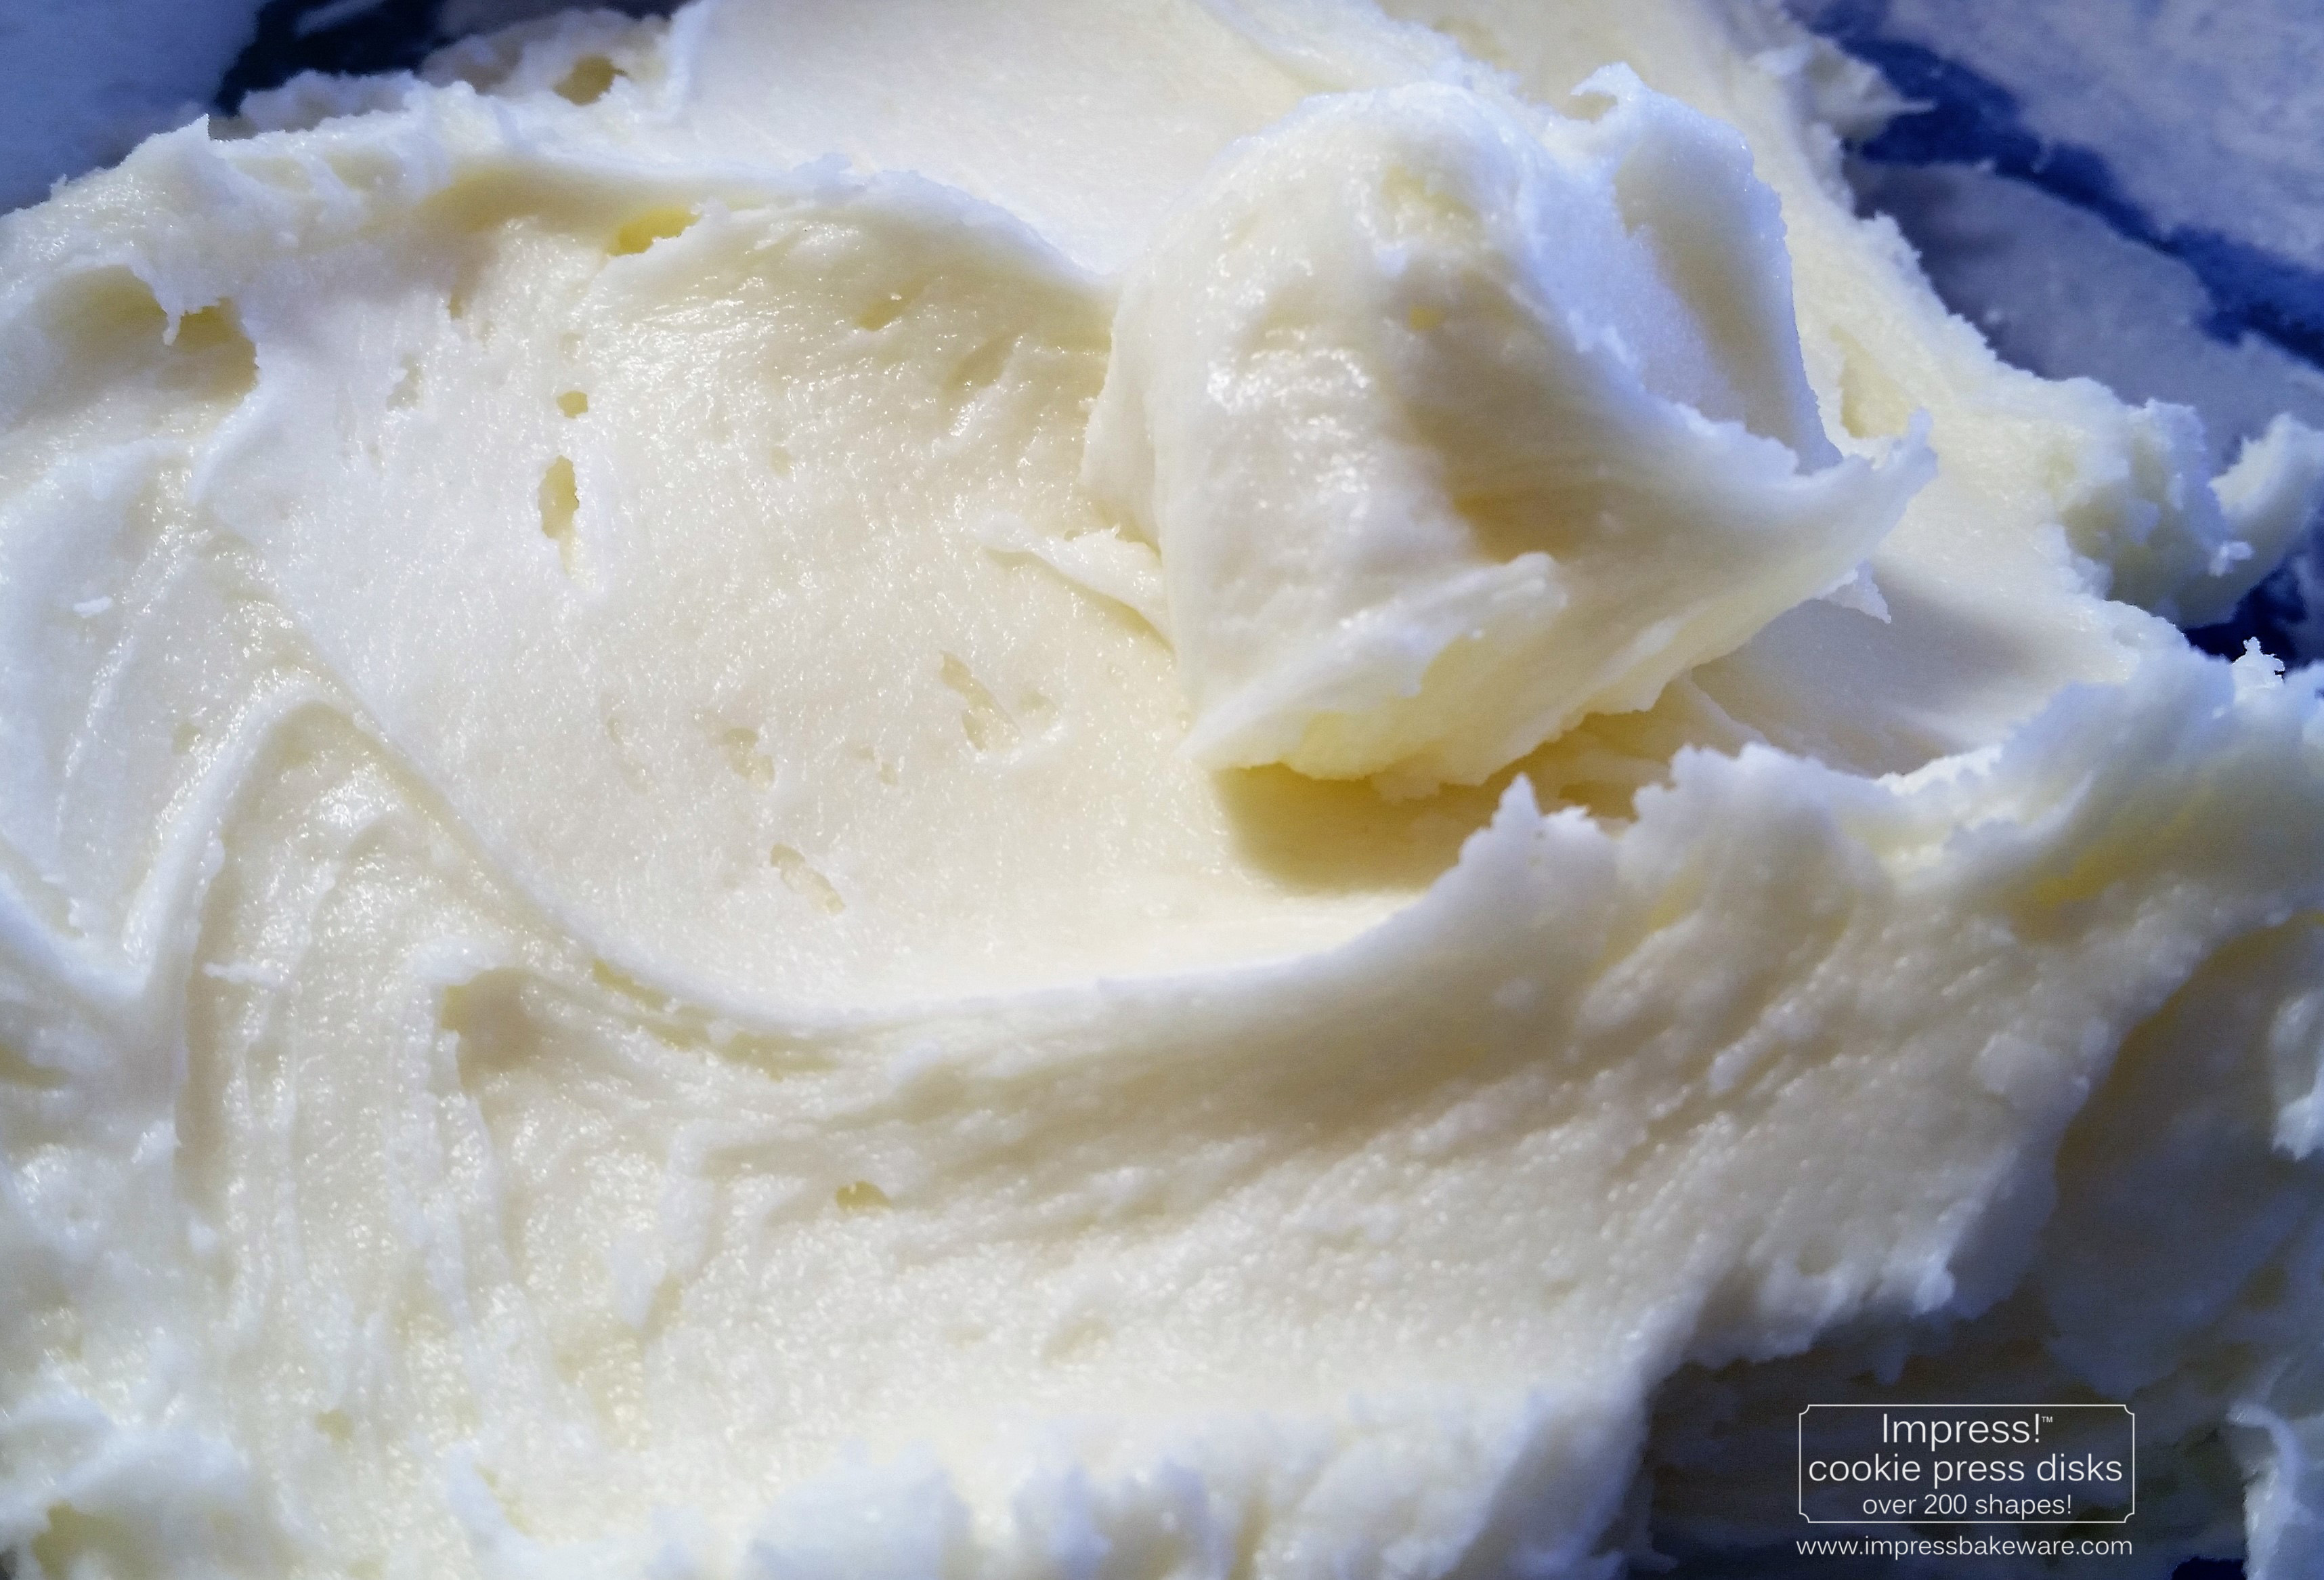
For the sandwiches, cream the butter and cream cheese with an electric mixer until smooth. Slowly add the powdered sugar until it’s a fairly stiff mixture. This isn’t a lightweight frosting, it’s cookie stuffing. I made this very heavy on cream cheese, so it takes less like a cream cheese flavored buttercream and more of a knock-your-socks-off cream cheese filling.
Remember that being real cream cheese and lots of it, you’ll want to store these in the fridge or the freezer. Spritz cookies do very well even for a couple of months in the freezer and take a short time (15 to 20 minutes at most) to thaw out and be fabulous. They’re fine for a few hours at a party but do take precautions. To be honest, these are great the next day but incredible the day they’re made. So you might plan for a day-you-need-them bake. 😉
While you could use a knife to spread the filling on, I used a decorating bag with a #4 round tip. It made for nice smooth edges and a clean look.
Match two cookies up by size, one right side up the other upside-down. Pipe the filling around the outline of the upside-down cookie then fill in the middle as thick as you want. If you want to give them a cute, playful look add little red tongues as shown in the photo below. Place the top cookie on top and gently squeeze together. If you haven’t already done so, add the eyes and nose.
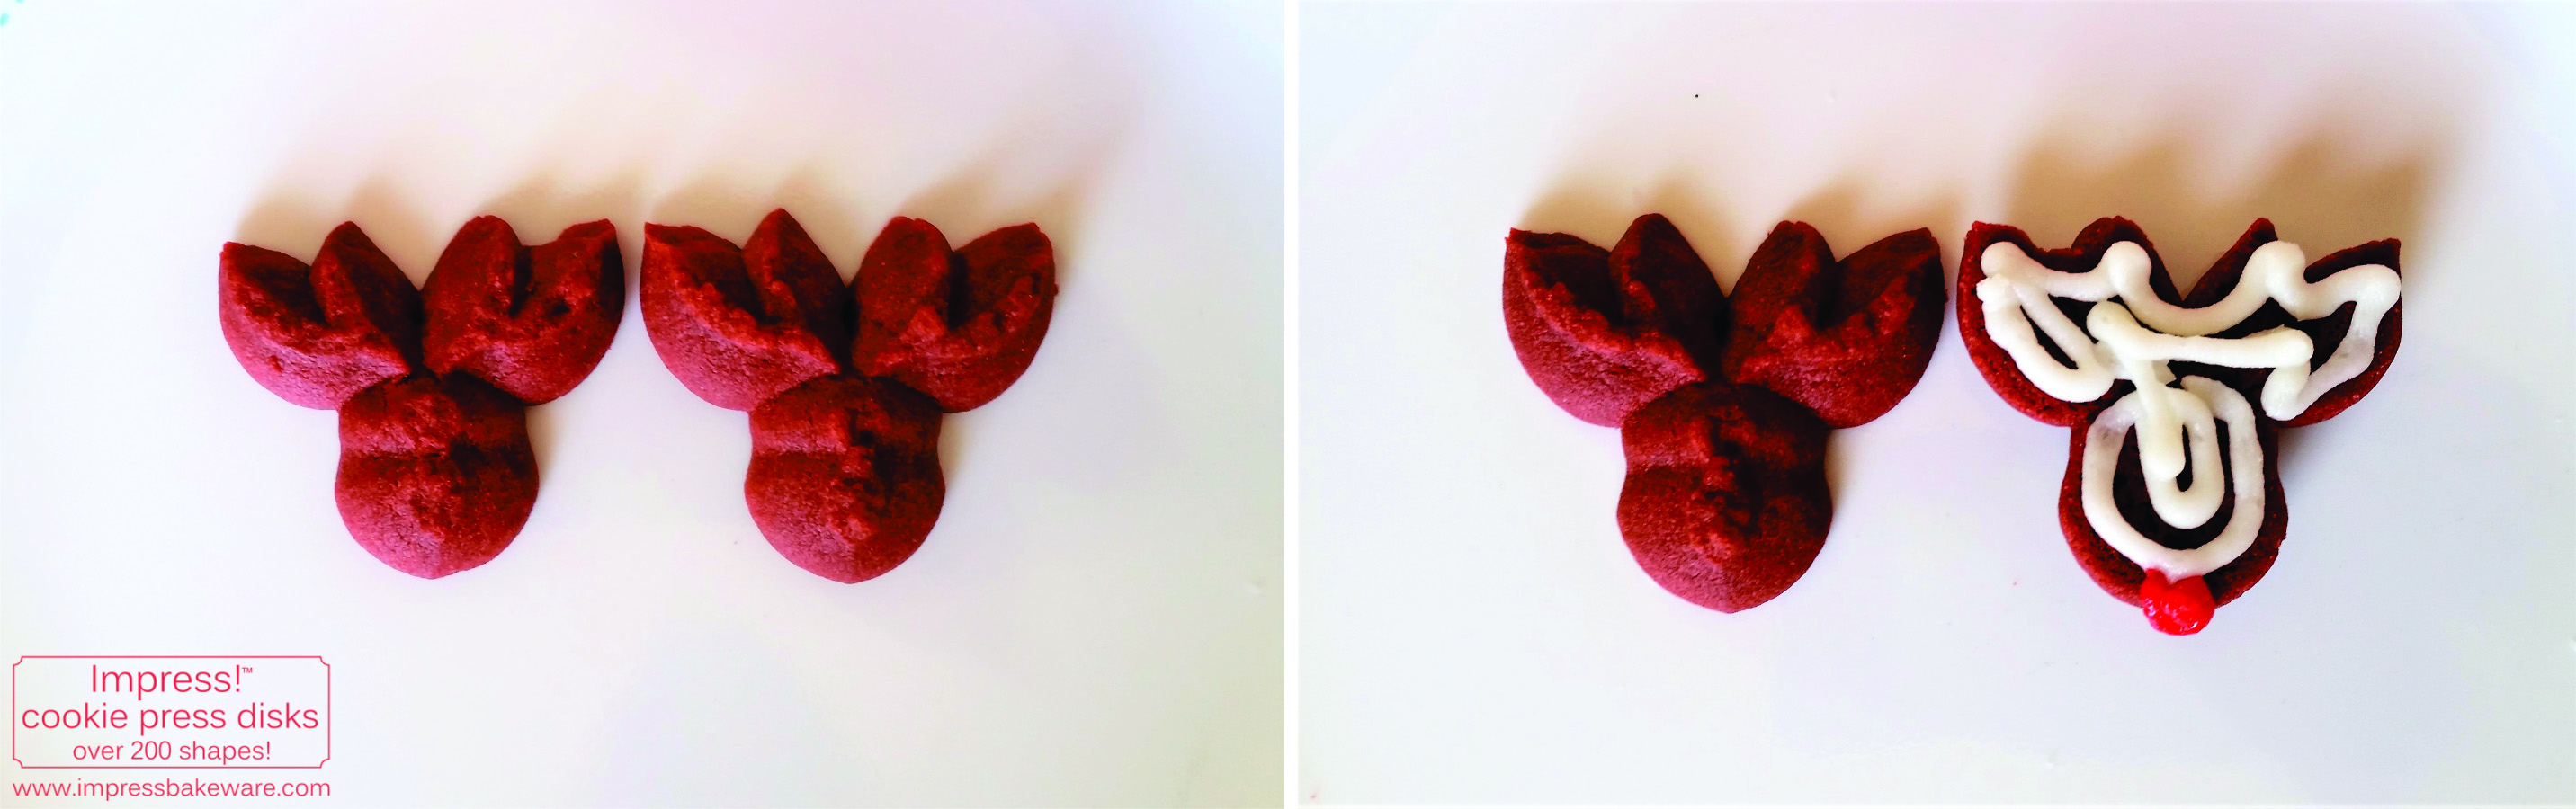
For the side view reindeer, do the same thing, but match up reindeer of similar size so that their noses touch. One goes upside-down, one right side up.

The last variation I did was a bit more decorating. I added jingle bell collars and festive saddle blankets to the side view reindeer. I simply piped on green and red icing (from a tube from the store, to be honest) and added gold pearls/nonpareils in a cute pattern.
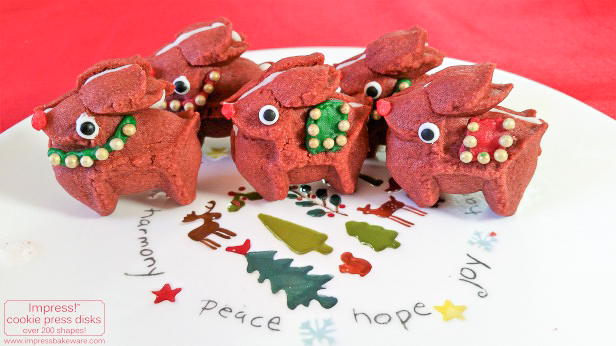
If you just flatten their feet with your fingernail they stand up! They’re all ready to pull Santa’s sleigh!
I hope these cuties add some whimsical joy to your Christmas fun.
🙏We have a request💕 If you’re enjoying our recipes, *EVERY DISK & PIN PURCHASED helps us stay in business* & supports our families! Impress is a women/family-owned USA small business in Colorado. We design, make, & sell over 300 shapes of cookie press disks & dozens of embossed rolling pins. The recipes we share are free – we have no ads on this recipe blog – we make our money selling disks & pins. The recipes give our customers creative ideas and attract new customers!💕 THANK YOU! 💕~Susie the Disk & Pin Designer
Merry Christmas from our families to yours, and as always, Happy Baking!
Disk set pictures below. 
~Susie
Disk Designer/Co-Owner at Impress! Bakeware, LLC
Our website has all of our 200+ disk shapes, cookie press, embossed rolling pins, baking accessories plus more about our Women/Family Owned company! impressbakeware.com
All products are on our Etsy shop.
Our Amazon shop has our cookie press and disks and embossed rolling pins.
Follow us on facebook!
The Christmas and Gingerbread Disk Sets:

The candy eyes I used here can be found at: http://www.thebakerskitchen.net/3/16-in-Candy-Eyes-Assorted-Colors—1000-Count-Pack.aspx
