

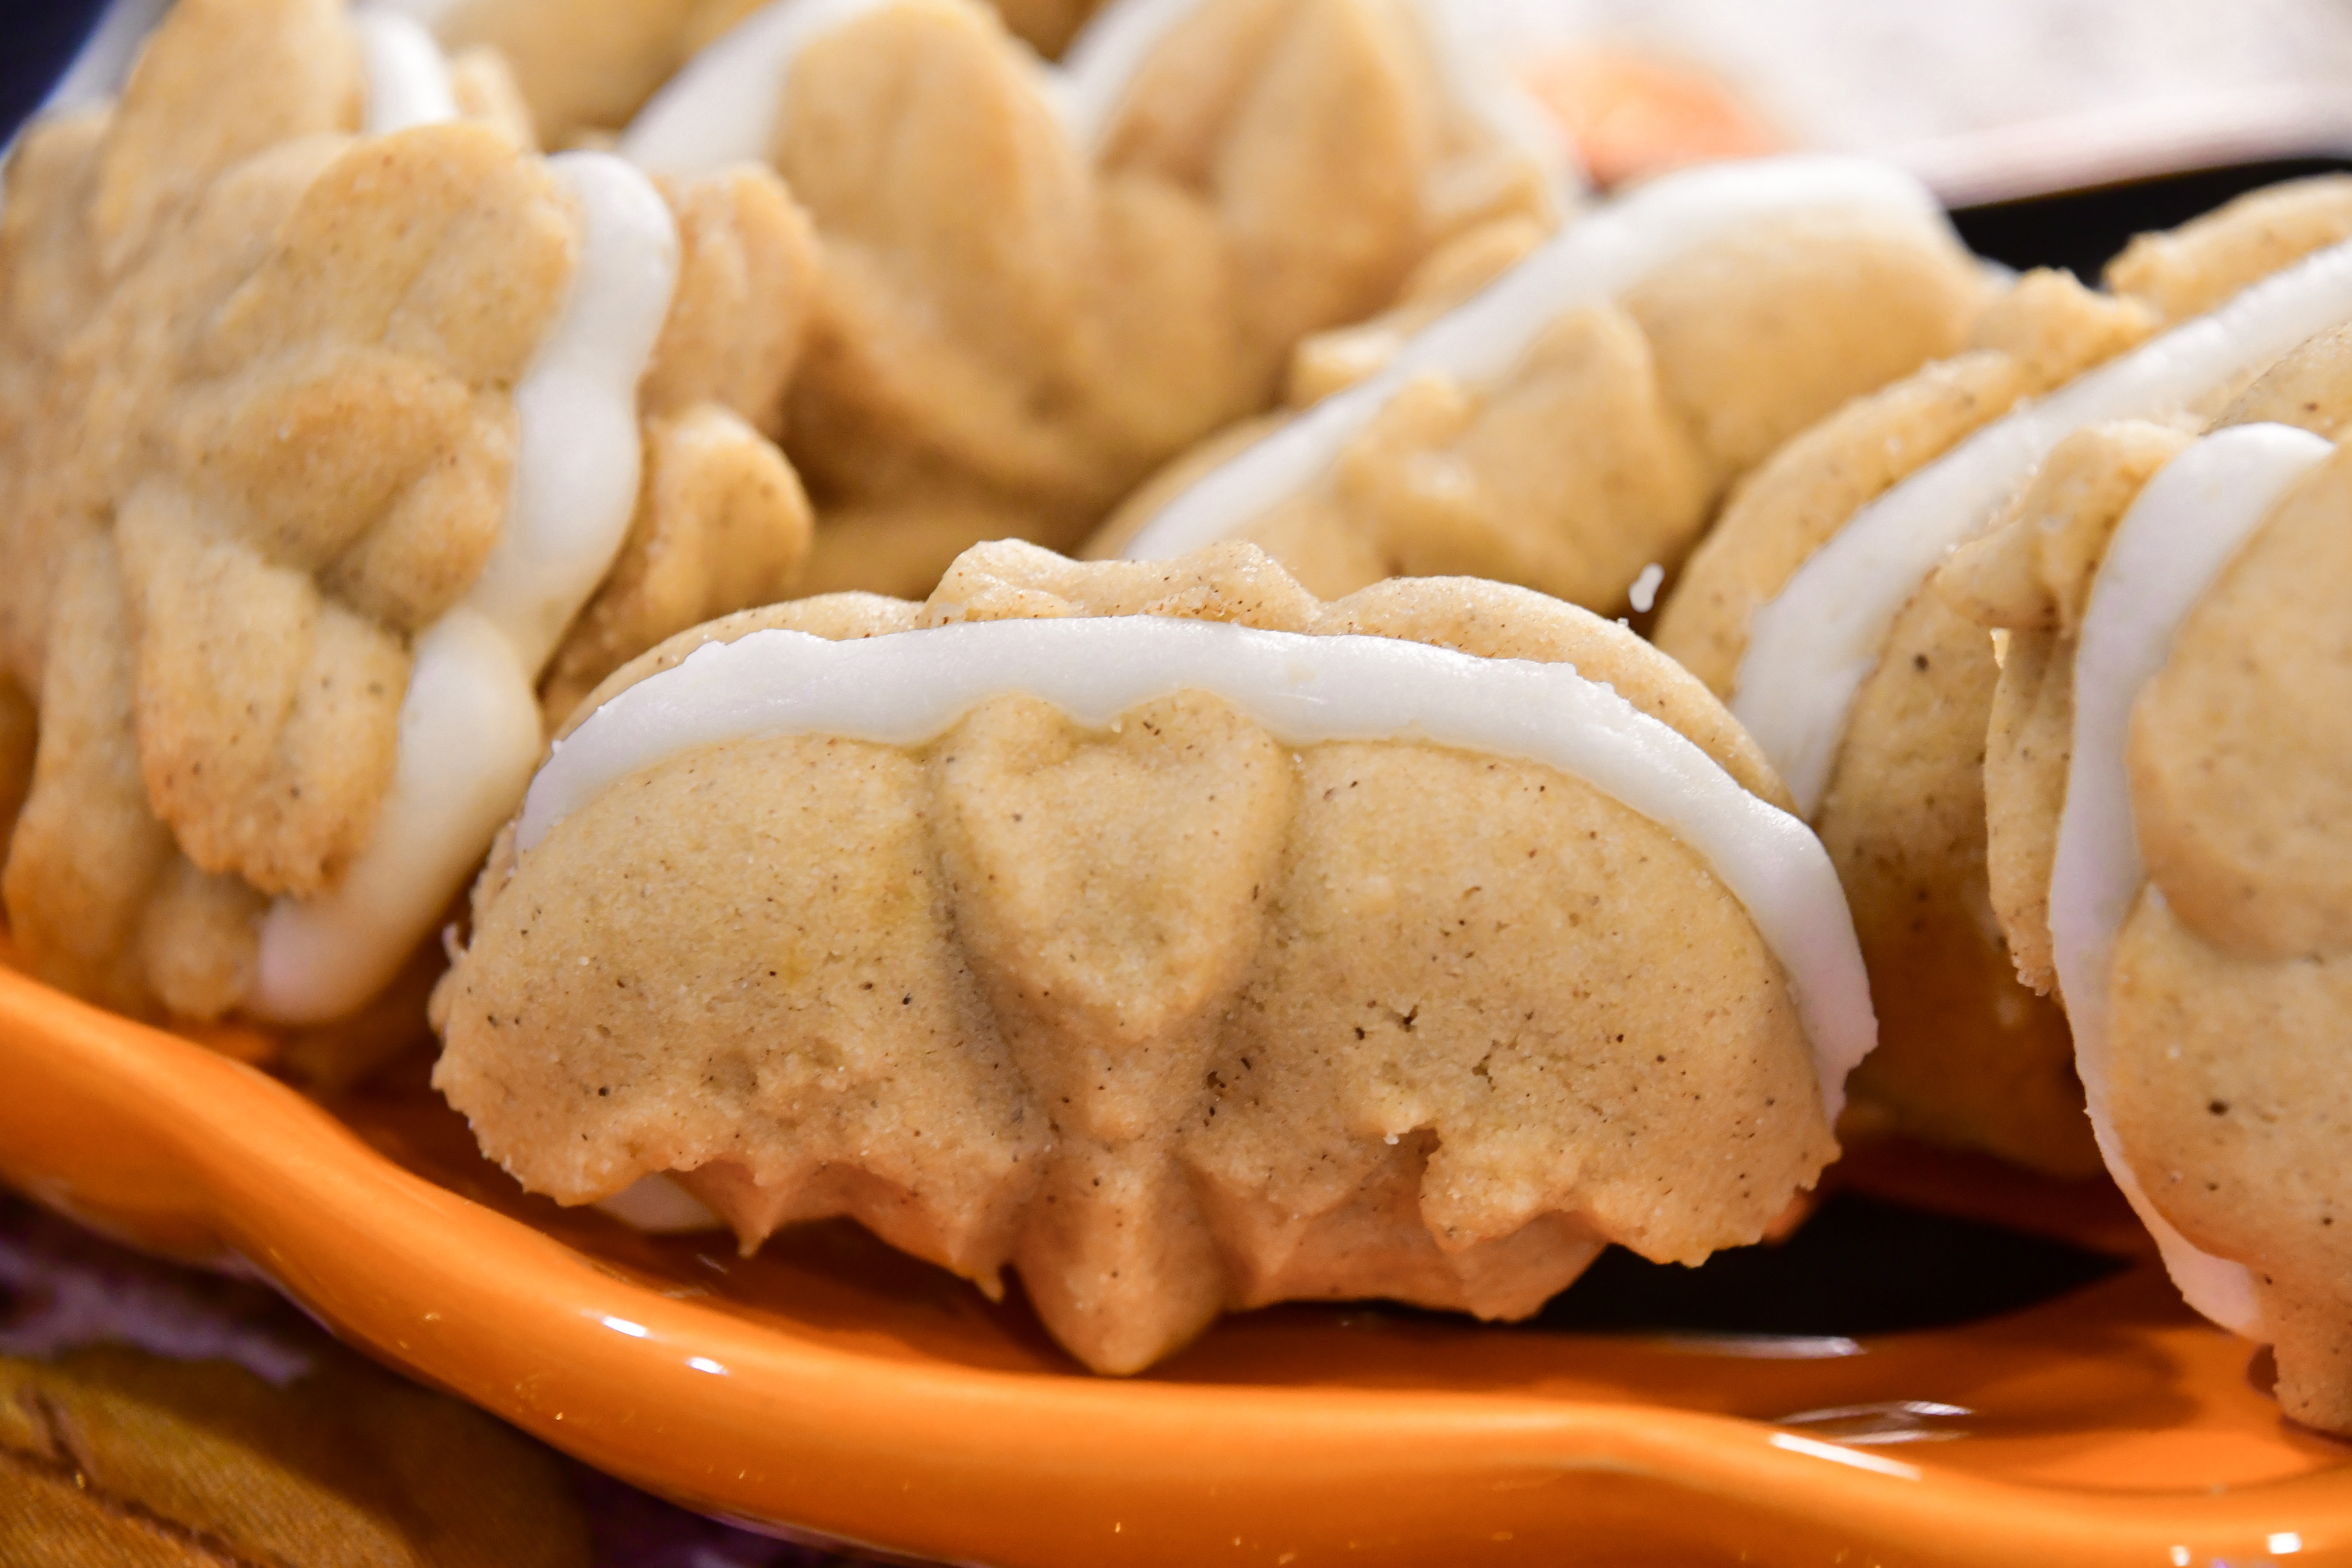
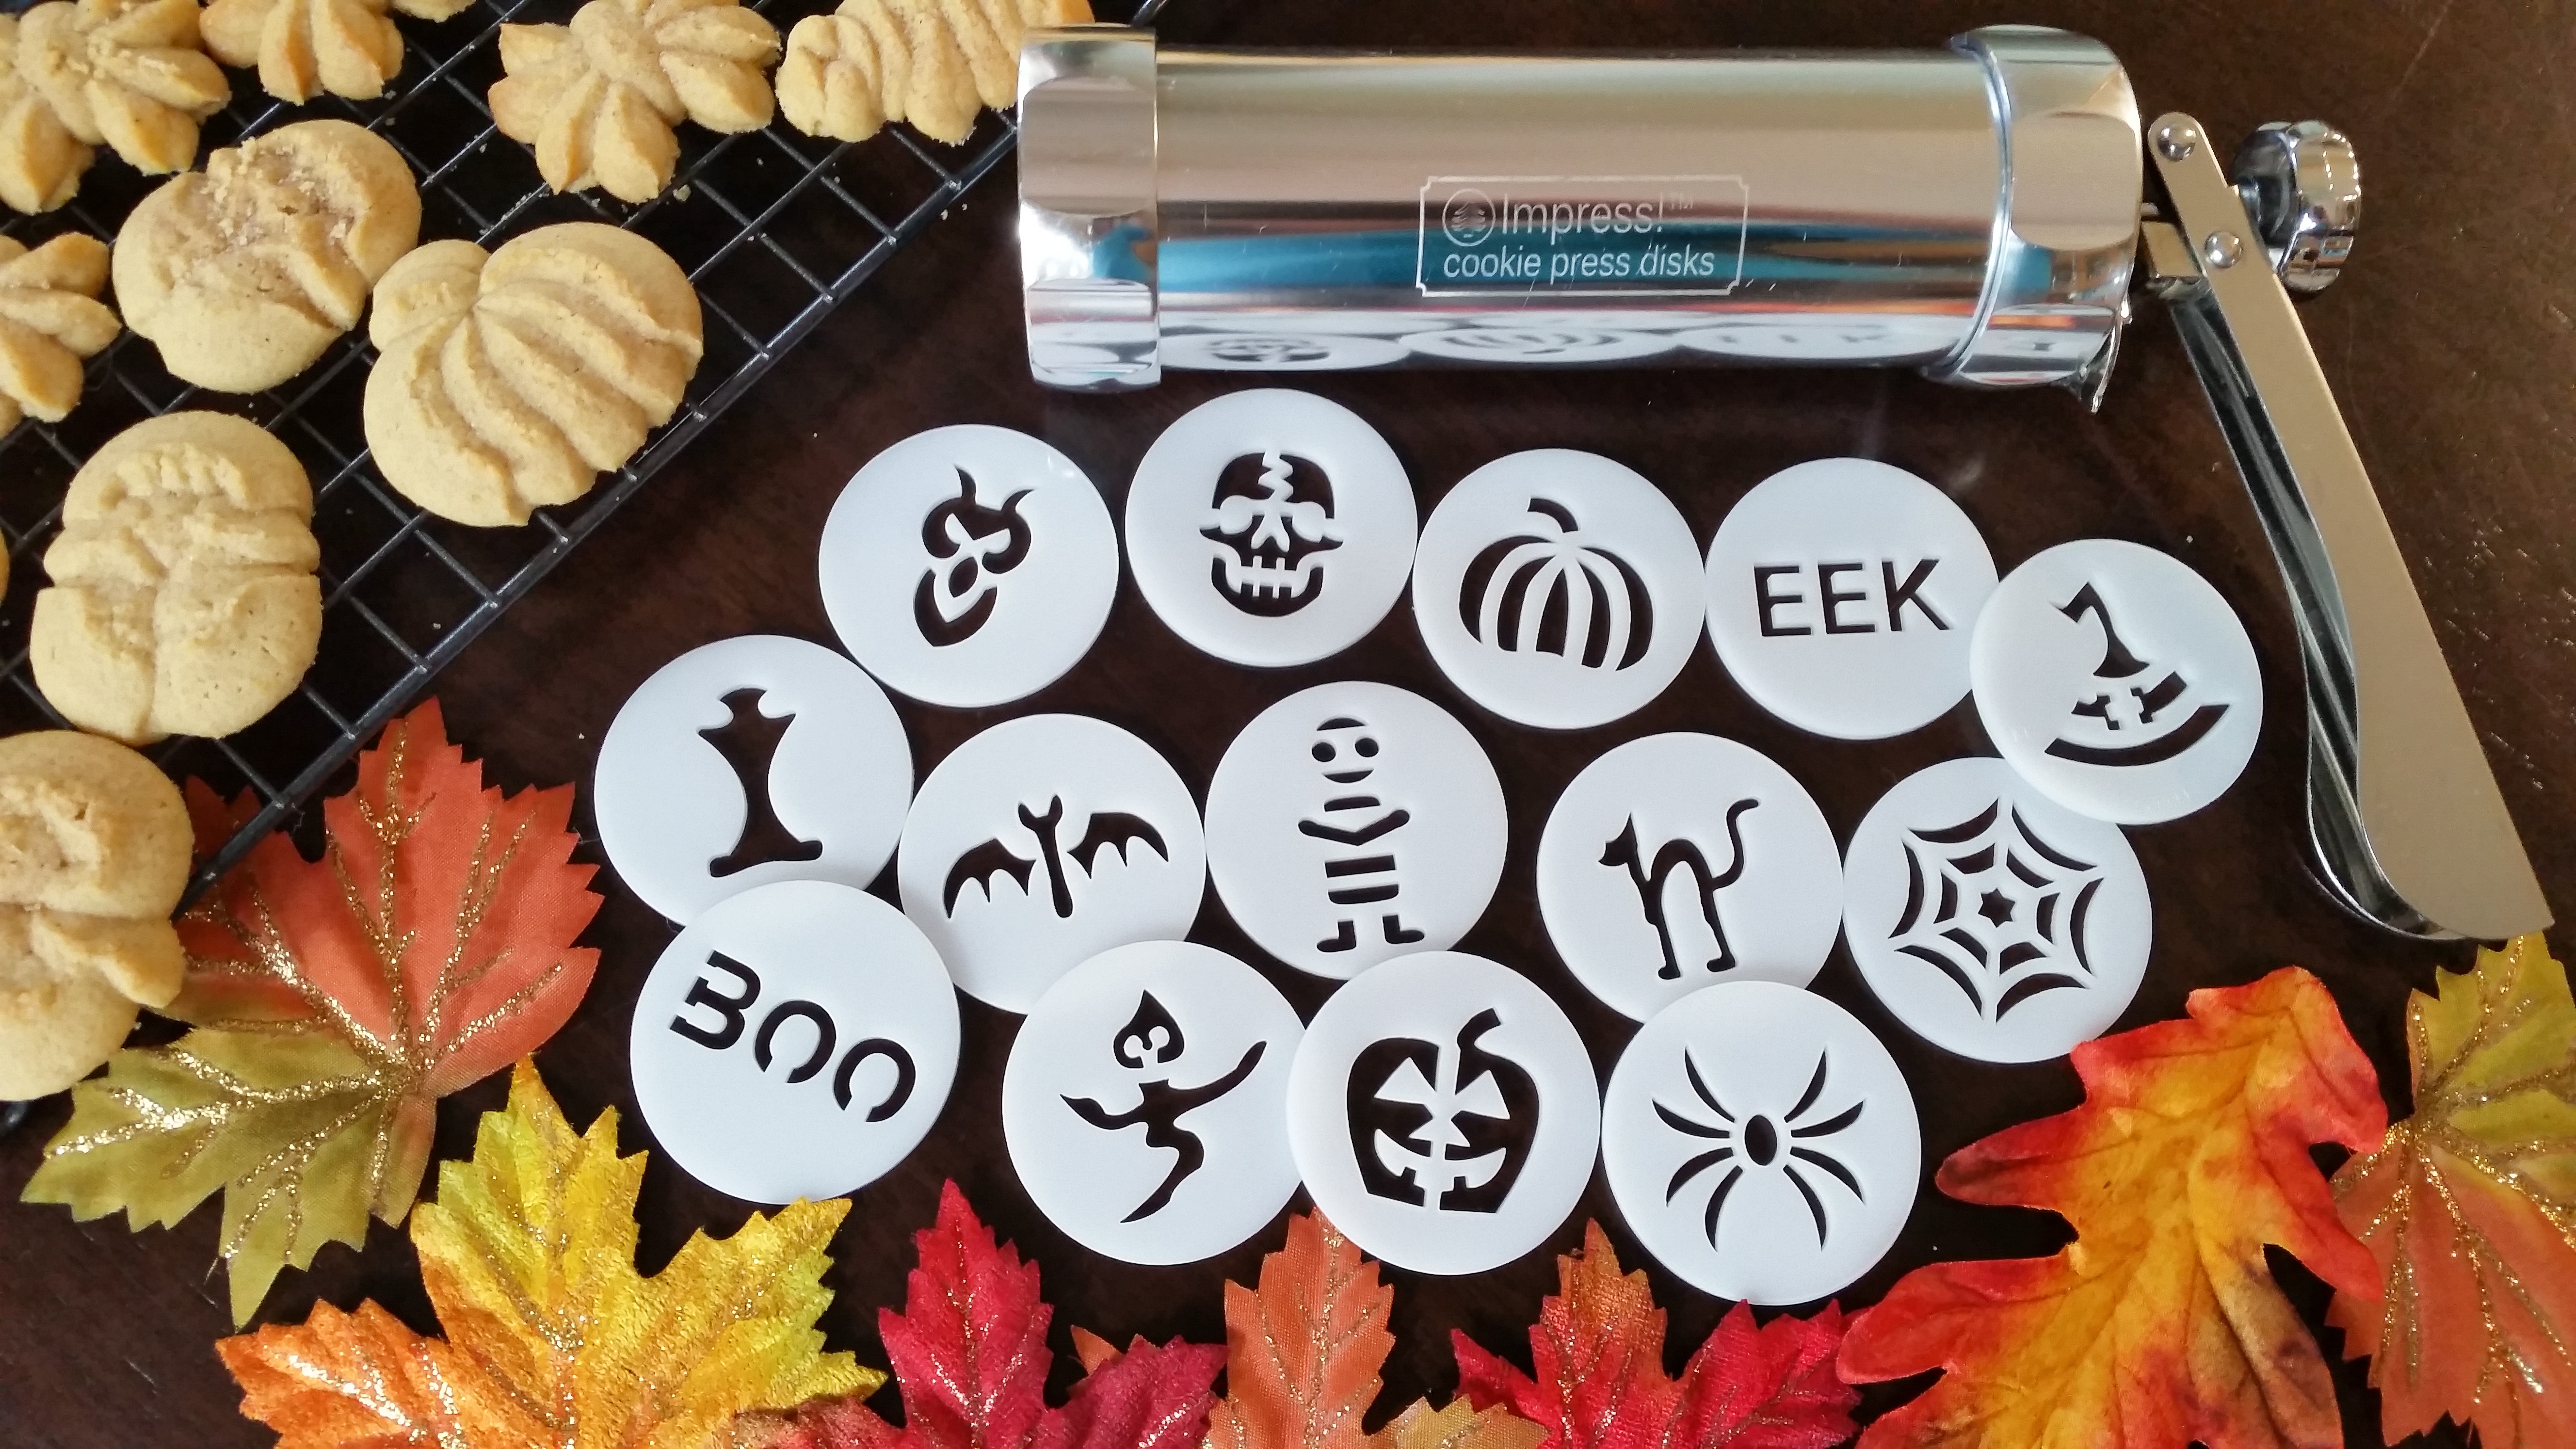
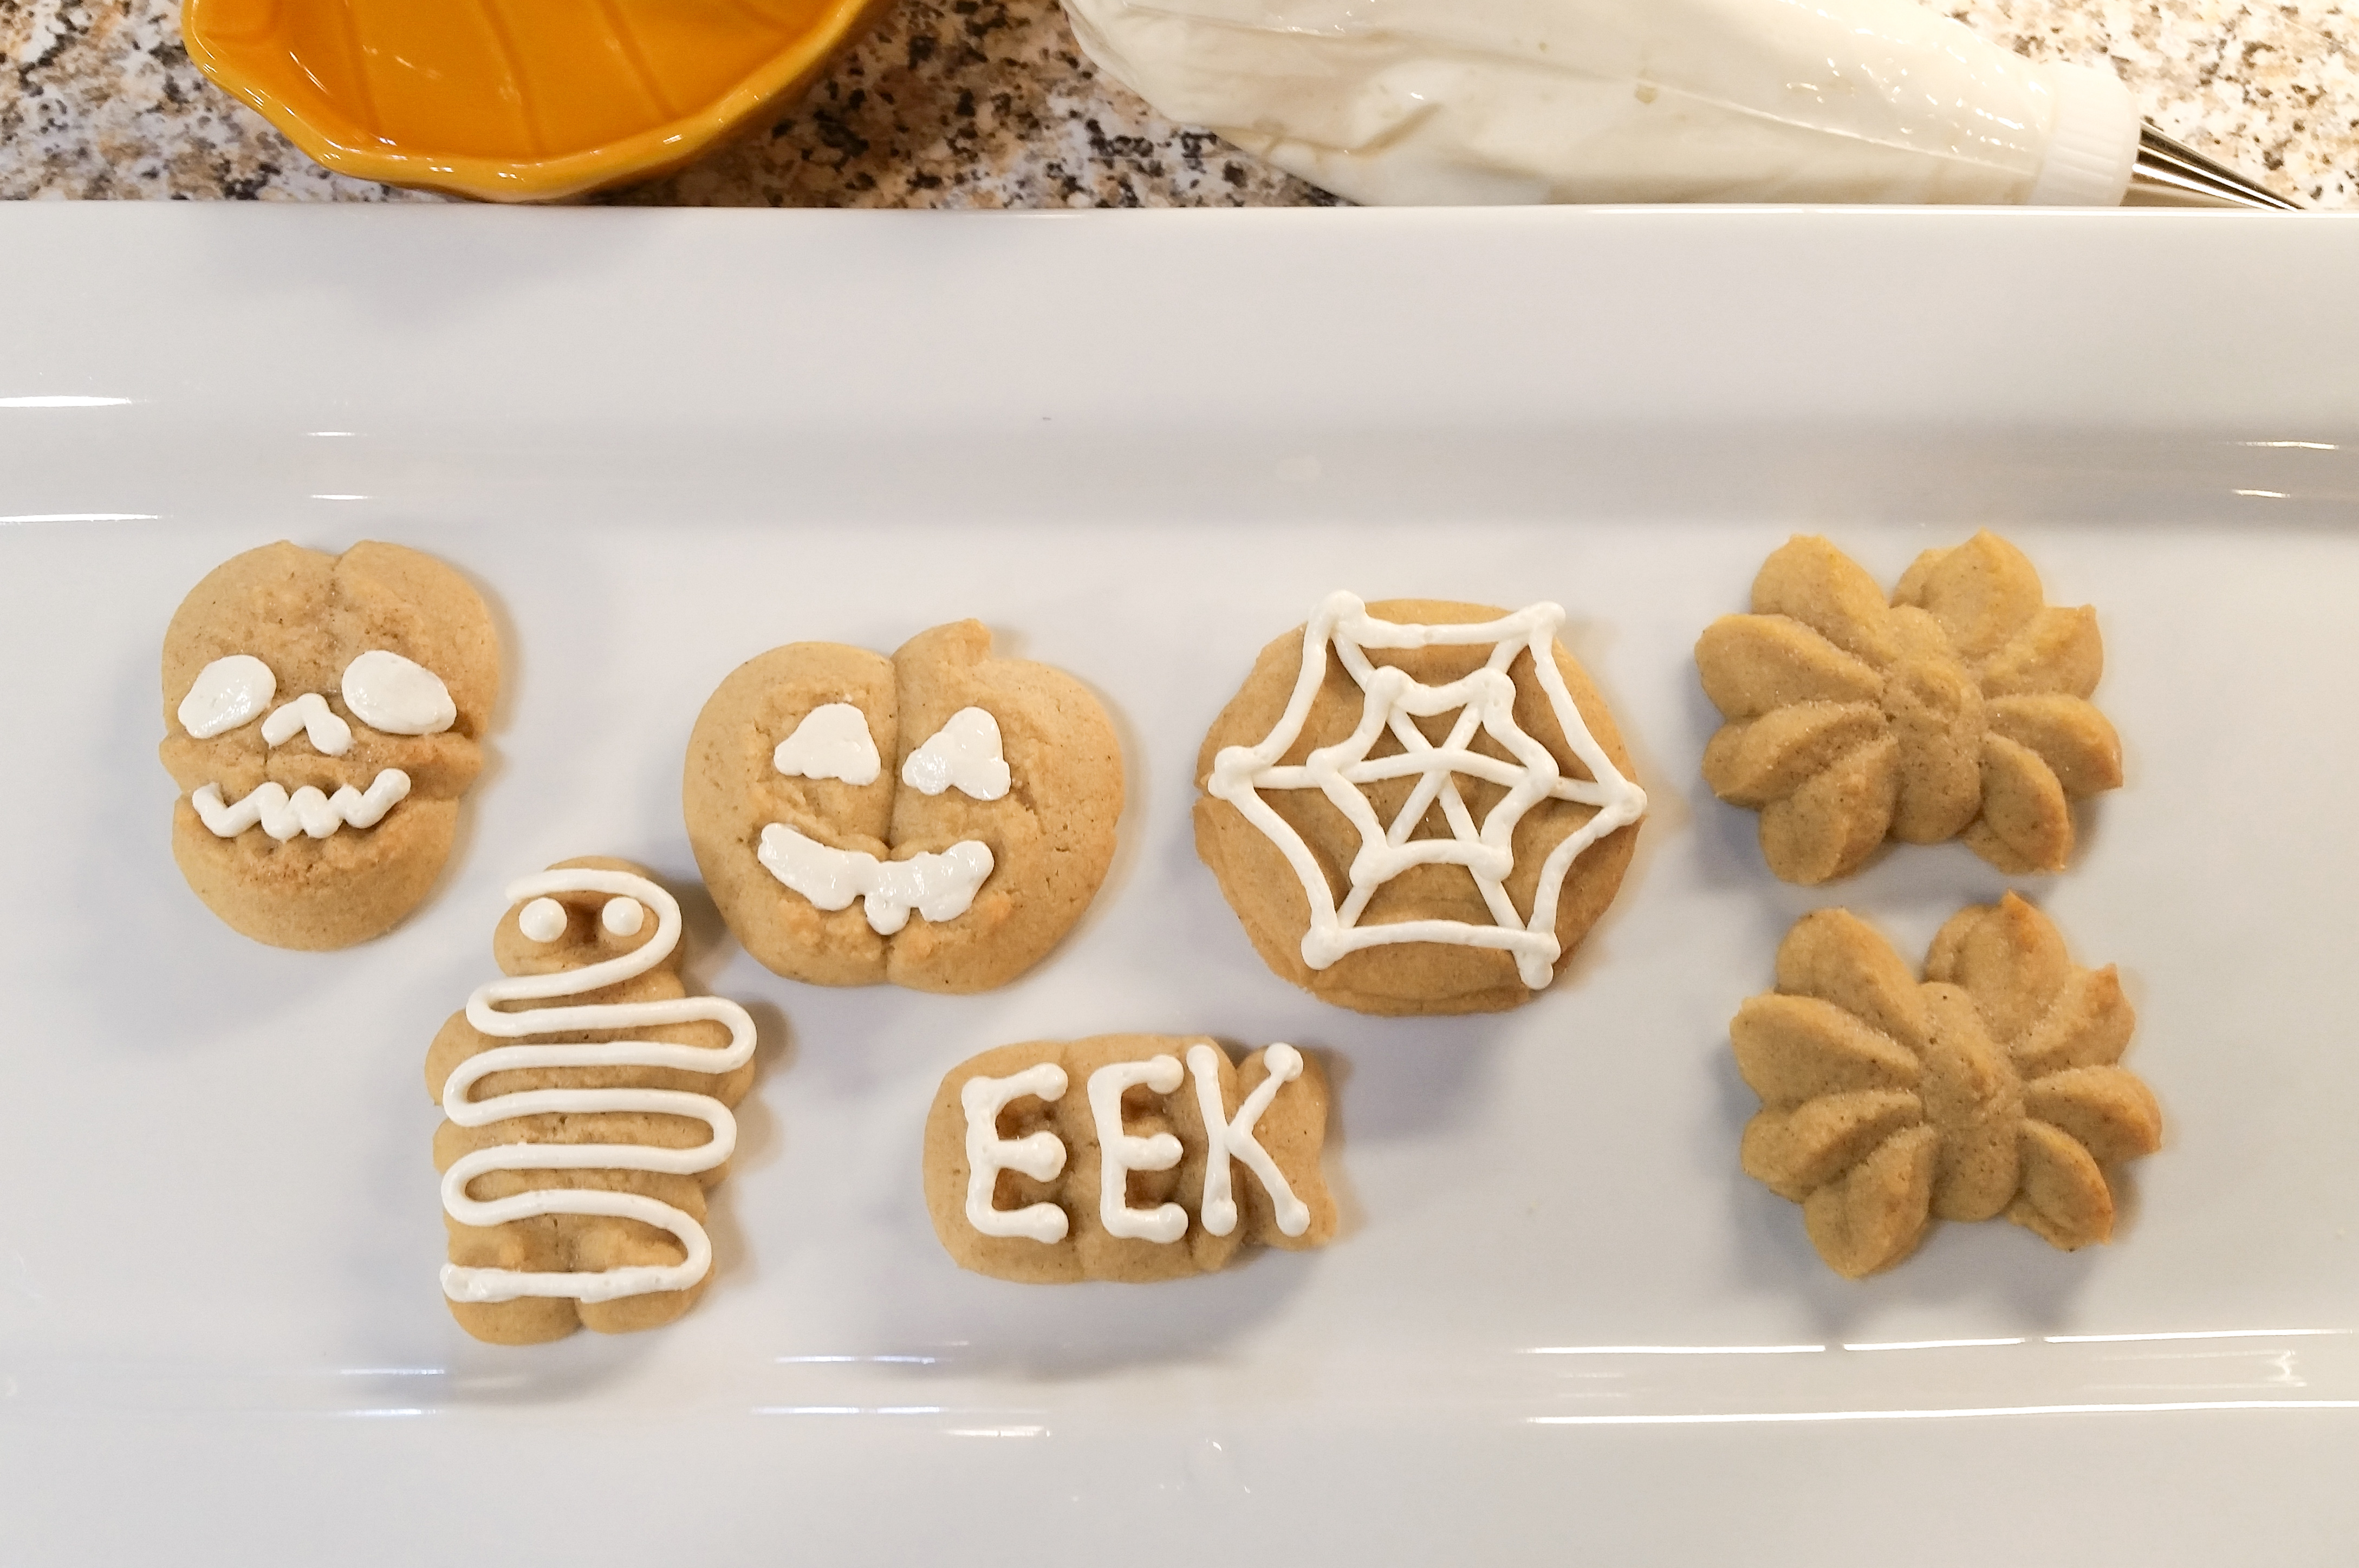
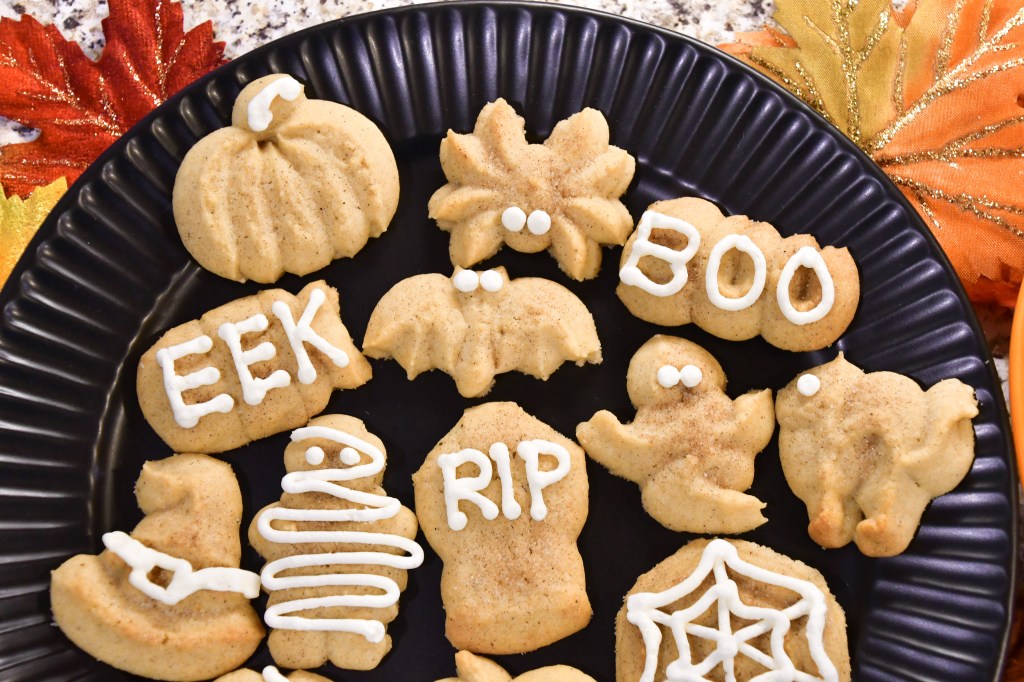
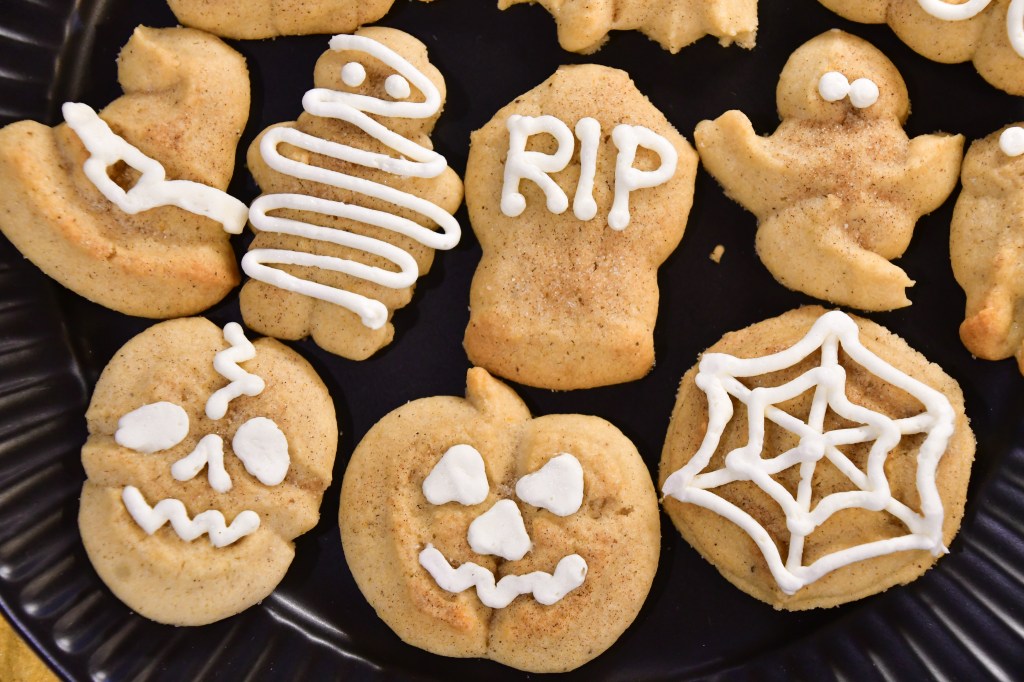
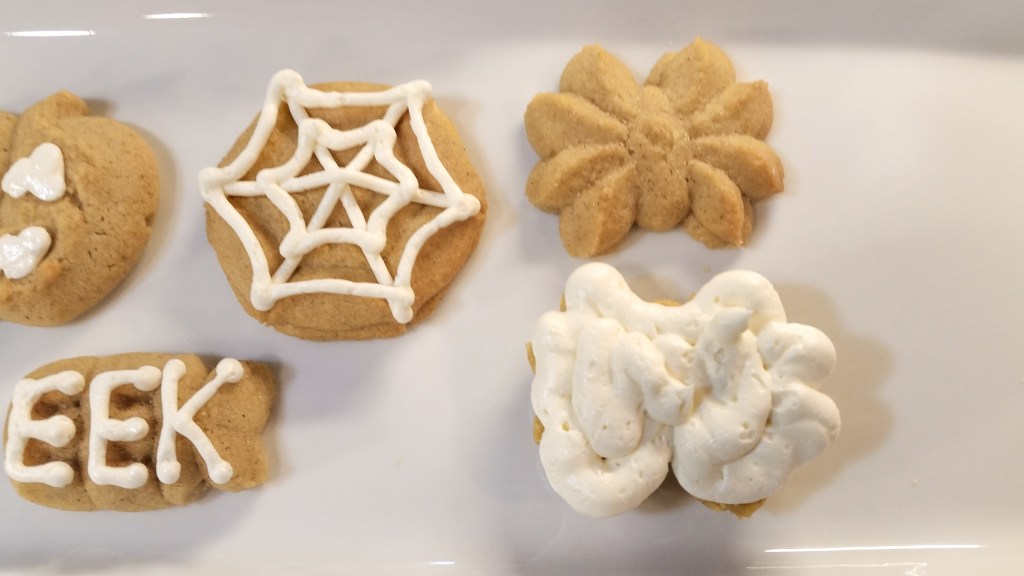
I combined my Pumpkin Spice and Snickerdoodle recipes into a “pumpkin doodle” spritz recipe! My original Pumpkin Spice Spritz are fabulous on their own, but I wanted another pumpkin-in-the-cookie recipe option. I thought why not soften them up and add some cinnamon pizazz? In the past I’ve stuffed them with a decadent caramel pecan filling (check those out here! https://creativecookiepress.com/2016/10/26/pumpkin-caramel-pecan-stuffed-sandwich-cookies/ ) This time I’m tweaking the recipe itself by replacing the baking powder I normally use with the cream of tartar and baking soda that gives snickerdoodles their unique tangy taste. The result is a softer, tangier pumpkin spice cookie with a wonderful texture. I pressed them in some of our Halloween shapes (we have 2 Halloween sets, shown below) then gave them the simplest decoration with a wicked good buttercream. Of course, that buttercream thickened up becomes yummy sandwich cookie filling, so I couldn’t resist including a sandwich option!

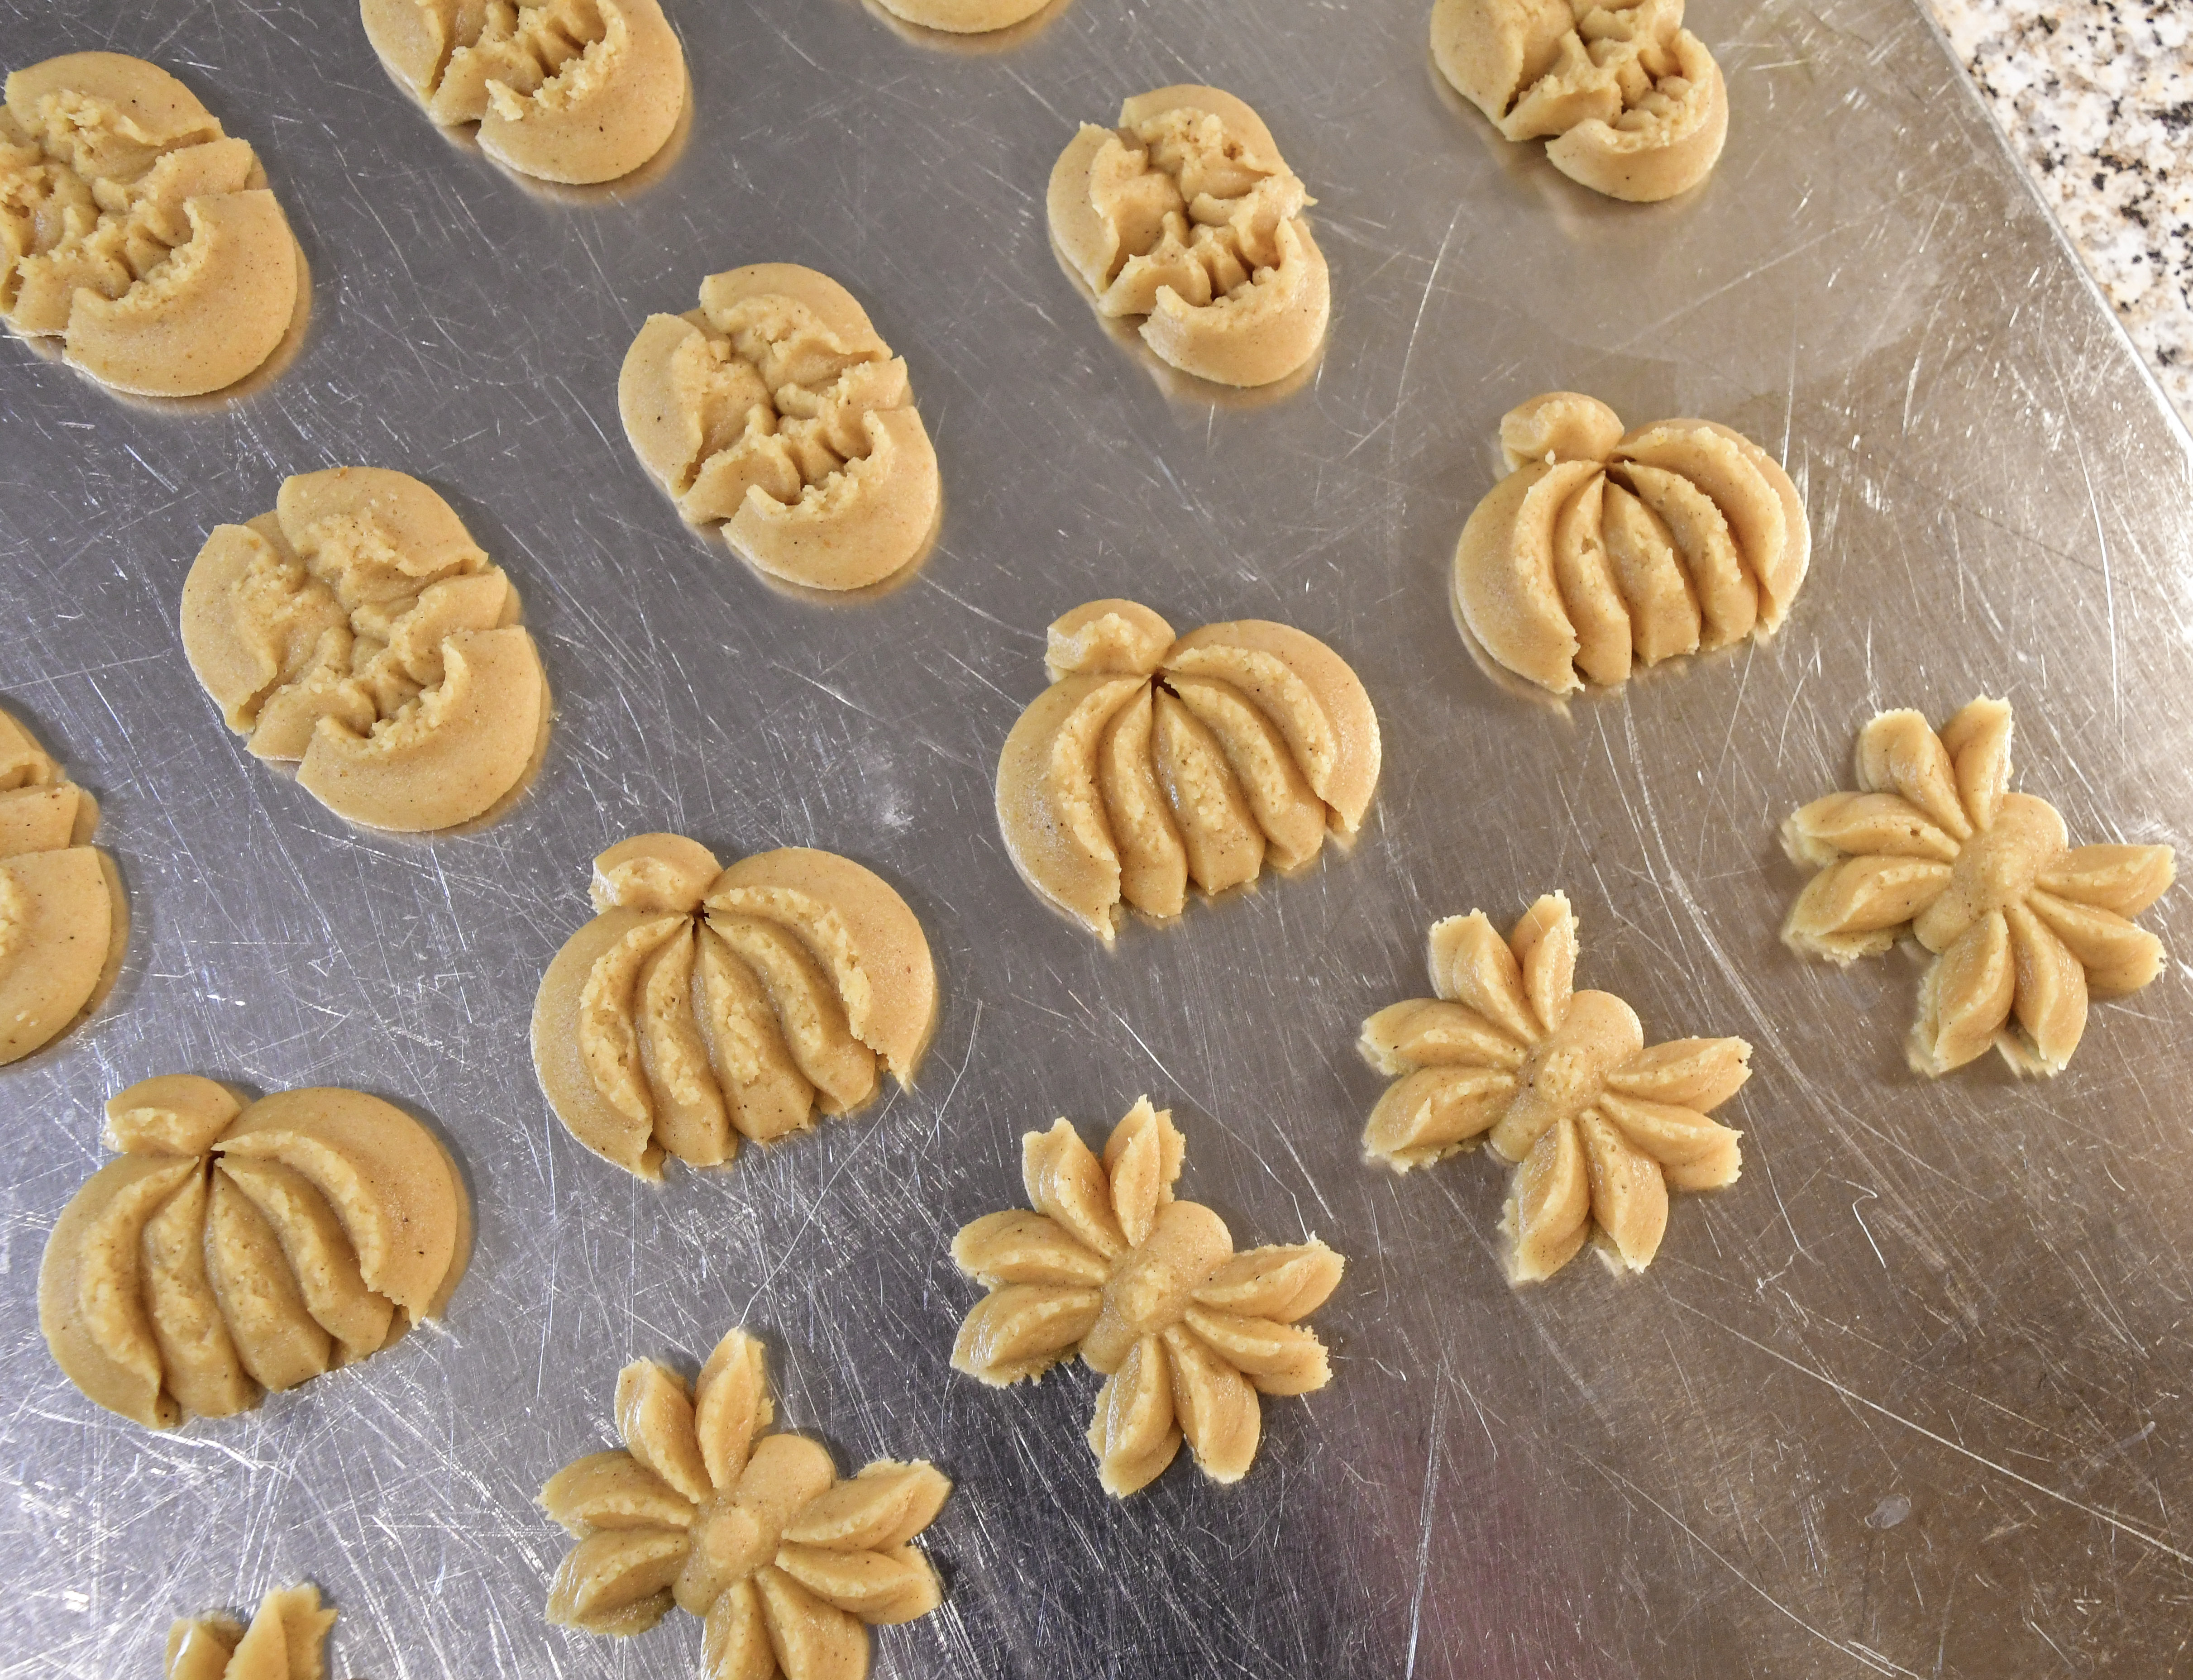
As far as spritz cookie dough goes, this is one of the stickiest I’ve created. Normally I prefer my dough to be like a soft clay that’s moldable but doesn’t stick to your fingers, as that has superior pressability. For whatever bizarre culinary reason, this recipe is soft and sticky as you load the press barrel, but they press just beautifully! Their sticky nature made two of our 16 Halloween shapes too difficult to press. The Bubbling Cauldron and the Candy Corn came out as blobs LOL. So I’d recommend skipping them. I did press the Spooky Owl but somehow they got left out of the photos!
Our website has all of our 200+ disk shapes, cookie press, embossed rolling pins, stamps, baking accessories plus more about our Women/Family Owned company! impressbakeware.com
All products are on our Etsy shop.
Our Amazon shop has our cookie press and disks and embossed rolling pins.
🎉EXTENDED❗ Big Fall 15% off SALE
🍁Make edible art this Fall, because baking should be fun!
Discount on our cookie press disks, cookie press, embossed rolling pins, luster dusts, cookie cutters & baking accessories. Sale October 7-28, 2025, on our website and Etsy shops ONLY! (Links above) Sale excludes holiday gift sets and our recipe book.
Let’s bake!
Gather your disks and ingredients and preheat your oven to 400 degrees.
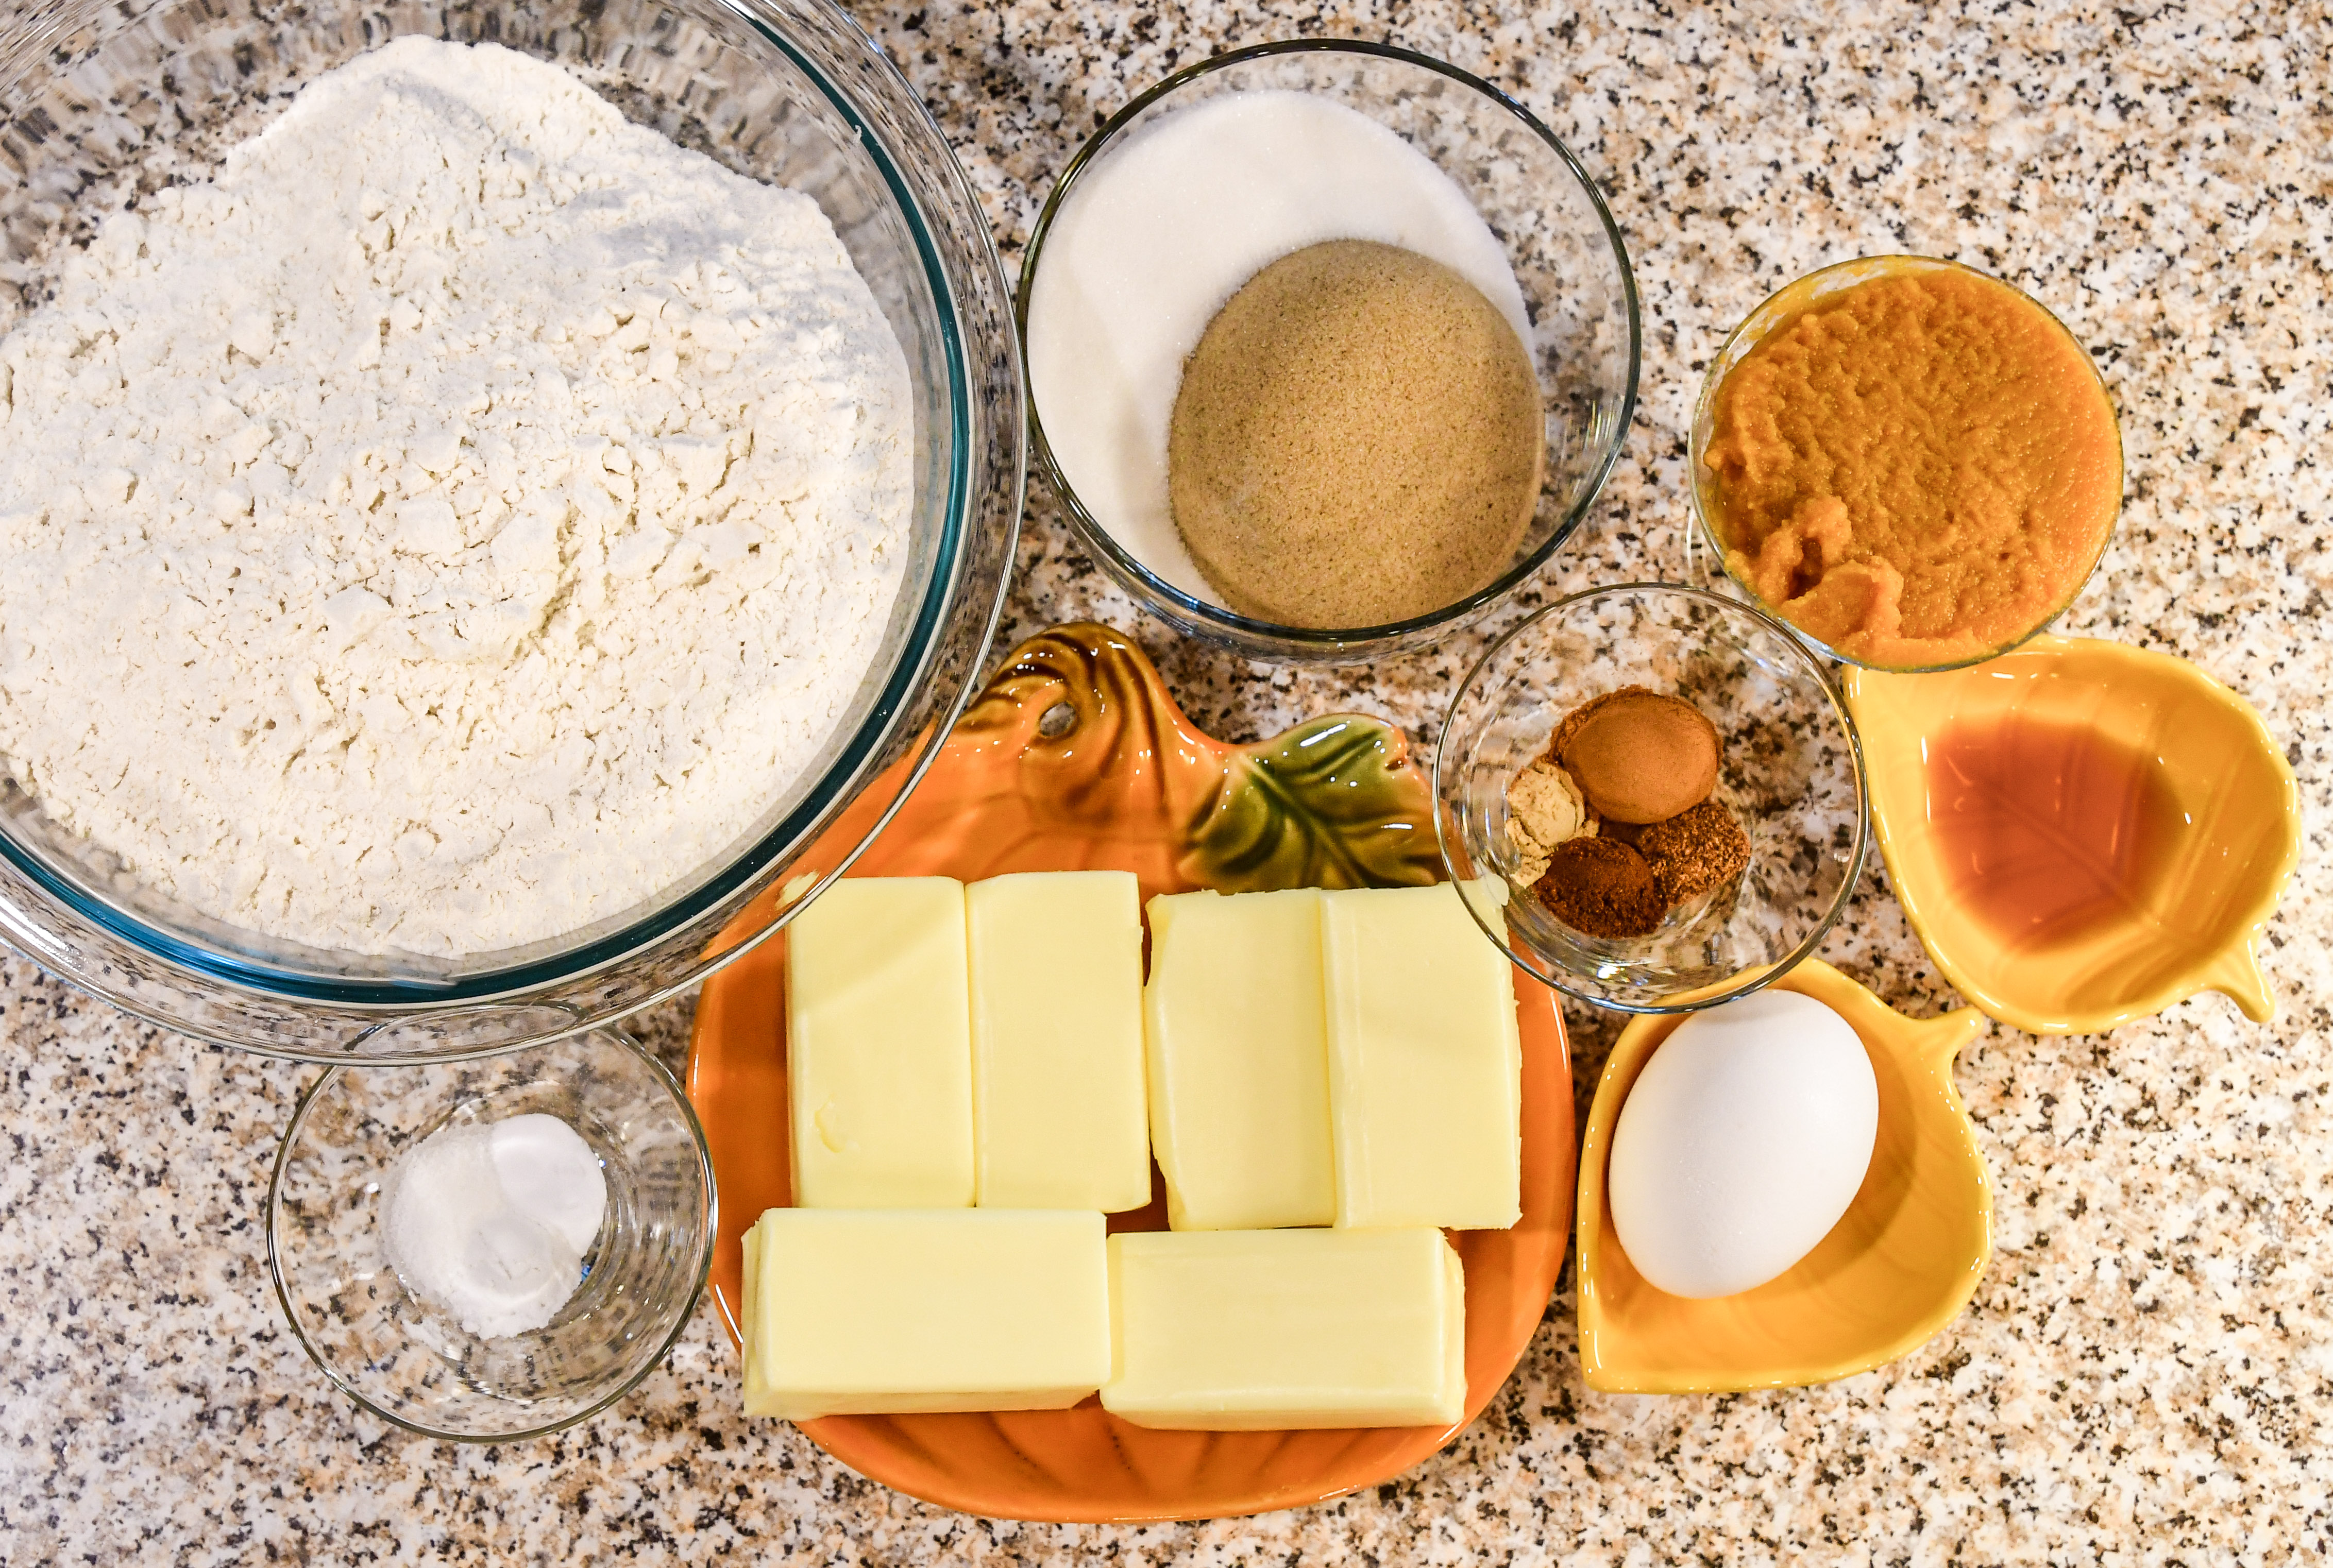
Pumpkin Snickerdoodle Spritz Cookies “Pumpkin Doodles”
For the cookies:
1 ½ cups (3 sticks) butter, softened to room temperature (not melted) (I recommend Land O Lakes brand as I know it creams well. I have had trouble with some generic butters not creaming properly and making the dough hard to press)
2/3 cup granulated (white) sugar
½ cup brown sugar, firmly packed
1/3 cup canned pumpkin
1 egg
1 teaspoon vanilla extract
3 ¾ cups all-purpose flour
1/2 teaspoon cream of tartar
1/4 teaspoon baking soda
¼ teaspoon salt
1 teaspoon ground cinnamon
½ teaspoon ground cloves
¼ teaspoon ground nutmeg
¼ teaspoon ground ginger
Note: For a gluten-free option simply replace the flour with a 1:1 substitute like King Arthur’s Gluten Free Measure for Measure.
For sprinkling on top of pressed cookies:
1 1/2 Tablespoons granulated sugar
1/4 teaspoon ground cinnamon
For decorating
To be quick just go with store-bought icing. If you’re willing to make your own, this decadent buttercream is epic with the flavor of the Pumpkin Doodles.
Thinner buttercream recipe for decorating.
1/2 cup (1 stick) butter, softened (not melted)
2 1/4 cups powdered sugar
1 teaspoon vanilla extract
2 Tablespoons heavy cream
Here is the thick version for centers of sandwich cookies:
Ultra-decadent buttercream sandwich filling
1/2 cups (1 stick) butter, softened (not melted)
1 teaspoon vanilla
2 Tablespoons heavy cream
1/8 teaspoon salt (optional)
3 1/2 cups powdered sugar
In a large bowl, combine flour, cream of tartar, baking soda, salt, and spices with a whisk. Make sure they are evenly mixed. Set aside. Measure the cream of tartar and soda precisely. Too much and your cookies will puff up and lose their shape!
Using an electric mixer, cream the butter very well. I am admittedly rather repetitive about this, but it’s the thing I stress the most about making spritz cookies. Set that mixer on the highest setting and pretend you’re making frosting.
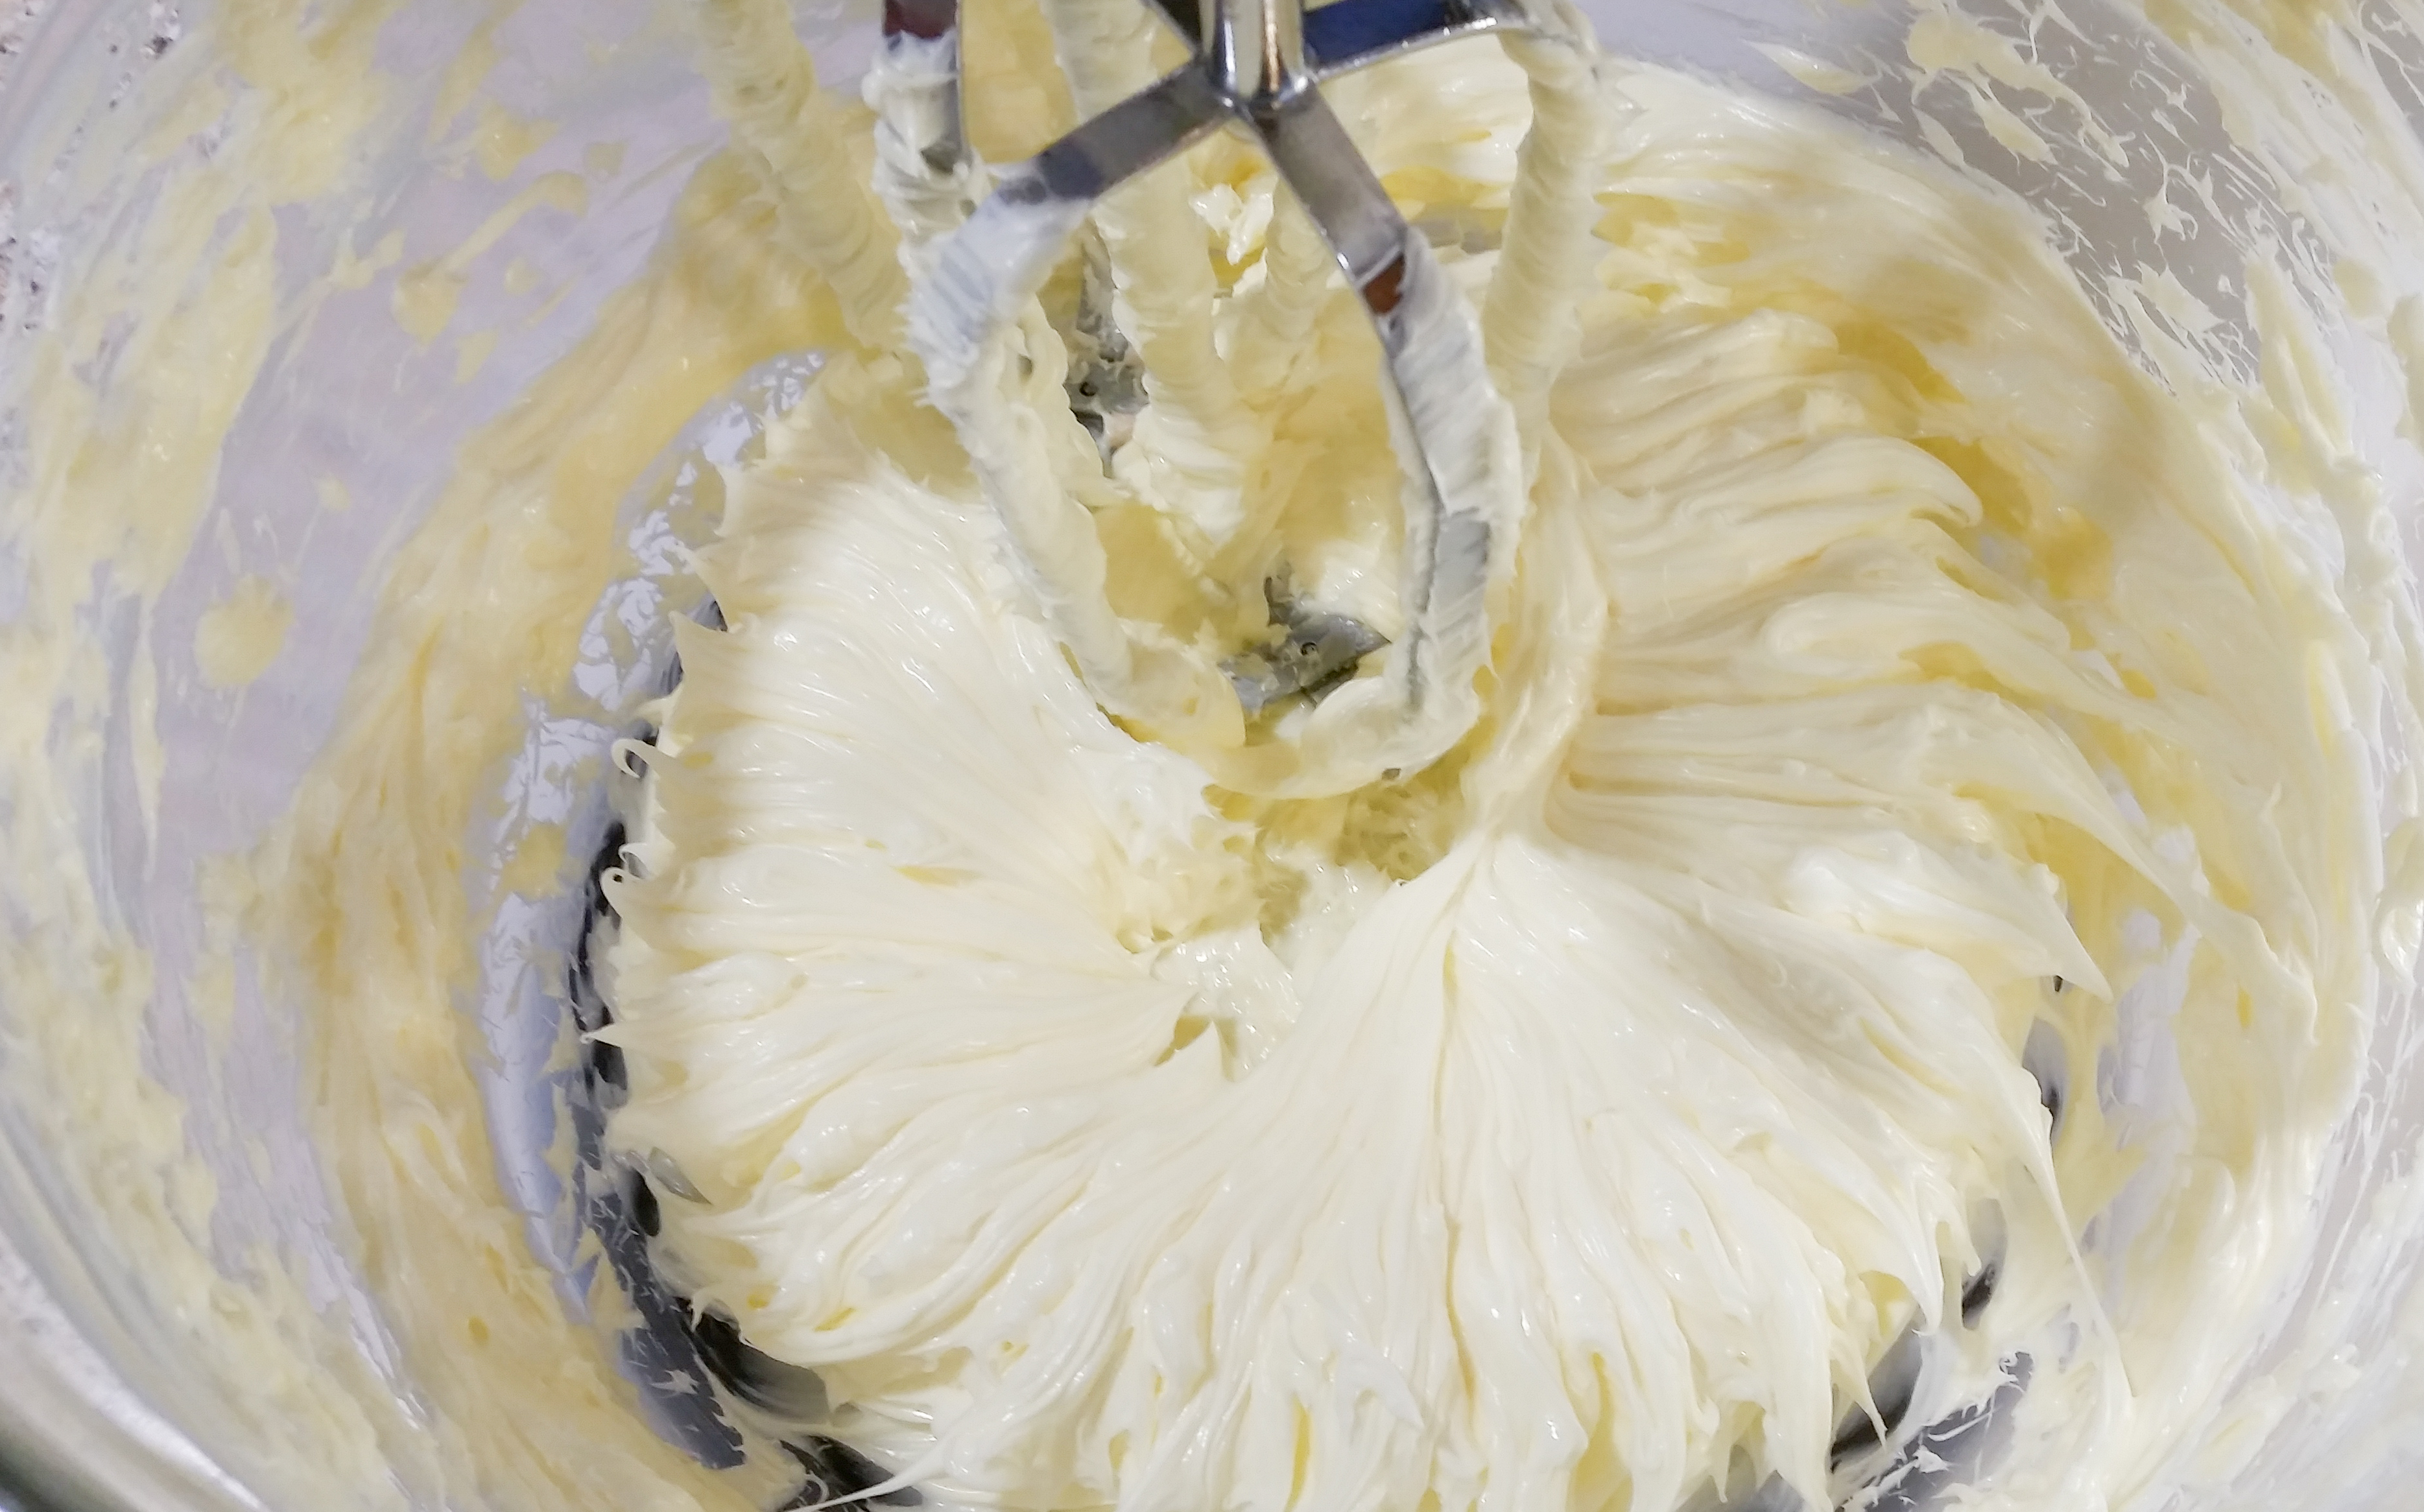
Add the pumpkin and cream again. Add the sugars and whip it well until you have a fluffy mixture. Add the vanilla and egg and do it again! It has a pretty pumpkin color and smells wonderful at this stage.
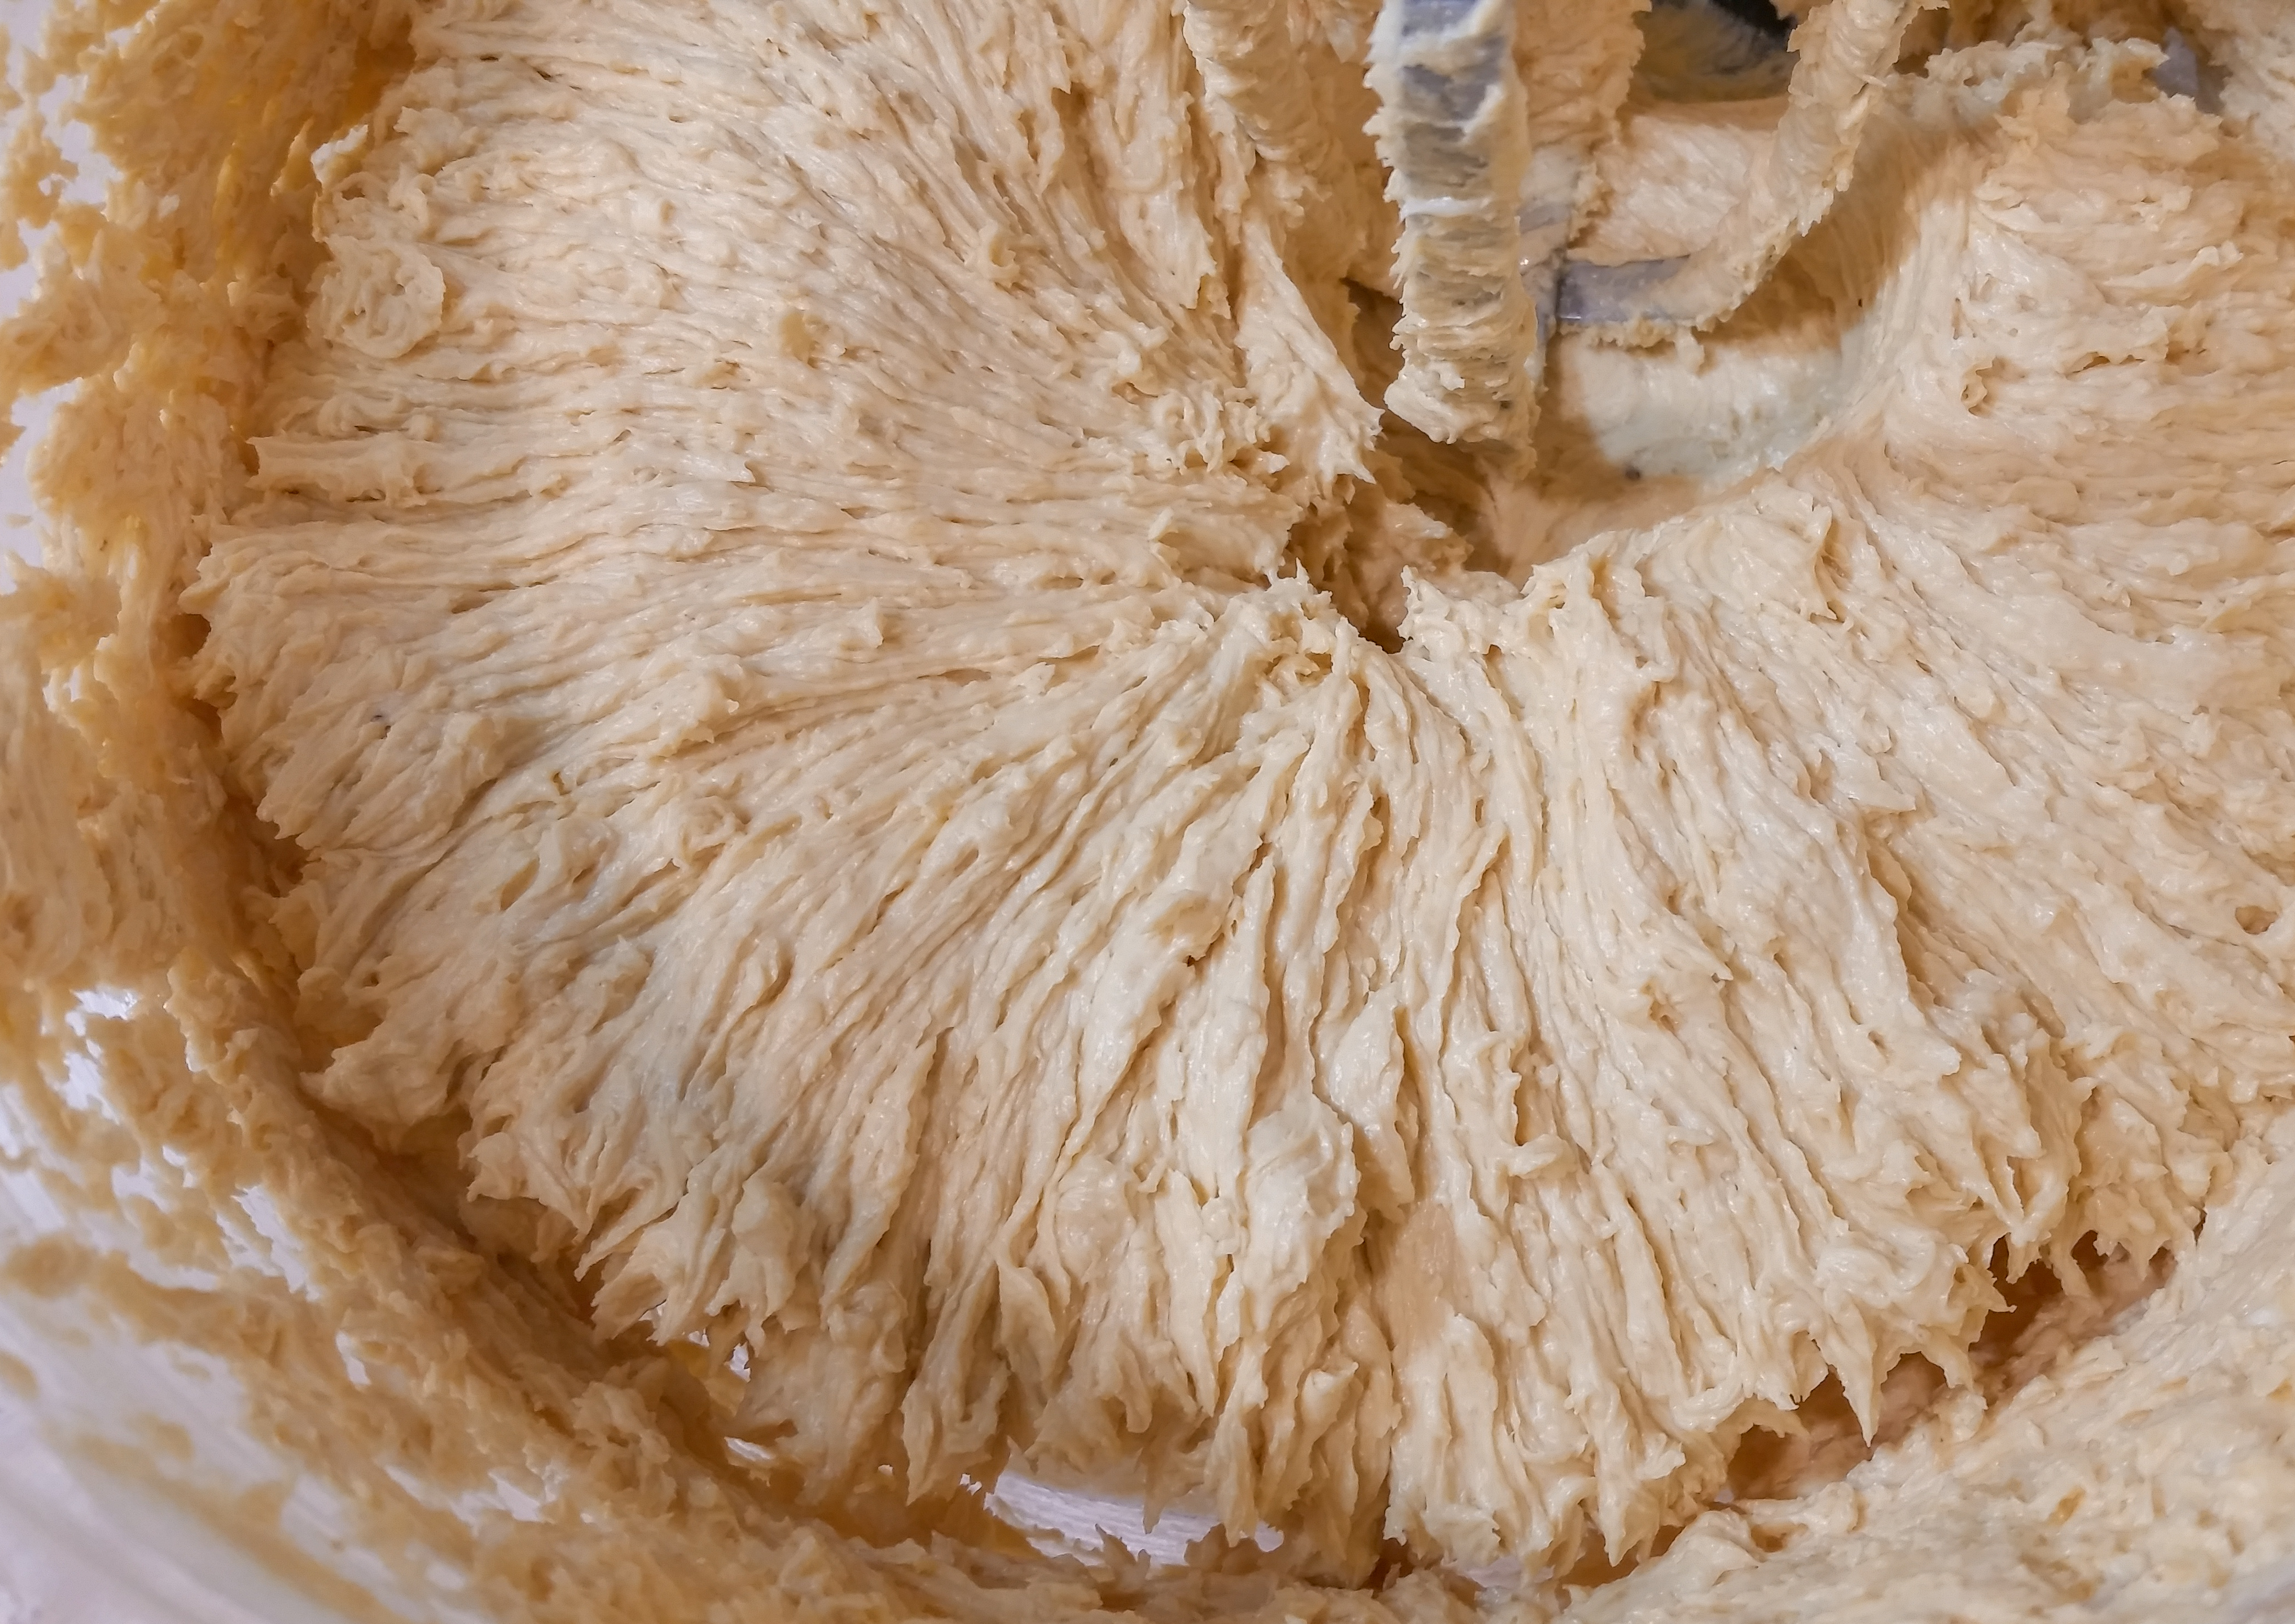
Slowly add the flour mixture on low speed. Mix until the flour is completely incorporated and you have a consistent texture and a slightly stiff dough. Being rather sticky to begin with, this dough does well if you let it sit for about 10 minutes before putting it In the press. It becomes drier, stiffer, and easier to press as it sits. Always remember that you can tweak overly stiff dough by adding more vanilla a teaspoon at a time, or tweak overly soft or sticky dough by adding flour a tablespoon at a time. I usually say that perfect spritz dough has a soft malleable texture that is not too sticky or too stiff. You can let this one be a bit sticky. Don’t add too much flour!
For this dough I found the best way to place it into the press barrel is to roll small balls or tubes of dough, just small enough to fit into the barrel. Drop them in and pack them down with the back of a spoon. Using small-ish amounts prevents sticking to the barrel!
Place a shape disk in the bottom ring, attach to your press, and start pressing onto a clean, un-greased cookie sheet. If you have them, silicone baking mats actually work rather well with this dough. You just have to hold down the edges so they don’t pull up as you lift the press! Use a couple of soup cans or ask someone to help. 🙂 Use a consistent rhythm to keep the shapes a uniform size. It’s not at all uncommon for your first few cookies to be mis-shaped, as pressure needs to build in the barrel to make consistent shapes. It’s totally ok! Just throw them back in the bowl to be re-pressed. If you’re still having trouble pressing (mis-shaped cookies, trouble sticking to the pan, etc) press one cookie into the air and wipe it off and toss back into the bowl to re-set your pressure in the press. You can also refrigerate your cookie sheets for 5 minutes if sticking is an issue. Keep this dough from getting overly warm or it becomes stickier. (There are more troubleshooting tips on the Troubleshooting and Decorating Tips page- see the top menu on the homepage. 🙂 ) But see? They press beautifully!
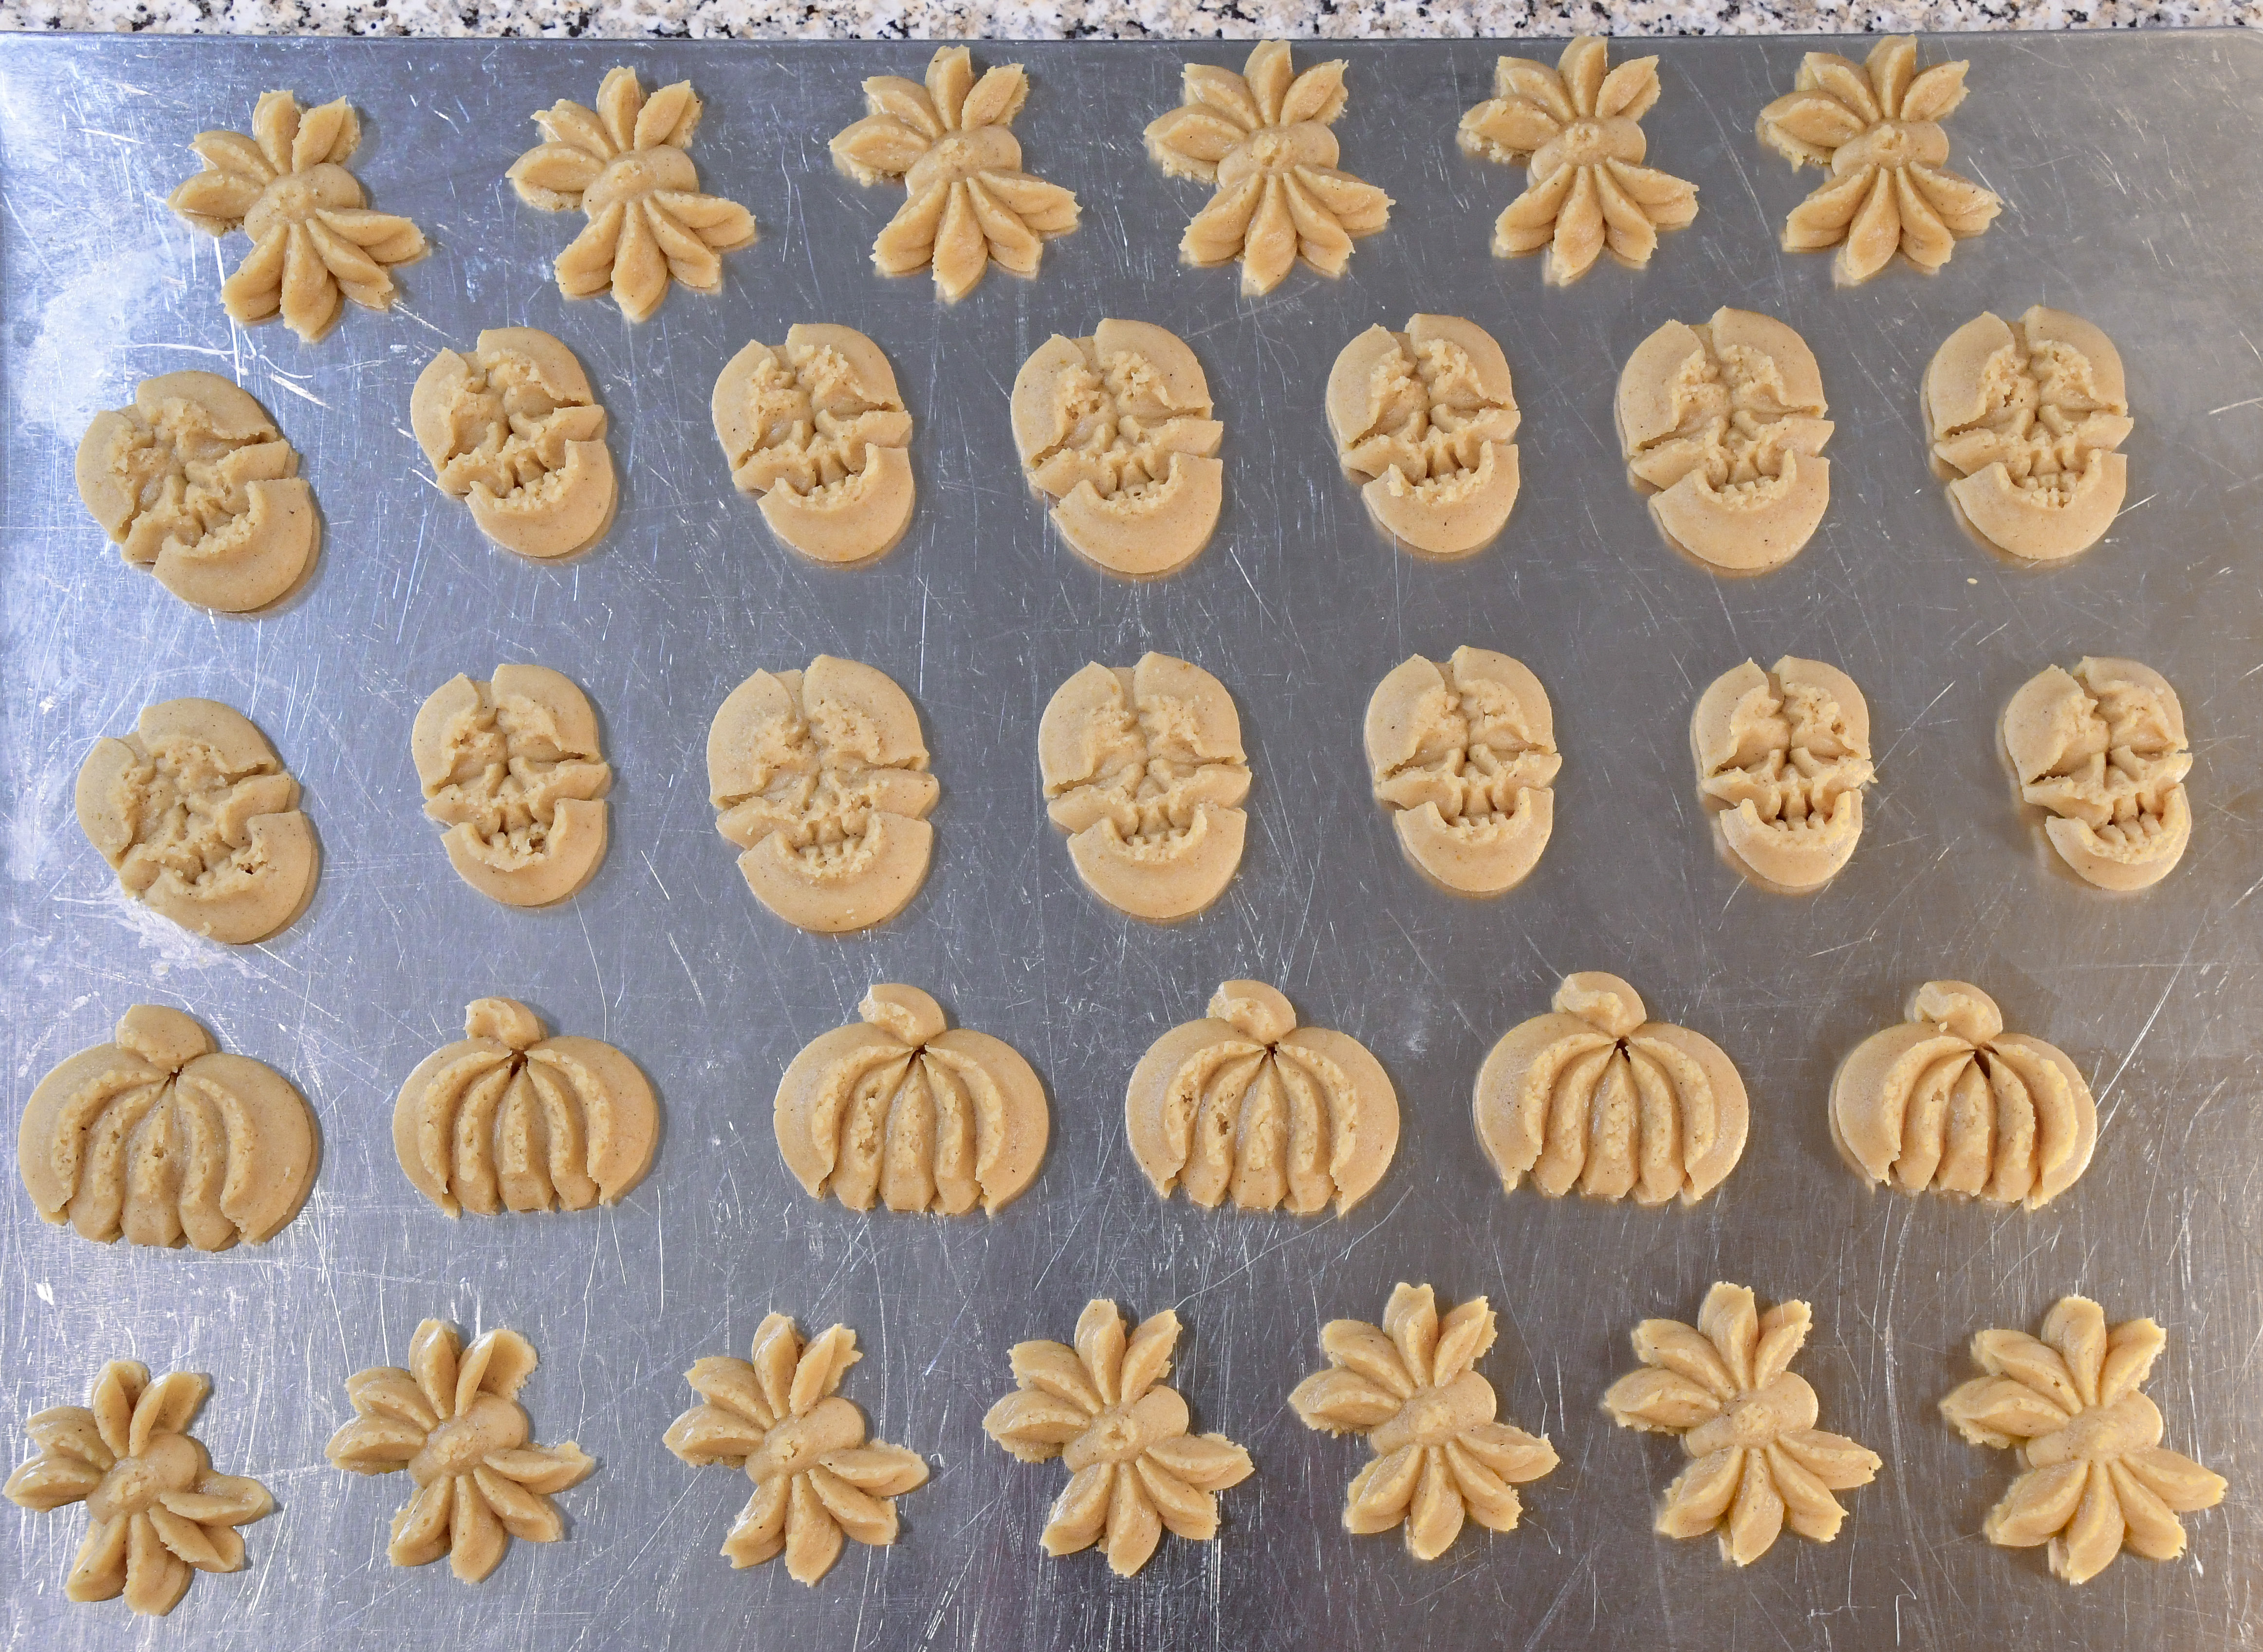
Now sprinkle some cinnamon sugar on the pressed cookies before baking.
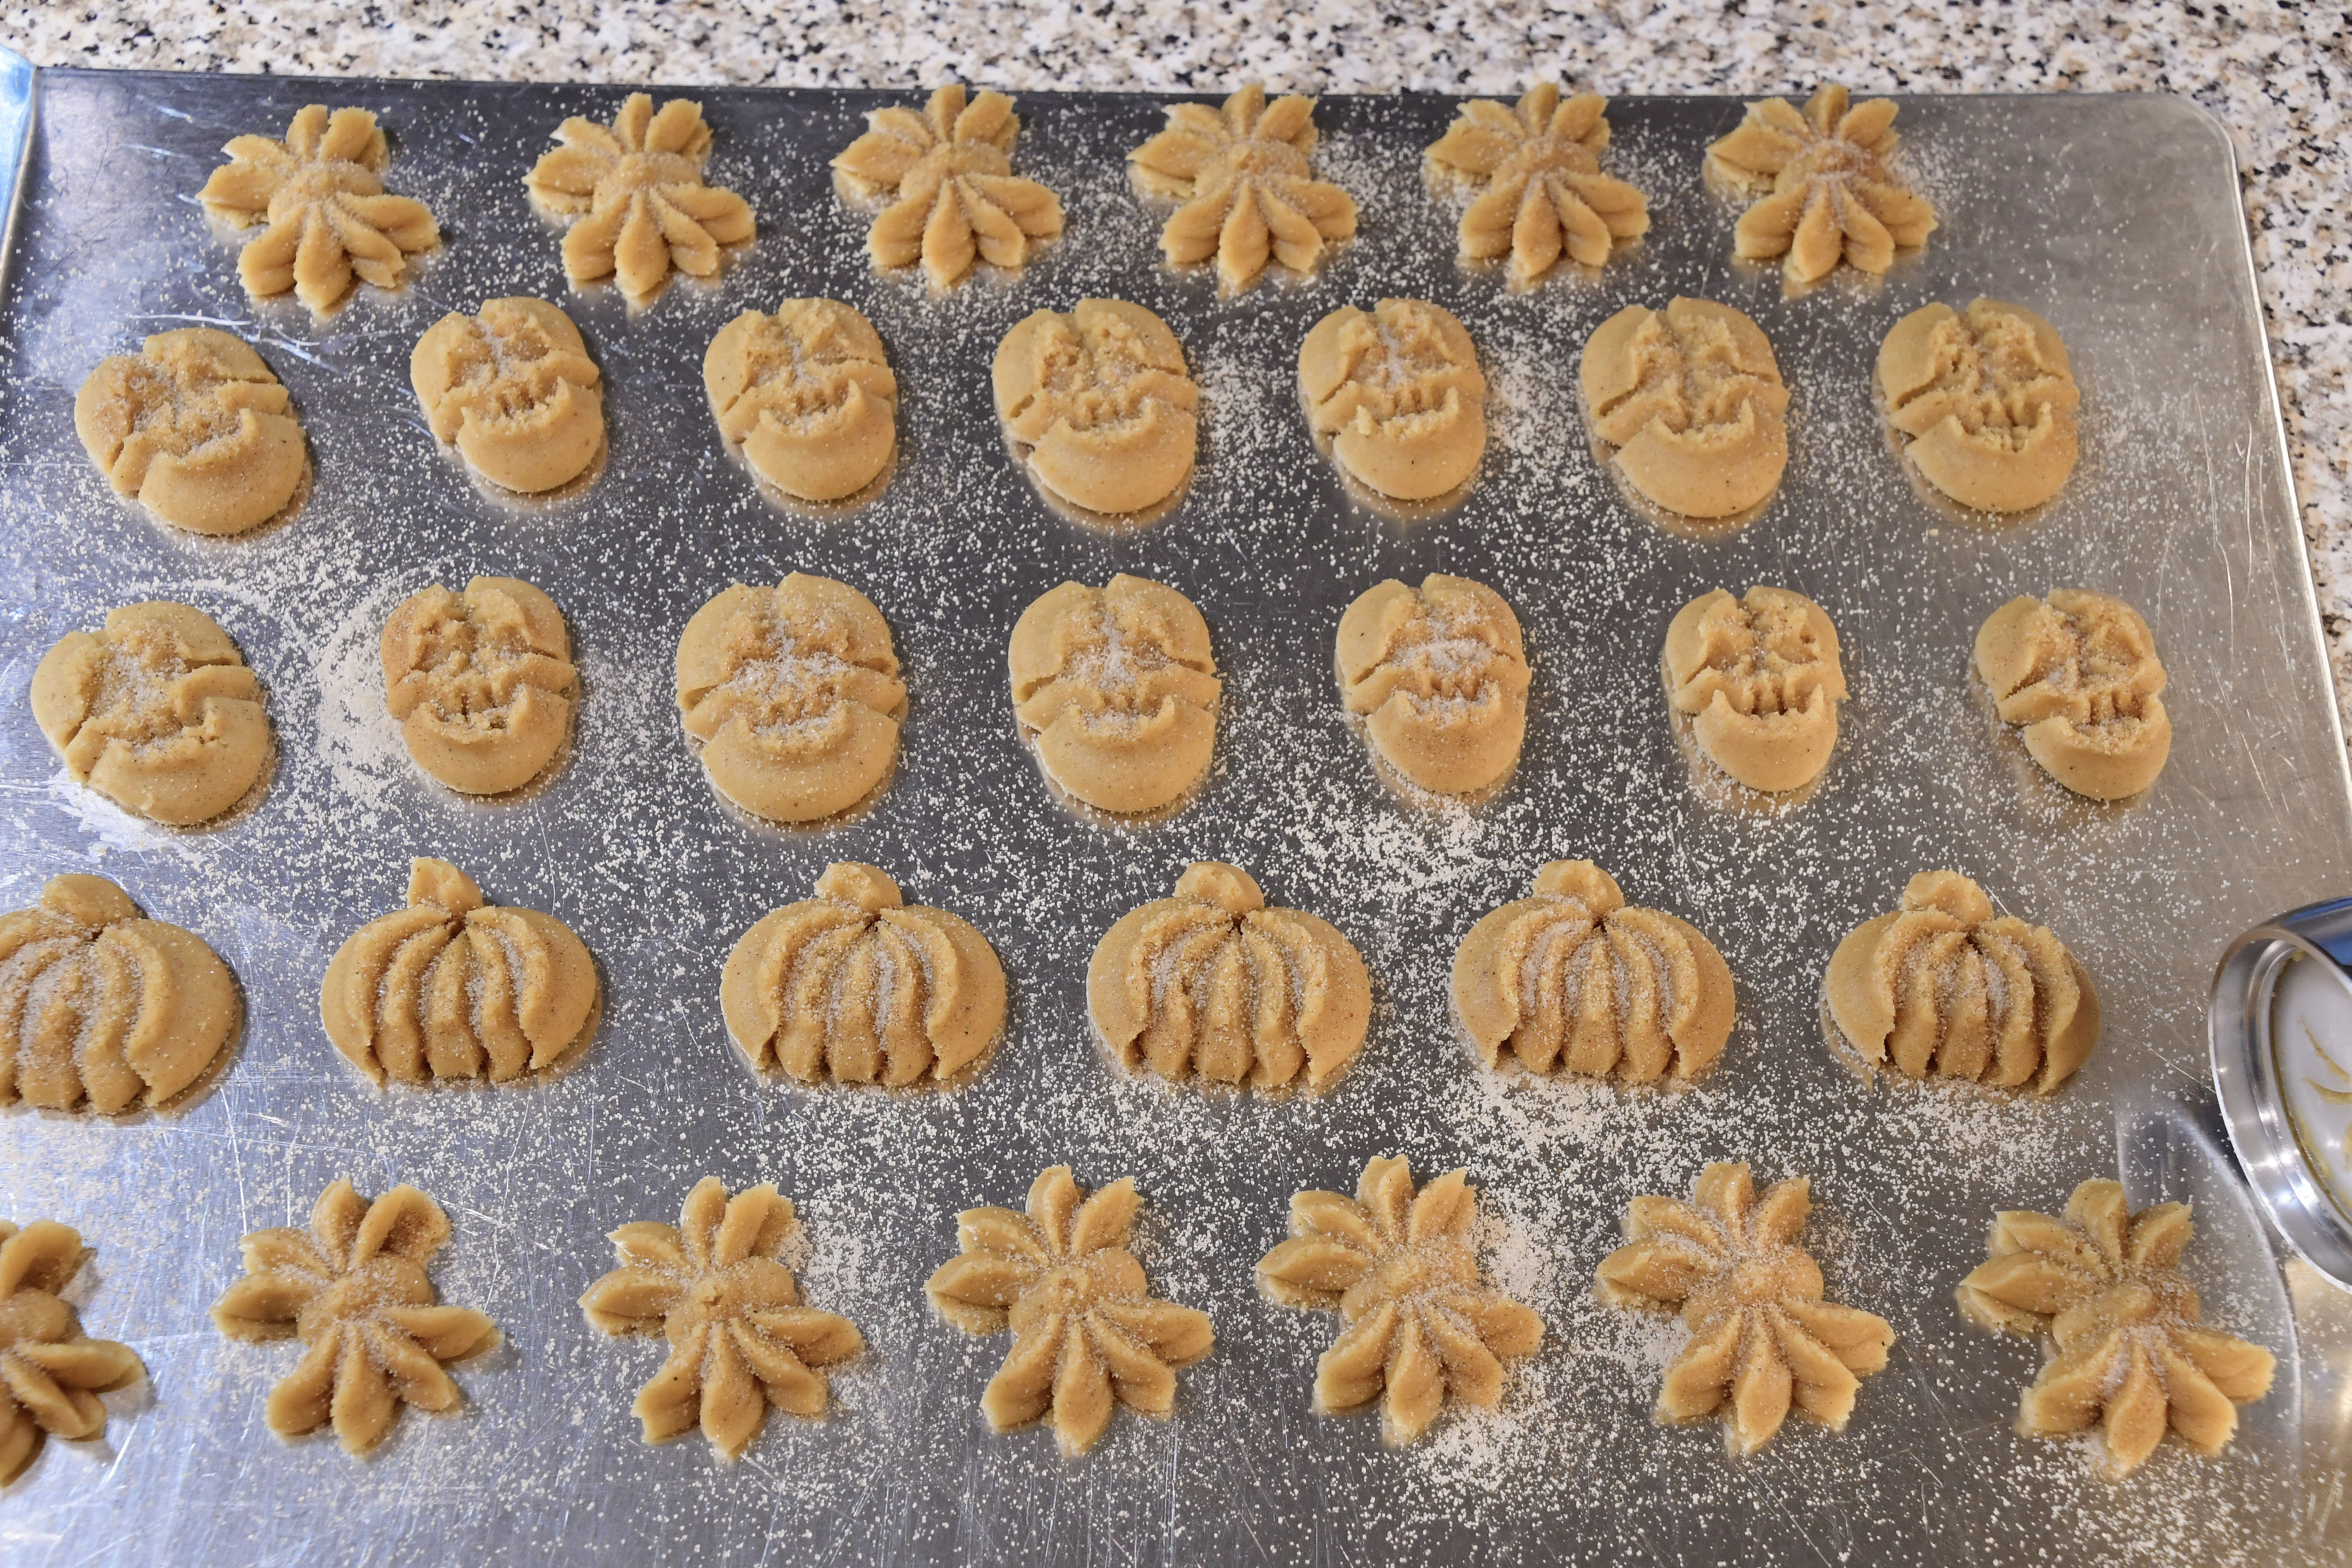

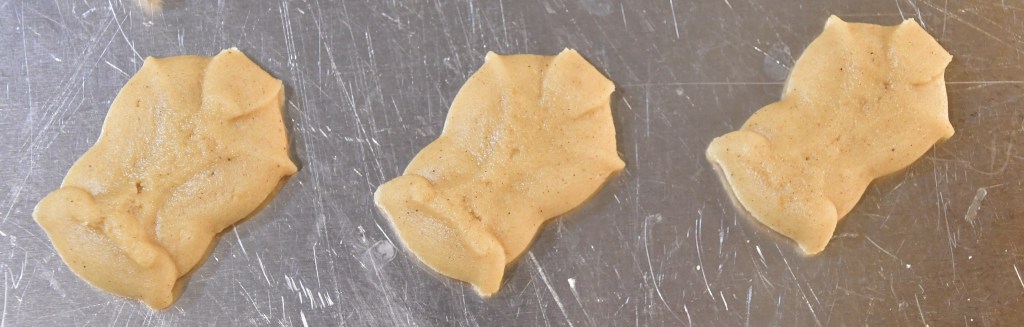
Two quick notes. One, if you’re doing the tombstones, flatten the surfaces with your fingers as shown here.

Two, if you are making sandwich cookies, press cookies in both “directions”. In other words, press some then flip the disk over in the ring to press some facing the other way. Then when you put them back-to-back for a sandwich they will fit together well. Shapes like the cat, ghost, witch hat, jack-o-lantern and pumpkin work better this way. No big deal if you forget, I totally forgot this time! Your sandwiches will just be a little sloppier. But taste great. 🙂
These take a bit longer than usual to bake. In my oven they were 10-12 minutes compared to my regular spritz at 7 or 8. Check them early and often and pull them out when the edges and ridges begin to brown.
Remove these from the cookie sheets fairly quickly, keeping your spatula nice and flat as you remove them to avoid breakage. Place them on cooling racks. Mine stuck to the cookie sheets if they sat more than a few minutes, except of course when I used the silicone mats. Those came off just fine.

While the cookies cool, make the icing. Cream the butter very well, then add the rest of the ingredients a little at a time. Once they’re incorporated whip the icing for 2 to 3 minutes to make it super fluffy. Tweak it with a little more heavy cream if it’s too thick for decorating or with more sugar if it’s too thin.
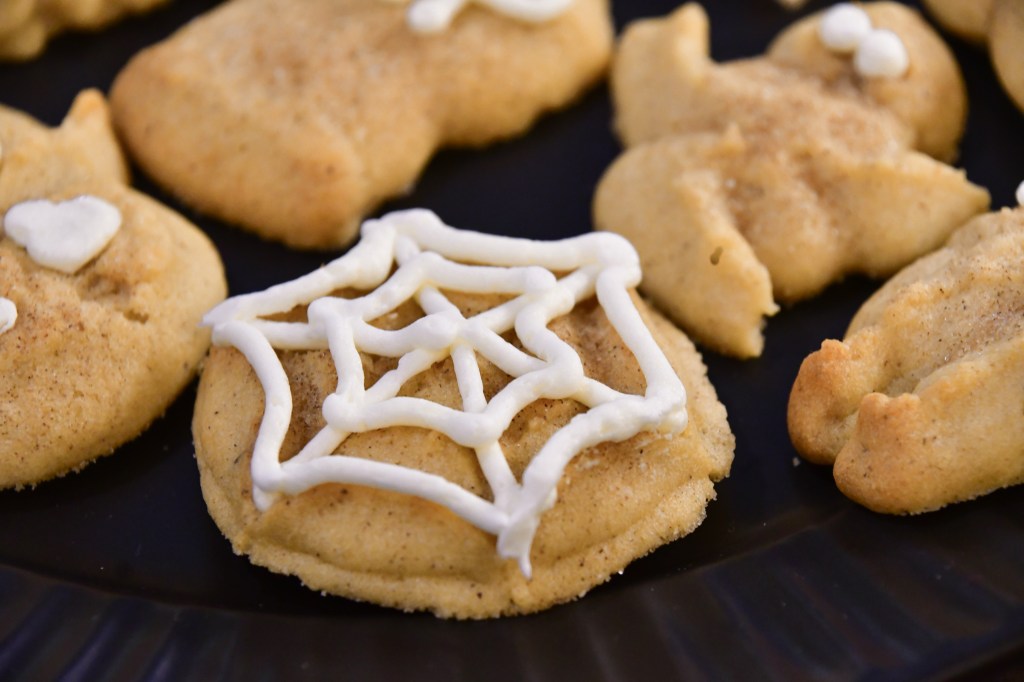
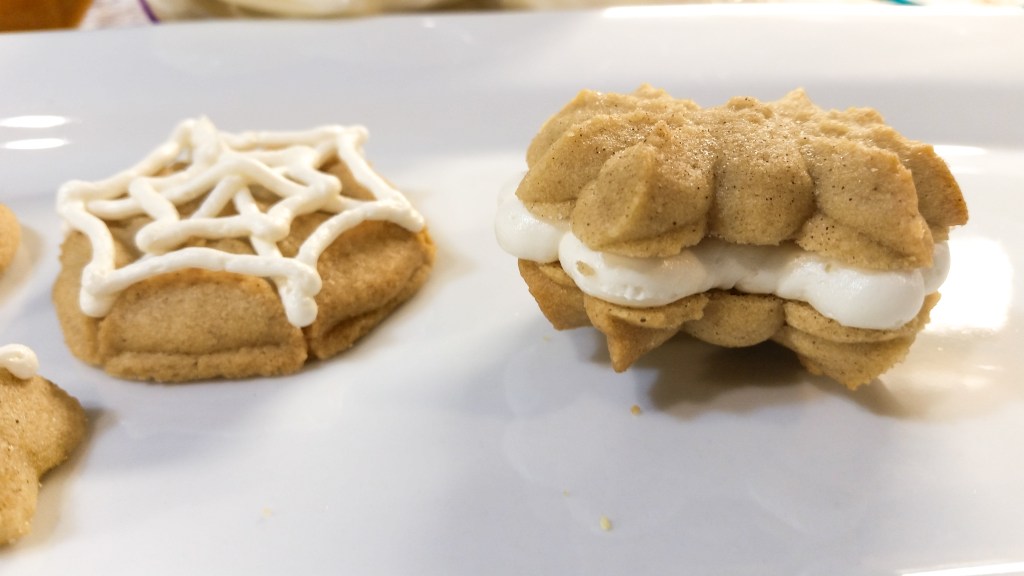
Use decorating bags with round writing tips to add simple eyes to bats, cats, and spiders, and follow my photos for ideas on how to use icing to fill in the hollows of the skulls and jack-o-lanterns. Trace the letters of EEK and BOO and draw a buckle on the with hat. Here’s how to do a few shape examples and the spider web!
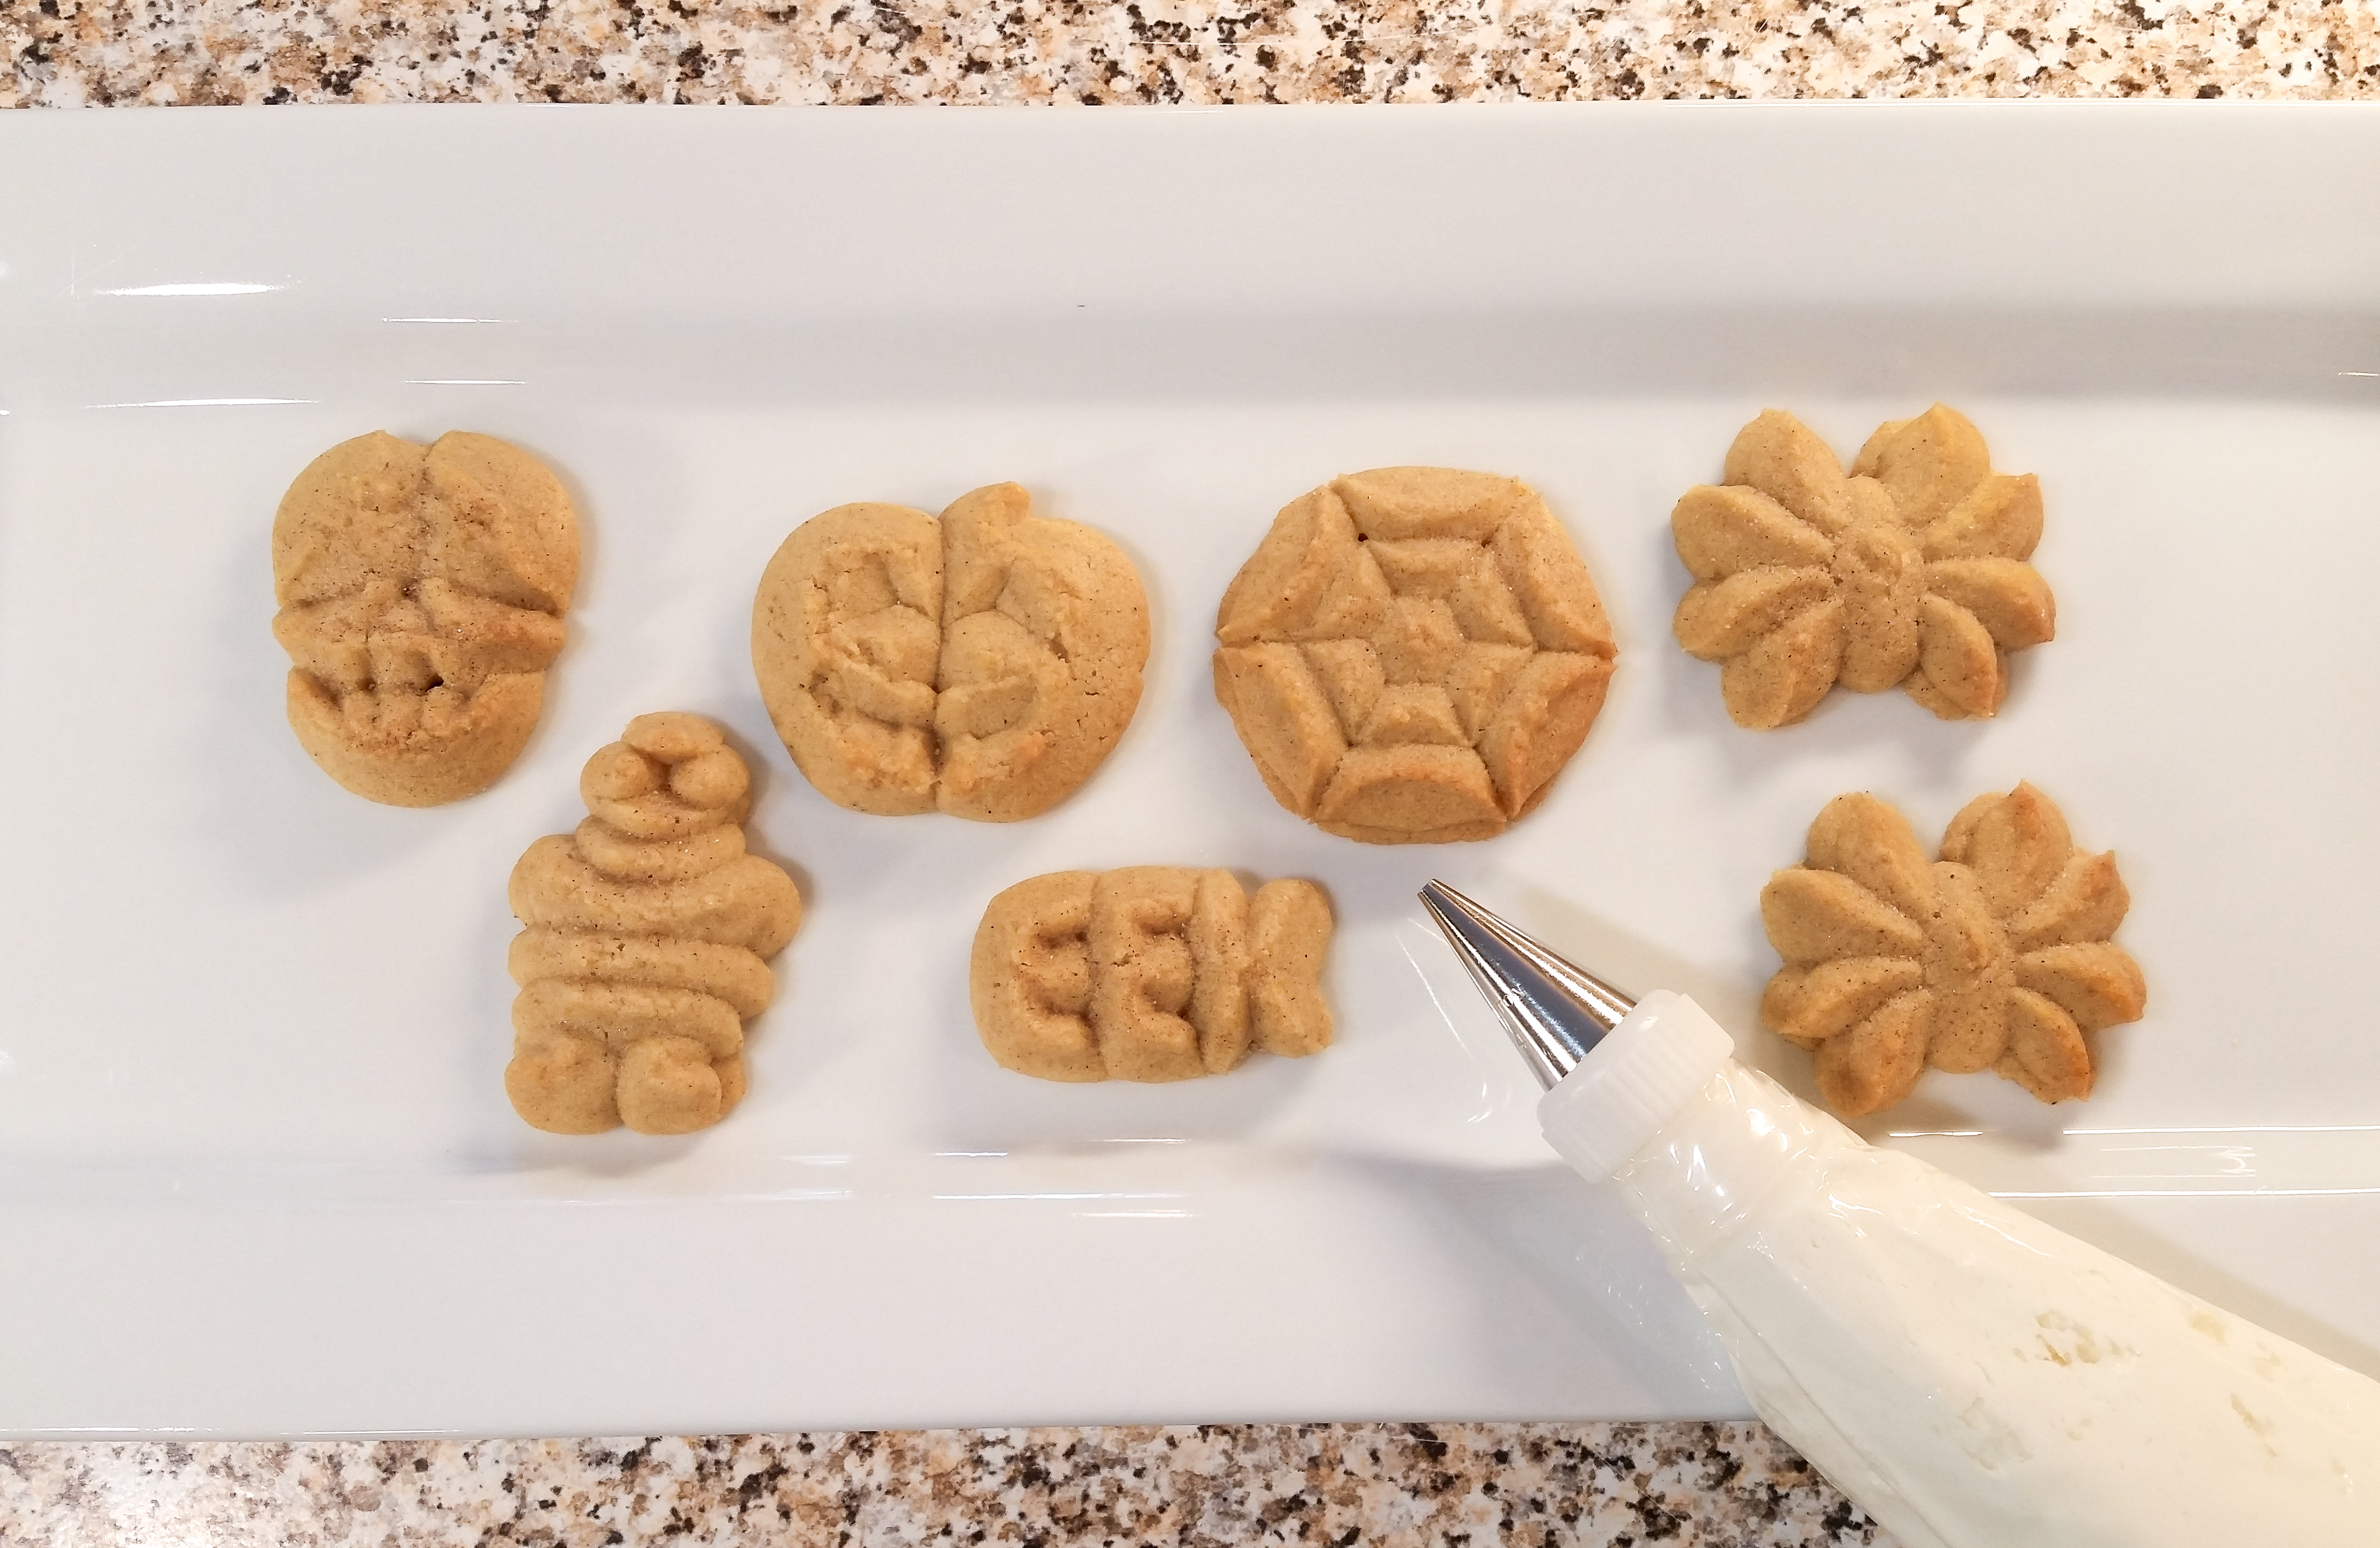
See the hollow spaces in the faces of the skull and jack-o-lantern? Fill those in with icing. Trace the letters and swipe on mummy wrapping, etc.

Pour a small dish of warm water and dip a finger in it, and with just a damp fingertip smooth out the icing wherever it looks uneven. See the difference in the faces? And where you start and end a line or dot of icing you can flatten out the points that form, too.
The last idea is sandwich cookies! For some this may be just too sweet, but if you’re like me and my kids, there’s no such thing! Even just try a few, just to say you did. Here I show the spiders. Pick two about the same size, flip one over and add the thicker version of the buttercream icing. You can use a knife, or for a cleaner look use a large round tip like a Wilton #5 or even up to #10 to neatly outline the underside of a cookie. Then fill it in and top it off with another same-sized cookie. I went nuts and stuffed these super thick. No regrets!
So there you go! “Pumpkin Doodle” Spritz Cookies for Halloween. They’ll be gone before you can say “Boo!”.
Disk set pictures and links below.
The Fall and Winter Holidays are on their way and I’m so excited. 🙂
Happy Halloween and Happy Baking everyone!
~Susie
Disk Designer/Co-Owner at Impress! Bakeware, LLC
Our website has all of our 200+ disk shapes, cookie press, embossed rolling pins, baking accessories plus more about our Women/Family Owned company! impressbakeware.com
All products are on our Etsy shop.
Our Amazon shop has our cookie press and disks and embossed rolling pins.
Follow us on facebook!
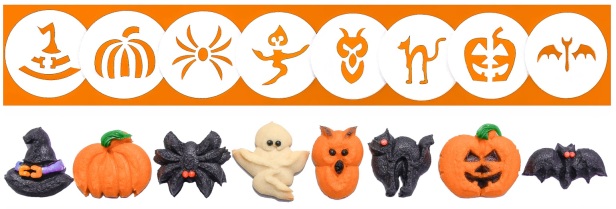
The Halloween Disk Set:
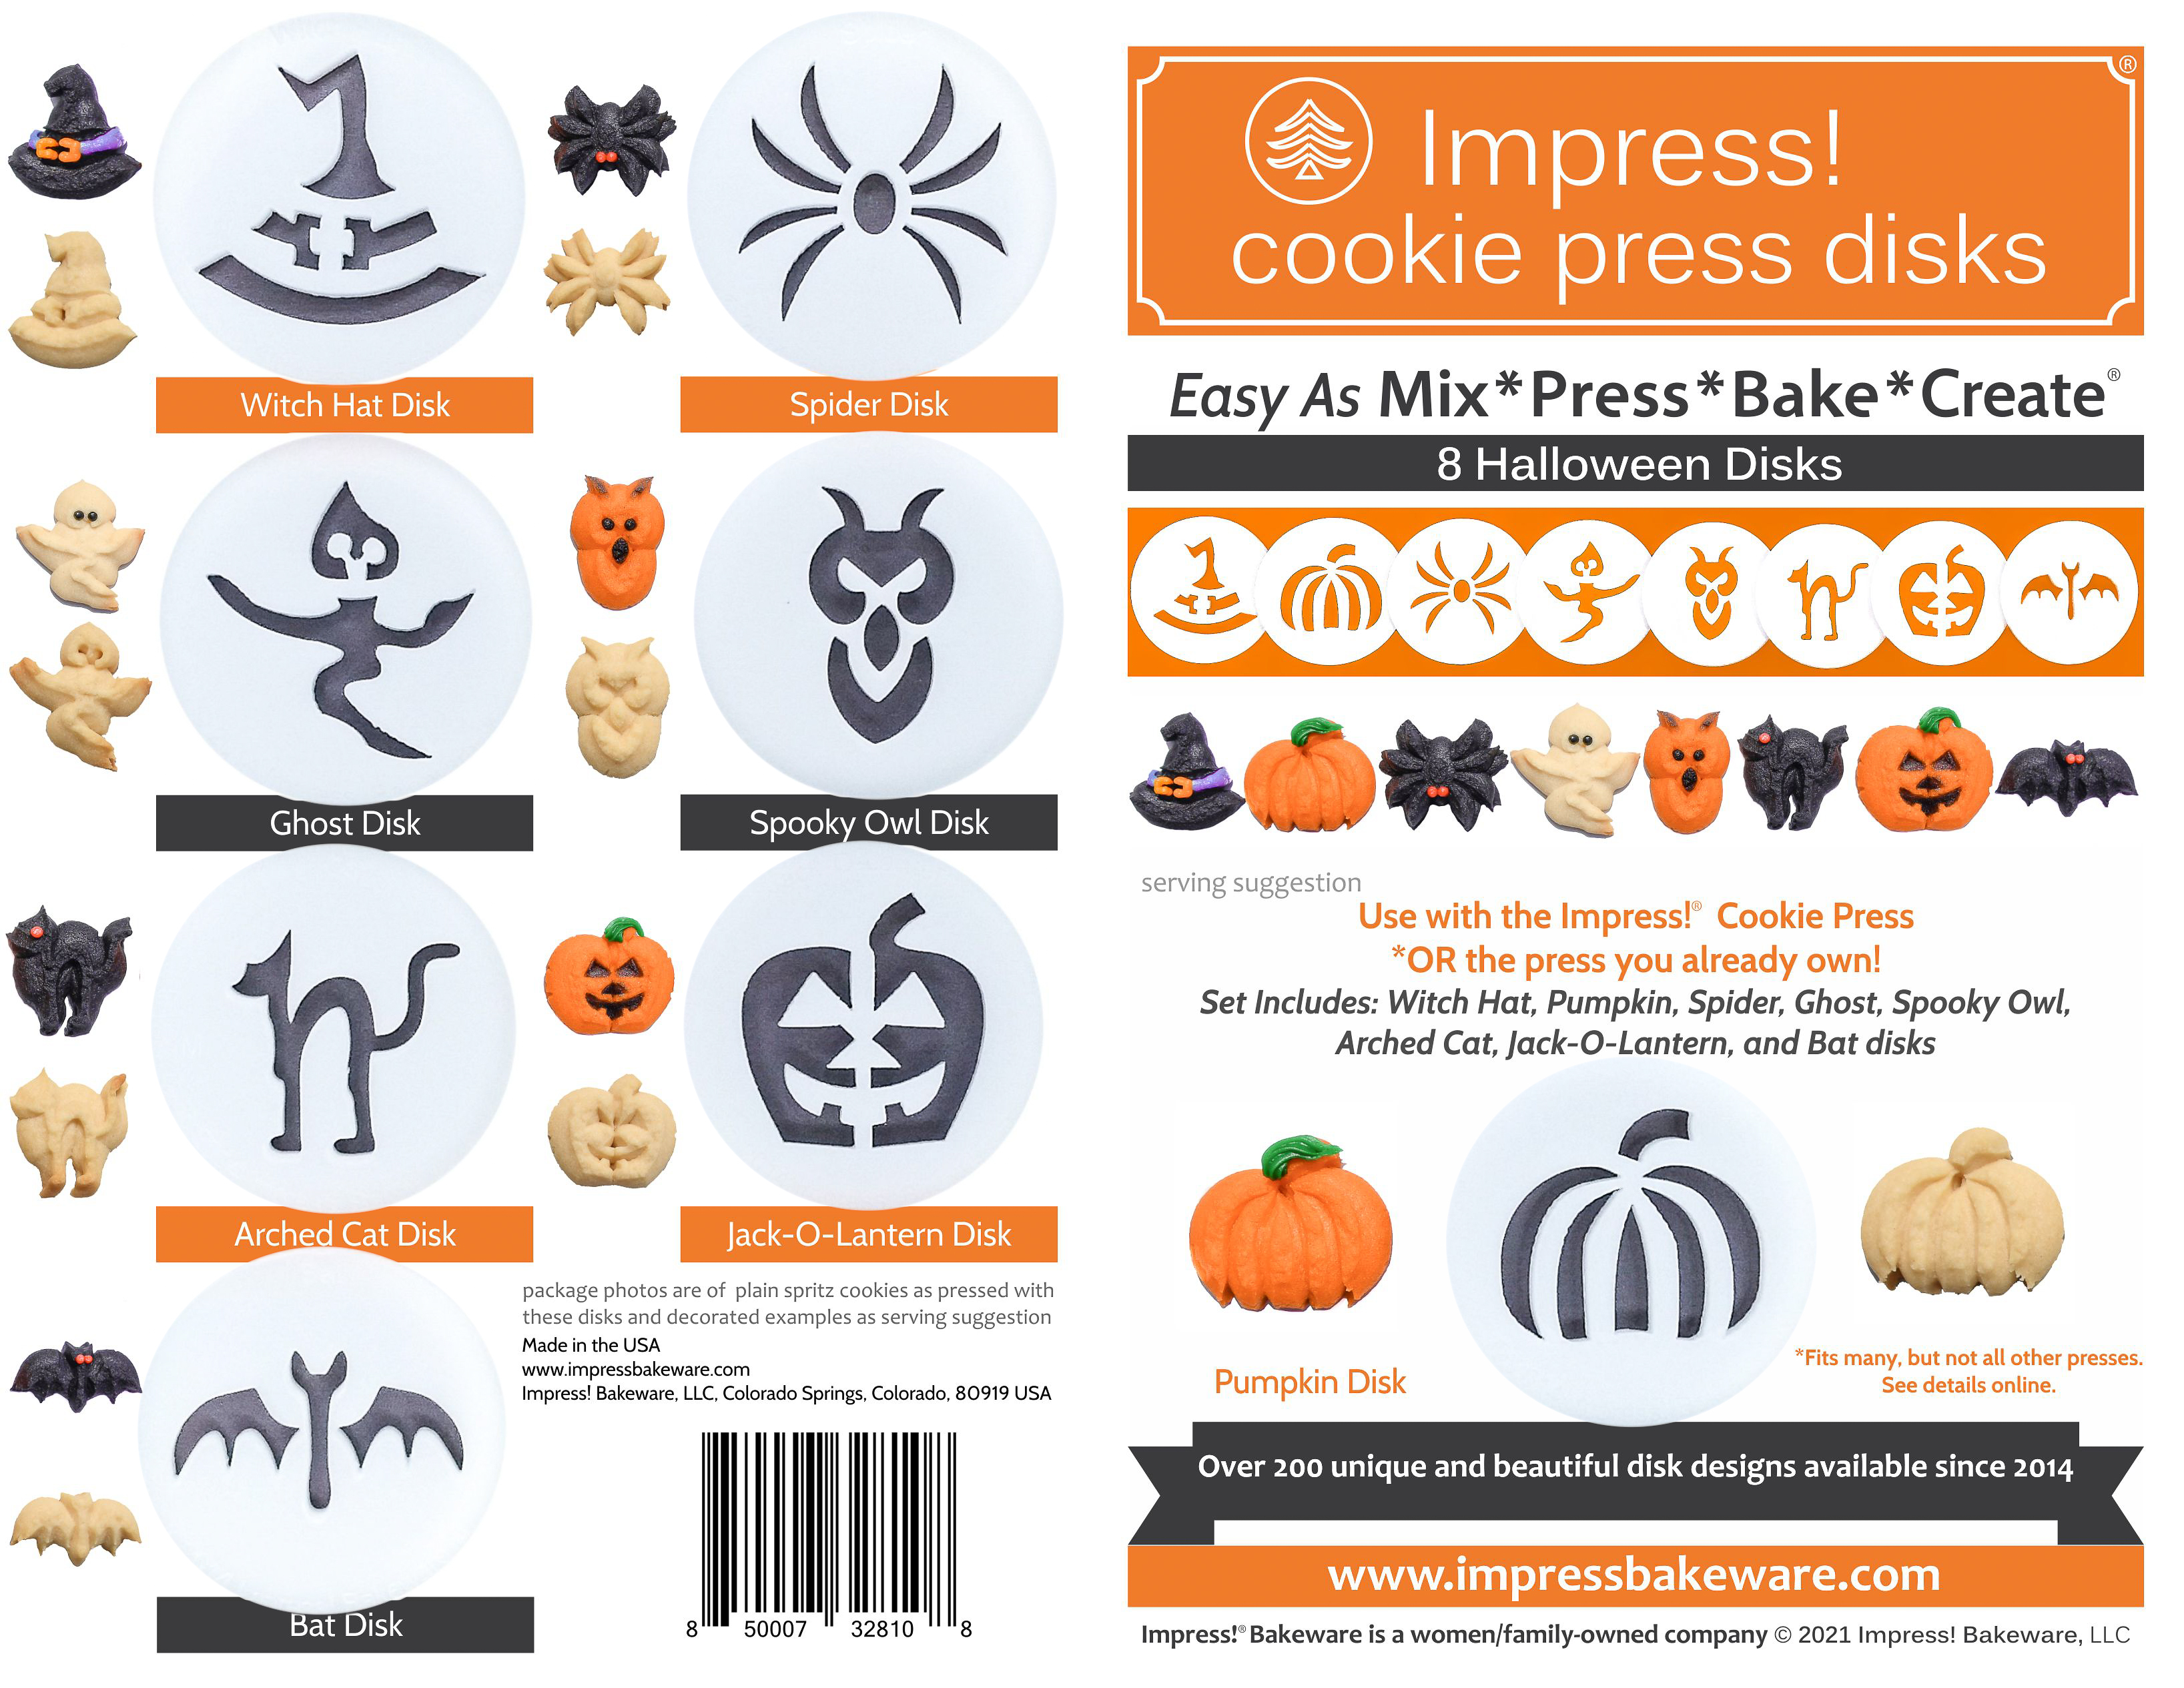
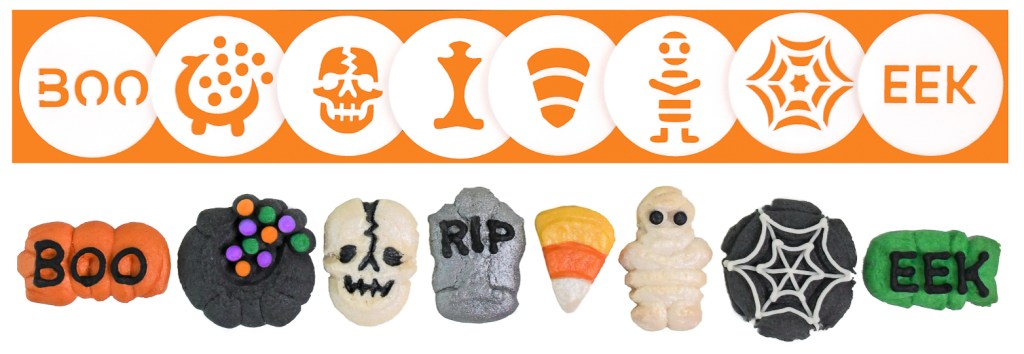
The Halloween Two Disk Set:


The skull and ghost crack me up! Nice to see you back-Happy Fall Baking:@)
LikeLike
Thanks Lynn!
LikeLike
Hi! Is it ok to make the pumpkin doodle dough in advance and use it next-day?
LikeLike
Hi Meg! Thanks for the question. I always have the same attitude about spritz dough- it is always better the day you make it. It CAN be refrigerated and used later, but just know the cookies will be denser and less lofty. The big thing about refrigerating dough is to make sure it comes to room temperature as evenly as possible before you press. As it warms up it will be colder towards the center of the dough ball and warmer on the outside. SO knead it by hand to make the temperature, and therefore the density, even throughout. If you skip this step your shapes might press unevenly or be just difficult to press in general. If part of the dough in the barrel is cold and stiff, and part is warm and soft, it will come out through the disk at an uneven rate and you’ll have lopsided shapes! I hope that answer helps and let me know how it works if you try it. I’ve never refrigerated that dough before! Happy Baking! ~Susie the Disk Designer
LikeLike