

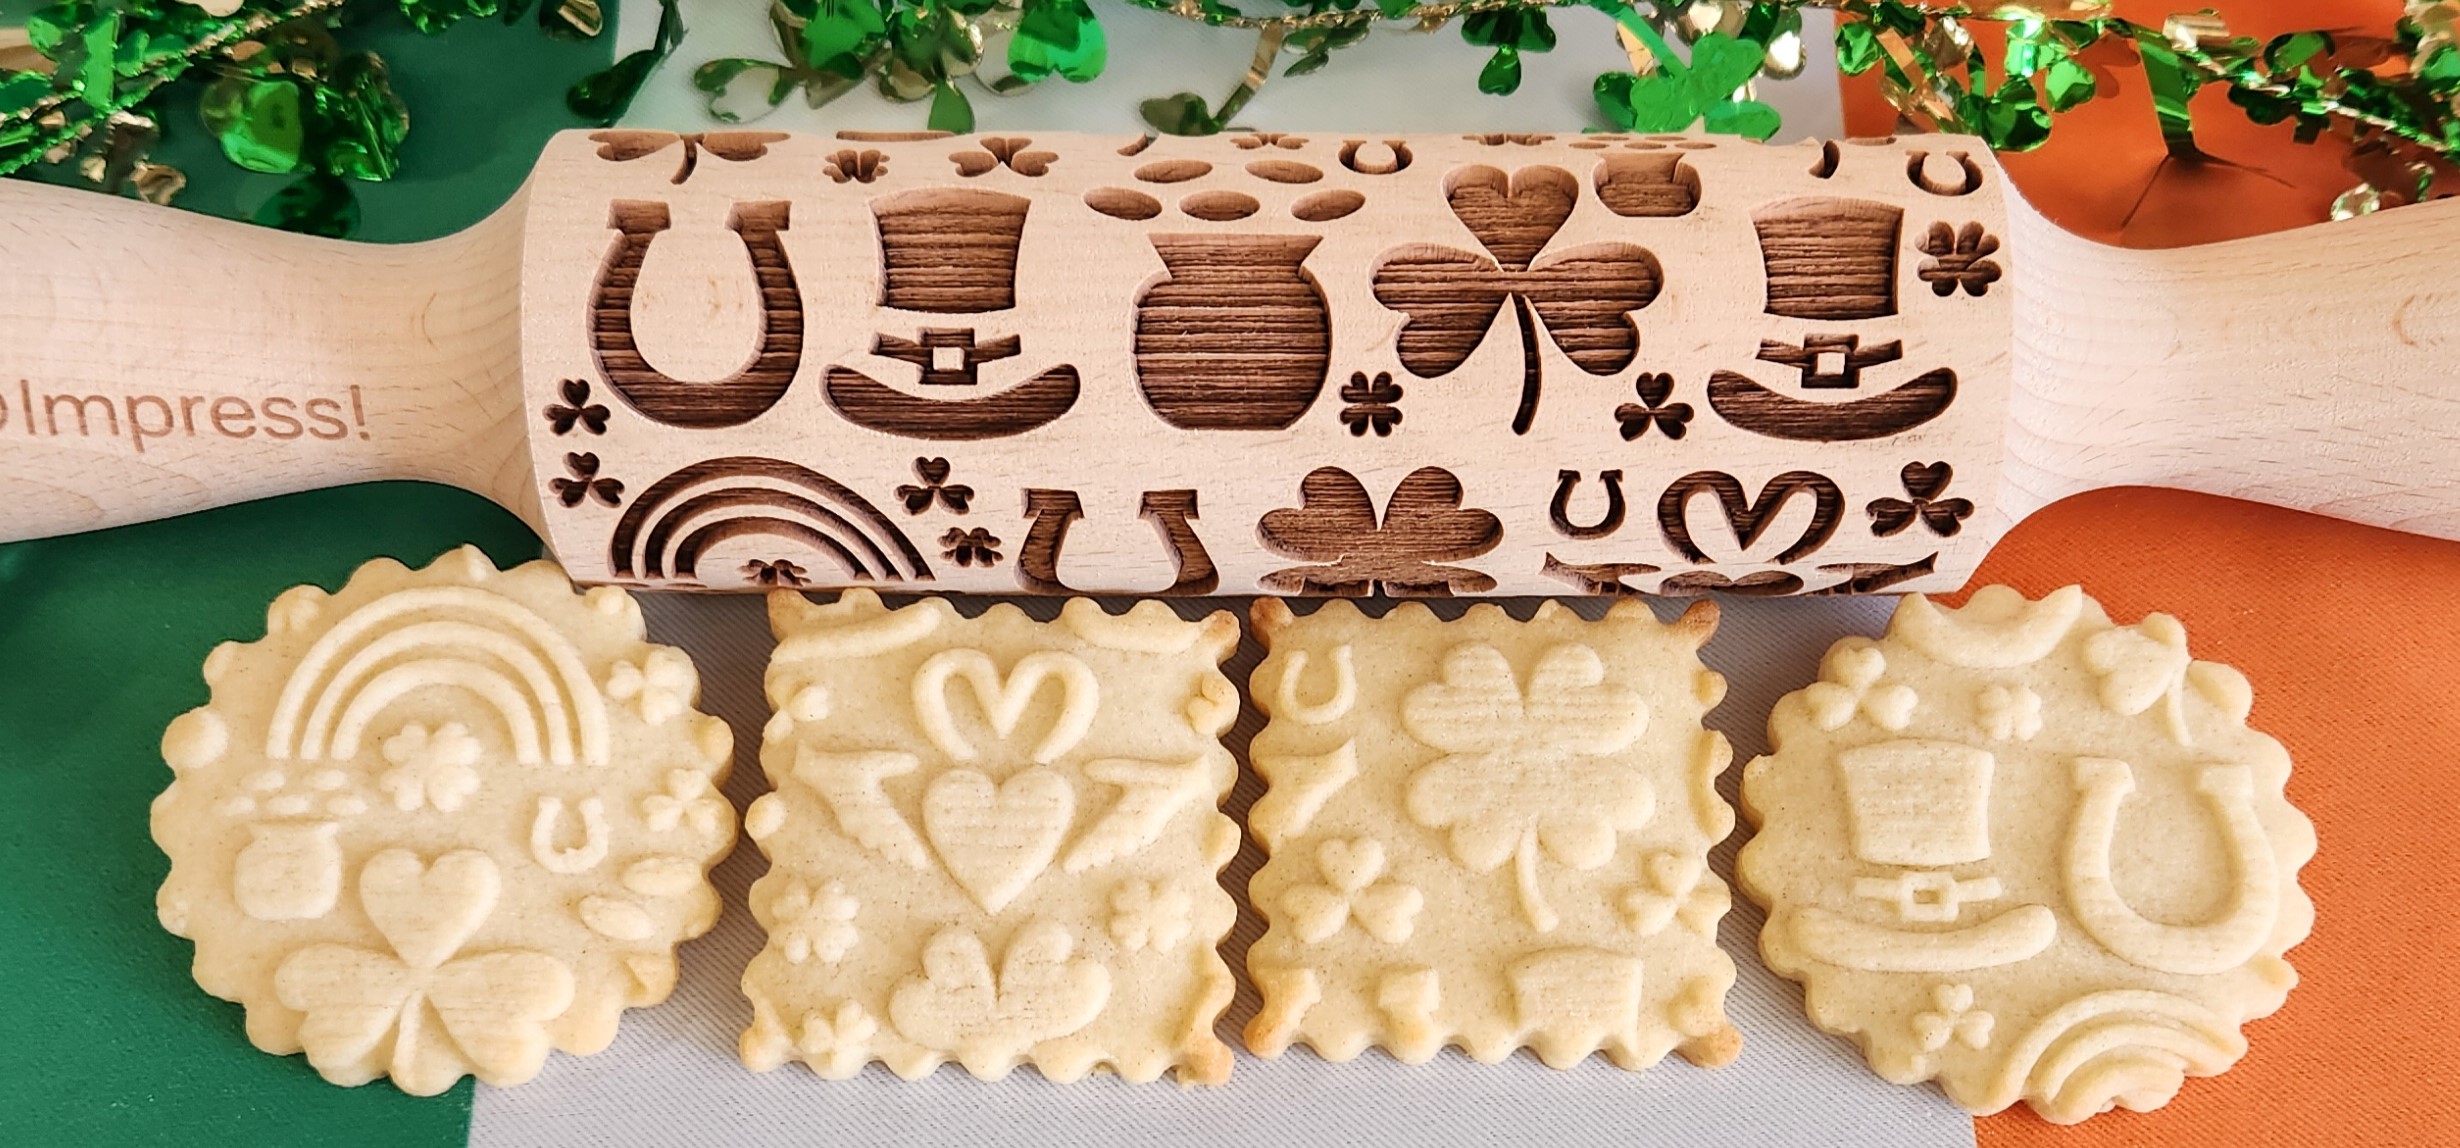
Bake up the Luck O the Irish with boozy St. Patrick’s Day cookies made with Baileys! Use our cookie press disks or embossed rolling pin to make the cookies, then sandwich them with Baileys infused buttercream! This fun festive look is made by painting with edible luster dust. You can also paint the sandwich filling edges gold! There are also a non-alcohol and non-sandwich options.
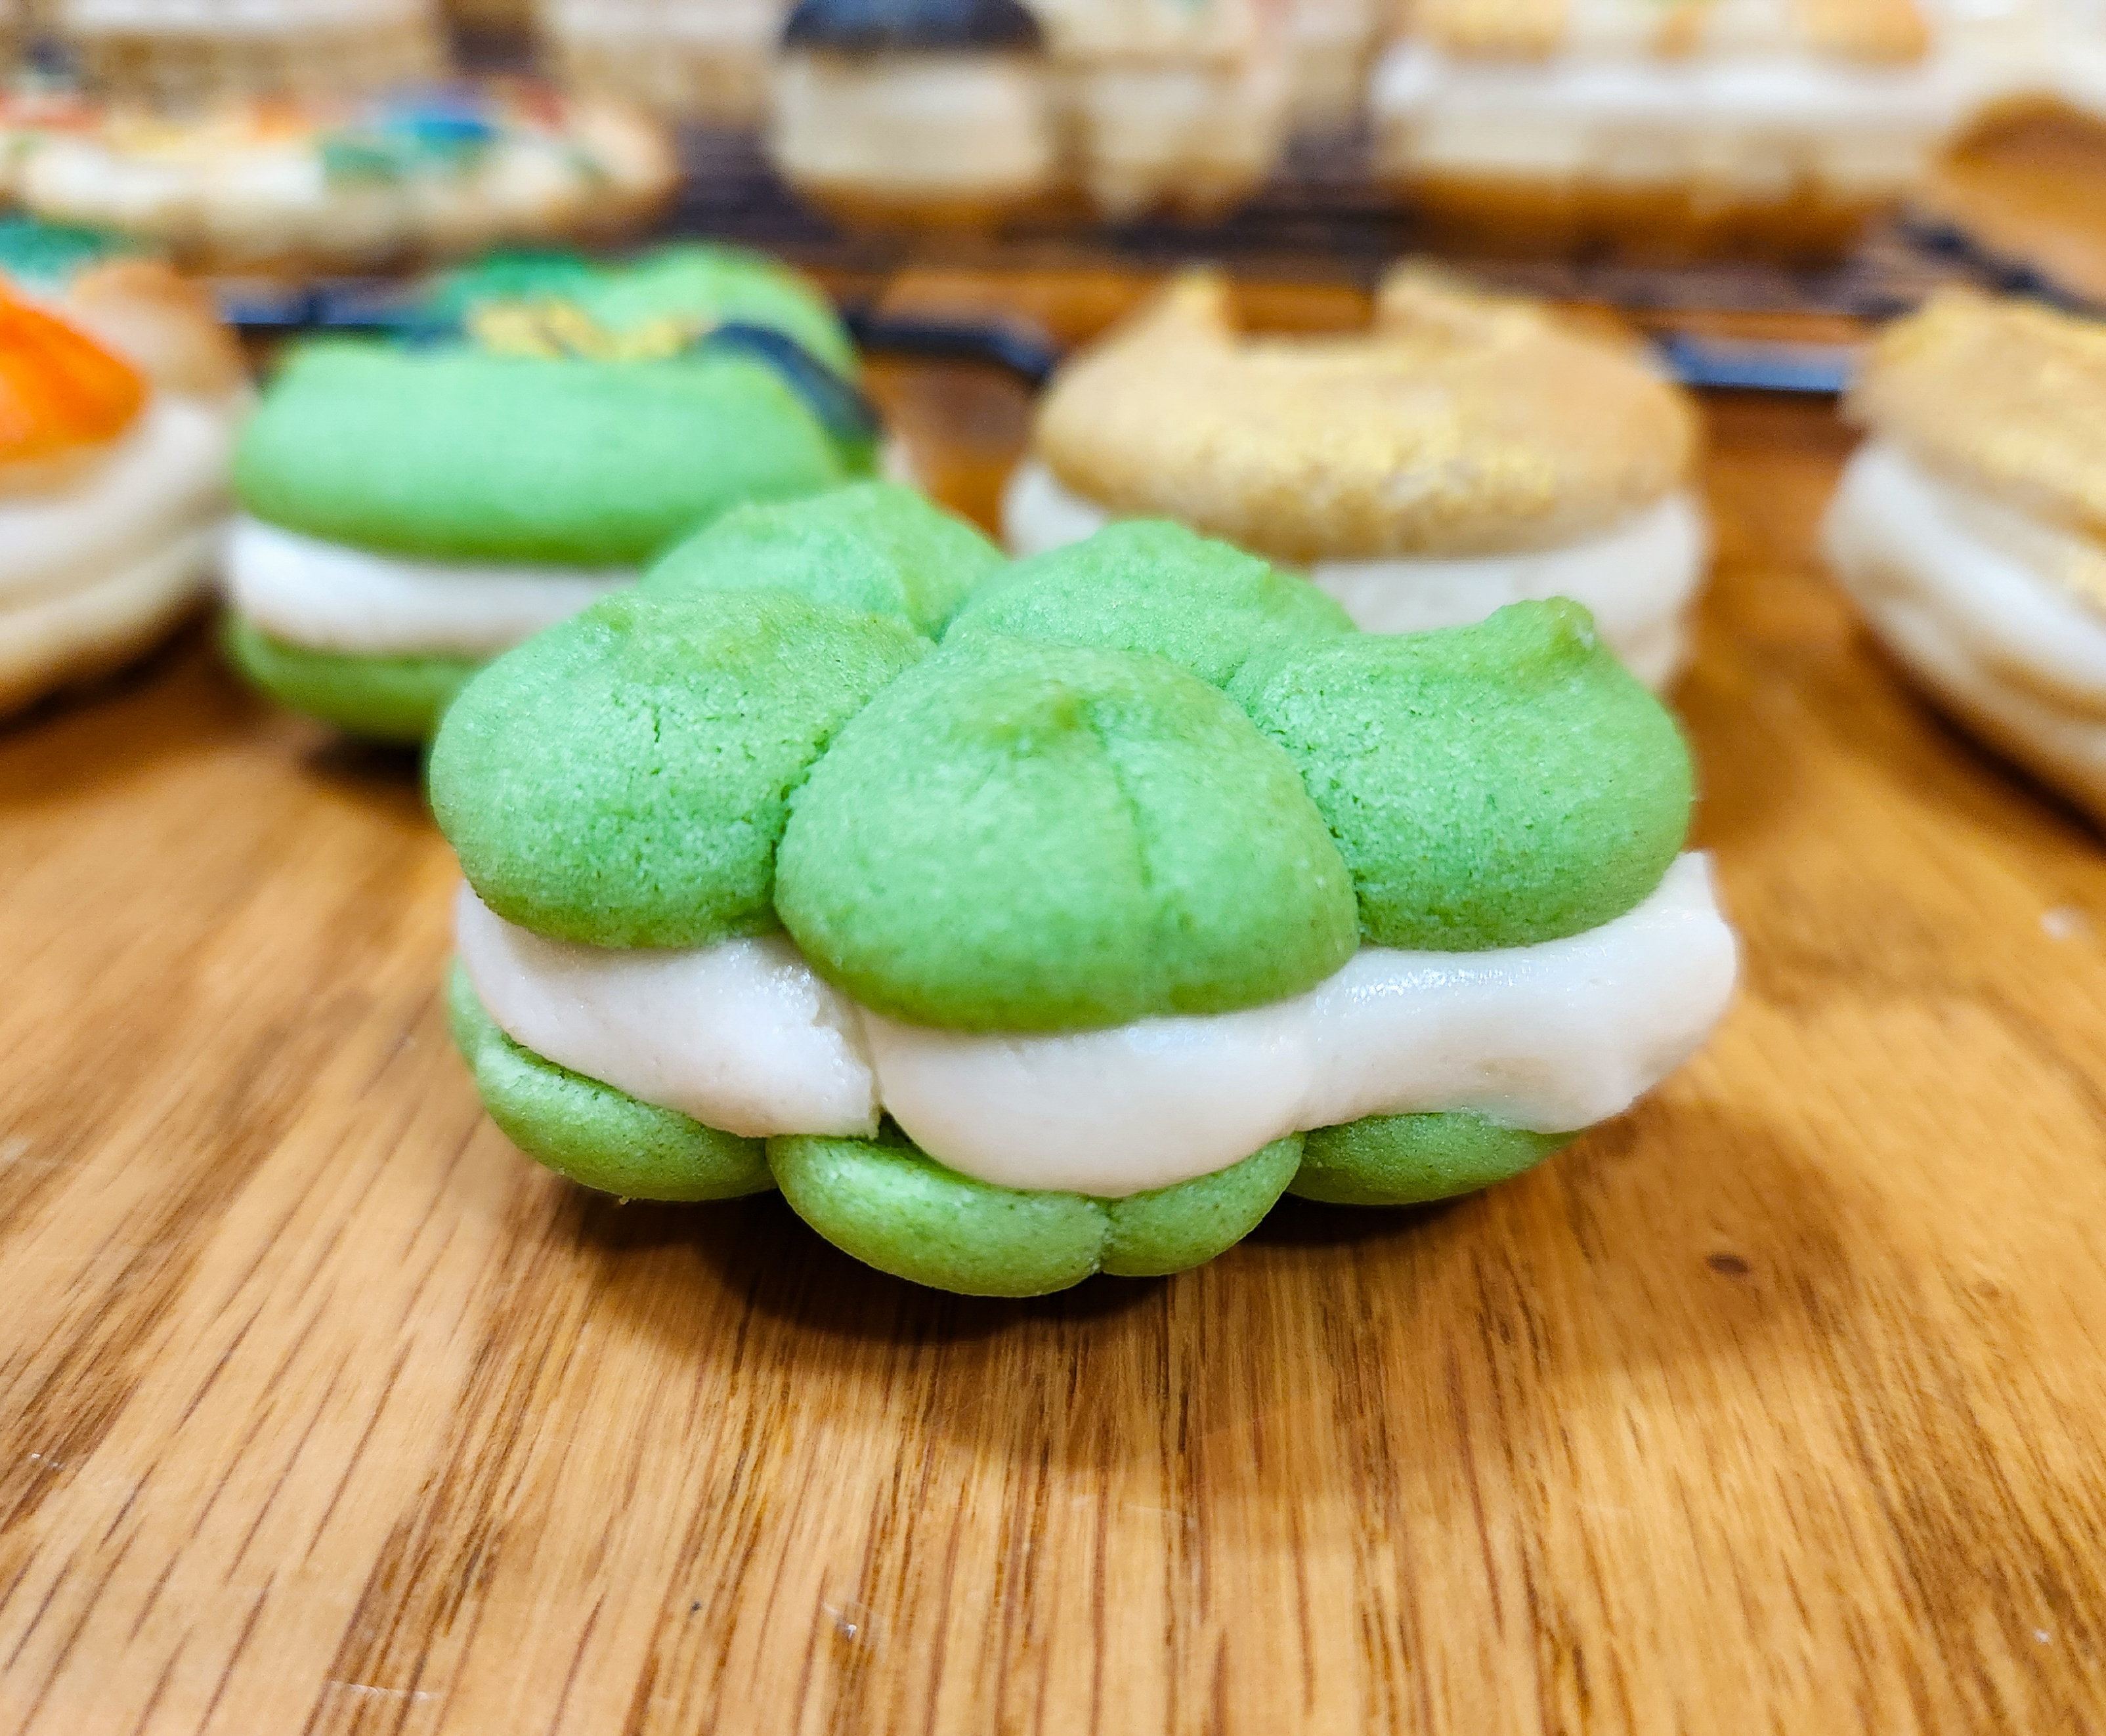
These are simple vanilla-honey spritz and rolled cookies, but when sandwiched with the intensely Baileys, boozy buttercream, they become spectacularly good!

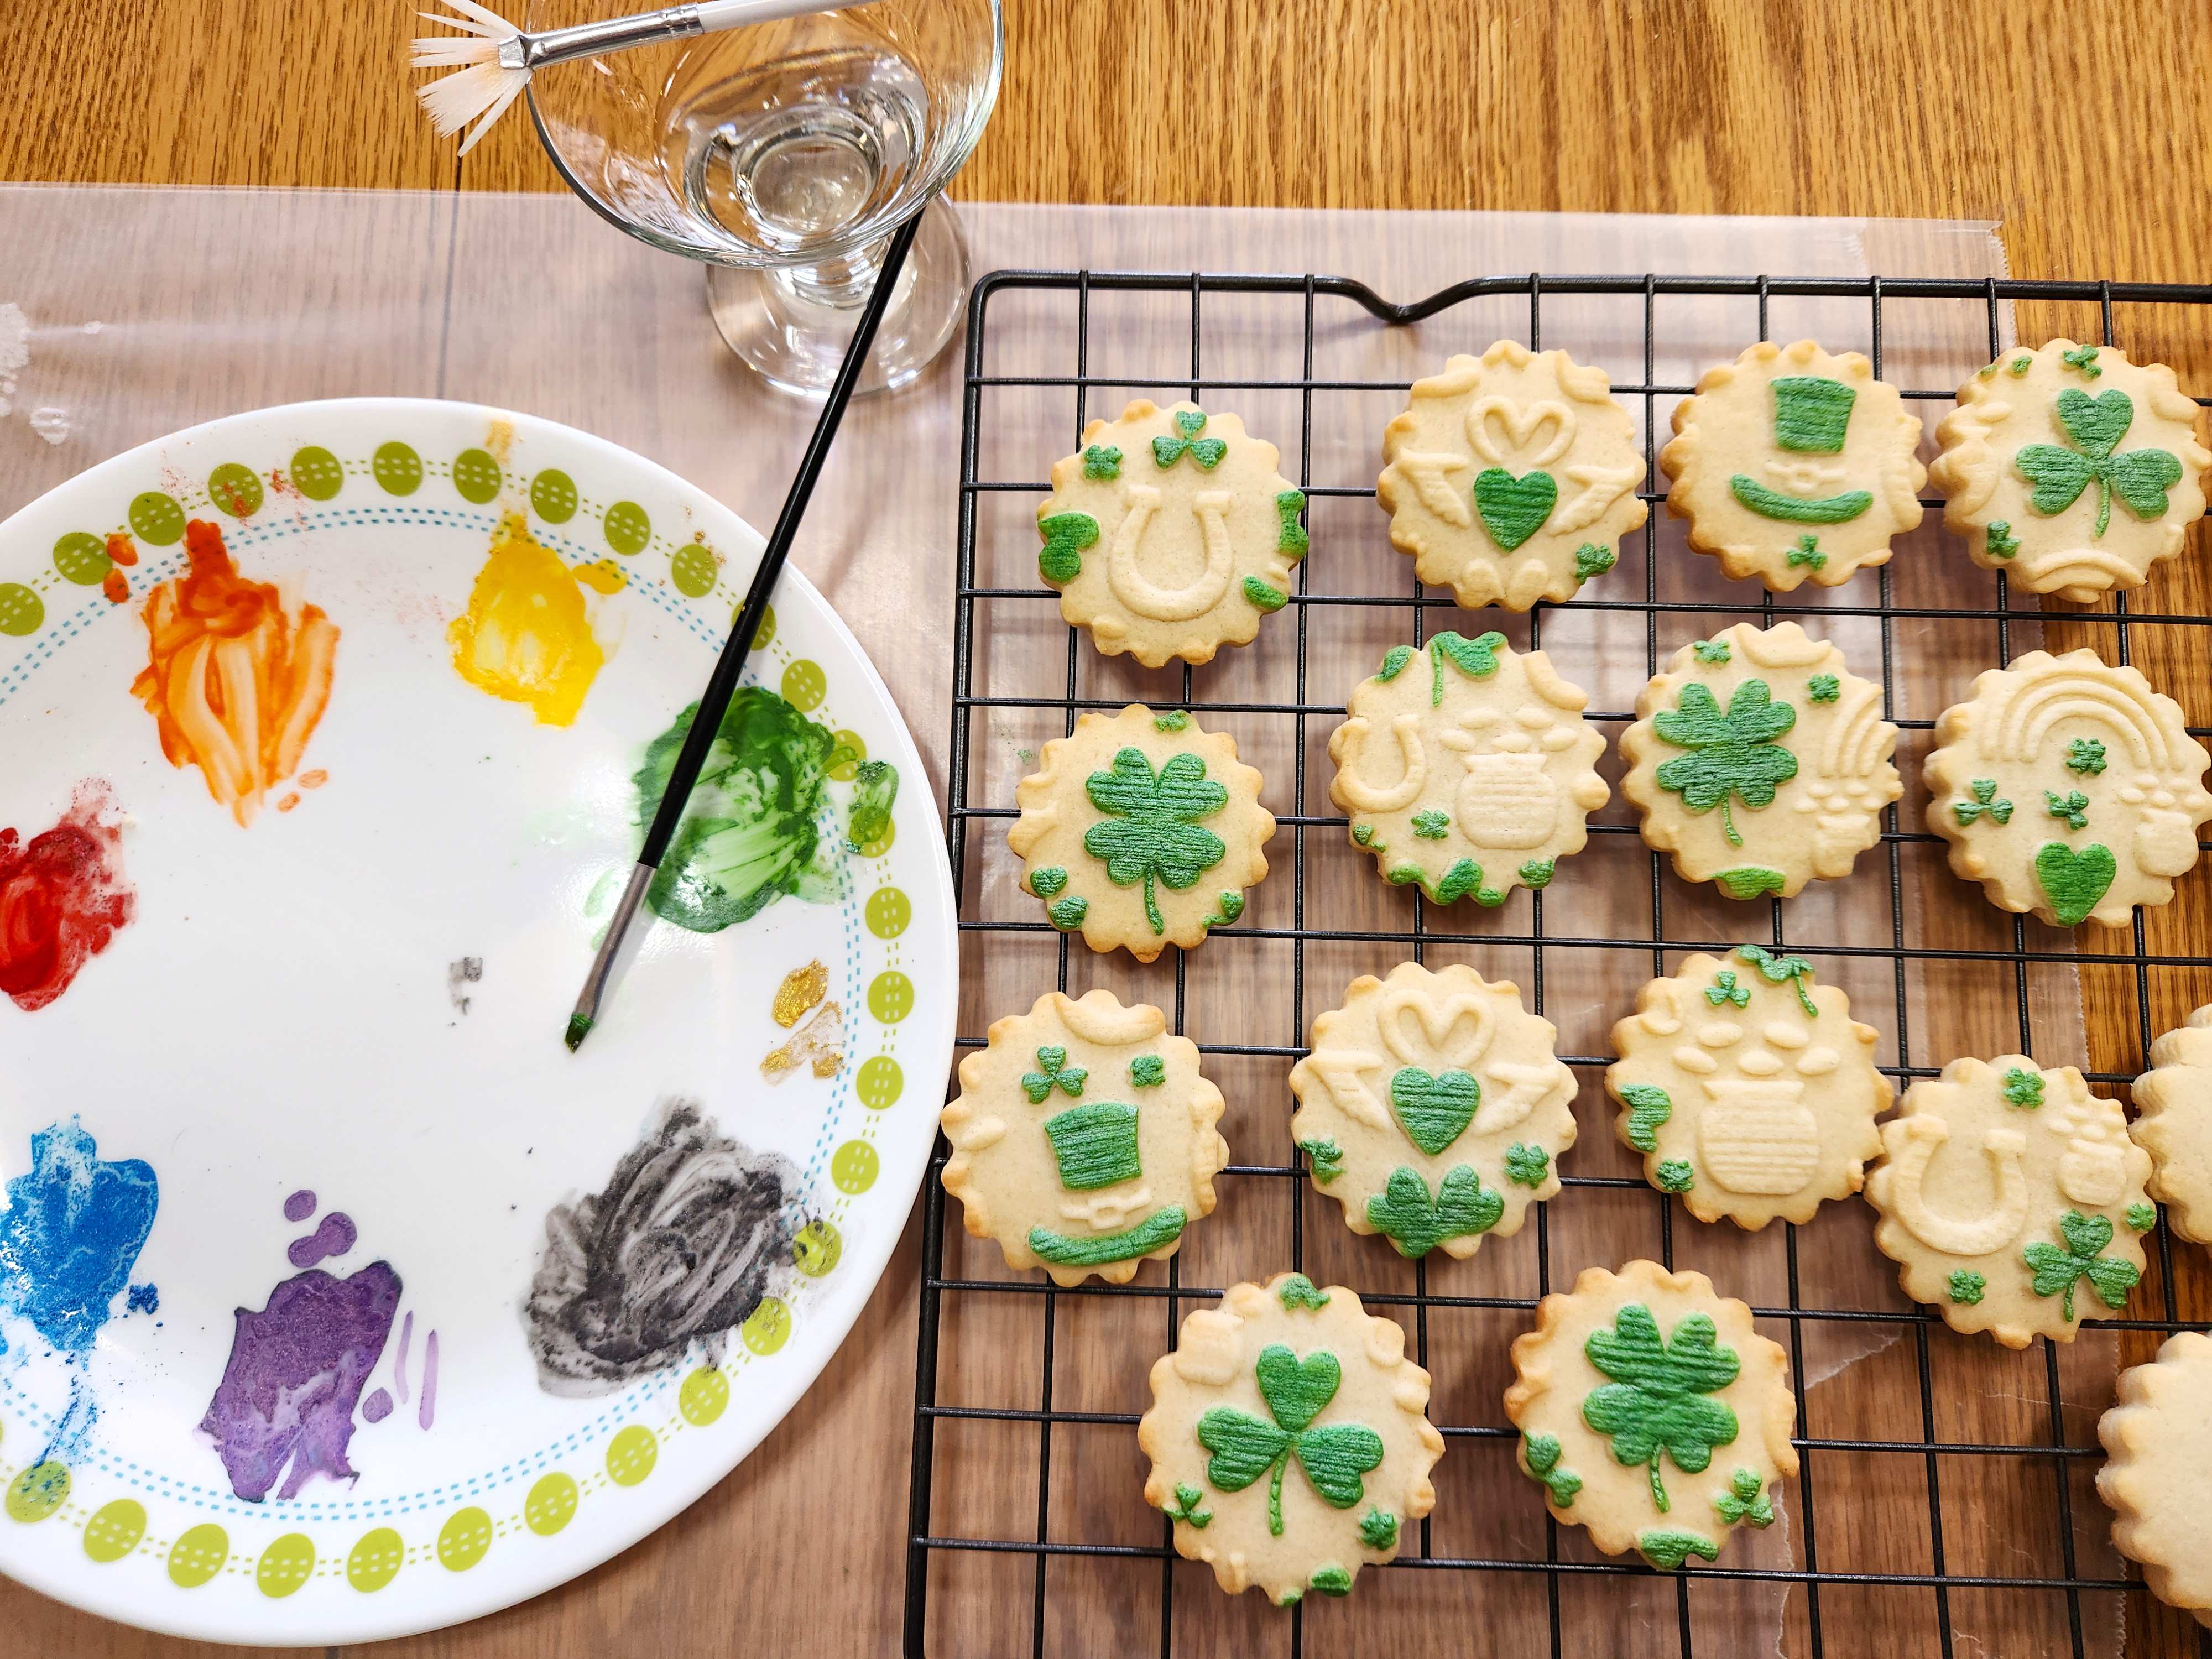
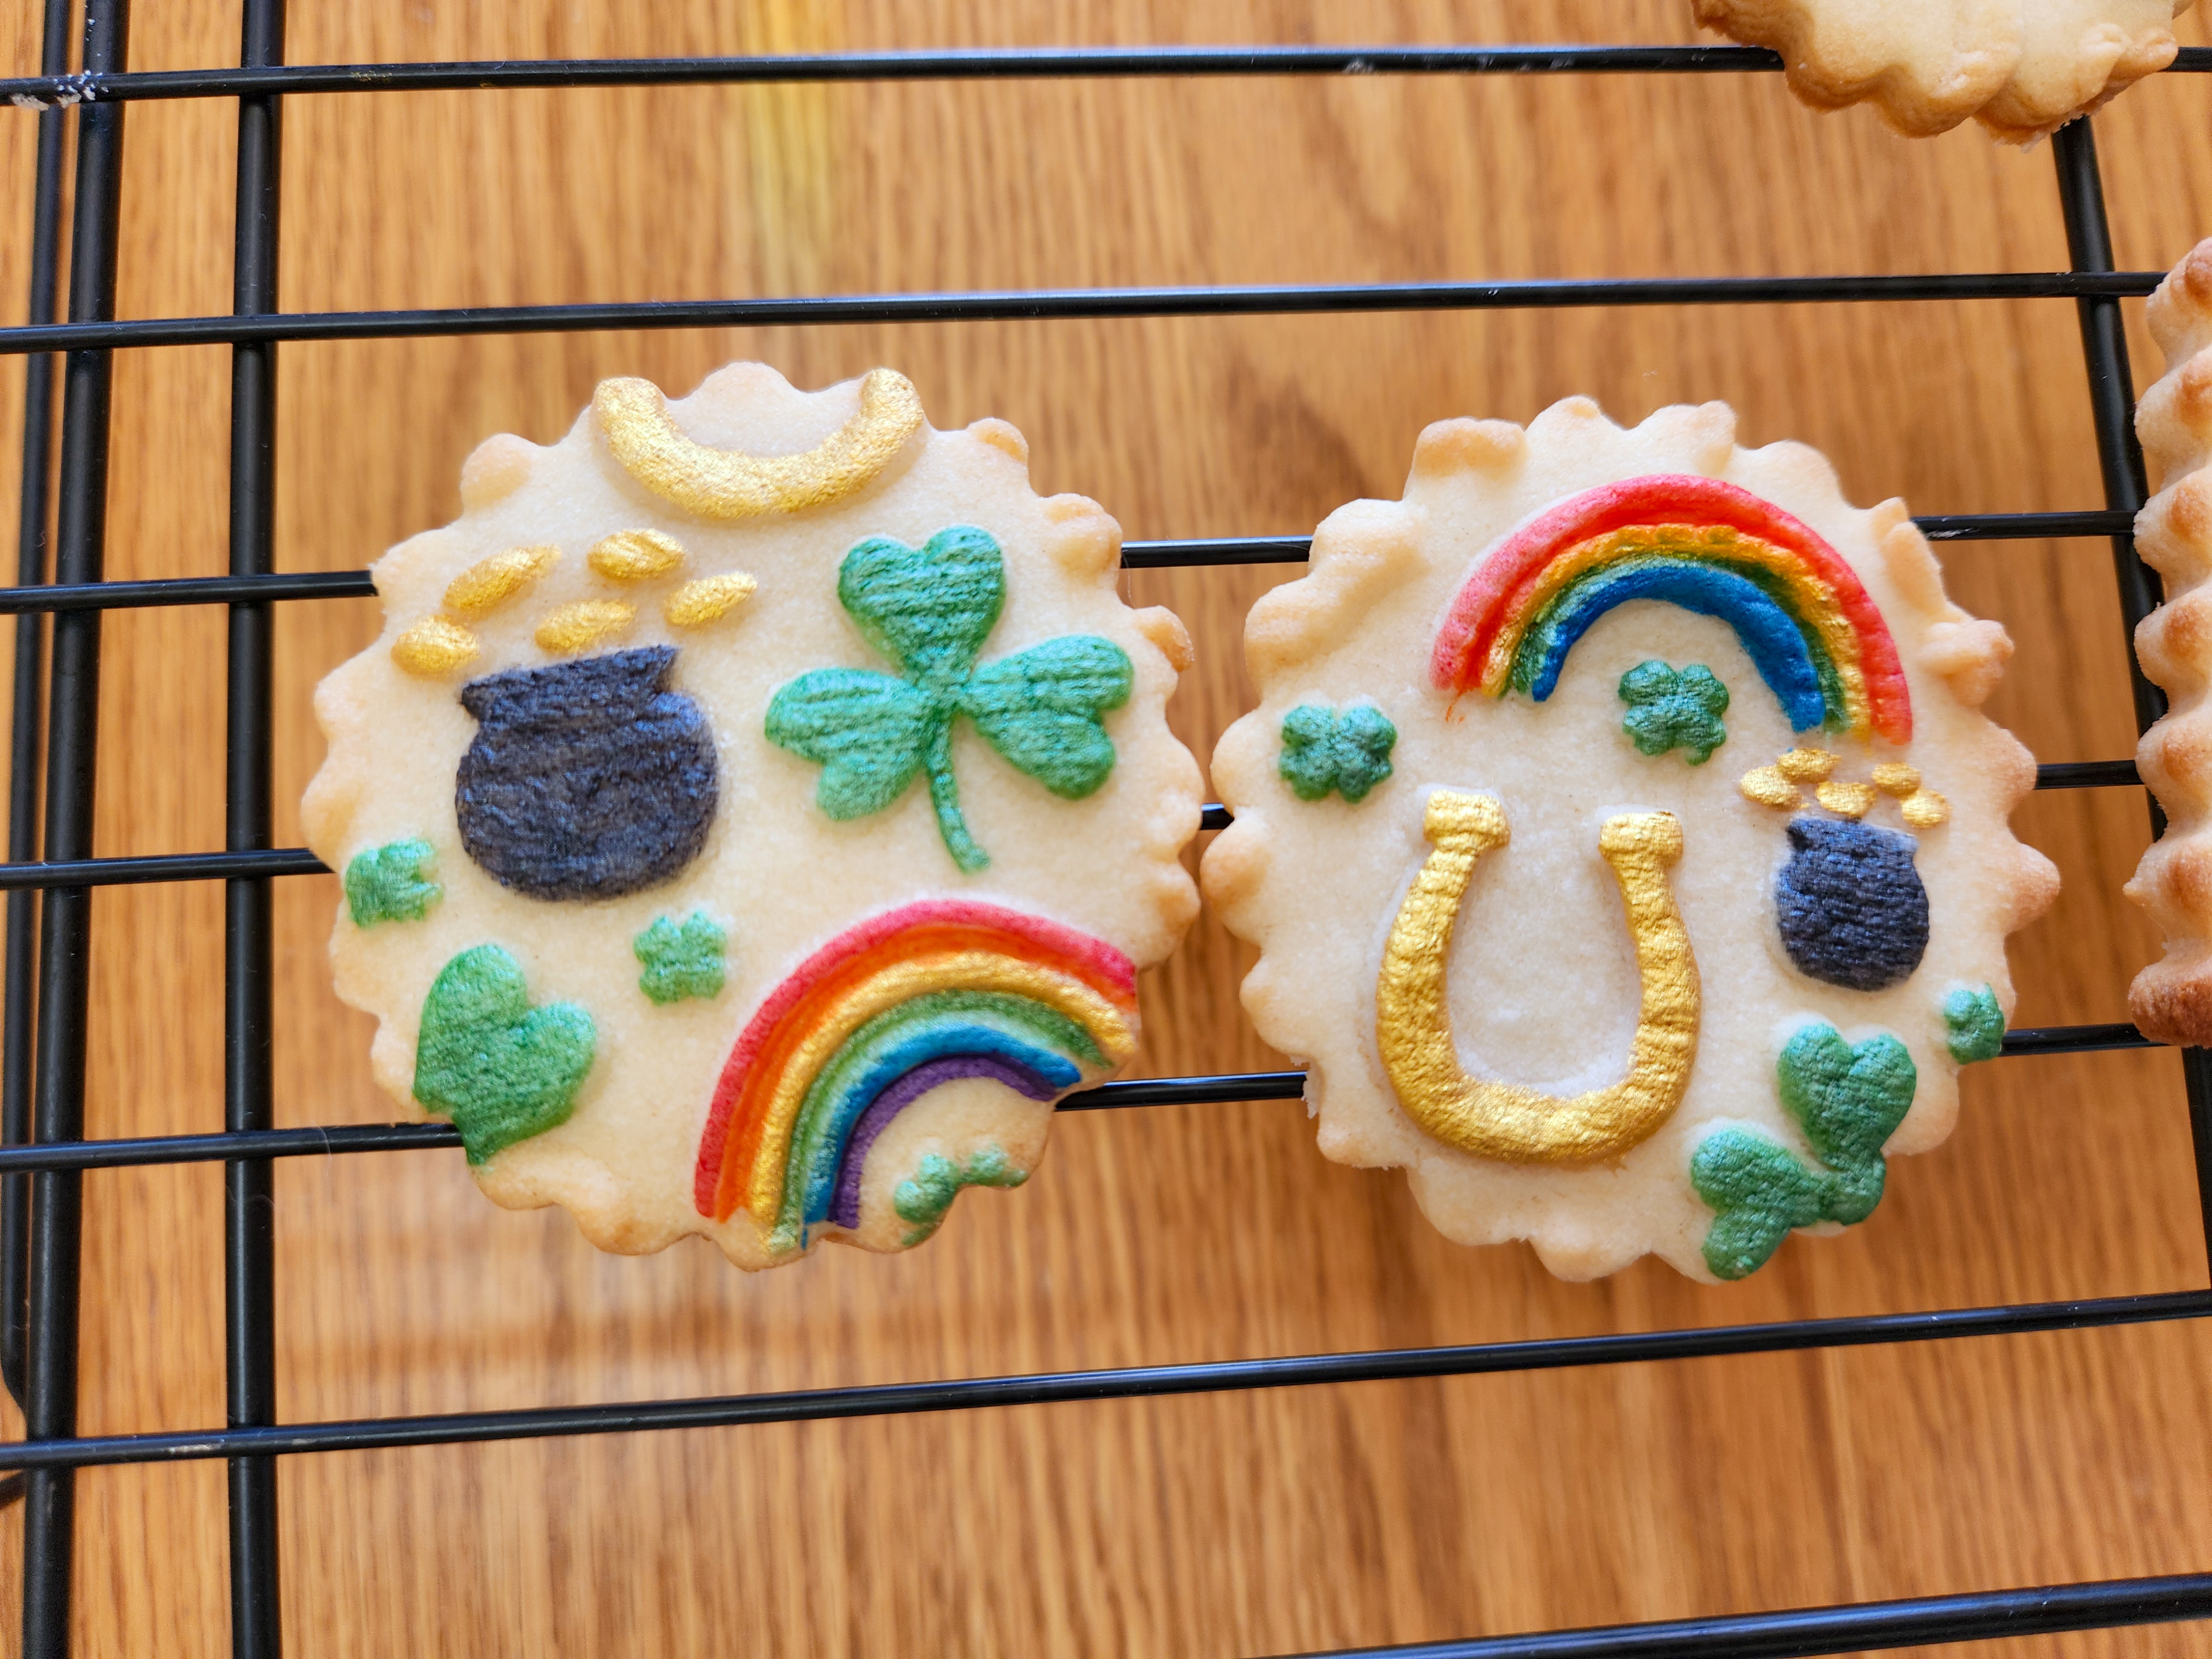
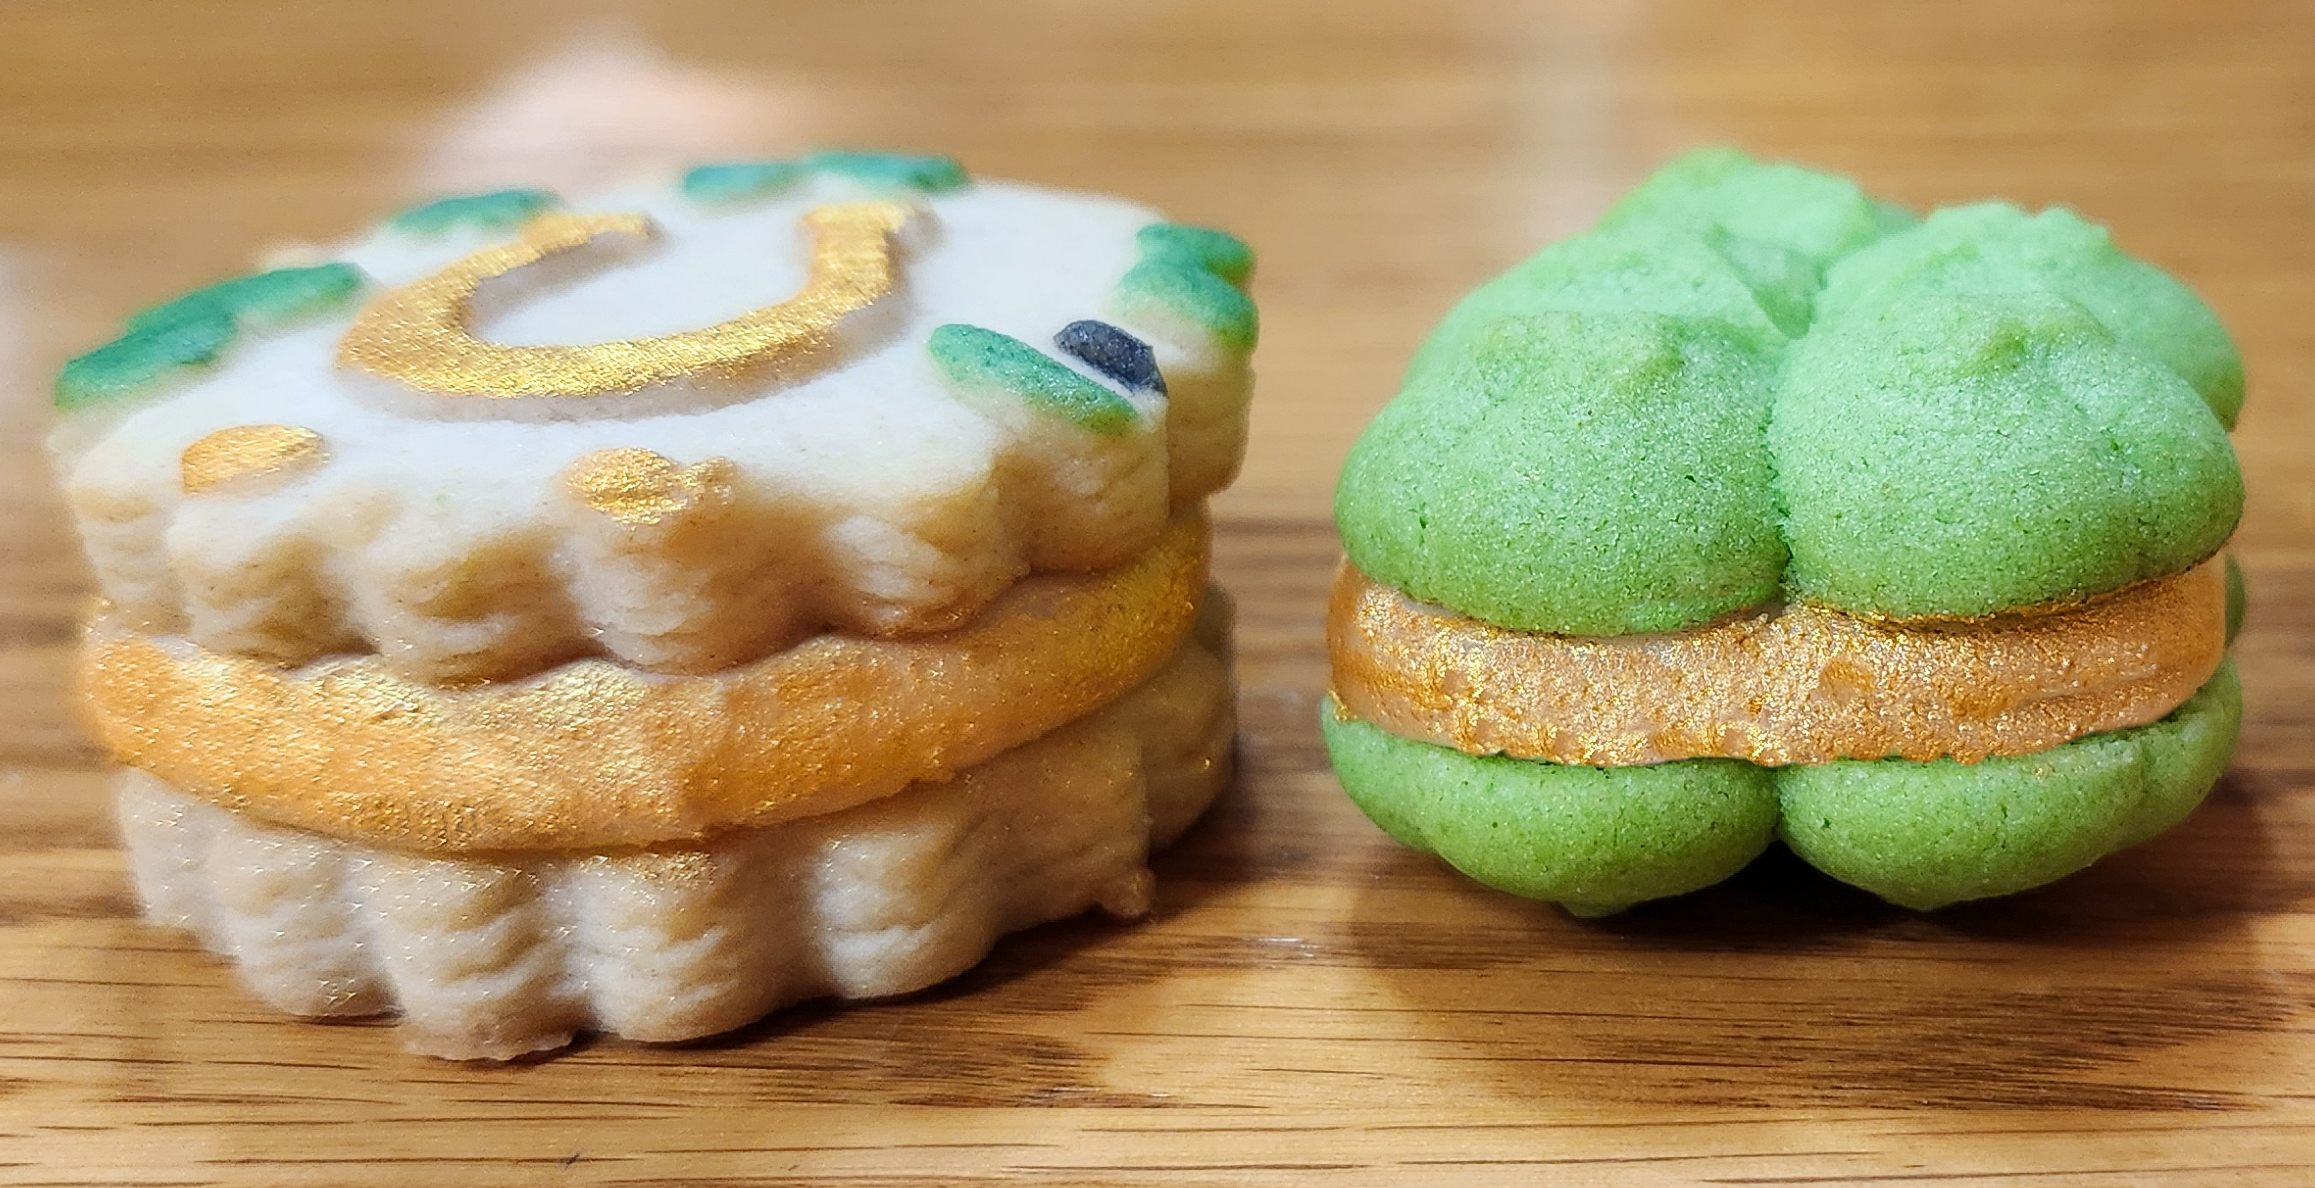
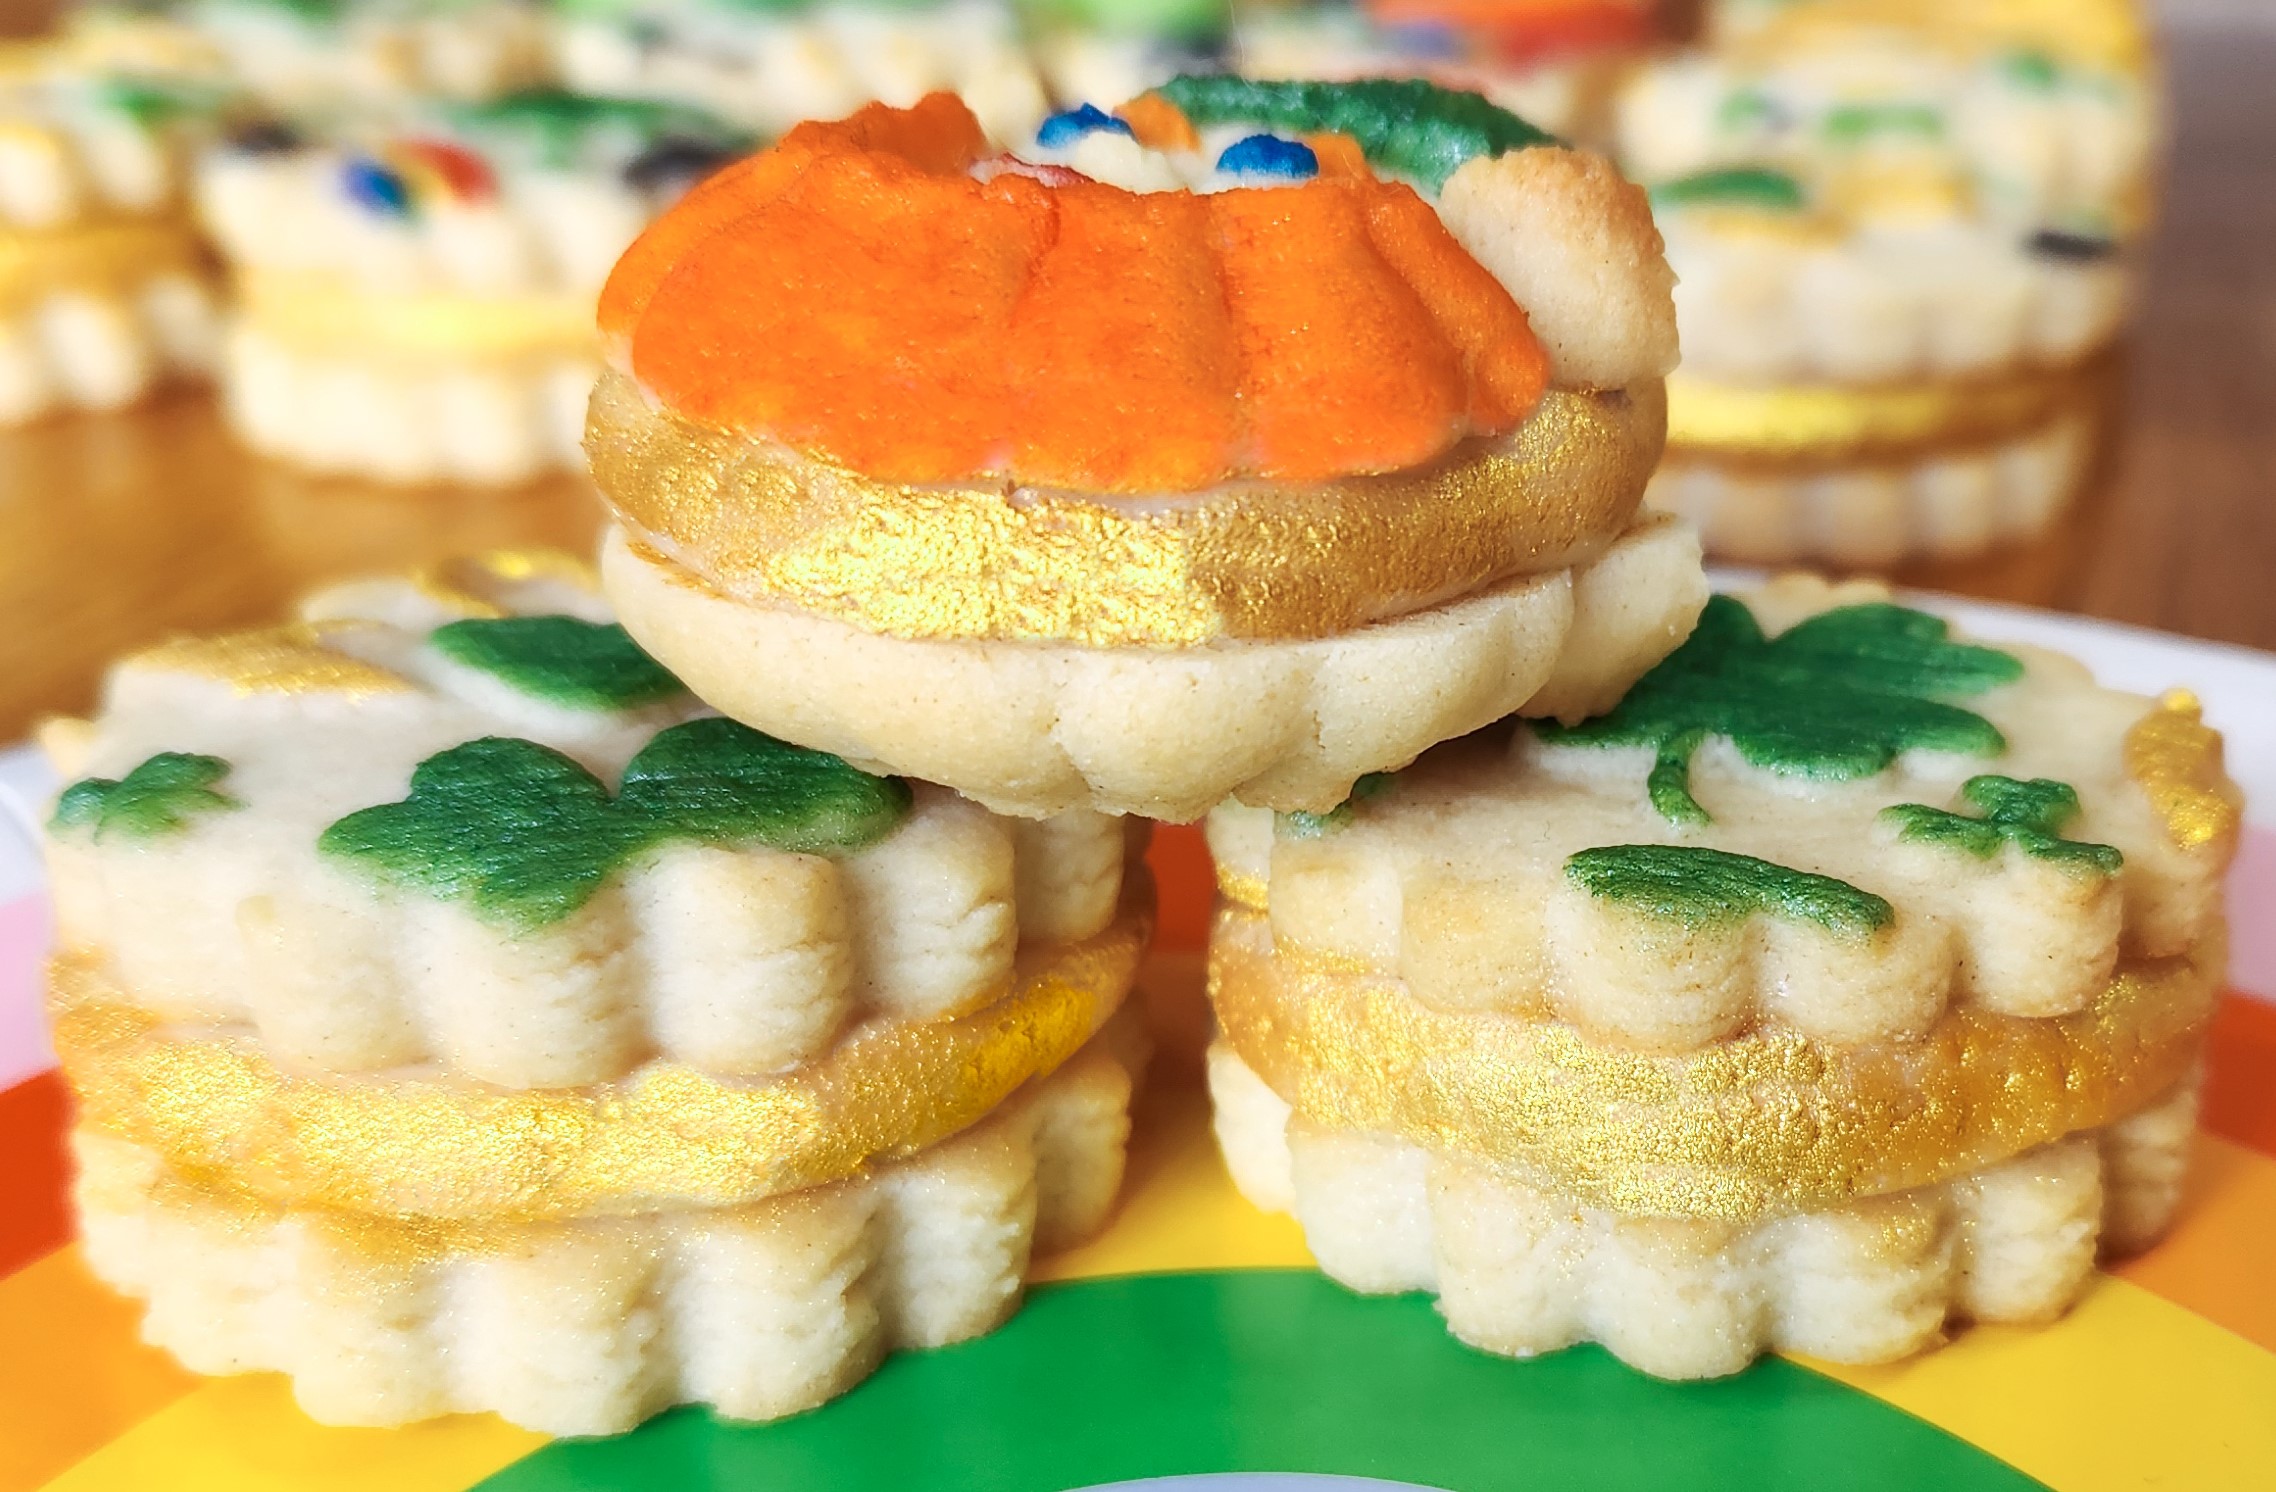
The plain cookies are cute, too! You could absolutely leave these un-decorated and they will be a hit! But if you want to decorate them, it’s easy and fun! I colored the spritz dough green for shamrocks and four leaf clovers. Everything else was painted with edible luster dust! You can paint these patterns with just 4 or 5 colors. This is art, nothing has to be perfect. With green, gold, blue, red, and black, you can paint the rainbow close enough (skip orange and purple- its just as cute). If you pick one of those colors for the pot of gold you’d only need 4 colors.
Here are the embossed rolling pin and cookie press disk set used in this recipe post.

This boozy buttercream is so amazing I had to share it with both kinds of cookies! You can also just make these darling cookies and skip the boozy filling if that’s not your thing! They’re yummy all on their own. I also included my regular vanilla buttercream filling for a non-alcoholic version of the sandwiches. This recipe tutorial will show you all the steps to make these, either way you like! I explain painting and sandwiching, giving you a bunch of options.
Our website has all of our 200+ disk shapes, cookie press, embossed rolling pins, luster dusts, baking accessories plus more about our Women/Family Owned company in beautiful Colorado Springs! impressbakeware.com
All products are on our Etsy shop.
Our Amazon shop has our cookie press and disks and embossed rolling pins.
![]() “Spring Forward” 15% off SALE!
“Spring Forward” 15% off SALE!![]() Create unique treats this Spring, because baking should be fun!
Create unique treats this Spring, because baking should be fun!![]() Try our 2 NEW embossed rolling pins: Spring Flowers & Butterflies, and St. Patrick’s Day!
Try our 2 NEW embossed rolling pins: Spring Flowers & Butterflies, and St. Patrick’s Day!![]() Explore our 200+ shapes of cookie press disks & dozens of recipes. SALE is from March 7-14, 2024, on our website and Etsy shops ONLY (links above). Sale does not include holiday gift sets or our new recipe book.
Explore our 200+ shapes of cookie press disks & dozens of recipes. SALE is from March 7-14, 2024, on our website and Etsy shops ONLY (links above). Sale does not include holiday gift sets or our new recipe book.
NOTE!!! I have full instructions for cookies with the embossed rolling pin in this post. But for the spritz cookie version (using a cookie press), that recipe has already been posted using some St. Patrick’s shapes, so I’m just going to link that here. I’ll show painting and sandwiching with Baileys buttercream here, but the basic cookie recipe, pressing, and baking instructions are already on the other post. The link: https://creativecookiepress.com/2017/02/24/shamrock-four-leaf-clover-st-patricks-day-cookies/
Let’s Bake!
Impress! Vanilla-Honey Rolled Cookies
1 cup (2 sticks) butter, softened (not melted)
1/2 cup granulated sugar
1/3 cup honey
1 teaspoon vanilla extract
1 egg
3 3/4 cups all-purpose flour
1/4 teaspoon salt
In a large bowl, combine flour and salt. Set aside.
Using an electric mixer, cream the butter. Add the sugar and cream together very well, until it is light and fluffy. Add the honey, then the vanilla, then the egg, mixing thoroughly after each addition.
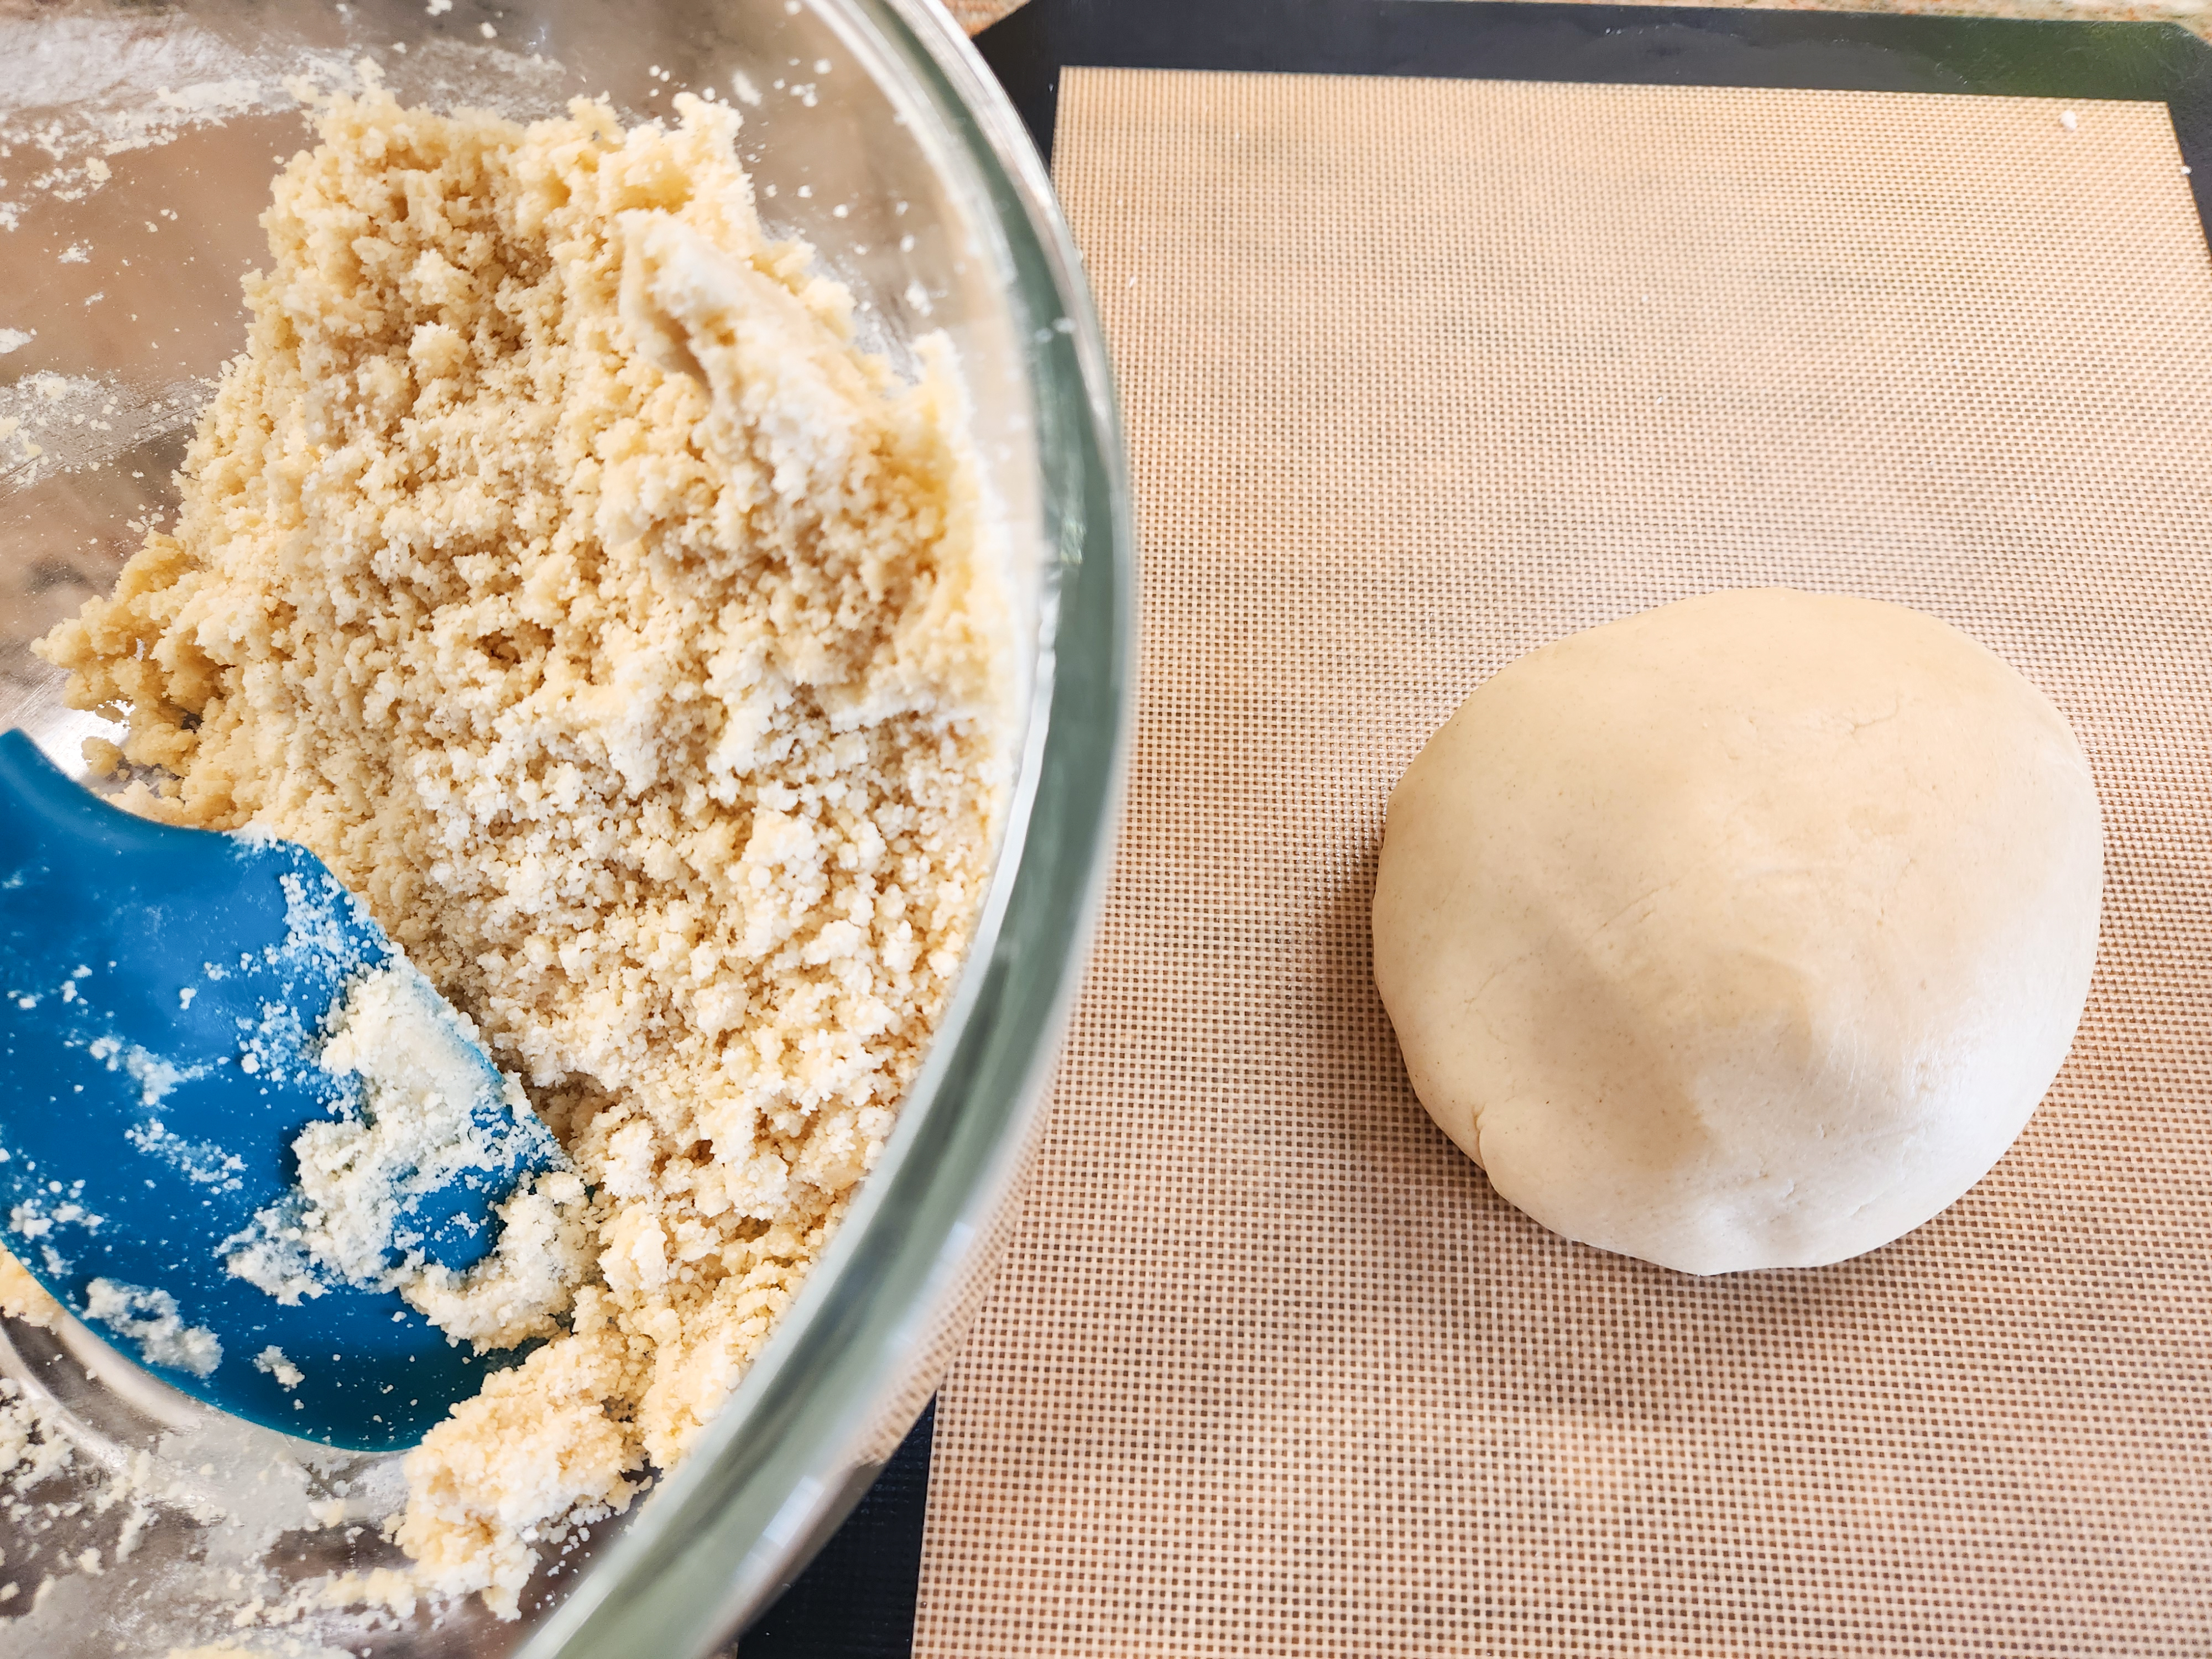
Add the flour mixture slowly, mixing on a slow speed until a workable dough forms. Make sure all of the flour is incorporated evenly. Knead it a bit by hand to make sure it is uniformly smooth and mixed. This dough can seem crumbly at first but it kneads together well. Perfect rolling dough has a clay-like, workable texture that is not too sticky or too stiff. If it feels difficult to knead, it is probably too stiff. Add a little water or vanilla extract a teaspoon at a time until you achieve a workable texture. If it is too easy to knead or is sticking to your fingers, it is probably too soft. Add flour a tablespoon at a time until it is workable like clay.
Divide your dough into balls a little bigger than your fist. Work with one portion at a time to keep it manageable. Cover the unused portion to keep it from drying out.
Instructions to make these as cutout cookies – with an embossed rolling pin:
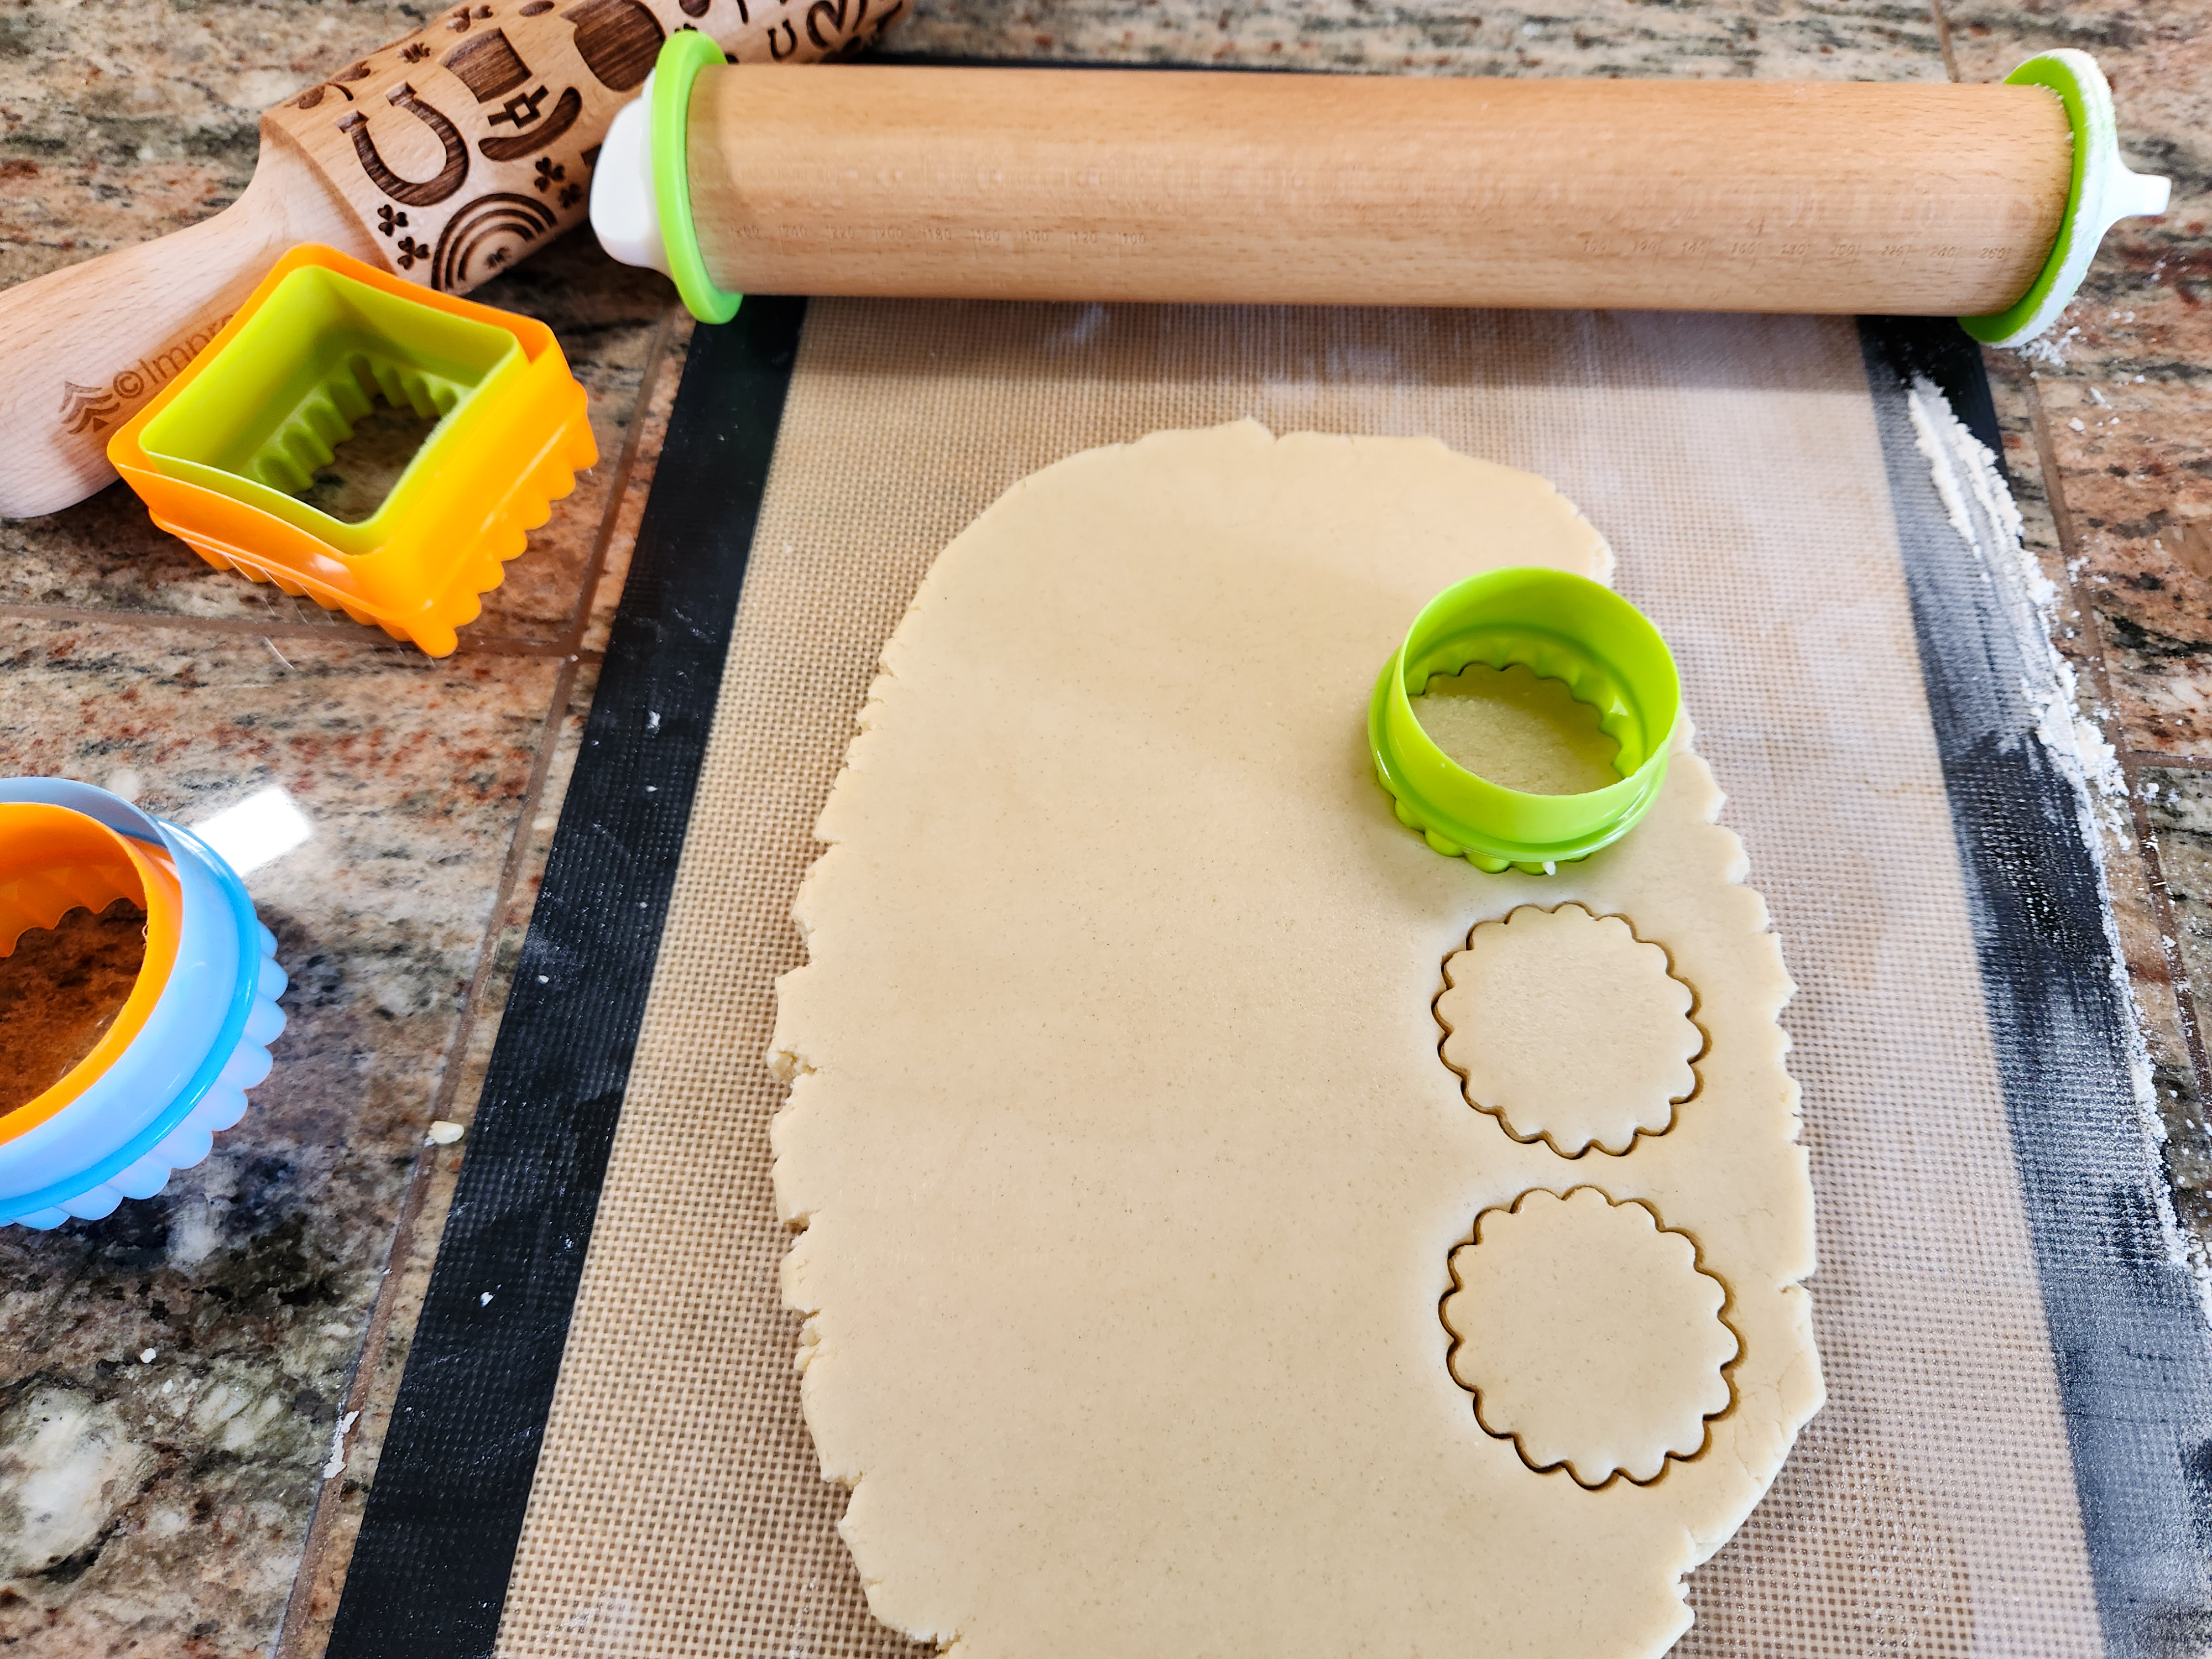
Use a lightly oiled regular rolling pin (preferably one with thickness spacer rings to make a perfect thickness) to roll your dough on to a silicone baking mat, glass cooktop, or lightly floured surface. Roll to a 1/4” thickness, and wide enough to accommodate the designed pin. Create a long rectangular slab of dough. The patterns on the embossed pins are designed to repeat, so you will be rolling a long rectangle of patterned dough.

Oil your embossed pin with canola (or similar) oil before rolling. Make sure to get it down into the engraved areas. Wipe off any excess with a paper towel. Oil should be down in the patterns, but not pooling in them! You can use a pastry brush but I think it’s much better to apply by hand, gently squeezing the pin to get oil into the shapes, and rubbing the surface to coat.
NOTE for this particular pin: Really focus on getting the rainbows oiled up! That’s a tight space and if dough sticks anywhere, that’s the logical spot. So let it pool a little in the rainbows and your rolling should go smoothly!


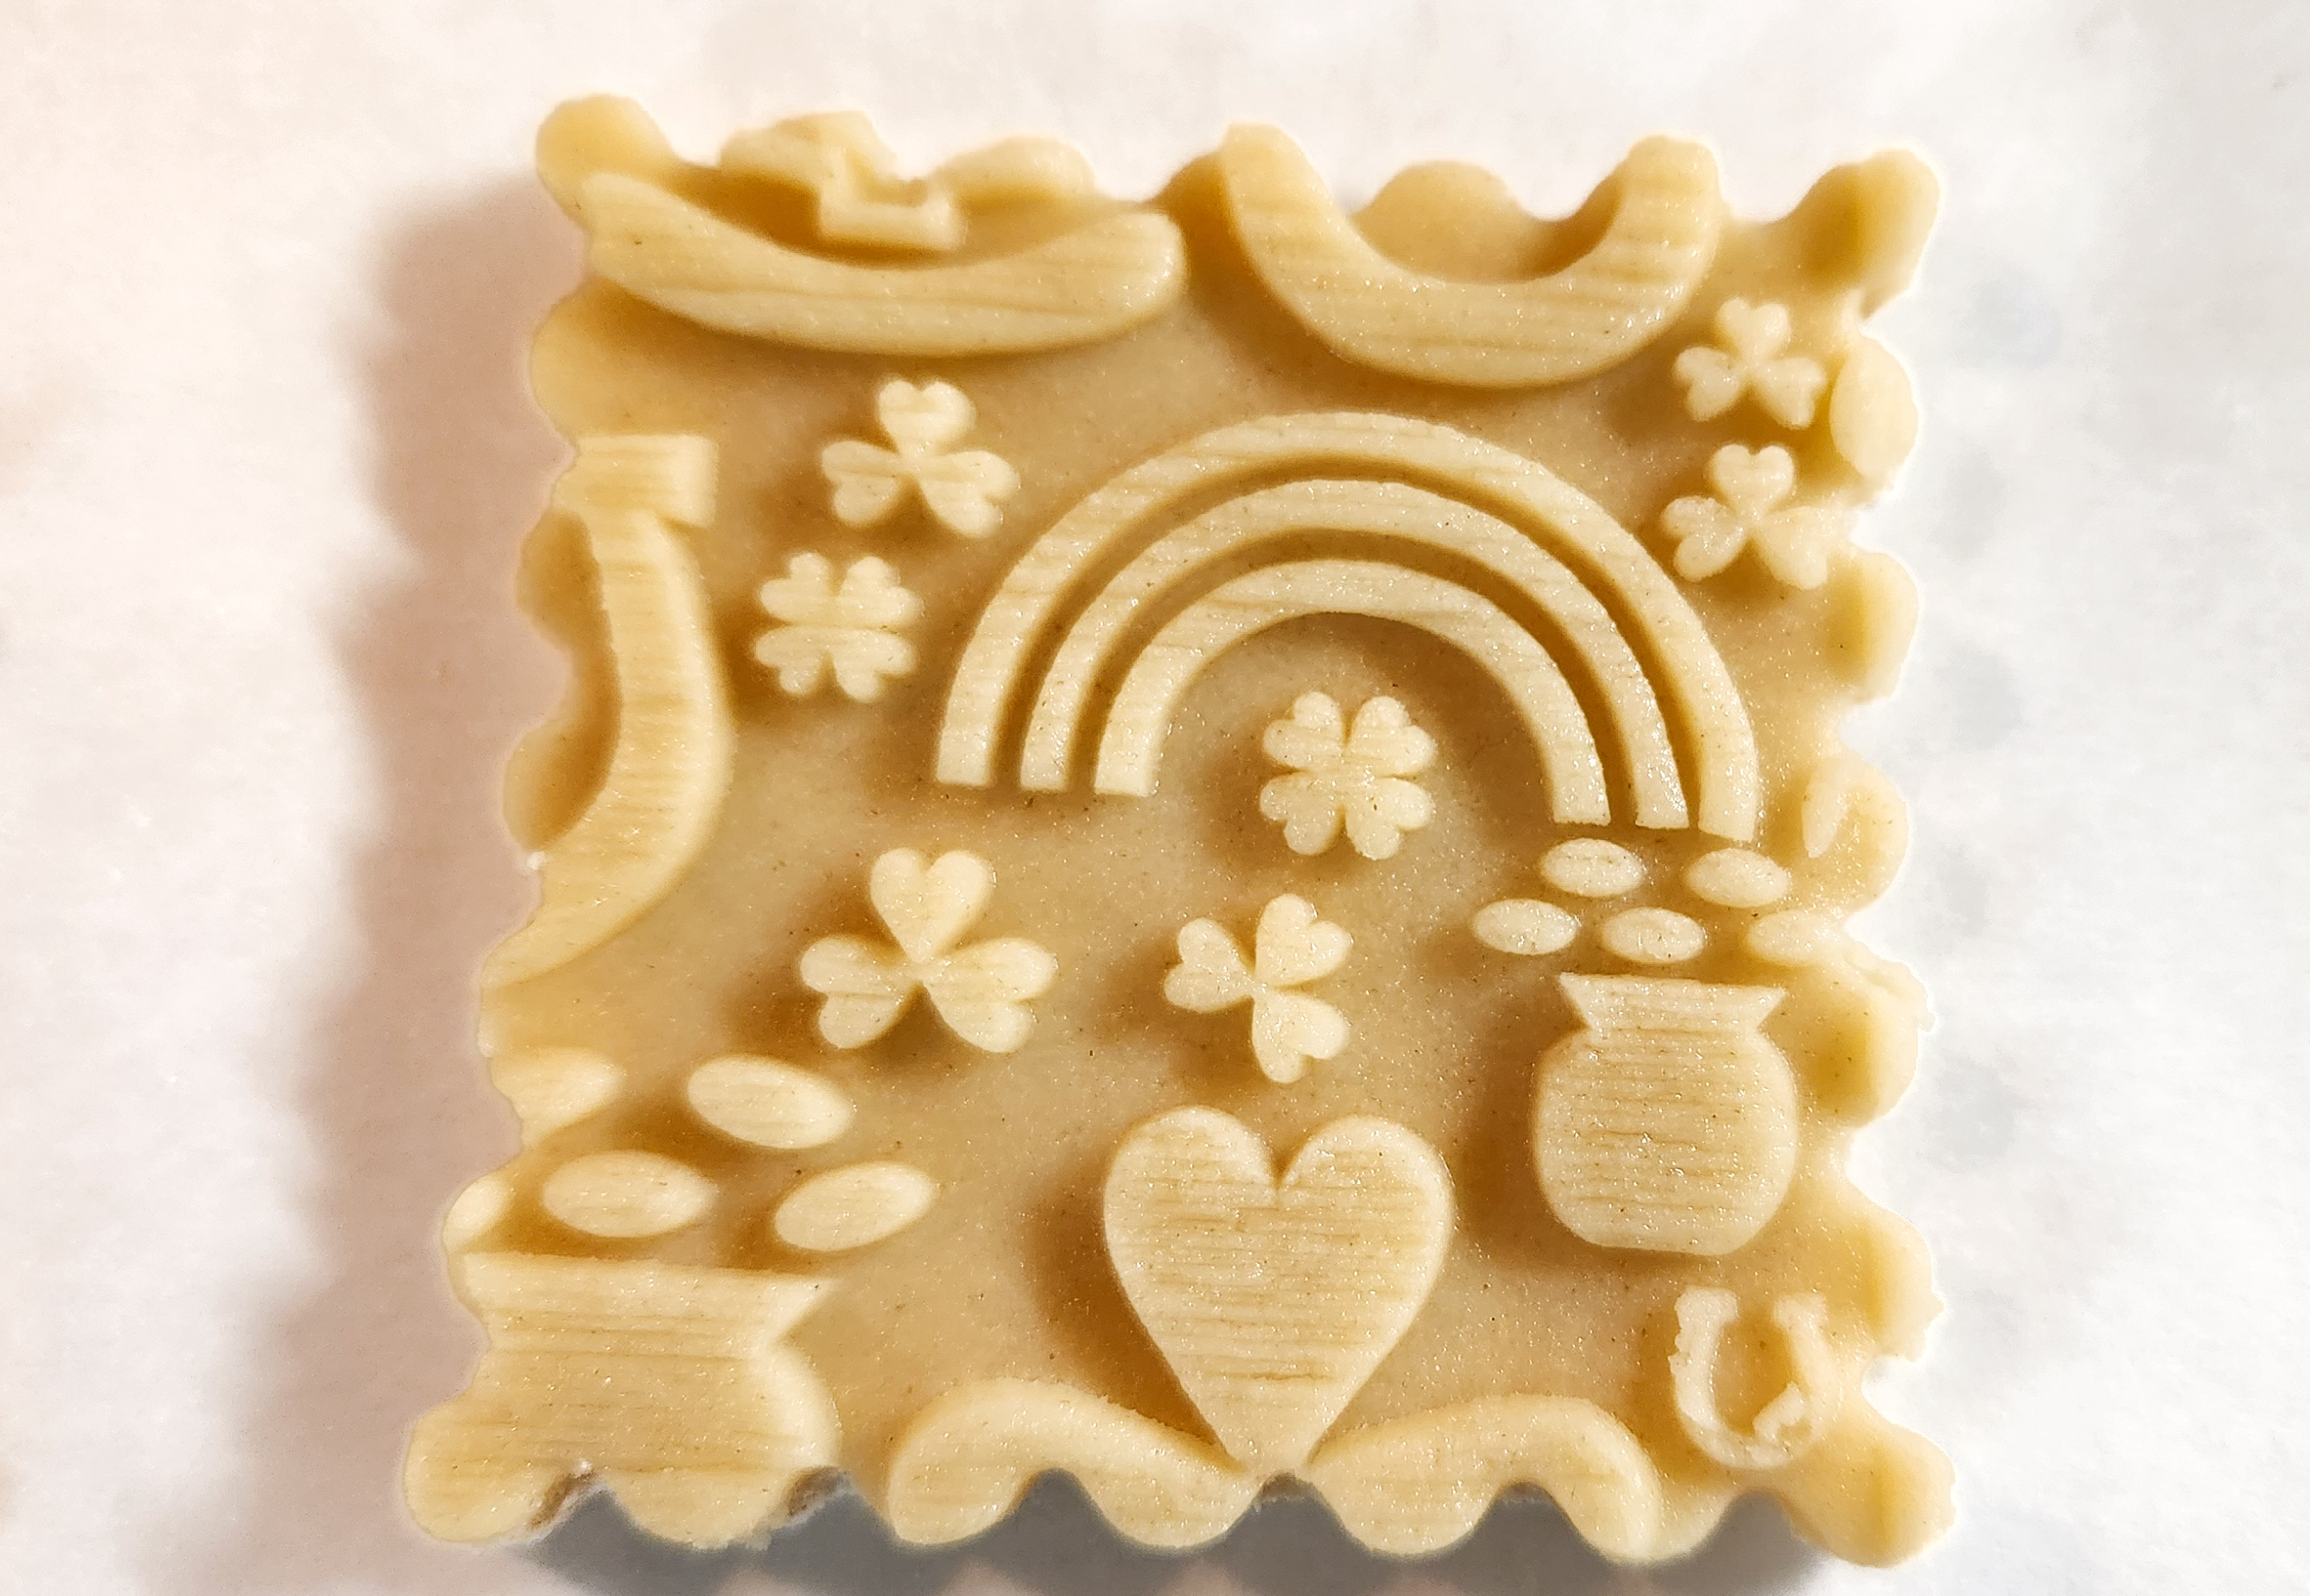
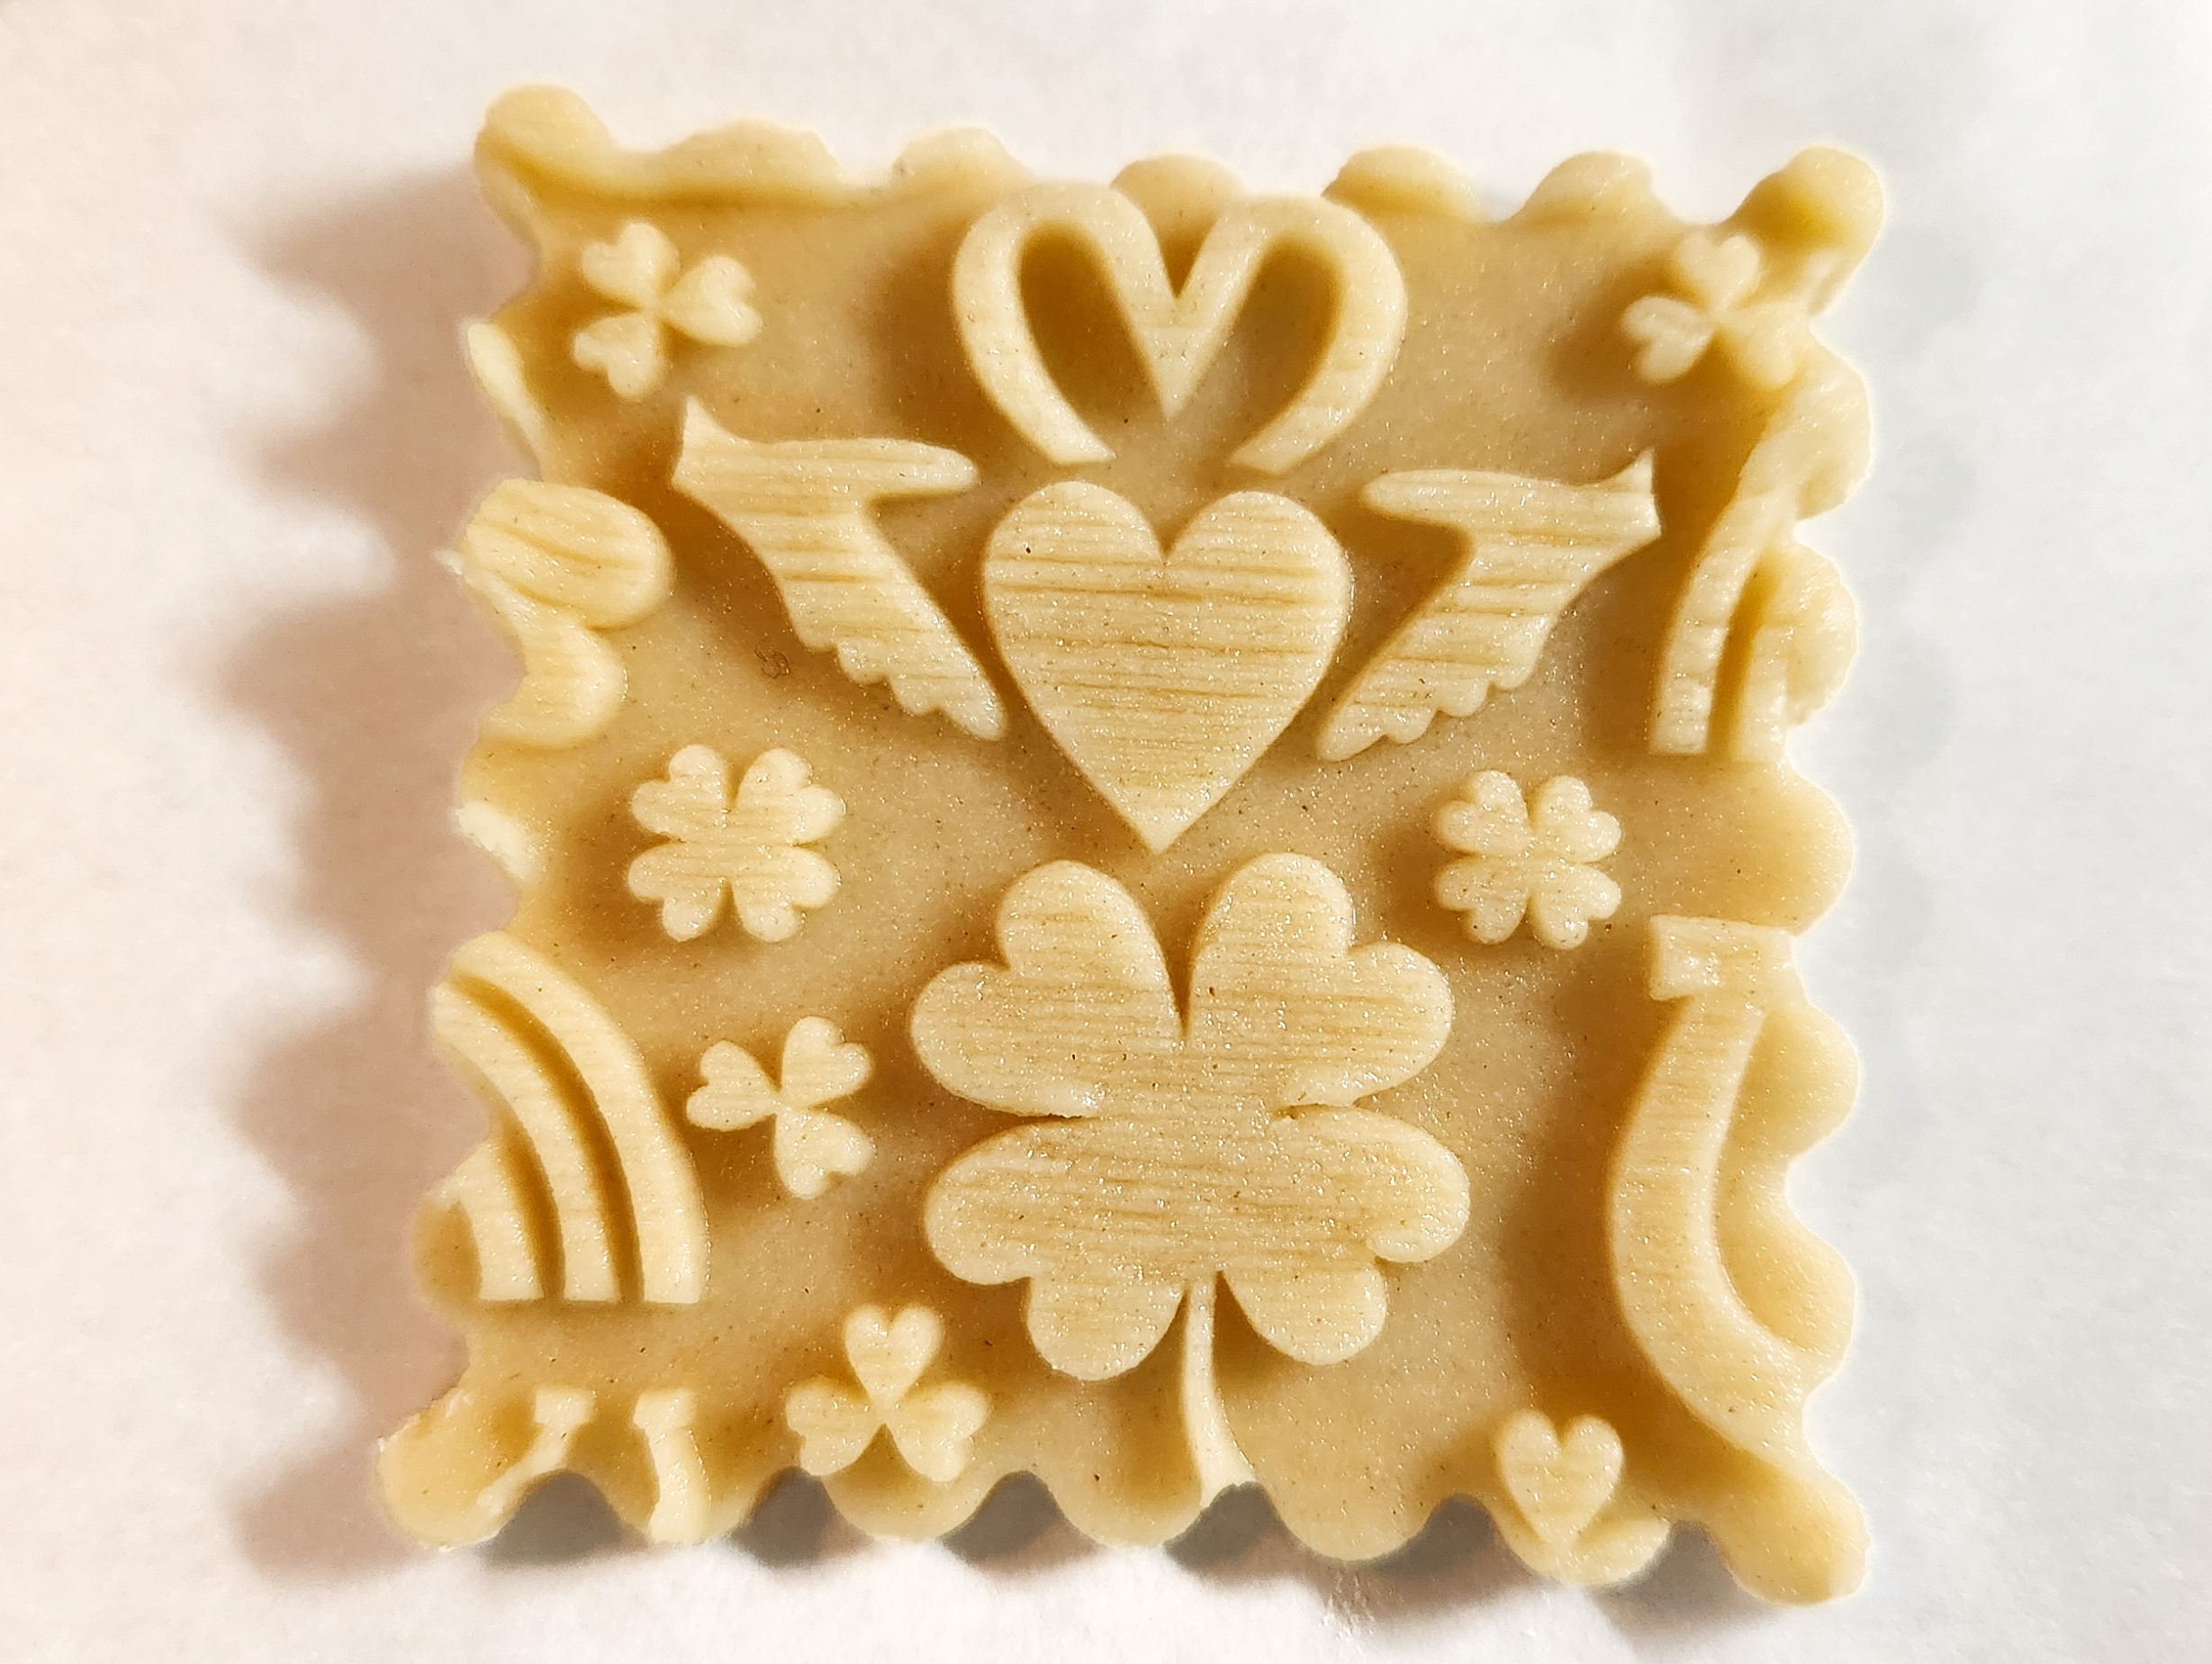
Roll with your embossed pin, pressing down with a steady pressure that leaves a deep impression in the dough. The designs should be as raised up on the dough as deep as they are in the pin. If the pattern is not deep enough it will disappear as the cookies bake and puff. As this dough is not cold or stiff, you do not have to press terribly hard! Just an even pressure.
Here’s a quick video clip of me oiling the pin and rolling this dough.
Once rolled, use cookie cutters to cut out shapes. Remove any excess dough around the edges. Keep your spatula/lifter flat, dust the end with a little flour, and lift the shapes, beginning by lifting one edge slightly first, then sliding the spatula/scraper under the whole shape. Transfer them to a cookie sheet lined with parchment paper, spacing them at least an inch apart. The rolling pin with thickness rings, bench/dough scraper and cookie cutters I’m using here are available at our website and Etsy shops.

Bake at 400°F for 6-10 minutes, checking at 6 minutes and every minute after as cookies brown quickly. They are done when the edges are slightly brown. Cookies harden significantly the longer they bake, so bake just a few cookies first to test timing for desired doneness and hardness.
Move to a cooling rack after 5 minutes.
If you are making sandwich cookies, roll out more dough and cut shapes as needed to make enough bottom cookies. Off to parchment paper on a cookie sheet and bake as described above.

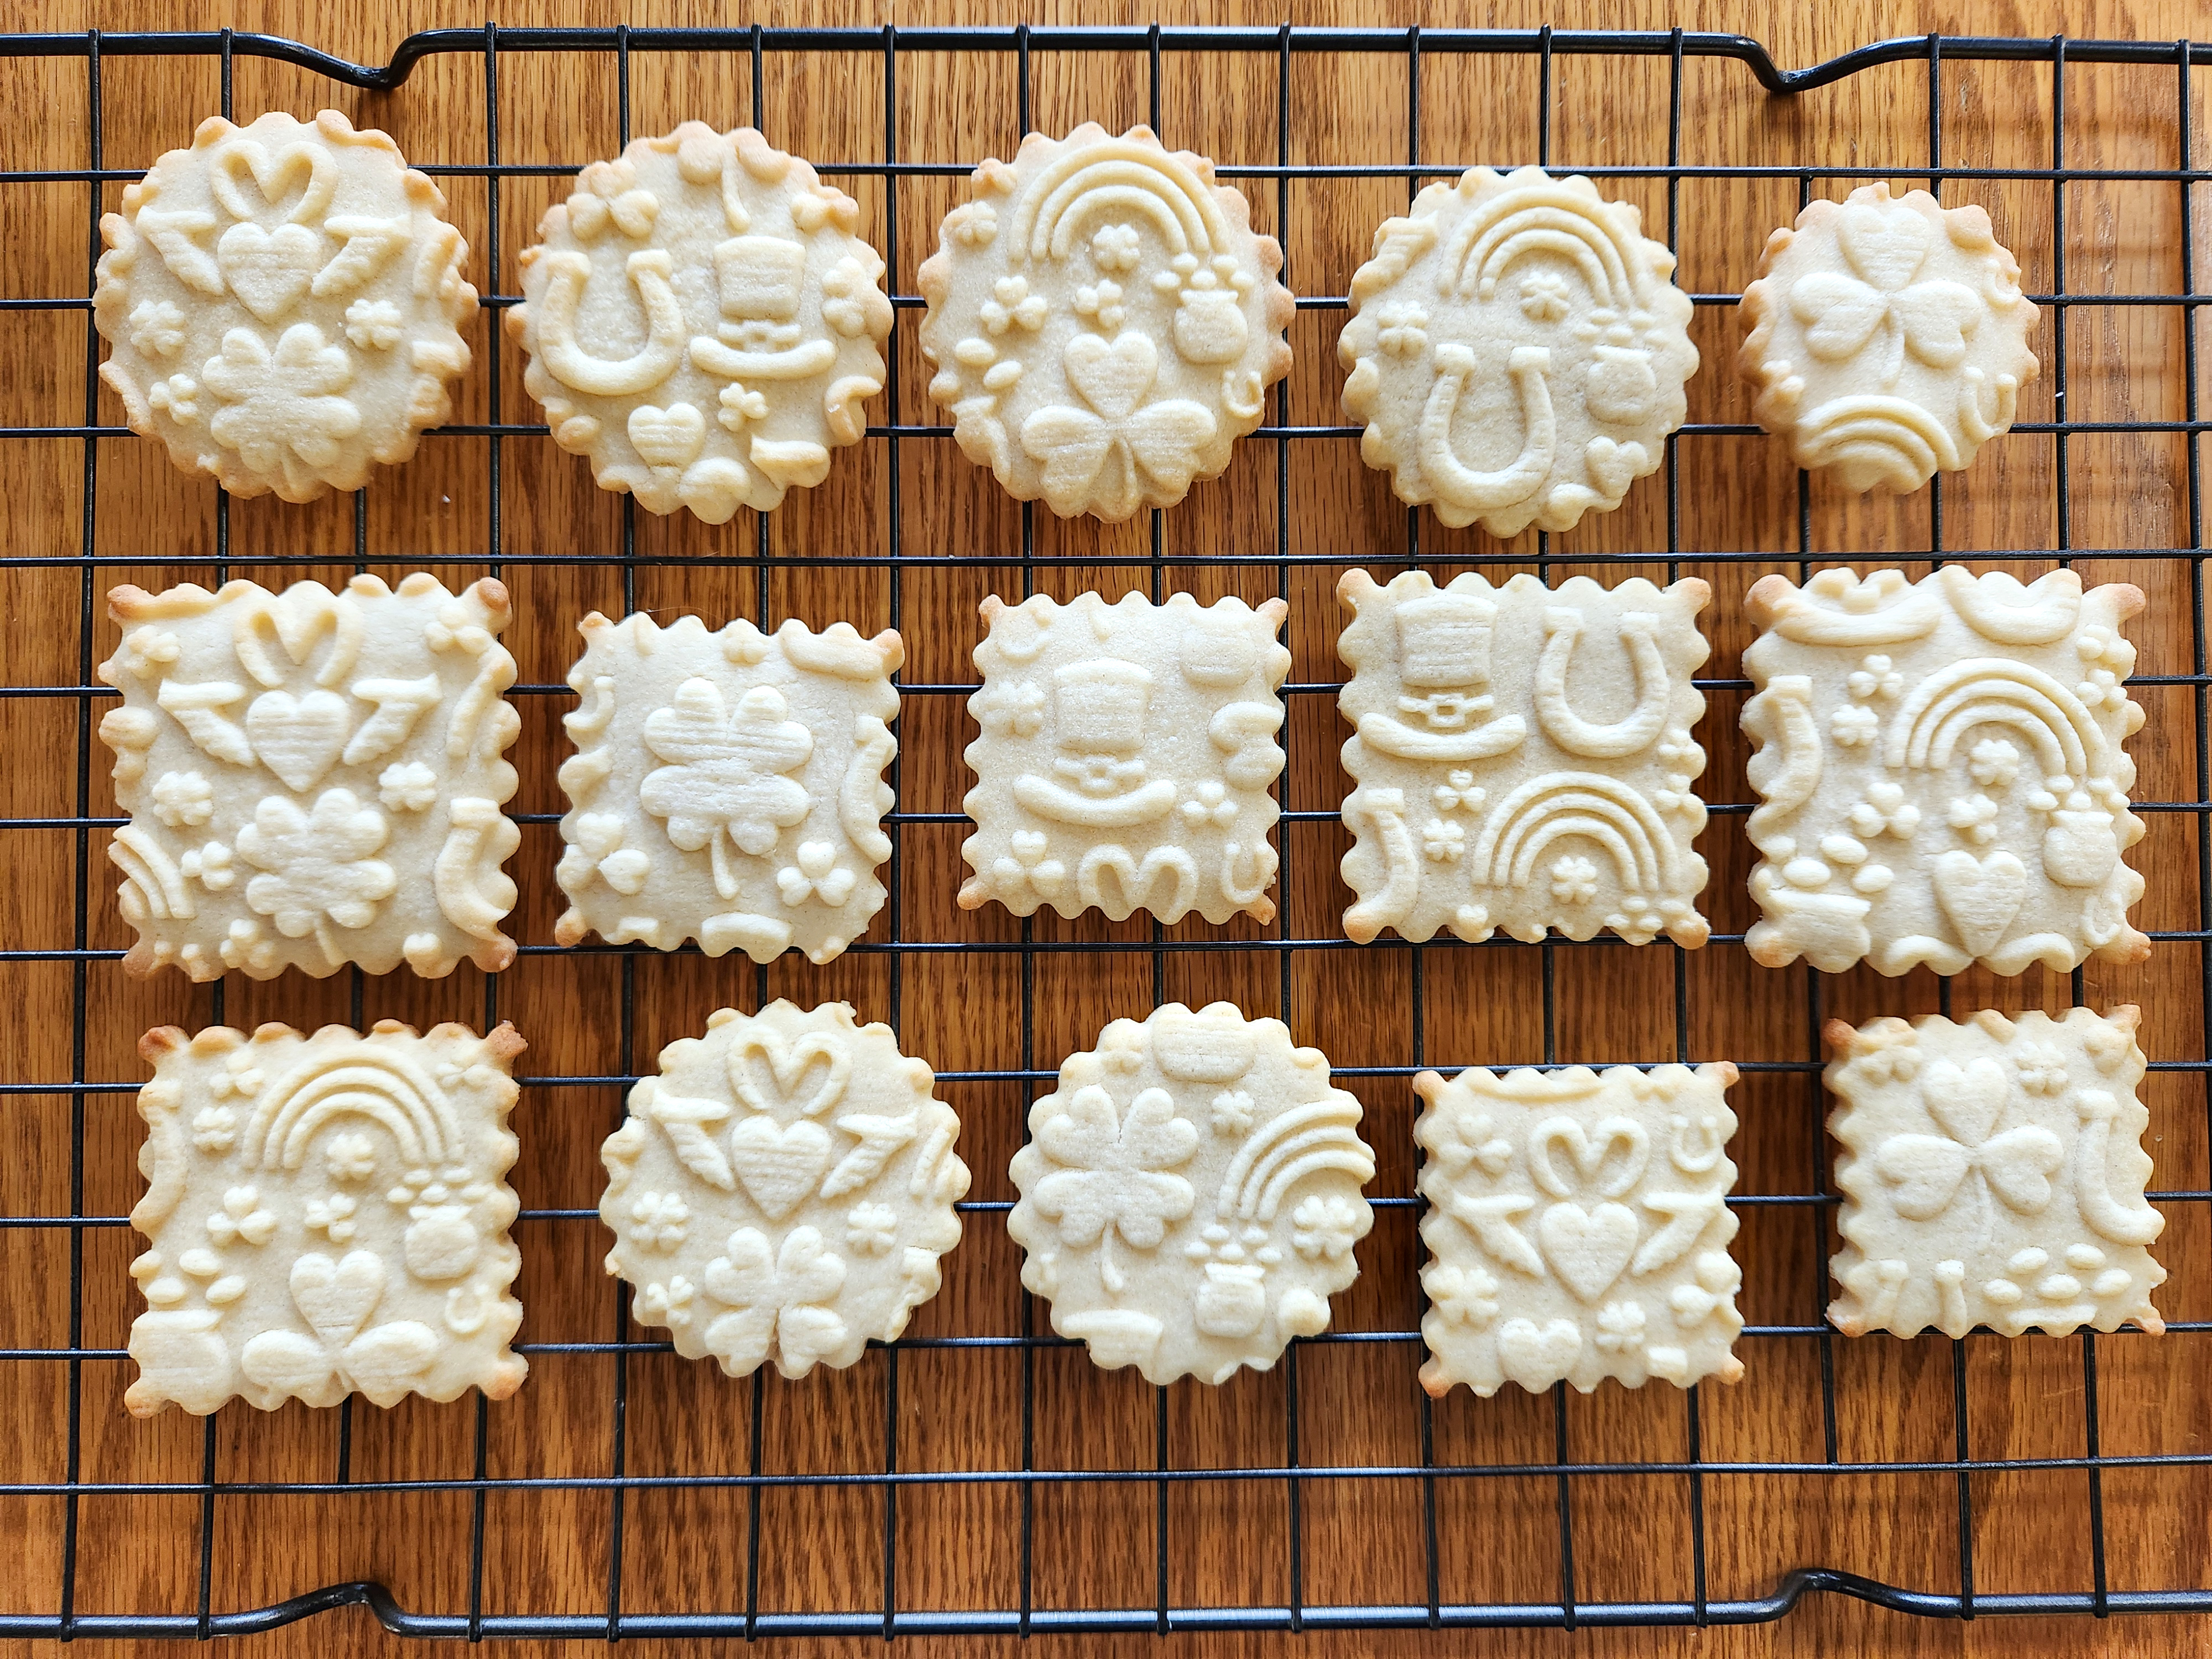

If you did the spritz cookies with a cookie press (following the link I gave earlier), here’s how they should look pressed, and then baked up and cooled, ready for decorating.


If you are decorating and sandwiching, decorate first.

I know this looks complicated but it’s really quite simple.
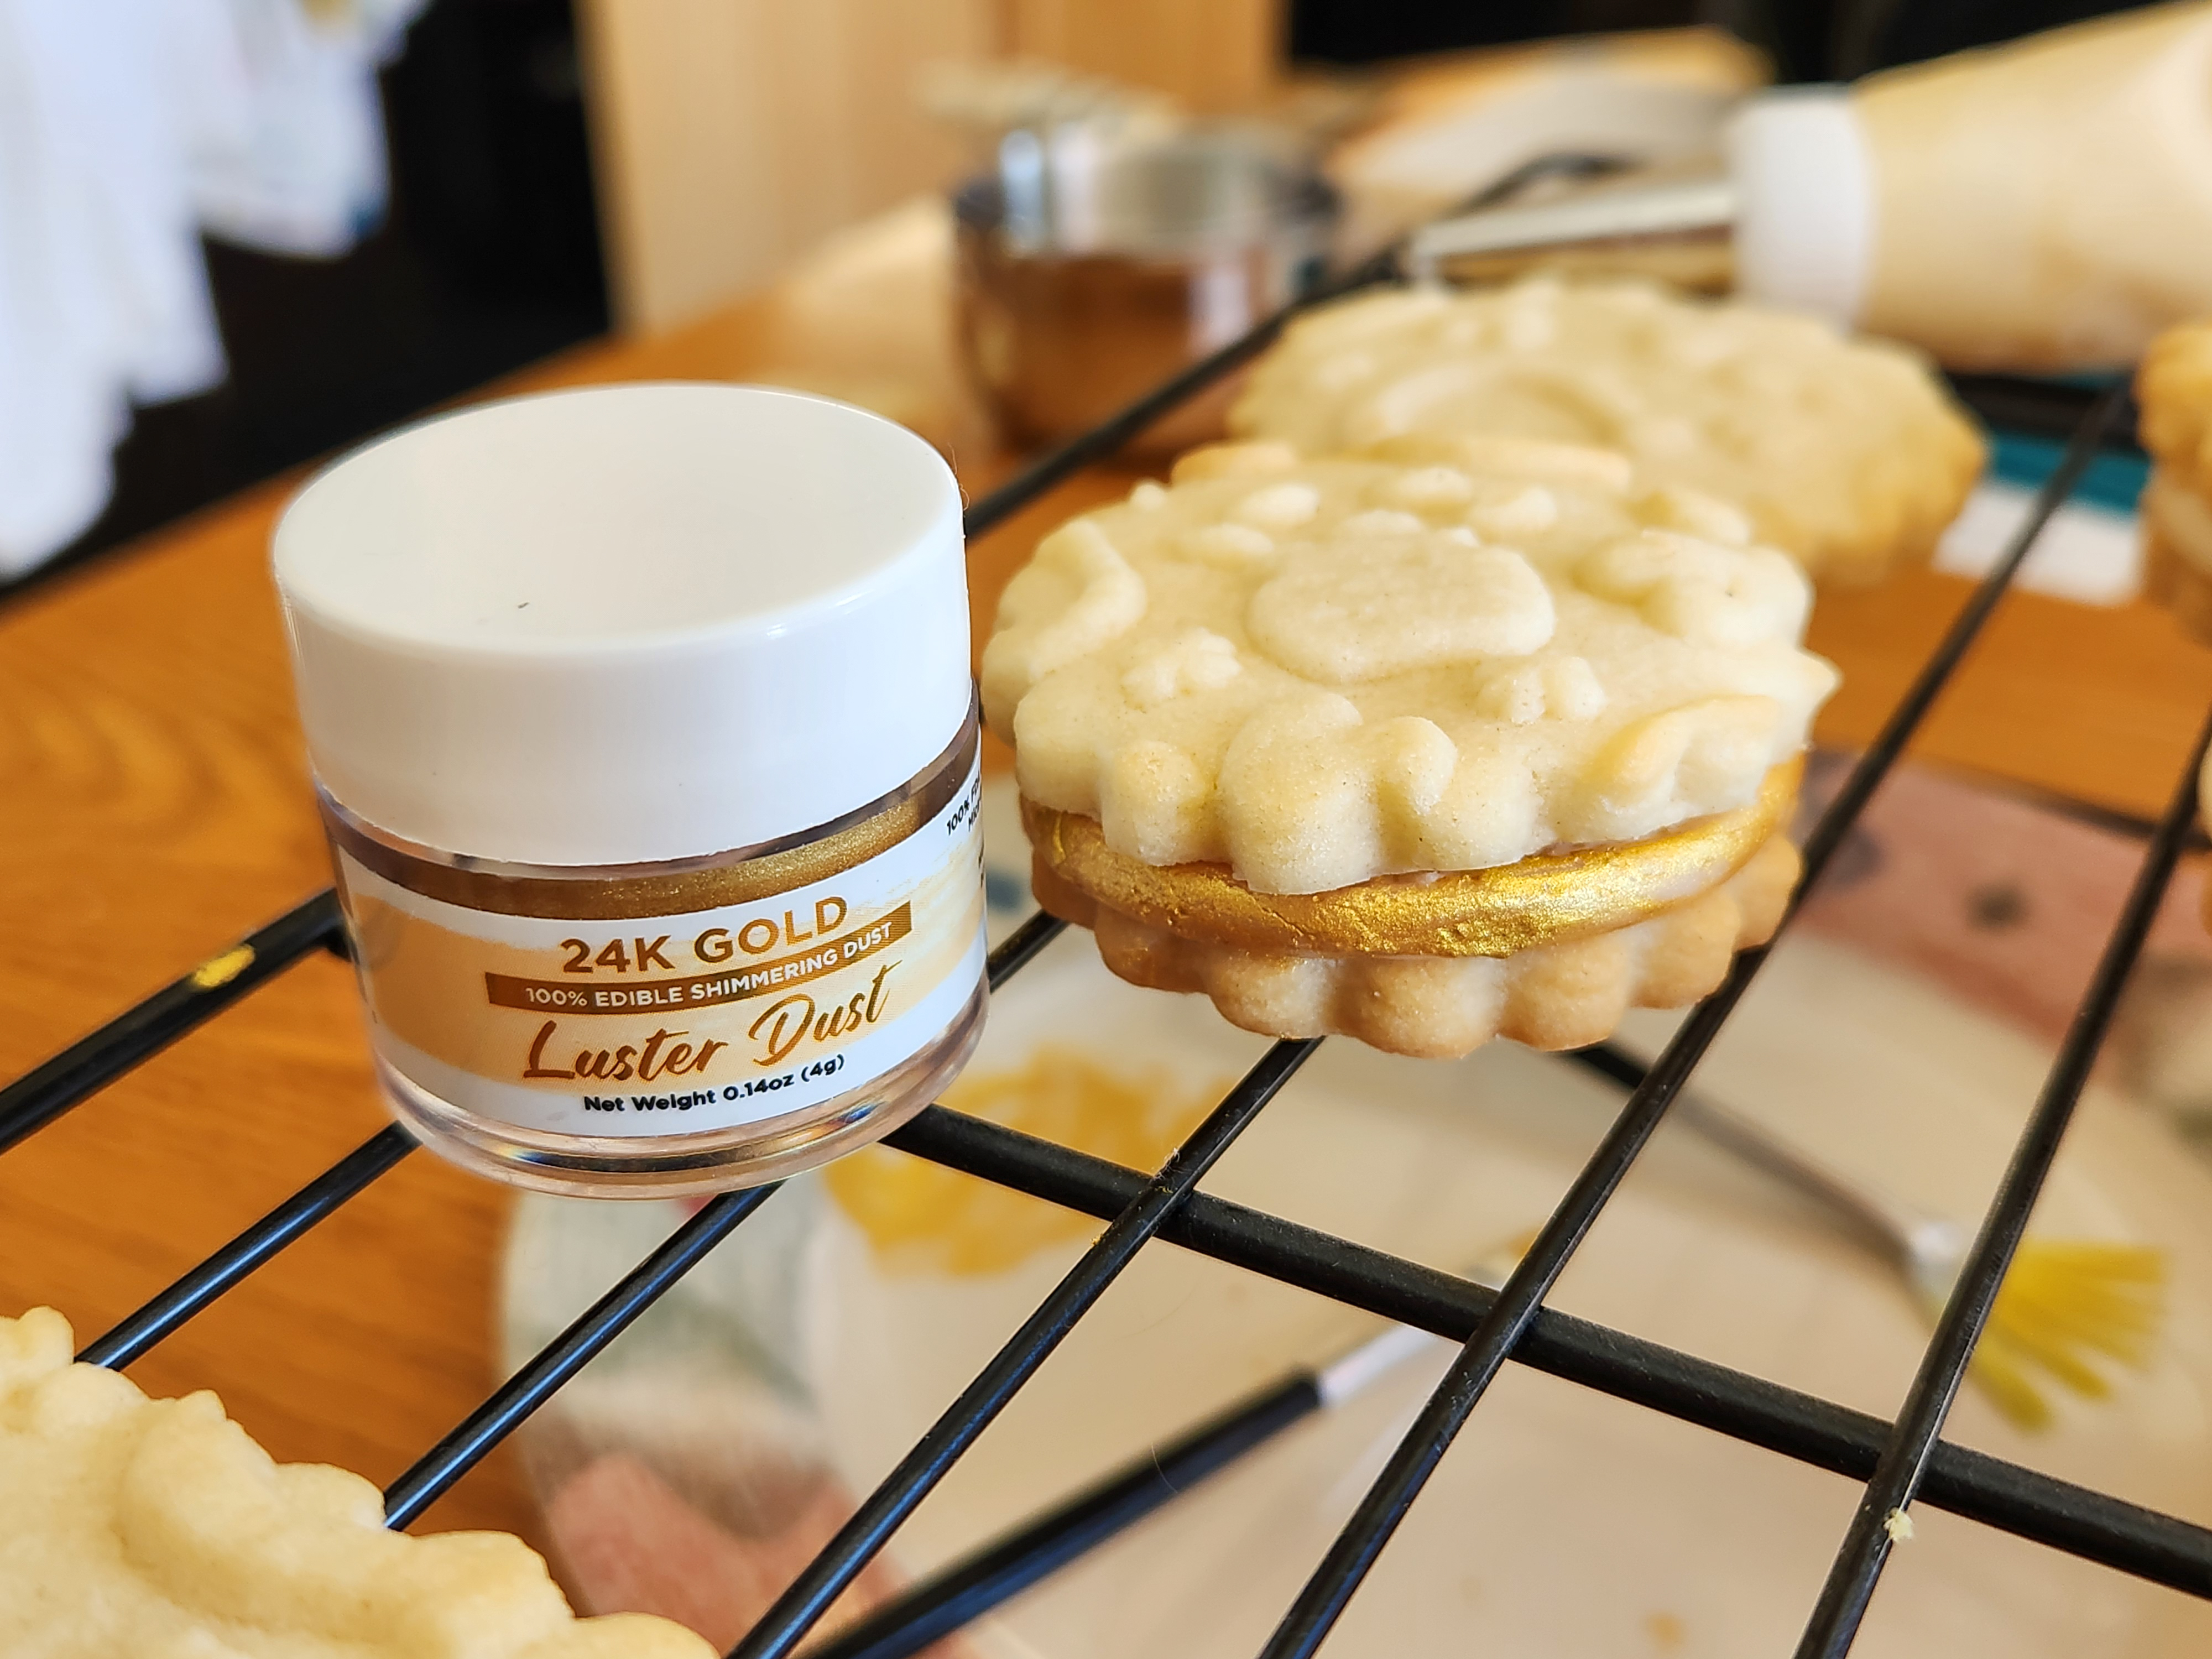
Luster dust is what makes this beautiful presentation possible. I use it so often in my cookie press posts that in 2022 we started selling it on our website and Etsy shop! We chose to partner with an American company, Bakell, that makes dusts here in the USA. They make gorgeous dusts that are silky, vibrant, and a joy to work with. Their 4 gram jars last and last. A little goes a long way!

To get this look (on either type of cookie) you’re going to paint with edible luster dust mixed with clear alcohol. You could alternatively use any clear extract. Vodka is definitely the best choice and makes the smoothest, fastest-drying paint! The taste disappears. As you experiment, you’ll get the hang of mixing dust and liquid. Piece of cake… or cookie. We also sell a wonderful decorating brush set.
My technique (you may come up with a better one) is to put a small amount of vodka in a little dish or cup, then use a larger brush (always use food safe brushes) to drip the liquid a little at a time next to your piles of dust. I use a big plate and place small dust piles around it, then add extract a little at a time- it doesn’t take much! It also dries out quickly so you’ll find yourself adding more. I save that big brush and keep it clean so I’m always re-dipping it in a clean liquid.
NOTE: Always make sure you are using EDIBLE dusts! Some luster/pearl/glitter dusts on the market are “non-toxic” but that does not mean they are edible. Plenty of brands have actual food ingredients and are marked “edible”. ONLY use those for safety’s sake!
I didn’t do anything particularly fancy or surprising with these cookies. I followed the raised patterns on the cookies themselves and treated them like a coloring book. Shamrocks are green, coins are gold, etc. I painted one color at a time. All the green first, then all the black, then the gold, then the rainbows. Follow what I did in the main photo or make some creative changes!
Painting cookies is relaxing and fun, like doing a coloring book. I put on a happy Spotify playlist and just painted while I sang. And unlike a coloring book, you can eat this art when you’re done with it! LOL
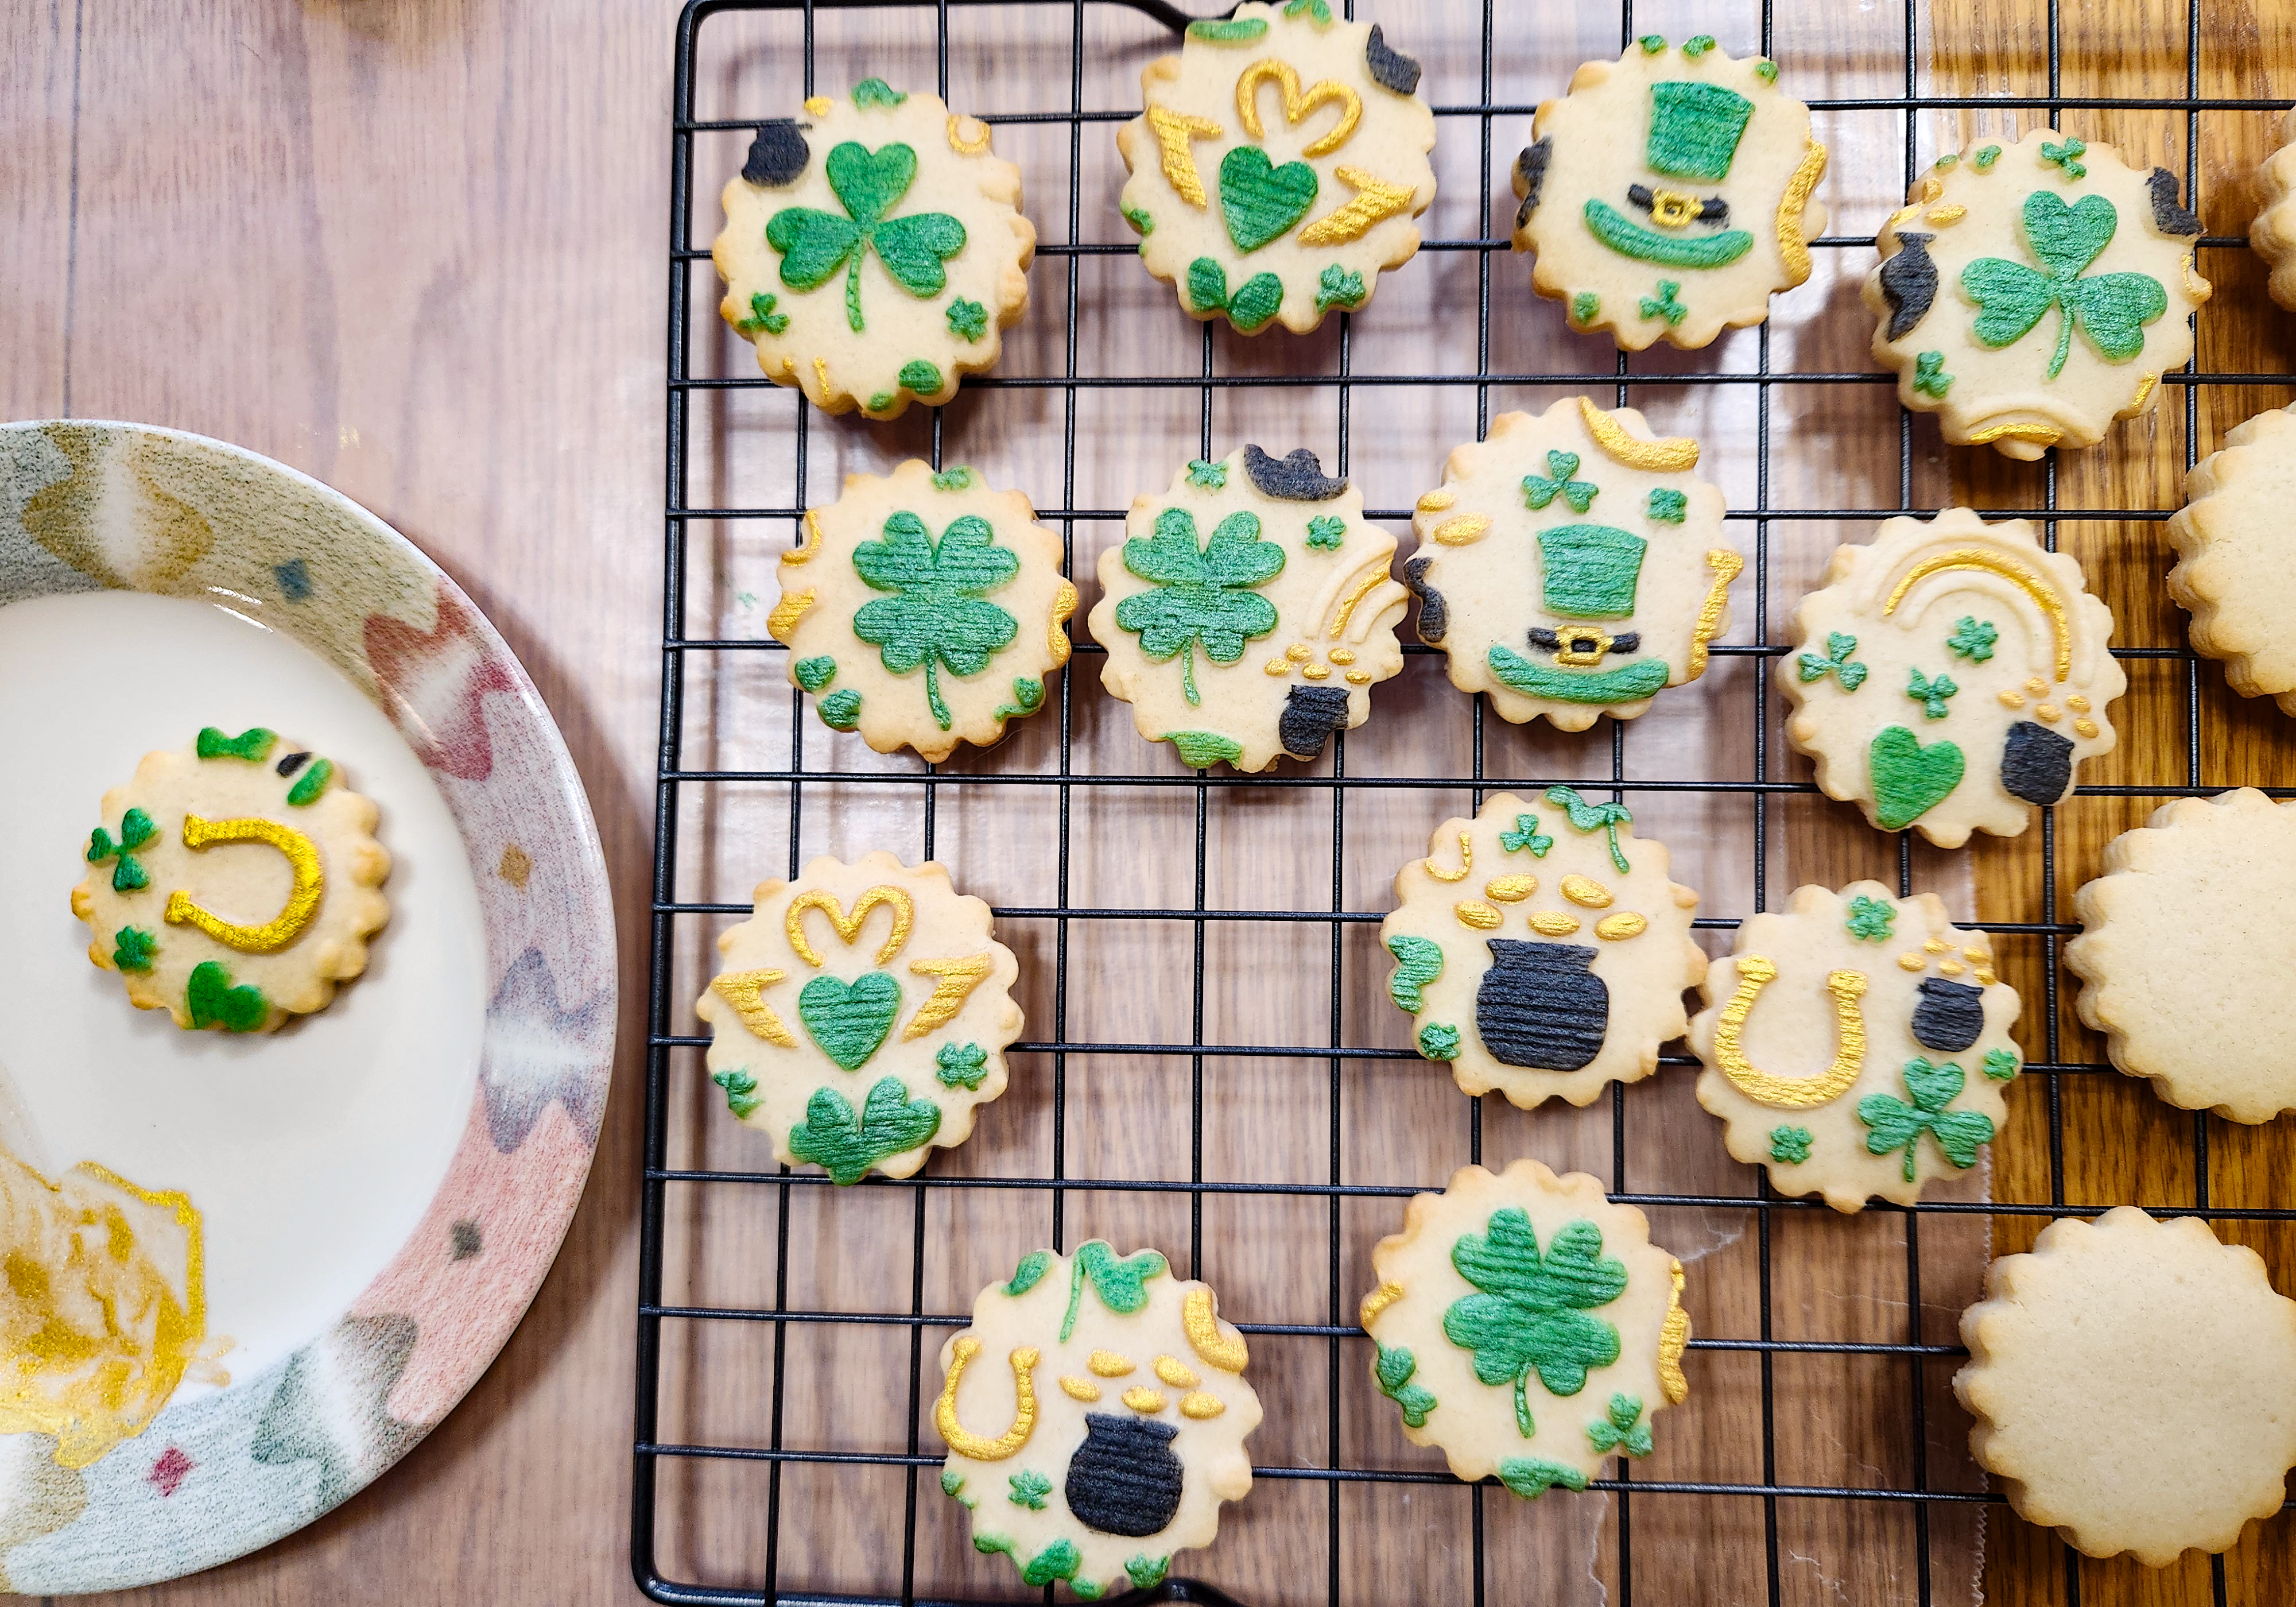
NOTE: I found with the rainbows on both kinds of cookies that it was easiest to paint the colors that were going down in the grooves first. There aren’t 6 ridges for all 6 colors, some of the colors go in the spaces between the ridges. So for example, I painted the innermost space orange, then the next one green, and let them dry. Then I painted the outermost ridge red, the middle ridge gold (or yellow if you like), and the innermost blue, with purple inside of it. I also noticed that leaving orange and purple out didnt change the look much. So if you’re only wanting to get a few colors of dust, you can do this with just 4: red, gold, green, and blue. Use maybe the blue for the pot of gold. Or get black dust and use that.

My own last-minute creative idea was to dry brush Bakell’s 14k Gold luster dust on the tops of the embossed cookies. They look like coins! I used a medium sized fan brush, tapped dry dust onto the cookie top, and smeared it all around until it was covered completely. Fabulous!

If you’re interested in in-depth tutorials on painting cookies with luster dust, I have 3 terrific posts from a few years ago: Spring Spritz Cookies https://creativecookiepress.com/2020/03/07/spring-spritz-cookies/ , Woodland Christmas https://creativecookiepress.com/2019/12/08/woodland-christmas-spritz-cookies/ , and a Halloween post with video https://creativecookiepress.com/2020/10/11/halloween-shimmering-ghosts-jack-o-lanterns-haunted-houses/ .
Last step! Buttercream flavored with Baileys Irish Cream
1/2 cup (1 stick) butter, softened to room temperature, but not melted or mushy
3 Tablespoons + 1 teaspoon Baileys Irish Cream (start with 2 Tablespoons if you want it less strong)
3 cups powdered sugar
(**Non-alcoholic buttercream recipe at post bottom.)
Cream the butter and Baileys together first until blended. Add the sugar one cup at a time, starting on a slow speed and increasing the speed as it incorporates.
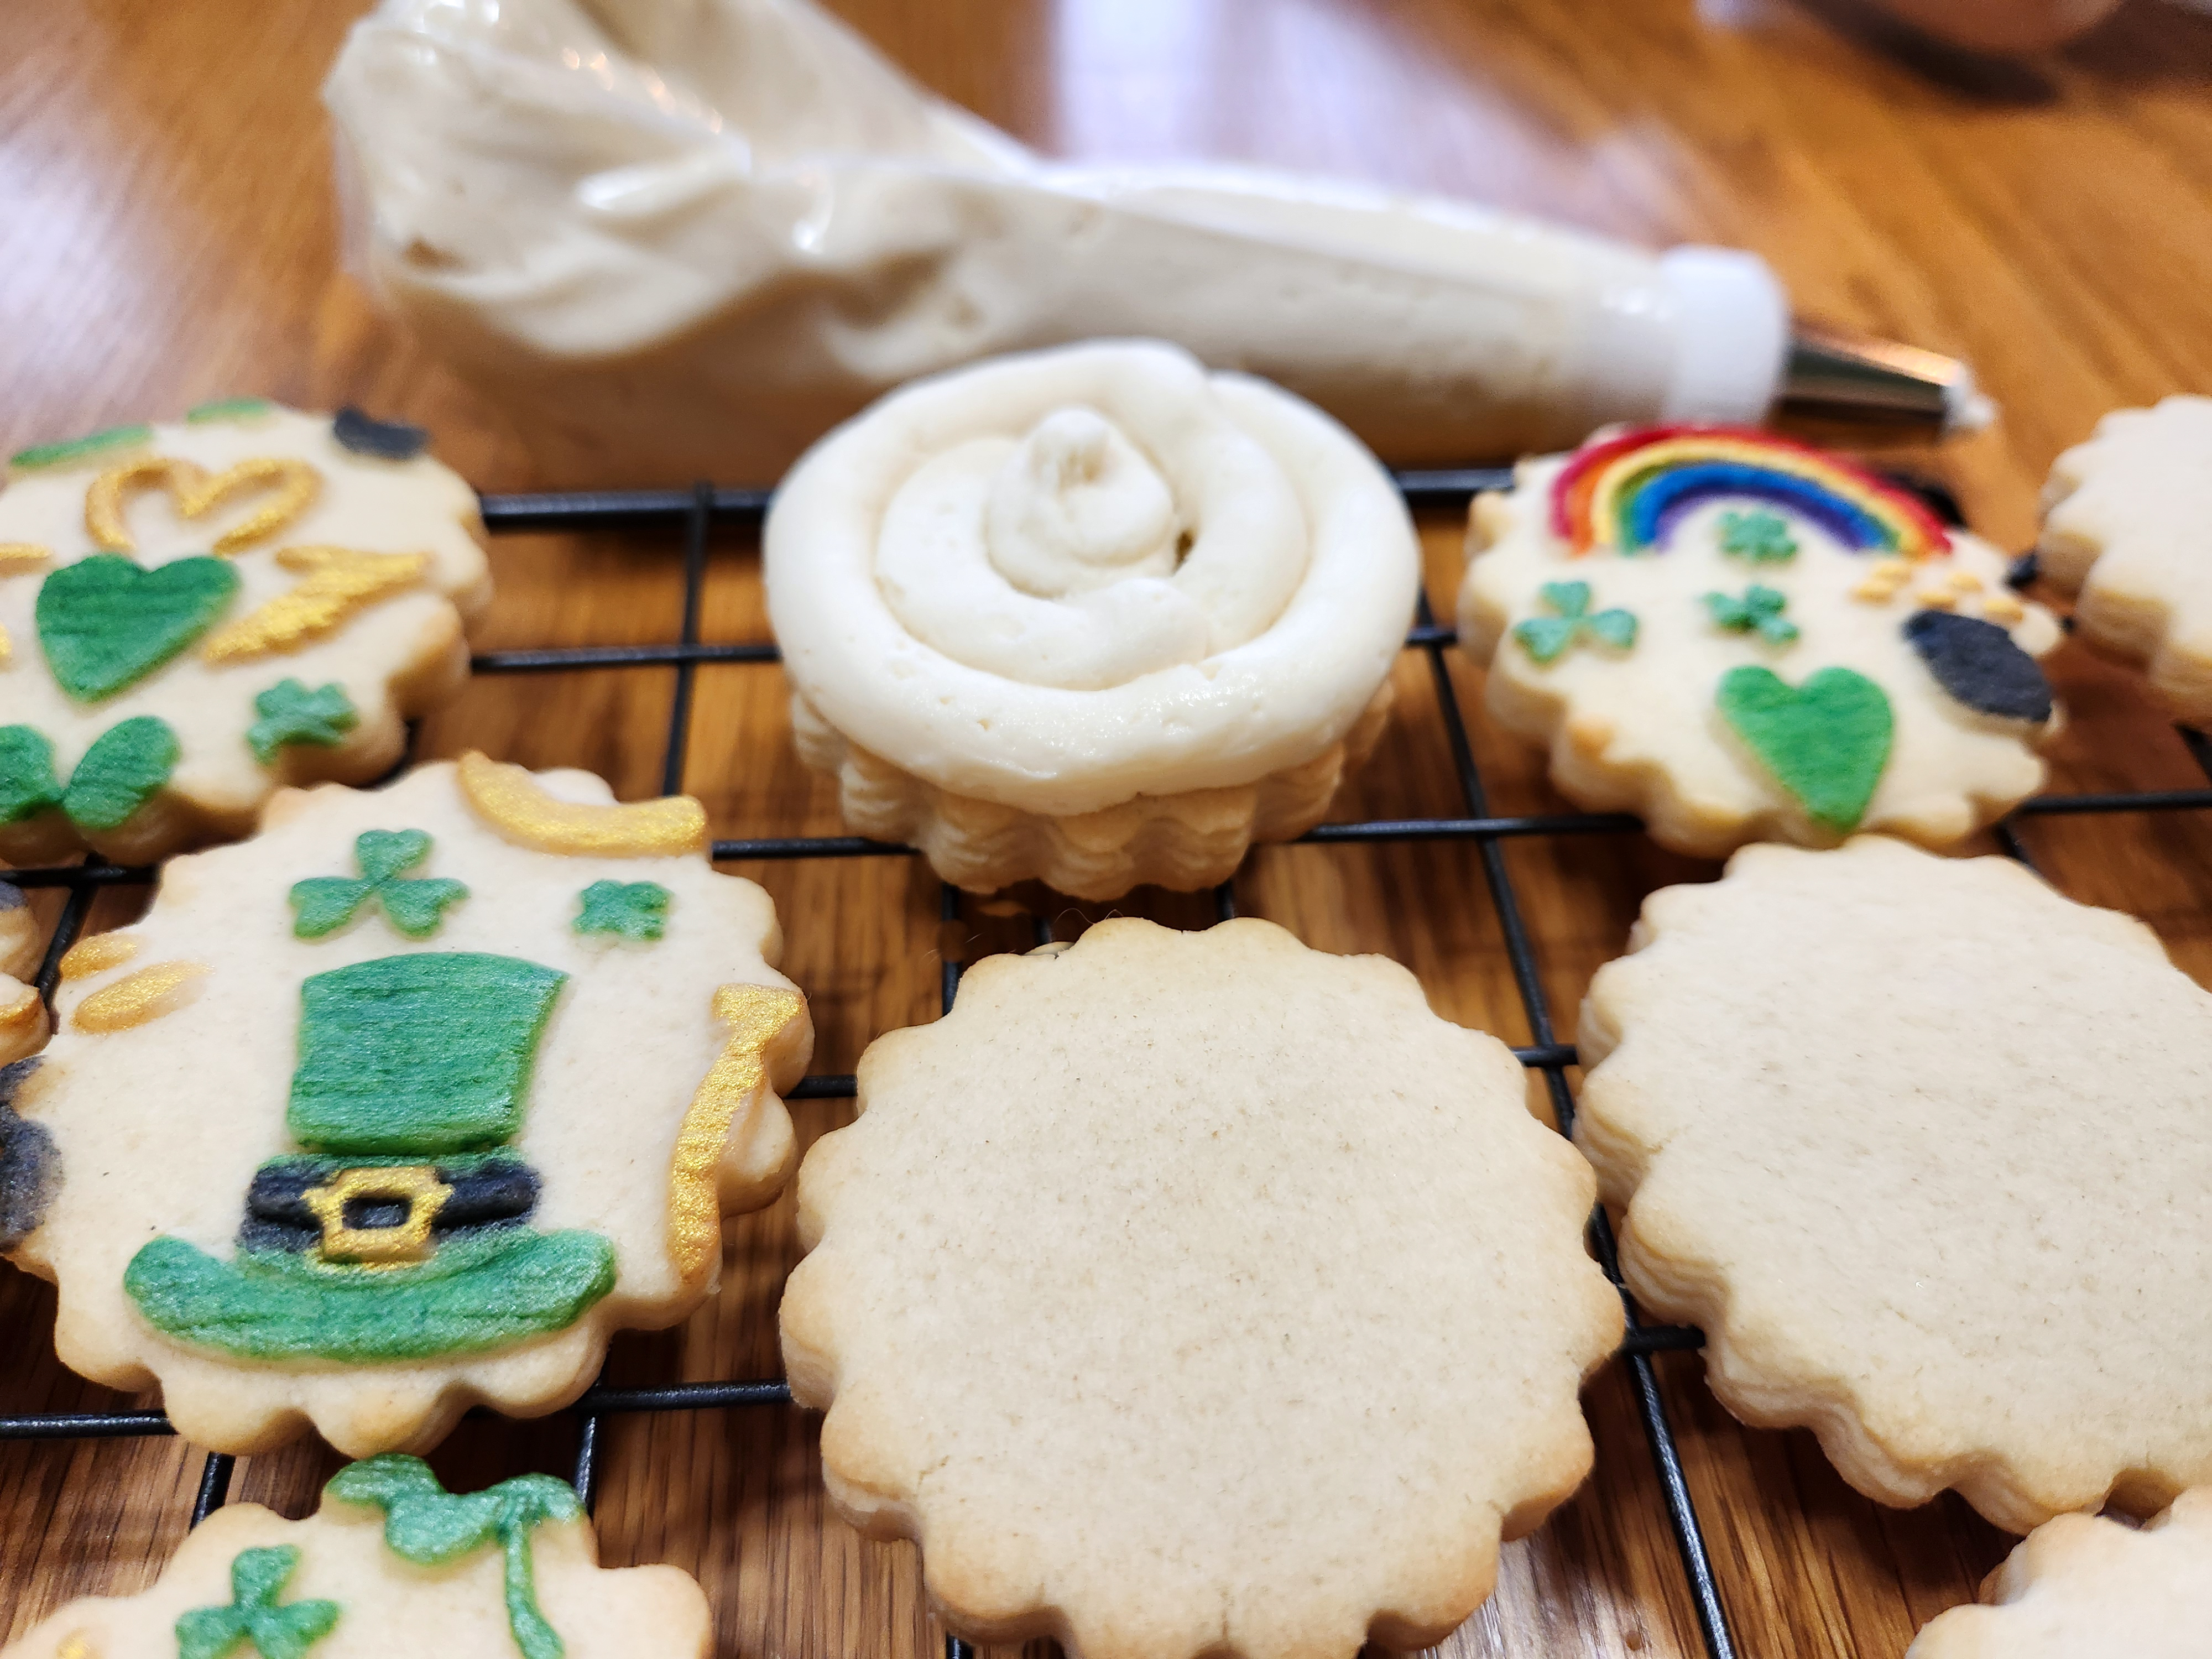
Use a decorating bag and round piping tips. I am pretty crazy with sandwich cookies and use a big fat # 12 tip to make super thick sandwiches. You could be a less sugar-obsessed person and use a smaller tip like a #6 or #10.
Follow the cookie edge close so that the filling will show enough to be cute, and so you can paint it gold if you like! You MUST wait for the icing to thoroughly dry before painting, or you will smoosh the icing around!


If you’re painting the filling edges, use the gold luster dust dry, and swipe it along the edges of the filling. This works best when the filling is dry and smooth. I love the look!

That’s it!
I hope you all have tons of fun with this!
Happy St. Patrick’s Day and Happy Baking!
~Susie
Disk, Pin, & Stamp Designer/Co-Owner at Impress! Bakeware, LLC
Our website has all of our 200+ disk shapes, cookie press, embossed rolling pins, stamps, luster dusts, baking accessories plus more about our Women/Family Owned company! impressbakeware.com
All products are on our Etsy shop.
Our Amazon store has our cookie press and disks and embossed rolling pins .
Follow us on facebook!
If you’re not familiar with rolling pins with thickness rings, here’s ours:
Ultra-decadent Buttercream Filling
½ cup (1 stick) butter, softened (not melted)
1 teaspoon vanilla
2 Tablespoons heavy cream
1/8 teaspoon salt (optional)
3 ½ cups powdered sugar
Combine all ingredients, whip until smooth. Use the same as the Baileys buttercream instructions above.
