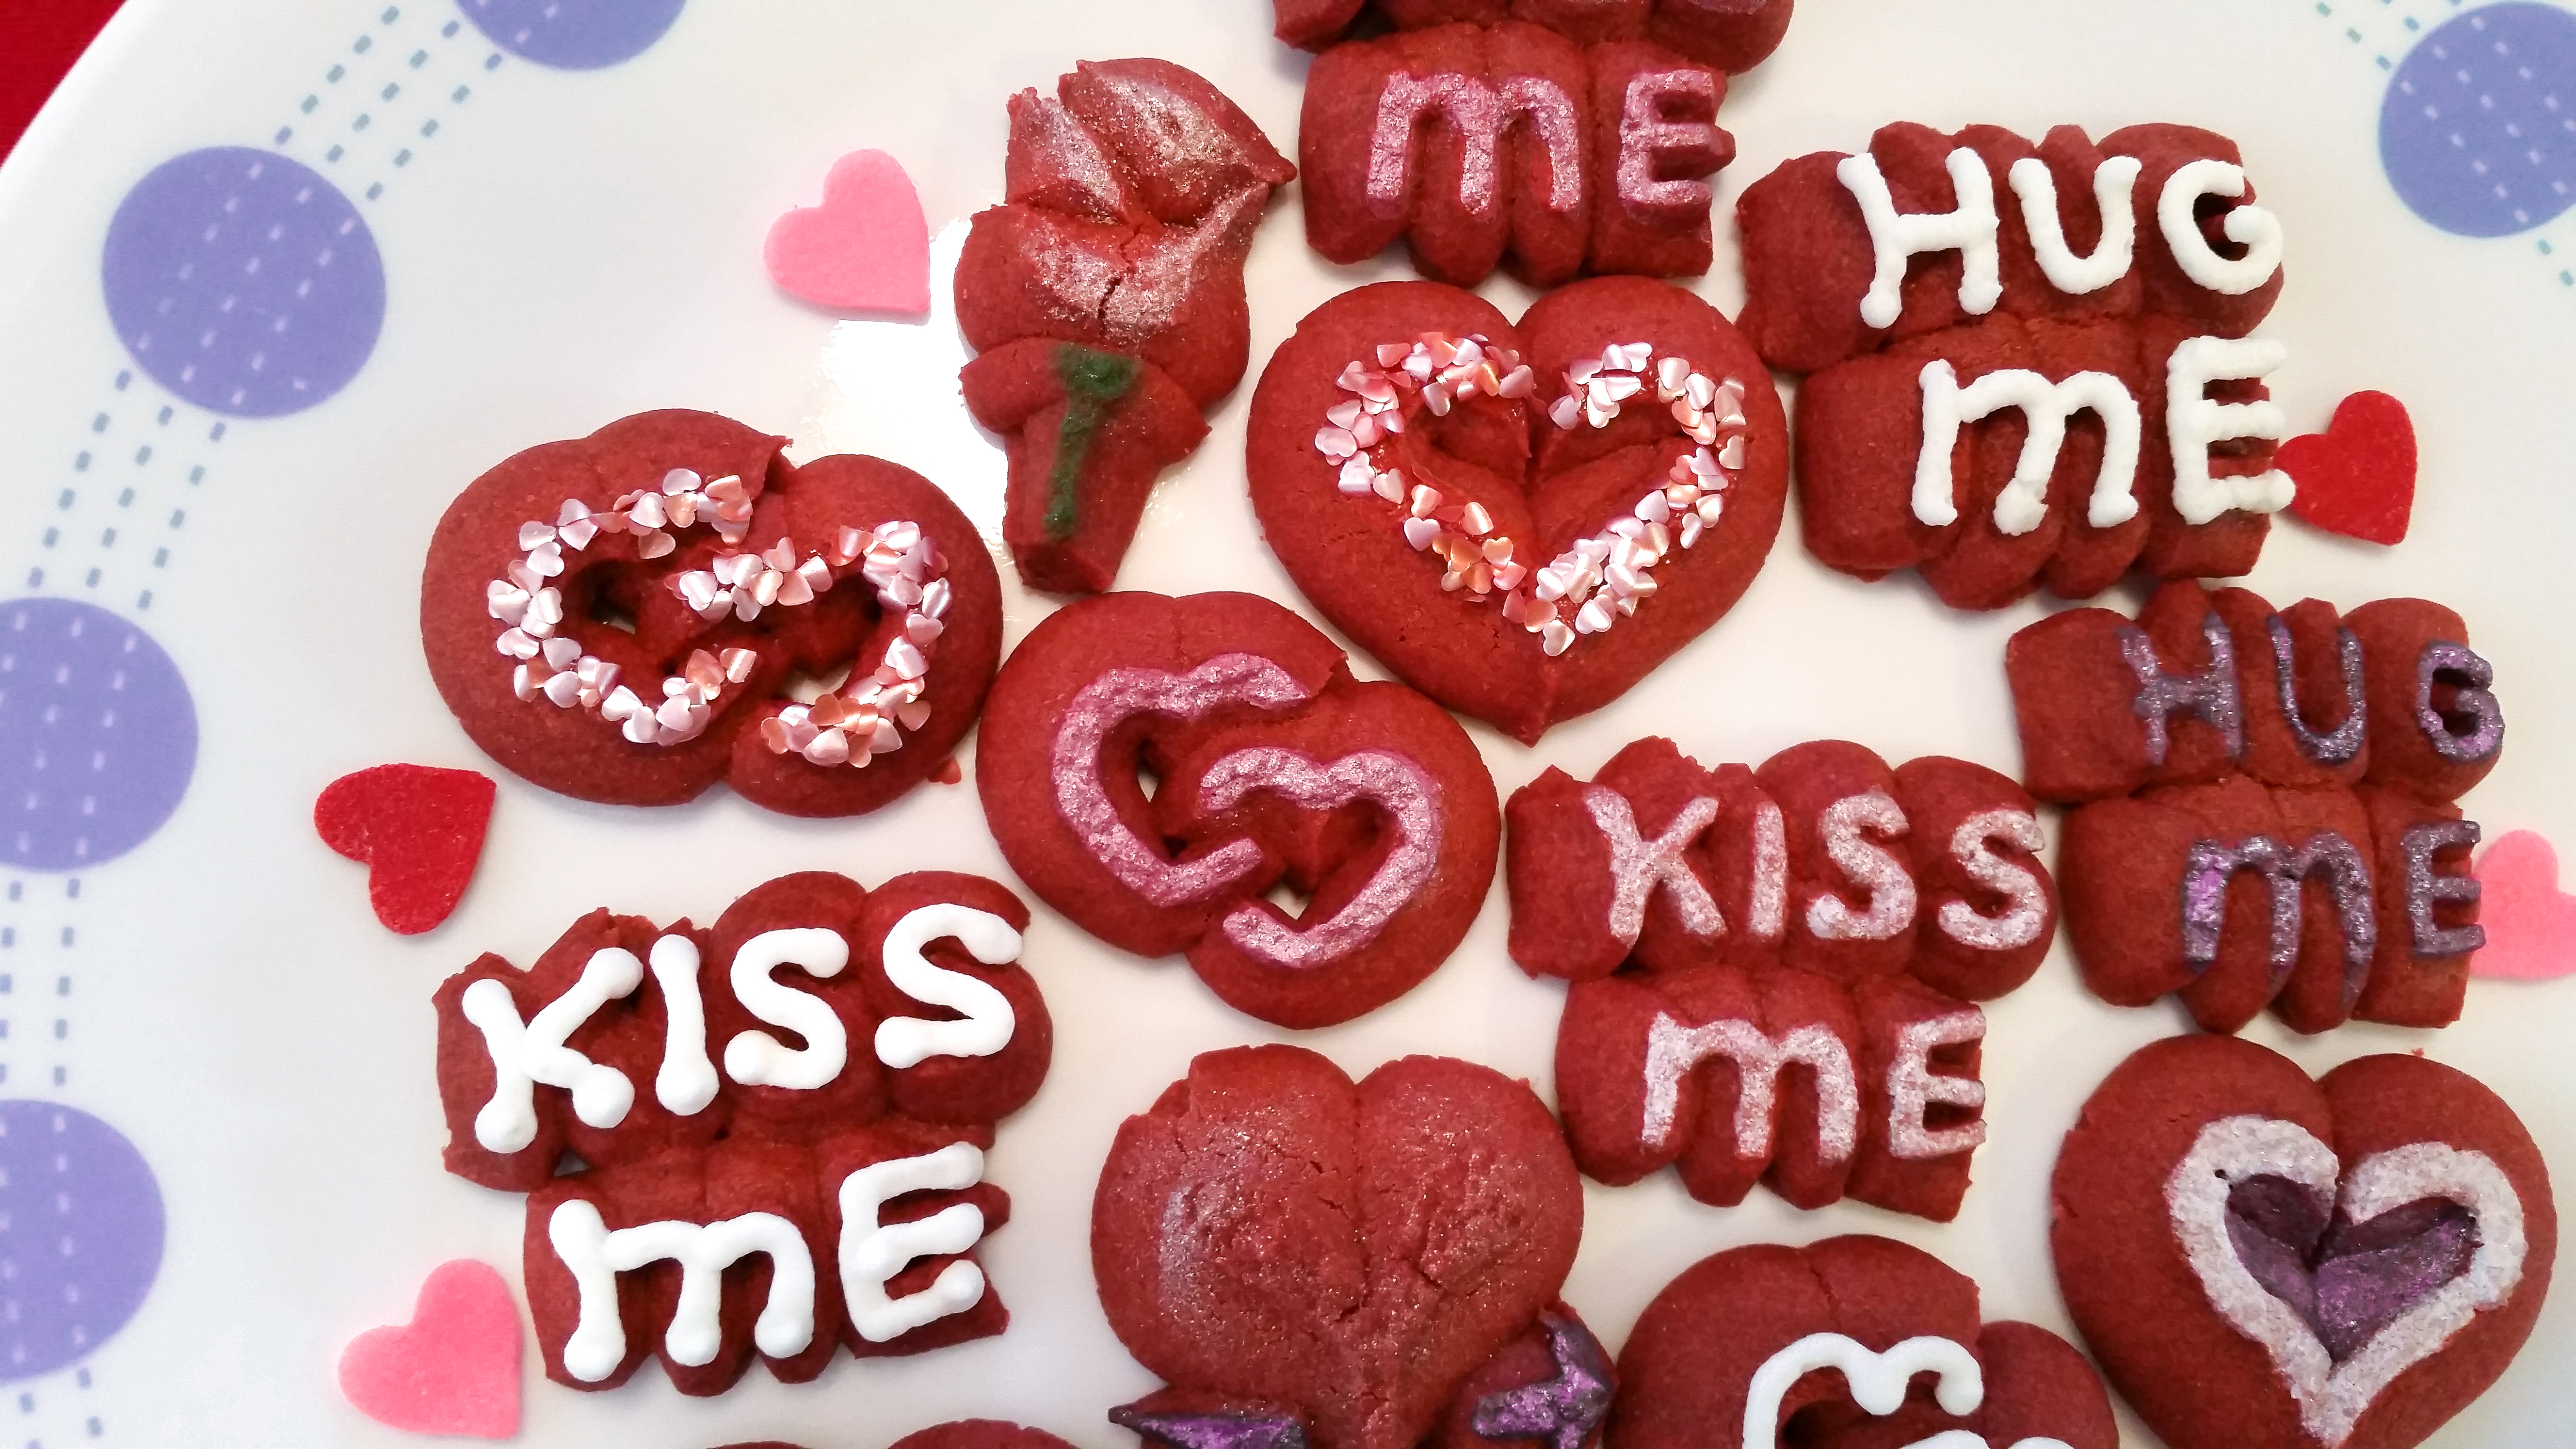
Bite-sized bundles of red velvet love pair up with a cream cheese icing in a match made in heaven. This decadent recipe presses easily and the decorating is simple and fun. Just 3 easy techniques made this cute plateful of joy: piped icing, painting with edible pearlescent dusts, and attaching edible sparkle hearts.
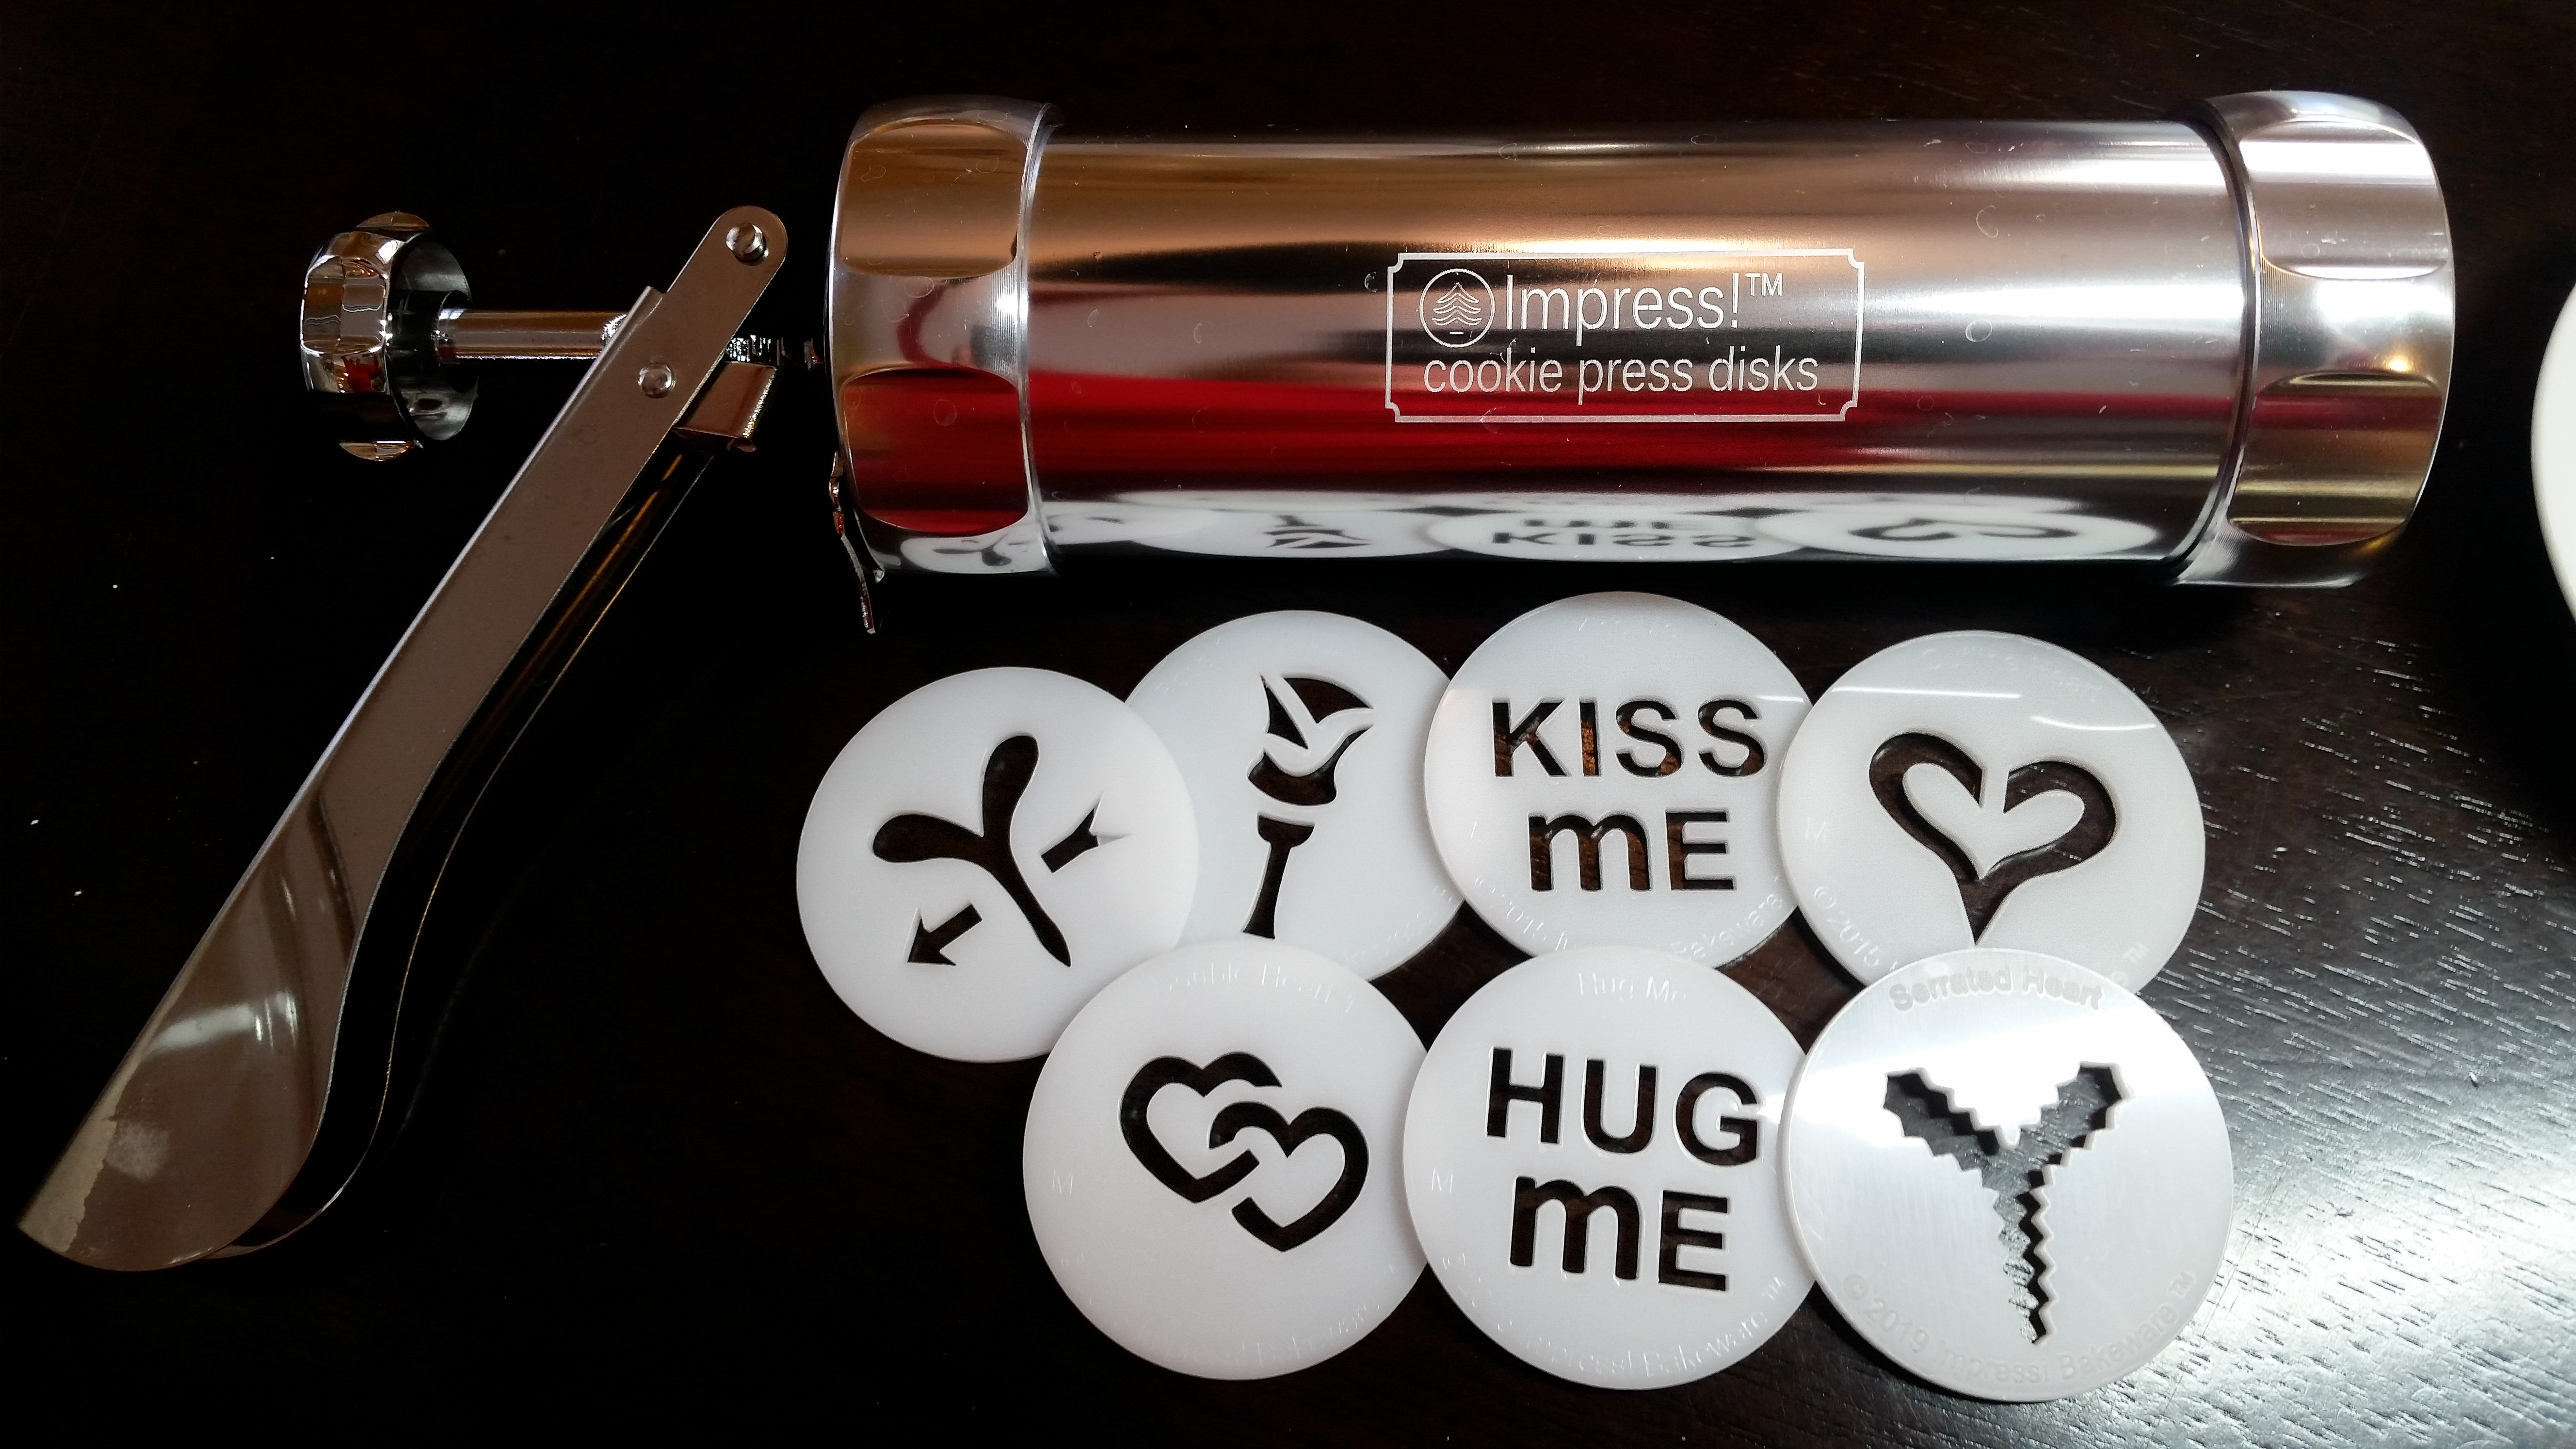
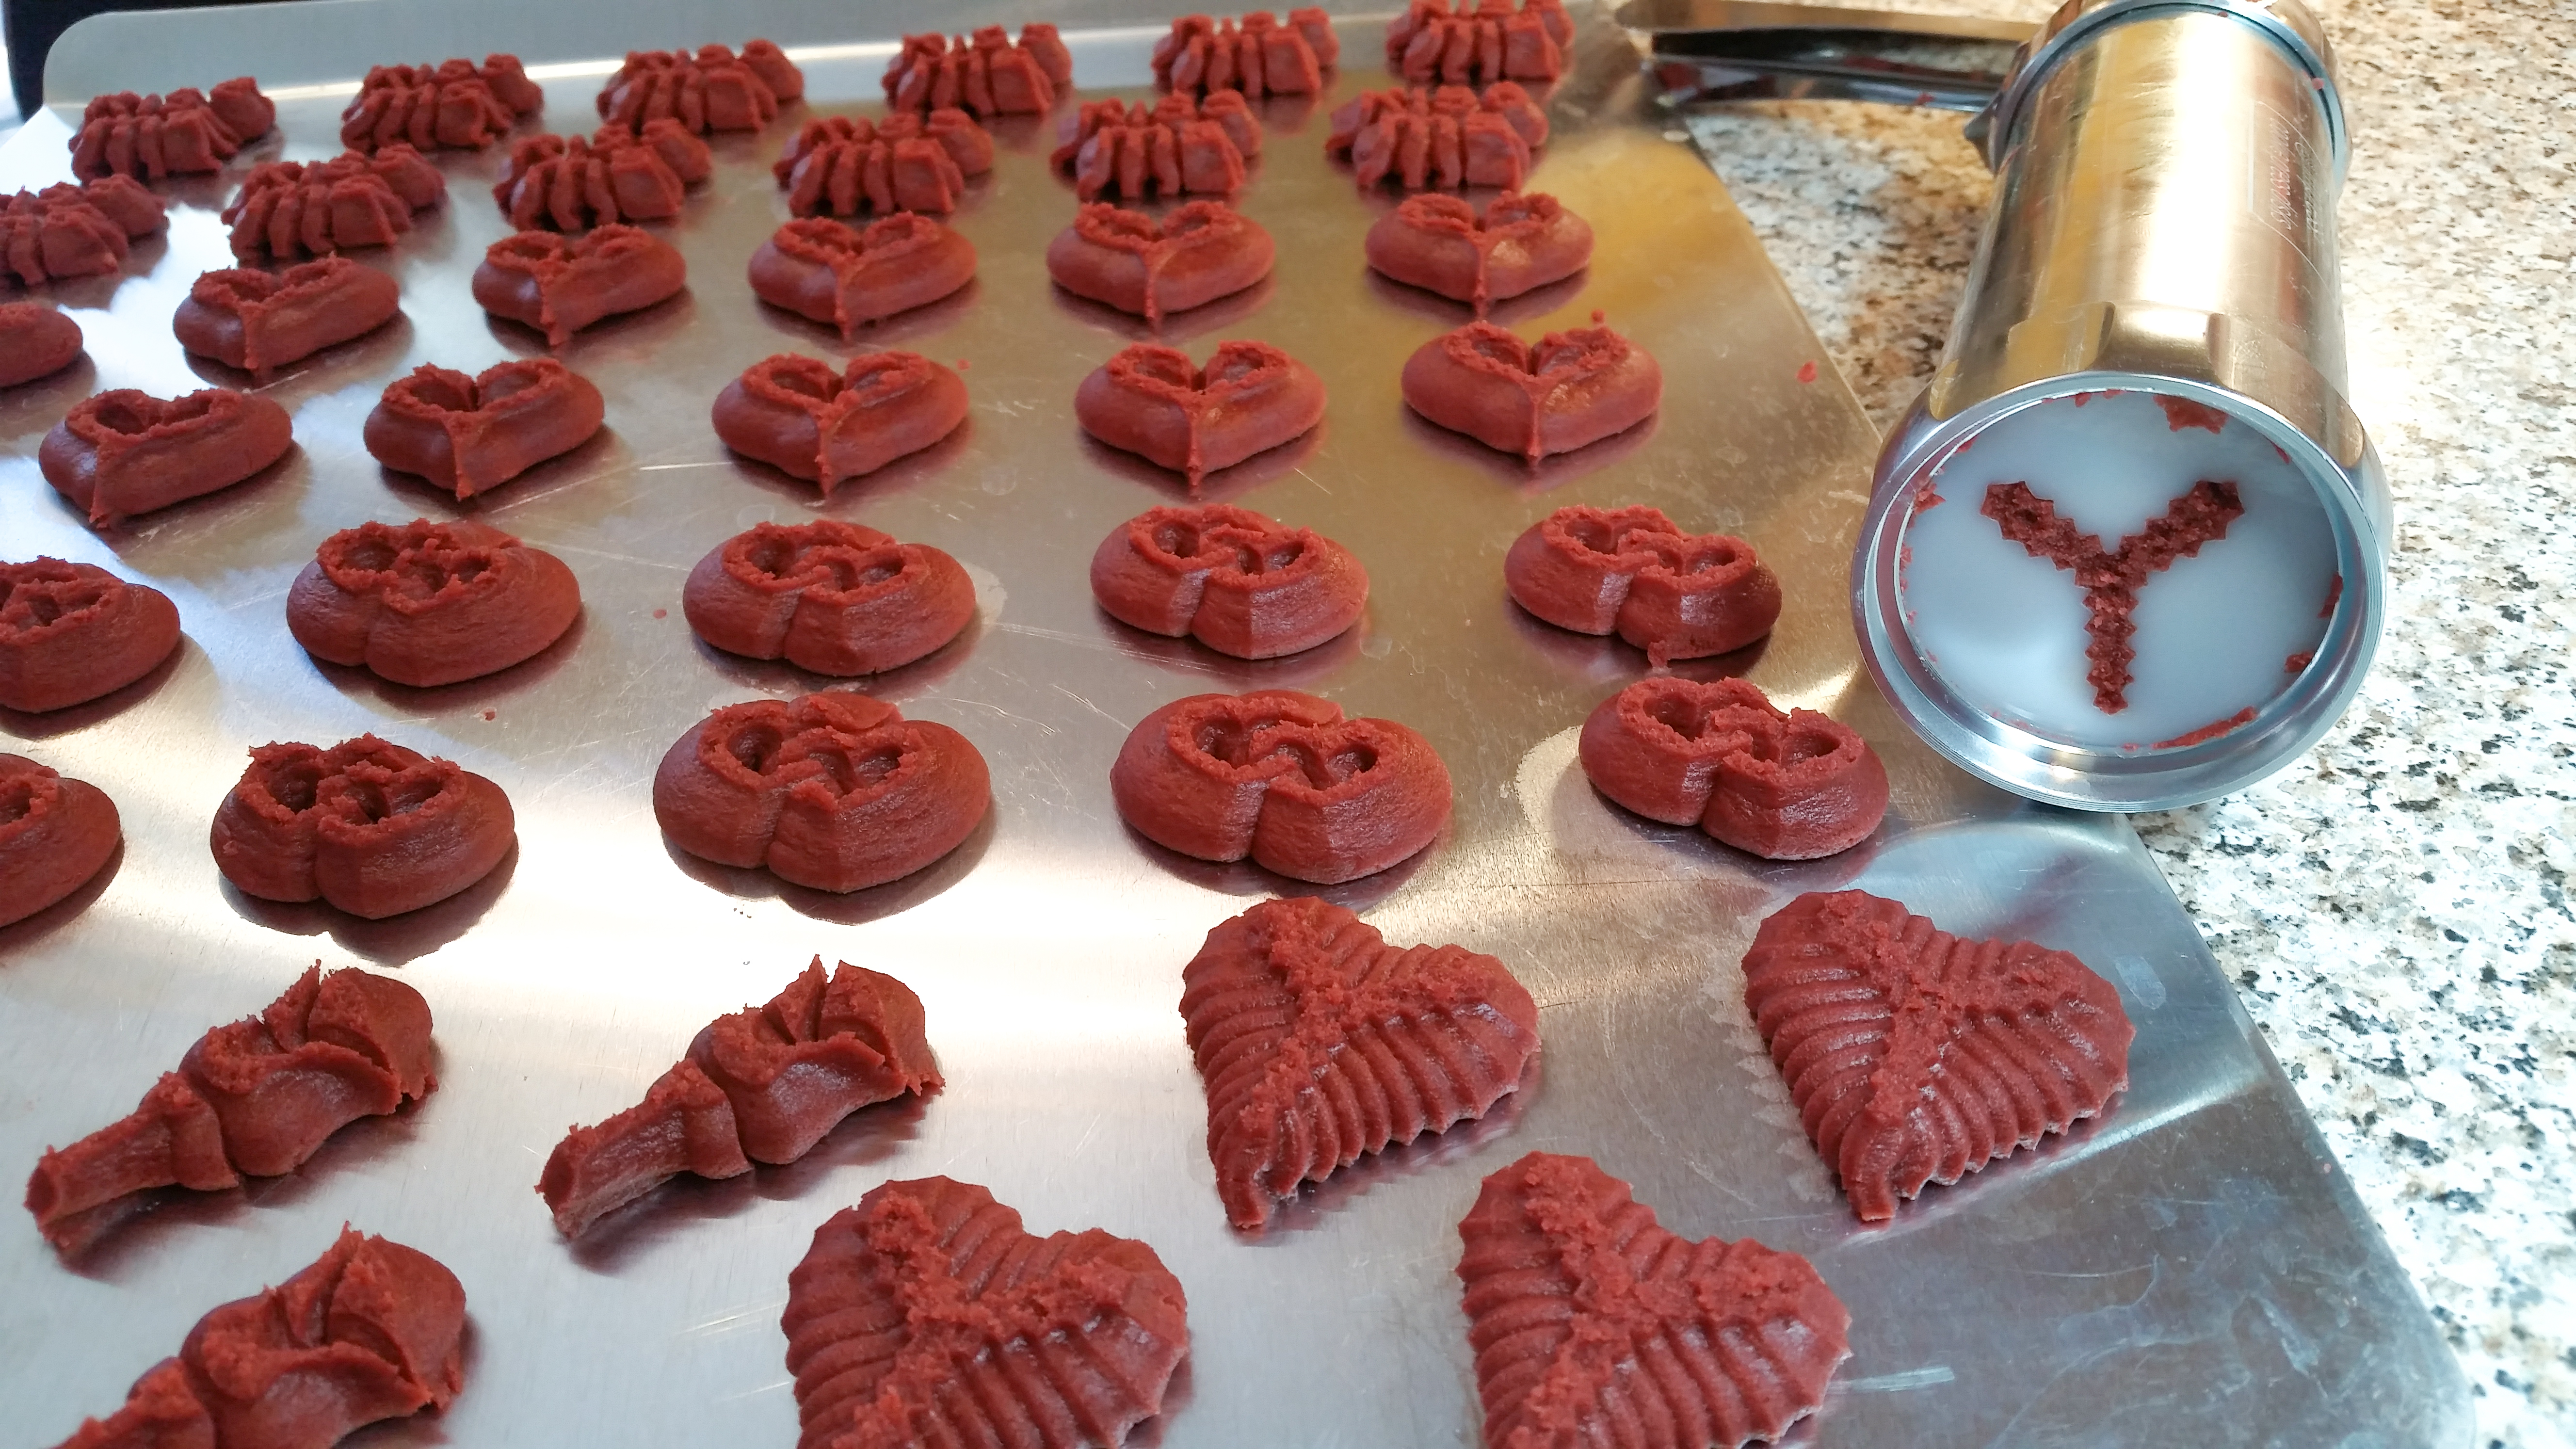
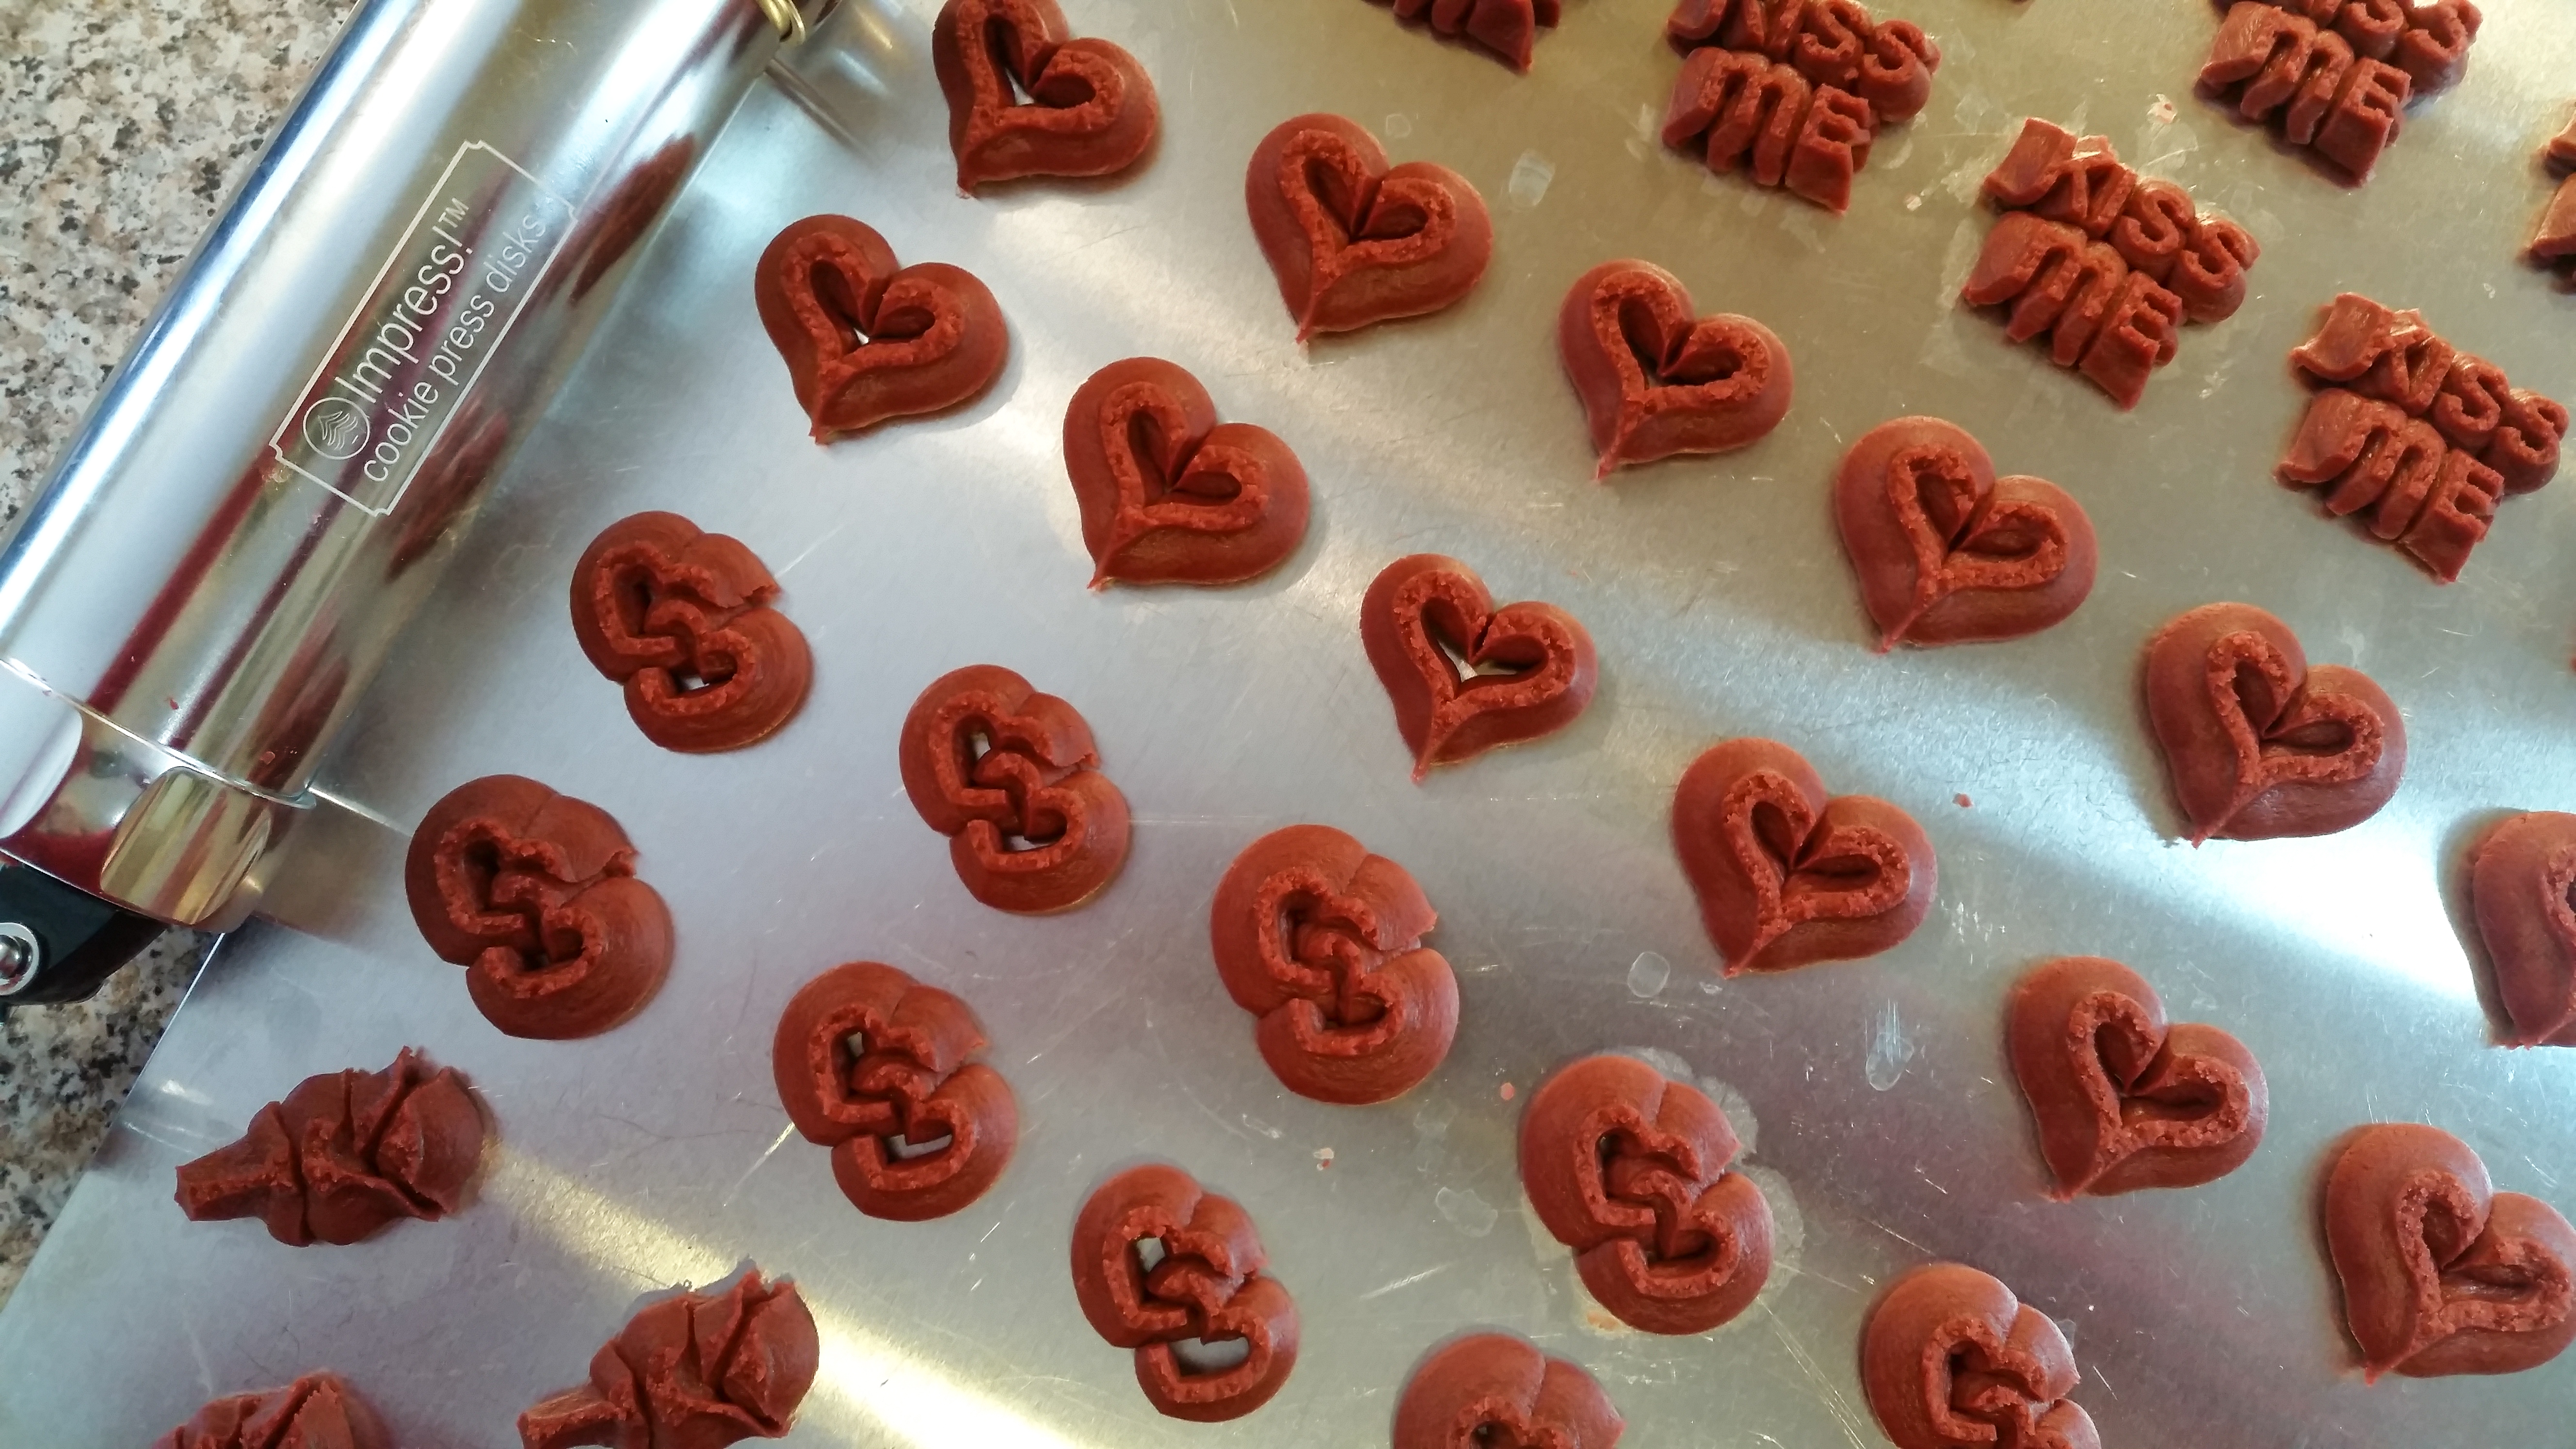
I used most of the disks from our Valentine’s Day Set (picture and link at bottom of post). I substituted the regular heart with the serrated heart from our Impress! Cookie Press Box Set for a little variety. I left out the “my love” disk as this recipe spreads a bit much for that particular shape. I stuck with the ones that turned out super sharp.
Our website has all of our 200+ disk shapes, cookie press, embossed rolling pins, baking accessories plus more about our Women/Family Owned company! impressbakeware.com
All products are on our Etsy shop.
Our cookie press and disks and embossed rolling pins are also available on Amazon.
Let’s bake!
Red Velvet Spritz Cookies
3/4 cup (1 1/2 sticks) butter, softened (not melted)
3/4 cup butter flavored shortening
1/2 cup white granulated sugar
3 Tablespoons brown sugar
1 Tablespoon warm buttermilk
1 Tablespoon white vinegar
2 egg whites
3/4 teaspoon red gel food coloring
1 teaspoon vanilla extract
3 1/3 cups plus 2 Tablespoons all-purpose flour
1/4 cup unsweetened cocoa powder
1/2 teaspoon baking soda
Cream cheese icing
1/2 cup (1 stick) butter, softened not melted
8 ounces of cream cheese (brick, not tub)
4 1/4 cups of powdered sugar
1/2 to 1 teaspoon vanilla depending on how thick you like it
For decorating:
Any edible pearlescent dusts to be painted on with any clear extract such as lemon or clear imitation vanilla, or vodka. Food safe brushes can be purchased where you buy dusts.
Any cute decors to be “glued” on with icing or light corn syrup

Thoroughly combine the flour, cocoa powder and baking soda in a large bowl and set aside.
The most important step to excellent spritz cookies is always to cream the butter very well. Pretend you are making a buttercream frosting and cream/whip your butter until it is wonderfully smooth. It has a slightly different feel when it’s half shortening, but the principle is still the same. It will just be a tad less fluffy.
Now add the sugars and cream it very well again. Then add the other wet ingredients: buttermilk, vinegar, vanilla extract, egg whites, and food coloring. You must use gel coloring. Liquid will affect the dough consistency. Fluff the mixture up one more time.
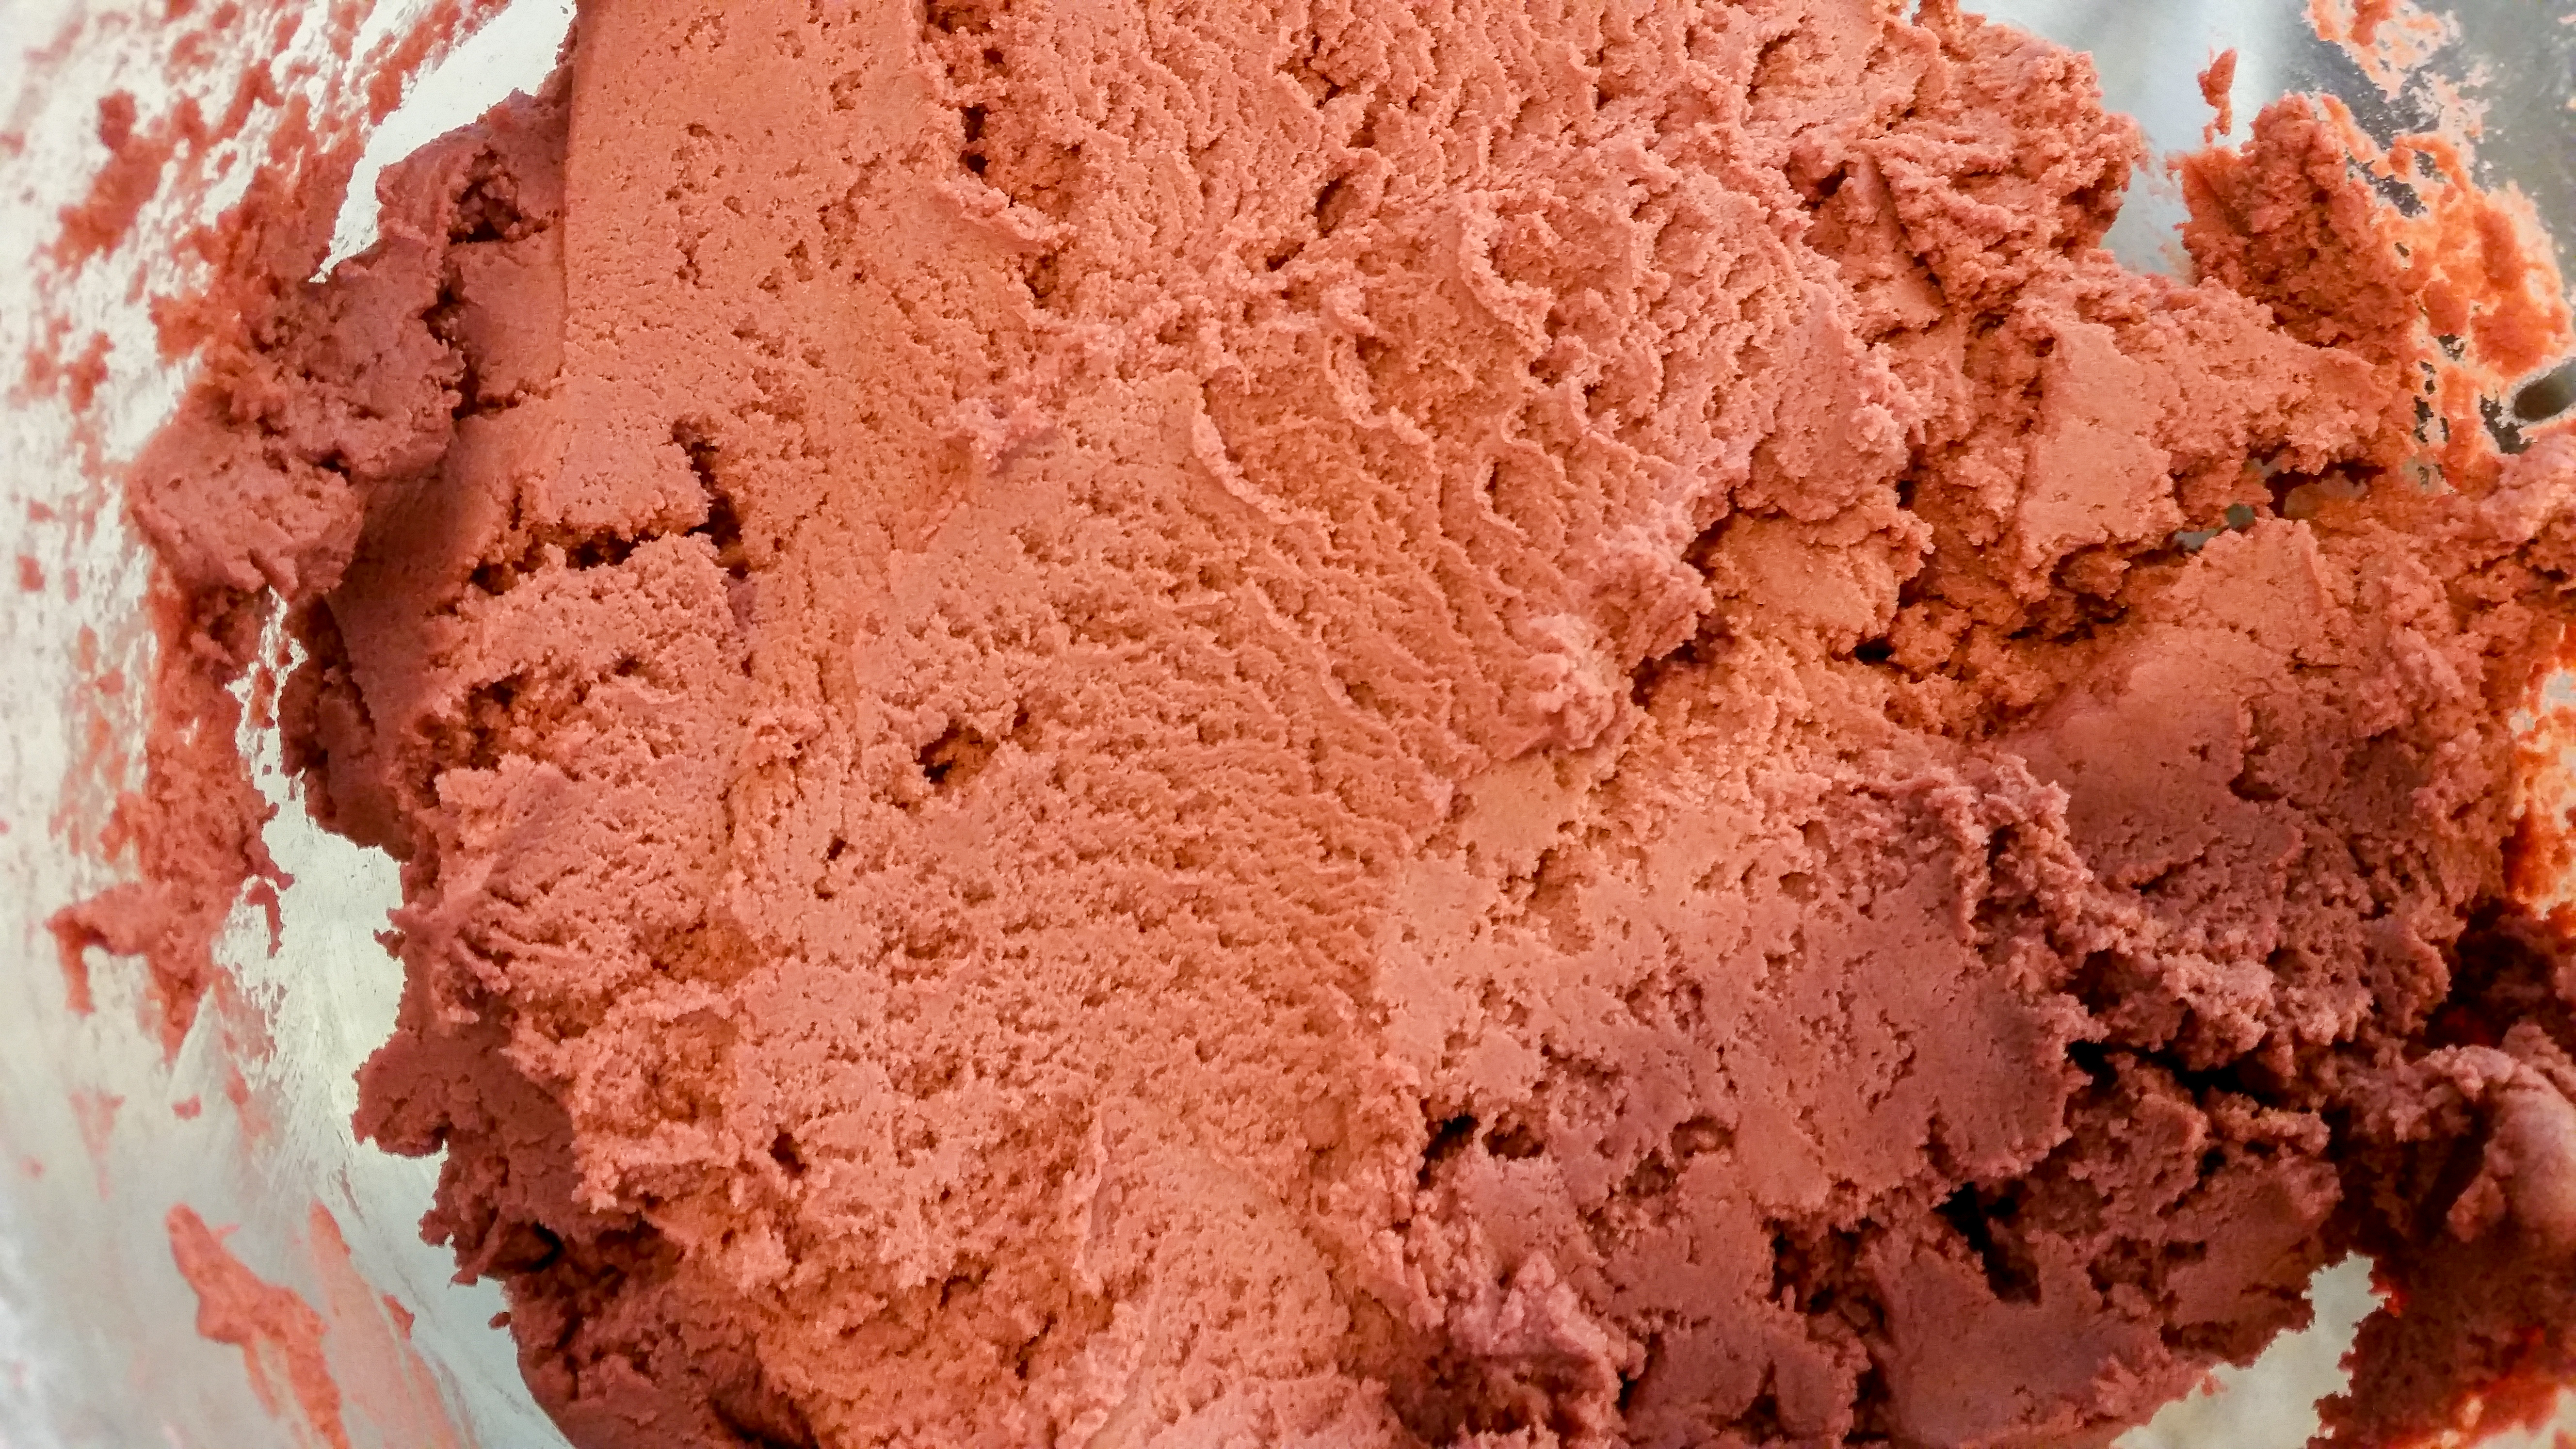
At this stage it is a shocking bright red/pink. Pretty!

Add the dry ingredients until thoroughly combined. Great spritz dough has a firm feel and does not stick to your fingers terribly. There is a dryness to it that makes it easy to handle. It’s almost like a very soft clay. This dough has a beautiful copper red color and a wonderful consistency.
Get your disks and pack your dough into your cookie press barrel, using the back of a spoon to press the air bubbles out. This helps create consistent pressure to press with. Place the disk in the bottom ring and start pressing onto an un-greased cookie sheet. Use a consistent rhythm to keep the shapes a uniform size. It’s ok if the first few shapes come out weird. That happens as pressure builds. Have patience! And if any shapes ever come out wrong, just toss them back in the bowl to be re-pressed.
If you’re having trouble pressing (mis-shaped cookies, trouble sticking to the pan, etc) press one cookie into the air and wipe it off and toss back into the bowl to re-set your pressure in the press. You can also refrigerate your cookie sheets for 5 minutes if sticking is an issue. Check out the Troubleshooting and Decorating Tips on the main menu of this blog for more help!
This is an excellent-pressing dough and I have my niece to thank for it! She created this recipe a few years ago after I wasn’t having luck with it. She’s an excellent baker and has helped with our family business since she was little! (She’s Jill’s daughter for those who have followed us for years. 🙂 )
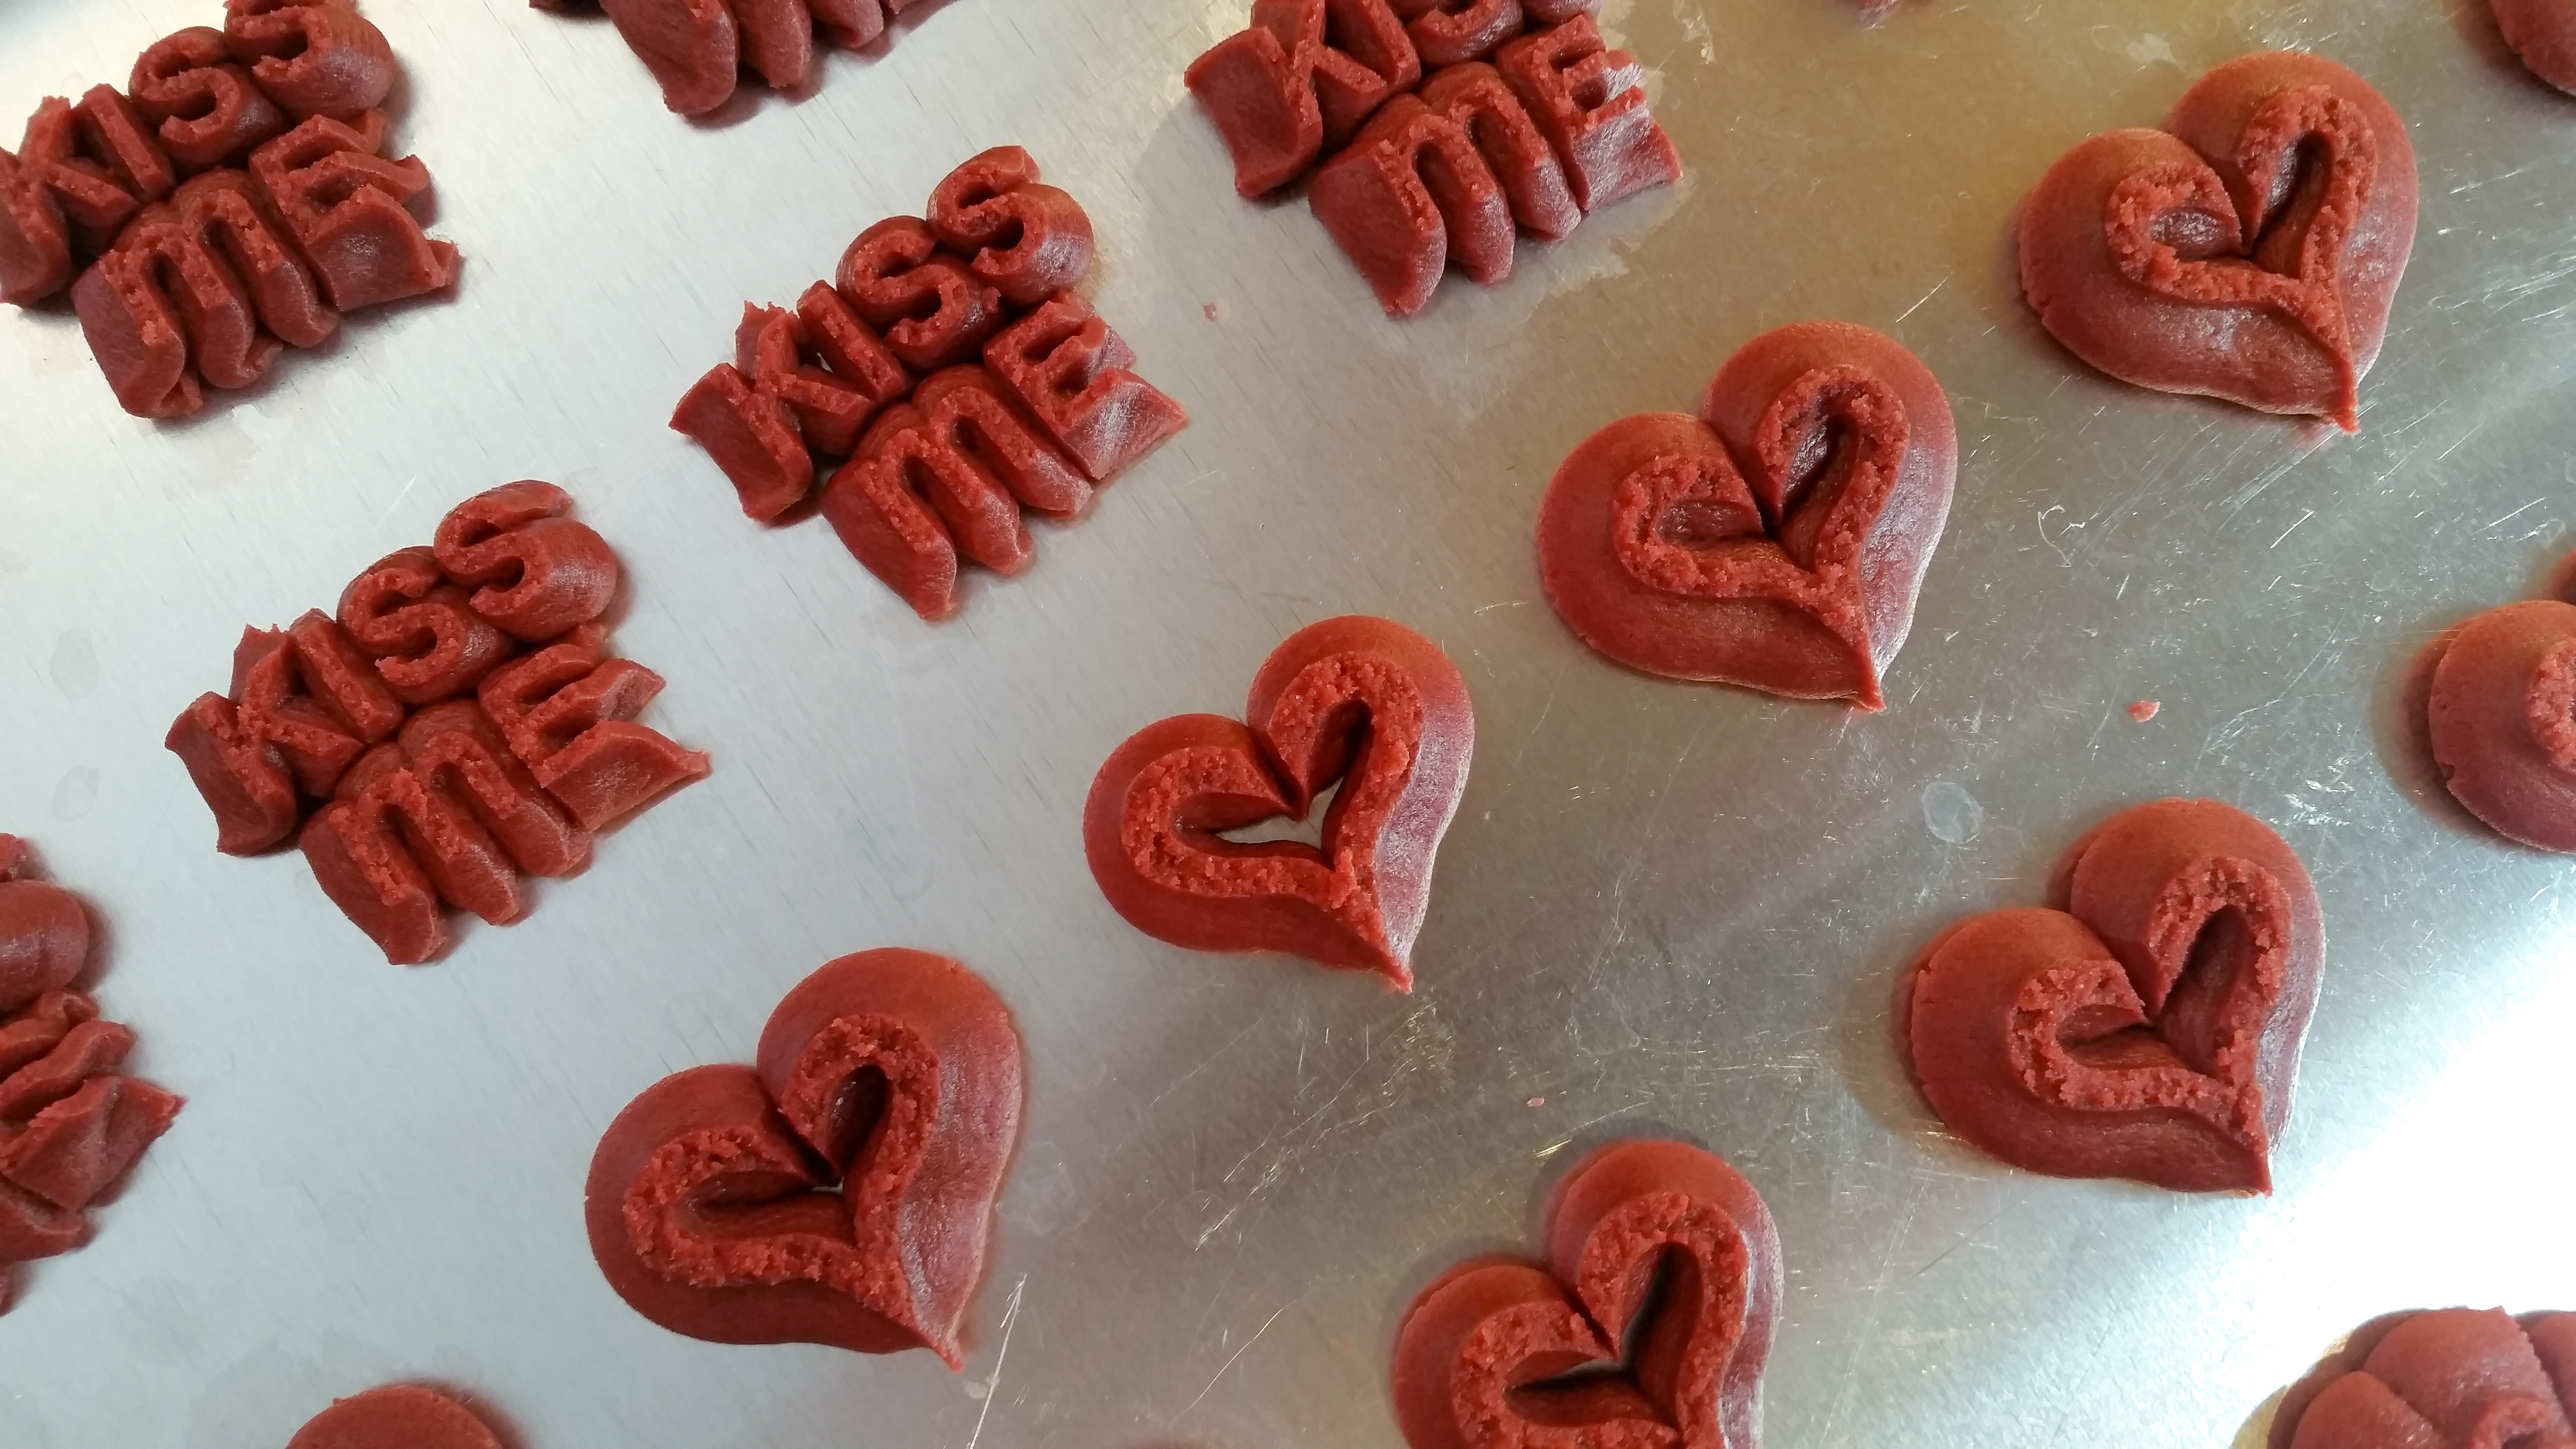
Super sharp shapes! And they taste just as yummy as they look. *Tip!* If you want sweeter cookie, lightly sprinkle regular granulated table sugar on these before baking. It will barely be noticeable to the eye but will add a zing of sweetness. Just tapping the edge of a spoon works fine.
Bake for 7-10 minutes or until they have a “set” look. Check them early and often especially on the first batch as all ovens are different. There’s no need to let them brown much, if at all, depending on how you like the taste. They’re best when not over-baked. They have a richer texture when just done. Let them sit on the cookie sheet for about 2 minutes then remove to a wire cooking rack.
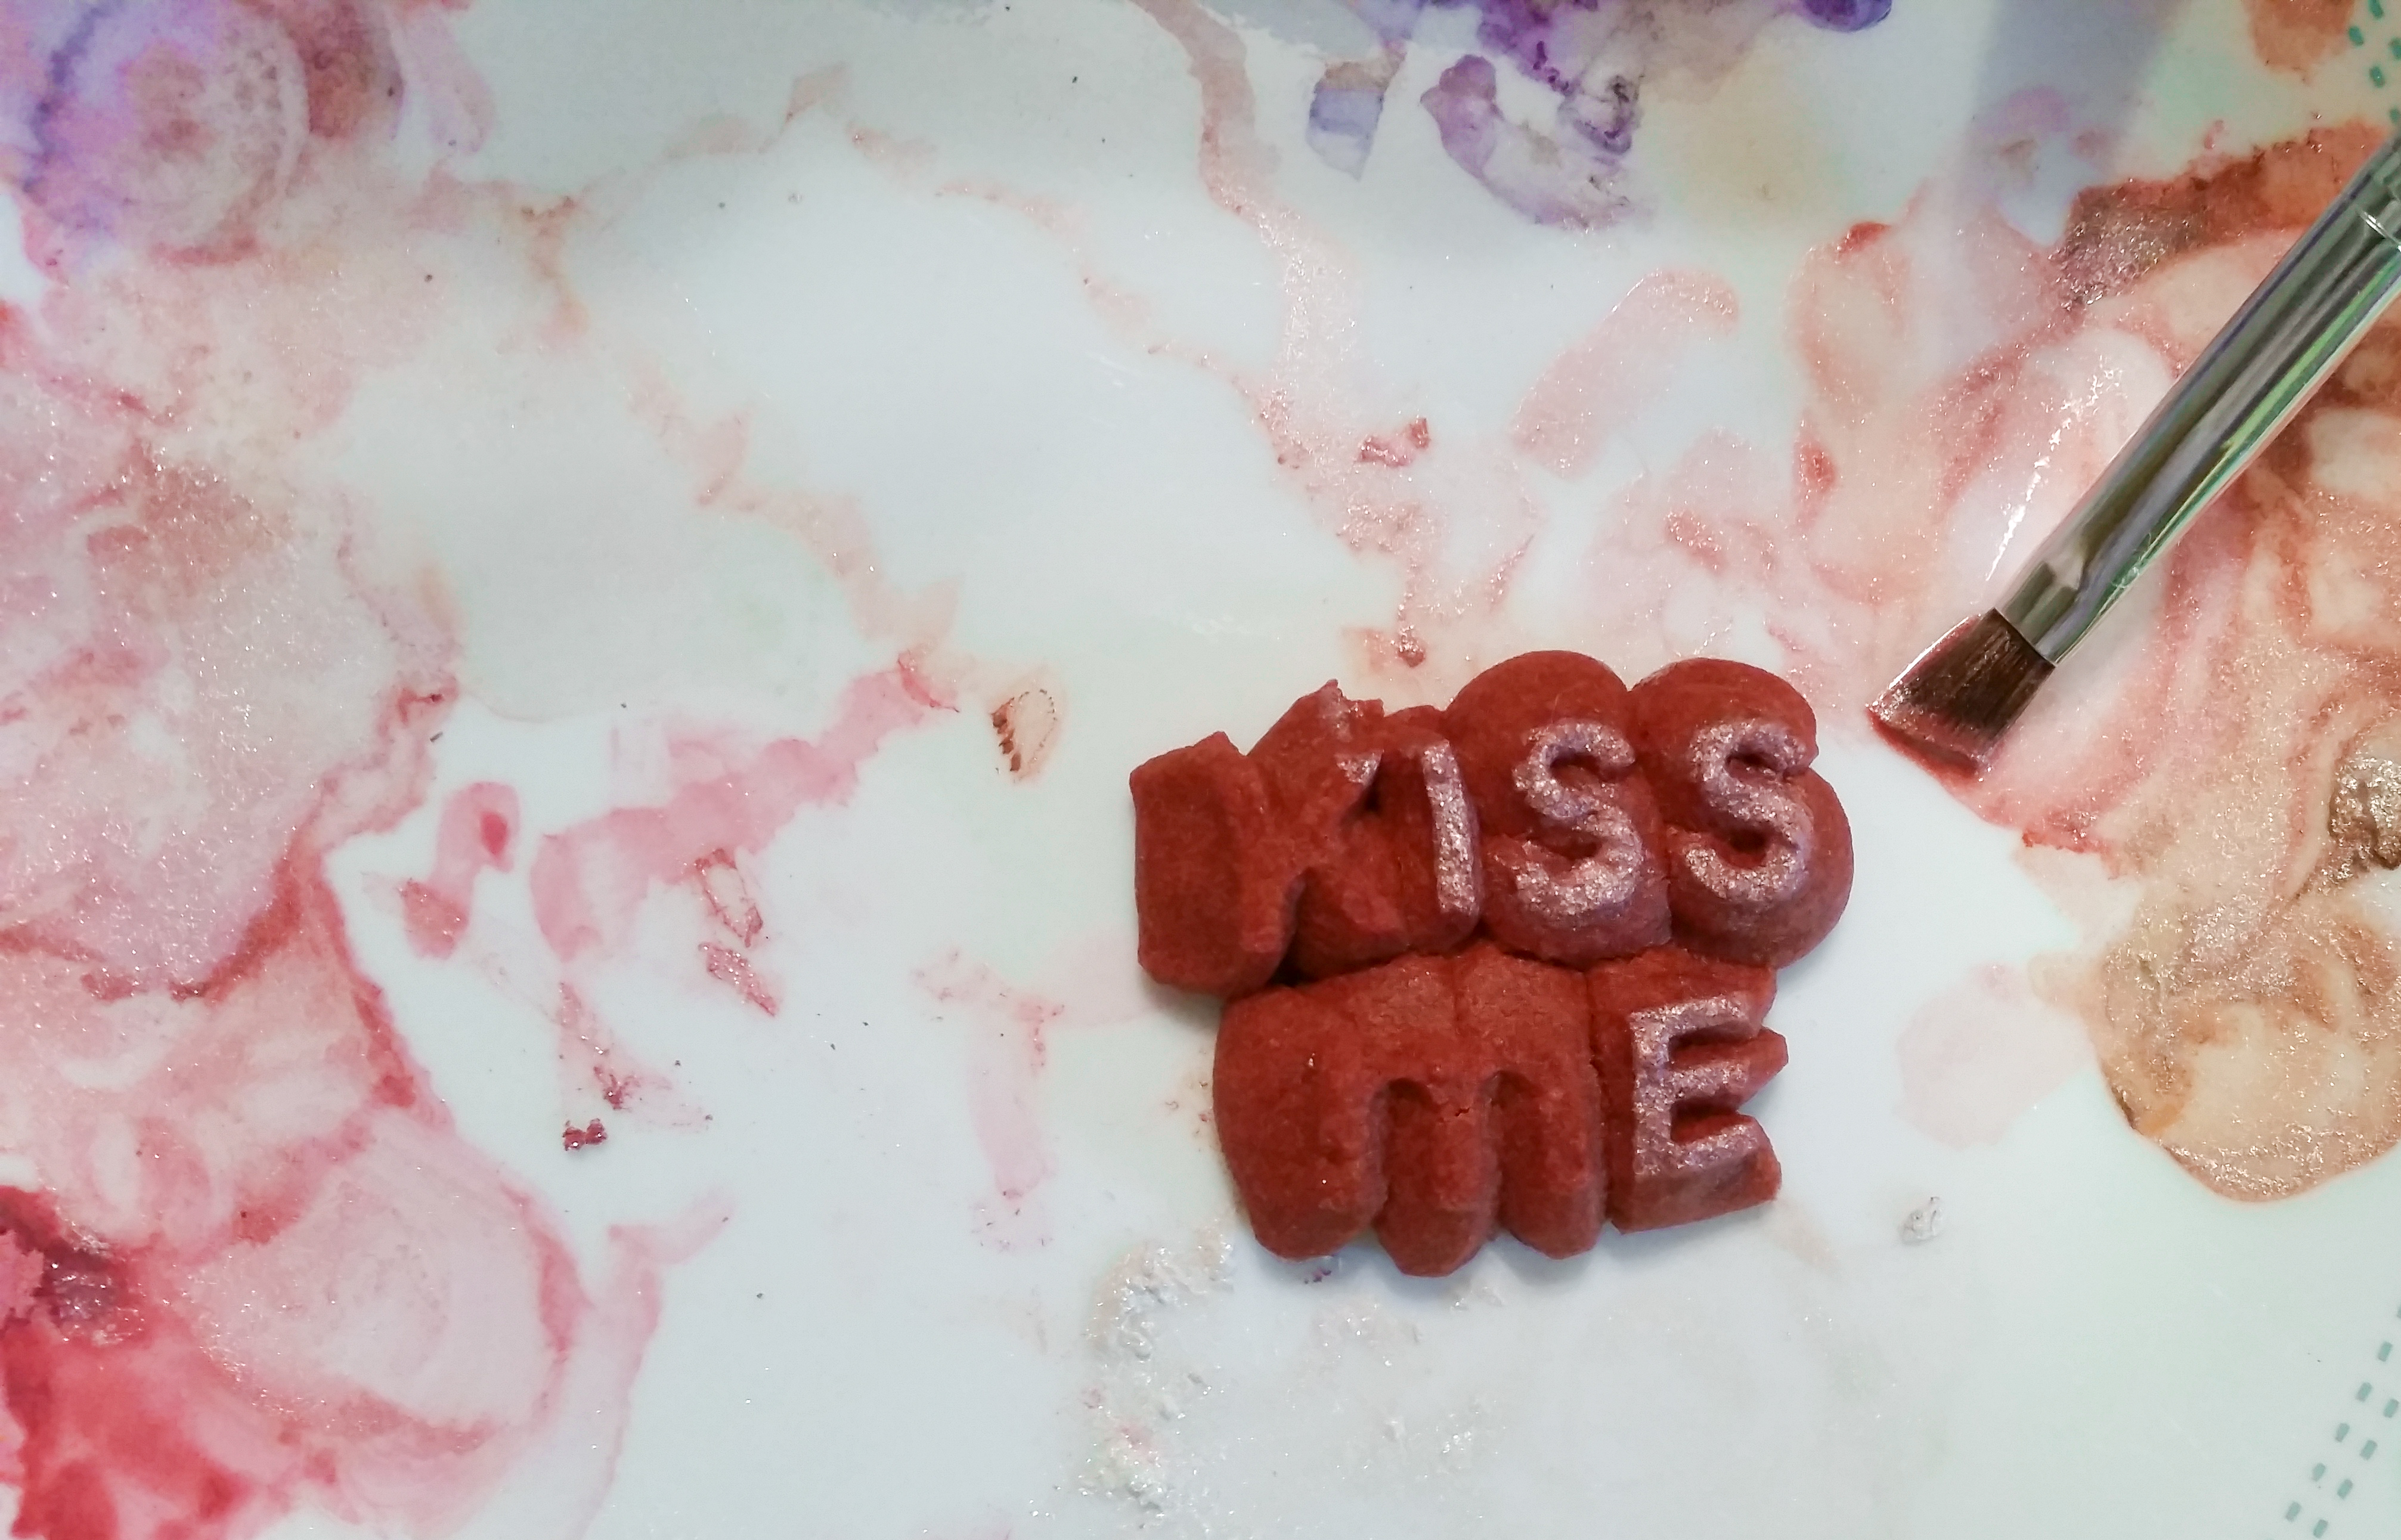
For the cream cheese icing, simply combine the butter, cream cheese and vanilla with an electric mixer until creamy. Slowly add the powdered sugar and whip it until until light and fluffy. You can always add more or less vanilla or powdered sugar to tweak the texture to your liking. To pipe on the outlined hearts and letters I used a Wilton #4 writing tip to make nice wide lines and give lots of flavor.

*Tip!*
You may have leftover icing, and if you do, you can use it to make these into sandwich cookies if you like! Just add powdered sugar till your icing is stiff like the consistency of sandwich cookie filling. Or, if you know you’re going to want to make sandwiches, go to my Red Velvet Reindeer post for a super thick cream cheese filling and instructions on how to press your cookies in mirror-images to match them up to sandwich. https://creativecookiepress.com/2016/11/26/red-velvet-reindeer-cookies/
2023 NOTE: Luster dust is what makes this beautiful presentation possible. I use it so often in my cookie press posts that this year (2022) we’ve started selling it on our website and Etsy shop! We chose to partner with an American company, Bakell, that makes dusts here in the USA. They make gorgeous dusts that are silky, vibrant, and a joy to work with. Their 4 gram jars last and last. A little goes a long way!
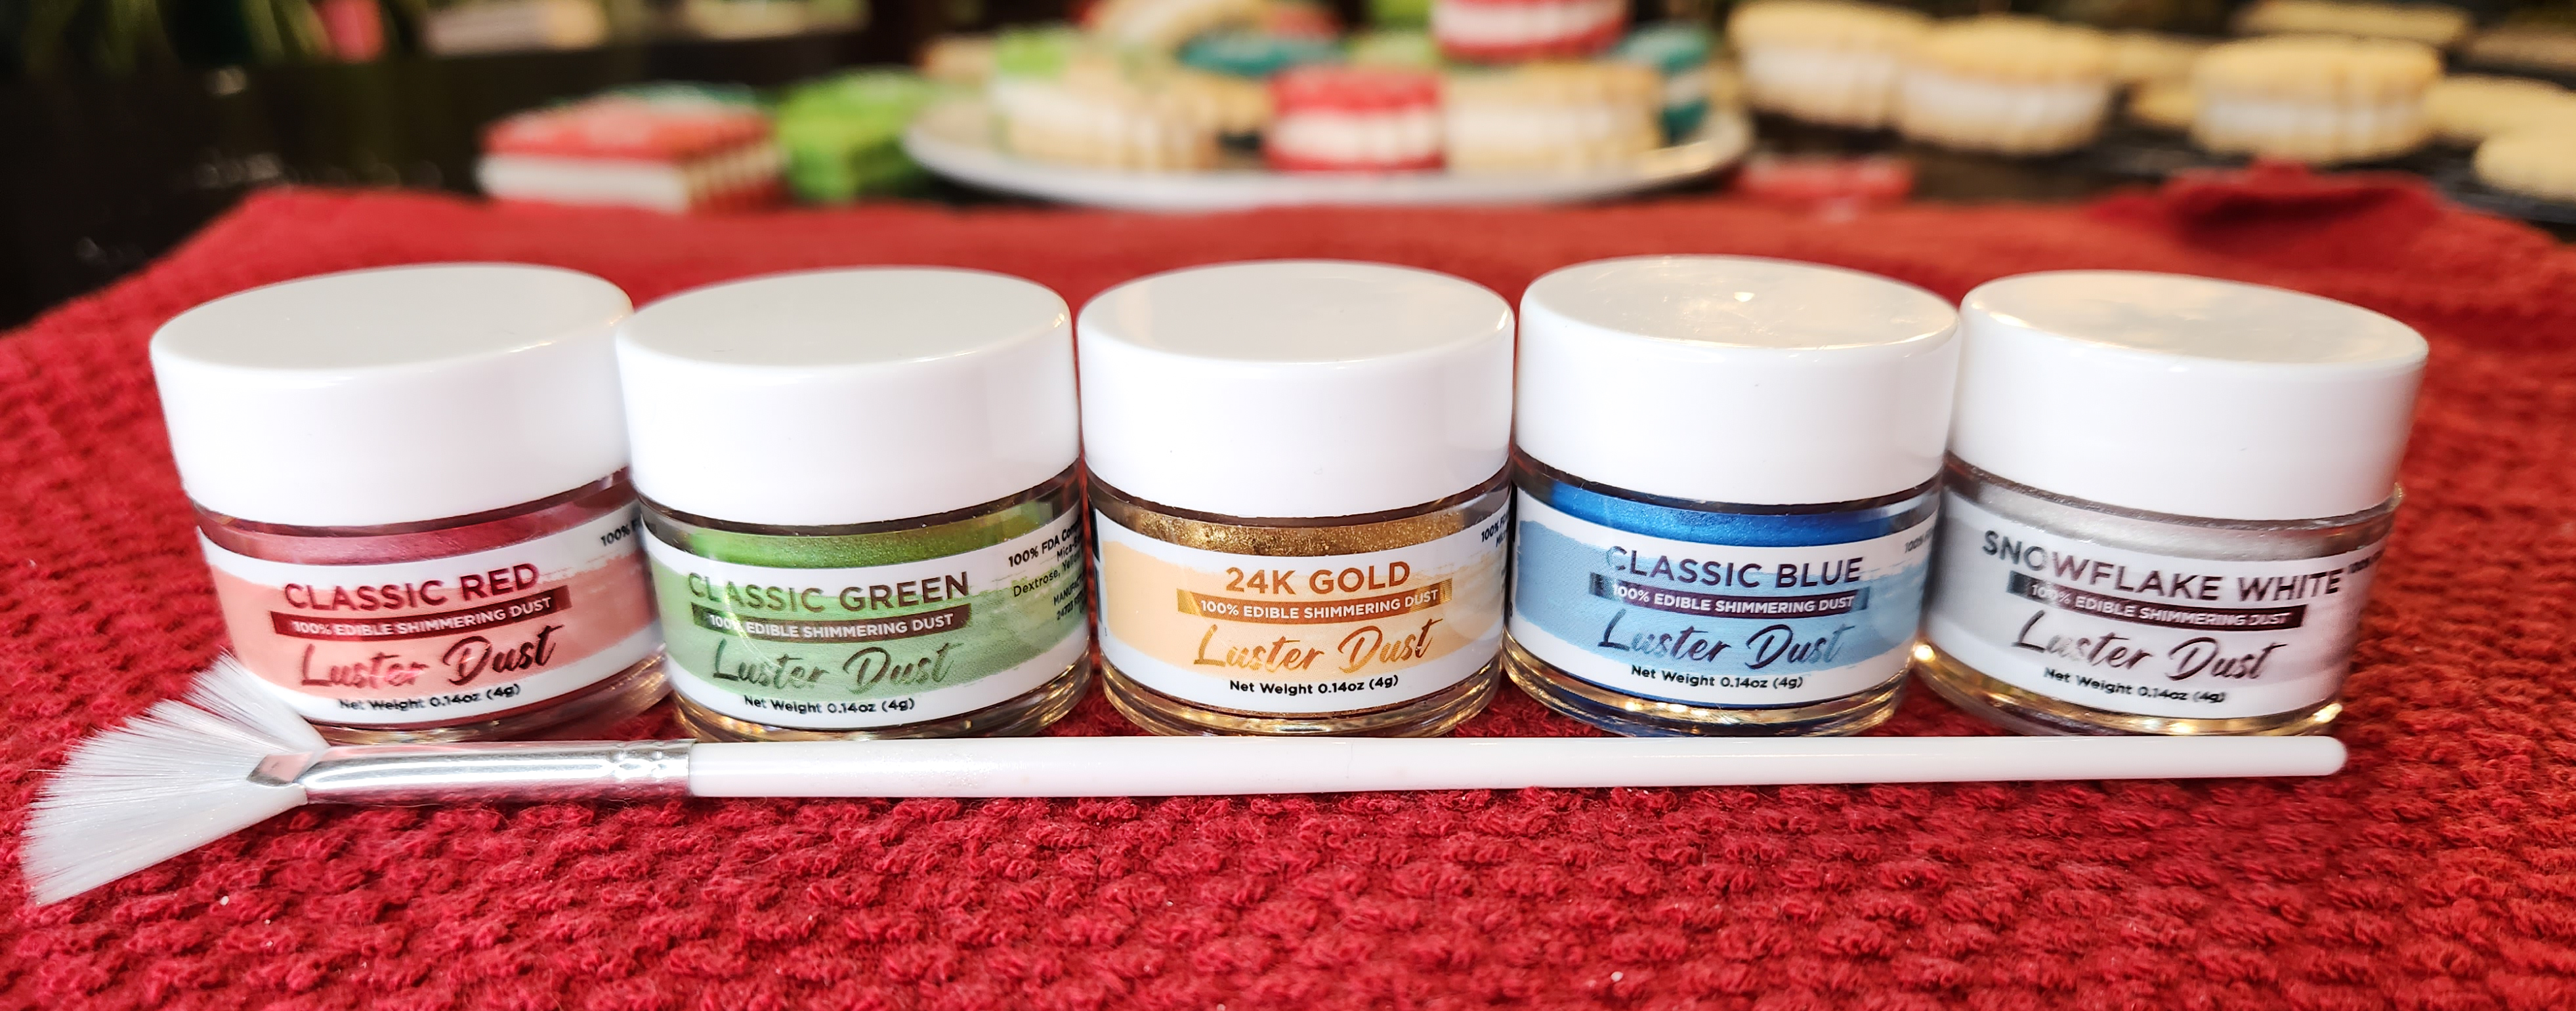
Painting with pearlescent dust is so much fun! Mix the dust with one of the alcohols listed above (it evaporates and there is no taste) on a plate and experiment just as you would with water color paints. It’s a swishy, swirly, creative art. Mix the colors (I found pink mixed with copper was fantastic on red velvet!). All I did was follow the ridges on the cookies and add some accents, like filling in the outline hearts. For a tutorial on this decorating technique see my Woodland Christmas Spritz Cookies post: https://creativecookiepress.com/2019/12/08/woodland-christmas-spritz-cookies/

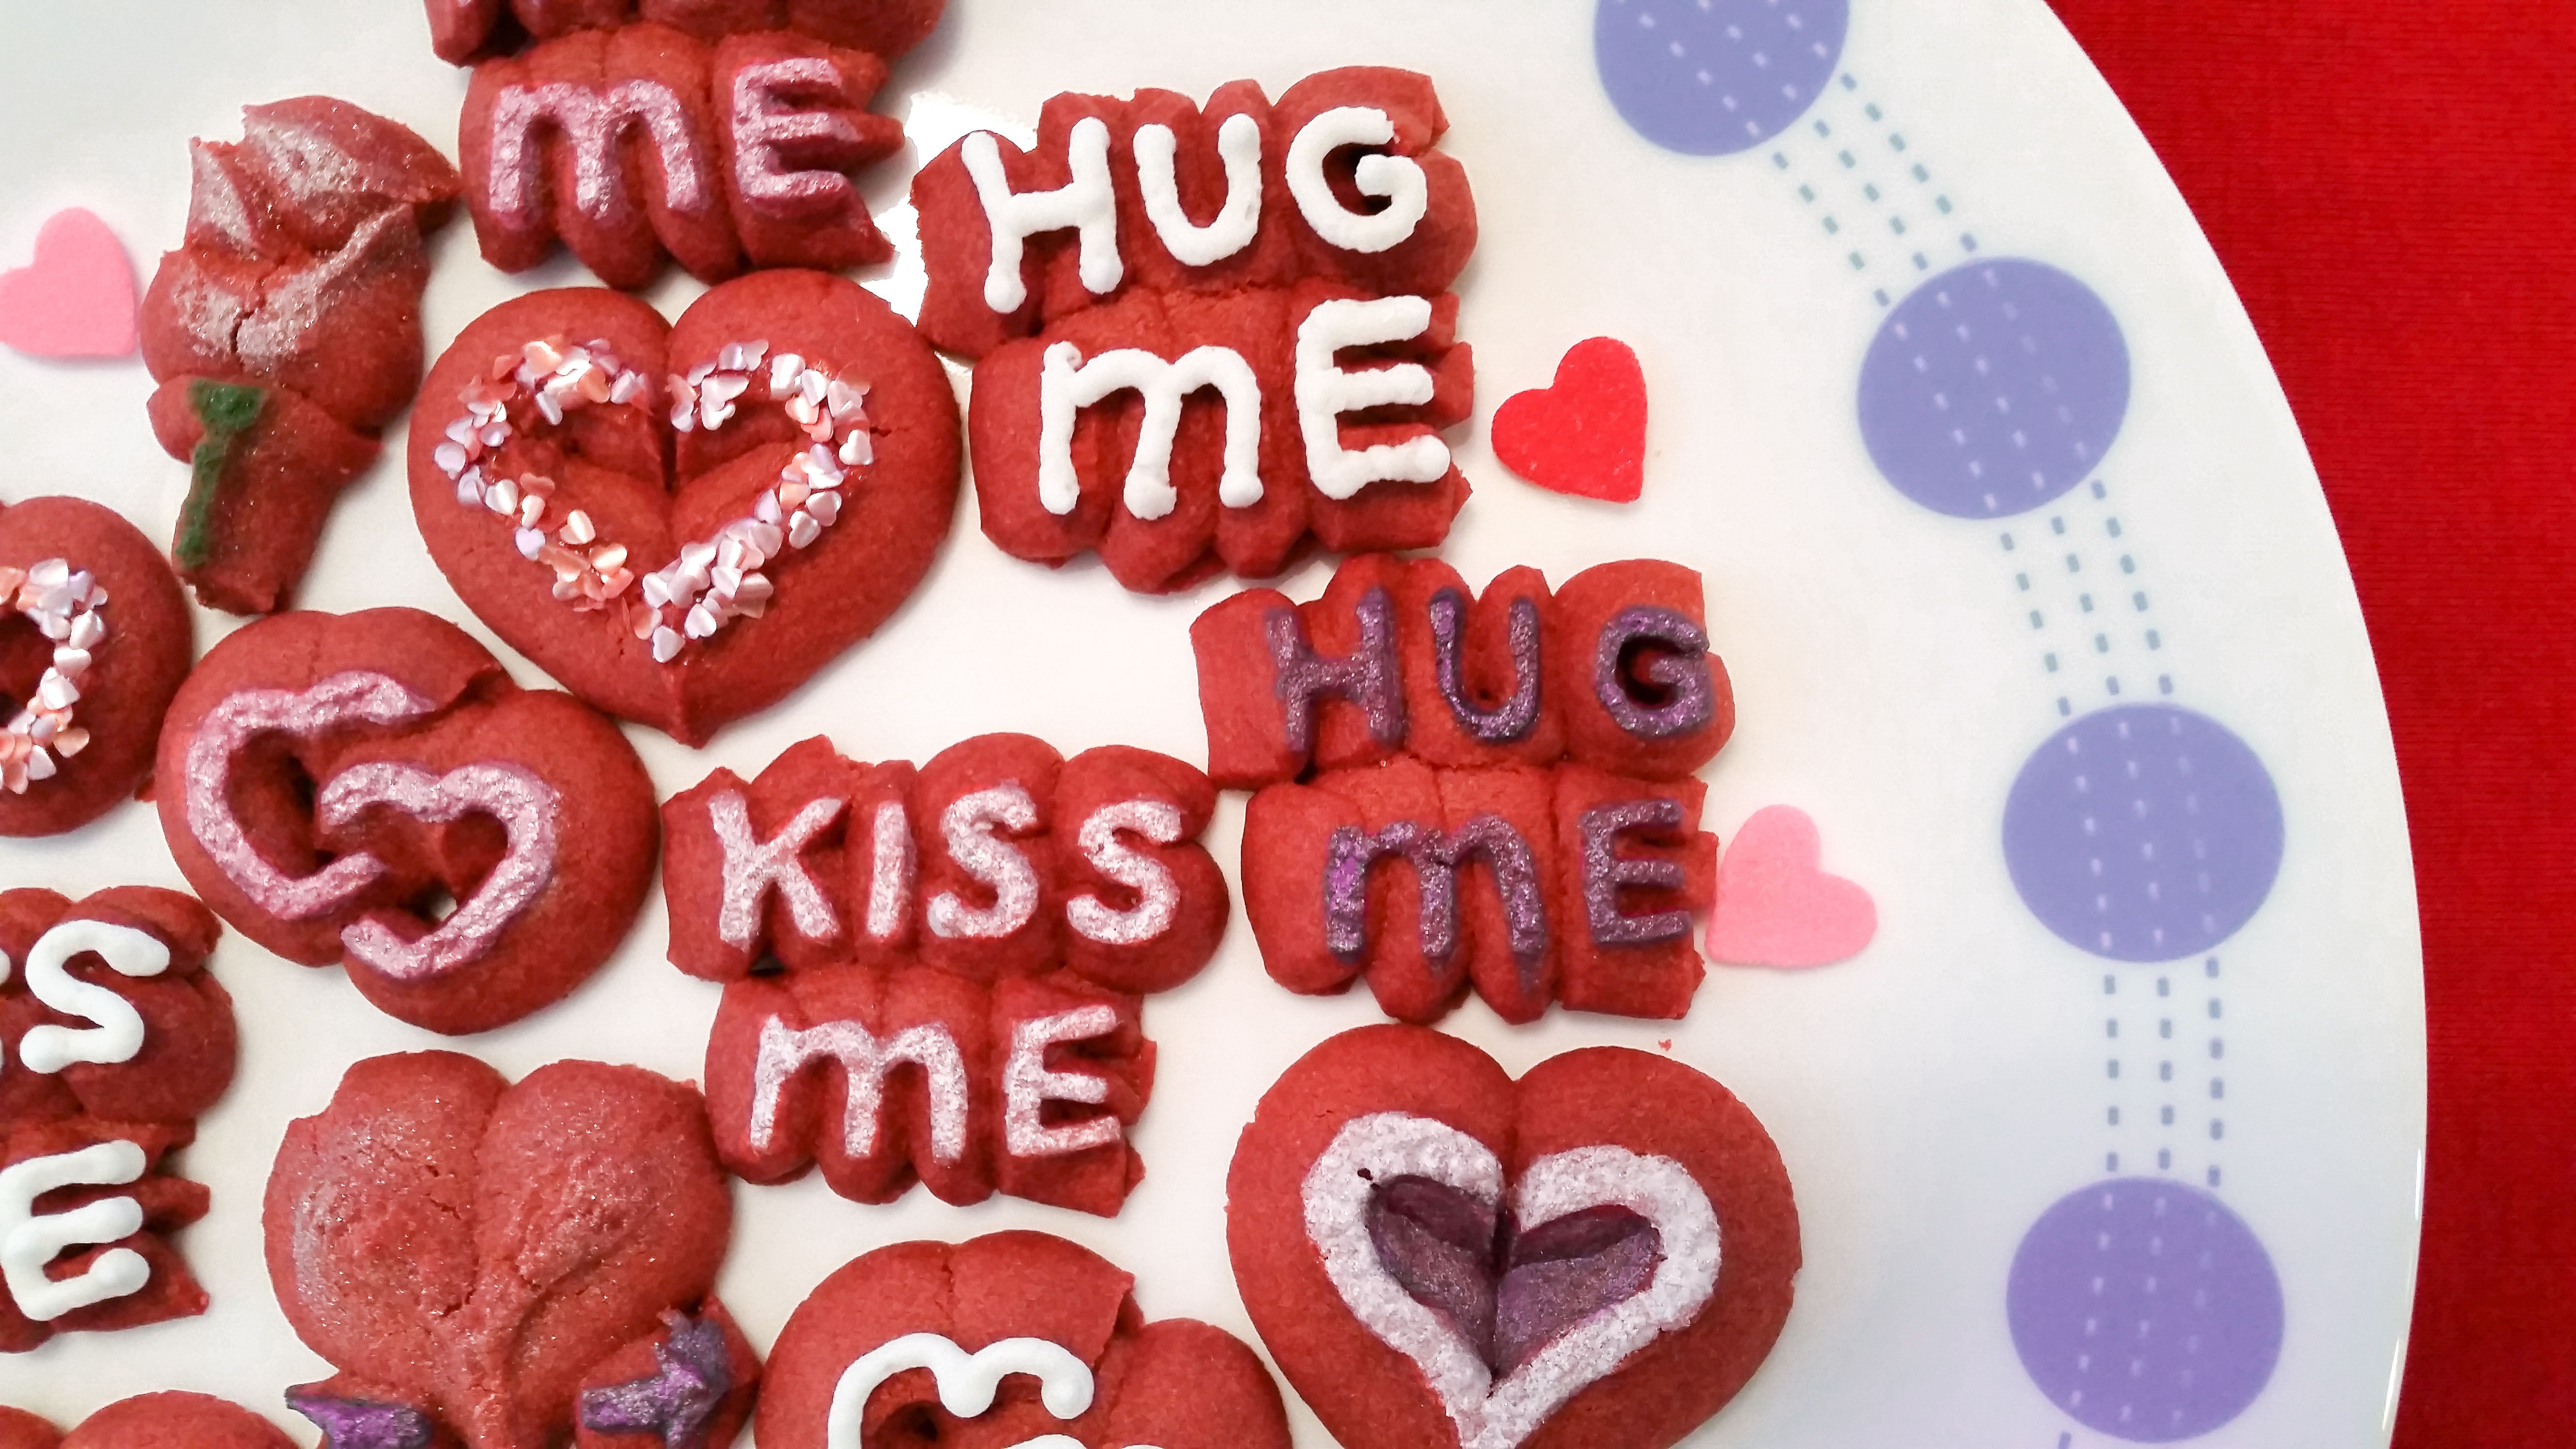
To add the tiny edible hearts (an awesome Wilton product), I painted light corn syrup on the ridges only of the outline and double hearts, then turned the cookies upside-down into a small pile of hearts, tapping it till the outline was covered. I then used a toothpick to clean up any messy ones. You could also use icing to glue them on. I loved their iridescent sparkle.
That’s it! I’m sure many of you could come up with all sorts of creative decorating ideas. Go for it! Spritz cookies are supposed to be fun, so enjoy your baking time and then enjoy eating them with those you love. ❤
*Remember that being real cream cheese and lots of it, you’ll want to store these in the fridge or the freezer. Spritz cookies do very well even for a couple of months in the freezer and take a short time (15 to 20 minutes at most) to thaw out and be fabulous. They’re fine for a few hours at a party but do take precautions. To be honest, these are great the next day but incredible the day they’re made. So you might plan for a day-you-need-them bake. 😉
Happy Valentine’s Day and as always, Happy Baking!
~Susie
Disk Designer/Co-Owner at Impress! Bakeware, LLC
Our website has all of our 200+ disk shapes, cookie press, embossed rolling pins, baking accessories plus more about our Women/Family Owned company! impressbakeware.com
All products are on our Etsy shop.
Our cookie press, disks, and embossed rolling pins are also available on Amazon
Follow us on facebook!
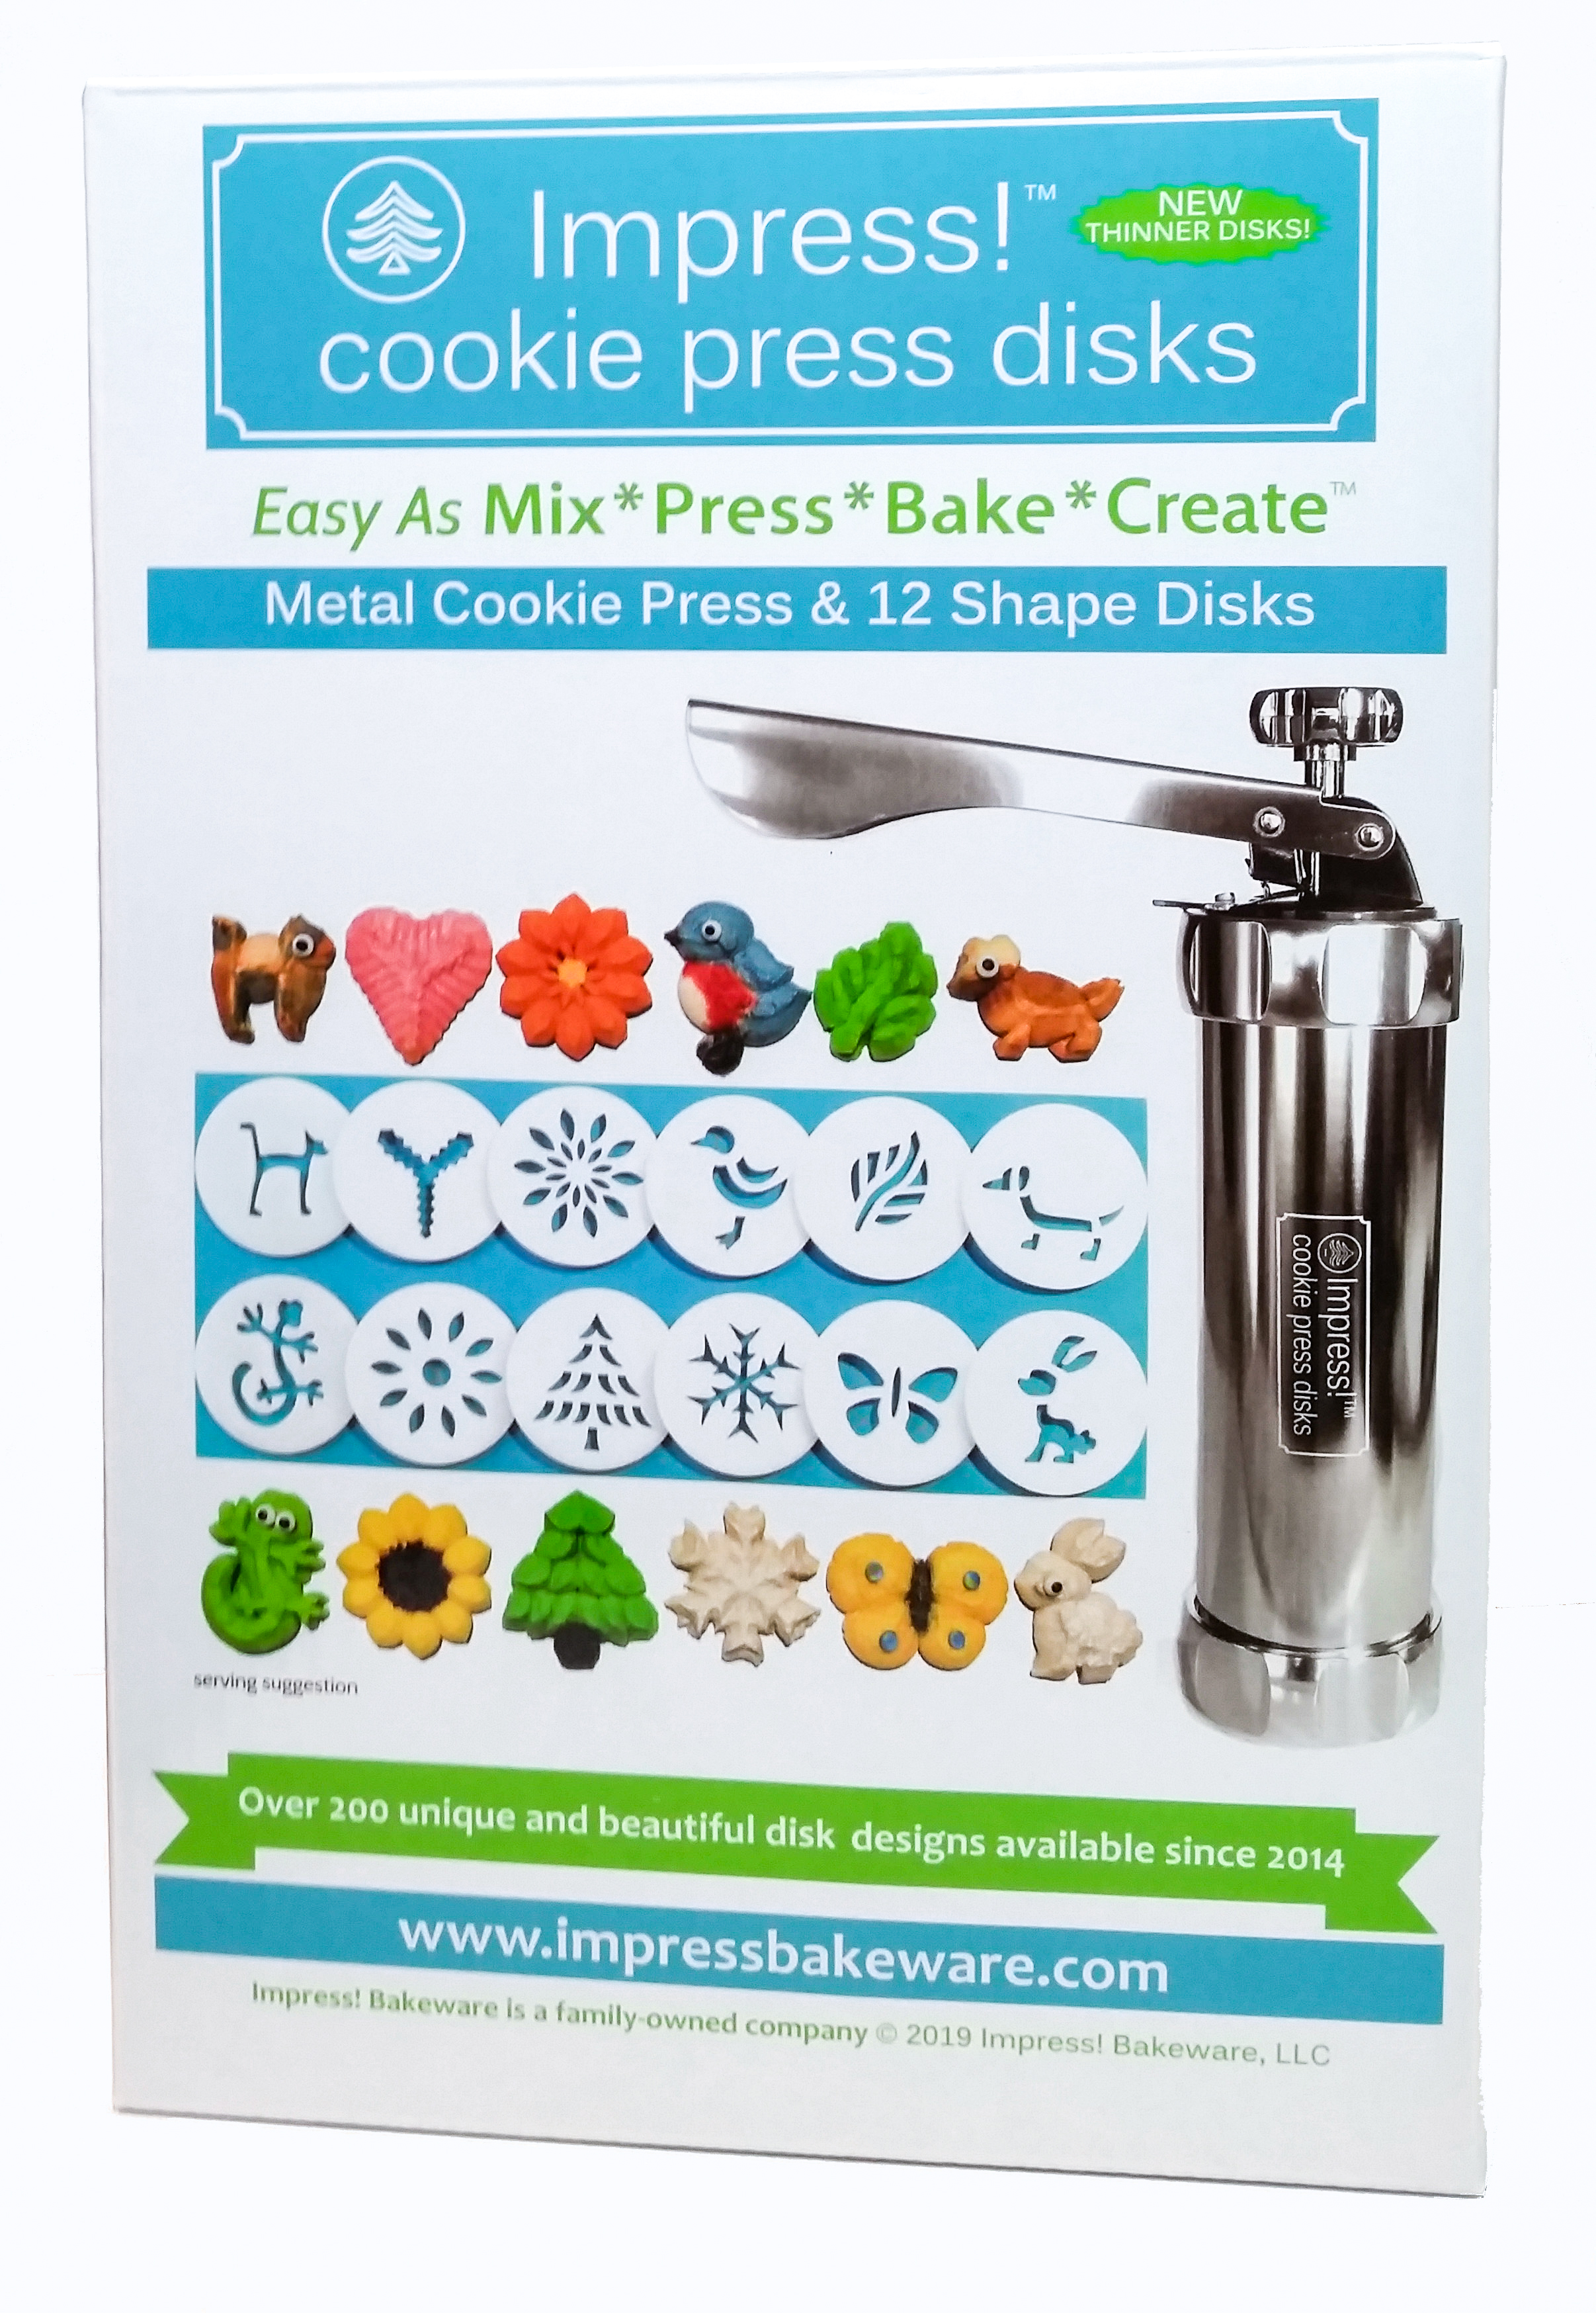
The Valentine’s Day Set:


The Cookie Press and 12 Disks: